文章
莹723
2020年09月28日

Have you ever thought about using rusty milk cans, chicken feeders, or galvanized mop buckets to grow plants?
Blogger Carlene Blair has created quite the oasis for herself right outside her door. This gorgeous garden is anything but "junky."She insisted in repurposing old junk into planters! It's a great hobby combining love of flower gardening with junking.
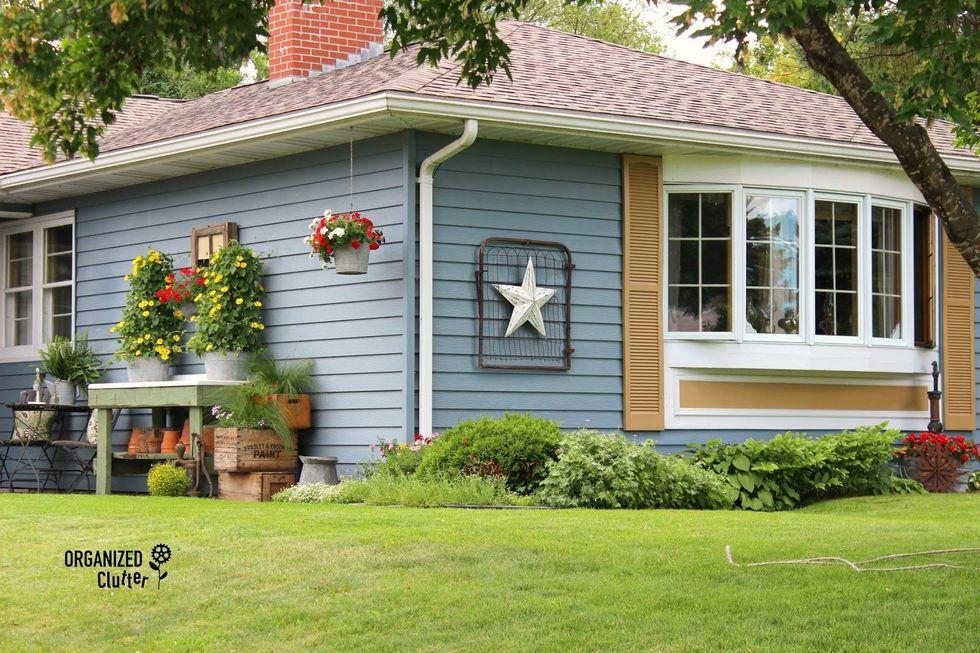
Let’s find out how she's going to top this!
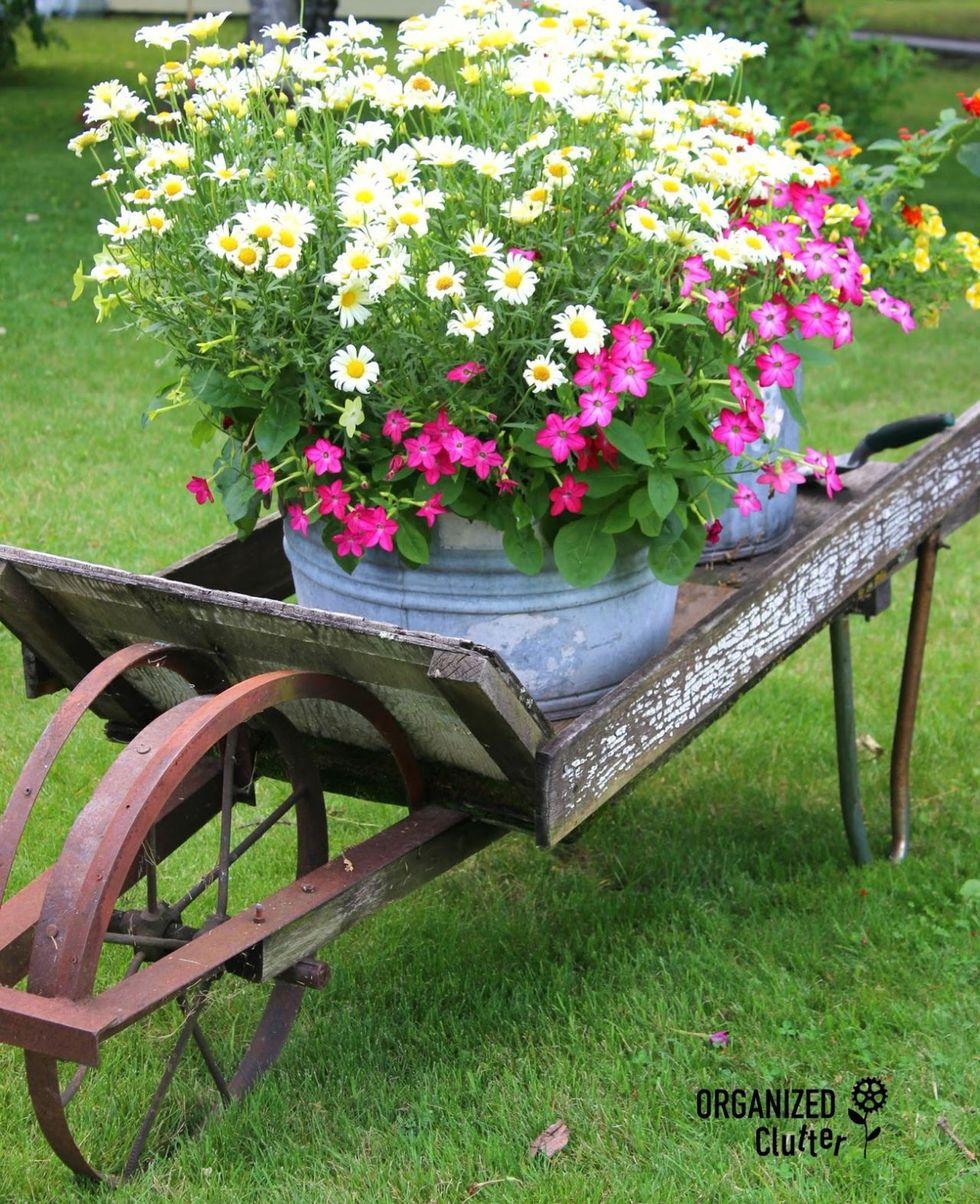
Blair's very first junk garden piece is this old wheelbarrow bursting with Marguerite daisies and nicotiana.
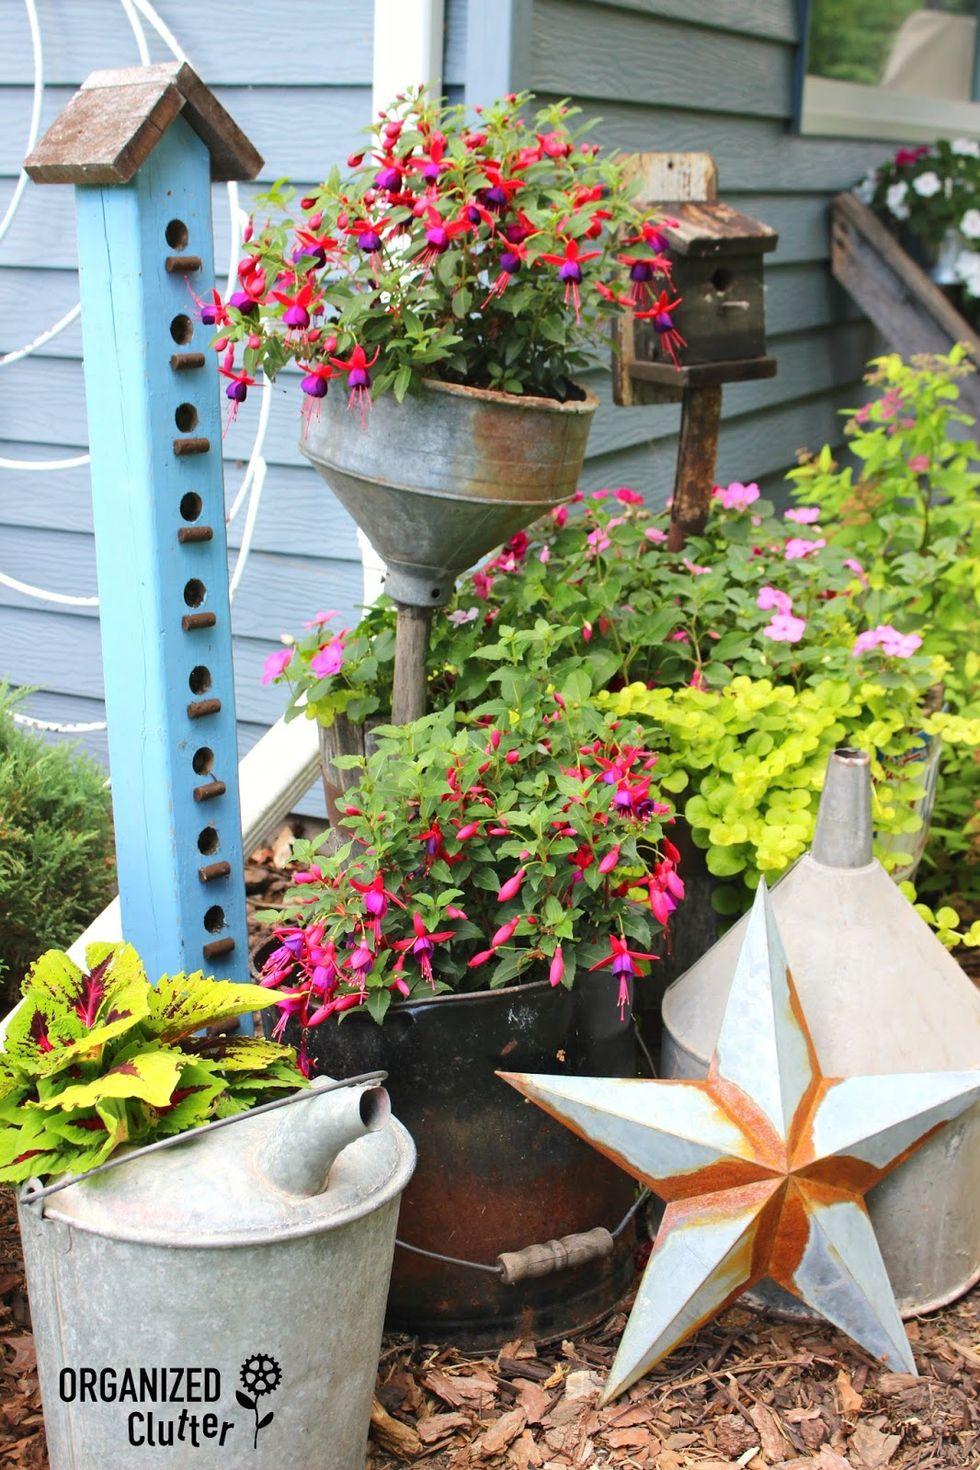
Have you ever seen such an assortment of trash-to-treasure planters?

The wild, abandoned look of this old typewriter in the bed of succulents is amazing.
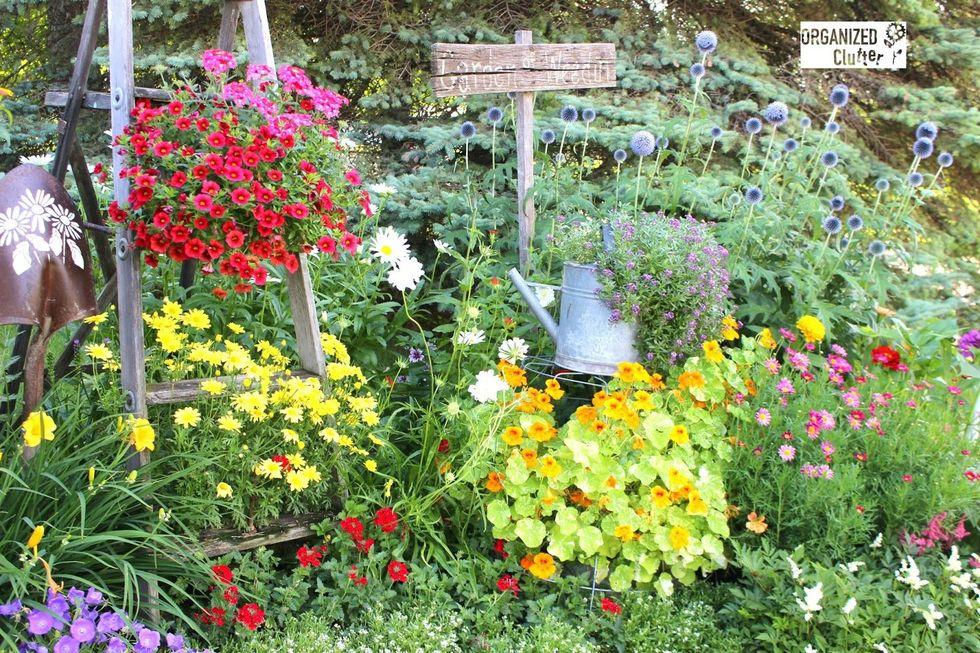
In her front yard, perennials and annuals spill out of watering cans and funnels and off the steps of a ladder.
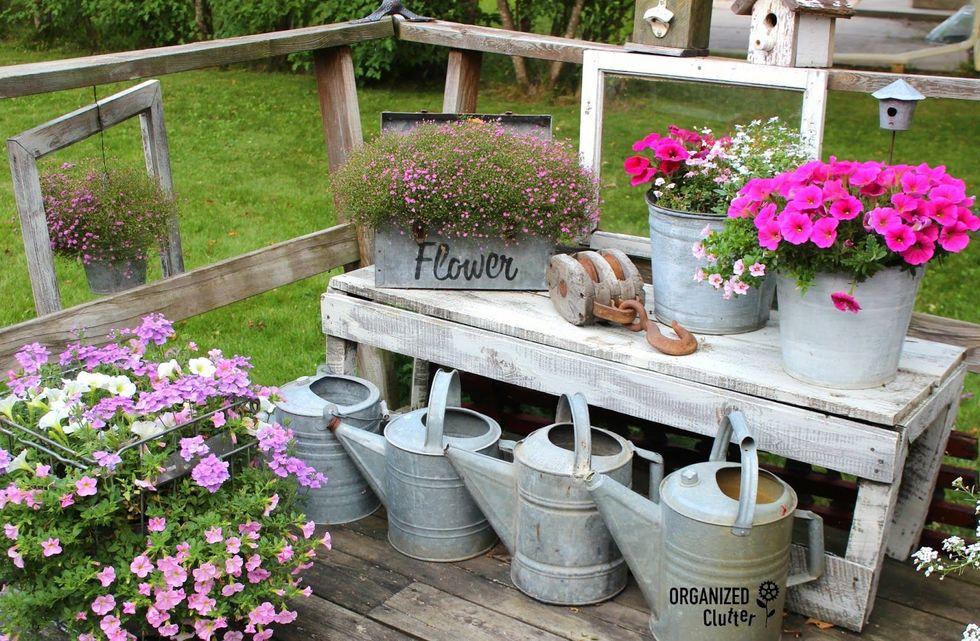
A whitewashed bench holds galvanized buckets and a toolbox, which are adorably stenciled.

What was once a gun rack is now attached to an old barn door and used to hold vintage garden tools.
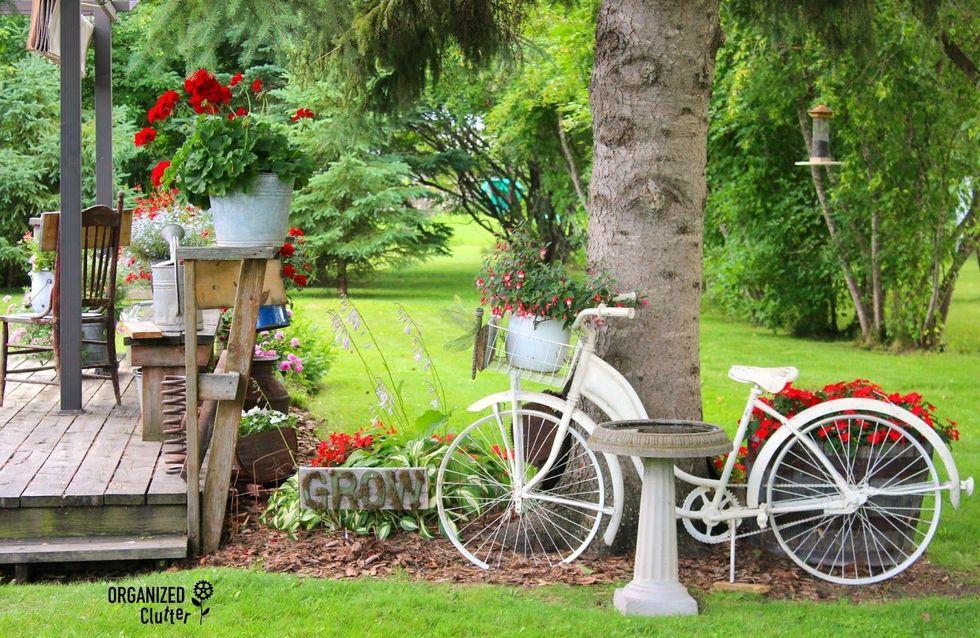
Even a bike can be a beautiful planter.

This "Flower Market" sign is made of two spindle legs and a weathered piece of barn siding.
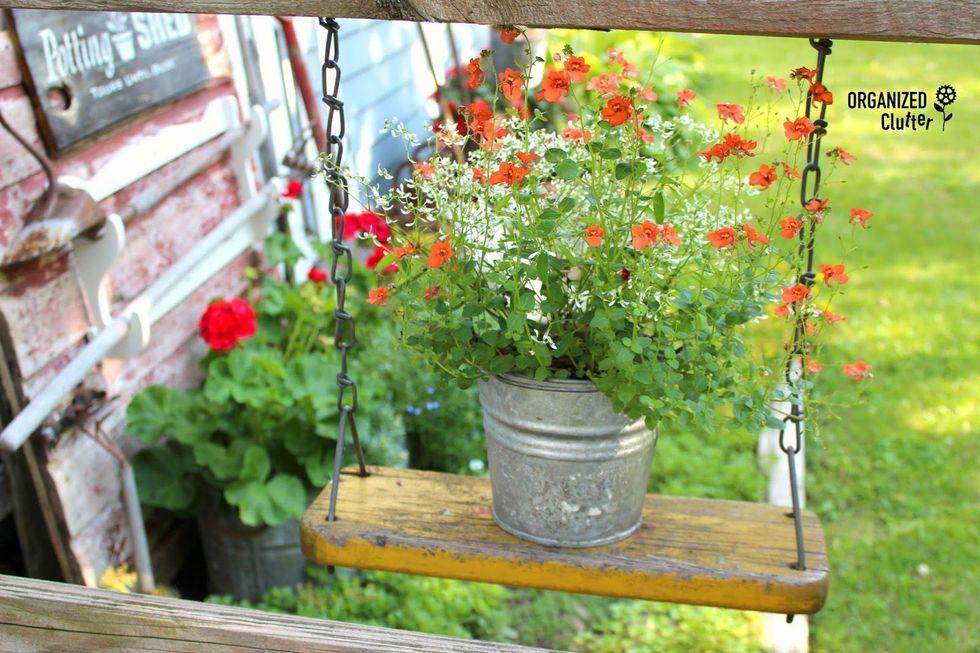
Last year, Blair tackled this project: repurposing a children's swing into a flower pot holder.

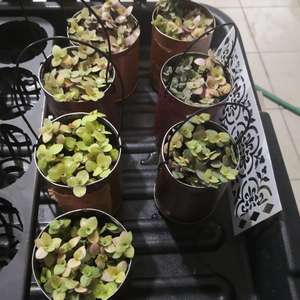
Rusty milk cans, chicken feeders, and galvanized mop buckets were given new life as planters.
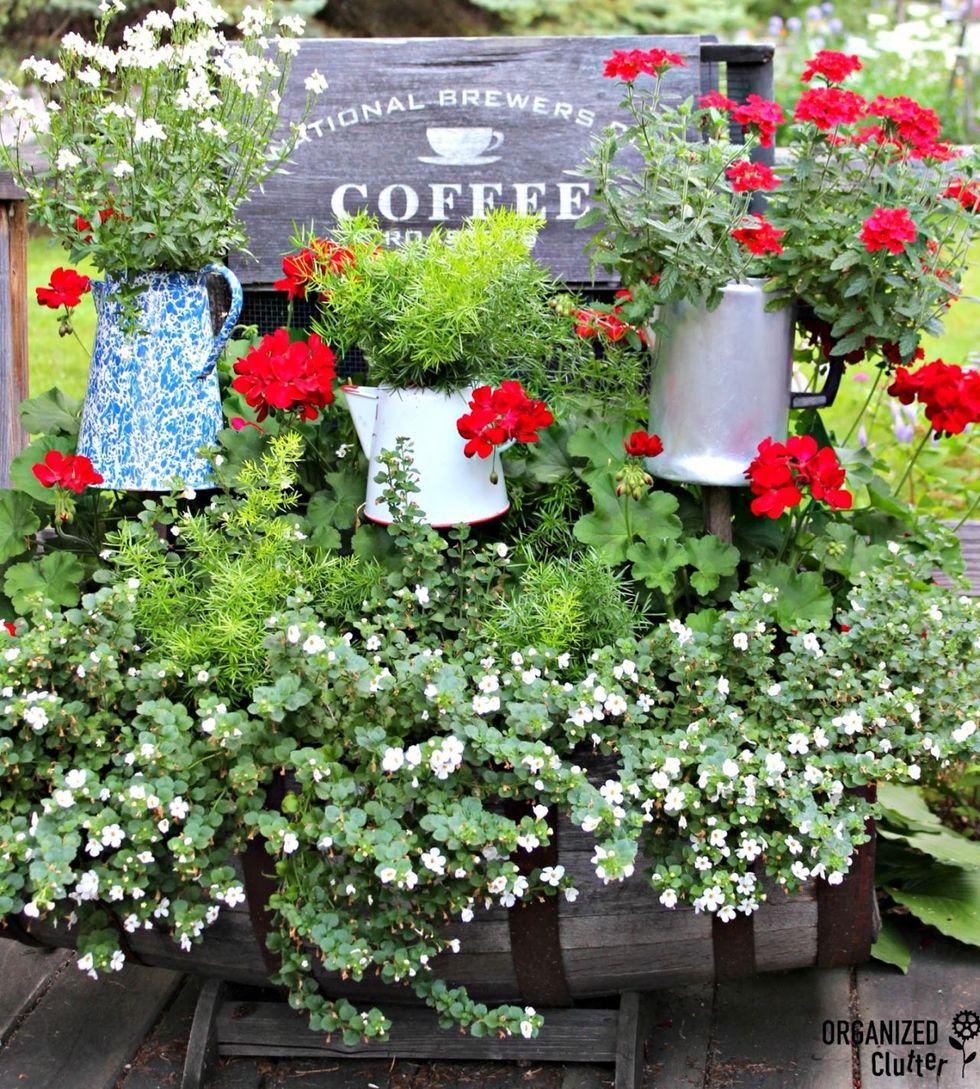
As were these scavenged coffee pots, which are mounted on stakes.
Blogger Carlene Blair has created quite the oasis for herself right outside her door. This gorgeous garden is anything but "junky."She insisted in repurposing old junk into planters! It's a great hobby combining love of flower gardening with junking.

Let’s find out how she's going to top this!

Blair's very first junk garden piece is this old wheelbarrow bursting with Marguerite daisies and nicotiana.

Have you ever seen such an assortment of trash-to-treasure planters?

The wild, abandoned look of this old typewriter in the bed of succulents is amazing.

In her front yard, perennials and annuals spill out of watering cans and funnels and off the steps of a ladder.

A whitewashed bench holds galvanized buckets and a toolbox, which are adorably stenciled.

What was once a gun rack is now attached to an old barn door and used to hold vintage garden tools.

Even a bike can be a beautiful planter.

This "Flower Market" sign is made of two spindle legs and a weathered piece of barn siding.

Last year, Blair tackled this project: repurposing a children's swing into a flower pot holder.

Rusty milk cans, chicken feeders, and galvanized mop buckets were given new life as planters.

As were these scavenged coffee pots, which are mounted on stakes.
0
0
文章
莹723
2020年09月15日

After planting in spring and early summer, do you know fall garden can also be productive and fun?
In a hot climate, you can put in a second crop of beans in mid-summer for fall harvest. But even some short-season crops, such as radishes, broccoli can be planted in late summer. They are strong enough to keep going right until a hard freeze. Some veggies, such as lettuce or Swiss chard, can be grown in pots and window boxes. You can also plant fall flowers such as pansies and chrysanthemums.
Here’s what you need to know about how to plant a fall garden.
-Find Right Time.
First read seed packages to find out how long you need to grow them to maturity. Then find the average first frost date for your area. Figure out the latest possible time you can plant. Plant greens 30 days before average first frost date.
-Pull out scraggly summer crops.
If your tomatoes are down to a few brown leaves and flowers without maturing fruit, pull them out. Summer squash probably is winding down, too. And, take out anything that’s been struggling from bugs or disease; it’s not going to get any better! Leave cool-season crops, such as broccoli, cabbage, and cauliflower, in place to finish maturing.
-Stick with transplants or quick crops.
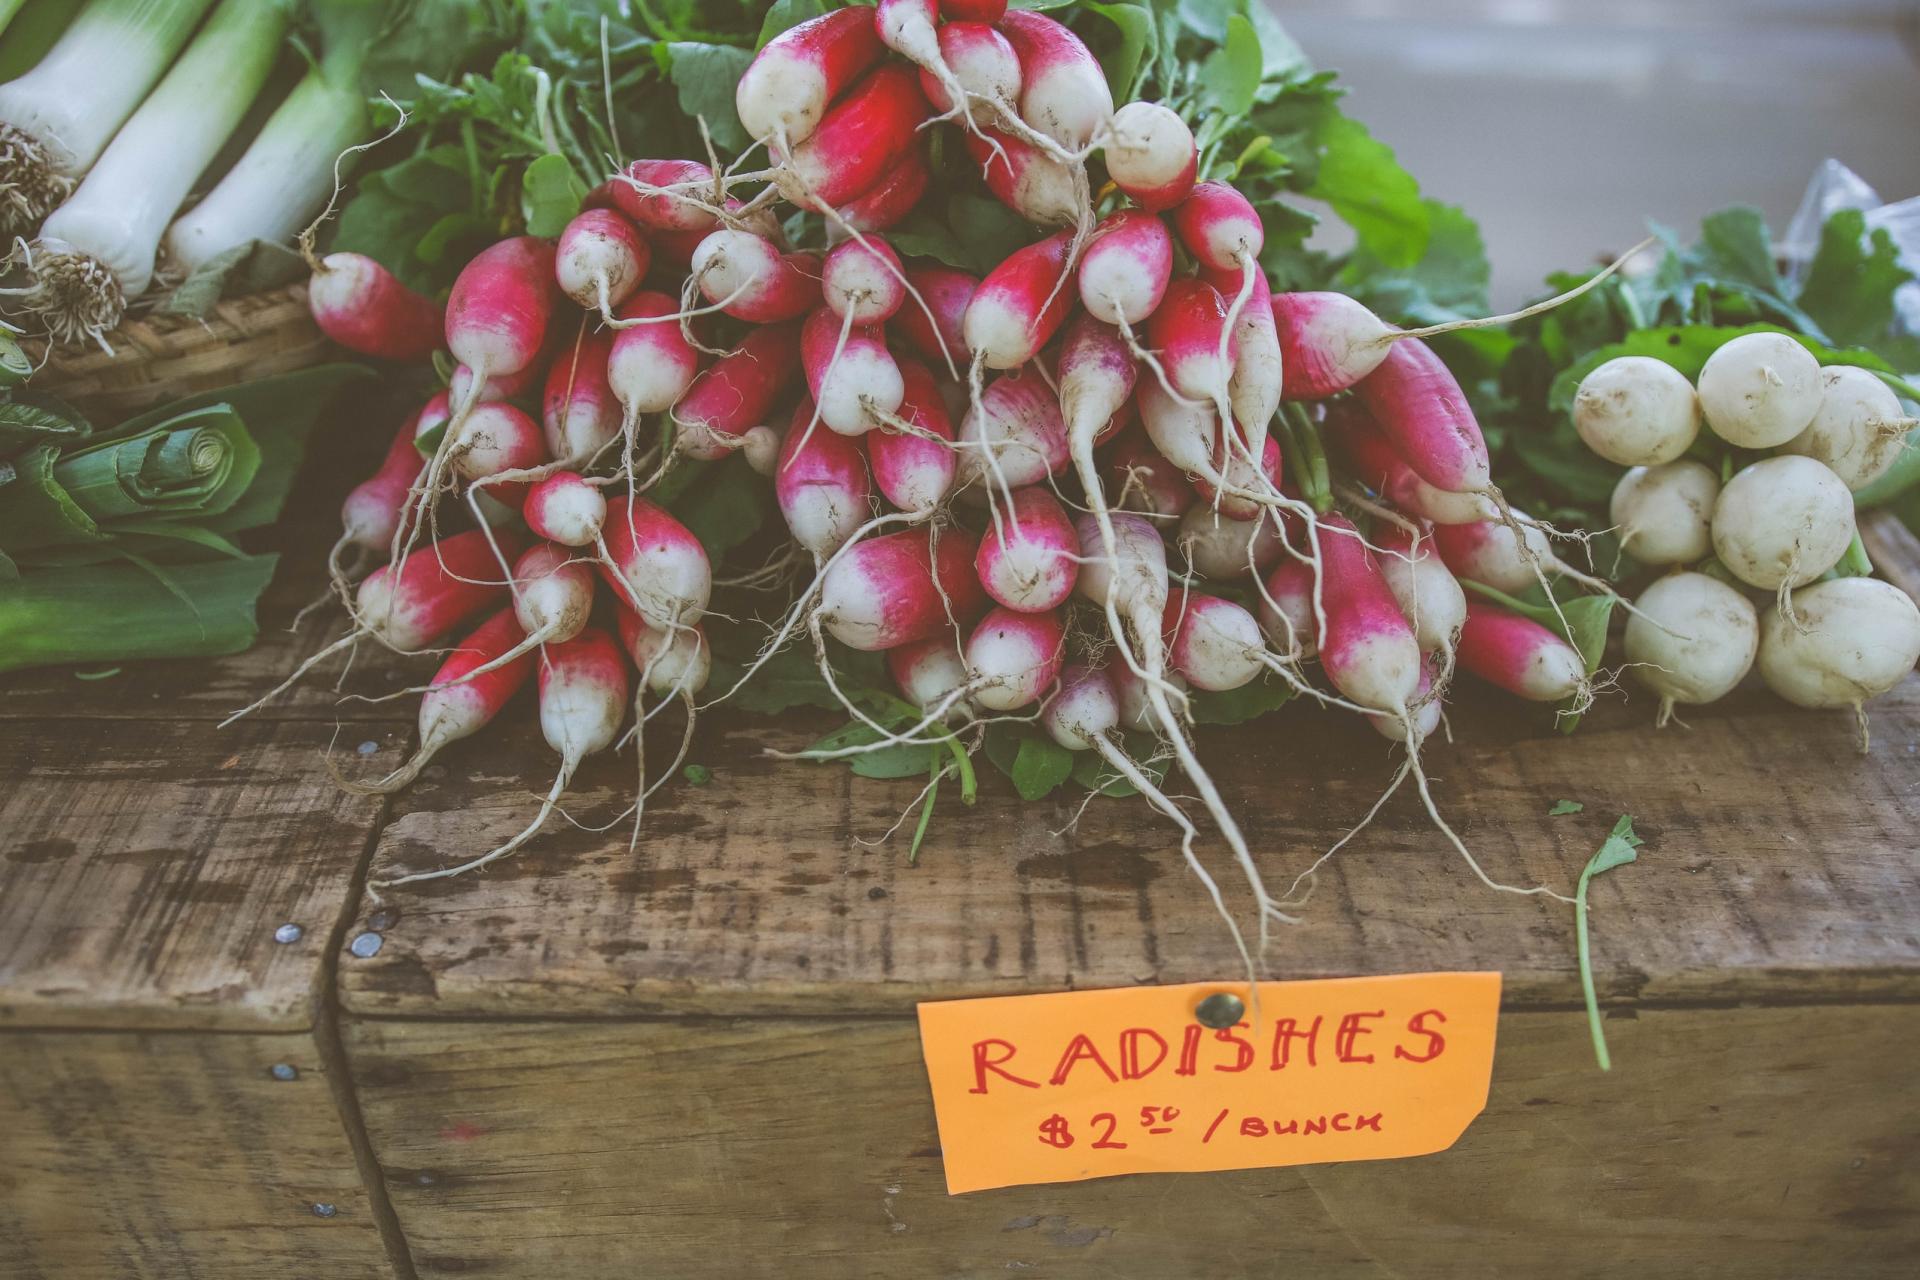
Transplants crops that are too late to plant from seed, such as broccoli, cauliflower, and Brussels sprouts. You can plant super-quick crops from seed include beets, turnips, and radishes, which are ready in as little as 25 days, and lettuce, in about a month. Others include spinach, Swiss chard, mustard greens, collards, and kale. Some kale varieties overwinter and green up again next spring, so don’t be too eager to yank your plants out at the end of the growing season.

-Keep watering and weeding.
Autumn are still hot and dry, so make sure you’re giving the new plants plenty to drink. Greens prefer to be kept moist as they sprout. Pull weeds as soon as you see them because they compete for moisture and nutrients with the plants.
-Plan for next year.
Some crops, like garlic, must be planted now for harvest next spring and summer. You can harvest Hardneck before the bulbs are ready in mid-summer. Softneck types like warm climates. Either way, separate the cloves and plant pointy-side up about 6 inches apart and a few inches deep; they will be read next spring. Fall is also a great time to plant perennial herbs such as thyme, chives, sage, and oregano.

-Keep a journal.
Save seed packages and labels and tape them in a notebook. List where you got them in case you want to buy more next year, and how they did, especially anything that wasn’t worth your time. Jot details such as first and last frost dates for the year. Learning from past will make next year’s harvest better!
In a hot climate, you can put in a second crop of beans in mid-summer for fall harvest. But even some short-season crops, such as radishes, broccoli can be planted in late summer. They are strong enough to keep going right until a hard freeze. Some veggies, such as lettuce or Swiss chard, can be grown in pots and window boxes. You can also plant fall flowers such as pansies and chrysanthemums.
Here’s what you need to know about how to plant a fall garden.
-Find Right Time.
First read seed packages to find out how long you need to grow them to maturity. Then find the average first frost date for your area. Figure out the latest possible time you can plant. Plant greens 30 days before average first frost date.

-Pull out scraggly summer crops.
If your tomatoes are down to a few brown leaves and flowers without maturing fruit, pull them out. Summer squash probably is winding down, too. And, take out anything that’s been struggling from bugs or disease; it’s not going to get any better! Leave cool-season crops, such as broccoli, cabbage, and cauliflower, in place to finish maturing.
-Stick with transplants or quick crops.
Transplants crops that are too late to plant from seed, such as broccoli, cauliflower, and Brussels sprouts. You can plant super-quick crops from seed include beets, turnips, and radishes, which are ready in as little as 25 days, and lettuce, in about a month. Others include spinach, Swiss chard, mustard greens, collards, and kale. Some kale varieties overwinter and green up again next spring, so don’t be too eager to yank your plants out at the end of the growing season.

-Keep watering and weeding.
Autumn are still hot and dry, so make sure you’re giving the new plants plenty to drink. Greens prefer to be kept moist as they sprout. Pull weeds as soon as you see them because they compete for moisture and nutrients with the plants.
-Plan for next year.
Some crops, like garlic, must be planted now for harvest next spring and summer. You can harvest Hardneck before the bulbs are ready in mid-summer. Softneck types like warm climates. Either way, separate the cloves and plant pointy-side up about 6 inches apart and a few inches deep; they will be read next spring. Fall is also a great time to plant perennial herbs such as thyme, chives, sage, and oregano.

-Keep a journal.
Save seed packages and labels and tape them in a notebook. List where you got them in case you want to buy more next year, and how they did, especially anything that wasn’t worth your time. Jot details such as first and last frost dates for the year. Learning from past will make next year’s harvest better!
1
1
莹723:👵
文章
莹723
2020年09月11日

Do you want to step outside and close your eyes enjoying your garden?
On those days when the sun is shining, the breeze blows, birds are chirping, bees are humming, we just want to get away from gardening business. Take a moment to sit back and smell all those different roses.
If you want to enjoy the success of well-designed garden plans, it's important to plan a low-maintenance garden. Today, I will teach you how to choose the right plants which you can't kill. You don't need to worry about when to prune and to dig your plants up and bring them in after blooming season.
Here are the low-maintenance flowers you are looking for.
1- Peonies
They’re very, very long-lived—peonies will bloom in the same spot for decades. Peonies attract ants, but they're not harmful—simply dunk the budding flower heads in mild soapy water after you've cut them to get rid of the critters.
Zones: 3-8

2-Anemone
These ground cover florals, which resemble daisies, can spread underneath your shrubs. Plus, when they're done blooming, you don't have to worry about any messy foliage leftovers that flowers like tulips tend to leave behind.
Zones: 5-8

3- Dwarf Daffodils
Gardeners will love these short bulbs because they're poisonous to moles and mice. After they return yearly, they're also able to multiply.
Zones: 3-8

4- Hydrangeas
They are very adapted to growing in containers, and wonderful for a container garden if you want more of a country look.
Zones: 3-9

5-Coneflower
Coneflowers are hardy, drought-tolerant, long-blooming, and they are being cultivated in an ever-widening range of pinks and purples. The most common is purple coneflower.
Zones: 3-9

On those days when the sun is shining, the breeze blows, birds are chirping, bees are humming, we just want to get away from gardening business. Take a moment to sit back and smell all those different roses.
If you want to enjoy the success of well-designed garden plans, it's important to plan a low-maintenance garden. Today, I will teach you how to choose the right plants which you can't kill. You don't need to worry about when to prune and to dig your plants up and bring them in after blooming season.
Here are the low-maintenance flowers you are looking for.
1- Peonies
They’re very, very long-lived—peonies will bloom in the same spot for decades. Peonies attract ants, but they're not harmful—simply dunk the budding flower heads in mild soapy water after you've cut them to get rid of the critters.
Zones: 3-8

2-Anemone
These ground cover florals, which resemble daisies, can spread underneath your shrubs. Plus, when they're done blooming, you don't have to worry about any messy foliage leftovers that flowers like tulips tend to leave behind.
Zones: 5-8

3- Dwarf Daffodils
Gardeners will love these short bulbs because they're poisonous to moles and mice. After they return yearly, they're also able to multiply.
Zones: 3-8

4- Hydrangeas
They are very adapted to growing in containers, and wonderful for a container garden if you want more of a country look.
Zones: 3-9

5-Coneflower
Coneflowers are hardy, drought-tolerant, long-blooming, and they are being cultivated in an ever-widening range of pinks and purples. The most common is purple coneflower.
Zones: 3-9

0
0
文章
莹723
2020年09月06日

1. Decide what type of garden to grow. What purpose do you want your garden to serve? Some gardens are functional and produce fruit and vegetables you can use to feed your family or give away to neighbors. Others are more ornamental in purpose, serving to beautify your property and provide a pleasing sight to people passing by. If you're not sure what type of garden you want, consider the following options:
- Vegetable gardens can include peppers, tomatoes, cabbages and lettuces, potatoes, squash, carrots, and many other vegetables. If vegetables can grow in your climate, you can find a way to grow them in your yard.
-In flower gardens, different types of flowers may be strategically planted so that something is in bloom almost all year long. Some flower gardens are structured with plantings in neat rows and patterns; others are wilder in appearance. Your personal style and yard size will determine what type of flower garden you might plant.
-Herb gardens often complement both flower and vegetable gardens, since they tend to bloom beautifully while serving the functional purpose of adding flavor to your food. Herb gardens might include rosemary, thyme, dill, cilantro and a variety of other herbs you may want to use to make dried spices and teas.
-In general, vegetable gardens require fertile soil and regular maintenance. Flowers and herbs can tolerate more neglect and poorer soil.
2. Decide what specific plants to include in your garden. Find out what grows well in your area by using this zone finder to determine what zone you are in. Then research which plants do well in your region. As you find out more about your options, make a list of the plants you want to buy and the best time of year to plant them.
- Some plants don't grow well in certain zones. If you live in a place with mild winters and hot summers, you may have trouble growing plants that require a cold snap to grow properly.
- Unless you plan to make your garden relatively large, try to choose varieties that need similar growing conditions. Do they need the same soil type and sun exposure? If not, you may have to create a garden with several types of growing conditions, which can be challenging in a small garden.
- Visit a farmers market or plant sale in the spring. Often you can learn useful information from vendors and buy healthy plants that grow well in your area.

3. Choose a spot for your garden. Take a look around your yard to decide where you want the garden to be. The location you choose should help the garden serve its purpose while producing strong, healthy plants.
- No matter what type of garden you're planting, most plants will grow better in rich, well-drained soil. Avoid spots in your yard where water seems to stand for awhile after a heavy rain, as this could indicate the soil there is too soggy or clay-based for healthy plant growth.
- Most vegetables grow best with a lot of sunlight, so if you're planting a vegetable garden, choose a spot that isn't shaded by trees, fences or buildings. Flowers are more versatile, and if you'd like a flower plot next to your house, you can choose flowers that grow best in partial or full shade.
- If your soil isn't especially fertile, you can make a raised bed or beds and grow flowers or vegetables there. Raised beds are planting beds that are built on top of the ground within wooden frames that are filled with enriched soil.
- If you don't have a yard, you can still have a garden. Plant flowers, herbs and certain vegetables in large pots on your patio. You can move them around according to the amount of sun the plants need.
4. Make a garden design. Draw an outline of your garden or yard space. Map out different options where you want to plant various items in the location you chose. Tailor the design to fit the needs of your plants, making sure the ones that need shade will be planted in a shady spot and the ones that need full sun are in an area that isn't shaded during the day.
- Take into account the space each mature plant will need. Make sure everything you want to plant will fit in your garden and have enough space to spread out while leaving you room to move around between rows or beds.
- Take timing into account. Planting dates vary with climate zones. If you live in a region with mild winters and hot summers, for example, you'll be able to plant earlier in the year than you would if you lived in a region with cold winters and shorter summers.
- If you're planting a vegetable garden, design it so that it's convenient for you to walk into the garden and harvest vegetables as they ripen. You may want to make a path through the garden for this purpose.
- Flower gardens should be designed with aesthetics in mind. Choose colors that look pretty together, and make patterns that are pleasing to the eye. As you plan keep in mind when different varieties will begin to bloom.
Take your lifestyle into account. Do you have children or pets who might run through the area? Is the garden within reach of your water hose? Is it too close to or too far from your home?

- Vegetable gardens can include peppers, tomatoes, cabbages and lettuces, potatoes, squash, carrots, and many other vegetables. If vegetables can grow in your climate, you can find a way to grow them in your yard.
-In flower gardens, different types of flowers may be strategically planted so that something is in bloom almost all year long. Some flower gardens are structured with plantings in neat rows and patterns; others are wilder in appearance. Your personal style and yard size will determine what type of flower garden you might plant.
-Herb gardens often complement both flower and vegetable gardens, since they tend to bloom beautifully while serving the functional purpose of adding flavor to your food. Herb gardens might include rosemary, thyme, dill, cilantro and a variety of other herbs you may want to use to make dried spices and teas.
-In general, vegetable gardens require fertile soil and regular maintenance. Flowers and herbs can tolerate more neglect and poorer soil.
2. Decide what specific plants to include in your garden. Find out what grows well in your area by using this zone finder to determine what zone you are in. Then research which plants do well in your region. As you find out more about your options, make a list of the plants you want to buy and the best time of year to plant them.
- Some plants don't grow well in certain zones. If you live in a place with mild winters and hot summers, you may have trouble growing plants that require a cold snap to grow properly.
- Unless you plan to make your garden relatively large, try to choose varieties that need similar growing conditions. Do they need the same soil type and sun exposure? If not, you may have to create a garden with several types of growing conditions, which can be challenging in a small garden.
- Visit a farmers market or plant sale in the spring. Often you can learn useful information from vendors and buy healthy plants that grow well in your area.

3. Choose a spot for your garden. Take a look around your yard to decide where you want the garden to be. The location you choose should help the garden serve its purpose while producing strong, healthy plants.
- No matter what type of garden you're planting, most plants will grow better in rich, well-drained soil. Avoid spots in your yard where water seems to stand for awhile after a heavy rain, as this could indicate the soil there is too soggy or clay-based for healthy plant growth.
- Most vegetables grow best with a lot of sunlight, so if you're planting a vegetable garden, choose a spot that isn't shaded by trees, fences or buildings. Flowers are more versatile, and if you'd like a flower plot next to your house, you can choose flowers that grow best in partial or full shade.
- If your soil isn't especially fertile, you can make a raised bed or beds and grow flowers or vegetables there. Raised beds are planting beds that are built on top of the ground within wooden frames that are filled with enriched soil.
- If you don't have a yard, you can still have a garden. Plant flowers, herbs and certain vegetables in large pots on your patio. You can move them around according to the amount of sun the plants need.
4. Make a garden design. Draw an outline of your garden or yard space. Map out different options where you want to plant various items in the location you chose. Tailor the design to fit the needs of your plants, making sure the ones that need shade will be planted in a shady spot and the ones that need full sun are in an area that isn't shaded during the day.
- Take into account the space each mature plant will need. Make sure everything you want to plant will fit in your garden and have enough space to spread out while leaving you room to move around between rows or beds.
- Take timing into account. Planting dates vary with climate zones. If you live in a region with mild winters and hot summers, for example, you'll be able to plant earlier in the year than you would if you lived in a region with cold winters and shorter summers.
- If you're planting a vegetable garden, design it so that it's convenient for you to walk into the garden and harvest vegetables as they ripen. You may want to make a path through the garden for this purpose.
- Flower gardens should be designed with aesthetics in mind. Choose colors that look pretty together, and make patterns that are pleasing to the eye. As you plan keep in mind when different varieties will begin to bloom.
Take your lifestyle into account. Do you have children or pets who might run through the area? Is the garden within reach of your water hose? Is it too close to or too far from your home?

0
0
文章
ritau
2020年08月27日

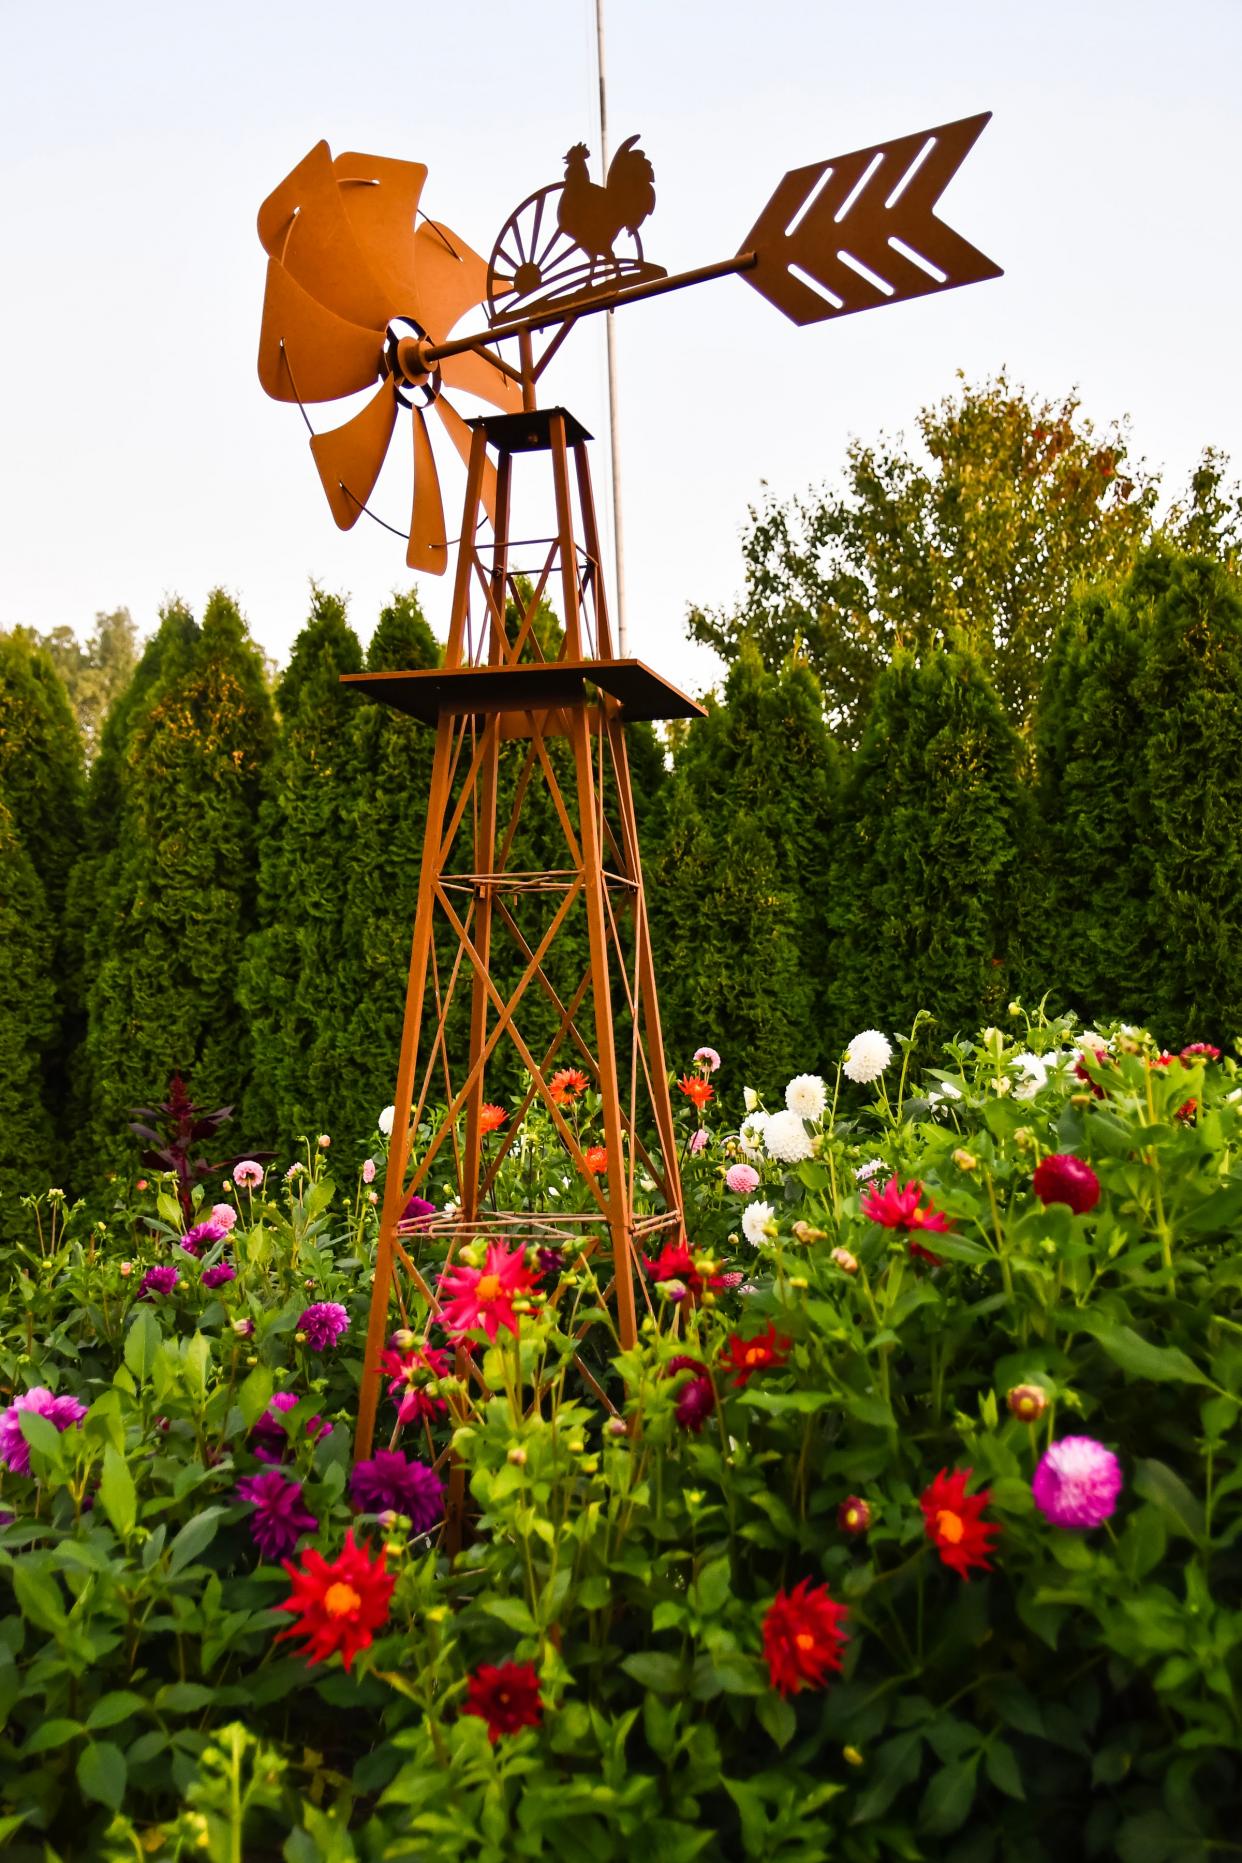
Dahlia is a genus of bushy, tuberous, herbaceous perennial plants native to Mexico and Central America. A member of the Asteraceae (formerly Compositae) family of dicotyledonous plants, its garden relatives thus include the sunflower, daisy, chrysanthemum, and zinnia. There are 42 species of dahlia, with hybrids commonly grown as garden plants. Flower forms are variable, with one head per stem; these can be as small as 5 cm (2 in) diameter or up to 30 cm (1 ft) ("dinner plate"). This great variety results from dahlias being octoploids—that is, they have eight sets of homologous chromosomes, whereas most plants have only two. In addition, dahlias also contain many transposons—genetic pieces that move from place to place upon an allele—which contributes to their manifesting such great diversity.
The stems are leafy, ranging in height from as low as 30 cm (12 in) to more than 1.8–2.4 m (6–8 ft). The majority of species do not produce scented flowers. Like most plants that do not attract pollinating insects through scent, they are brightly colored, displaying most hues, with the exception of blue.
The dahlia was declared the national flower of Mexico in 1963.The tubers were grown as a food crop by the Aztecs, but this use largely died out after the Spanish Conquest. Attempts to introduce the tubers as a food crop in Europe were unsuccessful.
Dahlias are perennial plants with tuberous roots, though they are grown as annuals in some regions with cold winters. While some have herbaceous stems, others have stems which lignify in the absence of secondary tissue and resprout following winter dormancy, allowing further seasons of growth. As a member of the Asteraceae, the dahlia has a flower head that is actually a composite (hence the older name Compositae) with both central disc florets and surrounding ray florets. Each floret is a flower in its own right, but is often incorrectly described as a petal, particularly by horticulturists. The modern name Asteraceae refers to the appearance of a star with surrounding rays.
*History
Spaniards reported finding the plants growing in Mexico in 1525, but the earliest known description is by Francisco Hernández, physician to Philip II, who was ordered to visit Mexico in 1570 to study the "natural products of that country". They were used as a source of food by the indigenous peoples, and were both gathered in the wild and cultivated. The Aztecs used them to treat epilepsy,and employed the long hollow stem of the (Dahlia imperalis) for water pipes. The indigenous peoples variously identified the plants as "Chichipatl" (Toltecs) and "Acocotle" or "Cocoxochitl" (Aztecs). From Hernandez's perception of Aztec, to Spanish, through various other translations, the word is "water cane", "water pipe", "water pipe flower", "hollow stem flower" and "cane flower". All these refer to the hollowness of the plants' stem.
Hernandez described two varieties of dahlias (the pinwheel-like Dahlia pinnata and the huge Dahlia imperialis) as well as other medicinal plants of New Spain. Francisco Dominguez, a Hidalgo gentleman who accompanied Hernandez on part of his seven-year study, made a series of drawings to supplement the four volume report. Three of his drawings showed plants with flowers: two resembled the modern bedding dahlia, and one resembled the species Dahlia merki; all displayed a high degree of doubleness.In 1578 the manuscript, entitled Nova Plantarum, Animalium et Mineralium Mexicanorum Historia, was sent back to the Escorial in Madrid; they were not translated into Latin by Francisco Ximenes until 1615. In 1640, Francisco Cesi, President of the Academia Linei of Rome, bought the Ximenes translation, and after annotating it, published it in 1649-1651 in two volumes as Rerum Medicarum Novae Hispaniae Thesaurus Seu Nova Plantarium, Animalium et Mineraliuím Mexicanorum Historia. The original manuscripts were destroyed in a fire in the mid-1600s.
"Stars of the Devil"
In 1872 J.T. van der Berg of Utrecht in the Netherlands, received a shipment of seeds and plants from a friend in Mexico. The entire shipment was badly rotted and appeared to be ruined, but van der Berg examined it carefully and found a small piece of root that seemed alive. He planted and carefully tended it; it grew into a plant that he identified as a dahlia. He made cuttings from the plant during the winter of 1872-1873. This was an entirely different type of flower, with a rich, red color and a high degree of doubling. In 1874 van der Berg catalogued it for sale, calling it Dahlia juarezii to honor Mexican President Benito Pablo Juarez, who had died the year before, and described it as "...equal to the beautiful color of the red poppy. Its form is very outstanding and different in every respect of all known dahlia flowers.".

This plant has perhaps had a greater influence on the popularity of the modern dahlia than any other. Called "Les Etoiles du Diable" (Stars of the Devil) in France and "Cactus dahlia" elsewhere, the edges of its petals rolled backwards, rather than forward, and this new form revolutionized the dahlia world. It was thought to be a distinct mutation since no other plant that resembled it could be found in the wild. Today it is assumed that D. juarezii had, at one time, existed in Mexico and subsequently disappeared. Nurserymen in Europe crossbred this plant with dahlias discovered earlier; the results became the progenitors of all modern dahlia hybrids today.
The stems are leafy, ranging in height from as low as 30 cm (12 in) to more than 1.8–2.4 m (6–8 ft). The majority of species do not produce scented flowers. Like most plants that do not attract pollinating insects through scent, they are brightly colored, displaying most hues, with the exception of blue.
The dahlia was declared the national flower of Mexico in 1963.The tubers were grown as a food crop by the Aztecs, but this use largely died out after the Spanish Conquest. Attempts to introduce the tubers as a food crop in Europe were unsuccessful.
Dahlias are perennial plants with tuberous roots, though they are grown as annuals in some regions with cold winters. While some have herbaceous stems, others have stems which lignify in the absence of secondary tissue and resprout following winter dormancy, allowing further seasons of growth. As a member of the Asteraceae, the dahlia has a flower head that is actually a composite (hence the older name Compositae) with both central disc florets and surrounding ray florets. Each floret is a flower in its own right, but is often incorrectly described as a petal, particularly by horticulturists. The modern name Asteraceae refers to the appearance of a star with surrounding rays.

*History
Spaniards reported finding the plants growing in Mexico in 1525, but the earliest known description is by Francisco Hernández, physician to Philip II, who was ordered to visit Mexico in 1570 to study the "natural products of that country". They were used as a source of food by the indigenous peoples, and were both gathered in the wild and cultivated. The Aztecs used them to treat epilepsy,and employed the long hollow stem of the (Dahlia imperalis) for water pipes. The indigenous peoples variously identified the plants as "Chichipatl" (Toltecs) and "Acocotle" or "Cocoxochitl" (Aztecs). From Hernandez's perception of Aztec, to Spanish, through various other translations, the word is "water cane", "water pipe", "water pipe flower", "hollow stem flower" and "cane flower". All these refer to the hollowness of the plants' stem.
Hernandez described two varieties of dahlias (the pinwheel-like Dahlia pinnata and the huge Dahlia imperialis) as well as other medicinal plants of New Spain. Francisco Dominguez, a Hidalgo gentleman who accompanied Hernandez on part of his seven-year study, made a series of drawings to supplement the four volume report. Three of his drawings showed plants with flowers: two resembled the modern bedding dahlia, and one resembled the species Dahlia merki; all displayed a high degree of doubleness.In 1578 the manuscript, entitled Nova Plantarum, Animalium et Mineralium Mexicanorum Historia, was sent back to the Escorial in Madrid; they were not translated into Latin by Francisco Ximenes until 1615. In 1640, Francisco Cesi, President of the Academia Linei of Rome, bought the Ximenes translation, and after annotating it, published it in 1649-1651 in two volumes as Rerum Medicarum Novae Hispaniae Thesaurus Seu Nova Plantarium, Animalium et Mineraliuím Mexicanorum Historia. The original manuscripts were destroyed in a fire in the mid-1600s.
"Stars of the Devil"
In 1872 J.T. van der Berg of Utrecht in the Netherlands, received a shipment of seeds and plants from a friend in Mexico. The entire shipment was badly rotted and appeared to be ruined, but van der Berg examined it carefully and found a small piece of root that seemed alive. He planted and carefully tended it; it grew into a plant that he identified as a dahlia. He made cuttings from the plant during the winter of 1872-1873. This was an entirely different type of flower, with a rich, red color and a high degree of doubling. In 1874 van der Berg catalogued it for sale, calling it Dahlia juarezii to honor Mexican President Benito Pablo Juarez, who had died the year before, and described it as "...equal to the beautiful color of the red poppy. Its form is very outstanding and different in every respect of all known dahlia flowers.".

This plant has perhaps had a greater influence on the popularity of the modern dahlia than any other. Called "Les Etoiles du Diable" (Stars of the Devil) in France and "Cactus dahlia" elsewhere, the edges of its petals rolled backwards, rather than forward, and this new form revolutionized the dahlia world. It was thought to be a distinct mutation since no other plant that resembled it could be found in the wild. Today it is assumed that D. juarezii had, at one time, existed in Mexico and subsequently disappeared. Nurserymen in Europe crossbred this plant with dahlias discovered earlier; the results became the progenitors of all modern dahlia hybrids today.
0
0
文章
ritau
2020年08月16日

1. Choose a lettuce variety that thrives indoors. Although most lettuce plants can stay healthy indoors, you'll have better success with some varieties over others. Buy any of these lettuce varieties, which are known for growing well inside, from a garden center or plant nursery:
-Garden Babies
-Merlot
-Baby Oakleaf
-Salad Bowl
-Lollo Rosa
-Black-Seeded Simpson
-Tom Thumb
-Red Deer Tongue
2. Fill a pot with a seed starting soil mix. Seed starting mixes are lightweight, they help your plants’ roots grow, and they're well-draining to prevent overwatering. If you cannot find a seed starting mix, you can also create a soil made from equal parts peat moss or coir, vermiculite, and sand.
-Each lettuce plant requires 4–6 in (10–15 cm) of space and a depth of about 8 inches (20 cm). Choose a pot that can accommodate these measurements.
-Purchase pots with drainage holes on the bottom. Place a saucer underneath the pot to catch draining water.
-You can buy seed starting soil mixes from most plant nurseries or garden centers.
3. Plant your seeds approximately 1 in (2.5 cm) apart. Dig a 4–6 in (10–15 cm) deep hole and place your seeds inside at about 1 in (2.5 cm) apart. Limit your seeds to 4 per pot to avoid overcrowding the lettuce as it grows. If you want to plant more than 4 seeds, prepare several pots ahead of time.
4. Sprinkle your seeds lightly with potting soil and water. Take a handful of potting soil and gently sprinkle it over the newly-planted seeds. Fill a spray bottle with water and gently mist the seeds to avoid washing them away.
5. Plant lettuce seedlings if you don't want to wait for seeds to sprout. If you don't want to wait for seeds to sprout, you can plant lettuce seedlings instead. Use the same technique as you would for lettuce seedlings, planting no more than 4 per pot.
-You can buy lettuce seedlings at many plant nurseries or garden centers

6. Mist your seeds daily until they sprout into seedlings. When they sprout, give your lettuce at least 1 in (2.5 cm) of water per week. Poke your finger in the soil once or twice a day and water your lettuce whenever the soil feels dry.
-The soil should be moist but not waterlogged.
-Another way to test the moisture level of soil is lifting up the pot. If it feels heavy, the soil is saturated with water.
7. Grow your lettuce in room temperature conditions. Lettuce grows best at temperatures around 65–70 °F (18–21 °C). Turn on the air conditioner or heater as needed to keep your plants at an even, sustainable temperature.
-If the weather is warm or cool enough outside, you can move your plants outdoors periodically to get fresh air.
8. Place your lettuce plant near a sunny window or a fluorescent grow light. Lettuce plants grow best with direct sunlight. If you're in a climate with very little sun, purchase a grow light from a plant nursery and position it about 12 inches (30 cm) overhead.
Lettuce plants need at least 12 hours of direct sunlight a day, with 14-16 hours the preferred amount.
Keep in mind that plants grown under a grow light generally need more time under the light than they would with natural sunlight. Aim closer to 14-16 hours instead of 12+ hours if you're using a grow light.
9. Water your lettuce whenever the leaves wilt. Lettuce plant leaves visibly wilt when they are thirsty. If your plant's leaves droop, water the lettuce until its soil is moist, but not soaking wet or waterlogged.
-The hotter the temperatures, the more often you will need to water your lettuce
10. Fertilize your lettuce 3 weeks after planting it. Lettuce needs nitrogen-rich soil to grow, so spray a liquid fertilizer on the plant 3 weeks after you planted it, or when the first leaves grow on the plant. Spray the fertilizer mainly near the soil, avoiding the lettuce leaves to prevent burning them.
-Use a liquid fertilizer. Granular fertilizers need to be mixed into the soil.
-Organic alfalfa meal or a nitrogen-rich, slow-release fertilizer both work well with lettuce.
-You can also use fish or seaweed emulsion fertilizers but they can emit a strong odor and are less recommended for indoor lettuce plants
11. Begin harvesting your lettuce 30-45 days after planting. On average, lettuce takes about 30-45 days after you plant the seeds to mature. Make a note on your calendar to begin harvesting after about 30 days has passed.
-Indoor lettuce plants grow and mature continually, so you can continue harvesting your plant after you've picked it for the first time.
-Mature indoor lettuce usually grows to about 4 inches (10 cm) tall.
-See How to Harvest Romaine Lettuce for specific instructions relating to this type of lettuce.
12. Harvest your lettuce in the morning. Morning is when your plant's most hydrated and at its strongest. If possible, harvest your plant before the late morning or afternoon to attain a healthier yield.
-If you can't harvest in the morning, avoid mid-to-late afternoon, which is when your plant's least hydrated.
13. Cut off the outer leaves. Do not harvest your indoor lettuce plant all at once. As long as you continue taking care of it, you can harvest it for several months. Cut 3-4 of the outer leaves at a time with garden shears or scissors, leaving the rest of the plant to heal and grow back later on.
-Avoid picking the lettuce's crown or center. Limit yourself to the outer leaves to boost its overall harvesting yield.

14. Refrigerate your lettuce for 5-8 days after harvesting. Depending on the variety, lettuce can last anywhere between 3-10 days in the refrigerator. Check how long your specific variety lasts for and, after placing the lettuce in the fridge, plan to use it by its expiration date.
-If you don't think you'll use your lettuce in 5-8 days, wait a few days before harvesting your plant.
15. Harvest your lettuce again in about 2 weeks. Your plant requires about 2 weeks to heal and grow more leaves before it is ready to harvest again. After your first time harvesting, wait 2 weeks in-between harvesting to keep your plant healthy and able to grow more leaves.
-Wait at least 2 weeks before harvesting young plants, which may take time to grow strong after being harvested.
-Sow additional seeds every 2 weeks to extend your harvest.
-Garden Babies
-Merlot
-Baby Oakleaf
-Salad Bowl
-Lollo Rosa
-Black-Seeded Simpson
-Tom Thumb
-Red Deer Tongue
2. Fill a pot with a seed starting soil mix. Seed starting mixes are lightweight, they help your plants’ roots grow, and they're well-draining to prevent overwatering. If you cannot find a seed starting mix, you can also create a soil made from equal parts peat moss or coir, vermiculite, and sand.
-Each lettuce plant requires 4–6 in (10–15 cm) of space and a depth of about 8 inches (20 cm). Choose a pot that can accommodate these measurements.
-Purchase pots with drainage holes on the bottom. Place a saucer underneath the pot to catch draining water.
-You can buy seed starting soil mixes from most plant nurseries or garden centers.
3. Plant your seeds approximately 1 in (2.5 cm) apart. Dig a 4–6 in (10–15 cm) deep hole and place your seeds inside at about 1 in (2.5 cm) apart. Limit your seeds to 4 per pot to avoid overcrowding the lettuce as it grows. If you want to plant more than 4 seeds, prepare several pots ahead of time.
4. Sprinkle your seeds lightly with potting soil and water. Take a handful of potting soil and gently sprinkle it over the newly-planted seeds. Fill a spray bottle with water and gently mist the seeds to avoid washing them away.
5. Plant lettuce seedlings if you don't want to wait for seeds to sprout. If you don't want to wait for seeds to sprout, you can plant lettuce seedlings instead. Use the same technique as you would for lettuce seedlings, planting no more than 4 per pot.
-You can buy lettuce seedlings at many plant nurseries or garden centers

6. Mist your seeds daily until they sprout into seedlings. When they sprout, give your lettuce at least 1 in (2.5 cm) of water per week. Poke your finger in the soil once or twice a day and water your lettuce whenever the soil feels dry.
-The soil should be moist but not waterlogged.
-Another way to test the moisture level of soil is lifting up the pot. If it feels heavy, the soil is saturated with water.
7. Grow your lettuce in room temperature conditions. Lettuce grows best at temperatures around 65–70 °F (18–21 °C). Turn on the air conditioner or heater as needed to keep your plants at an even, sustainable temperature.
-If the weather is warm or cool enough outside, you can move your plants outdoors periodically to get fresh air.
8. Place your lettuce plant near a sunny window or a fluorescent grow light. Lettuce plants grow best with direct sunlight. If you're in a climate with very little sun, purchase a grow light from a plant nursery and position it about 12 inches (30 cm) overhead.
Lettuce plants need at least 12 hours of direct sunlight a day, with 14-16 hours the preferred amount.
Keep in mind that plants grown under a grow light generally need more time under the light than they would with natural sunlight. Aim closer to 14-16 hours instead of 12+ hours if you're using a grow light.
9. Water your lettuce whenever the leaves wilt. Lettuce plant leaves visibly wilt when they are thirsty. If your plant's leaves droop, water the lettuce until its soil is moist, but not soaking wet or waterlogged.
-The hotter the temperatures, the more often you will need to water your lettuce
10. Fertilize your lettuce 3 weeks after planting it. Lettuce needs nitrogen-rich soil to grow, so spray a liquid fertilizer on the plant 3 weeks after you planted it, or when the first leaves grow on the plant. Spray the fertilizer mainly near the soil, avoiding the lettuce leaves to prevent burning them.
-Use a liquid fertilizer. Granular fertilizers need to be mixed into the soil.
-Organic alfalfa meal or a nitrogen-rich, slow-release fertilizer both work well with lettuce.
-You can also use fish or seaweed emulsion fertilizers but they can emit a strong odor and are less recommended for indoor lettuce plants
11. Begin harvesting your lettuce 30-45 days after planting. On average, lettuce takes about 30-45 days after you plant the seeds to mature. Make a note on your calendar to begin harvesting after about 30 days has passed.
-Indoor lettuce plants grow and mature continually, so you can continue harvesting your plant after you've picked it for the first time.
-Mature indoor lettuce usually grows to about 4 inches (10 cm) tall.
-See How to Harvest Romaine Lettuce for specific instructions relating to this type of lettuce.
12. Harvest your lettuce in the morning. Morning is when your plant's most hydrated and at its strongest. If possible, harvest your plant before the late morning or afternoon to attain a healthier yield.
-If you can't harvest in the morning, avoid mid-to-late afternoon, which is when your plant's least hydrated.
13. Cut off the outer leaves. Do not harvest your indoor lettuce plant all at once. As long as you continue taking care of it, you can harvest it for several months. Cut 3-4 of the outer leaves at a time with garden shears or scissors, leaving the rest of the plant to heal and grow back later on.
-Avoid picking the lettuce's crown or center. Limit yourself to the outer leaves to boost its overall harvesting yield.

14. Refrigerate your lettuce for 5-8 days after harvesting. Depending on the variety, lettuce can last anywhere between 3-10 days in the refrigerator. Check how long your specific variety lasts for and, after placing the lettuce in the fridge, plan to use it by its expiration date.
-If you don't think you'll use your lettuce in 5-8 days, wait a few days before harvesting your plant.
15. Harvest your lettuce again in about 2 weeks. Your plant requires about 2 weeks to heal and grow more leaves before it is ready to harvest again. After your first time harvesting, wait 2 weeks in-between harvesting to keep your plant healthy and able to grow more leaves.
-Wait at least 2 weeks before harvesting young plants, which may take time to grow strong after being harvested.
-Sow additional seeds every 2 weeks to extend your harvest.
0
0


