文章
Abigal
2017年05月22日


Our backyards are used for BBQ’s and family gatherings, playgrounds and football games. Don’t forget to use your yard for some good ‘ol wind down time! These 13 projects for backyard relaxation will help turn your garden space into a zen place. Catchy, right? :) Our feature project above, is a hanging bed from ‘The Devoted Wife‘.
From ‘Pottery Barn‘, we love this backyard bed space too! Want to make one of your own? Then jump on over to our post on DIY garden hanging beds and find a bunch of great tutorials!

If you love those hanging beds, then try something a little different with this deck makeover by Sarah Dorsey for ‘Home Depot’. In this one post, there is a tutorial for her DIY hanging bench, cable railing, privacy curtains and deck makeover. What a cool space to have a glass of wine or tea in!

Need a more comfy spot, perhaps under a tree? For a whole afternoon? We feel ya. Try this DIY hammock from ‘Martha’ made from a simple drop cloth.

Or learn how to make a rope hammock from ‘Kinfolk’. This is just inexpensive nylon rope and overhand knots! Or for more ideas, check out our post on DIY hammocks.

Amy of ‘Her Tool Belt’ did this DIY chaise tutorial from 2×4’s for ‘Bob Vila’. Just in case you were getting tired of laying down… ;)

These DIY chaise lounges look perfect for a warm afternoon! Made by ‘Being Brooke’ at ‘Ana White’, she did these for $35!

Ok, now you have a place to relax your body, now it’s time to relax the soul! Start with water… this DIY fountain from ‘Oregon Live’ ought to do it!

‘Diane and Dean’ have another take for you…. They did this garden fountain on the edge of an existing pool to add to the ambience, and it looks kinda “tropical wonderland” to us!

If water hasn’t gotten you there, how about wind? Make your own wind chimes with this tutorial by ‘HGTV’. This is a simple project using a craft round, pipe and twine.

Or make these DIY wind chimes in an hour with things from the shop, including simple washers! From ‘Bob Vila’.

Ok, so now you’ve had a relaxing afternoon, but the evening is creeping in… No need to start the stress parade again.! Just fire up your DIY propane fire pit! This one from ‘WC Welding’ was done in just 5 steps from a garden patio table.
Finally, if you want to get a bit serious, jump on over to one of our fav sites, ‘Homemade Modern’ and learn how to make their concrete fire pit.

Ok, are we officially in kick back mode yet?
0
1
文章
Abigal
2017年05月21日

When the warmer seasons come around, most of us like to spend some evenings (or most!) lounging in our yards and gardens. Having good outdoor lighting can make your outdoor space a usable and enjoyable spot to visit with loved ones, have a late snack, or sip a good glass of red. Try these backyard lighting ideas and tutorials to get your yard in shape for when the sun goes down! Our feature photo below is a gorgeous backyard globe light set up by ‘Willow Jade Floral‘ in L.A. If I could have my whole yard look just like this!

Make these geometric light columns with this tutorial from ‘Martha’. This uses just three simple materials, and would be great for a graduation or Fourth of July party!

From ‘House of Fifty’ magazine, make mason jar candle lanterns! These are easy, and who doesn’t love mason jars!

Another version of a mason jar lantern, these we found on Pinterest, but can’t find the original source. Please share if you know where these are from! We really like how they look hanging against the wood fence. It makes for a really pretty look, but if you do this, consider using LED candles instead.

This outdoor lighted cube table is a woodworking tutorial from ‘Lowes’… This would make additional lighting in your patio area unnecessary!

A great idea from ‘Sunset‘… hang tea light lanterns from different heights as an outdoor chandelier…

Robin at ‘All Things Heart and Home’ has a tutorial for her easy DIY outdoor chandelier made from grapevine balls! Love this project!

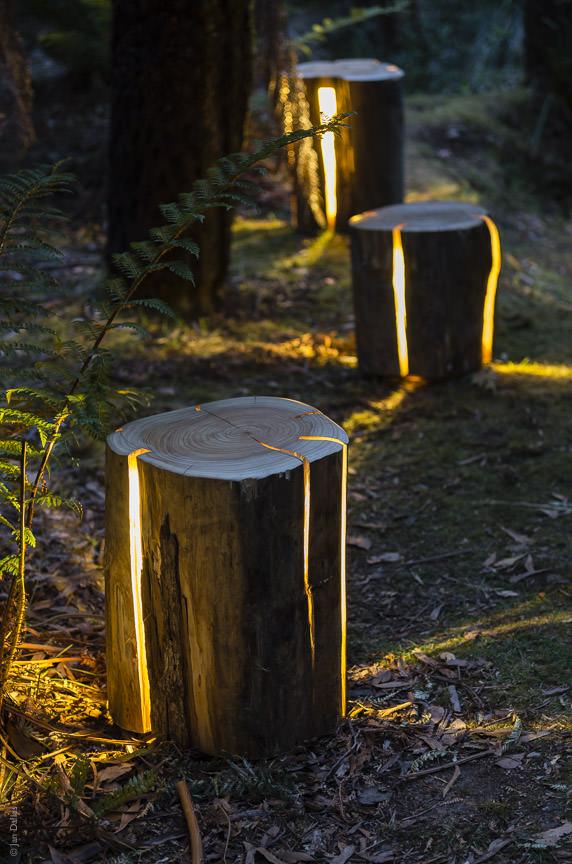
Ok, these are just cool. These are cracked log lamps made by artist Duncan Meerding, via ‘Recycled Interiors’. You have to go check out how he makes these! I would love these all through a woodland garden! Fairy garden!
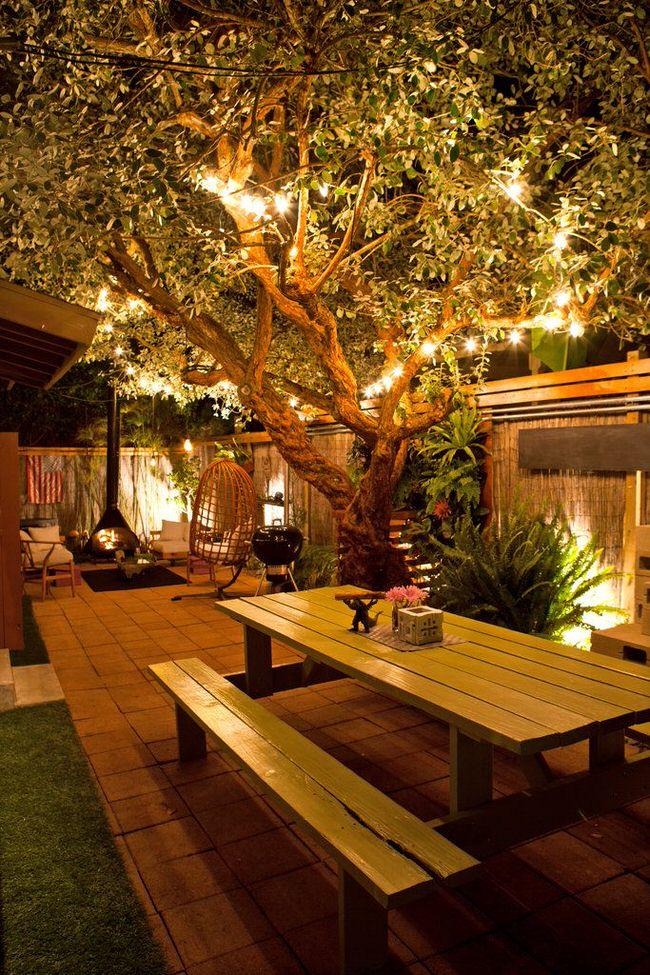
Love the idea of string lights, but want to make it really amazing? Just use this photo from ‘Fondly Forever‘ to inspire you!

Use uplighting to brighten dark corners or to light focal plantings at night. Photo by Laura Joliet for ‘The NY Times‘.
Try lighting the pass through areas between yards to add dimension to your outdoor space. Photo by ‘Martha‘.

Ok, last we have these moonlight globes from ‘Home Infatuation’… These. Are. Cool. Not cheap, but amazingly cool! They can float, or be mounted, and can be recharged over and over.


Make these geometric light columns with this tutorial from ‘Martha’. This uses just three simple materials, and would be great for a graduation or Fourth of July party!

From ‘House of Fifty’ magazine, make mason jar candle lanterns! These are easy, and who doesn’t love mason jars!

Another version of a mason jar lantern, these we found on Pinterest, but can’t find the original source. Please share if you know where these are from! We really like how they look hanging against the wood fence. It makes for a really pretty look, but if you do this, consider using LED candles instead.

This outdoor lighted cube table is a woodworking tutorial from ‘Lowes’… This would make additional lighting in your patio area unnecessary!

A great idea from ‘Sunset‘… hang tea light lanterns from different heights as an outdoor chandelier…

Robin at ‘All Things Heart and Home’ has a tutorial for her easy DIY outdoor chandelier made from grapevine balls! Love this project!

Ok, these are just cool. These are cracked log lamps made by artist Duncan Meerding, via ‘Recycled Interiors’. You have to go check out how he makes these! I would love these all through a woodland garden! Fairy garden!

Love the idea of string lights, but want to make it really amazing? Just use this photo from ‘Fondly Forever‘ to inspire you!

Use uplighting to brighten dark corners or to light focal plantings at night. Photo by Laura Joliet for ‘The NY Times‘.

Try lighting the pass through areas between yards to add dimension to your outdoor space. Photo by ‘Martha‘.

Ok, last we have these moonlight globes from ‘Home Infatuation’… These. Are. Cool. Not cheap, but amazingly cool! They can float, or be mounted, and can be recharged over and over.

0
1
文章
Abigal
2017年05月21日


If your garden is on any kind of a slope, it’s possible a garden retaining wall might make your property more usable, and more valuable. Retaining walls hold back soil to allow a level planting area in a space that normally would have poor soil, drainage, and access. So banish the idea that only ground cover plants can grow on your slope! Build one of these DIY garden retaining walls and change the whole dynamic of your yard.
Our first bit of retaining wall inspiration is from ‘Isbir Construction‘… there isn’t a tutorial, but it’s a great photo in that it shows you how simple a retaining wall can be. This is simply cedar timbers cut to different lengths for interest, a row of bricks to prevent erosion, and then soil and mulch to backfill. Obviously this simple project is better for a minor slope correction. Perfect for this flower beds where the water just seems to run right off…

Want the same timber feel, but on a larger scale for a bigger job? Then follow along with this tutorial and video from ‘This Old House’ and build your own timber retaining wall. This particular one is not a small job, but with some DIY ability, you could save thousands over having this installed. Photo: Landscape Supplies

Do you want a wall with a different look and feel? Build a concrete block retaining wall with this tutorial from ‘Family Handyman’. This also has no possibility of rot, making it a very long lasting solution.

Also from ‘Family Handyman’, make a retaining wall from less expensive pressure treated 2×4’s…. This is a great plan for the gardener on a tighter budget. I love the look of this, it could go well with a modern or rustic style garden.

From ‘BHG”, build this concrete block retaining wall in less than a weekend! I love the cap on the top of the blocks, it gives it a finished look, and also a place for seating.

Use all those boulder size rocks you keep digging up by building a rock or stone retaining wall with this tutorial from ‘Las Pilitas Nursery’… They even have drawings to show how to layer the wire and mortar to make a strong wall…
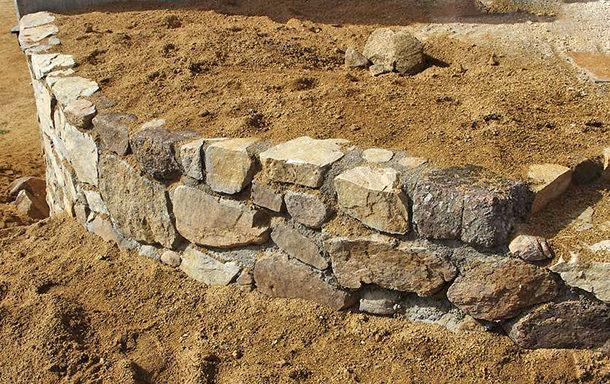
‘DIY Network’ offers a great step by step tutorial for building a stone block wall, with lots of photos along the way.


Finally, a little inspiration from “Down Under”, ‘Gabion 1‘ in Australia has two ideas for you using wire mesh to create a “gabion”. These can be filled with stones, bricks or recycled materials. Use your imagination on what kind of repurposed objects could fill the wall!


1
0
文章
Abigal
2017年05月16日


At least three seasons of the year, a #hammock can be your best friend in the #garden . All the planning and work and planting you do in your garden space means nothing if you don’t spend time enjoying it. And isn’t the garden all about a peaceful retreat? Well, retreat to your #DIY hammock that you made, (here are lots of tutorials!) and spend time pondering life, reading a good book, or taking a well deserved nap. Better yet, snuggle up with your S.O. and take a nap for two! Our feature project, above and below, is a step by step DIY hammock by ‘The Little Dog Blog’. Steve came across this project, and thinks it’s one of the best, most complete tutorials he has seen! This is a great place to start!

I really like this DIY hammock chair by ‘A Beautiful Mess’. You could use it outdoors, or even in a sunroom like she did. What a comfy place to have a cup of tea!

Try ‘Gardenista’s DIY instant hammock version of an expensive store bought one! This is a short tutorial, so bring your DIY skills, but its a basic rectangle and grommets on the corners. You can find grommet kits in any craft store. Make sure you get heavy duty ones!

If you aren’t lucky enough to have several mature trees or sturdy posts in your yard, you’re gonna need a stand. The tutorial at ‘Here comes the Sun’ for their DIY hammock stand will get you a good quality stand that will last… not some cheap metal thing that will rust the first season. You know the kind, the ones every discount store sells.

From ‘The Merry Thought’… well oh me oh my… this is the quintessential vision of a day in the hammock, isn’t it? Learn how to make this DIY hammock with a very complete tutorial. (Including how to use those grommets!) This is true hammock heaven!

Lastly, from ‘Instructables’, this DIY hammock stand has lots of photos to inspire you, but we’ve yet to discover the tutorial… however, after reading the comments, they posted a written plan for the hammock stand.

1
0
文章
Abigal
2017年03月28日


We all have those little trinkets around our home, to personalize our space, remind us of memories, or simply to showcase our creativity. But did you ever think of having garden trinkets? You know, cute decorative things that just make you smile? After all, the garden is an extension of the home. (At least it always should be!) So we searched the blogosphere and found you some great ideas for DIY garden trinkets, to add some jewelry to your garden!
From ‘Birds and Blooms’, this DIY dragonfly garden art is the perfect little sparkle for containers, beds, or just for a little whimsy in an unexpected corner. I don’t own a mini torch, but a soldering gun works just as well, and you can find one at the craft store for just a few dollars.

‘Crown Hill’ has a tutorial for these DIY concrete mushrooms that are so cute and easy! I can see a whole tiny field of these in a shade garden…

These DIY rock animals from ‘Your Livable Garden’ are really cute, and as they mention, an easy project to do with the kids. I like this project, because it’s simple, but gets you out working with nature itself, creating possibilities with shapes and textures… then all it takes is a little glue to seal the deal! Check out their site to see which glue they recommend…

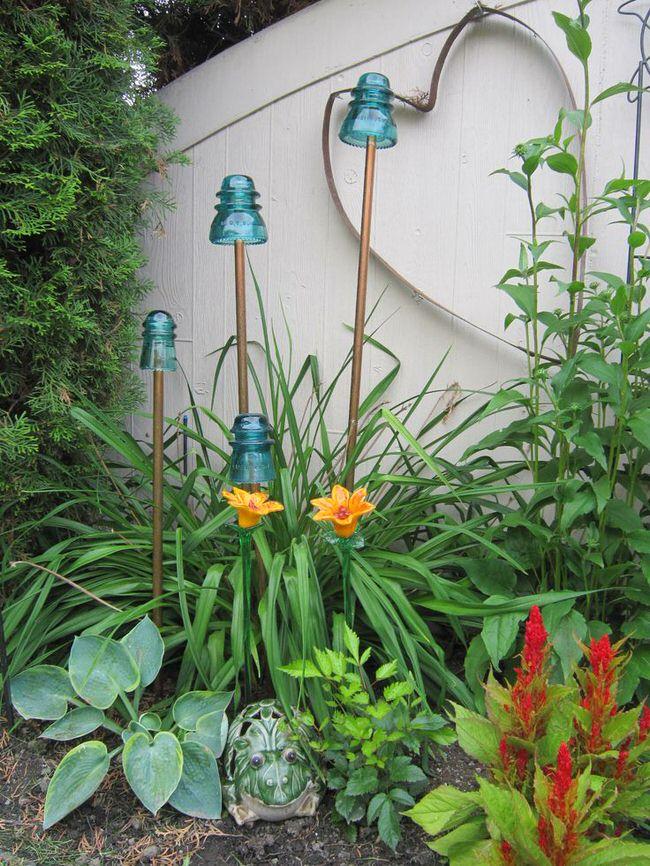
We found these garden ornaments on Pinterest… if anyone knows the source, please share! But these insulators are easily found at antique and thrift shops, and can be glued onto copper pipe segments, and then insert them into the soil. Easy idea!
This great idea is from ‘Paradis Express‘… Chicken wire globes with spray paint. The site is in French, but the idea is amazing!

I LOVE these DIY garden things from ‘Instructables‘! So amazingly cute!

From ‘Art Drops’, these DIY golf ball buggies are a quick and creative project for anyone. This site is not in english, but you can either use Google translate, or just follow the photos, which are really self explanatory.

These bowling ball bugs are the same idea as the golf ball ladybugs, but if you don’t want to DIY them, you can purchase these adorable ones from ‘Recycled Smiles‘.

From ‘Gardening Help’, these spoon butterfly ornaments are made from recycled flatware. Easy and short tutorial!

Make something very similar to these garden spheres from West Elm, with the directions from ‘Metropolitan Hip’!

So decorate your garden with these DIY trinkets!
1
0
文章
Gina
2017年03月16日


Spring is just around the corner, and indoor seed starting is even closer… Many of us are looking for ways to mark out flats, pots and rows without using those ugly plastic sticks… The garden should not be treated just as a utilitarian space! Here are some easy DIY plant marker projects that will get you excited about popping those first seedlings into newly warmed earth…and actually remembering what you planted there! Our featured project from Our Little Coop (above) uses chalkboard paint to make garden marker signs… easy tutorial!
Our first project inspiration comes from The Micro Gardner, and we love this idea! How cool is this? Terra Cotta Plant Markers – Sharpie and broken terra cotta pots…

Scissors and Spatulas has a great tutorial on using chalkboard paint and pots… and you know we’ve been into the chalkboard paint lately! This is great because when you change plants in each pot, you just erase and write the new name!

42 Things on Etsy has these garden plant markers that are natural, clever and cool…
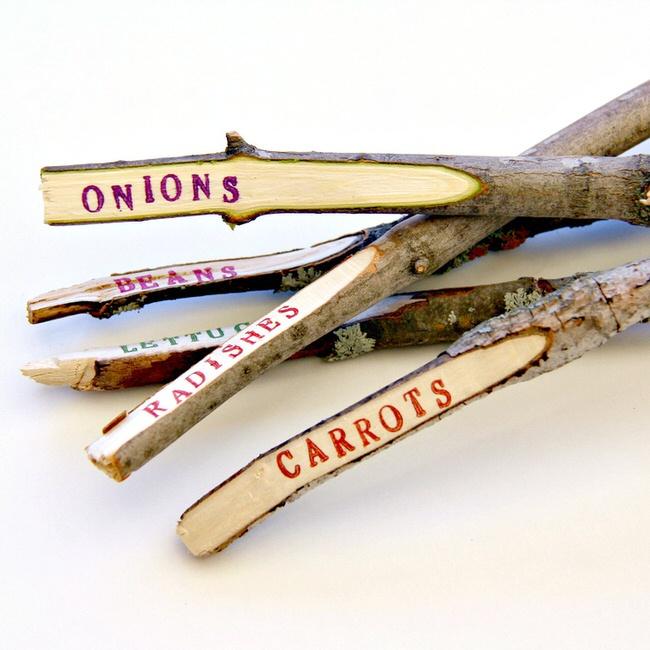
Or create similar plant markers yourself…

Learn how to make these charming wooden spoon plant markers from DIY Adventures.

Create these brick style garden markers with a thick sharpie or paint. Great for marking rows, you don’t have to worry about losing your markers in the wind and forgetting which row is which!

Aunt Peaches created these aluminum tape garden markers for less than $5 for 50!

Finally, these DIY wine cork garden markers by Happier Homemaker are perfect for me! I knew I save all those wine corks for a reason!

So get some seeds planted, but first pick one of these great DIY plant markers projects and get crafting for the garden!
1
1
文章
安小宝
2017年03月16日


Japanese Maples are easily one of the most elegant and stunning specimen plants you can add to your garden. There are varieties that can be grown in containers, and few of them ever reach over 25 feet tall, making them adaptable to any space. The fall colors on Japanese Maples is stunning, and because of their smaller size, easy to appreciate in a small garden than a larger tree or shrub. Many varieties even look amazing all winter long with attractive bark and branch formation. They leaf out early with fresh green leaves, some of which change to reds or oranges as the season progresses. They are available in both red and green varieties, and some varieties have reached collector status.
Japanese Maples also have a reputation for being difficult to grow, but while they have needs that need to be attended to for best growth and color, they are a tough and adaptable plant.
Here are the steps on how to grow Japanese Maples, and our top fav varieties!
Sun vs. Shade
Japanese Maples are shade lovers, but they do need some sun in order to get to their best color. It’s best to provide morning sun and afternoon shade, or dappled shade at most. The farther south you are, the more afternoon shade should be provided. Below is an example of leaf scorch that some maples are prone to with too much afternoon sun.
Soil
They are eager feeders, especially when young, so lots of compost or organic matter should be worked into the planting hole. One note: These plants do not do well with salt in the soil. They can handle a wider variety of soil issues, but that is deadly to them.
Water
Evenly moist, not soggy and not dry when young. Believe it or not, at maturity Japanese Maples can be somewhat drought resistant.
Wind
Obviously you can’t protect any outdoor plant from all wind, but if you can choose a more protected spot, your maple will appreciate it. Winds can dry out and brown the leaves if they are constant.
Cold/Heat
Most Japanese Maples are hardy down to zone 5, but they dislike overly hot environments. However, I grow my Coral Bark Maple in an inland northwest desert, in full afternoon sun… I just keep it well watered every day in well drained soil… However, towards the end of summer I do get some brown curling on the leaves.
Special Tips
Reduce your watering in the fall for the best color. Japanese Maples grow fairly slowly, so if after a season or two you find the spot you chose isn’t working, you can dig it up and move it, they are pretty tough. Just dig a nice sized root ball and transplant it in the fall. Water it well… even if you see some stress related leaf drop, chances are it will be just fine come spring.
Favorite Varieties
Green
Coral Bark – This variety has lovely red bark that shows well in the winter months. Leaves are green with a sight reddish edge, then turn golden in the fall. To 20 feet.

Gold
The Golden Full Moon Maple has gorgeous gold leaves, that turn more red from the tips down in the fall. To 20 feet.

Red
Dissectum Atropurpureum – This is the common red variety that you see with fine foliage and a dwarf form.

Best for Southern or Warmer Climates
Beni schichihenge – This variety is a variegated leaf with cream, green and pink, and turns to an orange golden in the fall. To 8 feet, and tolerates hot temperatures better than most.

1
1
文章
Abigal
2017年03月15日

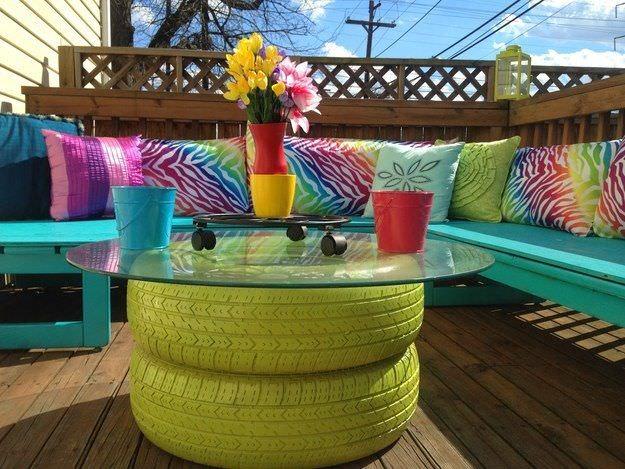
Backyard furniture can be just as important as the furniture in your living room these days… after all, we have finally embraced the outdoors as another room on it’s own! Make sure your backyard space has furniture with a personality that tells a story about you and your family… Are you creative, adventurous, ingenious, or perhaps a little ‘uptown girl’? We have a great selection of super cool backyard furniture projects that you can DIY for your garden! Our featured project is shown above. This tire coffee table from ‘Madcap Frenzy’ may or may not be your cup o’ tea, but you have to admire the creativity! Love the bright colors!
‘Homemade Modern’ made this log lounger for $30 and in 6 hours… scroll down the page to see all the step by step photos, and they even have a how to video!

‘Apartment Therapy’ shows us how to make a flower pot table out of two pots and a pizza pan! (Oh, and a little bit of spray paint!)

This daybed lounger from ‘vtwonen’ looks like a very expensive piece of furniture. The whole tutorial is there, problem is, it’s in Dutch! Luckily, you can go to Google Translate and be able to read the instructions.

If you are like me, you might be getting a little tired of the “DIY pallet” phenomenon… but you have to admit, its clever, cheap and upcycling! Once in while a project catches our eye that makes it worth including, and this DIY pallet furniture by ‘Bridgman’ is! Ok, the view might have swayed us a little…

This fence bench by ‘The Brick House’ is my favorite piece of the post! It’s made from old fence boards, and I love the modern mid century legs to add an upscale and trendy feel. Click through to see it used indoors as well.

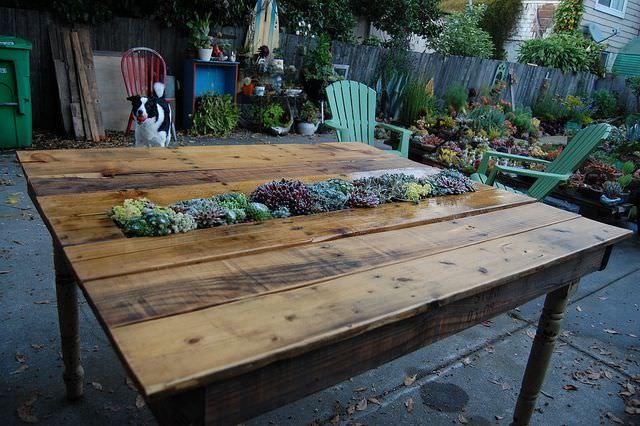
Another pallet project that made the grade, this pallet succulent table by ‘Far Out Flora’ was made for the Sunset test gardens!
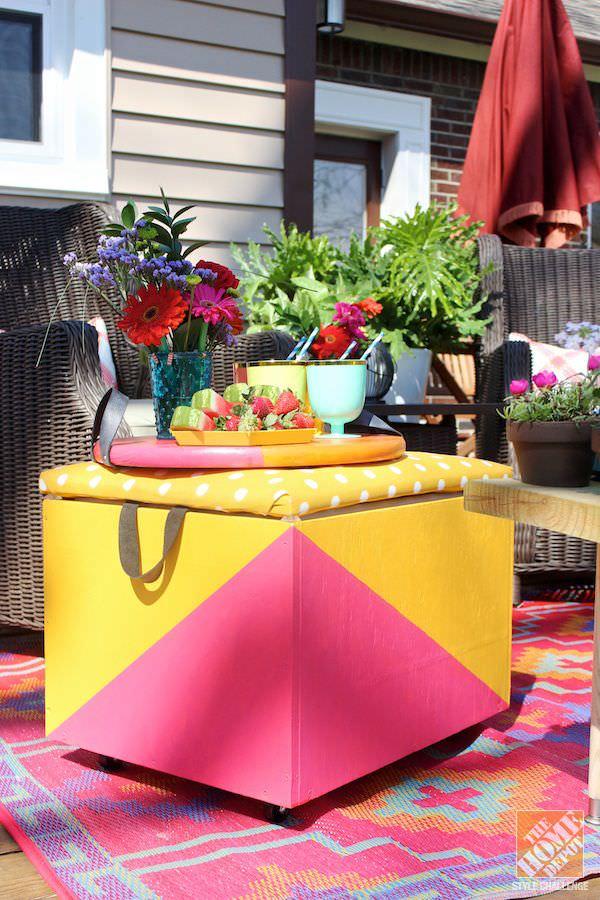
This crate storage table by Beckie at ‘Infarrantly Creative’ (we love her!) is not only a vintage looking piece you would love to have, it stores as well! Tuck a reading blanket in there for cool and sunny fall afternoons…

From Home Depot, this rolling cooler ottoman is both those things, and a shot of bright color for a tired fall garden!
Our last two projects we are including for inspiration… they are both DIY’able but they don’t have complete tutorials… this is where that wonderful loved one who is good with their hands will be really appreciated!
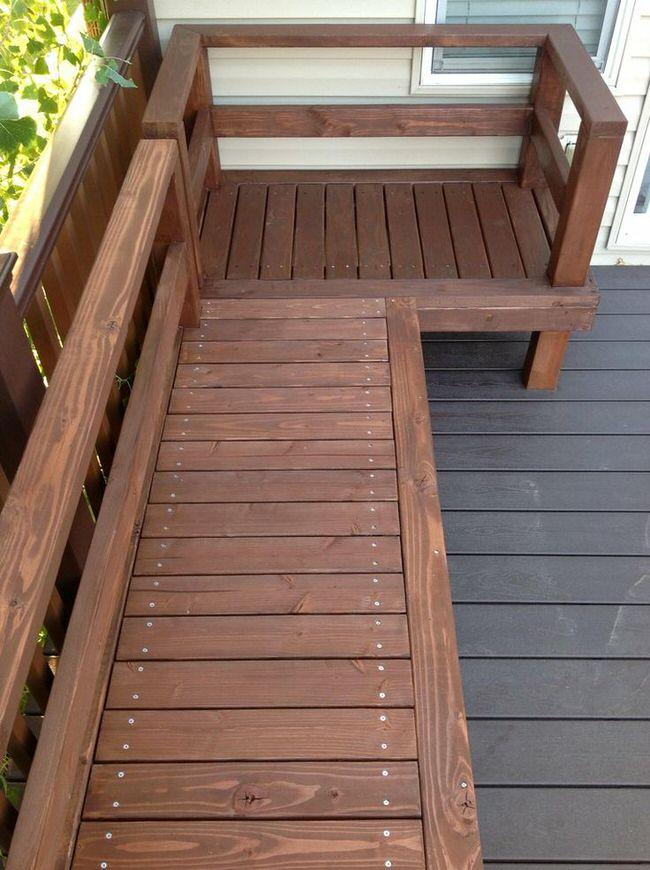
This deck bench has a very short explanation of how it was made, but all out of 2×4’s…
Watch a video of the DIY magnetic pallet chair… could you DIY this? So clever! You can purchase this chair at Uncommon Goods.

0
1
文章
lenny
2017年03月15日
These 23 (Rooftop) Terrace Garden Tips will help you in transforming your urban space into a green oasis.
You love to garden but you don’t have a piece of land. No problem, you can have a garden on the rooftop, however small. It is not necessary to abandon the idea of being able to create a natural paradise. There are many tricks and clever ideas to do this and here are a few rooftop gardening tips that’ll help you.
Terrace Garden Tips
1.

Create a theme for your rooftop garden and stick to it. Choose plants, furniture, and other accessories according to it.
2.

Creating green walls and hedges can completely transform a rooftop terrace into an unbelievable outdoor area that can even look like a regular garden. For this, create tall and dense vegetation around all the corners that will offer you total privacy and a perfect setting for outdoor dining and relaxing moments surrounded by nature.
3.

In our terrace garden tips, lighting is very important. Good lighting can enhance the beauty of the vegetation. This way you can enjoy the evening on the rooftop garden.
4.

A roof-top has a parapet or breastwork, make that low wall little high so that you can use that as a support for growing climbing plants and creepers and if you need shadow in sitting area, umbrellas in light colors are perfect.
5.

Flowering annuals can completely transform the look of any garden when they bloom all together. You can plant different species of flowers for every season. Opt for a combination of two or three colors to create a harmony is a good idea.
6.

While choosing furniture, take care that they are light, durable and must not take too much space.
7.

Although small, this rooftop garden is totally unique and appealing with the addition of two interesting things: The ivy topiary and a large mirror, which opens the view and creates the illusion of enlarged space. Adding a mirror is one of the useful rooftop gardening tips.
8.

If tall buildings surround your terrace or you have got an interesting view from there then it makes no sense to try to get privacy. Instead, concentrate on the open space and include large planters so that you can grow large trees in them.
9.

You can also make a great looking, elegant terrace or roof top garden by just growing conifers and beautiful foliage plants.
10.

Choose simple plants that love the direct sunlight and opt for designer containers. Do not make compromises– the planters are as important as what they contain.
11.

Being able to enjoy a breath of fresh air right above your urban dwelling is wonderful. With a little creativity, you can turn the rooftop garden into an outdoor living room, adding a bar or a kitchen countertop is also a good idea.
12.

Use as many natural materials as possible. For flooring use natural stones. Arrange wooden planters or construct beds using sandstone bricks. For seating you can buy tree stumps, they are inexpensive and do not take much of your space. This is a great way to create a more authentic and natural environment.
13.

Bright colorful shrubs in combination with a neutral decor will create a dazzling effect and on the contrary if you have a colorful setup and gaudy furniture, grow neutral plants.
14.

Choose a flooring style that is deep and bold and eye-catching. Keep the color combinations in mind to give a unique touch to the rooftop garden.
15.

Whitish beige is a main color here combined with blue and yellow. Don’t use so many colors. Decide three or four main colors and use their shades, if you want more.
16.
A terrace garden does not necessarily need to include a large number of plants, trees, and flowers. A manicured, lush green lawn and a couple of planters or well-maintained borders against the wall are sufficient to create an impressive style.
17.

If you have a small rooftop, it is better to have a couple of big planters rather than so many small containers, so as not to overwhelm the space or create chaos and disorder.
18.

Create raised beds all around the roof, raised beds can be metallic or made of wood. You can also construct permanent concrete raised beds. But before doing this, ensure your rooftop can bear that much weight. Read our article on how to construct a rooftop garden for more information.
19.

Don’t want to grow so many plants? Place colorful and modern furnishings to transform a small space into an attractive sitting area.
20.

Don’t forget to add a focal point on your urban terrace garden. Place something to allure the eyes. Adding the water element, through the insertion of a small fountain is a great idea, you can also create a small container pond.
21.

Maximize the seating space of your roof or terrace by fixing wooden benches along the raised beds.
22.

String lighting works wonderfully in open spaces. It enhances the small spaces. Most of the rooftops receive all day long sun and in such a case adding solar lights is a smart idea.
23.

You love to garden but you don’t have a piece of land. No problem, you can have a garden on the rooftop, however small. It is not necessary to abandon the idea of being able to create a natural paradise. There are many tricks and clever ideas to do this and here are a few rooftop gardening tips that’ll help you.
Terrace Garden Tips
1.

Create a theme for your rooftop garden and stick to it. Choose plants, furniture, and other accessories according to it.
2.

Creating green walls and hedges can completely transform a rooftop terrace into an unbelievable outdoor area that can even look like a regular garden. For this, create tall and dense vegetation around all the corners that will offer you total privacy and a perfect setting for outdoor dining and relaxing moments surrounded by nature.
3.

In our terrace garden tips, lighting is very important. Good lighting can enhance the beauty of the vegetation. This way you can enjoy the evening on the rooftop garden.
4.

A roof-top has a parapet or breastwork, make that low wall little high so that you can use that as a support for growing climbing plants and creepers and if you need shadow in sitting area, umbrellas in light colors are perfect.
5.

Flowering annuals can completely transform the look of any garden when they bloom all together. You can plant different species of flowers for every season. Opt for a combination of two or three colors to create a harmony is a good idea.
6.

While choosing furniture, take care that they are light, durable and must not take too much space.
7.

Although small, this rooftop garden is totally unique and appealing with the addition of two interesting things: The ivy topiary and a large mirror, which opens the view and creates the illusion of enlarged space. Adding a mirror is one of the useful rooftop gardening tips.
8.

If tall buildings surround your terrace or you have got an interesting view from there then it makes no sense to try to get privacy. Instead, concentrate on the open space and include large planters so that you can grow large trees in them.
9.

You can also make a great looking, elegant terrace or roof top garden by just growing conifers and beautiful foliage plants.
10.

Choose simple plants that love the direct sunlight and opt for designer containers. Do not make compromises– the planters are as important as what they contain.
11.

Being able to enjoy a breath of fresh air right above your urban dwelling is wonderful. With a little creativity, you can turn the rooftop garden into an outdoor living room, adding a bar or a kitchen countertop is also a good idea.
12.

Use as many natural materials as possible. For flooring use natural stones. Arrange wooden planters or construct beds using sandstone bricks. For seating you can buy tree stumps, they are inexpensive and do not take much of your space. This is a great way to create a more authentic and natural environment.
13.

Bright colorful shrubs in combination with a neutral decor will create a dazzling effect and on the contrary if you have a colorful setup and gaudy furniture, grow neutral plants.
14.

Choose a flooring style that is deep and bold and eye-catching. Keep the color combinations in mind to give a unique touch to the rooftop garden.
15.

Whitish beige is a main color here combined with blue and yellow. Don’t use so many colors. Decide three or four main colors and use their shades, if you want more.
16.
A terrace garden does not necessarily need to include a large number of plants, trees, and flowers. A manicured, lush green lawn and a couple of planters or well-maintained borders against the wall are sufficient to create an impressive style.
17.

If you have a small rooftop, it is better to have a couple of big planters rather than so many small containers, so as not to overwhelm the space or create chaos and disorder.
18.

Create raised beds all around the roof, raised beds can be metallic or made of wood. You can also construct permanent concrete raised beds. But before doing this, ensure your rooftop can bear that much weight. Read our article on how to construct a rooftop garden for more information.
19.

Don’t want to grow so many plants? Place colorful and modern furnishings to transform a small space into an attractive sitting area.
20.

Don’t forget to add a focal point on your urban terrace garden. Place something to allure the eyes. Adding the water element, through the insertion of a small fountain is a great idea, you can also create a small container pond.
21.

Maximize the seating space of your roof or terrace by fixing wooden benches along the raised beds.
22.

String lighting works wonderfully in open spaces. It enhances the small spaces. Most of the rooftops receive all day long sun and in such a case adding solar lights is a smart idea.
23.

0
0
文章
Gina
2017年03月15日

If you need more gardening space, or you just want to try something a little more unique and interesting, consider a vertical garden. There is nothing new about the idea of going up in garden design… hanging planters, trees and arbors and porticos are all examples of taking things skyward. But these DIY vertical gardens are clever and smart, and give your garden a creative edge. So the next time you’re trying to figure out how to find enough space to grow those herbs, or what you can do to liven up a ho-hum garden space, go vertical! Our feature photo below, is a modern, space saving DIY vertical garden from Chris at ‘Man Made DIY’. He grew veggies in it, but anything is fair game!

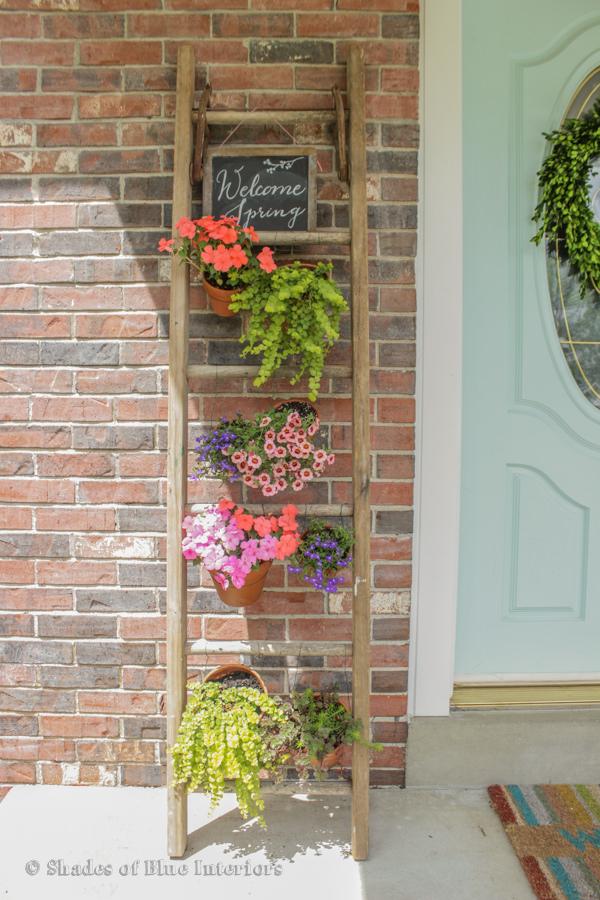
Rachel at ‘Shades of Blue Interiors’ wanted a pop of color for her small front porch. Her DIY ladder vertical garden brought that color to eye level and added charm to her porch as well! This is an easy project with inexpensive materials. The key would be an attractive wooden ladder! If you don’t have an authentically old one, consider picking up a cheap wood ladder at a home improvement store and staining it.
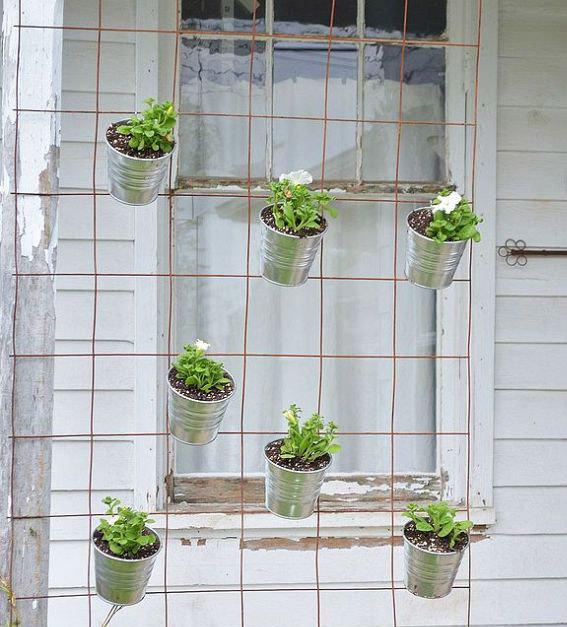
Got a roll of rusty metal fence? Or already have a fence that could use a spruce up? Punch holes in simple metal or plastic containers, and hang onto the fence with an s-hook. Plant with your fav flowers or herbs! Remember, keep the containers small enough so that the fence will hold the weight when they are full of soil. This project is from Jill at ‘Sew a Fine Seam‘.
Make succulent frames with this tutorial from ‘Sunset‘. This is a fun project that can turn a patio or balcony space into a really special garden area, even if you have only concrete flooring! Photo from ‘Sky Parlour‘.

‘AKA Design’ built an arbor support for their DIY vertical garden. I love these kinds of container gardens because they are so versatile. This could be all moss, ferns, succulents, herbs, or flowers. Use a color theme or all the colors you can. Trailing plants or mounding ones. Having the same pot throughout ties it all together. Great tutorial!

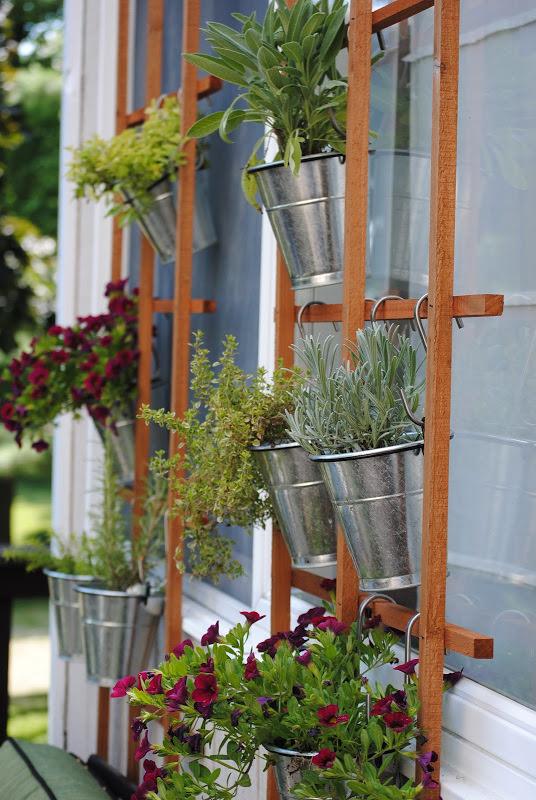
This vertical herb garden trellis wall from Carrie at ‘Making Lemonade’ is perfect for adding some shade to a window with none, or just making fresh herbs easily accessible from the kitchen door! Simple project anyone can do with ordinary trellis from the home improvement store and some Ikea pots. Plus, I love her theory on how important it is to take care of yourself! (Go read it, the whole deck makeover is so cute!)
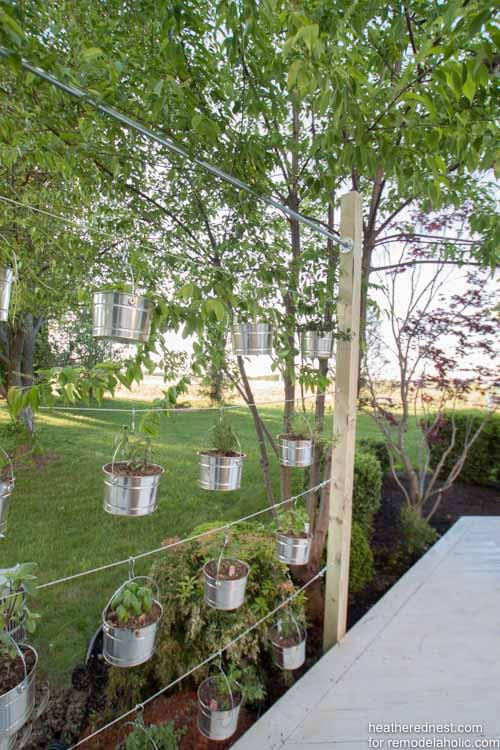
Love this DIY suspended vertical garden from ‘The Heathered Nest’ via ‘Remodelaholic’. This project is made with some simple pots and galvanized wire, and they walk you through it step by step. They even make suggestions on how you can customize it!
This DIY outdoor succulent wall garden from ‘Sugar & Cloth’ was made using an unfinished hand rail and used paint tins! Love how clever this is.

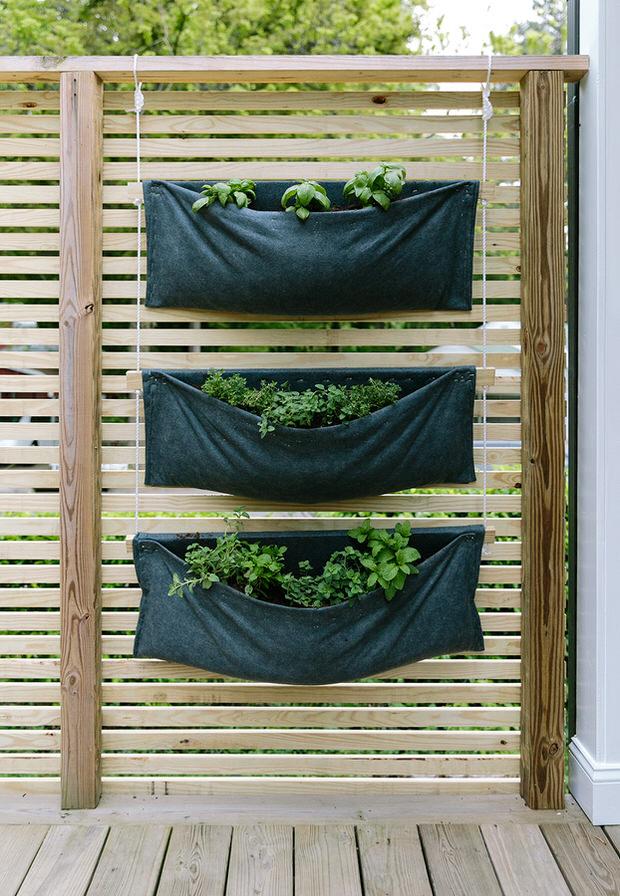
Lovin’ on this DIY simple modern vertical wall garden from ‘The Fresh Exchange’. Would love to grow container veggies in this! This is made with felt from the fabric store, believe it or not!
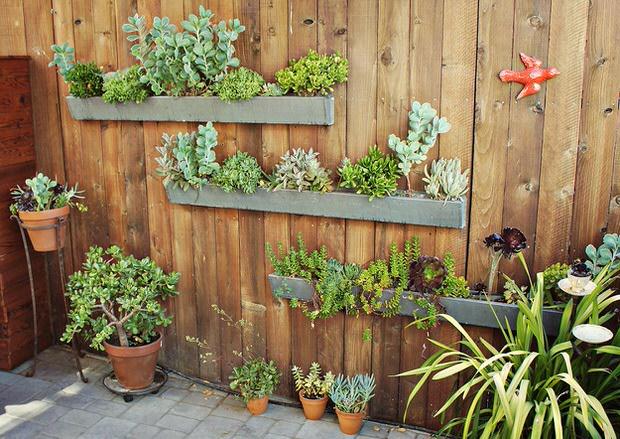
This vertical garden DIY is from ‘Numi Tea Blog’, and is made from ordinary rain gutters. I wonder if we could figure out a way to mount these to a stone block wall? :)
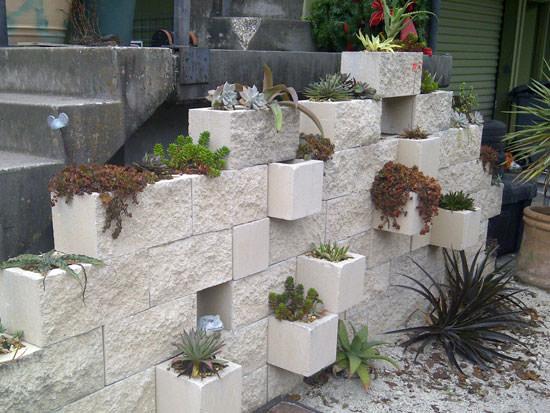
Make a cinderblock garden! You can visit our tutorial for our DIY cinder clock vertical planter to get all the instructions. This photo from ‘The Rainforest Garden‘.
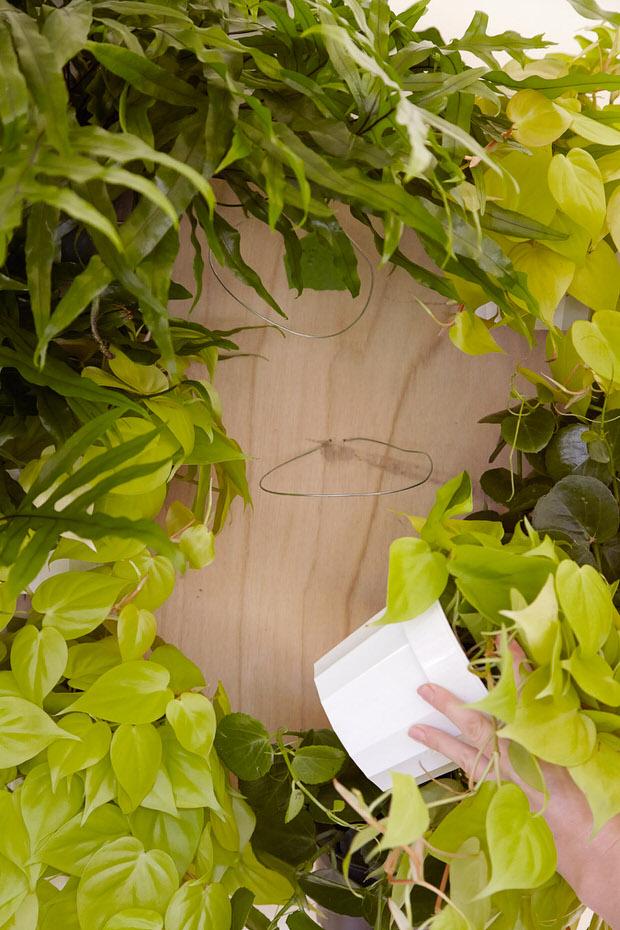
Last, learn how to plant a vertical garden from ‘Front & Main’, the blog of ‘West Elm’. This project would look amazing indoors or out on a covered patio. Simple and awesome!

Get creative! No matter how small or boring your garden space, there is always a way to create your own amazing little bit of green earth!

Rachel at ‘Shades of Blue Interiors’ wanted a pop of color for her small front porch. Her DIY ladder vertical garden brought that color to eye level and added charm to her porch as well! This is an easy project with inexpensive materials. The key would be an attractive wooden ladder! If you don’t have an authentically old one, consider picking up a cheap wood ladder at a home improvement store and staining it.

Got a roll of rusty metal fence? Or already have a fence that could use a spruce up? Punch holes in simple metal or plastic containers, and hang onto the fence with an s-hook. Plant with your fav flowers or herbs! Remember, keep the containers small enough so that the fence will hold the weight when they are full of soil. This project is from Jill at ‘Sew a Fine Seam‘.

Make succulent frames with this tutorial from ‘Sunset‘. This is a fun project that can turn a patio or balcony space into a really special garden area, even if you have only concrete flooring! Photo from ‘Sky Parlour‘.

‘AKA Design’ built an arbor support for their DIY vertical garden. I love these kinds of container gardens because they are so versatile. This could be all moss, ferns, succulents, herbs, or flowers. Use a color theme or all the colors you can. Trailing plants or mounding ones. Having the same pot throughout ties it all together. Great tutorial!

This vertical herb garden trellis wall from Carrie at ‘Making Lemonade’ is perfect for adding some shade to a window with none, or just making fresh herbs easily accessible from the kitchen door! Simple project anyone can do with ordinary trellis from the home improvement store and some Ikea pots. Plus, I love her theory on how important it is to take care of yourself! (Go read it, the whole deck makeover is so cute!)

Love this DIY suspended vertical garden from ‘The Heathered Nest’ via ‘Remodelaholic’. This project is made with some simple pots and galvanized wire, and they walk you through it step by step. They even make suggestions on how you can customize it!

This DIY outdoor succulent wall garden from ‘Sugar & Cloth’ was made using an unfinished hand rail and used paint tins! Love how clever this is.

Lovin’ on this DIY simple modern vertical wall garden from ‘The Fresh Exchange’. Would love to grow container veggies in this! This is made with felt from the fabric store, believe it or not!

This vertical garden DIY is from ‘Numi Tea Blog’, and is made from ordinary rain gutters. I wonder if we could figure out a way to mount these to a stone block wall? :)

Make a cinderblock garden! You can visit our tutorial for our DIY cinder clock vertical planter to get all the instructions. This photo from ‘The Rainforest Garden‘.

Last, learn how to plant a vertical garden from ‘Front & Main’, the blog of ‘West Elm’. This project would look amazing indoors or out on a covered patio. Simple and awesome!


Get creative! No matter how small or boring your garden space, there is always a way to create your own amazing little bit of green earth!
1
1
文章
扭扭
2017年03月14日

These ‘Vertical Balcony Garden Ideas’ will inspire you to generate space and how to make balcony vertical garden.
You have a small balcony or a terrace and you want to grow a garden there? Well, if you arrange everything neatly and use every inch of your space then you will be able to do this really. One thing you need to remember is balcony gardening is not about putting some pots and grow plants. It is about how aptly you manage space. Using vertical space is part of it.
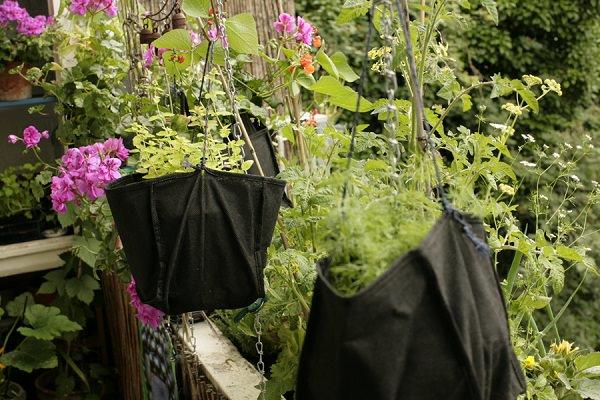
1.These two grow bags are strong enough to bear the weight of herbs growing in the containers kept inside them, this is a good idea if you don’t have hanging baskets.
2.These clay pots are arranged one above each other using threaded steel and fasteners.

3.Use racks to keep pots, this way you can use lot of vertical space of your balcony.
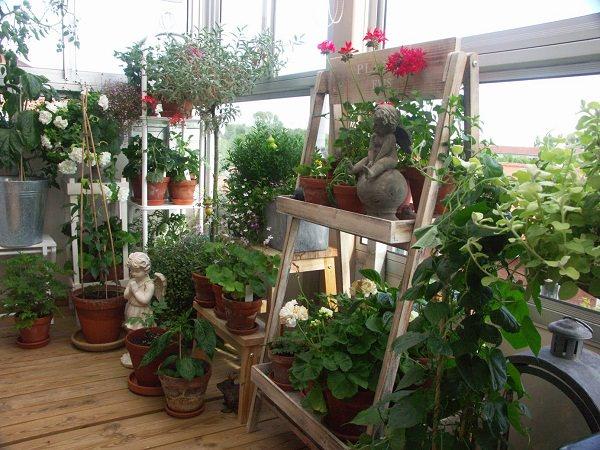
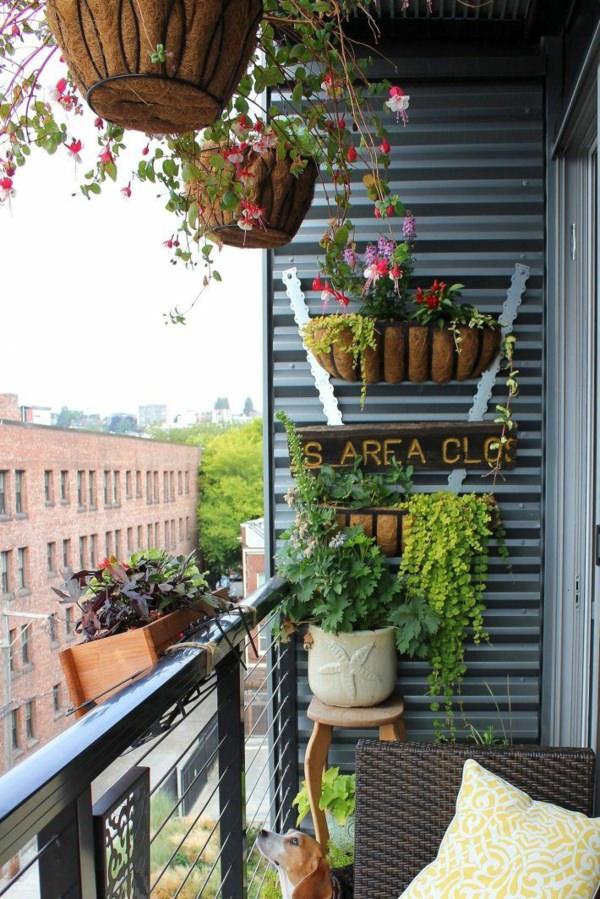
4.Fuchsia growing on a hanging basket is looking beautiful and a wooden planter is tied on railing is a smart way to use outside space.
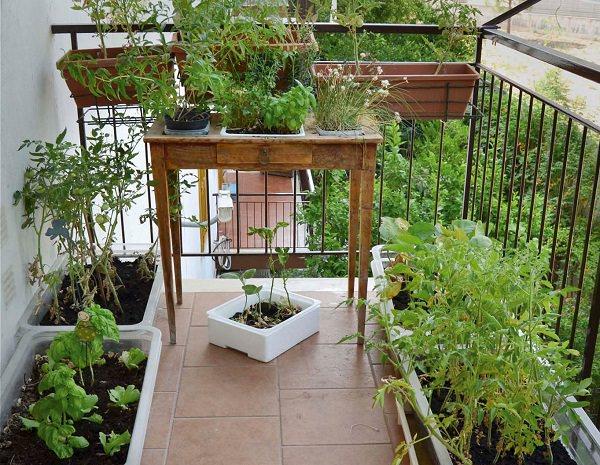
5. Table garden is used to grow plants, two main benefit of table garden is that if you have a back problem then you don’t need to get down and up. Besides this, it saves space on the floor.
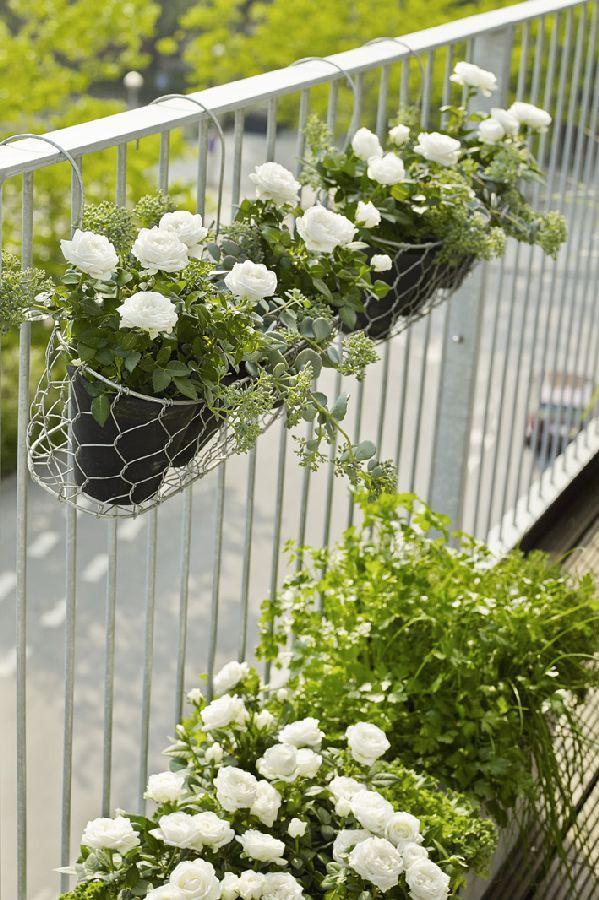
6.Hang lot of planters on the railings of your balcony garden, this is an apt way to generate lot of space.
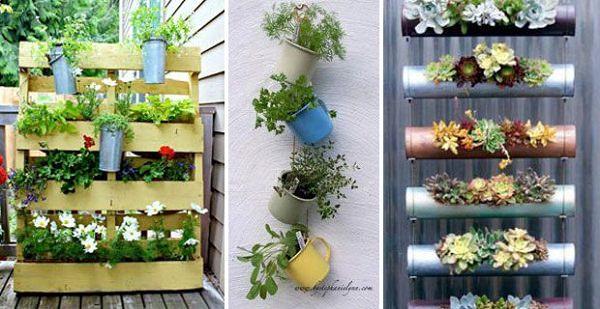
7.Wooden pallets can be used to do multiple things. You can hang pots on them and grow plants in its narrow space. Read more on DIY pallets ideas. You can also arrange pots one above each other as you see in the picture. Use PVC pipes to grow plants, this is called gutter gardening. Here’s one tutorial on how to grow strawberries in gutters.
8.And here comes a burning one. If you have ammo cans use your creativity to make them vertical planter. Before trying this, make sure to clean up the canes properly.

9.OK! It’s a bit cheeky idea, herbs growing inside the gloves. If you have some odd ideas, try them.

10.Use plant walls if you want to optimize space of your balcony or terrace. You’ll be stunned after you install one, these plant walls are useful innovation for small gardens.
11.This is one cheap solution you should look at. Planters are hanged on this wooden bracket mounted on the wall.

12.Grow herbs and green leafy vegetables on these gutters, this is a modern way to create lot of space.
You have a small balcony or a terrace and you want to grow a garden there? Well, if you arrange everything neatly and use every inch of your space then you will be able to do this really. One thing you need to remember is balcony gardening is not about putting some pots and grow plants. It is about how aptly you manage space. Using vertical space is part of it.
1.These two grow bags are strong enough to bear the weight of herbs growing in the containers kept inside them, this is a good idea if you don’t have hanging baskets.

2.These clay pots are arranged one above each other using threaded steel and fasteners.

3.Use racks to keep pots, this way you can use lot of vertical space of your balcony.

4.Fuchsia growing on a hanging basket is looking beautiful and a wooden planter is tied on railing is a smart way to use outside space.

5. Table garden is used to grow plants, two main benefit of table garden is that if you have a back problem then you don’t need to get down and up. Besides this, it saves space on the floor.

6.Hang lot of planters on the railings of your balcony garden, this is an apt way to generate lot of space.

7.Wooden pallets can be used to do multiple things. You can hang pots on them and grow plants in its narrow space. Read more on DIY pallets ideas. You can also arrange pots one above each other as you see in the picture. Use PVC pipes to grow plants, this is called gutter gardening. Here’s one tutorial on how to grow strawberries in gutters.

8.And here comes a burning one. If you have ammo cans use your creativity to make them vertical planter. Before trying this, make sure to clean up the canes properly.

9.OK! It’s a bit cheeky idea, herbs growing inside the gloves. If you have some odd ideas, try them.

10.Use plant walls if you want to optimize space of your balcony or terrace. You’ll be stunned after you install one, these plant walls are useful innovation for small gardens.
11.This is one cheap solution you should look at. Planters are hanged on this wooden bracket mounted on the wall.

12.Grow herbs and green leafy vegetables on these gutters, this is a modern way to create lot of space.

1
0
成长记
Hong Lam
2017年03月14日

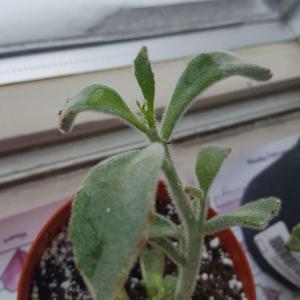
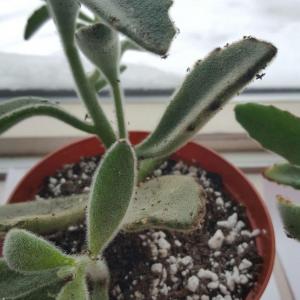
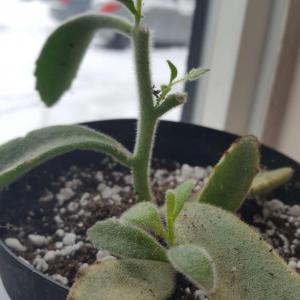
These guys are so fuzzy! I bought one pot of the guys, but they seemed so crowded that I decided to repot them into three little pots for more space. They seem highly damaged, but hopefully with some care they'll grow nice and big!


1
0
文章
Mirella
2017年03月13日

Learn how to grow okra in containers in this article. Growing okra in pots doesn’t require a lot of space and it is easy too if you complete all of the planting requirements.
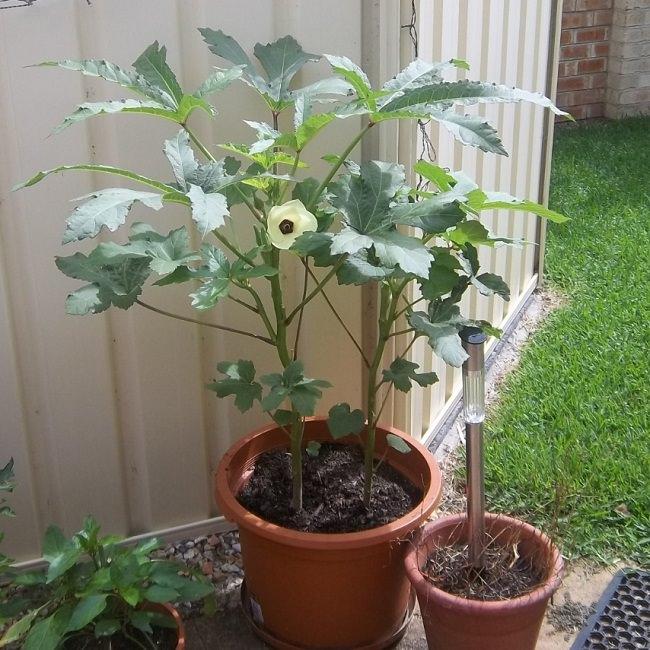
Okra, which is also called lady’s finger is a warm season tropical vegetable that is also grown for ornamental purposes. Its delicate foliage and showy blooms that look like hibiscus (don’t forget okra belongs to the same hibiscus family) look amazing.
Very low in calories (25 to 40 kcal per 100g), okra is a vegetable rich in vitamins A, C and P, calcium and many minerals.
Choosing a pot
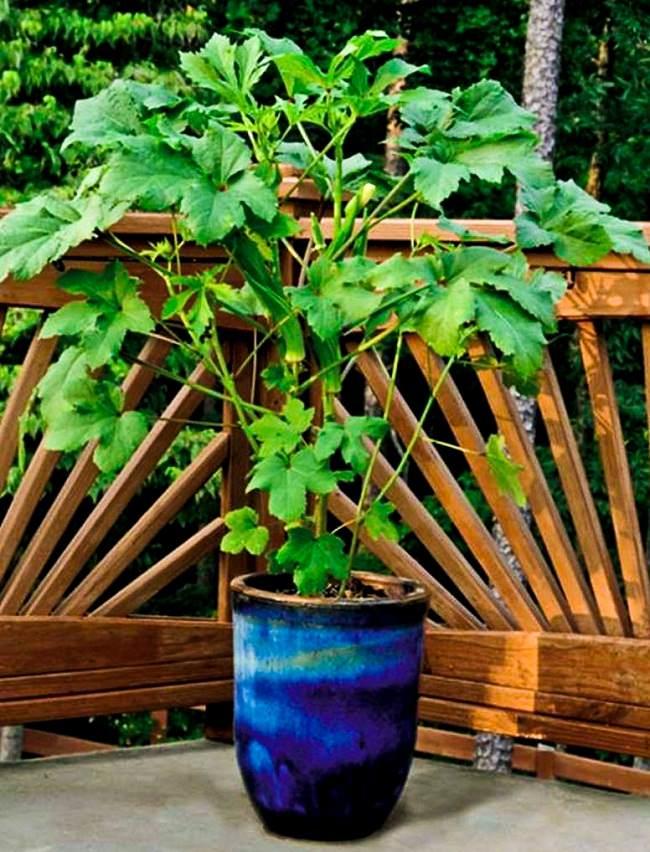
Choose a pot of whatever material you like. Pot should be at least 3 gallons in size. Ideally, a 5-gallon pot that is 10-12 inches deep and similar in diameter would be perfect for one okra plant if you have got a larger pot you can grow a few plants in it. Best to choose a black colored pot as okra loves heat.
Planting Okra Seeds
The first step for growing okra is to get the seeds. Ask for the dwarf okra variety that will not grow above 5 feet tall. However, you can grow any okra variety in a pot, but it is best if you choose the dwarf one. If you live in a climate with short summers, search for varieties that mature fast.
The best planting time is when the temperature starts to stay above 55-60 F (13-16 C) and all the dangers of frost are passed. Growing okra is possible year round if you live in USDA Zones 9-11 or any other subtropical or tropical region on our earth.
Due to its taproot, okra doesn’t transplant well that’s why you’ll have to directly plant the seeds in the container or a biodegradable pot. Sow 2-3 okra seeds 1/2 to 1 inch deep in each pot. Water with a sprayer and keep the seeds in a bright, warm place, the substrate should remain moist until seeds germinate. The germination takes 5 to 10 days after sowing. The more warmth, the faster the germination.
Requirements for Growing Okra in PotsPosition
Pick a spot that receives full sun (at least 5-6 hours of sunlight is essential). Like tomatoes and peppers, okra requires plenty of sunlight to produce well.
Soil
The soil you use must be loamy and crumbly; it must be well draining too. Opt for a soilless potting mix that is rich in organic matter. You can also add a lot of compost or aged manure to provide the constant supply of nutrients to your okra plant.
Watering
Okra requires slightly moist soil. Water regularly to keep the soil uniformly moist and particularly more from the beginning of the flowering period and until the end of production.
Temperature
The cultivation of okra plant is extremely easy but requires a lot of heat. The plant can grow above 50 F (10 C), but to flower and to bear fruit abundantly the temperature must be around 75 to 95 F (23-35 C) ideally. The plant can tolerate higher temperatures well but fails to grow when the temperature starts to touch lower levels.
Okra Plant Care
Fertilization
Mix manure in soil to provide nutrients to the plant, you can also side dress the plant with it. Also, at the time of planting, you can add balanced fertilizer if you want. Once the plant has reached the height of 6 inches, apply a dose of balanced fertilizer again. Keep in mind that if the soil is nitrogen rich, it may promote vegetative growth at the expense of fruiting so maintain the balance. Later on, feed the plant with low in nitrogen fertilizer such as NPK 5-10-15 or 6-12-12.
Pollination
Okra is self-pollinating so you don’t need to care about pollination.
Pinching and Topping
As you’re growing okra in containers, dwarf varieties we consider, the plant will not exceed the height of 5 feet. In that case, you don’t need to care about pinching or topping.
Pests and Diseases
Okra is susceptible to fusarium wilt and nematode attack as well as aphids and whiteflies in pests. Mealybugs also affect the plant’s growth. However, these pests do more damage on plants grown in large quantities. As you’re growing okra in pots, you can easily control them.
Harvesting
Okra requires frequent harvesting. It blooms about two months from planting, and the fruits appear 5-7 days after flowering. The fruits/pods are harvested when they are still tender. Otherwise, they become fibrous and too hard to be eaten. Ideally, the picking length is between 3 to 5 inches.
How to see if okras are not too late to be picked?
Bend the tip of any fruit and if it breaks easily this means that they are still tender and crispy and good to harvest.
Okra, which is also called lady’s finger is a warm season tropical vegetable that is also grown for ornamental purposes. Its delicate foliage and showy blooms that look like hibiscus (don’t forget okra belongs to the same hibiscus family) look amazing.
Very low in calories (25 to 40 kcal per 100g), okra is a vegetable rich in vitamins A, C and P, calcium and many minerals.

Choosing a pot
Choose a pot of whatever material you like. Pot should be at least 3 gallons in size. Ideally, a 5-gallon pot that is 10-12 inches deep and similar in diameter would be perfect for one okra plant if you have got a larger pot you can grow a few plants in it. Best to choose a black colored pot as okra loves heat.
Planting Okra Seeds
The first step for growing okra is to get the seeds. Ask for the dwarf okra variety that will not grow above 5 feet tall. However, you can grow any okra variety in a pot, but it is best if you choose the dwarf one. If you live in a climate with short summers, search for varieties that mature fast.
The best planting time is when the temperature starts to stay above 55-60 F (13-16 C) and all the dangers of frost are passed. Growing okra is possible year round if you live in USDA Zones 9-11 or any other subtropical or tropical region on our earth.
Due to its taproot, okra doesn’t transplant well that’s why you’ll have to directly plant the seeds in the container or a biodegradable pot. Sow 2-3 okra seeds 1/2 to 1 inch deep in each pot. Water with a sprayer and keep the seeds in a bright, warm place, the substrate should remain moist until seeds germinate. The germination takes 5 to 10 days after sowing. The more warmth, the faster the germination.
Requirements for Growing Okra in PotsPosition
Pick a spot that receives full sun (at least 5-6 hours of sunlight is essential). Like tomatoes and peppers, okra requires plenty of sunlight to produce well.
Soil
The soil you use must be loamy and crumbly; it must be well draining too. Opt for a soilless potting mix that is rich in organic matter. You can also add a lot of compost or aged manure to provide the constant supply of nutrients to your okra plant.
Watering
Okra requires slightly moist soil. Water regularly to keep the soil uniformly moist and particularly more from the beginning of the flowering period and until the end of production.
Temperature
The cultivation of okra plant is extremely easy but requires a lot of heat. The plant can grow above 50 F (10 C), but to flower and to bear fruit abundantly the temperature must be around 75 to 95 F (23-35 C) ideally. The plant can tolerate higher temperatures well but fails to grow when the temperature starts to touch lower levels.
Okra Plant Care

Fertilization
Mix manure in soil to provide nutrients to the plant, you can also side dress the plant with it. Also, at the time of planting, you can add balanced fertilizer if you want. Once the plant has reached the height of 6 inches, apply a dose of balanced fertilizer again. Keep in mind that if the soil is nitrogen rich, it may promote vegetative growth at the expense of fruiting so maintain the balance. Later on, feed the plant with low in nitrogen fertilizer such as NPK 5-10-15 or 6-12-12.
Pollination
Okra is self-pollinating so you don’t need to care about pollination.
Pinching and Topping
As you’re growing okra in containers, dwarf varieties we consider, the plant will not exceed the height of 5 feet. In that case, you don’t need to care about pinching or topping.
Pests and Diseases
Okra is susceptible to fusarium wilt and nematode attack as well as aphids and whiteflies in pests. Mealybugs also affect the plant’s growth. However, these pests do more damage on plants grown in large quantities. As you’re growing okra in pots, you can easily control them.
Harvesting
Okra requires frequent harvesting. It blooms about two months from planting, and the fruits appear 5-7 days after flowering. The fruits/pods are harvested when they are still tender. Otherwise, they become fibrous and too hard to be eaten. Ideally, the picking length is between 3 to 5 inches.
How to see if okras are not too late to be picked?
Bend the tip of any fruit and if it breaks easily this means that they are still tender and crispy and good to harvest.
1
0
文章
Andy
2017年03月13日

Learn how to make a windowsill herb garden, if you’re short of space. Pleasure of harvesting your own herbs is immense– you can make fresh tea, use them in salads and garnish them on food.You don’t need a big yard for this, just a small and simple windowsill that receives a few hours of sunlight.
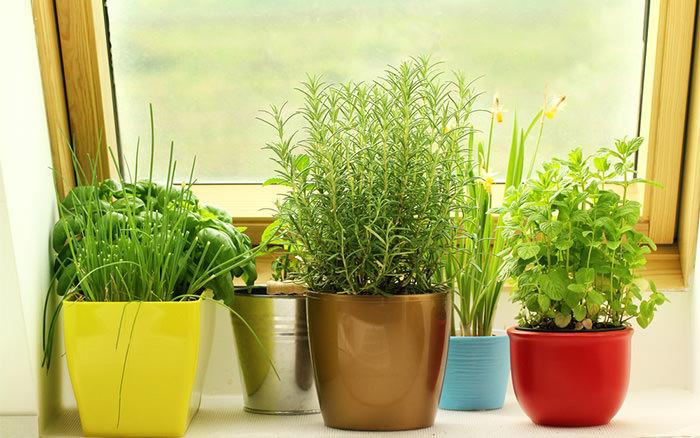
It’s easy and anyone who have lack of space can create a mini herb garden that grows on a window sill. Here are 6 basic steps to follow to make it possible.How to
Make a Windowsill Herb Garden
1. Choose Suitable Container to Make a Windowsill Herb Garden
Either use lot of pots to grow specific herb in each one or choose a planter as wide as that it’ll cover the space of your windowsill easily, make sure the pot you use should be at least 6 to 12 inches deep. Herbs are shallow root plants so they don’t mind growing in less deep planters. But most of the herbs like mint and thyme have tendency to spread, so it’s good to select a large and wide pot for them.
One more benefit of choosing a large pot is that you can pour lot of soil in it and this will save you from frequent watering.
2. Ensure sufficient drainage
Once you select a container or containers, second step is to ensure good drainage. Check out the bottom of planter for drainage holes, if they are not sufficient, make some.
You don’t need to put gravels or clay balls to make a drainage layer. This is a myth and doesn’t do any good for drainage.
3. Provide quality Potting soil
Soil or growing medium for growing herbs should be of best quality. It have to be light, penetrable, fertile and airy.
Buy soil less potting mix or make your own by adding perlite, compost and garden soil, it is the best growing medium for containers and essential for the success of your windowsill herb garden.
An aerated and rich soil with good retention power of the water improves the quality of plants you grow.
4. Planting a Windowsill Herb Garden
Be realistic and don’t try to grow all the aromatic and tastiest herbs you’ve heard about.
Make a list of herbs you would like to plant, and find out those which matches your growing conditions.
Forget about the species and varieties that are difficult to grow and spread more.
Choose basil, rosemary, thyme, oregano, cilantro and sage if your window is exposed to at least 6 hours of direct sun. If exposure of sun is less than this, prefer parsley, lemon balm, fennel, chives, chervil and mint.
These are the all time favorite herbs and easiest to grow, if you want to grow something out of the box, do some research.
5. Windowsill Herb Garden Care
Water your plants frequently in summer, in fall and winter limit the watering needs.
You can also add hydrogel crystals in soil and do heavy mulching to preserve water if you live in tropical climate.
To improve the quality and quantity of your crop, it is essential to use fertilizer regularly. Prefer organic fertilizers that provide all the necessary nutrients while being more environmentally friendly.
You’ll need nitrogen rich fertilizers to promote more foliage growth in herbs.
6. Harvesting
The best way to encourage the production of foliage and dense growth is to harvest herbs regularly, this frequent pinching and picking up of leaves promotes lush and healthy growth of plants.
You’ll also need to deadhead flowers to stop the herbs from seeding to prolong their growing time.
In addition, to add some colors on your windowsill herb garden, you can plant annual flowers that require similar growing conditions to grow.
1
2
文章
Abigal
2017年03月13日


Growing vines and other vertical elements in a garden adds height, interest, expands useful space, and sometimes even acts as a privacy screen! It’s pretty impossibly to grow most vines, however, without the proper support. You can build DIY garden trellises for any garden from anything from inexpensive lumber to recycled and repurpose materials. Check out these DIY garden trellis tutorials and find one that’s right for the style, feel, and needs in your garden!
Our first project, above, is a freestanding DIY trellis from Lowes, with complete step by step instructions.
Next we have a $6 DIY Trellis from Two Zero One… Love this cost saving project!

We found this great project on Flickr…there is no tutorial, but it’s a pretty basic idea…using the narrow strips of wood gives it a more modern feel.

Sybil Alfano created this great DIY trellis out of an old coat rack… Love this idea! Great instructions.

Find out how to make a basic wood trellis from Remove and Replace…

This is a great idea for inspiration… Using a recycled old mattress base as a trellis! Great idea!
Flea Market Gardening showcases this old ladder trellis… another amazing repurposed idea!

Renee Garner stapled chicken wire to an old window frame for her trellis… So cute!

Another idea from Ecosalon…

And another DIY trellis idea!
Using the side of an old crib as a trellis…

Finally, if your style is a little more modern, Modern in MN has a short tutorial on creating this Kee Klamp Trellis.

0
1


