文章
lenny
2017年05月23日
Make a Terrace Vegetable Garden on your rooftop, it is easy if you’ll do this with some planning. In this article you’ll learn which vegetables are suitable and how you can grow them on terrace.
Fresh home grown vegetables taste delicious, are good for health and safe from chemicals. You don’t need to acquire a regular garden to grow them, you can also grow these on a balcony or terrace.
There are some really interesting ways to incorporate the vegetable crops on the terrace. These alternatives are space saving and also a real eye-catcher.
1. Creating a vegetable Garden in Pots
In containers you can plant almost any vegetable. Choose large and deep pots, avoid thin and poor quality plastic pots because they heat up quickly and drain poorly.
Soil
Using normal garden soil is a bad idea for growing vegetables in pots. Instead use good quality potting mix for healthy growth of plants and productivity. You can also prepare it yourself, read this article.
Vegetables for Pots
Tomatoes
Cucumbers
Radishes
Beans
Potatoes
Onions
Carrots
Beetroot
Lettuce
Garlic
Chilies and Peppers
Gourds
Eggplant (Brinjal)
2. Create Raised Beds on Terrace
If you’re looking for practical as well as stylish way to make a terrace vegetable garden. Make a raised bed, in raised beds you’ll be able to grow lot of vegetables in compare to containers. Plants will thrive better with less care and maintenance, plus they are cheap.
The raised bed on the terrace does not differ fundamentally from those you see in a regular garden.
In well-stocked hardware stores or even online shops you will find special raised beds for terraces, you’ll only need to configure which one is better for you or you can make your own raised bed, which is very easy. Just ensure before installing it that the surface of terrace below it is waterproofed efficiently or not.
Fill Raised Bed with Soil
If you fill the raised bed with soil, consider to prevent voles and pests from entering the bed.
To make soil, just mix quality garden soil, ripe compost and manure.
Advantage of Raised Beds
Probably the greatest advantage of raised bed is of course its height and wideness on terrace. Gardening can hardly be more convenient.
3. Integrate Vegetable Patch on the Terrace
You can also integrate a vegetable patch on your terrace and grow vegetable on the surface itself. But doing this is only good on large rooftops. Vegetable patch is similar to making a normal garden bed.
The integrated bed should be filled normally with soil like a regular garden bed. An addition of compost in soil is a perfect natural fertilizer for most of the plants.
4. Creating a Vegetable Terrace Garden in Planter boxes
Flower boxes and planters can be used to create a vegetable garden. You can hang these on an existing railing or set them just on the floor. How do you use them is entirely up to you.
Do not use ordinary garden soil in these planter boxes, either use quality potting mix or compost rich soil. Fertilizing is also important to improve productivity but it varies according to plants: peppers and tomatoes are heavy feeders, whereas green leafy vegetables do not need much fertilizer.
Plants for Flower Boxes
Cucumbers
Tomatoes
Garlic
Chilies
Herbs
Radishes
Bush beans
Greens
Cucumbers, tomatoes and beans require a climbing aid, so that the plants do not break.
5. Repurpose Sandboxes
A sandbox is not just for games. From a small simple wooden sandpit, you can also make a hefty vegetable patch. This looks not only decorative, but provides your plants an optimal space to thrive.
Instead of using gravel for drainage, just fill the quality compost with soil. In the sandbox you can grow all sorts of small vegetables and herbs, mostly low growing that spreads too much.
Radishes
Herbs
Garlic
Lettuce
Spinach
Ginger
Asian Greens and lot of other green leafy vegetables
6. Optimize Vertical Space
Your main challenge is how smartly you utilize your vertical space to double up the space you have on your terrace, make a plan on how you should do this, if you have walls, hang planters on it.
Grow vegetable shrubs and vines like beans, squashes, gourds and tall tomato varieties near the walls and railings. This way they’ll not only get support but also grow outside and upward and you’ll save a lot of your space.
Use old shelves, racks to keep pots and buy pot holders, put them around the corners.
On these you can grow herbs to improve the taste of salads and cuisines you’ll prepare, you can also grow lot of flowers to appease ornamental views.
Tips for the Prolific Terrace Vegetable Garden
Fertilize vegetables regularly with good quality organic fertilizer. With some research and experience you’ll be able to find out which type of fertilizer you should feed to specific vegetables.
Water plants regularly and deeply. Read this article for container watering tips.
Check plants regularly for pests. Read this article for homemade natural pesticide recipes.
Prune vegetable plants to keep them in good shape and in healthy growth. Look out for suckers, especially in tomatoes and pinch them off immediately if found one.
For the vegetables, it is always good to grow them on the Southern or Western face, so the plants will have enough sun and can thrive easily. But too much sun is not good either. If you live in a warm tropical climate and the sun is too strong, it is advisable to provide afternoon shade to plants.

Fresh home grown vegetables taste delicious, are good for health and safe from chemicals. You don’t need to acquire a regular garden to grow them, you can also grow these on a balcony or terrace.
There are some really interesting ways to incorporate the vegetable crops on the terrace. These alternatives are space saving and also a real eye-catcher.
1. Creating a vegetable Garden in Pots
In containers you can plant almost any vegetable. Choose large and deep pots, avoid thin and poor quality plastic pots because they heat up quickly and drain poorly.
Soil
Using normal garden soil is a bad idea for growing vegetables in pots. Instead use good quality potting mix for healthy growth of plants and productivity. You can also prepare it yourself, read this article.
Vegetables for Pots
Tomatoes
Cucumbers
Radishes
Beans
Potatoes
Onions
Carrots
Beetroot
Lettuce
Garlic
Chilies and Peppers
Gourds
Eggplant (Brinjal)
2. Create Raised Beds on Terrace

If you’re looking for practical as well as stylish way to make a terrace vegetable garden. Make a raised bed, in raised beds you’ll be able to grow lot of vegetables in compare to containers. Plants will thrive better with less care and maintenance, plus they are cheap.
The raised bed on the terrace does not differ fundamentally from those you see in a regular garden.
In well-stocked hardware stores or even online shops you will find special raised beds for terraces, you’ll only need to configure which one is better for you or you can make your own raised bed, which is very easy. Just ensure before installing it that the surface of terrace below it is waterproofed efficiently or not.
Fill Raised Bed with Soil
If you fill the raised bed with soil, consider to prevent voles and pests from entering the bed.
To make soil, just mix quality garden soil, ripe compost and manure.
Advantage of Raised Beds
Probably the greatest advantage of raised bed is of course its height and wideness on terrace. Gardening can hardly be more convenient.
3. Integrate Vegetable Patch on the Terrace
You can also integrate a vegetable patch on your terrace and grow vegetable on the surface itself. But doing this is only good on large rooftops. Vegetable patch is similar to making a normal garden bed.
The integrated bed should be filled normally with soil like a regular garden bed. An addition of compost in soil is a perfect natural fertilizer for most of the plants.
4. Creating a Vegetable Terrace Garden in Planter boxes
Flower boxes and planters can be used to create a vegetable garden. You can hang these on an existing railing or set them just on the floor. How do you use them is entirely up to you.
Do not use ordinary garden soil in these planter boxes, either use quality potting mix or compost rich soil. Fertilizing is also important to improve productivity but it varies according to plants: peppers and tomatoes are heavy feeders, whereas green leafy vegetables do not need much fertilizer.
Plants for Flower Boxes
Cucumbers
Tomatoes
Garlic
Chilies
Herbs
Radishes
Bush beans
Greens
Cucumbers, tomatoes and beans require a climbing aid, so that the plants do not break.
5. Repurpose Sandboxes
A sandbox is not just for games. From a small simple wooden sandpit, you can also make a hefty vegetable patch. This looks not only decorative, but provides your plants an optimal space to thrive.
Instead of using gravel for drainage, just fill the quality compost with soil. In the sandbox you can grow all sorts of small vegetables and herbs, mostly low growing that spreads too much.
Radishes
Herbs
Garlic
Lettuce
Spinach
Ginger
Asian Greens and lot of other green leafy vegetables
6. Optimize Vertical Space

Your main challenge is how smartly you utilize your vertical space to double up the space you have on your terrace, make a plan on how you should do this, if you have walls, hang planters on it.
Grow vegetable shrubs and vines like beans, squashes, gourds and tall tomato varieties near the walls and railings. This way they’ll not only get support but also grow outside and upward and you’ll save a lot of your space.
Use old shelves, racks to keep pots and buy pot holders, put them around the corners.
On these you can grow herbs to improve the taste of salads and cuisines you’ll prepare, you can also grow lot of flowers to appease ornamental views.
Tips for the Prolific Terrace Vegetable Garden
Fertilize vegetables regularly with good quality organic fertilizer. With some research and experience you’ll be able to find out which type of fertilizer you should feed to specific vegetables.
Water plants regularly and deeply. Read this article for container watering tips.
Check plants regularly for pests. Read this article for homemade natural pesticide recipes.
Prune vegetable plants to keep them in good shape and in healthy growth. Look out for suckers, especially in tomatoes and pinch them off immediately if found one.
For the vegetables, it is always good to grow them on the Southern or Western face, so the plants will have enough sun and can thrive easily. But too much sun is not good either. If you live in a warm tropical climate and the sun is too strong, it is advisable to provide afternoon shade to plants.
1
1
文章
Colorful
2017年05月23日
There are herbs and vegetables that regrow in water INDOORS , you can grow them from scraps and use in salads and toppings. Take a look!
In this article, you’ll learn about the herbs and vegetables that can re-grow (for a while) without soil, using just water and water, good for those who have no space to grow their own food, growing plants in water also help if you want to grow the roots of these scrap food plants for propagation.
Growing your own fruits, vegetables and herbs is one of the trendiest thing in the gardening. Growing food generates anticipation, curiosity, and interest, as well as it is fundamentally healthy- organic and free from harmful chemicals that are often used in producing large crops.
In addition, it’s much more rewarding! There is nothing better than a meal made with organic fruits of your own.1. Carrot Greens
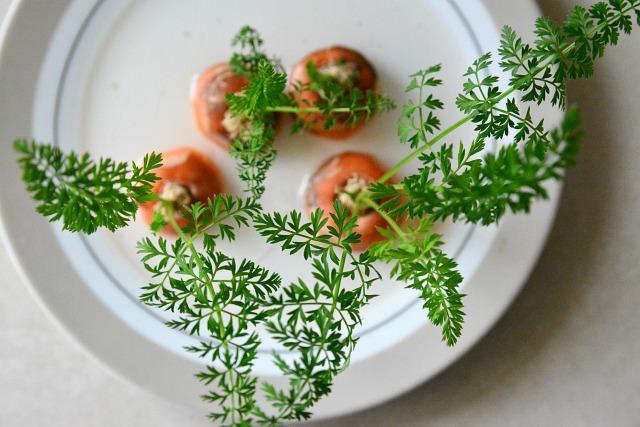
Although you can not bring back and GROW carrots in water but instead of throwing away the green ends from the top, put them in a shallow container of water in a bright spot to regrow the carrot greens. Keep changing the water every other day and in a few days, you’ll be able to see tiny green leaves, a wonderful addition to a salad, pesto or chutney.
2. Green Onion
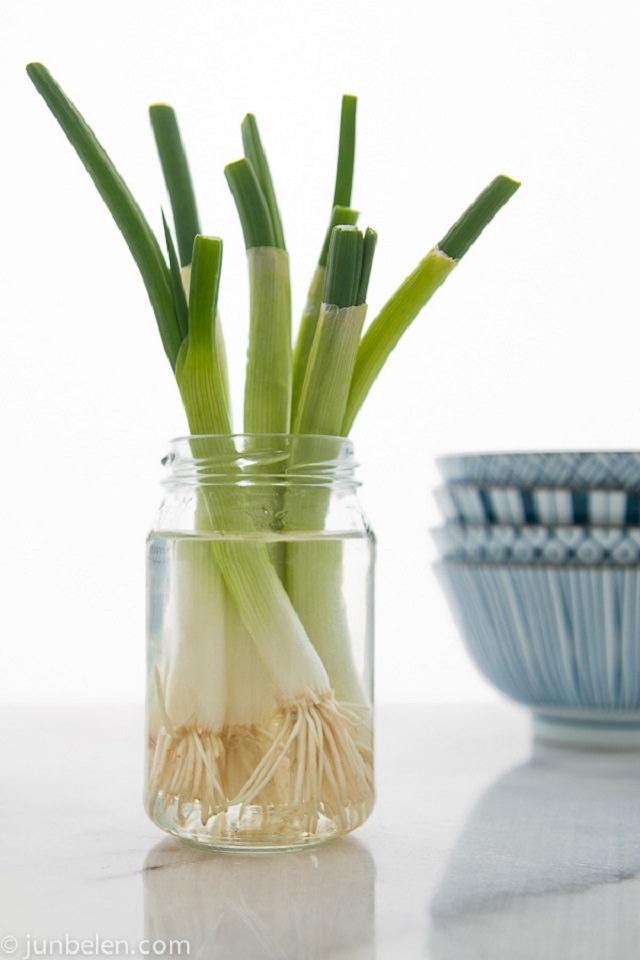
Noodles, Salads, and Pasta or even much more, there’re so many recipes in which you can try green onions. Isn’t it better to grow them fresh in your home?
Growing green onions in water is super easy, too. You don’t need a garden for this; all you need is a sunny windowsill, transparent jar or glass, and green onion bulbs. Read more about this here!
3. Bok Choi
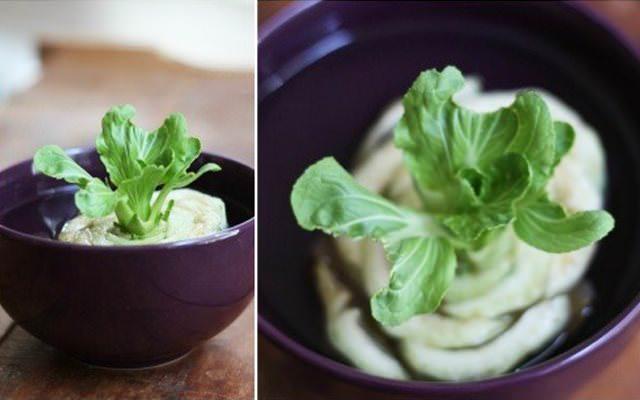
Bok choy, Bok Choi or Chinese cabbage is a green vegetable widely consumed in many Asian countries. Can be eaten raw, in salad and cooked. It contains lots of vitamins and minerals. To regrow again, cut the base of the stem and place this in a small bowl of water. It’s that simple! You will see how the new growth begins in only 2 days. See the tutorial! Either use the young leaves or transplant the regrowing Bok Choi in a container.
4. Celery

Celery is a herb that has been used since ancient times for its natural medicinal qualities. It is characterized by having a diuretic, digestive, purifying and anti-inflammatory action. To grow again, use the base! Place that in a small bowl of water. You will see how it grows back in 3 or 4 days. Young leaves can be used again or plant it if you have a small pot.
Also Read: Cool DIY Planter Ideas from Household Items
5. Fennel
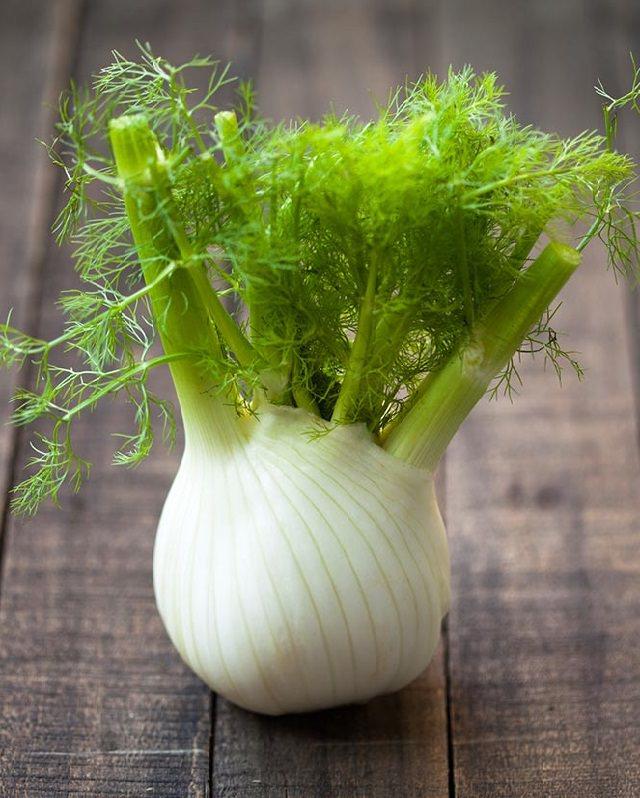
Fennel looks similar to dill, it can be a great addition to your cuisines. You can regrow it as easily as celery. Take a fennel bulb and set it in a cup or small bowl of clear water, a level of water should be at the level of the bulb. Keep the bowl in a spot that receives some sun and change the water in every couple of days.
6. Lettuce
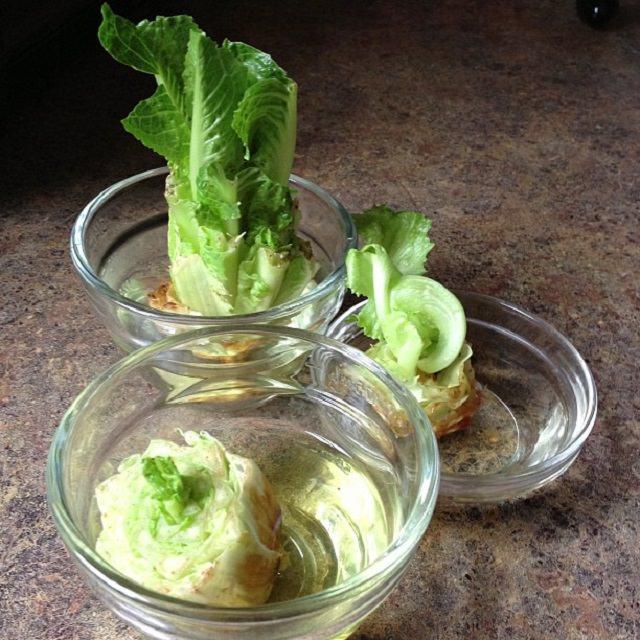
Lettuce taste best when fresh! However, growing lettuce in water won’t satiate your lettuce needs but you’ll love growing it that way. You can use this tiny supply in your salads or top the sandwiches with it. To regrow, eat your purchased lettuce, cutting the leaves at about 1 inch from the bottom. Place remaining stem in a shallow dish of water (about 1/2 inch). Now place that on a windowsill or under grow lights. Change water in a bowl every 1 to 2 days. Read more on Getty Stewart’s site!
7. Lemongrass
Get the lemongrass stalks and keep them in water in a bright spot that receives some sun, change the water every day, and watch as new leaves begin growing almost immediately. The roots start emerging after a week, and the stalk eventually divides itself (via offshoot stalks) after a few weeks. You can either use it or transplant that in pot.
8. Garlic Sprout

To make it grow, find a garlic clove with green sprout and keep it in a glass. Fill the water up to the level of clove. In 2-3 days the sprout will start to grow and the clove will produce roots. When the sprouts are 3 inches in height, you can cut it for use leaving 1/3 of the shoot. It can be used in salads baked potatoes, or to spice up any preparation, because it has an aroma and garlic-like flavor.
9. Beet Greens
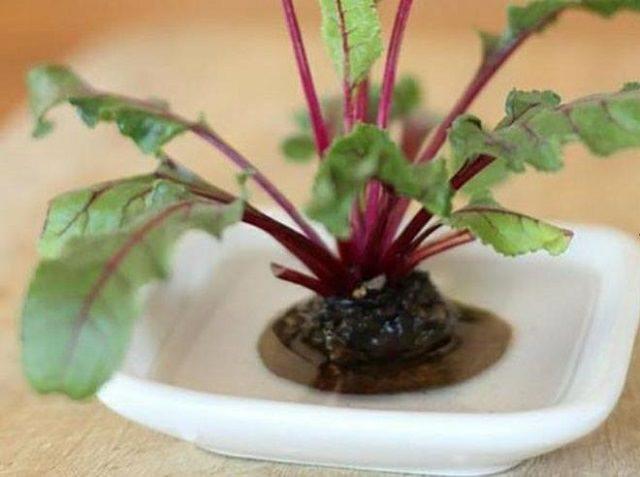
Beetroot is a highly nutritious vegetable, but its green part is also very healthy. It contains more iron than spinach, also the vitamin A that helps strengthen the immune system and stimulates the production of antibodies and white blood cells. To regrow, slice off the top portion of a beet with a knife. Take no more than one-third of the beet. Fill a glass, mug or bowl with water. Place the beet top into the water, with the cut side facing downward. Set the glass on a windowsill, counter or table that is close to the window, so the beet top will receive adequate sunlight. Read more of it here.
In this article, you’ll learn about the herbs and vegetables that can re-grow (for a while) without soil, using just water and water, good for those who have no space to grow their own food, growing plants in water also help if you want to grow the roots of these scrap food plants for propagation.
Growing your own fruits, vegetables and herbs is one of the trendiest thing in the gardening. Growing food generates anticipation, curiosity, and interest, as well as it is fundamentally healthy- organic and free from harmful chemicals that are often used in producing large crops.
In addition, it’s much more rewarding! There is nothing better than a meal made with organic fruits of your own.1. Carrot Greens

Although you can not bring back and GROW carrots in water but instead of throwing away the green ends from the top, put them in a shallow container of water in a bright spot to regrow the carrot greens. Keep changing the water every other day and in a few days, you’ll be able to see tiny green leaves, a wonderful addition to a salad, pesto or chutney.
2. Green Onion

Noodles, Salads, and Pasta or even much more, there’re so many recipes in which you can try green onions. Isn’t it better to grow them fresh in your home?
Growing green onions in water is super easy, too. You don’t need a garden for this; all you need is a sunny windowsill, transparent jar or glass, and green onion bulbs. Read more about this here!
3. Bok Choi

Bok choy, Bok Choi or Chinese cabbage is a green vegetable widely consumed in many Asian countries. Can be eaten raw, in salad and cooked. It contains lots of vitamins and minerals. To regrow again, cut the base of the stem and place this in a small bowl of water. It’s that simple! You will see how the new growth begins in only 2 days. See the tutorial! Either use the young leaves or transplant the regrowing Bok Choi in a container.
4. Celery

Celery is a herb that has been used since ancient times for its natural medicinal qualities. It is characterized by having a diuretic, digestive, purifying and anti-inflammatory action. To grow again, use the base! Place that in a small bowl of water. You will see how it grows back in 3 or 4 days. Young leaves can be used again or plant it if you have a small pot.
Also Read: Cool DIY Planter Ideas from Household Items
5. Fennel

Fennel looks similar to dill, it can be a great addition to your cuisines. You can regrow it as easily as celery. Take a fennel bulb and set it in a cup or small bowl of clear water, a level of water should be at the level of the bulb. Keep the bowl in a spot that receives some sun and change the water in every couple of days.
6. Lettuce

Lettuce taste best when fresh! However, growing lettuce in water won’t satiate your lettuce needs but you’ll love growing it that way. You can use this tiny supply in your salads or top the sandwiches with it. To regrow, eat your purchased lettuce, cutting the leaves at about 1 inch from the bottom. Place remaining stem in a shallow dish of water (about 1/2 inch). Now place that on a windowsill or under grow lights. Change water in a bowl every 1 to 2 days. Read more on Getty Stewart’s site!
7. Lemongrass
Get the lemongrass stalks and keep them in water in a bright spot that receives some sun, change the water every day, and watch as new leaves begin growing almost immediately. The roots start emerging after a week, and the stalk eventually divides itself (via offshoot stalks) after a few weeks. You can either use it or transplant that in pot.
8. Garlic Sprout

To make it grow, find a garlic clove with green sprout and keep it in a glass. Fill the water up to the level of clove. In 2-3 days the sprout will start to grow and the clove will produce roots. When the sprouts are 3 inches in height, you can cut it for use leaving 1/3 of the shoot. It can be used in salads baked potatoes, or to spice up any preparation, because it has an aroma and garlic-like flavor.
9. Beet Greens

Beetroot is a highly nutritious vegetable, but its green part is also very healthy. It contains more iron than spinach, also the vitamin A that helps strengthen the immune system and stimulates the production of antibodies and white blood cells. To regrow, slice off the top portion of a beet with a knife. Take no more than one-third of the beet. Fill a glass, mug or bowl with water. Place the beet top into the water, with the cut side facing downward. Set the glass on a windowsill, counter or table that is close to the window, so the beet top will receive adequate sunlight. Read more of it here.
3
0
文章
lenny
2017年05月23日

Growing lettuce in containers is fun and easy and you can harvest fresh, crispy, and organic lettuce leaves for your salads in no time.

Lettuce is one of the vegetables that is very easy to grow in pots and you can even grow it in a small container. Healthy and continuously productive, this crispy salad green has many qualities that make it a blessing for health. Rich in water, fiber, vitamins and minerals such as calcium, magnesium, potassium and sodium, the lettuce is perfect for those who have intestinal transit problems, and also contributes to the smooth functioning of the nervous system.
You can start to harvest lettuce in no time– about 8 weeks for most of the varieties, it is super easy to grow and productive; similar to spinach. And the best part is you don’t need a lot of space to grow lettuce.
Also Read: How to Grow Spinach
Choosing a Pot
Almost all the lettuce varieties grow well in pots. As their shallow roots don’t need deep soil, they do best in wide and shallow containers. The pot must have adequate drainage holes in the bottom and should be at least 6 inches deep. You can use any material for pots such as plastic, clay or terracotta pots.
*However, if you’re growing lettuce in a container in a warm climate, do that in clay pots and plant heat resistant varieties.Planting Lettuce in Pots

Lettuce is a cool season crop and growing lettuce in pots is possible from spring to fall in most of the regions. Although, if you live in USDA Zones 10-11 or in any other subtropical or tropical part of the world, you should try to grow lettuce in winter.
You can easily cultivate the lettuce from seeds or from seedlings. If you want to grow it from seeds, read this post. Alternatively, you can directly buy the seedlings from a nearby nursery.
For continuous harvest do successive planting, sow seeds in every two weeks throughout the growing season.
In summer, when the weather starts to heat up the lettuce tends to bolt, to reduce this tendency keep your potted lettuce plant in a cool spot and provide proper shade.
Requirements for Growing Lettuce in ContainersSpacing
Considering you’re growing lettuce in a small space in your container garden, we assume you’ll harvest your lettuce plants regularly; trying “Cut And Come Again” method. This way you don’t need to care much about spacing.
Sow seeds densely and thin out the seedlings as they grow picking young, tender leaves regularly. Keep the plants 4-6 inches apart (depending on the size of the leaves you want and cultivar). However, head lettuces require more spacing than leaf lettuces and planting depth (8 inches) must be increased too.
Position
The lettuce loves the sunlight (*more in cooler zones) though it can be grown easily in a partially shaded area but if you’re growing lettuce in a warm climate where the sun is intense try to place the pot in a spot that receives only a few hours of morning sun.
During the hottest hours of the day (in the afternoon) it is recommended to create a shade for the plant to prevent the drying of the soil as lettuce prefers slightly moist soil constantly. Also, move the container in a cool spot when the temperature rises as this favorite green is heat sensitive.
Soil
For growing healthy lettuce, use a good quality soil mix which has plenty of organic matter, such as compost and peat. You can also add well-rotted manure or compost additionally. The soil you use must be loamy and well-drained and doesn’t hold water too much.
Watering
In shallow pots, you may need to water frequently so that the plant will not dry out completely. Make sure that you not only keep the soil slightly moist but also avoid to overwater your container grown lettuces as overwatering can kill the plants due to root rot.
Fertilizer
Because lettuce plants mature quickly, a single or double application of fertilizer is usually all that is needed to boost the production. Before you fertilize, wait for a few weeks to allow the seedlings to establish. To fertilize lettuce you can use a granular balanced fertilizer such as 10-10-10. You can also use liquid fertilizer for a quick boost. When fertilizing, be sure to follow manufacturer’s instructions as both over and under fertilization can be harmful.
Pests and Diseases
Growing lettuces in containers require care from leaf eating insects. However, if the plants are healthy there are fewer chances of infestation of pests or diseases. Mildew, leaf spot, rot and a variety of bacterial infections are common diseases that can attack lettuce. In pests and insects– caterpillars, cutworms, aphids, maggots and beetles can cause damage to the plant.
Harvesting
Once the lettuce leaves have reached the height of 4-6″ (the baby green size perfect for cut and come again method) or according to your desired size, either pick the outer leaves individually or harvest them by cutting the leaves off 1″ (2-3 cm) from above the base or crown (Must remember, don’t cut into or below the crown or else your plant will die). This way the plant will grow back and you’ll be able to harvest it again.
You can also pick the leaf lettuce before maturity, it’s simple, just remove the outer leaves when you need them in salads and keep the center leaves growing.

Lettuce is one of the vegetables that is very easy to grow in pots and you can even grow it in a small container. Healthy and continuously productive, this crispy salad green has many qualities that make it a blessing for health. Rich in water, fiber, vitamins and minerals such as calcium, magnesium, potassium and sodium, the lettuce is perfect for those who have intestinal transit problems, and also contributes to the smooth functioning of the nervous system.
You can start to harvest lettuce in no time– about 8 weeks for most of the varieties, it is super easy to grow and productive; similar to spinach. And the best part is you don’t need a lot of space to grow lettuce.
Also Read: How to Grow Spinach
Choosing a Pot
Almost all the lettuce varieties grow well in pots. As their shallow roots don’t need deep soil, they do best in wide and shallow containers. The pot must have adequate drainage holes in the bottom and should be at least 6 inches deep. You can use any material for pots such as plastic, clay or terracotta pots.
*However, if you’re growing lettuce in a container in a warm climate, do that in clay pots and plant heat resistant varieties.Planting Lettuce in Pots

Lettuce is a cool season crop and growing lettuce in pots is possible from spring to fall in most of the regions. Although, if you live in USDA Zones 10-11 or in any other subtropical or tropical part of the world, you should try to grow lettuce in winter.
You can easily cultivate the lettuce from seeds or from seedlings. If you want to grow it from seeds, read this post. Alternatively, you can directly buy the seedlings from a nearby nursery.
For continuous harvest do successive planting, sow seeds in every two weeks throughout the growing season.
In summer, when the weather starts to heat up the lettuce tends to bolt, to reduce this tendency keep your potted lettuce plant in a cool spot and provide proper shade.
Requirements for Growing Lettuce in ContainersSpacing
Considering you’re growing lettuce in a small space in your container garden, we assume you’ll harvest your lettuce plants regularly; trying “Cut And Come Again” method. This way you don’t need to care much about spacing.
Sow seeds densely and thin out the seedlings as they grow picking young, tender leaves regularly. Keep the plants 4-6 inches apart (depending on the size of the leaves you want and cultivar). However, head lettuces require more spacing than leaf lettuces and planting depth (8 inches) must be increased too.
Position
The lettuce loves the sunlight (*more in cooler zones) though it can be grown easily in a partially shaded area but if you’re growing lettuce in a warm climate where the sun is intense try to place the pot in a spot that receives only a few hours of morning sun.
During the hottest hours of the day (in the afternoon) it is recommended to create a shade for the plant to prevent the drying of the soil as lettuce prefers slightly moist soil constantly. Also, move the container in a cool spot when the temperature rises as this favorite green is heat sensitive.
Soil
For growing healthy lettuce, use a good quality soil mix which has plenty of organic matter, such as compost and peat. You can also add well-rotted manure or compost additionally. The soil you use must be loamy and well-drained and doesn’t hold water too much.
Watering
In shallow pots, you may need to water frequently so that the plant will not dry out completely. Make sure that you not only keep the soil slightly moist but also avoid to overwater your container grown lettuces as overwatering can kill the plants due to root rot.
Fertilizer

Because lettuce plants mature quickly, a single or double application of fertilizer is usually all that is needed to boost the production. Before you fertilize, wait for a few weeks to allow the seedlings to establish. To fertilize lettuce you can use a granular balanced fertilizer such as 10-10-10. You can also use liquid fertilizer for a quick boost. When fertilizing, be sure to follow manufacturer’s instructions as both over and under fertilization can be harmful.
Pests and Diseases
Growing lettuces in containers require care from leaf eating insects. However, if the plants are healthy there are fewer chances of infestation of pests or diseases. Mildew, leaf spot, rot and a variety of bacterial infections are common diseases that can attack lettuce. In pests and insects– caterpillars, cutworms, aphids, maggots and beetles can cause damage to the plant.
Harvesting
Once the lettuce leaves have reached the height of 4-6″ (the baby green size perfect for cut and come again method) or according to your desired size, either pick the outer leaves individually or harvest them by cutting the leaves off 1″ (2-3 cm) from above the base or crown (Must remember, don’t cut into or below the crown or else your plant will die). This way the plant will grow back and you’ll be able to harvest it again.
You can also pick the leaf lettuce before maturity, it’s simple, just remove the outer leaves when you need them in salads and keep the center leaves growing.
0
0
文章
Gina
2017年05月23日

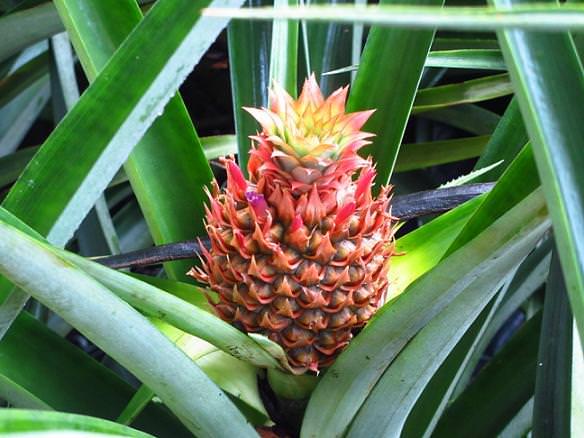
It’s no secret to anyone who went through kindergarten that you can grow plants from some of the cuttings of common vegetables. But for those of you about to head into winter (or just because!) and are going to be missing your more tropical looking plants in the garden, we have a great quick tip for you. Are you aware, that if you replant the top of a pineapple, not only will it grow, it grows into a very cool, modern looking houseplant you can enjoy all winter? Who-da thunk?
Here’s how:
Cut or twist off the top of your pineapple by just grasping with gloves, then twist until it comes apart. Peel off the bottom leaves until a good chunk of base is exposed. (You don’t want leaves sitting in water to rot.) Then slice off the bottom to make it a clean cut. Set in a saucer of water to root. Make sure you keep the bottom section from drying out while it’s rooting. Once you see a good number of new roots forming (about 3 weeks or so) then you can pot it up. Use a moisture retaining potting soil and pot up you plant, making sure you firm the soil well around the base. Keep the soil evenly moist. In a few weeks the roots should take hold in the soil and you will have a new plant! Keep in bright light, and water regularly.
Beat that for easy! Will your plant grow a pineapple? Eh…maybe in a few years if it has the right conditions, but it will be an excellent reminder of summer all year round…Any other ideas for cool house plants grown from fruits or veggies? And yes, we did say cool… no one wants to see your avocado pit on the windowsill!
3
0
文章
小马奥
2017年05月23日

Want to grow FRESH & ORGANIC vegetables but short of space? No problem, you can even do this near your kitchen window. Just learn about the Windowsill Vegetable Gardening and 11 best vegetables you can grow there!
So what if you don’t have a big outdoor space to grow your own food, you can also grow your own fresh and organic vegetables in a small space– on your windowsill. Improvise and act, get some window boxes, hanging baskets or make some cool DIY containers.
Also Read: Windowsill Herb Garden
It’s fun and exciting and you’ll be successful if you care about a few things: Your window must receive minimum 4-5 hours of sunlight, you should fertilize your plants correctly and the balance in watering must be maintained (avoiding both overwatering and underwatering).
Also Read: How to Water Container Plants
1. Green Onions

Fresh green onions can be a wonderful and delicious addition to your salad bowls and sandwiches. In a small space like a windowsill, you can get enough harvest. You can even grow green onions in water. See the tutorial! If you want, you can try to grow onions, too. Also, vertically in plastic bottles. Check out this post.
A Tip: If you’re growing green onions in water, replace the water every day.
2. Loose Leaf Lettuce

After green onions growing lettuce is one of the easiest things in the windowsill gardening! It doesn’t require a sunny window, a few hours of sunlight is enough, if not, you can also use artificial light. And the best part is you can make decorative arrangements, combining red or green leaf lettuces in the same pot or choosing variegated ones.
A Tip: Wide-shallow containers are sufficient and provide you small crop. Learn how to grow lettuce in a pot here.
3. Tomatoes

Growing tomatoes on a windowsill is easy if it is sunny. A great way to grow and enjoy fresh, organic, juicy tomatoes indoors. For best results, choose dwarf varieties (cherry tomatoes, are perfect). Also, some varieties that grow well on windowsill includes Early Salad, Red Cushion, Pretty Patio and Tiny Tim.
Also Read: How to Grow So Many Tomatoes in So Little Space
A Tip: Cherry tomatoes don’t require a big deep pot, you can use a small to medium sized container. If you like to grow them in hanging baskets near your windows, it is possible too. Learn how to do this here.
4. Spinach

You can have your own spinach and you don’t need a big yard for this. You can grow it on a windowsill if it receives only a few hours of sun. Here’s the helpful guide on growing spinach in containers.
A Tip: Keep the soil slightly moist and provide shallow but wide planter, a 6 inches deep pot would be sufficient.
5. Chillies

Exotic, hot, spicy, and colorful– You can grow chilies on your kitchen windowsill. But only if it is sunny and warm. Also, the pot you use should be at least 8-10 inches deep. It’s fun and you’ll love your plants once they’ll start to flower and fruit. You can make your curry recipes spicier this way.
Also Read: How to Grow Banana Peppers
A Tip: Provide as much sun as possible and keep your eyes on pests.
6. Carrots
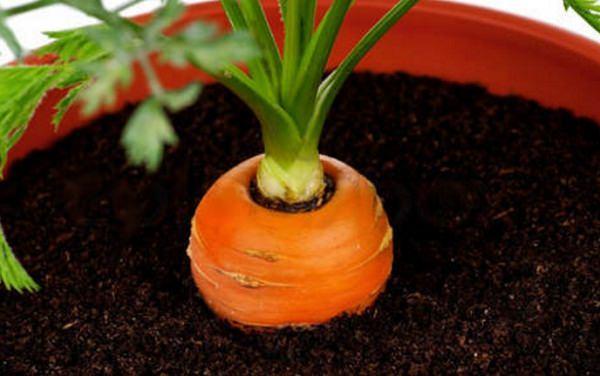
Growing carrot on a windowsill is possible and you can expect a decent homegrown harvest in small pots or window boxes. Carrot plants need regular watering, otherwise, the roots (carrots) will dry out and crack. Growing this root vegetable in containers is easy and it doesn’t take much space too. Read this to learn how to grow carrots in containers.
A Tip: Choose smaller varieties.
7. Sprouts

The healthiest stuff you can grow– Almost anywhere in your home, also on the windowsill. It is such a rewarding experience as they grow easily and quickly. All you need is a quart jar, a few tablespoons of sprouting seeds and water. In a week, you’ll have a jar full of healthy delicate sprouts that you can sprinkle on salads, add to sandwiches or toss into soups for a delicious and healthful twist on your favorite recipes.
A Tip: Just read these two articles– here and here.
8. Garlic

No need to teach you about the GARLIC glories! Let’s come to the point– Garlic will grow happily on your windowsill. To grow it, buy some fresh garlic from a grocery store. Plant a large, unpeeled clove with the pointed side up, in well-draining soil. Keep the soil moist and in a few days, you should see a green shoot. You can use its leaves in many recipes in place of garlic, will taste delicious. To harvest the leaves, cut them off with a sharp scissor, only a few inches at a time. When the leaves dry, dig up the soil to harvest the garlic bulbs.
A Tip: Choose at least 6 inches deep pot.
9. Microgreens

A big bowl of green leaves can be a prime source of vitamins A, C, K and folic acid. And microgreens (aka seedlings of herbs and vegetables) maybe even more nutrient-rich and tasty than the mature ones. Here is everything about growing microgreens.
A Tip: To grow microgreens you will need seeds of various greens and a wide but shallow tray.
10. Radishes

Radishes grow so fast and require little care and don’t mind the small pots. Plus, there leaves are also edible and you can prepare delicious exotic recipes from them. They need sunny windowsill and a moist soil.
A Tip: Ensure the pots you use have sufficient drainage holes and the potting soil must be well-drained and rich in organic matter.
11. Beans and Peas

Both the beans and peas can be grown on windowsills if there is space. Pole beans if planted in window boxes can be trained and supported by tying a string or wire from the planter to the window frame.
A Tip: Dwarf and bushier bean varieties and peas don’t require any special support, thus more suitable for windowsill gardening.
So what if you don’t have a big outdoor space to grow your own food, you can also grow your own fresh and organic vegetables in a small space– on your windowsill. Improvise and act, get some window boxes, hanging baskets or make some cool DIY containers.
Also Read: Windowsill Herb Garden
It’s fun and exciting and you’ll be successful if you care about a few things: Your window must receive minimum 4-5 hours of sunlight, you should fertilize your plants correctly and the balance in watering must be maintained (avoiding both overwatering and underwatering).
Also Read: How to Water Container Plants
1. Green Onions

Fresh green onions can be a wonderful and delicious addition to your salad bowls and sandwiches. In a small space like a windowsill, you can get enough harvest. You can even grow green onions in water. See the tutorial! If you want, you can try to grow onions, too. Also, vertically in plastic bottles. Check out this post.
A Tip: If you’re growing green onions in water, replace the water every day.
2. Loose Leaf Lettuce

After green onions growing lettuce is one of the easiest things in the windowsill gardening! It doesn’t require a sunny window, a few hours of sunlight is enough, if not, you can also use artificial light. And the best part is you can make decorative arrangements, combining red or green leaf lettuces in the same pot or choosing variegated ones.
A Tip: Wide-shallow containers are sufficient and provide you small crop. Learn how to grow lettuce in a pot here.
3. Tomatoes

Growing tomatoes on a windowsill is easy if it is sunny. A great way to grow and enjoy fresh, organic, juicy tomatoes indoors. For best results, choose dwarf varieties (cherry tomatoes, are perfect). Also, some varieties that grow well on windowsill includes Early Salad, Red Cushion, Pretty Patio and Tiny Tim.
Also Read: How to Grow So Many Tomatoes in So Little Space
A Tip: Cherry tomatoes don’t require a big deep pot, you can use a small to medium sized container. If you like to grow them in hanging baskets near your windows, it is possible too. Learn how to do this here.
4. Spinach

You can have your own spinach and you don’t need a big yard for this. You can grow it on a windowsill if it receives only a few hours of sun. Here’s the helpful guide on growing spinach in containers.
A Tip: Keep the soil slightly moist and provide shallow but wide planter, a 6 inches deep pot would be sufficient.
5. Chillies

Exotic, hot, spicy, and colorful– You can grow chilies on your kitchen windowsill. But only if it is sunny and warm. Also, the pot you use should be at least 8-10 inches deep. It’s fun and you’ll love your plants once they’ll start to flower and fruit. You can make your curry recipes spicier this way.
Also Read: How to Grow Banana Peppers
A Tip: Provide as much sun as possible and keep your eyes on pests.
6. Carrots

Growing carrot on a windowsill is possible and you can expect a decent homegrown harvest in small pots or window boxes. Carrot plants need regular watering, otherwise, the roots (carrots) will dry out and crack. Growing this root vegetable in containers is easy and it doesn’t take much space too. Read this to learn how to grow carrots in containers.
A Tip: Choose smaller varieties.
7. Sprouts

The healthiest stuff you can grow– Almost anywhere in your home, also on the windowsill. It is such a rewarding experience as they grow easily and quickly. All you need is a quart jar, a few tablespoons of sprouting seeds and water. In a week, you’ll have a jar full of healthy delicate sprouts that you can sprinkle on salads, add to sandwiches or toss into soups for a delicious and healthful twist on your favorite recipes.
A Tip: Just read these two articles– here and here.
8. Garlic

No need to teach you about the GARLIC glories! Let’s come to the point– Garlic will grow happily on your windowsill. To grow it, buy some fresh garlic from a grocery store. Plant a large, unpeeled clove with the pointed side up, in well-draining soil. Keep the soil moist and in a few days, you should see a green shoot. You can use its leaves in many recipes in place of garlic, will taste delicious. To harvest the leaves, cut them off with a sharp scissor, only a few inches at a time. When the leaves dry, dig up the soil to harvest the garlic bulbs.
A Tip: Choose at least 6 inches deep pot.
9. Microgreens

A big bowl of green leaves can be a prime source of vitamins A, C, K and folic acid. And microgreens (aka seedlings of herbs and vegetables) maybe even more nutrient-rich and tasty than the mature ones. Here is everything about growing microgreens.
A Tip: To grow microgreens you will need seeds of various greens and a wide but shallow tray.
10. Radishes

Radishes grow so fast and require little care and don’t mind the small pots. Plus, there leaves are also edible and you can prepare delicious exotic recipes from them. They need sunny windowsill and a moist soil.
A Tip: Ensure the pots you use have sufficient drainage holes and the potting soil must be well-drained and rich in organic matter.
11. Beans and Peas

Both the beans and peas can be grown on windowsills if there is space. Pole beans if planted in window boxes can be trained and supported by tying a string or wire from the planter to the window frame.
A Tip: Dwarf and bushier bean varieties and peas don’t require any special support, thus more suitable for windowsill gardening.
3
1
文章
lenny
2017年05月23日

Container vegetable gardening allows you to cultivate edibles in smallest of spaces and in this article you’ll find out easy container vegetables which you can grow on your balcony or rooftop garden.
Easy Container Vegetables
Beans

Most of the beans are climbers and really easy to grow. You can grow them on your balcony or rooftop garden on a trellis near a wall and within weeks, you will get a green wall of a climber running up through soft tendrils over the trellis. For growing beans you will need a spot that receives the sun in abundance, a pot that is minimum 12 inches deep and a trellis like structure for support. Since beans fix the nitrogen most of the vegetables that require more nitrogen are good to grow with them. If you’re growing beans in a very large pot you can grow summer savory, kale, and celery in the base.
Tomatoes
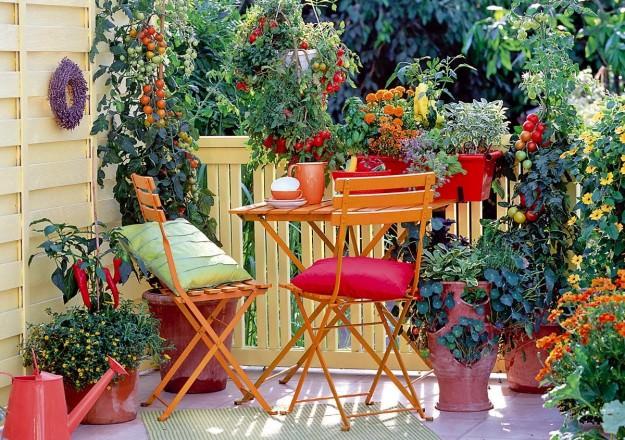
Without a doubt, tomatoes are easiest to grow. If you receive ample sun (at least 5-6 hours) you can grow tomatoes. For this, choose a large pot that is 12 inches deep. On a limited space, growing dwarf varieties of determinate type are best. You should also try cherry tomatoes for higher yield. Read our article on growing tomatoes on a balcony.
Lettuce

Growing lettuce in pots is easy. It grows up quickly and you will have the opportunity to harvest repeatedly. Lettuce is a cool season crop and you have to decide what is the right time for its growth according to your climate, usually, seeds are started in spring. But if you live in warm climate, grow lettuce in winter.
For growing lettuce, choose a wide planter rather than deep (6″ deep is enough). Leave space of 4-7 inches between each plant. Remember, leaf lettuces can be grown more closely than head lettuces. Use well draining soil and do shallow and frequent watering to keep the soil slightly moist.
Cucumber

Cucumbers are one of the easy container vegetables though it requires regular watering, full sun, warm temperature and fertilizer. If you have some space, instead of growing dwarf and bushier varieties grow tall, climbing varieties for higher yield. You can grow these varieties on a trellis in a large container in barely 1-2 sqft. of space. To know more about growing cucumbers vertically read our post.
Peppers and Chilies

After tomatoes, peppers and chilies are easiest to grow in containers and they are most productive too. If you keep the pot in a sunny spot and provide right soil and fertilizer at the time the plant will fruit prolifically. The Large and deep pot that is minimum 12 inches deep is optimum. Pepper plants are susceptible to pests. You will have to keep an eye on aphids.
Carrots

Sow the seeds of carrot varieties that are short instead of standard as they require more room to grow their roots. Choose containers that are deep enough (12″). Carrots are easy to grow in pots if you choose a right variety. Keep the plant in partial sun and water it regularly to keep the soil slightly moist, avoid overwatering. Also, carrots are susceptible to mildew so don’t wet the foliage.
Radishes

Radishes are one of the quickest growing vegetables and suitable for container vegetable gardening as you can also grow them in small pots. A planter that is 6 inches deep is enough but if you are growing larger varieties use 10 inches deep pot. You can plant radishes closely, allow 3 inches of space between each plant in a wide container. Radishes are ready for the harvest in 24-60 days, depending on the variety.
Peas

Peas require moist soil and cool to moderate weather to thrive. All varieties are suitable for container gardening but dwarf bushier varieties are better. A pot that is 6-12 inches deep is enough. You can grow 4-6 plants in a 12 inches wide and deep container, it depends more on the variety you are growing. Keep the potted plants in the partial sun if reach to full sunlight is not possible.
Eggplant

Most of the vegetables grow fairly easy in standard size 5-gallon pot. For growing eggplant, choose a one foot deep and wide pot to provide sufficient space. Eggplant is very productive
vegetable and fruits heavily if you provide it at least 6 hours of direct sun daily. Also, it is a heavy feeder like tomatoes, thus requires regular fertilizing. You have to provide support to plant by staking or caging. Simply poke a stick in the pot to help the plant when it starts to look lean.
Beets
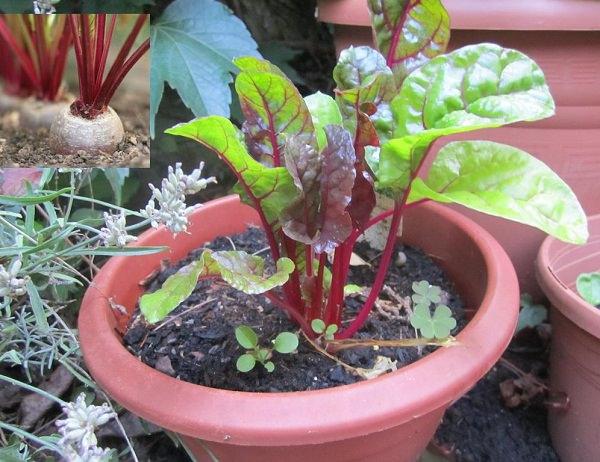
Growing beets in containers on a balcony or terrace is easy. It is a fast growing crop and you don’t need a large container for planting it. A medium sized container that is 6-8 inches deep is sufficient. The soil you use must be permeable and rich in compost.
A Tip
Do mulching, it also helps in container vegetable gardening. Mulch the surface of your potted vegetables with organic matter. It will reduce the process of evaporation and after the decomposition, the organic mulch will provide nutrition to plants.
Easy Container Vegetables
Beans

Most of the beans are climbers and really easy to grow. You can grow them on your balcony or rooftop garden on a trellis near a wall and within weeks, you will get a green wall of a climber running up through soft tendrils over the trellis. For growing beans you will need a spot that receives the sun in abundance, a pot that is minimum 12 inches deep and a trellis like structure for support. Since beans fix the nitrogen most of the vegetables that require more nitrogen are good to grow with them. If you’re growing beans in a very large pot you can grow summer savory, kale, and celery in the base.
Tomatoes

Without a doubt, tomatoes are easiest to grow. If you receive ample sun (at least 5-6 hours) you can grow tomatoes. For this, choose a large pot that is 12 inches deep. On a limited space, growing dwarf varieties of determinate type are best. You should also try cherry tomatoes for higher yield. Read our article on growing tomatoes on a balcony.
Lettuce

Growing lettuce in pots is easy. It grows up quickly and you will have the opportunity to harvest repeatedly. Lettuce is a cool season crop and you have to decide what is the right time for its growth according to your climate, usually, seeds are started in spring. But if you live in warm climate, grow lettuce in winter.
For growing lettuce, choose a wide planter rather than deep (6″ deep is enough). Leave space of 4-7 inches between each plant. Remember, leaf lettuces can be grown more closely than head lettuces. Use well draining soil and do shallow and frequent watering to keep the soil slightly moist.
Cucumber

Cucumbers are one of the easy container vegetables though it requires regular watering, full sun, warm temperature and fertilizer. If you have some space, instead of growing dwarf and bushier varieties grow tall, climbing varieties for higher yield. You can grow these varieties on a trellis in a large container in barely 1-2 sqft. of space. To know more about growing cucumbers vertically read our post.
Peppers and Chilies

After tomatoes, peppers and chilies are easiest to grow in containers and they are most productive too. If you keep the pot in a sunny spot and provide right soil and fertilizer at the time the plant will fruit prolifically. The Large and deep pot that is minimum 12 inches deep is optimum. Pepper plants are susceptible to pests. You will have to keep an eye on aphids.
Carrots

Sow the seeds of carrot varieties that are short instead of standard as they require more room to grow their roots. Choose containers that are deep enough (12″). Carrots are easy to grow in pots if you choose a right variety. Keep the plant in partial sun and water it regularly to keep the soil slightly moist, avoid overwatering. Also, carrots are susceptible to mildew so don’t wet the foliage.
Radishes

Radishes are one of the quickest growing vegetables and suitable for container vegetable gardening as you can also grow them in small pots. A planter that is 6 inches deep is enough but if you are growing larger varieties use 10 inches deep pot. You can plant radishes closely, allow 3 inches of space between each plant in a wide container. Radishes are ready for the harvest in 24-60 days, depending on the variety.
Peas

Peas require moist soil and cool to moderate weather to thrive. All varieties are suitable for container gardening but dwarf bushier varieties are better. A pot that is 6-12 inches deep is enough. You can grow 4-6 plants in a 12 inches wide and deep container, it depends more on the variety you are growing. Keep the potted plants in the partial sun if reach to full sunlight is not possible.
Eggplant

Most of the vegetables grow fairly easy in standard size 5-gallon pot. For growing eggplant, choose a one foot deep and wide pot to provide sufficient space. Eggplant is very productive
vegetable and fruits heavily if you provide it at least 6 hours of direct sun daily. Also, it is a heavy feeder like tomatoes, thus requires regular fertilizing. You have to provide support to plant by staking or caging. Simply poke a stick in the pot to help the plant when it starts to look lean.
Beets

Growing beets in containers on a balcony or terrace is easy. It is a fast growing crop and you don’t need a large container for planting it. A medium sized container that is 6-8 inches deep is sufficient. The soil you use must be permeable and rich in compost.
A Tip
Do mulching, it also helps in container vegetable gardening. Mulch the surface of your potted vegetables with organic matter. It will reduce the process of evaporation and after the decomposition, the organic mulch will provide nutrition to plants.
1
0
文章
lenny
2017年05月23日

Growing vegetables in containers is possible but there are some that grow easily and produce heavily in containers. Due to this we’ve added 20 Best and Most Productive Vegetables to grow in pots.
The productivity of a small garden also improves when you utilize the vertical space. Using trellis to provide support to trailing plants and vines always helps.
Best Vegetables to Grow in Pots1. Tomatoes

Without a doubt, tomatoes are the most productive vegetables you can grow in pots. Tomatoes need ample sun (5-6 hours minimum). The pot size depends on the type of tomatoes you are growing. In containers, growing dwarf varieties of determinate type is best. You should also try cherry tomatoes for higher yield.
2. Beans

Most of the beans are climbers or bushier type and they grow upward. They are productive in pots and are easy to grow. You can grow them on a trellis near a wall and within weeks, you will get a green wall of beans running across the trellis. For growing beans you need a sunny place, and a pot that is minimum 12 inches deep (the bigger the better) and a strong trellis like structure for support. Since beans fix the nitrogen most of the vegetables that require more nitrogen are good to grow underneath them. If you’re growing beans in a very large pot you can grow summer savory, kale, or celery with them.
3. Lettuce

Lettuce grows up quickly and you will have the opportunity to harvest them multiple times throughout the growing season. As lettuce is a cool season crop, you’ll have to decide what is the right time for its growth according to your climate, usually, seeds are started in spring. But if you live in a warm climate, grow lettuce in winter.
For growing lettuce, choose a wide planter rather than deep (6″ deep is enough). When planting, make sure to leave space of at least 4 inches between each plant. Remember, leaf lettuces can be grown more closely than head lettuces. Use well draining soil and do shallow and frequent watering to keep the soil slightly moist always.
4. Peppers and Chillies

Peppers and chillies are super productive and excellent candidates for growing in containers. They look great in pots and need a sunny and warm place to thrive. If you keep the pot in a sunny spot and provide right soil and fertilize the plant time to time it will fruit heavily. A large pot that is atleast 12 inches deep is optimum.
5. Radishes

Radishes are one of the quickest growing vegetables and suitable for container vegetable gardening as you can also grow them in small and wide pots. A planter that is just 6 inches deep is enough but if you want to grow larger varieties use 8-10 inches deep pot. Allow 3 inches of space between each plant.
6. Asian Greens

Asian greens are great crops to grow in pots as they grow fast and don’t need a lot of sun. You can grow them in shade in a spot that receives 3-4 hours of morning sun. Providing them plenty of moisture and organic fertilizer is important so that they thrive.
7. Spinach

Spinach is one of the best vegetables for containers. It grows well in partial shade and in any kind of space. Growing spinach in containers is easy too you can even grow it indoors on a windowsill. For growing spinach in pots, choose a pot that is least 6-8 inches deep. You don’t need a very deep pot rather use a wide one. Learn how to grow spinach in pots here.
8. Peas

Peas prefer moderate conditions, they are a perfect crop for container gardening and don’t require a large pot. They grow quickly without attention. You can even grow peas on a balcony. Choose a dwarf or bushier type varieties and do regular and frequent watering as peas prefer slightly moist soil. Keep the plants in a spot that receives full sun to part sun (especially in warm climates).
9. Carrots

Carrots grow best in cool weather. Carrot plants need regular watering, otherwise the roots dry out and crack. Growing this plant in containers is easy and it doesn’t take much space too.
10. Cucumber

Cucumbers are heavy feeders and require regular watering too. Grow them in a medium to large sized pot (depending on the variety) and in full sun. You can have your homegrown successful crunchy cucumbers within a few months. To learn more about growing cucumbers read this article.
11. Eggplant
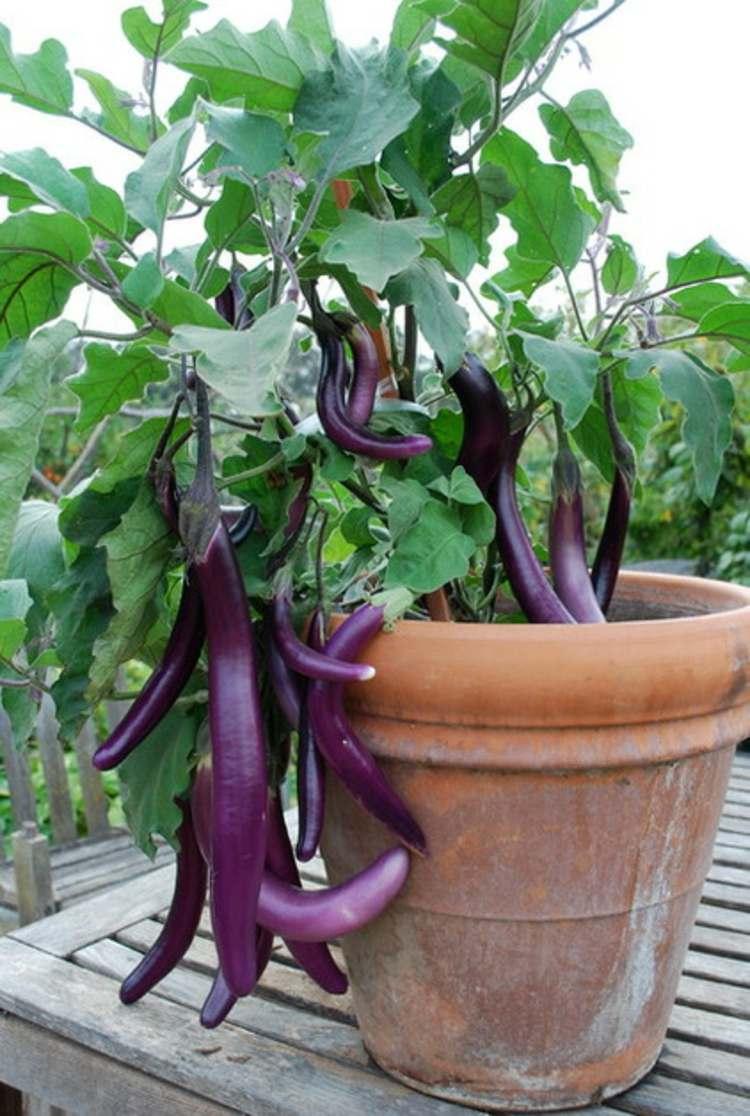
Although eggplants are susceptible to many garden pests, still growing them is easy. They are heat-loving plants and need high temperatures both day and night, thus a suitable summer crop. But if you live in a warm climate you can grow it year round.
Also, it is easier to maintain them in containers than in a large vegetable garden. It is necessary that you keep the pots in a full sun and feed heavily (like all other plants from tomato family– peppers, tomatoes, potatoes; eggplants are heavy feeders too).
12. Squash
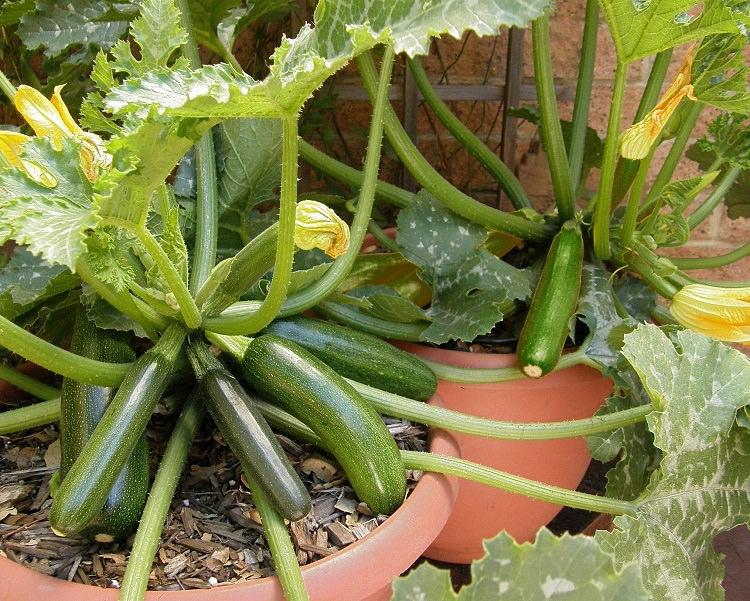
Squashes are easy to grow plants. Summer squashes (Zucchini) are more productive than winter squashes. You can harvest bountiful even in containers. It is one of the most suitable crops for rooftop, balcony or patio gardeners.
The productivity of a small garden also improves when you utilize the vertical space. Using trellis to provide support to trailing plants and vines always helps.
Best Vegetables to Grow in Pots1. Tomatoes

Without a doubt, tomatoes are the most productive vegetables you can grow in pots. Tomatoes need ample sun (5-6 hours minimum). The pot size depends on the type of tomatoes you are growing. In containers, growing dwarf varieties of determinate type is best. You should also try cherry tomatoes for higher yield.
2. Beans

Most of the beans are climbers or bushier type and they grow upward. They are productive in pots and are easy to grow. You can grow them on a trellis near a wall and within weeks, you will get a green wall of beans running across the trellis. For growing beans you need a sunny place, and a pot that is minimum 12 inches deep (the bigger the better) and a strong trellis like structure for support. Since beans fix the nitrogen most of the vegetables that require more nitrogen are good to grow underneath them. If you’re growing beans in a very large pot you can grow summer savory, kale, or celery with them.
3. Lettuce

Lettuce grows up quickly and you will have the opportunity to harvest them multiple times throughout the growing season. As lettuce is a cool season crop, you’ll have to decide what is the right time for its growth according to your climate, usually, seeds are started in spring. But if you live in a warm climate, grow lettuce in winter.
For growing lettuce, choose a wide planter rather than deep (6″ deep is enough). When planting, make sure to leave space of at least 4 inches between each plant. Remember, leaf lettuces can be grown more closely than head lettuces. Use well draining soil and do shallow and frequent watering to keep the soil slightly moist always.
4. Peppers and Chillies

Peppers and chillies are super productive and excellent candidates for growing in containers. They look great in pots and need a sunny and warm place to thrive. If you keep the pot in a sunny spot and provide right soil and fertilize the plant time to time it will fruit heavily. A large pot that is atleast 12 inches deep is optimum.
5. Radishes

Radishes are one of the quickest growing vegetables and suitable for container vegetable gardening as you can also grow them in small and wide pots. A planter that is just 6 inches deep is enough but if you want to grow larger varieties use 8-10 inches deep pot. Allow 3 inches of space between each plant.
6. Asian Greens

Asian greens are great crops to grow in pots as they grow fast and don’t need a lot of sun. You can grow them in shade in a spot that receives 3-4 hours of morning sun. Providing them plenty of moisture and organic fertilizer is important so that they thrive.
7. Spinach

Spinach is one of the best vegetables for containers. It grows well in partial shade and in any kind of space. Growing spinach in containers is easy too you can even grow it indoors on a windowsill. For growing spinach in pots, choose a pot that is least 6-8 inches deep. You don’t need a very deep pot rather use a wide one. Learn how to grow spinach in pots here.
8. Peas

Peas prefer moderate conditions, they are a perfect crop for container gardening and don’t require a large pot. They grow quickly without attention. You can even grow peas on a balcony. Choose a dwarf or bushier type varieties and do regular and frequent watering as peas prefer slightly moist soil. Keep the plants in a spot that receives full sun to part sun (especially in warm climates).
9. Carrots

Carrots grow best in cool weather. Carrot plants need regular watering, otherwise the roots dry out and crack. Growing this plant in containers is easy and it doesn’t take much space too.
10. Cucumber

Cucumbers are heavy feeders and require regular watering too. Grow them in a medium to large sized pot (depending on the variety) and in full sun. You can have your homegrown successful crunchy cucumbers within a few months. To learn more about growing cucumbers read this article.
11. Eggplant

Although eggplants are susceptible to many garden pests, still growing them is easy. They are heat-loving plants and need high temperatures both day and night, thus a suitable summer crop. But if you live in a warm climate you can grow it year round.
Also, it is easier to maintain them in containers than in a large vegetable garden. It is necessary that you keep the pots in a full sun and feed heavily (like all other plants from tomato family– peppers, tomatoes, potatoes; eggplants are heavy feeders too).
12. Squash

Squashes are easy to grow plants. Summer squashes (Zucchini) are more productive than winter squashes. You can harvest bountiful even in containers. It is one of the most suitable crops for rooftop, balcony or patio gardeners.
1
1
文章
lenny
2017年05月23日

Want to know how to make an Urban Vegetable Garden? This article will help you in creating a functional and productive city vegetable garden.

What a pleasure to taste freshly picked vegetables and herbs in soups, stews, salads, in curries and other delicious cuisines, which have been cultivated in your own garden? But what if you live in a city and you don’t have a space for a regular garden?
Well, there are options available even for the city gardeners who have a small home, apartment or a flat. The solution is optimization of the available space you have.
Your little urban vegetable garden will not look like a traditional garden, where rows of tomatoes, beans, onion and cucumbers are planted in line in garden beds and thrive abundantly, but it will bring you immense satisfaction with enough homegrown harvest.
Urban Vegetable Garden Design
First of all, decide how much space you have– do you have a small patio, a balcony or a flat roof? If you have a veranda or a porch, you can use that space too. You can even grow a few plants on a windowsill.
Read our post on windowsill herb garden
Choose the solution of square foot gardening for a city vegetable garden. Square foot gardening is proposed by Mel Bartholomew, it allows to utilize the small space well and increases the productivity.

In a square foot garden, vegetables are grown in raised bed made of individual squares of one square foot each (30 cm) and at least 6″ deep.
Either you can place individual squares side by side to form one large square or make a whole 4’*4′ size raised bed and divide it into 4 squares. Square foot gardening method is a revolutionizing culture, it favors organic gardening. According to Bartholomew, only fertilizer you should use is compost. You can also use manure if it is readily available to you.
In contrast to the traditional garden, which requires a large field to grow vegetable patches and a lot of care, small square foot garden is suitable for limited spaces.
Indeed, this way of growing vegetables greatly helps. Some everyday actions are extremely easy to maintain. You can easily manage crops, it’s so easy to water each plant in a right amount with a simple watering can. No waste, no weed and almost no to less problem of pests. And the icing on the cake are those checkered appetizing and colorful vegetables that look very decorative too in an urban vegetable garden.
You can make such raised beds of wood, PVC pipes and if you don’t mind having permanent structure make a concrete raised bed or you can put individual square containers side by side.
Urban Vegetable Garden on a Balcony
Balconies are even more limited space, but if you receive enough sun there you can easily manage to grow a lot of vegetables and herbs. You can imply the same square foot gardening method or grow plants in containers.
If you want to make a vegetable garden on the balcony, read this post.Rooftop Vegetable Garden
A lot of space in compare to small balconies and if you optimize it well, you’ll be able to cultivate enough vegetables for home use, fresh and organic.
When choosing what to plant in your urban vegetable garden, consider your personal taste first, then of course how compatible your location and space is to grow it. Almost all the species demand ample sun and if your terrace garden is shady, your choices will shrink.
Patio Vegetable Garden

In a city having a patio is a boon. You can make a productive patio vegetable garden there by this square foot gardening method. You can grow vegetables both on grounds and in containers. In addition, grow herbs that you’re fancy about. Almost all the herbs are easy to grow.
You can grow citrus varieties in containers too.
Urban Vegetable Garden on Veranda, Porch or other Enclosed Spaces
Living in a city you know how precious every inch of space is, if you have a porch or veranda, use it to grow vegetables and herbs in containers. Choose plants that are easy to grow in partial shade as most of the time these spaces are roofed and don’t receive full sun. You can try all the green leafy vegetables like spinach, bok choi, and lettuce, root vegetables like carrot, parsnip and potatoes too. Home grown fresh and organic potatoes taste heavenly.
Tips

Don’t cram up the containers or your squares with a lot of plants. Be aware that some vegetables need to be grown alone as they need more space for root development like peppers and chilies. Same in the case with tomatoes, eggplant, and cucumbers. Zucchini also needs to grow alone in a large container.It is best to choose a variety of vegetables that do not send runners and spread as they will fill up the space of containers.By combining vertical supports in squares or containers, you can also grow beans, peas, and small gourds.Carrots, radishes, lettuce, beets are also easy to grow.Fertilize plants regularly with organic fertilizer.
And do not forget that a small urban vegetable garden can be as beautiful as it is functional, especially if you grow flowers in it with vegetables.

What a pleasure to taste freshly picked vegetables and herbs in soups, stews, salads, in curries and other delicious cuisines, which have been cultivated in your own garden? But what if you live in a city and you don’t have a space for a regular garden?
Well, there are options available even for the city gardeners who have a small home, apartment or a flat. The solution is optimization of the available space you have.
Your little urban vegetable garden will not look like a traditional garden, where rows of tomatoes, beans, onion and cucumbers are planted in line in garden beds and thrive abundantly, but it will bring you immense satisfaction with enough homegrown harvest.
Urban Vegetable Garden Design
First of all, decide how much space you have– do you have a small patio, a balcony or a flat roof? If you have a veranda or a porch, you can use that space too. You can even grow a few plants on a windowsill.
Read our post on windowsill herb garden
Choose the solution of square foot gardening for a city vegetable garden. Square foot gardening is proposed by Mel Bartholomew, it allows to utilize the small space well and increases the productivity.

In a square foot garden, vegetables are grown in raised bed made of individual squares of one square foot each (30 cm) and at least 6″ deep.
Either you can place individual squares side by side to form one large square or make a whole 4’*4′ size raised bed and divide it into 4 squares. Square foot gardening method is a revolutionizing culture, it favors organic gardening. According to Bartholomew, only fertilizer you should use is compost. You can also use manure if it is readily available to you.
In contrast to the traditional garden, which requires a large field to grow vegetable patches and a lot of care, small square foot garden is suitable for limited spaces.
Indeed, this way of growing vegetables greatly helps. Some everyday actions are extremely easy to maintain. You can easily manage crops, it’s so easy to water each plant in a right amount with a simple watering can. No waste, no weed and almost no to less problem of pests. And the icing on the cake are those checkered appetizing and colorful vegetables that look very decorative too in an urban vegetable garden.
You can make such raised beds of wood, PVC pipes and if you don’t mind having permanent structure make a concrete raised bed or you can put individual square containers side by side.
Urban Vegetable Garden on a Balcony
Balconies are even more limited space, but if you receive enough sun there you can easily manage to grow a lot of vegetables and herbs. You can imply the same square foot gardening method or grow plants in containers.
If you want to make a vegetable garden on the balcony, read this post.Rooftop Vegetable Garden
A lot of space in compare to small balconies and if you optimize it well, you’ll be able to cultivate enough vegetables for home use, fresh and organic.
When choosing what to plant in your urban vegetable garden, consider your personal taste first, then of course how compatible your location and space is to grow it. Almost all the species demand ample sun and if your terrace garden is shady, your choices will shrink.
Patio Vegetable Garden

In a city having a patio is a boon. You can make a productive patio vegetable garden there by this square foot gardening method. You can grow vegetables both on grounds and in containers. In addition, grow herbs that you’re fancy about. Almost all the herbs are easy to grow.
You can grow citrus varieties in containers too.
Urban Vegetable Garden on Veranda, Porch or other Enclosed Spaces
Living in a city you know how precious every inch of space is, if you have a porch or veranda, use it to grow vegetables and herbs in containers. Choose plants that are easy to grow in partial shade as most of the time these spaces are roofed and don’t receive full sun. You can try all the green leafy vegetables like spinach, bok choi, and lettuce, root vegetables like carrot, parsnip and potatoes too. Home grown fresh and organic potatoes taste heavenly.
Tips

Don’t cram up the containers or your squares with a lot of plants. Be aware that some vegetables need to be grown alone as they need more space for root development like peppers and chilies. Same in the case with tomatoes, eggplant, and cucumbers. Zucchini also needs to grow alone in a large container.It is best to choose a variety of vegetables that do not send runners and spread as they will fill up the space of containers.By combining vertical supports in squares or containers, you can also grow beans, peas, and small gourds.Carrots, radishes, lettuce, beets are also easy to grow.Fertilize plants regularly with organic fertilizer.
And do not forget that a small urban vegetable garden can be as beautiful as it is functional, especially if you grow flowers in it with vegetables.
1
0
文章
Martha
2017年05月22日

Growing Beets in Containers is easy. This quick growing vegetable doesn’t require much care and perfect for beginner container gardeners.

Beets are one of the fast growing vegetables and if you’ve grown other root vegetables like radishes or carrots, then growing beets in containers is not much different.
Choosing a pot
Use any type of container you find best with SUFFICIENT drainage holes. However, clay pots are an excellent choice. Growing beets is possible in small pots but ensure they are minimum 8 inches deep. 10 to 12 inches deep pots are IDEAL as they will encourage roots to develop! You can choose as much wide container as you want. The wider it would be the more plants you can grow together. Window boxes or large rectangular containers with the recommended depth are good choices.
When to begin planting
As a best practice, you can start planting beets in the spring, three-two weeks before the last (average) frost date in your area. You can continue to sow seeds every 3 to 4 weeks until when the temperature start to reach above 80 F (27 C). Again, you can begin planting in the late summer and early fall (autumn) when the temperature starts to come under the range of 85 F (29 C).
For warm tropical climate
As beets is a cool weather crop, those who live in warm subtropical or tropical areas (USDA Zones 9b-11) should grow it in late fall, winter and early spring.
Planting Beets in Pots

First thing first– Beets don’t like to be transplanted, so no role of seed trays! Pick desired pots and sow seeds 1/4 inch deep. Once they germinate and reach the significant height, you can select the healthiest seedlings and thin others apart to maintain the recommended 3 inches distance spacing. To speed up the germination, you can also soak the seeds overnight in nonchlorinated water before planting. However, if seeds are treated with fungicide, avoid this.
The seedlings will emerge anytime between 5 to 15 days, depending on the growing conditions. Until then keep the pots in a spot that is warm and receive mild sun and maintain the moisture in the soil. Once germinated, place the baby plants in the desired position and later when seedlings grow up to 3 inches tall, thin them. To maintain the spacing recommendation mentioned below.
Varieties
If you know how to grow beets in containers, you can try any variety. A few of them we’ve listed here are the Detroit Dark Red, Early Wonder, Sangria, and Sweetheart.
Requirements for Growing Beets in Containers

Position
Beets can be grown in full sun to part shade but for optimum growth choose a spot that receives full sun, at least 6 hours of sunlight is necessary. Also, make sure the spot you place your containers have good air circulation.
Soil
Soil that is loamy, penetrable and promotes the development of large roots is best for growing beet in a pot. Make sure your soil is rich in nutrients, you can also add a lot of compost. Also, avoid adding pebbles or stones in the soil or the bottom layer when growing this root vegetable.
If you’re not using commercial soil packet for growing beets, prepare your own potting mix by adding 1 part soil, 1 part compost or well-rotted manure, and 1 part perlite. If you want to make a soilless mix, add 1 part peat moss or coco peat, 1 part compost or well-rotted manure, and 1 part perlite, vermiculite or sand. You can also add time-based fertilizer that is low in nitrogen at the time of mixing the soil.Watering
If you don’t want hard and sinewy beetroots, water regularly and evenly. To keep the soil slightly moist all the time. Ensure you not let the soil dry out completely between the growing process and also avoid OVERWATERING.
Spacing
Maintain the 3 inches of distance between each plant from all direction for growing beets in pots successfully. You can grow each plant 2 inches apart, but this will hamper the growth of roots. For reference, the 12 inches wide rectangular pot can support around 4-5 plants.
Temperature
Keep in mind, the optimum temperature for growing beets in containers require a temperature around 50 F – 85 F (10 C – 29 C), but it can be grown in temperature as low as 40 F (4.5 C) and as high as 90 F (32 C) with difficulty.
Beet Care

Fertilizer
It’s a good idea to use time-based (slow release) fertilizer to add into the potting soil. As beets is a root vegetable and you may like to increase its root development, use a fertilizer that is low in nitrogen but high in phosphorous and potassium. For example, a formula of NPK 5-10-10.
Once the beetroots growing in pots become one month and doing well, you can switch to a water-soluble fertilizer. With the same 5-10-10 formula. And if you see Nitrogen deficiency in soil, use the complete fertilizer with NPK in 20-20-20 ratio.
If you want to grow beets organically, side dress plants with compost or manure and feed the plants with compost tea every other week. As beets usually suffer from boron deficiency, you can add seaweed (an excellent source of boron) fertilizer in compost tea for optimum growth.Pests and Diseases
When growing beets in pots, you don’t have to worry about pests and diseases much. You can avoid most of the problems by not overwatering and avoiding overhead watering. The common culprits are root rot and scab. Leaf miners and common pests like aphids can affect the foliage growth.
Harvesting
Beets on average require anywhere from 6-8 weeks to get ready for harvest after germination. You can also harvest beet green to use in salads; the tender leaves taste delicious. You can start harvesting greens when leaves are a few inches long by cutting the outer leaves only and leaving the small inner foliage to grow, which you can harvest later.

Beets are one of the fast growing vegetables and if you’ve grown other root vegetables like radishes or carrots, then growing beets in containers is not much different.
Choosing a pot
Use any type of container you find best with SUFFICIENT drainage holes. However, clay pots are an excellent choice. Growing beets is possible in small pots but ensure they are minimum 8 inches deep. 10 to 12 inches deep pots are IDEAL as they will encourage roots to develop! You can choose as much wide container as you want. The wider it would be the more plants you can grow together. Window boxes or large rectangular containers with the recommended depth are good choices.
When to begin planting
As a best practice, you can start planting beets in the spring, three-two weeks before the last (average) frost date in your area. You can continue to sow seeds every 3 to 4 weeks until when the temperature start to reach above 80 F (27 C). Again, you can begin planting in the late summer and early fall (autumn) when the temperature starts to come under the range of 85 F (29 C).
For warm tropical climate
As beets is a cool weather crop, those who live in warm subtropical or tropical areas (USDA Zones 9b-11) should grow it in late fall, winter and early spring.
Planting Beets in Pots

First thing first– Beets don’t like to be transplanted, so no role of seed trays! Pick desired pots and sow seeds 1/4 inch deep. Once they germinate and reach the significant height, you can select the healthiest seedlings and thin others apart to maintain the recommended 3 inches distance spacing. To speed up the germination, you can also soak the seeds overnight in nonchlorinated water before planting. However, if seeds are treated with fungicide, avoid this.
The seedlings will emerge anytime between 5 to 15 days, depending on the growing conditions. Until then keep the pots in a spot that is warm and receive mild sun and maintain the moisture in the soil. Once germinated, place the baby plants in the desired position and later when seedlings grow up to 3 inches tall, thin them. To maintain the spacing recommendation mentioned below.
Varieties
If you know how to grow beets in containers, you can try any variety. A few of them we’ve listed here are the Detroit Dark Red, Early Wonder, Sangria, and Sweetheart.
Requirements for Growing Beets in Containers

Position
Beets can be grown in full sun to part shade but for optimum growth choose a spot that receives full sun, at least 6 hours of sunlight is necessary. Also, make sure the spot you place your containers have good air circulation.
Soil
Soil that is loamy, penetrable and promotes the development of large roots is best for growing beet in a pot. Make sure your soil is rich in nutrients, you can also add a lot of compost. Also, avoid adding pebbles or stones in the soil or the bottom layer when growing this root vegetable.
If you’re not using commercial soil packet for growing beets, prepare your own potting mix by adding 1 part soil, 1 part compost or well-rotted manure, and 1 part perlite. If you want to make a soilless mix, add 1 part peat moss or coco peat, 1 part compost or well-rotted manure, and 1 part perlite, vermiculite or sand. You can also add time-based fertilizer that is low in nitrogen at the time of mixing the soil.Watering
If you don’t want hard and sinewy beetroots, water regularly and evenly. To keep the soil slightly moist all the time. Ensure you not let the soil dry out completely between the growing process and also avoid OVERWATERING.
Spacing
Maintain the 3 inches of distance between each plant from all direction for growing beets in pots successfully. You can grow each plant 2 inches apart, but this will hamper the growth of roots. For reference, the 12 inches wide rectangular pot can support around 4-5 plants.
Temperature
Keep in mind, the optimum temperature for growing beets in containers require a temperature around 50 F – 85 F (10 C – 29 C), but it can be grown in temperature as low as 40 F (4.5 C) and as high as 90 F (32 C) with difficulty.
Beet Care

Fertilizer
It’s a good idea to use time-based (slow release) fertilizer to add into the potting soil. As beets is a root vegetable and you may like to increase its root development, use a fertilizer that is low in nitrogen but high in phosphorous and potassium. For example, a formula of NPK 5-10-10.
Once the beetroots growing in pots become one month and doing well, you can switch to a water-soluble fertilizer. With the same 5-10-10 formula. And if you see Nitrogen deficiency in soil, use the complete fertilizer with NPK in 20-20-20 ratio.
If you want to grow beets organically, side dress plants with compost or manure and feed the plants with compost tea every other week. As beets usually suffer from boron deficiency, you can add seaweed (an excellent source of boron) fertilizer in compost tea for optimum growth.Pests and Diseases
When growing beets in pots, you don’t have to worry about pests and diseases much. You can avoid most of the problems by not overwatering and avoiding overhead watering. The common culprits are root rot and scab. Leaf miners and common pests like aphids can affect the foliage growth.
Harvesting
Beets on average require anywhere from 6-8 weeks to get ready for harvest after germination. You can also harvest beet green to use in salads; the tender leaves taste delicious. You can start harvesting greens when leaves are a few inches long by cutting the outer leaves only and leaving the small inner foliage to grow, which you can harvest later.
2
0
文章
Mirella
2017年05月22日

If you are new to gardening or get little impatient when growing vegetables– Must see this list of Fast Growing Vegetables. All vegetables in this list can be grown in containers and harvested in 2 months or quicker.
These vegetables are ready to eat in just a few days and the best thing is all of these grows easily in pots.
1. Lettuce

When it comes to fast growing vegetables, lettuce is our favorite. Healthy and continuously productive, this crispy salad green has many qualities that make it a blessing for health. Growing lettuce is easy and fun too, to read more about this click here!
2. Arugula (Rocket)
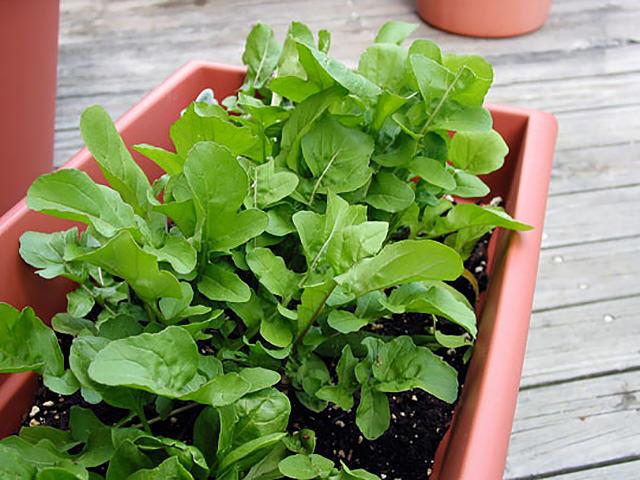
Arugula is an aromatic, peppery-flavored salad green. This easy to grow veggie is fast growing and you can start to harvest it in just 20-21 days for baby leaves. You can easily grow it in places where space is premium. Window boxes or other shallow wide containers are suitable, you can place this edible where it will receive a fair amount of sun and plenty of moisture.
3. Spinach
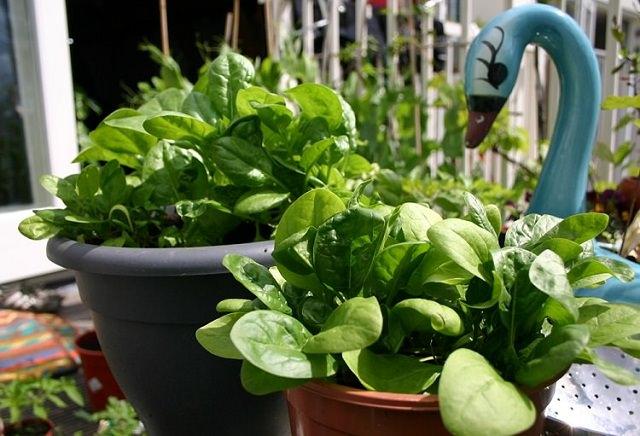
Spinach is one of the vegetables that can be grown in both shade and sun. It grows easily in containers and you can even plant it indoors on a windowsill. For growing spinach in pots, choose a pot that is least 6-8 inches deep and use a quality potting mix that is rich in organic matter. Check out this article to learn how to grow it in pots.
4. Beets

Growing beets in containers is quick and easy and you don’t need a large container for planting it, too. A container that is 6-8 inches deep and soil that is rich in compost is all you need. Its roots get ready to harvest in as little as 45 days although you can harvest the greens within two to three weeks.
5. Radish
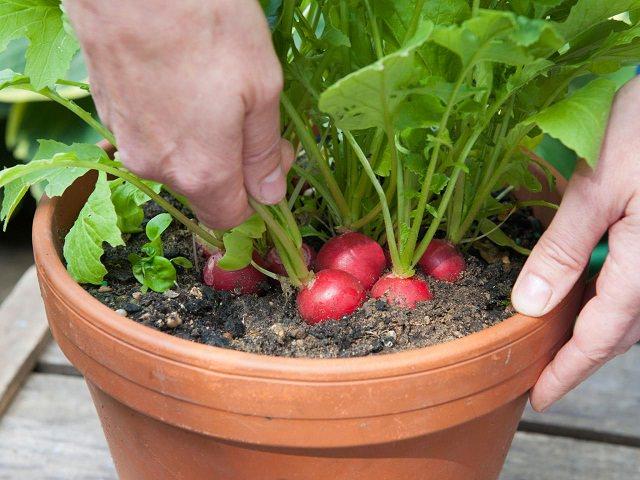
Radishes are one of the quickest growing vegetables and suitable for container vegetable gardening as you can also grow them in small pots. A planter that is 6 inches deep is enough as they have a shallow root system. Radishes are ready for the harvest within 24-60 days, depending more on the variety.
6. Asian Greens
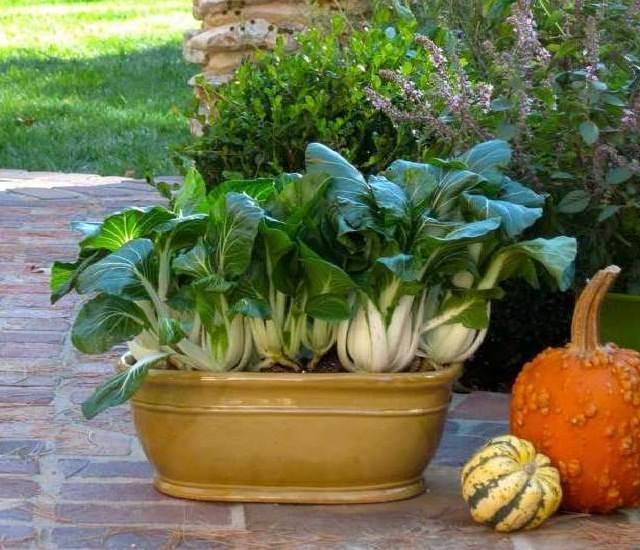
Asian greens are great to grow in pots in shady spaces, they grow fast and don’t need a lot of sun. You can grow them in a spot that receives only 3-4 hours of sun. Providing them plenty of moisture and organic fertilizer is important so that they thrive.
Bok choy of one of the Asian greens that get ready to harvest as soon as about 30 days for baby varieties.
7. Green Onion
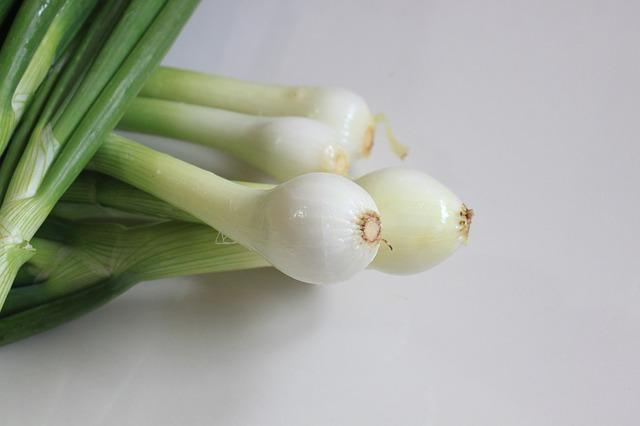
Green onions can be a crispy and delicious addition to your salad bowls and sandwiches. Even in a limited space like a windowsill, you can get enough harvest. Green onion stalks can be picked after 3 or 4 weeks.
8. Sprouts
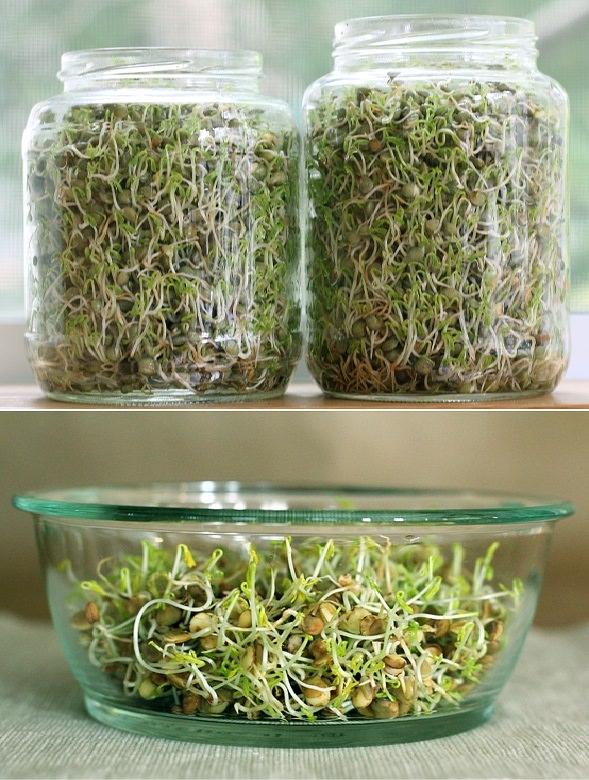
If you are little impatient for harvesting, grow sprouts. Sprouts can grow almost anywhere in your home. It is such a rewarding experience as they grow easily and quickly. All you need is a quart jar, a few tablespoons of sprouting seeds and water. In a week, you’ll have a jar full of healthy delicate sprouts that can be sprinkled on salads, added to sandwiches or tossed into soups for a delicious and healthful twist on your favorite recipes.
9. Fenugreek

Fenugreek is a lesser known annual Asian vegetable (popularly used in the Indian subcontinent), it grows quickly if the temperature is warm in summer. You can start this plant from seeds just like spinach. Check out more here!
10. Peas

Within 2 months after planting peas can be harvested. If you choose a right variety and growing conditions are optimal, growing peas is super easy, even in containers. Also, check out our article on BEST CONTAINER VEGETABLES!
11. Kale

Kale can tolerate some heat but the best flavor comes when the weather cools down, especially in spring and fall. You can plant kale from early spring to late summer and if you want to try this green in subtropical or tropical climate, winter is the right time for its growth.
12. Okra
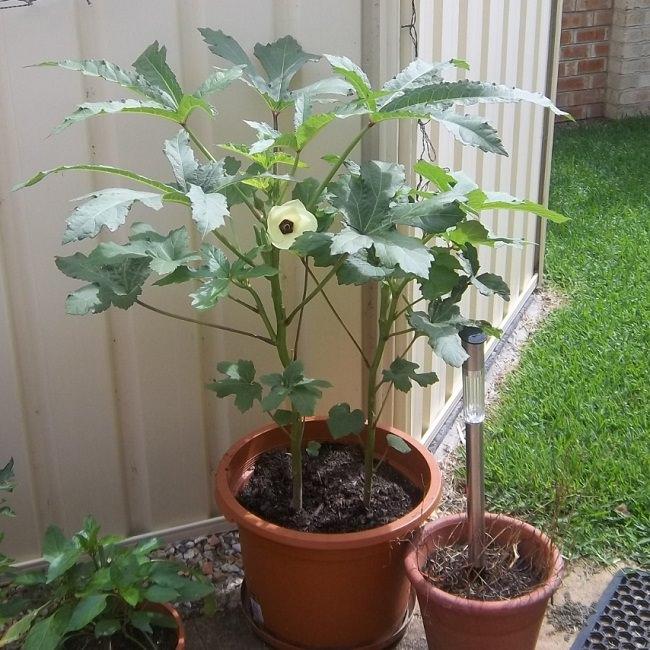
Also known as “Lady Finger”, this slimy-sweet, warm weather vegetable is favorite of many Southerners and in other parts in the world. It’s true that no other vegetable can taste like okra! Many okra varieties start to produce pods in just 50 days, not only this– it’s flowers look beautiful too.
Also Read: How To Grow Okra In Pots
13. Mustard Green

Like other greens, mustard is one of the fast growing vegetables. It is easy to grow and prefers warm weather. You can use its tender leaves in salads, or use it like spinach. There are also many curry recipes that require mustard leaves.
These vegetables are ready to eat in just a few days and the best thing is all of these grows easily in pots.
1. Lettuce

When it comes to fast growing vegetables, lettuce is our favorite. Healthy and continuously productive, this crispy salad green has many qualities that make it a blessing for health. Growing lettuce is easy and fun too, to read more about this click here!
2. Arugula (Rocket)

Arugula is an aromatic, peppery-flavored salad green. This easy to grow veggie is fast growing and you can start to harvest it in just 20-21 days for baby leaves. You can easily grow it in places where space is premium. Window boxes or other shallow wide containers are suitable, you can place this edible where it will receive a fair amount of sun and plenty of moisture.
3. Spinach

Spinach is one of the vegetables that can be grown in both shade and sun. It grows easily in containers and you can even plant it indoors on a windowsill. For growing spinach in pots, choose a pot that is least 6-8 inches deep and use a quality potting mix that is rich in organic matter. Check out this article to learn how to grow it in pots.
4. Beets

Growing beets in containers is quick and easy and you don’t need a large container for planting it, too. A container that is 6-8 inches deep and soil that is rich in compost is all you need. Its roots get ready to harvest in as little as 45 days although you can harvest the greens within two to three weeks.
5. Radish

Radishes are one of the quickest growing vegetables and suitable for container vegetable gardening as you can also grow them in small pots. A planter that is 6 inches deep is enough as they have a shallow root system. Radishes are ready for the harvest within 24-60 days, depending more on the variety.
6. Asian Greens

Asian greens are great to grow in pots in shady spaces, they grow fast and don’t need a lot of sun. You can grow them in a spot that receives only 3-4 hours of sun. Providing them plenty of moisture and organic fertilizer is important so that they thrive.
Bok choy of one of the Asian greens that get ready to harvest as soon as about 30 days for baby varieties.
7. Green Onion

Green onions can be a crispy and delicious addition to your salad bowls and sandwiches. Even in a limited space like a windowsill, you can get enough harvest. Green onion stalks can be picked after 3 or 4 weeks.
8. Sprouts

If you are little impatient for harvesting, grow sprouts. Sprouts can grow almost anywhere in your home. It is such a rewarding experience as they grow easily and quickly. All you need is a quart jar, a few tablespoons of sprouting seeds and water. In a week, you’ll have a jar full of healthy delicate sprouts that can be sprinkled on salads, added to sandwiches or tossed into soups for a delicious and healthful twist on your favorite recipes.
9. Fenugreek

Fenugreek is a lesser known annual Asian vegetable (popularly used in the Indian subcontinent), it grows quickly if the temperature is warm in summer. You can start this plant from seeds just like spinach. Check out more here!
10. Peas

Within 2 months after planting peas can be harvested. If you choose a right variety and growing conditions are optimal, growing peas is super easy, even in containers. Also, check out our article on BEST CONTAINER VEGETABLES!
11. Kale

Kale can tolerate some heat but the best flavor comes when the weather cools down, especially in spring and fall. You can plant kale from early spring to late summer and if you want to try this green in subtropical or tropical climate, winter is the right time for its growth.
12. Okra

Also known as “Lady Finger”, this slimy-sweet, warm weather vegetable is favorite of many Southerners and in other parts in the world. It’s true that no other vegetable can taste like okra! Many okra varieties start to produce pods in just 50 days, not only this– it’s flowers look beautiful too.
Also Read: How To Grow Okra In Pots
13. Mustard Green

Like other greens, mustard is one of the fast growing vegetables. It is easy to grow and prefers warm weather. You can use its tender leaves in salads, or use it like spinach. There are also many curry recipes that require mustard leaves.
1
1
文章
Mirella
2017年05月22日

Learn how to spinach in pots, it is one of the vegetables that you can grow in some shade and in any kind of space. Growing spinach in containers is easy too you can even grow it indoors on a windowsill.
USDA Zones— 3 – 11
Difficulty— Easy
Other Names— Spinacia oleracea (Scientific Name), Persian vegetable, palak, bōsī cài, 波斯菜, leafy greens
How to Grow Spinach in Pots
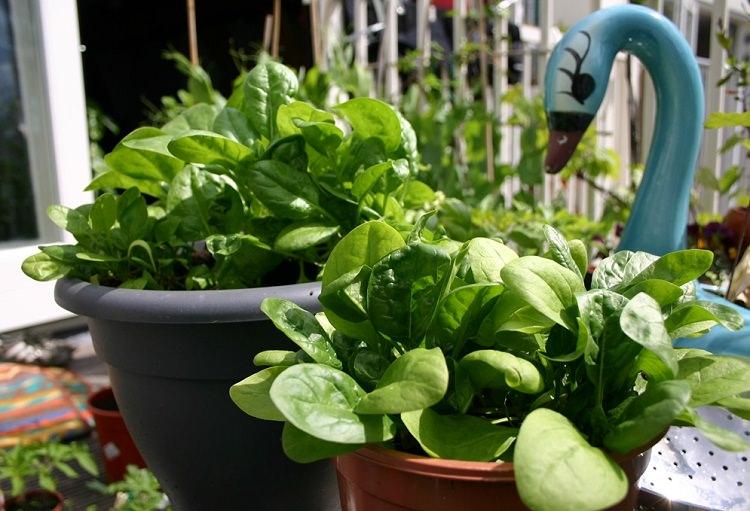
Growing Spinach in Pots from Seeds
Sow seeds 1/2 inches deep directly in containers or in a seed tray. Seedlings will germinate in 5-14 days depending on the variety and growing conditions. If you have sown seeds in a seed tray wait until 2-3 true leaves appear in each plant and then transplant them into the original pots carefully.
Choosing a pot
For growing spinach in pots, choose a pot that is least 6-8 inches deep. You don’t need a very deep pot rather use a wide pot. You can either use so many small pots and grow one plant in each or select large window boxes, wooden boxes or crates.
Spacing
Provide each spinach plant a space of 3 inches, if you want to pick large leaves give more space to each plant, 5 inches. If you want to harvest leaves at very young age, then this area can be reduced to 2 inches only. Divide the planter box into squares, and see how many plants will feel comfortable in it.
Requirements for Growing Spinach in ContainersPosition
If you are growing spinach in fall (autumn), keep the plant in a sunny spot (in mild climates) due to shorter days and less intensity of the sun. For spring and summer planting keep your potted plants in a location where it receives some shade, especially in the afternoon. In subtropical or tropical climate, place the containers in a spot that receives plenty of shade.
Soil
For growing spinach in containers, use quality potting mix rich in organic matter. The texture of soil must be crumbly and loamy. Avoid soil that clogs the drainage and remains waterlogged. Well-draining soil is most important factor for the optimum growth of spinach in containers. Soil pH must be neutral.
Watering
When growing spinach in containers avoid water stagnation because it will lead to the development of rot and various fungal diseases. Also, avoid wetting the foliage. Keep the soil moist but not soggy or wet. It is necessary to take care of good drainage in the pot.
Temperature
Spinach seeds germinate in temperatures as low as 40 F (4 C) and in high temperatures too. The best soil temperature for growing spinach falls in the range of 50-80 F (10-27 C). Many spinach cultivars can tolerate temperature down to 20 F (-6) and up to 90 F (32 C) easily. Once the temperature starts to soar high you may need to provide shade to your plants.
Growing Spinach Indoors

Growing spinach indoors on a windowsill is a great idea (as it doesn’t require a lot of sunlight) if you’re short of outdoor space. For this, buy a few 6 inches deep small pots and grow spinach in them. You can also grow herbs and annual flowers there.
Also Read: How to Make a Windowsill Herb Garden
Spinach Care
Growing spinach in pots doesn’t need special care. Regular watering, fertilizing and the right soil is the key to the great harvest.
Fertilizing
For growing healthy green spinach, you have to provide nitrogen. At the time of planting, you can mix time-based fertilizer or you can add a lot of compost or well-rotted manure, this will provide nutrients slowly. Feeding the plant with fish emulsion, compost or manure tea in the middle of the growth and so on is a nice organic way to promote the plants. If you have not done added time-based fertilizer, you can also feed the plant with balanced liquid fertilizer at regular intervals.
Mulching
Do mulching, even if you’re growing spinach in pots. Mulching plants with organic matter will help in retaining moisture.
Pests and Diseases
You don’t need to worry much about pests as you’re growing spinach in containers, in a small space and you can easily control them. However, keeping an eye on leaf-eating insects like slugs and caterpillars and other common garden pests like aphids will help you in eliminating them in time.
A Few Tips for Growing Spinach in Tropics
It is a cool season crop but growing spinach in tropics and subtropics is extremely easy, moreover, you can grow it successively as a bi-annual crop, except in hot summer months. You’ll need to provide it shade and enough water to keep the soil temperature cool and moist.
In warm weather, vegetables like lettuce and spinach begin to bolt early and start to set seeds. One of the most important thing you need to consider when growing spinach in tropics is to grow heat tolerant varieties (there are a lot of Asian varieties that are suitable for tropical climate) that grow slowly and do not bolt quickly. These varieties easily tolerate the heat and humidity.
Harvesting
The spinach plant will be ready for harvest 37-50 days after germination depending on the growing conditions and cultivar.
Harvesting can be done when the plant has formed at least 5-6 healthy leaves and they are at least 3-4 inches long. Pick outer leaves first and leave the new inner leaves so that they continue to grow or cut the whole plant off at the base with a knife or scissor, the plant will resprout again.
When the weather becomes humid and hot (in warm climates) the plant tends to form an erect stem, on which you can see some small yellow or green flowers developing. To coincide with the flowering and the subsequent production of flowers, the foliage of the plant thickens and changes in flavor (more bitter), which is called bolting so it is convenient to harvest the plant before it starts flowering for better taste.
USDA Zones— 3 – 11
Difficulty— Easy
Other Names— Spinacia oleracea (Scientific Name), Persian vegetable, palak, bōsī cài, 波斯菜, leafy greens
How to Grow Spinach in Pots

Growing Spinach in Pots from Seeds
Sow seeds 1/2 inches deep directly in containers or in a seed tray. Seedlings will germinate in 5-14 days depending on the variety and growing conditions. If you have sown seeds in a seed tray wait until 2-3 true leaves appear in each plant and then transplant them into the original pots carefully.
Choosing a pot
For growing spinach in pots, choose a pot that is least 6-8 inches deep. You don’t need a very deep pot rather use a wide pot. You can either use so many small pots and grow one plant in each or select large window boxes, wooden boxes or crates.
Spacing
Provide each spinach plant a space of 3 inches, if you want to pick large leaves give more space to each plant, 5 inches. If you want to harvest leaves at very young age, then this area can be reduced to 2 inches only. Divide the planter box into squares, and see how many plants will feel comfortable in it.
Requirements for Growing Spinach in ContainersPosition
If you are growing spinach in fall (autumn), keep the plant in a sunny spot (in mild climates) due to shorter days and less intensity of the sun. For spring and summer planting keep your potted plants in a location where it receives some shade, especially in the afternoon. In subtropical or tropical climate, place the containers in a spot that receives plenty of shade.
Soil
For growing spinach in containers, use quality potting mix rich in organic matter. The texture of soil must be crumbly and loamy. Avoid soil that clogs the drainage and remains waterlogged. Well-draining soil is most important factor for the optimum growth of spinach in containers. Soil pH must be neutral.
Watering
When growing spinach in containers avoid water stagnation because it will lead to the development of rot and various fungal diseases. Also, avoid wetting the foliage. Keep the soil moist but not soggy or wet. It is necessary to take care of good drainage in the pot.
Temperature
Spinach seeds germinate in temperatures as low as 40 F (4 C) and in high temperatures too. The best soil temperature for growing spinach falls in the range of 50-80 F (10-27 C). Many spinach cultivars can tolerate temperature down to 20 F (-6) and up to 90 F (32 C) easily. Once the temperature starts to soar high you may need to provide shade to your plants.
Growing Spinach Indoors

Growing spinach indoors on a windowsill is a great idea (as it doesn’t require a lot of sunlight) if you’re short of outdoor space. For this, buy a few 6 inches deep small pots and grow spinach in them. You can also grow herbs and annual flowers there.
Also Read: How to Make a Windowsill Herb Garden
Spinach Care
Growing spinach in pots doesn’t need special care. Regular watering, fertilizing and the right soil is the key to the great harvest.
Fertilizing
For growing healthy green spinach, you have to provide nitrogen. At the time of planting, you can mix time-based fertilizer or you can add a lot of compost or well-rotted manure, this will provide nutrients slowly. Feeding the plant with fish emulsion, compost or manure tea in the middle of the growth and so on is a nice organic way to promote the plants. If you have not done added time-based fertilizer, you can also feed the plant with balanced liquid fertilizer at regular intervals.
Mulching
Do mulching, even if you’re growing spinach in pots. Mulching plants with organic matter will help in retaining moisture.
Pests and Diseases
You don’t need to worry much about pests as you’re growing spinach in containers, in a small space and you can easily control them. However, keeping an eye on leaf-eating insects like slugs and caterpillars and other common garden pests like aphids will help you in eliminating them in time.
A Few Tips for Growing Spinach in Tropics
It is a cool season crop but growing spinach in tropics and subtropics is extremely easy, moreover, you can grow it successively as a bi-annual crop, except in hot summer months. You’ll need to provide it shade and enough water to keep the soil temperature cool and moist.
In warm weather, vegetables like lettuce and spinach begin to bolt early and start to set seeds. One of the most important thing you need to consider when growing spinach in tropics is to grow heat tolerant varieties (there are a lot of Asian varieties that are suitable for tropical climate) that grow slowly and do not bolt quickly. These varieties easily tolerate the heat and humidity.
Harvesting
The spinach plant will be ready for harvest 37-50 days after germination depending on the growing conditions and cultivar.
Harvesting can be done when the plant has formed at least 5-6 healthy leaves and they are at least 3-4 inches long. Pick outer leaves first and leave the new inner leaves so that they continue to grow or cut the whole plant off at the base with a knife or scissor, the plant will resprout again.
When the weather becomes humid and hot (in warm climates) the plant tends to form an erect stem, on which you can see some small yellow or green flowers developing. To coincide with the flowering and the subsequent production of flowers, the foliage of the plant thickens and changes in flavor (more bitter), which is called bolting so it is convenient to harvest the plant before it starts flowering for better taste.
0
0
文章
Andrea
2017年05月22日


I’ve always loved having edibles in my garden. It isn’t a new idea, cottage gardens in Europe traditionally combined growing vegetables for the family along with table flowers, due to the small spaces most people had in those times. And cottage gardening continues to be one of the most popular gardening styles, because of the charm and possibilities that those type of gardens hold. I suppose there is something satisfying about an ornamental edible garden that touches on our needs for survival, but acknowledges our need for beauty. And so it perseveres, but edible gardens for beauty lost their appeal in the new century. Fortunately, with the new awareness of “green” living, and the DIY movement in design, gardeners are looking at their spaces in new ways. We don’t plant any longer within a structure of “rules”. We plant, and design, for that matter, leaning towards trying things that are new, pushing the envelope a bit, and being unique.
Ornamental edible gardens are becoming hot… with small spaces common and the desire to grow at least some of our own food, we need to see this more!
Some easy guidelines for growing ornamental edibles?
Remember to balance edibles that have a short growing season with edibles that are evergreen, or at least last all season. You don’t want a big hole in your garden when the lettuce is down for the summer.
Edibles can include herbs, veggies, fruits and some flowers too!
Remember texture is very important in an edible garden.
Don’t forget that the color of fruit or veggies affect the design as well. Hot peppers look great in glossy green, but add a pop of red when they mature!
Remember the basics… shade plants in shade gardens, sun in sun gardens. That having been said, most edible gardens will do better with 6 hours or more of sun a day. Some edibles, such as lettuce and some herbs, prefer afternoon shade. Plan accordingly.
Watch for pests, and treat as necessary. However, integrating herbs into your edible design can actually help minimize some pest problems.
Some ideas for ornamental edible plants?
Red and green leaf lettuce.
Cabbages
Other greens, such as red swiss chard and celery.
Herbs
Artichokes
Edible flowers such as roses, day lilies, pansies, nasturtiums and honeysuckle
Fruit trees and bushes. Blueberry blushes are especially handsome plants.
Still not convinced an ornamental edible garden can be beautiful?

Cabbage and tulips!

A pretty lettuce border.

Herbs used in a formal design.

Cabbage in a boxwood border.

Herbs in a beautiful combination border by Rosalind Creasy.
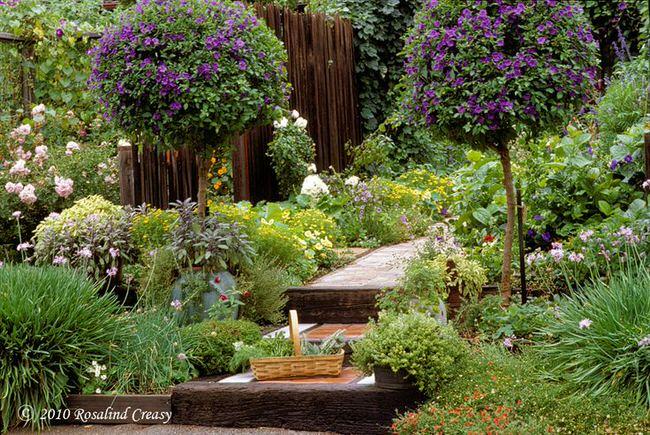
0
0
文章
Andrea
2017年05月22日


I used to grow vegetables in a larger separate garden here at TGG, but have since moved into a home with less space and open ground. I find that I do miss fresh herbs and veggies on my table, and so I have come up with some simple ways anyone can use to grow fresh vegetables even if their space is small, their soil is poor, or their motivation for lots of hard work is low! Did I mention? Growing your own vegetables is more nutritious for your family, and fattens up the checkbook too. Now is the perfect time of year to get started.
Grow Vegetables in Containers
You may be thinking, who has containers that big? Seriously, in today’s gardening world, you can find almost any veggie in a smaller container friendly version. Even summer squash and bush beans can easily be grown in as little as 12 inch pots.
Make sure you fertilize with every water with half strength liquid fertilizer, and make sure they don’t dry out in the container.
Don’t want your patio to look like a community container garden? No problem! Just add a couple decorative plants along the edge of each container, and let the vege be the foliage and texture.
Tuck Them Into Bed
Garden beds, that is! Again, compact varieties can be tucked right into those empty spots in the garden where the petunias were last year. Many types of herbs and vegetables can be quite ornamental as well. Try purple basil, Swiss chard, artichokes, red peppers, leaf lettuces and purple bush beans. Till up the spot in the garden bed you wish to plant with a spade, plant some seeds, cover with a little soil, water and fertilize. Many times your automatic watering system will make the job even easier. Make sure you keep your eye out for mildew disease and spray accordingly- vegetables planted in close quarters are more susceptible. You might find them so pretty you want to keep planting them every year, just for good looks!
Community Gardens
In many communities there are gardens set up exclusively for growing your own food, when you cannot grow at home. Some of these gardens are free, others charge a small fee. Depending on the size plot you are allotted, consider growing an extra row of food for food banks. It doesn’t take any longer to care for one more row of food, but can make a big difference in your community to a family who is struggling. One packet of seed costs $1.50. So check out community gardens, and make it a family project to care for your vegetables each evening! Find out more about community gardens at http://communitygarden.org/
Growing vegetables can be simple, and can include a separate vegetable garden to feed your whole family, or just one pot of lovingly tended tomatoes on the back porch. It’s can be as simple as you want to make it, but there is nothing like fresh vegetables and herbs on a summer table, so give at least one a try this season.
Are you growing vegetables this season? Comment and let us know what your garden includes!
0
0
文章
Andrea
2017年03月27日


Plant potatoes in your home garden and grow one of the most popular vegetables eaten today. Each American eats about 30 pounds of potatoes a year.
To begin growing potatoes, buy certified seed potatoes at nurseries or garden centers. The ones in supermarkets have usually been treated with growth retardants.
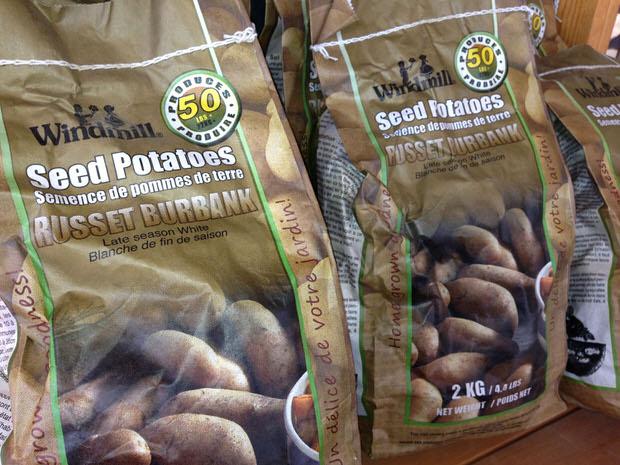

Ten to 14 days before planting, place seed potatoes in a warm area so they begin sprouting. Then, a day or two before planting, use a sharp knife to cut the sprouts, or eyes, into pieces. Each piece should contain 2 or 3 eyes. The bigger the piece, the more food the young potato plant will have to start growing.
About a week or two before the last frost date in your area you can plant the potatoes. Select a site that receives full sun.
Dig up the soil so that it’s loose and drains moisture well. Make rows about two and a half to three feet apart. Plant the potato pieces every 15 inches with the cut side down.
Potatoes are susceptible to frost so if they should be growing when frost conditions are imminent cover then with straw or a blanket or other light covering.
As the plants grow, mound additional soil around the plants every week or two. Continue to add soil or mulch or black plastic around the plants throughout the growing season. The potatoes should not be exposed to sunlight or they will obtain a green coloring which is toxic.
Water well throughout the summer. The most critical time is when the plants are flowering and for a short time afterward as that is the time when they are producing the young potatoes. Water in the morning so that the plants dry before nightfall. Potatoes are very susceptible to fungal diseases.
Fertilize every two to four weeks with a good root crop fertilizer.
Potatoes don’t have many pests but the most common one is the potato beetle which can be controlled with vigilance.
When foliage turns yellow and dies back, discontinue watering. The young potatoes will now mature. Harvest follows in about two weeks. But harvesting can occur at any stage of growth for small baby potatoes.
For winter storage let the potatoes dry either outside or in a dry, cool area for a few days.
1
0
文章
Andrea
2017年03月13日

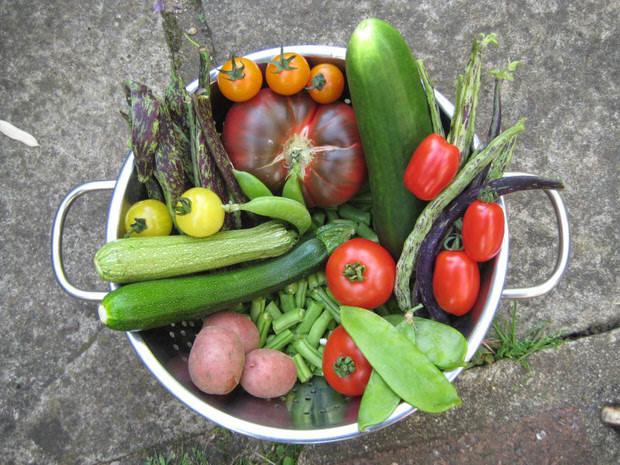
It’s that time of year again! Late summer and early fall is prime time for fresh vegetables in the garden. If you were lucky enough to grow some of the good stuff in your little spot this year, here are some easy tips to help you harvest your late summer vegetables at the right time for the best flavor, nutrition and texture.
Beans
Beans are a crop that should be harvested every other day as they continue to produce new beans. Pick when the beans are just under the maximum size for their type, and always pick late in the day, never in the morning. Picking beans when there is dew still present encourages mildew diseases.
Corn
Corn is ready when the silks start to turn brown but aren’t dried up yet. Kernels should be filled with a milky white juice if you cut one open. Corn starts to lose it’s sweetness as soon as it’s picked, so try to pick right before cooking.

Cucumbers
Harvest cucumbers as soon as they are the mature size for their type. If you allow them to grow large, they will become bitter. Harvest often to stimulate the plant to produce more, at least every couple of days.

Eggplant
Eggplant should be harvested when grown to mature size, and are smooth and shiny. If the seeds inside are dark, they were harvested late.
Herbs
Cut back most herbs often to keep them from blooming, and dry any herbs you cannot use right away. You can also freeze herbs as well. Follow this tutorial for instructions.
Melons
Cantaloupes: Pick when they are heavy and tan-colored with a slight yellowish cast. When ripe, a cantaloupe’s netting becomes harder and raised, and a crack forms around the stem where it touches the fruit. The melons should slip easily off the vines with a quick pull, but should not have already fallen off. The fruits get slightly softer at the bottom end and they smell fragrant.
Watermelons develop a dull green cast and have a light patch at the bottom that changes from green to light yellow when mature. Also, the leaf on the tendril nearest the fruit turns brown and withers. The skin should be hard–difficult to pierce with a fingernail. Some people say they can knock on a melon to detect a perfect hollow tone.
Pumpkins and Winter Squash
When the shell has developed it’s color and the rind cannot be pierced with a fingernail, they are ready. Cut 2-3 inch stem and allow to ripen in the field for 10 days. Store in a cool place.

Summer Squash
Summer squash is another one that most gardeners let grow too large…bigger is not always better! Larger fruits get seedy and watery, so pick when about 6 inches long. Round varieties can be picked at 3-4 inches.
Peppers
Peppers taste best when allowed to fully color before picking.
Tomatoes
Tomatoes are best when fully ripened to a deep color in the sun, but you can pick them early if you are having issues with cracking or cold nights. Do not ripen in the frig, on a counter is best.
Learning to harvest your vegetables at the right time helps them have better flavor and greater levels of nutrients. And let’s face it, it gives us bragging rights around the neighborhood as well!
1
0


