文章
Miss Chen
2022年06月07日

Cosmos are freely flowering annuals that are easy to grow by sprinkling some seeds in the garden after any danger of frost has passed. These quintessential cottage garden flowers reach full maturity in about two months. Cosmos can be slower to germinate, but it blooms quickly after that and continues to flower through the fall. The flowers sit atop long slender stems and form a cloud of attractive color all summer that attracts bees, butterflies, and birds to your garden. Cosmos flowers look a lot like daisies. They come in a broad range of colors, with more cultivars developed every year. The leaves grow opposite on stems and are deeply lobed, pinnate, or bipinnate and feathery-looking depending on the type. If you plan to have cosmos and live in the southern U.S., consider keeping them as potted plants since they tend to be invasive there.1
Common Name Cosmos, Mexican aster, cut-leaf cosmos
Botanical Name Cosmos sulphureus, Cosmos bipinnatus
Family Asteraceae
Plant Type Annual
Mature Size 1-6 ft. tall, 1-3 ft. wide
Sun Exposure Full
Soil Type Well-draining soil
Soil pH 6.0–6.8 (Acidic)
Bloom Time Summer through fall
Flower Color Golden yellow, white, pink, magenta, orange, yellow, red, chocolate
Hardiness Zones 2–11 (USDA)
Native Area northern South America, Central America, and southern North America
Cosmos Care
Cosmos grow easily in beds and make great cut flowers. When established, the plants can handle drought, poor soil conditions, and general neglect. They even self-sow. This is a truly low-maintenance plant.
While some pests, like aphids, flea beetles, and thrips feed on cosmos, they're easy to control with a strong spray of water or insecticidal soap. Aster yellows, bacterial wilt, and powdery mildew may also affect cosmos.2 Space plants accordingly to ensure good airflow to avoid diseases.
Taller varieties look good in the middle or rear of the border with goat's beard, coneflowers, and black-eyed Susans. Shorter varieties make very colorful, airy edging plants.
WARNING
Cosmos sulphureus is invasive in the southeast United States.1 Check with representatives from your local extension office to learn about any restrictions in your area.
Light
For the best flowering, choose a site that gets full sun. Cosmos will grow in partial shade but will have fewer blooms and be less vigorous when planted in shady areas. These plants will also thrive under uninterrupted full sun in the hottest conditions, much like their native habitat: the arid regions of Mexico and Central America.

Soil
Cosmos plants prefer a neutral soil with a pH of 6.0 to 8.0, although they will grow in poor soil where many flowering plants languish. They perform best in medium moisture, well-drained soils, but they will perform adequately in dry soils. Avoid planting in a rich soil; it can cause the plants to get too tall and flop over. You can prevent drooping by staking the plants or growing them close to other plants that can support them.
Water
Once established, you will not need to water your cosmos plants unless there is a prolonged drought. Where water is limited, these are the last plants that require irrigation.
Temperature and Humidity
Hot weather is ideal for cosmos, and they thrive in any humidity level.
Fertilizer
Fertilizing can negatively impact cosmos. Cosmos can handle poor soil. Too much fertilizer can often lead to strong plants with lots of foliage but few blooms. Unless your plants seem to be struggling, these plants do not need fertilizer.
Types of Cosmos
There are over 25 species of cosmos. However, three species are most commonly used in gardens and landscaping. Cosmos sulphureus is native to Mexico, Central America, and northern South America. With golden yellow blooms, it is very drought tolerant and loves hot weather. The plant grows 2 to 6 feet tall and comes in double and semi-double flowers. Some of the more recent cultivars tend to be shorter, more orangy, and with smaller flowers.
Cosmos bipinnatus are colorful daisy-like flowers that come in white, pinks, reds, and orange. At 1 to 4 feet in height, they are shorter than C. suphureus and are available in several popular hybrid series. Although they are not quite as heat tolerant as C. sulphureus, C. bipinnatus will grow well in just about any sunny space.
Chocolate cosmos are a separate species: Cosmos atrosanguineus. The dark red flowers smell like chocolate. This perennial is hardy to USDA zone 7, but it is higher maintenance than annual cosmos. Like dahlias, it grows from tubers.
Other common cosmos cultivars include:
'Bright Lights' mix: This variety boasts a blend of exuberant yellows, oranges, and reds.
'Cosmic Orange': This brilliant, semi-double orange flower has great drought tolerance.
'Peppermint Candy': An award-winning variety, the petals are splashed in magenta and white.
'Sea Shells' series: A pretty mix of pastel colors, it has distinctive tubular petals.
'Ladybird': This cosmos is a shorter variety that blooms in red, yellow, orange, or gold, averaging 18 to 24 inches tall. Light
For the best flowering, choose a site that gets full sun. Cosmos will grow in partial shade but will have fewer blooms and be less vigorous when planted in shady areas. These plants will also thrive under uninterrupted full sun in the hottest conditions, much like their native habitat: the arid regions of Mexico and Central America.
Soil
Cosmos plants prefer a neutral soil with a pH of 6.0 to 8.0, although they will grow in poor soil where many flowering plants languish. They perform best in medium moisture, well-drained soils, but they will perform adequately in dry soils. Avoid planting in a rich soil; it can cause the plants to get too tall and flop over. You can prevent drooping by staking the plants or growing them close to other plants that can support them.
Water
Once established, you will not need to water your cosmos plants unless there is a prolonged drought. Where water is limited, these are the last plants that require irrigation.
Temperature and Humidity
Hot weather is ideal for cosmos, and they thrive in any humidity level.
Fertilizer
Fertilizing can negatively impact cosmos. Cosmos can handle poor soil. Too much fertilizer can often lead to strong plants with lots of foliage but few blooms. Unless your plants seem to be struggling, these plants do not need fertilizer.
Types of Cosmos
There are over 25 species of cosmos. However, three species are most commonly used in gardens and landscaping. Cosmos sulphureus is native to Mexico, Central America, and northern South America. With golden yellow blooms, it is very drought tolerant and loves hot weather. The plant grows 2 to 6 feet tall and comes in double and semi-double flowers. Some of the more recent cultivars tend to be shorter, more orangy, and with smaller flowers.
Cosmos bipinnatus are colorful daisy-like flowers that come in white, pinks, reds, and orange. At 1 to 4 feet in height, they are shorter than C. suphureus and are available in several popular hybrid series. Although they are not quite as heat tolerant as C. sulphureus, C. bipinnatus will grow well in just about any sunny space.
Chocolate cosmos are a separate species: Cosmos atrosanguineus. The dark red flowers smell like chocolate. This perennial is hardy to USDA zone 7, but it is higher maintenance than annual cosmos. Like dahlias, it grows from tubers.
Other common cosmos cultivars include:
'Bright Lights' mix: This variety boasts a blend of exuberant yellows, oranges, and reds.
'Cosmic Orange': This brilliant, semi-double orange flower has great drought tolerance.
'Peppermint Candy': An award-winning variety, the petals are splashed in magenta and white.
'Sea Shells' series: A pretty mix of pastel colors, it has distinctive tubular petals.
'Ladybird': This cosmos is a shorter variety that blooms in red, yellow, orange, or gold, averaging 18 to 24 inches tall.
Pruning
The only real maintenance cosmos plants need is deadheading which will prolong the flowering season. If you fall behind, shear the plants by about one-third, when most flowers have faded. This kind of pruning produces a second flush of leaves and flowers. By the end of the season, you can cut off the plants at ground level or pull them up, roots and all. However, if you leave the plants in place, they may self-seed for the following growing season.
Propagating Cosmos
Cosmos plants readily self-seed. It's best to propagate these plants after the threat of frost is gone. Although sowing seeds is the best and easiest way to propagate this plant, you can also propagate via stem cutting. When you take stem trimmings, it stimulates more leaf and flower growth. Besides seed, stem cutting is the best way to propagate this plant. Here's how you do it:
You'll need sterile pruning shears or scissors and a pot of sterile, well-draining potting soil.
Fill a small 3-inch container with moistened potting soil. Using a pencil tip, push straight down in the soil about 1 to 2 inches deep, making a shallow hole.
Look for a cosmos shoot that has 3 to 5 leaf nodes on the stem. Cut under the last leaf node. At the last leaf node, carefully cut off the leaves, leaving the node intact for new growth.
Bury the cut tip of the stem in the pencil-made hole. Make sure that the last leaf node is above the soil line. Push down the soil around the stem, compacting the soil to keep the stem upright and in place.
Water generously and keep moist. You should notice new leaf growth within three weeks. If you do, you can gently pull the root ball out of the container, Transplant the root ball to its new location.
How to Grow Cosmos From Seeds
Start seeds indoors, four to six weeks before the last frost. Or if you can sow cosmos outdoors directly in the garden well after the threat of frost is gone. Cosmos grow very quickly but can be killed by a late frost, so don't rush it. They typically germinate in 7 to 21 days at 75 degrees Fahrenheit, followed by flowering in about 50 to 60 days.
Loosen the soil to a depth of 8 inches. Plant the seeds and cover them with 1/4 inch of fine soil. Seed packets usually recommend precise spacing, such as at 2-foot intervals, or you can scatter the seeds and let the plants support each other as they grow. You can always thin them out later, moving the extra plants to another part of the garden.
Potting and Repotting Cosmos
When growing cosmos in pots, make sure the container has bottom drainage holes. Cosmos can't handle overly wet, soggy soil. Plan on growing one cosmos plant per gallon of your container. If growing in pots, do not enrich the soil, it makes the plants grow tall, leggy, and droopy. Also, tall varieties will need staking in containers. At the very least, plan on using at least a heavy, 12-inch diameter container.
Overwintering
Cosmos is an annual. If left outside in frosty temperatures, they will die. However, at the end of the growing season, if you allow the dead flower heads to drop their seeds, cosmos seeds will go dormant and sprout when the soil warms up again in the spring.
If you have a potted cosmos in a container and want to keep your cosmos alive over the winter season, you will need a bright full sun growing lamp for at least 7 hours a day. You will need to snip off any blooms as they form. This plant's life cycle ends with flowering when it drops its seeds for the next growing season.
How to Get Cosmos to Bloom
Cosmos plants need full sun to bloom. Even the hint of shade, can restrict flowering. Also, to encourage more blooms, you need to deadhead the old blooms. For faster blooms, prune between the main stem and a leaf. The lower you cut in the stem, the longer it takes to grow more flowers.
Common Problems With Cosmos
Cosmos are easy to grow and maintain over the growing season. They are usually resistant to disease, and most insects; however, some pests can become a nuisance and affect their growth.3
Wilting or Leaf Discoloration
If your plant has ample water and is not wilting from a lack of hydration, there are two possible causes.
A plant that is wilting with leaf discoloration might have a common fusarium fungal infection.4 If you dig up the plant and notice a pink mass on the roots, then the plant likely has fusarium. The whole plant is beyond help, will die, and should be disposed of to stop the fungus spread.
If you dig up the roots and they look healthy, the plant may have a bacterial wilt infection.5 The bacteria cause the stems to wilt at their base. This plant will die and should be disposed of.
Yellowing Leaves and Leaf Drop
Powdery mildew mainly affects plants in the shade.6 Fungus spores fly through the air and attach to a host plant in a shady spot. It creates a powdery white coating on leaves and causes leaves to yellow and fall off. To prevent powdery mildew, provide your plants good circulation, bright light, and avoid getting water on the leaves. If your plant has fungus, use a horticultural fungicide according to the package instructions.
Flowers Distorting or Stunting in Growth
As a member of the aster family, cosmos can get aster yellows, a disease spread by leafhoppers (a tiny grasshopper-looking insect).7 The leaves will get yellow mottling on the leaves, and the flowers will appear distorted or stunted. Dispose of these plants since there is nothing you can do help them recover.

FAQ
Are cosmos easy to care for?
Cosmos are easy to care for, germinate, and will self-seed for the following growing season.
How fast do cosmos grow?
Cosmos generally take 7 to 21 days to germinate and will flower within 50 to 60 days of germination.
How long can cosmos live?
Cosmos is an annual that germinates, flowers, and drops seed in preparation for the following growing season. Cosmos will languish and eventually die after flowering.
What's the difference between a Cosmos sulphureus and Cosmos bipinnatus?
C. bipinnatus are bushy plants that grow to an average height of about 1 to 4 feet. The flowers come in red, pink, and white. The leaves are spaced apart along the stem and cut into thread-like segments. The outer rays of the flowers surround the yellow-colored, clustered central disc of florets. Meanwhile, C.sulphureus can grow to a height of 2 to 6 feet. The flowers come in shades of orange, yellow, and red. It has hairy stems, and the daisy-like flowers have yellow rays and discs.
Common Name Cosmos, Mexican aster, cut-leaf cosmos
Botanical Name Cosmos sulphureus, Cosmos bipinnatus
Family Asteraceae
Plant Type Annual
Mature Size 1-6 ft. tall, 1-3 ft. wide
Sun Exposure Full
Soil Type Well-draining soil
Soil pH 6.0–6.8 (Acidic)
Bloom Time Summer through fall
Flower Color Golden yellow, white, pink, magenta, orange, yellow, red, chocolate
Hardiness Zones 2–11 (USDA)
Native Area northern South America, Central America, and southern North America
Cosmos Care
Cosmos grow easily in beds and make great cut flowers. When established, the plants can handle drought, poor soil conditions, and general neglect. They even self-sow. This is a truly low-maintenance plant.
While some pests, like aphids, flea beetles, and thrips feed on cosmos, they're easy to control with a strong spray of water or insecticidal soap. Aster yellows, bacterial wilt, and powdery mildew may also affect cosmos.2 Space plants accordingly to ensure good airflow to avoid diseases.
Taller varieties look good in the middle or rear of the border with goat's beard, coneflowers, and black-eyed Susans. Shorter varieties make very colorful, airy edging plants.
WARNING
Cosmos sulphureus is invasive in the southeast United States.1 Check with representatives from your local extension office to learn about any restrictions in your area.
Light
For the best flowering, choose a site that gets full sun. Cosmos will grow in partial shade but will have fewer blooms and be less vigorous when planted in shady areas. These plants will also thrive under uninterrupted full sun in the hottest conditions, much like their native habitat: the arid regions of Mexico and Central America.

Soil
Cosmos plants prefer a neutral soil with a pH of 6.0 to 8.0, although they will grow in poor soil where many flowering plants languish. They perform best in medium moisture, well-drained soils, but they will perform adequately in dry soils. Avoid planting in a rich soil; it can cause the plants to get too tall and flop over. You can prevent drooping by staking the plants or growing them close to other plants that can support them.
Water
Once established, you will not need to water your cosmos plants unless there is a prolonged drought. Where water is limited, these are the last plants that require irrigation.
Temperature and Humidity
Hot weather is ideal for cosmos, and they thrive in any humidity level.
Fertilizer
Fertilizing can negatively impact cosmos. Cosmos can handle poor soil. Too much fertilizer can often lead to strong plants with lots of foliage but few blooms. Unless your plants seem to be struggling, these plants do not need fertilizer.
Types of Cosmos
There are over 25 species of cosmos. However, three species are most commonly used in gardens and landscaping. Cosmos sulphureus is native to Mexico, Central America, and northern South America. With golden yellow blooms, it is very drought tolerant and loves hot weather. The plant grows 2 to 6 feet tall and comes in double and semi-double flowers. Some of the more recent cultivars tend to be shorter, more orangy, and with smaller flowers.
Cosmos bipinnatus are colorful daisy-like flowers that come in white, pinks, reds, and orange. At 1 to 4 feet in height, they are shorter than C. suphureus and are available in several popular hybrid series. Although they are not quite as heat tolerant as C. sulphureus, C. bipinnatus will grow well in just about any sunny space.
Chocolate cosmos are a separate species: Cosmos atrosanguineus. The dark red flowers smell like chocolate. This perennial is hardy to USDA zone 7, but it is higher maintenance than annual cosmos. Like dahlias, it grows from tubers.
Other common cosmos cultivars include:
'Bright Lights' mix: This variety boasts a blend of exuberant yellows, oranges, and reds.
'Cosmic Orange': This brilliant, semi-double orange flower has great drought tolerance.
'Peppermint Candy': An award-winning variety, the petals are splashed in magenta and white.
'Sea Shells' series: A pretty mix of pastel colors, it has distinctive tubular petals.
'Ladybird': This cosmos is a shorter variety that blooms in red, yellow, orange, or gold, averaging 18 to 24 inches tall. Light
For the best flowering, choose a site that gets full sun. Cosmos will grow in partial shade but will have fewer blooms and be less vigorous when planted in shady areas. These plants will also thrive under uninterrupted full sun in the hottest conditions, much like their native habitat: the arid regions of Mexico and Central America.
Soil
Cosmos plants prefer a neutral soil with a pH of 6.0 to 8.0, although they will grow in poor soil where many flowering plants languish. They perform best in medium moisture, well-drained soils, but they will perform adequately in dry soils. Avoid planting in a rich soil; it can cause the plants to get too tall and flop over. You can prevent drooping by staking the plants or growing them close to other plants that can support them.
Water
Once established, you will not need to water your cosmos plants unless there is a prolonged drought. Where water is limited, these are the last plants that require irrigation.
Temperature and Humidity
Hot weather is ideal for cosmos, and they thrive in any humidity level.
Fertilizer
Fertilizing can negatively impact cosmos. Cosmos can handle poor soil. Too much fertilizer can often lead to strong plants with lots of foliage but few blooms. Unless your plants seem to be struggling, these plants do not need fertilizer.
Types of Cosmos
There are over 25 species of cosmos. However, three species are most commonly used in gardens and landscaping. Cosmos sulphureus is native to Mexico, Central America, and northern South America. With golden yellow blooms, it is very drought tolerant and loves hot weather. The plant grows 2 to 6 feet tall and comes in double and semi-double flowers. Some of the more recent cultivars tend to be shorter, more orangy, and with smaller flowers.
Cosmos bipinnatus are colorful daisy-like flowers that come in white, pinks, reds, and orange. At 1 to 4 feet in height, they are shorter than C. suphureus and are available in several popular hybrid series. Although they are not quite as heat tolerant as C. sulphureus, C. bipinnatus will grow well in just about any sunny space.
Chocolate cosmos are a separate species: Cosmos atrosanguineus. The dark red flowers smell like chocolate. This perennial is hardy to USDA zone 7, but it is higher maintenance than annual cosmos. Like dahlias, it grows from tubers.
Other common cosmos cultivars include:
'Bright Lights' mix: This variety boasts a blend of exuberant yellows, oranges, and reds.
'Cosmic Orange': This brilliant, semi-double orange flower has great drought tolerance.
'Peppermint Candy': An award-winning variety, the petals are splashed in magenta and white.
'Sea Shells' series: A pretty mix of pastel colors, it has distinctive tubular petals.
'Ladybird': This cosmos is a shorter variety that blooms in red, yellow, orange, or gold, averaging 18 to 24 inches tall.
Pruning
The only real maintenance cosmos plants need is deadheading which will prolong the flowering season. If you fall behind, shear the plants by about one-third, when most flowers have faded. This kind of pruning produces a second flush of leaves and flowers. By the end of the season, you can cut off the plants at ground level or pull them up, roots and all. However, if you leave the plants in place, they may self-seed for the following growing season.
Propagating Cosmos
Cosmos plants readily self-seed. It's best to propagate these plants after the threat of frost is gone. Although sowing seeds is the best and easiest way to propagate this plant, you can also propagate via stem cutting. When you take stem trimmings, it stimulates more leaf and flower growth. Besides seed, stem cutting is the best way to propagate this plant. Here's how you do it:
You'll need sterile pruning shears or scissors and a pot of sterile, well-draining potting soil.
Fill a small 3-inch container with moistened potting soil. Using a pencil tip, push straight down in the soil about 1 to 2 inches deep, making a shallow hole.
Look for a cosmos shoot that has 3 to 5 leaf nodes on the stem. Cut under the last leaf node. At the last leaf node, carefully cut off the leaves, leaving the node intact for new growth.
Bury the cut tip of the stem in the pencil-made hole. Make sure that the last leaf node is above the soil line. Push down the soil around the stem, compacting the soil to keep the stem upright and in place.
Water generously and keep moist. You should notice new leaf growth within three weeks. If you do, you can gently pull the root ball out of the container, Transplant the root ball to its new location.
How to Grow Cosmos From Seeds
Start seeds indoors, four to six weeks before the last frost. Or if you can sow cosmos outdoors directly in the garden well after the threat of frost is gone. Cosmos grow very quickly but can be killed by a late frost, so don't rush it. They typically germinate in 7 to 21 days at 75 degrees Fahrenheit, followed by flowering in about 50 to 60 days.
Loosen the soil to a depth of 8 inches. Plant the seeds and cover them with 1/4 inch of fine soil. Seed packets usually recommend precise spacing, such as at 2-foot intervals, or you can scatter the seeds and let the plants support each other as they grow. You can always thin them out later, moving the extra plants to another part of the garden.
Potting and Repotting Cosmos
When growing cosmos in pots, make sure the container has bottom drainage holes. Cosmos can't handle overly wet, soggy soil. Plan on growing one cosmos plant per gallon of your container. If growing in pots, do not enrich the soil, it makes the plants grow tall, leggy, and droopy. Also, tall varieties will need staking in containers. At the very least, plan on using at least a heavy, 12-inch diameter container.
Overwintering
Cosmos is an annual. If left outside in frosty temperatures, they will die. However, at the end of the growing season, if you allow the dead flower heads to drop their seeds, cosmos seeds will go dormant and sprout when the soil warms up again in the spring.
If you have a potted cosmos in a container and want to keep your cosmos alive over the winter season, you will need a bright full sun growing lamp for at least 7 hours a day. You will need to snip off any blooms as they form. This plant's life cycle ends with flowering when it drops its seeds for the next growing season.
How to Get Cosmos to Bloom
Cosmos plants need full sun to bloom. Even the hint of shade, can restrict flowering. Also, to encourage more blooms, you need to deadhead the old blooms. For faster blooms, prune between the main stem and a leaf. The lower you cut in the stem, the longer it takes to grow more flowers.
Common Problems With Cosmos
Cosmos are easy to grow and maintain over the growing season. They are usually resistant to disease, and most insects; however, some pests can become a nuisance and affect their growth.3
Wilting or Leaf Discoloration
If your plant has ample water and is not wilting from a lack of hydration, there are two possible causes.
A plant that is wilting with leaf discoloration might have a common fusarium fungal infection.4 If you dig up the plant and notice a pink mass on the roots, then the plant likely has fusarium. The whole plant is beyond help, will die, and should be disposed of to stop the fungus spread.
If you dig up the roots and they look healthy, the plant may have a bacterial wilt infection.5 The bacteria cause the stems to wilt at their base. This plant will die and should be disposed of.
Yellowing Leaves and Leaf Drop
Powdery mildew mainly affects plants in the shade.6 Fungus spores fly through the air and attach to a host plant in a shady spot. It creates a powdery white coating on leaves and causes leaves to yellow and fall off. To prevent powdery mildew, provide your plants good circulation, bright light, and avoid getting water on the leaves. If your plant has fungus, use a horticultural fungicide according to the package instructions.
Flowers Distorting or Stunting in Growth
As a member of the aster family, cosmos can get aster yellows, a disease spread by leafhoppers (a tiny grasshopper-looking insect).7 The leaves will get yellow mottling on the leaves, and the flowers will appear distorted or stunted. Dispose of these plants since there is nothing you can do help them recover.

FAQ
Are cosmos easy to care for?
Cosmos are easy to care for, germinate, and will self-seed for the following growing season.
How fast do cosmos grow?
Cosmos generally take 7 to 21 days to germinate and will flower within 50 to 60 days of germination.
How long can cosmos live?
Cosmos is an annual that germinates, flowers, and drops seed in preparation for the following growing season. Cosmos will languish and eventually die after flowering.
What's the difference between a Cosmos sulphureus and Cosmos bipinnatus?
C. bipinnatus are bushy plants that grow to an average height of about 1 to 4 feet. The flowers come in red, pink, and white. The leaves are spaced apart along the stem and cut into thread-like segments. The outer rays of the flowers surround the yellow-colored, clustered central disc of florets. Meanwhile, C.sulphureus can grow to a height of 2 to 6 feet. The flowers come in shades of orange, yellow, and red. It has hairy stems, and the daisy-like flowers have yellow rays and discs.
0
0
文章
Miss Chen
2021年05月12日

Flower Pots - Terra CottaFlower pots have had various uses over time: moving plants to new locations — sometimes great distances, starting seeds, patio gardening, cultivation of indoor plants, and often for year-round growth in very cold climates, which usually have a short growing season. During the 18th century Josiah Wedgwood manufactured flower pots that were as gorgeous as his China dinnerware; they were often chosen as table centerpieces.
Flower pots were historically made from terra cotta; coarse, porous clay fired in a kiln and used mainly for vases, roofing and architectural purposes. Known and made use of from as early as 3,000 B.C., terra cotta died out when the Roman Empire collapsed; it was revived in Italy and Germany in the 1400’s and remains popular to this day. Clay pots are commonly used for both house plants and outdoor plants; the unglazed clay allows air and moisture to penetrate the pot; they also act as a wick to take excess moisture from the soil, possibly preventing root rot and improving plant health care. They are an excellent choice for Roses, African Violets, Succulent plants, tropical plants (including Palm Plants), and there are even special terra cotta flower pots made for Orchid care.
Flower Pots - Metal Kit
Alternative Flower Pots
Presently we have commercial flower pots made of many materials such as plastic, wood, stone, and biodegradable materials. Recycling plastic food containers or tin cans by pounding drainage holes in the bottom with a hammer and nail also gives us flower pots.
Flower Pots - Terra Cotta Pot in a Wrought Iron Tricycle
During difficult financial periods we have often used tin cans for flower pots; you can decorate them by painting or gluing on tiny objects or just wrap with foil or pretty paper and tie a bow – voila! – beautiful and unique! Other ideas for flower pots, planters or just as garden ornaments include baskets, pails, coffee/tea pots, tea kettles, tubs or mailboxes – just stretch your imagination and use whatever fits in with your indoor, yard, patio or garden design.
Flower Pots - Hanging
Hanging planters are great for Spider Plants and similar types of houseplants, but they need to be placed where heads won’t be bumped; hanging them on fence panels adds a nice touch and they can usually be seen before you crack your skull! Hanging planters are also a good idea for poisonous plants because they can be kept out of reach of children and pets.
Flower pots usually have a hole in the bottom for drainage; sometimes there is a saucer placed beneath the pot to catch the water – often plants can use this water by taking it up through the root system. There are plants however, that should not be saturated and many that should not have water remain in the saucer even if they can be saturated – know the watering instructions for each plant you plan to grow.
Flower Pots - Self Watering Planter
More recently flower pots have been designed with an automatic watering system and their own reservoir for water storage, this innovation is particularly convenient if you must be away from home. Some Indoor plant stands, like the one in Figure 6, hold an assortment of flower pots and are self watering.
Container Gardening
Container gardening is as old as Rome, with the boxes also made of terra cotta. In the first century B.C most Romans cultivated their small cottage gardens to provide food, medicinal herbs, and flowers.
Flower Pots - French Style Window Box
Peasants had little if any gardening space and began to grow the plants they needed in window boxes. Eventually they were so popular that the rich upper classes began to develop balcony and rooftop gardens – elaborate with vines, shrubs, flowers and even fishponds.
The window boxes kept their popularity and spread to Europe and later to America. English cottage gardens boasted wire hay baskets as a new form to grow plants in at the windows; France often used wrought iron window boxes like the one pictured in Figure 7.
Flower Pots - Planter Box
Large planter boxes for vegetable gardening can be built at home, such as the one in Figure 8, constructed for peppers and tomatoes. Cyclamen also thrive in planters like these.
Original garden ideas can be checked for appropriate lighting, watering, fertilizing and aesthetic appeal at your local garden center. If you need fresh opinions or just suggestions also look through books at the library or search online. If you don’t have a gardeners’ supply center nearby, Amazon.com is an excellent source of books for garden ideas but also offers: tools, soil, fertilizers, herbicide/pesticide sprays, gloves, flower pots, fence panels, planter boxes, garden ornaments, plant pots, and window boxes along with the seeds or growing plants – and almost anything else you could need.
If you love to garden and are creative, I’m sure you’ll find things to put your foliage and flowering plants in that may be unusual but very useful and attractive in a specific setting.
0
0
文章
莹723
2021年03月01日

Though it’s still too cold to direct sow seeds outside, there are plenty that you can start off inside in February. A propagator is ideal if you have one, though a warm, bright windowsill is fine, too.
By sowing seeds early on in the year, you can be enjoying beautiful blooms and tasty crops for a larger part of the year. The season of interest can then be extended by carrying out repeated sowings from March onwards.

Once your seeds have grown into young plants and are ready to go out outside see our guide to the best cold frames to help you harden your plants before they go in the ground.
1.Cosmos
Cosmos are easy flowers to grow and they look great in borders or meadows. Go for annuals like Cosmos bipinnatus or C. sulphureus, and choose single-flowered varieties like ‘Fizzy Pink’ to please pollinators. The seeds need light to germinate, so sow on top of seed compost in a tray, then prick out when large enough to handle.

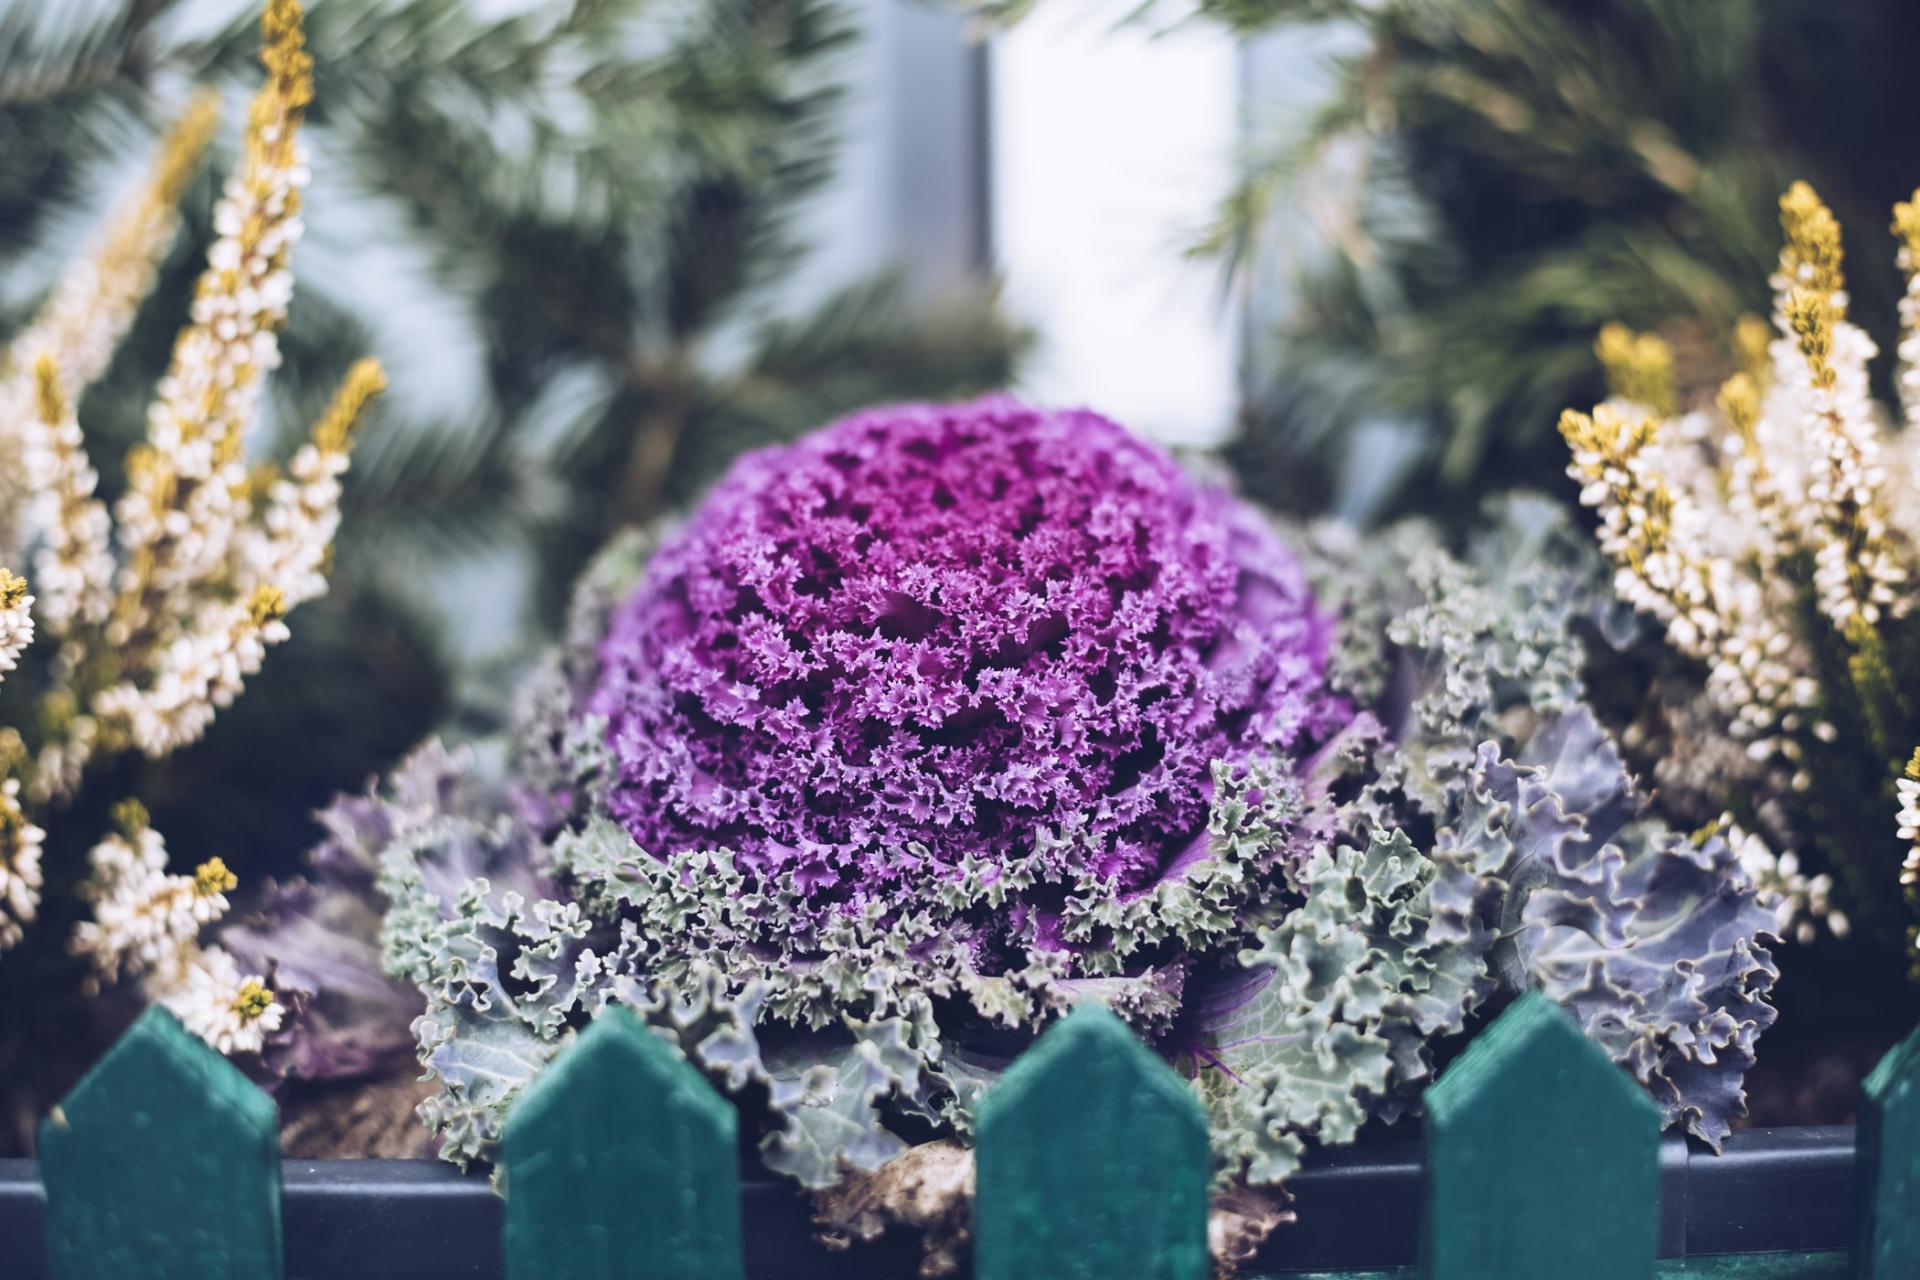
2.Kale
Red kale is very hardy, but kale seeds need to be started off indoors during winter. Sow them indoors in modules or 7cm pots, with 2-3 seeds per module, then thin to leave the healthiest seedling.
3.Sweet peas
Pink sweet pea ‘First Flame’Sweet peas provide a heady summer scent and growing them from seed couldn’t be easier. Biodegradable pots or cardboard tubes are best, as they allow the sweet peas to be planted out in their containers. Sow individually then place on a sunny windowsill, in a greenhouse, or in a heated propagator.

4.Tomatoes
Sowing tomato seeds in a tray in a propagator or on a sunny windowsill, tomatoes should germinate within two weeks. Sow tomato seeds in pots of seed compost, or in trays, and place in a heated propagator or on a warm windowsill, keeping the compost moist.

5.Salvias
Vivid blue Salvia patens, like this Salvia patens, are great for providing structure and height in the garden, and can be grown in borders or containers. Sow the seeds under cover in February, on top of seed compost. Cover the seeds with a fine layer of compost, then grow in a light, warm spot, keeping the compost moist. Other salvias you could sow in February include Salvia splendens and Salvia farinacea.

By sowing seeds early on in the year, you can be enjoying beautiful blooms and tasty crops for a larger part of the year. The season of interest can then be extended by carrying out repeated sowings from March onwards.

Once your seeds have grown into young plants and are ready to go out outside see our guide to the best cold frames to help you harden your plants before they go in the ground.
1.Cosmos
Cosmos are easy flowers to grow and they look great in borders or meadows. Go for annuals like Cosmos bipinnatus or C. sulphureus, and choose single-flowered varieties like ‘Fizzy Pink’ to please pollinators. The seeds need light to germinate, so sow on top of seed compost in a tray, then prick out when large enough to handle.

2.Kale
Red kale is very hardy, but kale seeds need to be started off indoors during winter. Sow them indoors in modules or 7cm pots, with 2-3 seeds per module, then thin to leave the healthiest seedling.

3.Sweet peas
Pink sweet pea ‘First Flame’Sweet peas provide a heady summer scent and growing them from seed couldn’t be easier. Biodegradable pots or cardboard tubes are best, as they allow the sweet peas to be planted out in their containers. Sow individually then place on a sunny windowsill, in a greenhouse, or in a heated propagator.

4.Tomatoes
Sowing tomato seeds in a tray in a propagator or on a sunny windowsill, tomatoes should germinate within two weeks. Sow tomato seeds in pots of seed compost, or in trays, and place in a heated propagator or on a warm windowsill, keeping the compost moist.

5.Salvias
Vivid blue Salvia patens, like this Salvia patens, are great for providing structure and height in the garden, and can be grown in borders or containers. Sow the seeds under cover in February, on top of seed compost. Cover the seeds with a fine layer of compost, then grow in a light, warm spot, keeping the compost moist. Other salvias you could sow in February include Salvia splendens and Salvia farinacea.

0
0
文章
莹723
2021年02月17日

Sowing seeds is something that some gardeners avoid, but it’s easy when you know how. You just need to give seeds the right conditions, and they’ll germinate.
Germination is triggered by the correct combination of light levels, temperature and moisture – get these right, and the seed will start to grow.
We show you when and where to sow all kinds of seeds, indoors and outdoors, in this sowing guide.

1.Hardy annuals
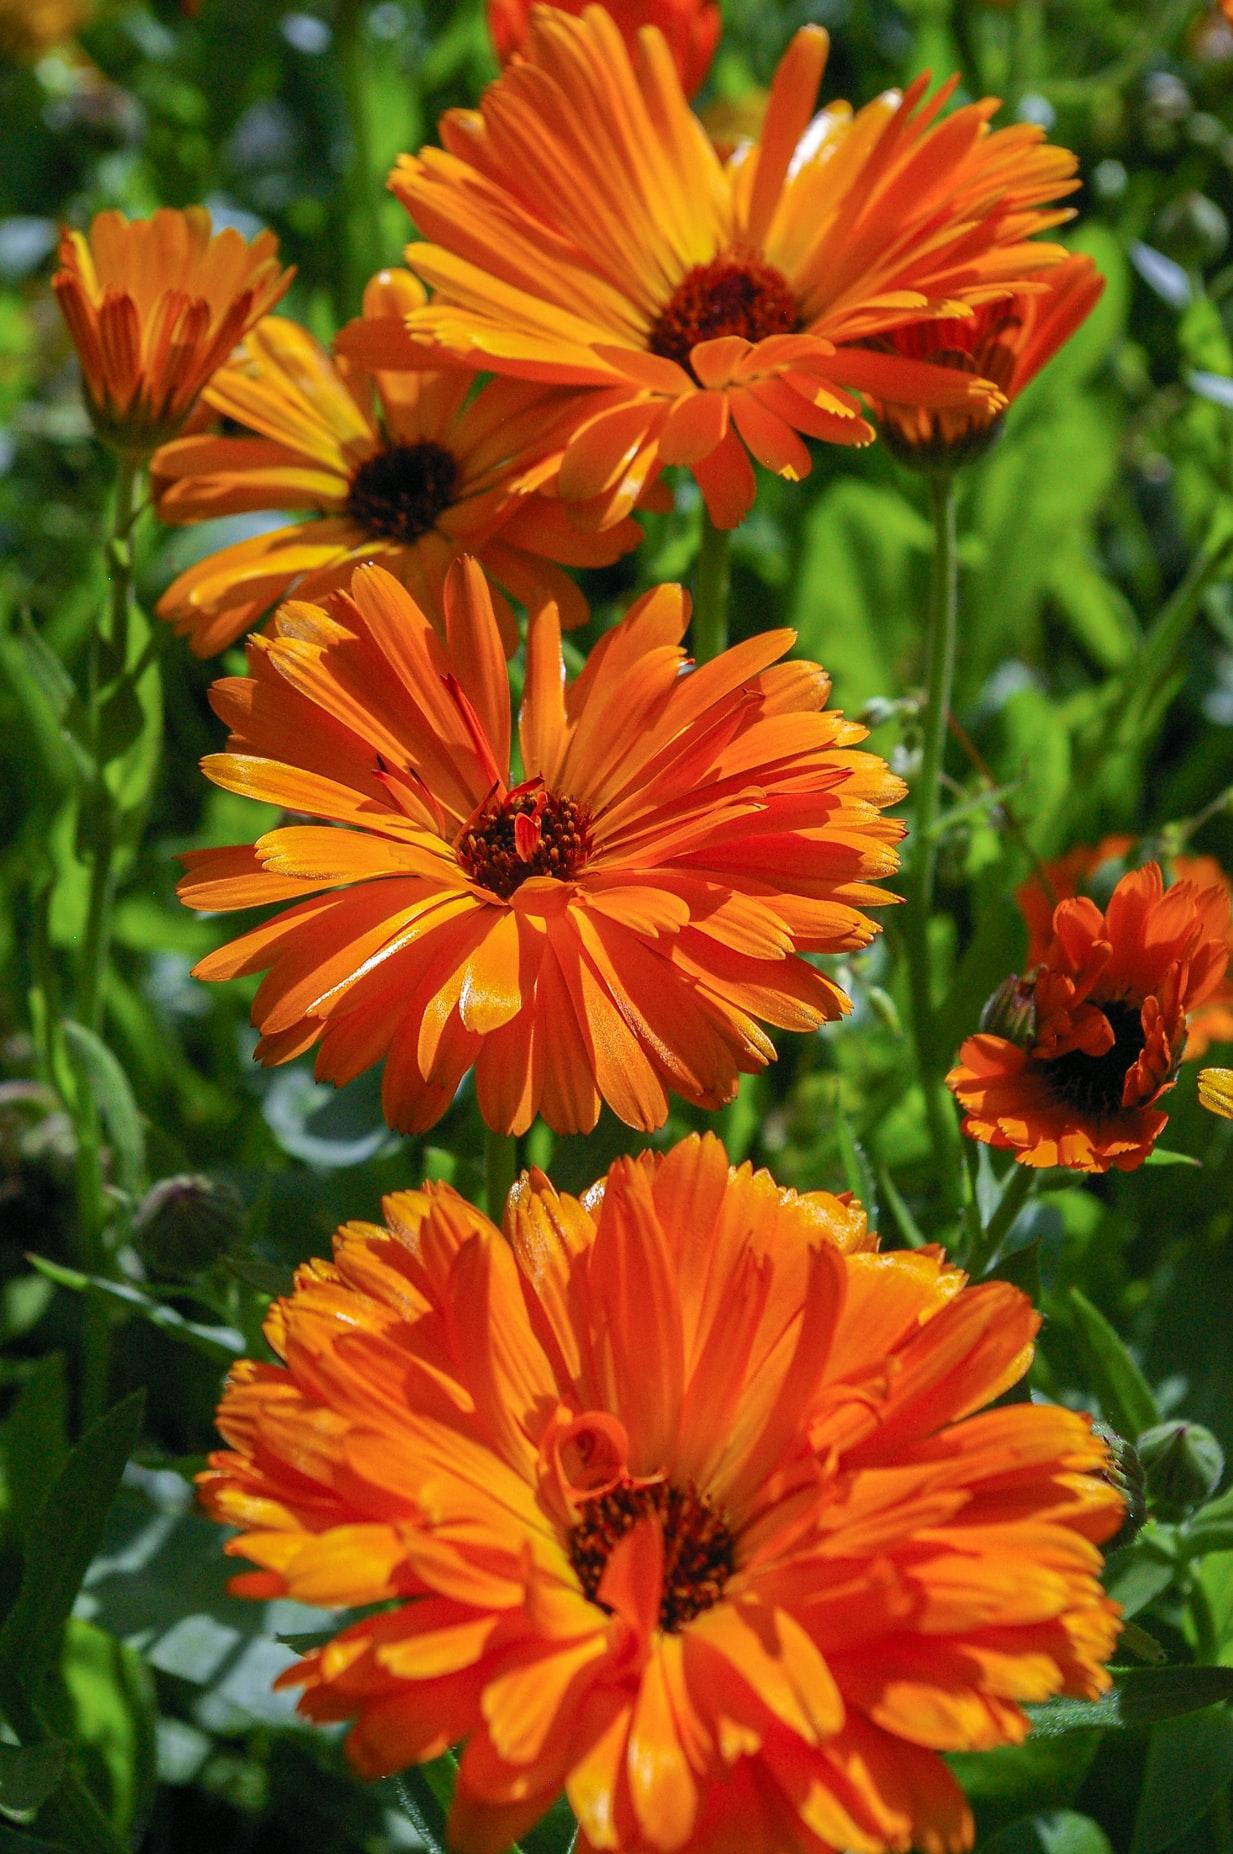
Including: calendula, cornflower, nasturtium, poppy, sunflower, sweet pea.
Sow under glass: Feb-Mar (soil temp 8-12°C).
Sow outdoors: Mar-April (soil temp 6-12°C).
2.Hardy salads and veg
Including: beetroot, broad bean, chard, lettuce, pea, spring onion, radish, rocket.
Sow under glass: Feb-April (soil temp 10-18°C).
Sow outdoors: March-Sep (soil temp 8-18°C).

3.Half-hardy flowers
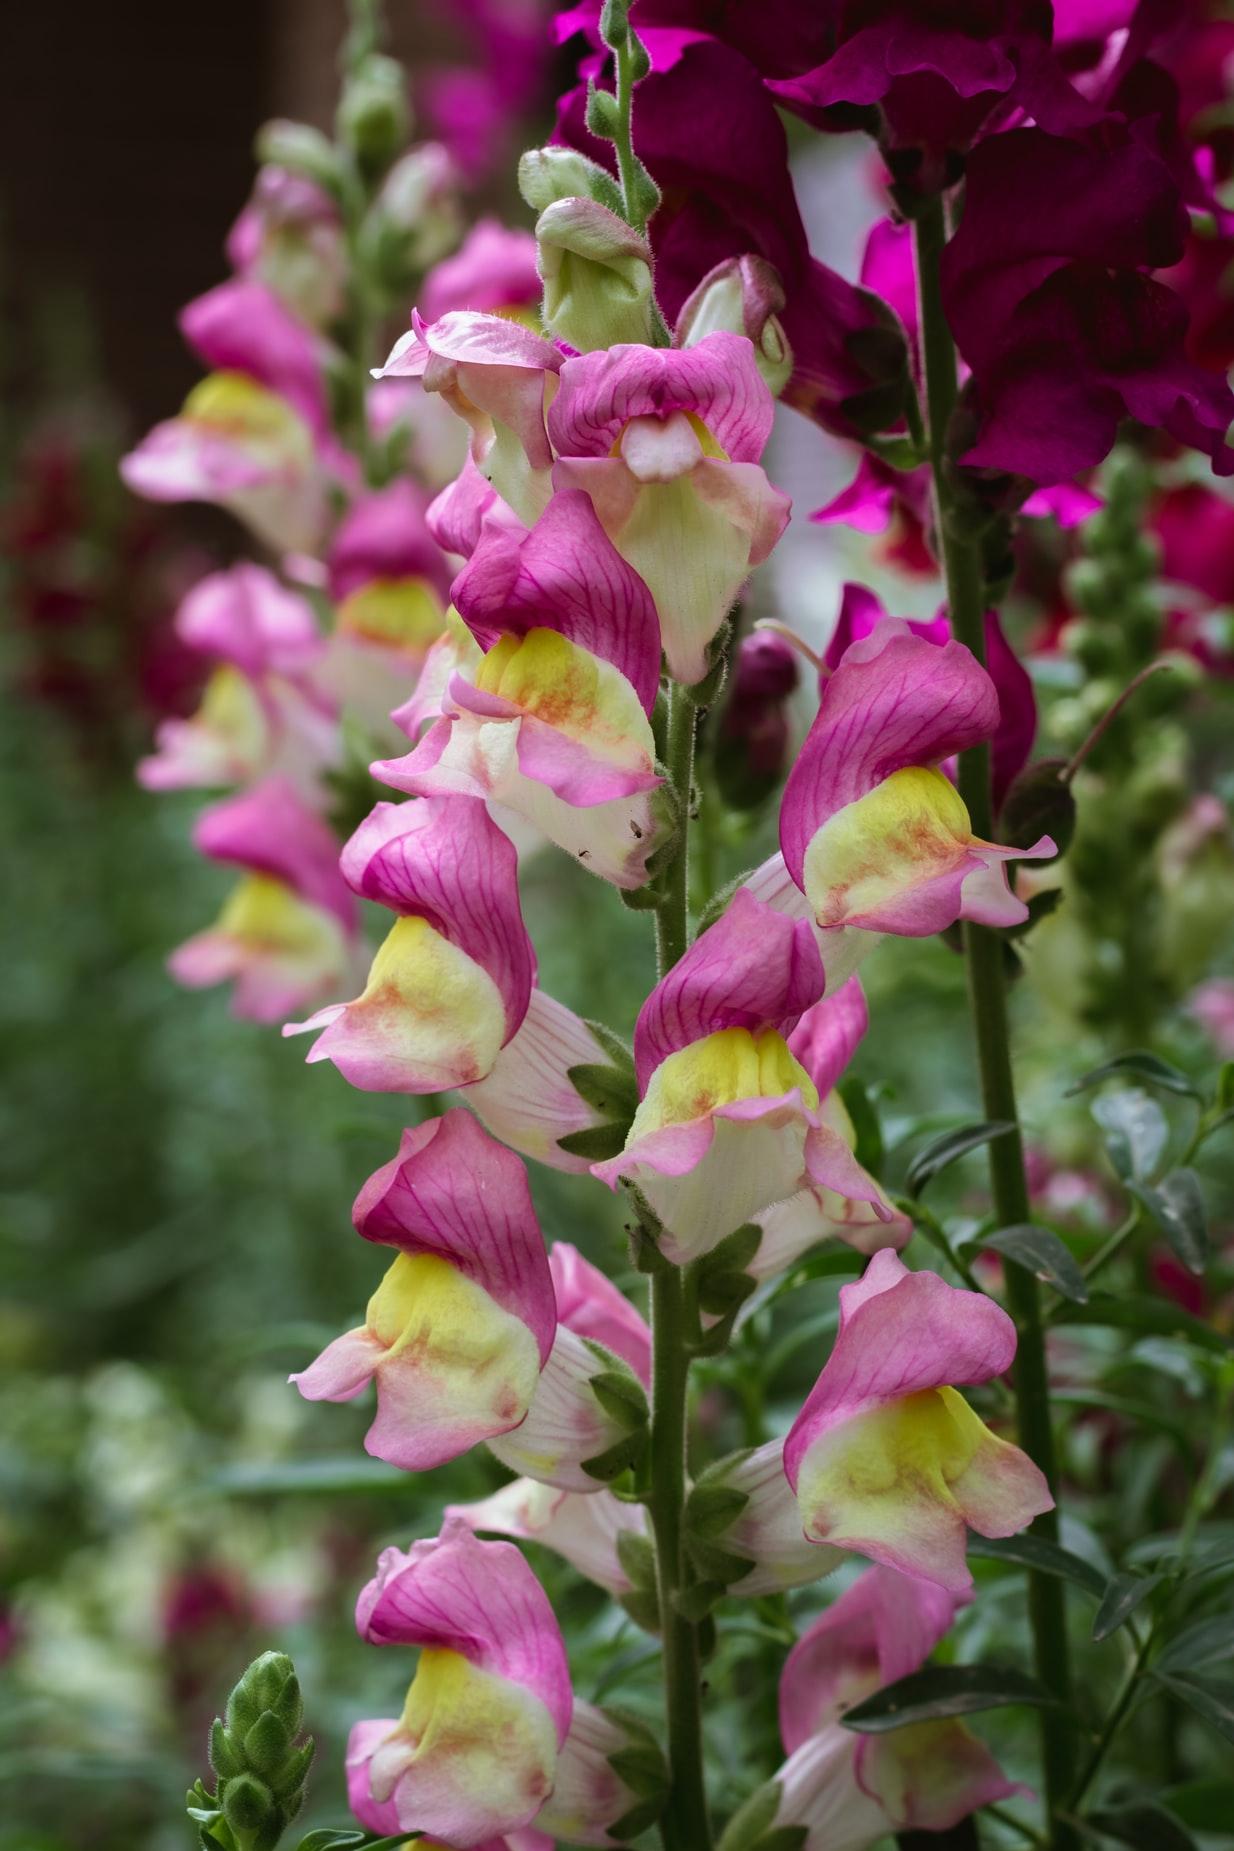
Including: cosmos, lobelia, morning glory, nicotiana, snapdragon.
Sow under glass: Mar (soil temp 16-24°C) – seeds must be sown indoors.
4.Tender perennials
Including: begonias, dahlia, fuchsia, heliotrope, pelargonium, salvia.
Sow under glass: Jan-Feb (soil temp 18-24°C) – must be sown under cover.

5.Frost-tender veg
Including: aubergine, chillies, courgette, French/runner bean, pepper, pumpkin, sweetcorn, tomato.
Sow under glass: April (soil temp 16-28°C).
Sow outdoors: May-June (soil temp at least 10°C).

6.Hardy perennials
Including: aquilegia, delphinium, echinacea, hellebore, lupin, rudbeckia, verbascum.
Sow under glass: Jan-Feb (soil temp 18-21°C).
Sow outdoors: April-June (soil temp at least 10°C).

7.Polyanthus
Including: campanula, forget-me-not, foxglove, polyanthus, sweet william, wallflower, winter pansy.
Sow under glass: June (soil temp 12-18°C).
Sow outdoors: April-June (soil temp 10-18°C).

8.Trees and shrubs
Including: abutilon, acer, bonsai, cotoneaster, cytisus (broom), hawthorn, sorbus.
Sow under glass: Sep-Mar (soil temp 4-10°C).
Sow outdoors: Sep-Mar (soil temp 0-12°C).

Germination is triggered by the correct combination of light levels, temperature and moisture – get these right, and the seed will start to grow.
We show you when and where to sow all kinds of seeds, indoors and outdoors, in this sowing guide.

1.Hardy annuals
Including: calendula, cornflower, nasturtium, poppy, sunflower, sweet pea.
Sow under glass: Feb-Mar (soil temp 8-12°C).
Sow outdoors: Mar-April (soil temp 6-12°C).

2.Hardy salads and veg
Including: beetroot, broad bean, chard, lettuce, pea, spring onion, radish, rocket.
Sow under glass: Feb-April (soil temp 10-18°C).
Sow outdoors: March-Sep (soil temp 8-18°C).

3.Half-hardy flowers
Including: cosmos, lobelia, morning glory, nicotiana, snapdragon.
Sow under glass: Mar (soil temp 16-24°C) – seeds must be sown indoors.

4.Tender perennials
Including: begonias, dahlia, fuchsia, heliotrope, pelargonium, salvia.
Sow under glass: Jan-Feb (soil temp 18-24°C) – must be sown under cover.

5.Frost-tender veg
Including: aubergine, chillies, courgette, French/runner bean, pepper, pumpkin, sweetcorn, tomato.
Sow under glass: April (soil temp 16-28°C).
Sow outdoors: May-June (soil temp at least 10°C).

6.Hardy perennials
Including: aquilegia, delphinium, echinacea, hellebore, lupin, rudbeckia, verbascum.
Sow under glass: Jan-Feb (soil temp 18-21°C).
Sow outdoors: April-June (soil temp at least 10°C).

7.Polyanthus
Including: campanula, forget-me-not, foxglove, polyanthus, sweet william, wallflower, winter pansy.
Sow under glass: June (soil temp 12-18°C).
Sow outdoors: April-June (soil temp 10-18°C).

8.Trees and shrubs
Including: abutilon, acer, bonsai, cotoneaster, cytisus (broom), hawthorn, sorbus.
Sow under glass: Sep-Mar (soil temp 4-10°C).
Sow outdoors: Sep-Mar (soil temp 0-12°C).

0
0
文章
莹723
2021年01月18日

Sowing seeds is a economical way to enjoy a supply of veg and flowers for many months of the year.
Different seeds need sowing at different times of year, either inside or outside, and some can be sowed successionally over several months to avoid gluts and ensure continuous harvests.
Give your seeds the right amount of heat, light and moisture, and they will germinate successfully. But there are some important rules to remember, including include good hygiene, using fresh seed and compost and good soil preparation.
Here’s our month-by-month guide to sowing seeds.
1.January
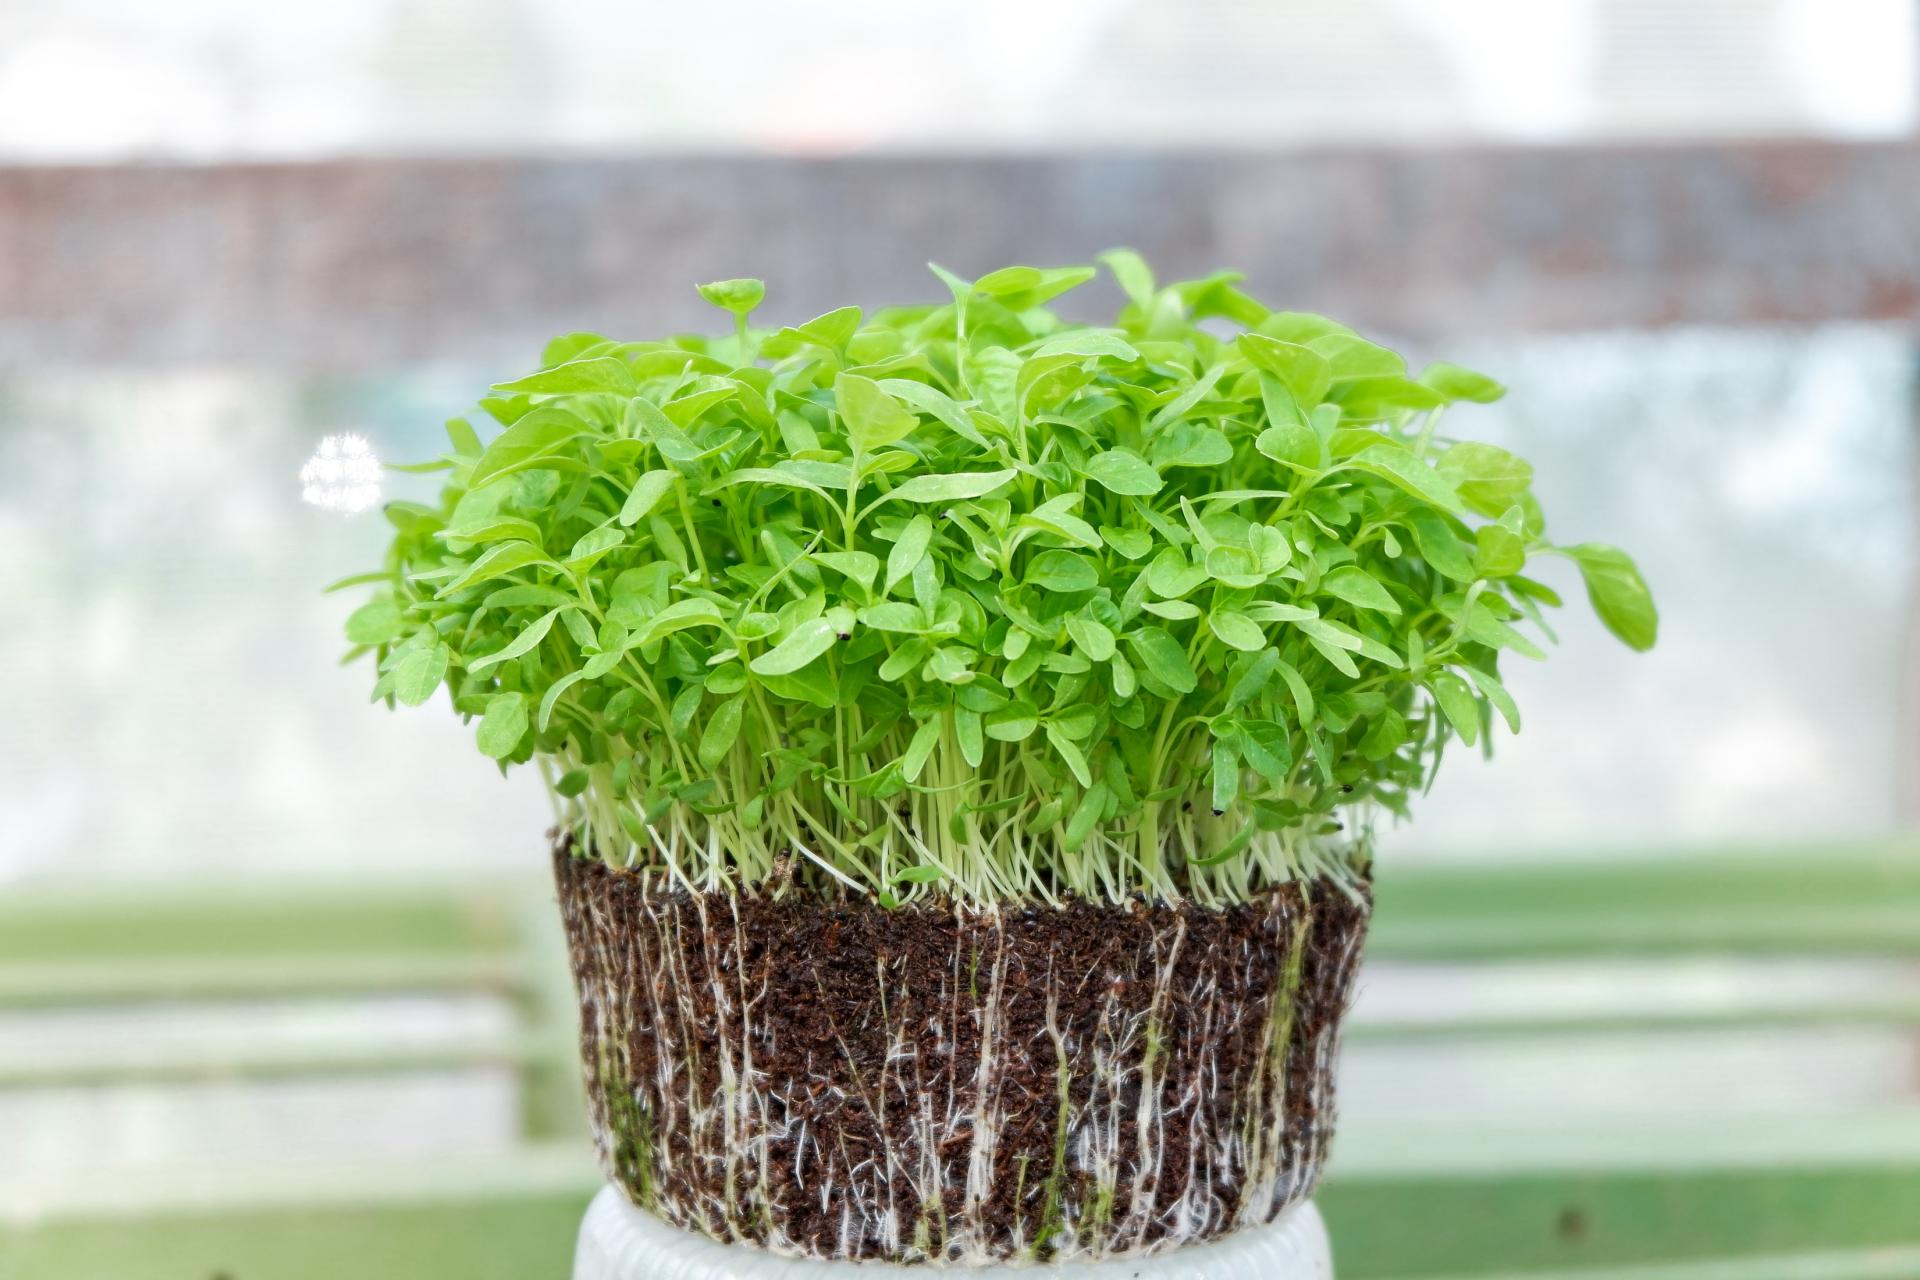
January is a good time to order seeds for the year ahead. If your green fingers are itching and you have a polytunnel, greenhouse or a heated propagator, you could start sowing tender crops, such as chillies, that need a long growing season. You could also sow garlic outside. Also sow sweet peas, plus microgreens on a windowsill.
Sow now
Veg: Microgreens, chillies, aubergines and peppers plus tomatoes under cover; garlic outside
Flowers: Sweet peas, under cover
2.February
You can begin or continue to sow tender crops such as tomatoes, chillies, aubergines and peppers, plus some hardy crops and hardy annuals such as sweet peas. You could also get a head start on peas, sown under cover in guttering. If you’re super keen you could have a go at sowing perennials. A propagator is ideal if you have one, though a warm, bright windowsill is fine, too. You can also sow garlic.
Sow now
Veg: Spinach, peas and broad beans (under cover), plus chillies, tomatoes, cucumbers and aubergines, under cover. Plus garlic outside.
Flowers: sweet peas and perennials
3.March
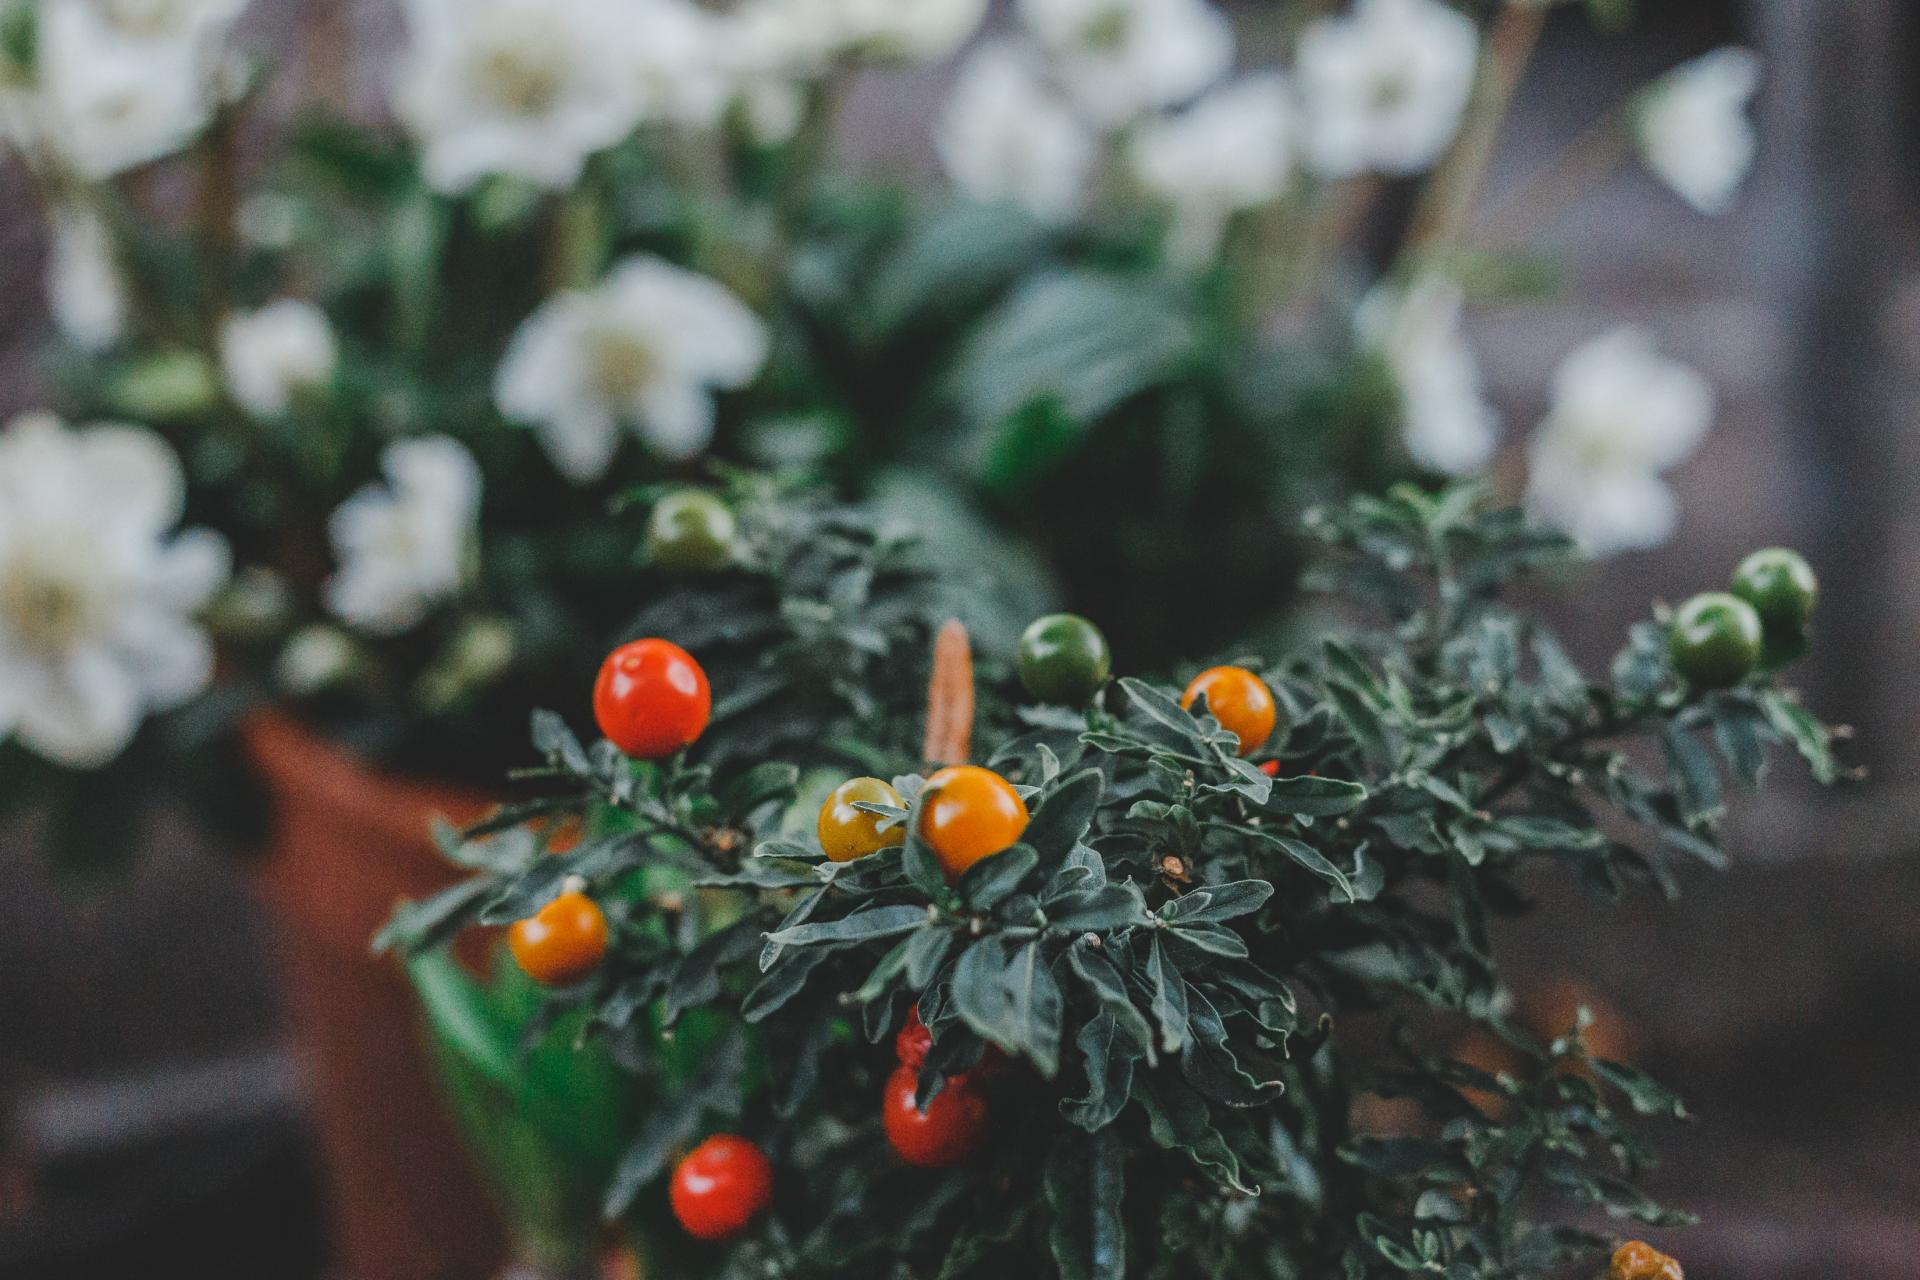
As the days lengthen and become warmer, you can begin sowing hardy annual flowers and crops outside. If the weather is still cold, warm the soil with polythene before sowing and protect seedlings with cloches or horticultural fleece. You can also start sowing half-hardy annuals and continue to sow tomatoes, chillies and aubergines under glass. Towards the end of the month you can plant out first early seed potatoes.
Sow now
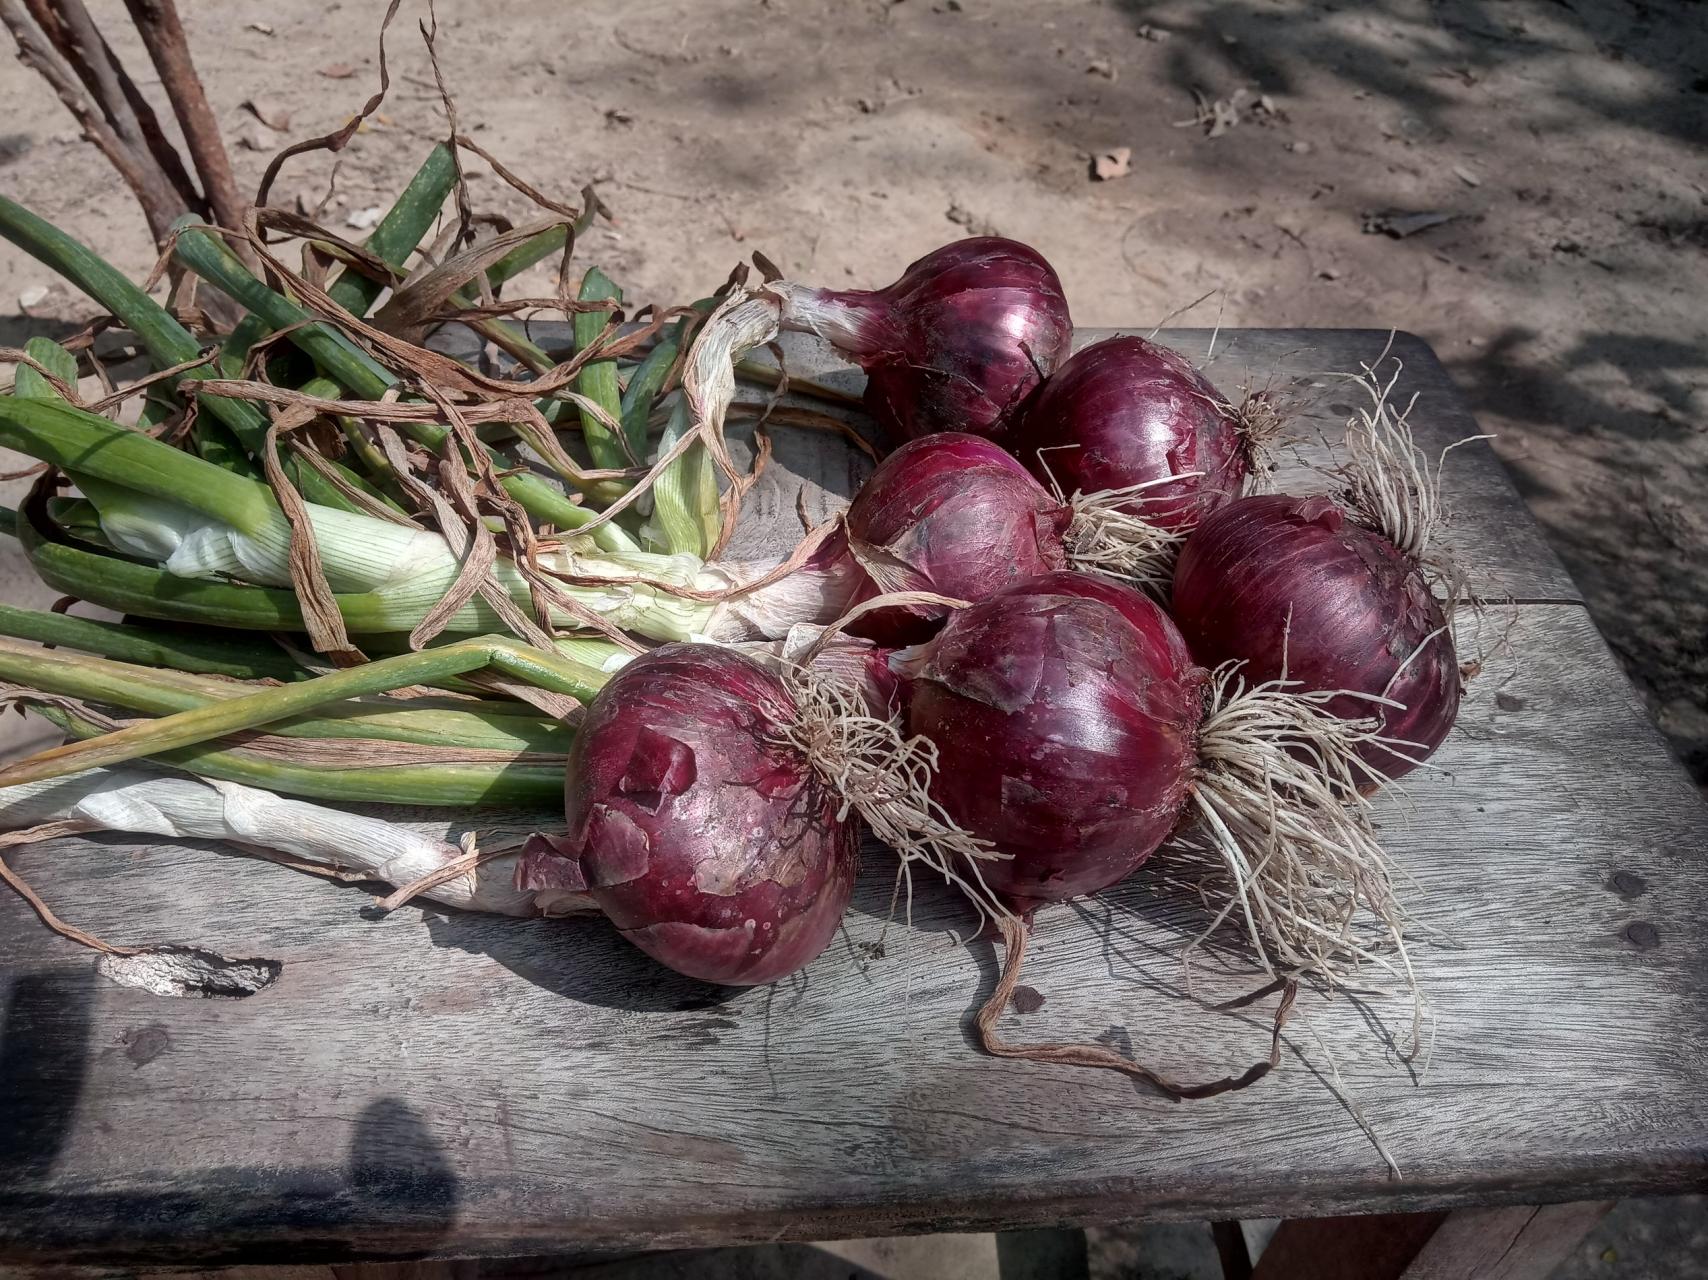
Veg: Aubergines, chillies and tomatoes (under cover), broad beans, peas, beetroot, Swiss chard, radish, kale, spinach, spring onions, first early potatoes (outdoors), plus shallot and onion sets and salad leaves (protect under fleece or a cloche)
Flowers: Cosmos, nicotiana, cleome, nasturtium, cornflowers, marigold (Calendula officinalis), clarkia, cerinthe, morning glory and more

4.April
Seed sowing begins in earnest in April, now that the days are longer and warmer, and many crops can be sown outside. More tender crops such as runner beans or courgettes still need to be sown under glass, either in a greenhouse or on a sunny windowsill. You can also plant out second early potatoes in early to mid-April and maincrop seed potatoes in mid to late-April, onion and shallot sets and garlic and Jerusalem artichokes.
Sow now
Veg: including aubergines, chillies and tomatoes, plus courgettes, squashes, pumpkins, marrows and leeks under cover. Beetroot, carrot, celeriac, peas, radish, lettuce, spinach, Swiss chard, broad beans, spring onions, second early and maincrop seed potatoes.
Flowers: Nicotiana, cosmos, morning glory and many more

5.May
With the risk of frost gone, most seeds can now be directly sown outdoors, including more tender crops such as runner beans and courgettes towards the end of the month. You can also sow half hardy annuals, including sunflowers, plus make a start on sowing biennials for blooms next year.
Sow now
Veg: Beetroot, purple sprouting broccoli, spinach, lettuce, peas, radish, carrots, spring onions outside; sweetcorn, cucumber, runner beans and courgettes (under cover at the beginning of the month, outside toward the end of the month) courgettes, squashes and pumpkins, under cover
Flowers: Cornflower, sunflowers, outdoors; zinnias and more under cover; foxgloves, sweet rocket and wallflowers, outside or under cover

6.June
Keep sowing quick growing crops such as beetroot, radishes and lettuce successionally, every week or so, for crops in a few weeks’ time. You can also sow carrots but be sure to protect sowings from carrot fly, using insect-proof mesh. Continue sowing biennials, and try sowing half-hardy annuals direct outside. You can also sow runner and French beans and courgettes direct outside for later crops.
Sow now
Veg: lettuce and radish every week or so, beetroot, peas, runner and French beans, spring onions, courgettes, lettuce, carrots, purple sprouting broccoli
Flowers: Zinnias, foxgloves, wallflowers, cosmos, sweet rocket and more

7.July
This is your last chance to sow biennials. It’s also time to make a start on sowing winter veg. It’s a good time to sow carrots to avoid carrot fly, as well as continuing with radishes, beetroot and lettuce. You can also sow runner or French beans for a late crop. If you fancy growing potatoes for Christmas, now is the time to plant some.
Sow now
Veg: Runner beans, Swiss chard (for crops the following spring), kale, winter cabbage, spinach, spring onions, potatoes for Christmas, radishes, beetroot, lettuce, radish
Flowers: Foxgloves, wallflowers, sweet rocket
8.August
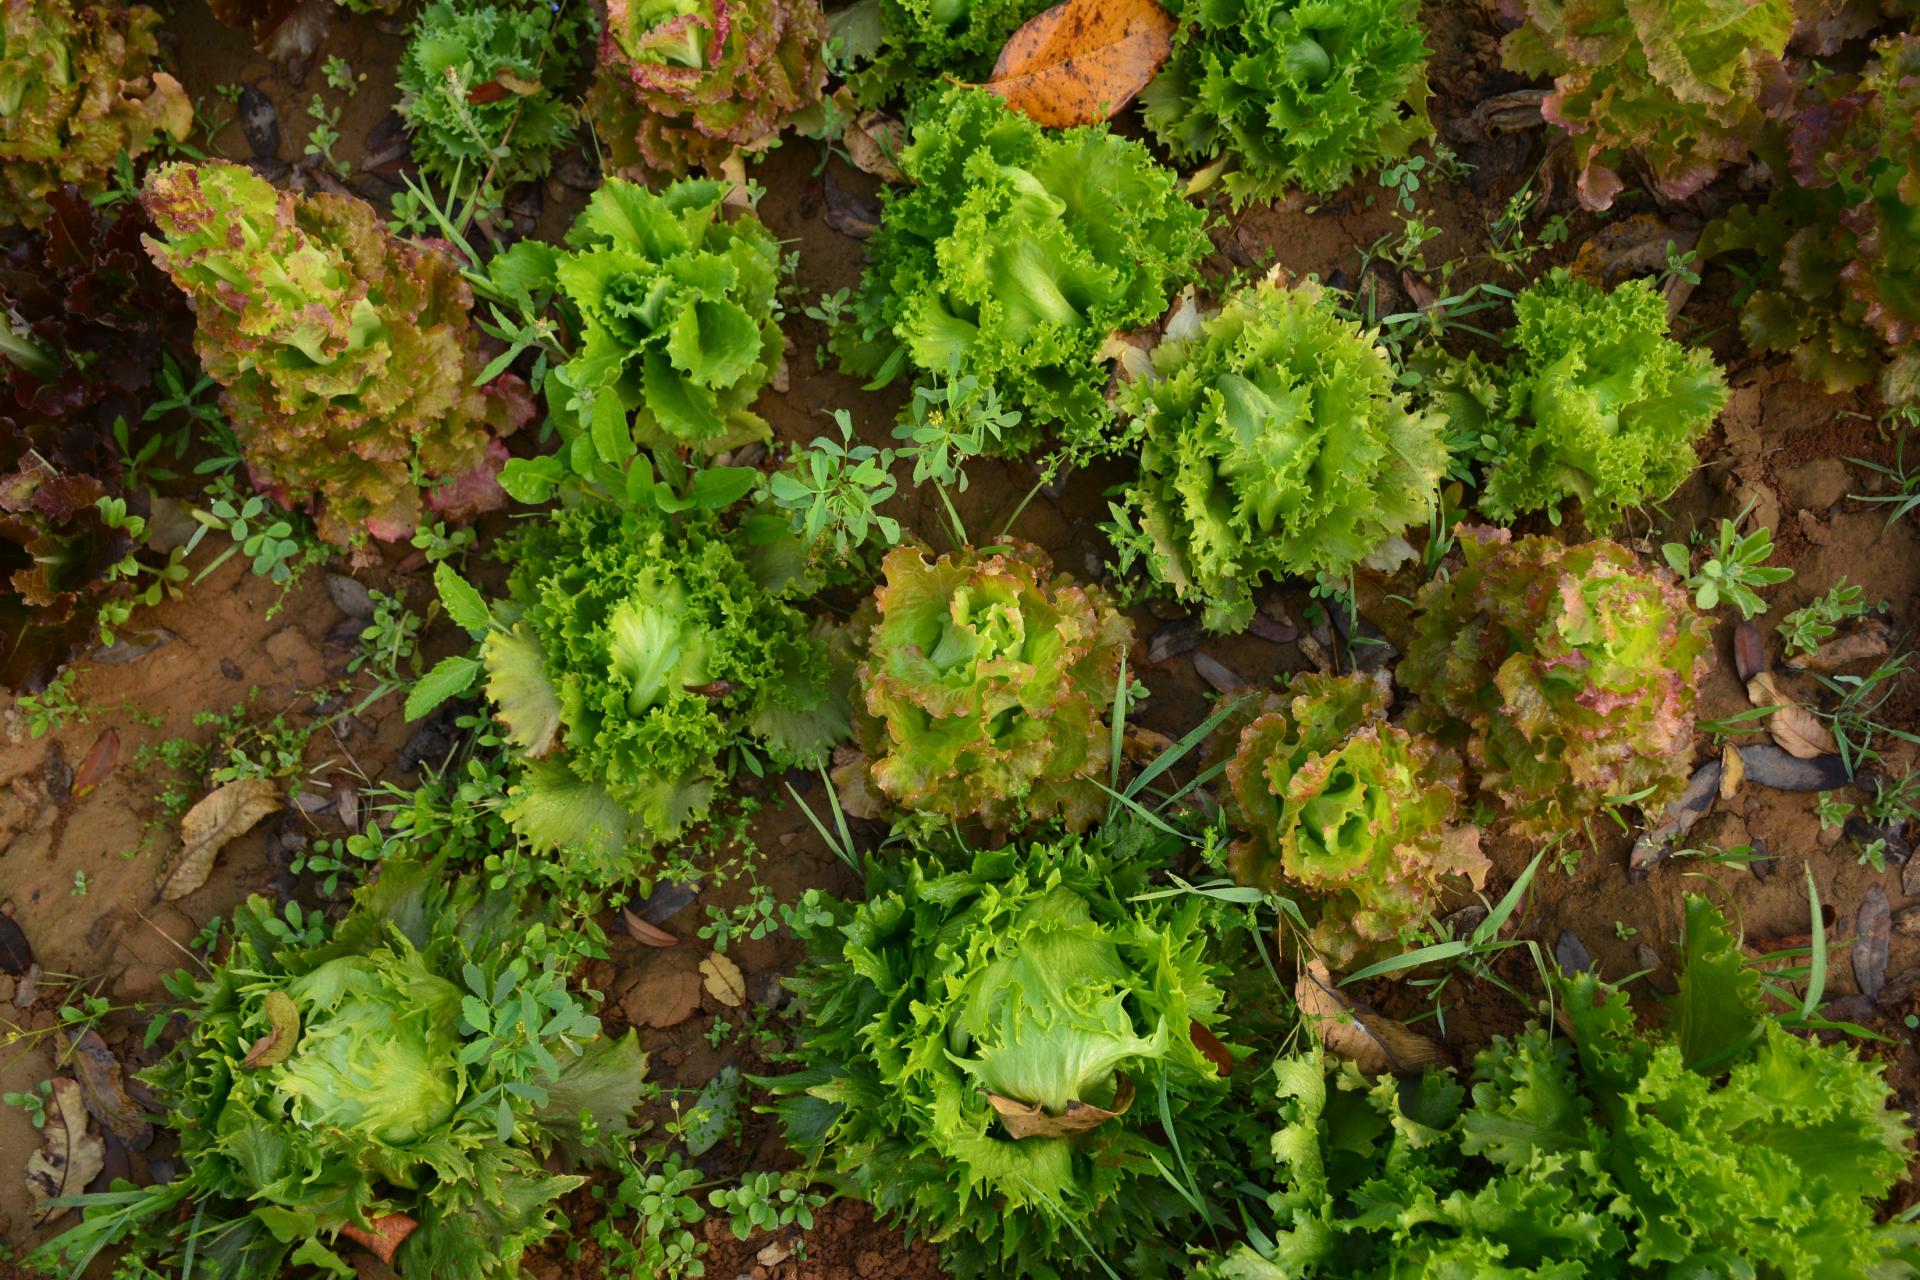
You can still sow lots of crops in August, for harvests into autumn and beyond, and it’s a key month for sowing winter crops. Discover some winter veg crops to sow in August. Continue to sow fast-growing crops such as radish, between slower-growing crops.
Sow now
Veg: Lettuce (keep out of the glare of direct sun), rocket, spring onion, radish, plus winter salads, including mibuna, mizuna, mustard leaf and lamb’s lettuce.
9.September
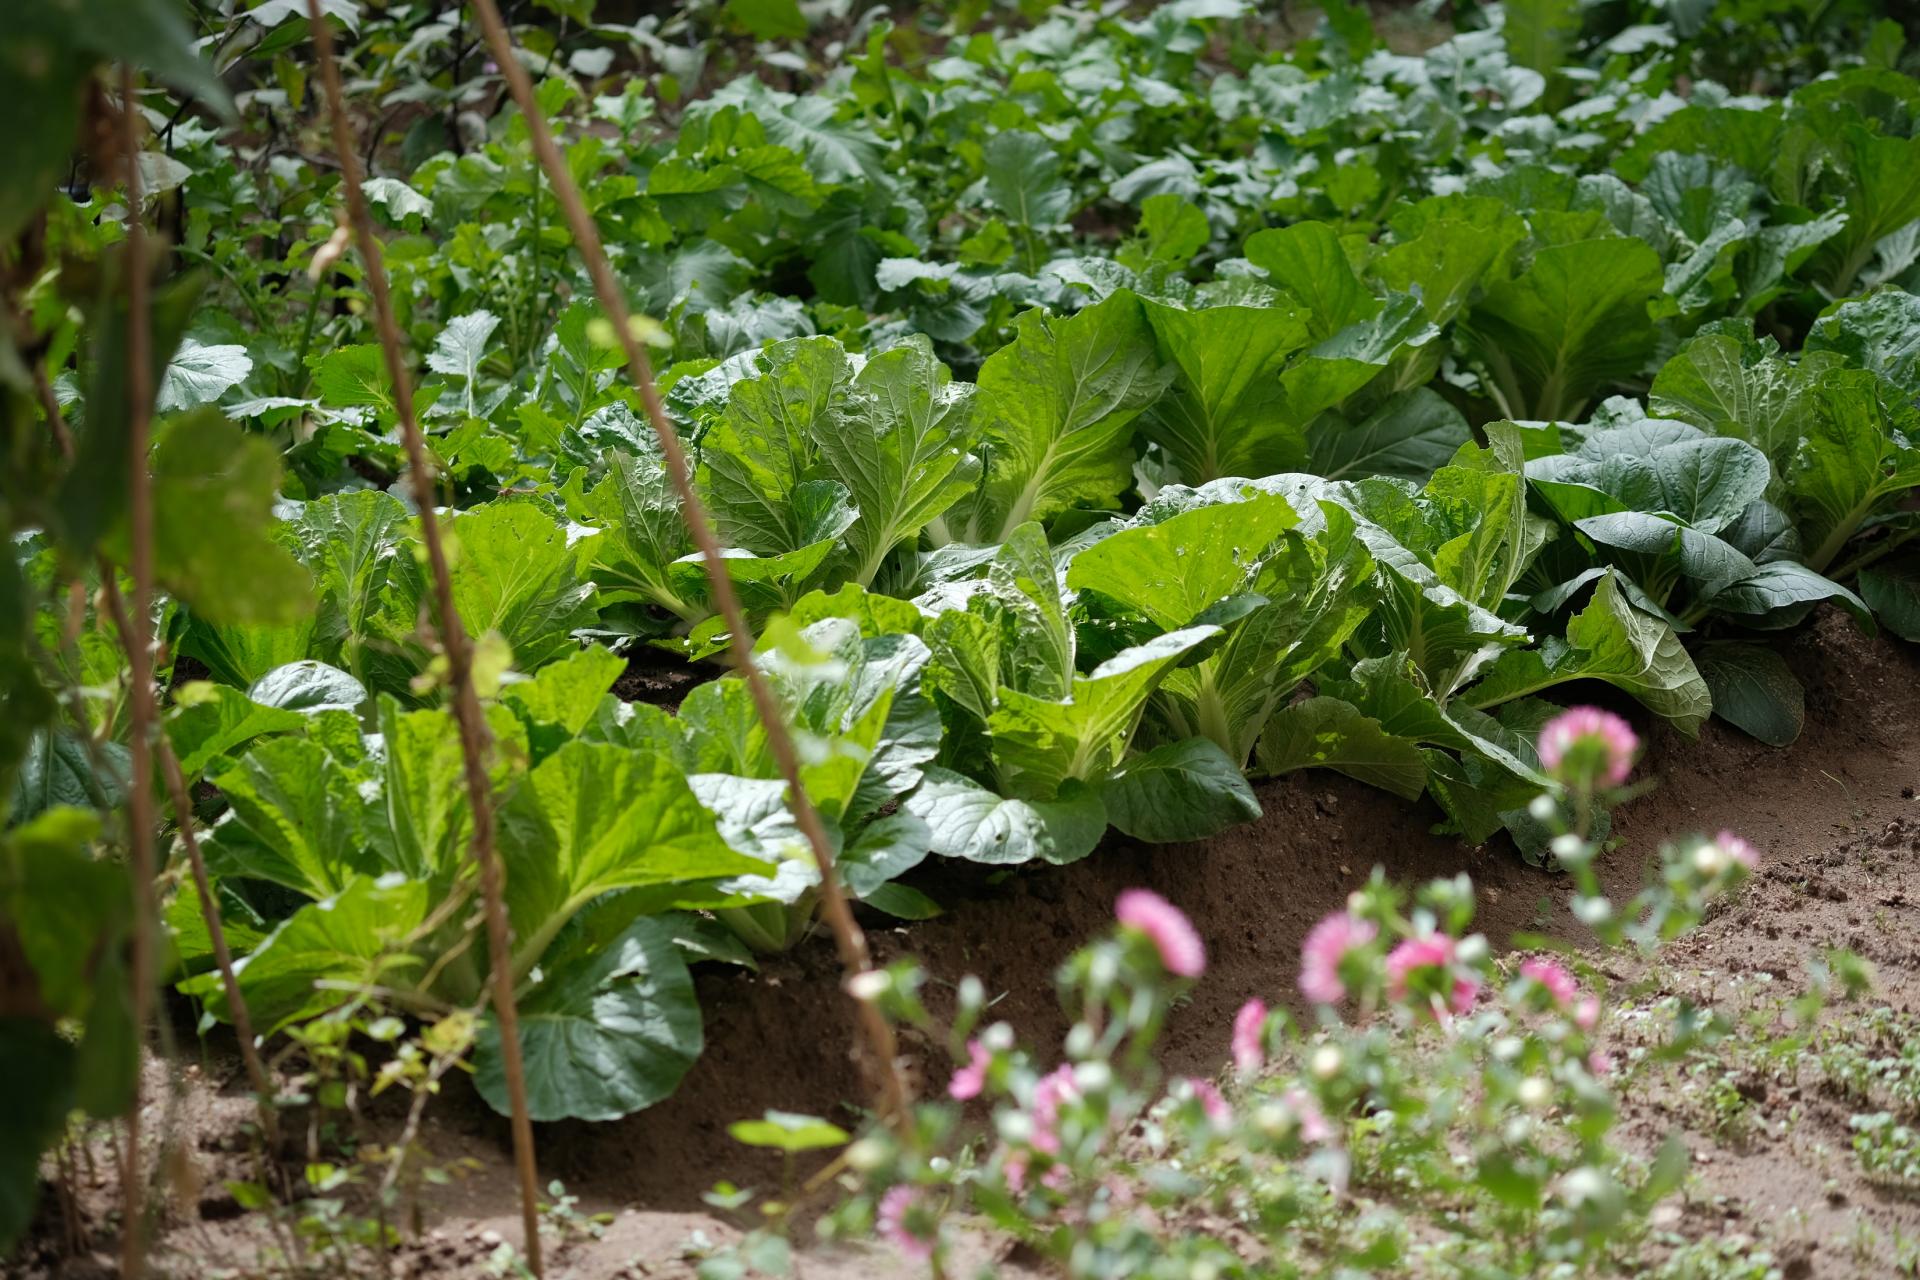
Now is the time to start sowing hardy annuals for early summer flowers next year. Some, such as Ammi majus, do better from an autumn sowing. You can sow leafy veg such as spinach, plus winter salads and quick-growing crops such as radish.
Sow now
Veg: Spinach, winter salads, radish
Flowers: Ammi majus and other hardy annuals
10.October
You can sow peas (protect from mice) and garlic outdoors. It’s also a great time to start sowing sweet peas for early flowers next summer. Still time to sow winter salads such as Japanese and Chinese salad leaves, corn salad, mustard and more.
Sow now
Veg: Winter salads, peas, garlic
Flowers: Sweet peas

11.November
You can sow broad beans now for an early crop next year. Garlic, onions and shallots can also be sown at this time of year. You can also sow sweet peas for early flowers next summer.
Sow now
Veg: Garlic, onions, shallots, broad beans
Flowers: Sweet peas
12.December
Seed sowing in unlikely to be on your mind at this time of year, but garlic is traditionally sown on the shortest day of the year. Microgreens can be sown and grown year round for an intense pop of flavour. You can also sow sweet peas.
Sow now
Veg: Garlic, microgreens
Flowers: Sweet peas

Different seeds need sowing at different times of year, either inside or outside, and some can be sowed successionally over several months to avoid gluts and ensure continuous harvests.

Give your seeds the right amount of heat, light and moisture, and they will germinate successfully. But there are some important rules to remember, including include good hygiene, using fresh seed and compost and good soil preparation.
Here’s our month-by-month guide to sowing seeds.
1.January
January is a good time to order seeds for the year ahead. If your green fingers are itching and you have a polytunnel, greenhouse or a heated propagator, you could start sowing tender crops, such as chillies, that need a long growing season. You could also sow garlic outside. Also sow sweet peas, plus microgreens on a windowsill.
Sow now
Veg: Microgreens, chillies, aubergines and peppers plus tomatoes under cover; garlic outside
Flowers: Sweet peas, under cover

2.February
You can begin or continue to sow tender crops such as tomatoes, chillies, aubergines and peppers, plus some hardy crops and hardy annuals such as sweet peas. You could also get a head start on peas, sown under cover in guttering. If you’re super keen you could have a go at sowing perennials. A propagator is ideal if you have one, though a warm, bright windowsill is fine, too. You can also sow garlic.
Sow now
Veg: Spinach, peas and broad beans (under cover), plus chillies, tomatoes, cucumbers and aubergines, under cover. Plus garlic outside.
Flowers: sweet peas and perennials

3.March
As the days lengthen and become warmer, you can begin sowing hardy annual flowers and crops outside. If the weather is still cold, warm the soil with polythene before sowing and protect seedlings with cloches or horticultural fleece. You can also start sowing half-hardy annuals and continue to sow tomatoes, chillies and aubergines under glass. Towards the end of the month you can plant out first early seed potatoes.
Sow now
Veg: Aubergines, chillies and tomatoes (under cover), broad beans, peas, beetroot, Swiss chard, radish, kale, spinach, spring onions, first early potatoes (outdoors), plus shallot and onion sets and salad leaves (protect under fleece or a cloche)
Flowers: Cosmos, nicotiana, cleome, nasturtium, cornflowers, marigold (Calendula officinalis), clarkia, cerinthe, morning glory and more

4.April
Seed sowing begins in earnest in April, now that the days are longer and warmer, and many crops can be sown outside. More tender crops such as runner beans or courgettes still need to be sown under glass, either in a greenhouse or on a sunny windowsill. You can also plant out second early potatoes in early to mid-April and maincrop seed potatoes in mid to late-April, onion and shallot sets and garlic and Jerusalem artichokes.
Sow now
Veg: including aubergines, chillies and tomatoes, plus courgettes, squashes, pumpkins, marrows and leeks under cover. Beetroot, carrot, celeriac, peas, radish, lettuce, spinach, Swiss chard, broad beans, spring onions, second early and maincrop seed potatoes.
Flowers: Nicotiana, cosmos, morning glory and many more

5.May
With the risk of frost gone, most seeds can now be directly sown outdoors, including more tender crops such as runner beans and courgettes towards the end of the month. You can also sow half hardy annuals, including sunflowers, plus make a start on sowing biennials for blooms next year.
Sow now
Veg: Beetroot, purple sprouting broccoli, spinach, lettuce, peas, radish, carrots, spring onions outside; sweetcorn, cucumber, runner beans and courgettes (under cover at the beginning of the month, outside toward the end of the month) courgettes, squashes and pumpkins, under cover
Flowers: Cornflower, sunflowers, outdoors; zinnias and more under cover; foxgloves, sweet rocket and wallflowers, outside or under cover

6.June
Keep sowing quick growing crops such as beetroot, radishes and lettuce successionally, every week or so, for crops in a few weeks’ time. You can also sow carrots but be sure to protect sowings from carrot fly, using insect-proof mesh. Continue sowing biennials, and try sowing half-hardy annuals direct outside. You can also sow runner and French beans and courgettes direct outside for later crops.
Sow now
Veg: lettuce and radish every week or so, beetroot, peas, runner and French beans, spring onions, courgettes, lettuce, carrots, purple sprouting broccoli
Flowers: Zinnias, foxgloves, wallflowers, cosmos, sweet rocket and more

7.July
This is your last chance to sow biennials. It’s also time to make a start on sowing winter veg. It’s a good time to sow carrots to avoid carrot fly, as well as continuing with radishes, beetroot and lettuce. You can also sow runner or French beans for a late crop. If you fancy growing potatoes for Christmas, now is the time to plant some.
Sow now
Veg: Runner beans, Swiss chard (for crops the following spring), kale, winter cabbage, spinach, spring onions, potatoes for Christmas, radishes, beetroot, lettuce, radish
Flowers: Foxgloves, wallflowers, sweet rocket

8.August
You can still sow lots of crops in August, for harvests into autumn and beyond, and it’s a key month for sowing winter crops. Discover some winter veg crops to sow in August. Continue to sow fast-growing crops such as radish, between slower-growing crops.
Sow now
Veg: Lettuce (keep out of the glare of direct sun), rocket, spring onion, radish, plus winter salads, including mibuna, mizuna, mustard leaf and lamb’s lettuce.

9.September
Now is the time to start sowing hardy annuals for early summer flowers next year. Some, such as Ammi majus, do better from an autumn sowing. You can sow leafy veg such as spinach, plus winter salads and quick-growing crops such as radish.
Sow now
Veg: Spinach, winter salads, radish
Flowers: Ammi majus and other hardy annuals

10.October
You can sow peas (protect from mice) and garlic outdoors. It’s also a great time to start sowing sweet peas for early flowers next summer. Still time to sow winter salads such as Japanese and Chinese salad leaves, corn salad, mustard and more.
Sow now
Veg: Winter salads, peas, garlic
Flowers: Sweet peas

11.November
You can sow broad beans now for an early crop next year. Garlic, onions and shallots can also be sown at this time of year. You can also sow sweet peas for early flowers next summer.
Sow now
Veg: Garlic, onions, shallots, broad beans
Flowers: Sweet peas

12.December
Seed sowing in unlikely to be on your mind at this time of year, but garlic is traditionally sown on the shortest day of the year. Microgreens can be sown and grown year round for an intense pop of flavour. You can also sow sweet peas.
Sow now
Veg: Garlic, microgreens
Flowers: Sweet peas

0
0
文章
莹723
2020年11月30日

Are your green fingers itching in midwinter? Good news for you! There are some flower seeds you could sow, and you may be rewarded with early blooms.
Shorter daylight hours provide little light for your seedlings. Sowing in a bright spot without too much direct sunlight can damage seedlings.
Most seeds sown indoors over winter will benefit from the warmth of a heated propagator or warm windowsill, so provide this where possible.
Discover five of the best flowers to sow in December, below.
1——Sweet peas
Sweet peas can be sown indoors in December, ideally in containers, such as cardboard tubes, that can be planted out in the soil, minimising root disturbance.

2——Laurentia
Laurentia are bushy, half-hardy annuals, with star-shaped, scented flowers. The seeds can be sown under glass in winter, in a bright spot. A heated propagator will help to warm the soil when sowing.

3——Pelargoniums
Pelargoniums are often propagated by taking cuttings, but why not try growing them from seed, too? Ideally, surface sow in a heated propagator, in a bright spot out of direct sunlight.

4——Hardy cyclamens
Hardy cyclamens like Cyclamen coum and Cyclamen hederifolium can be sown in December. Before sowing, soak the seeds overnight, then sow straight after in small pots. Keep the pots at a temperature of 13-16°C.

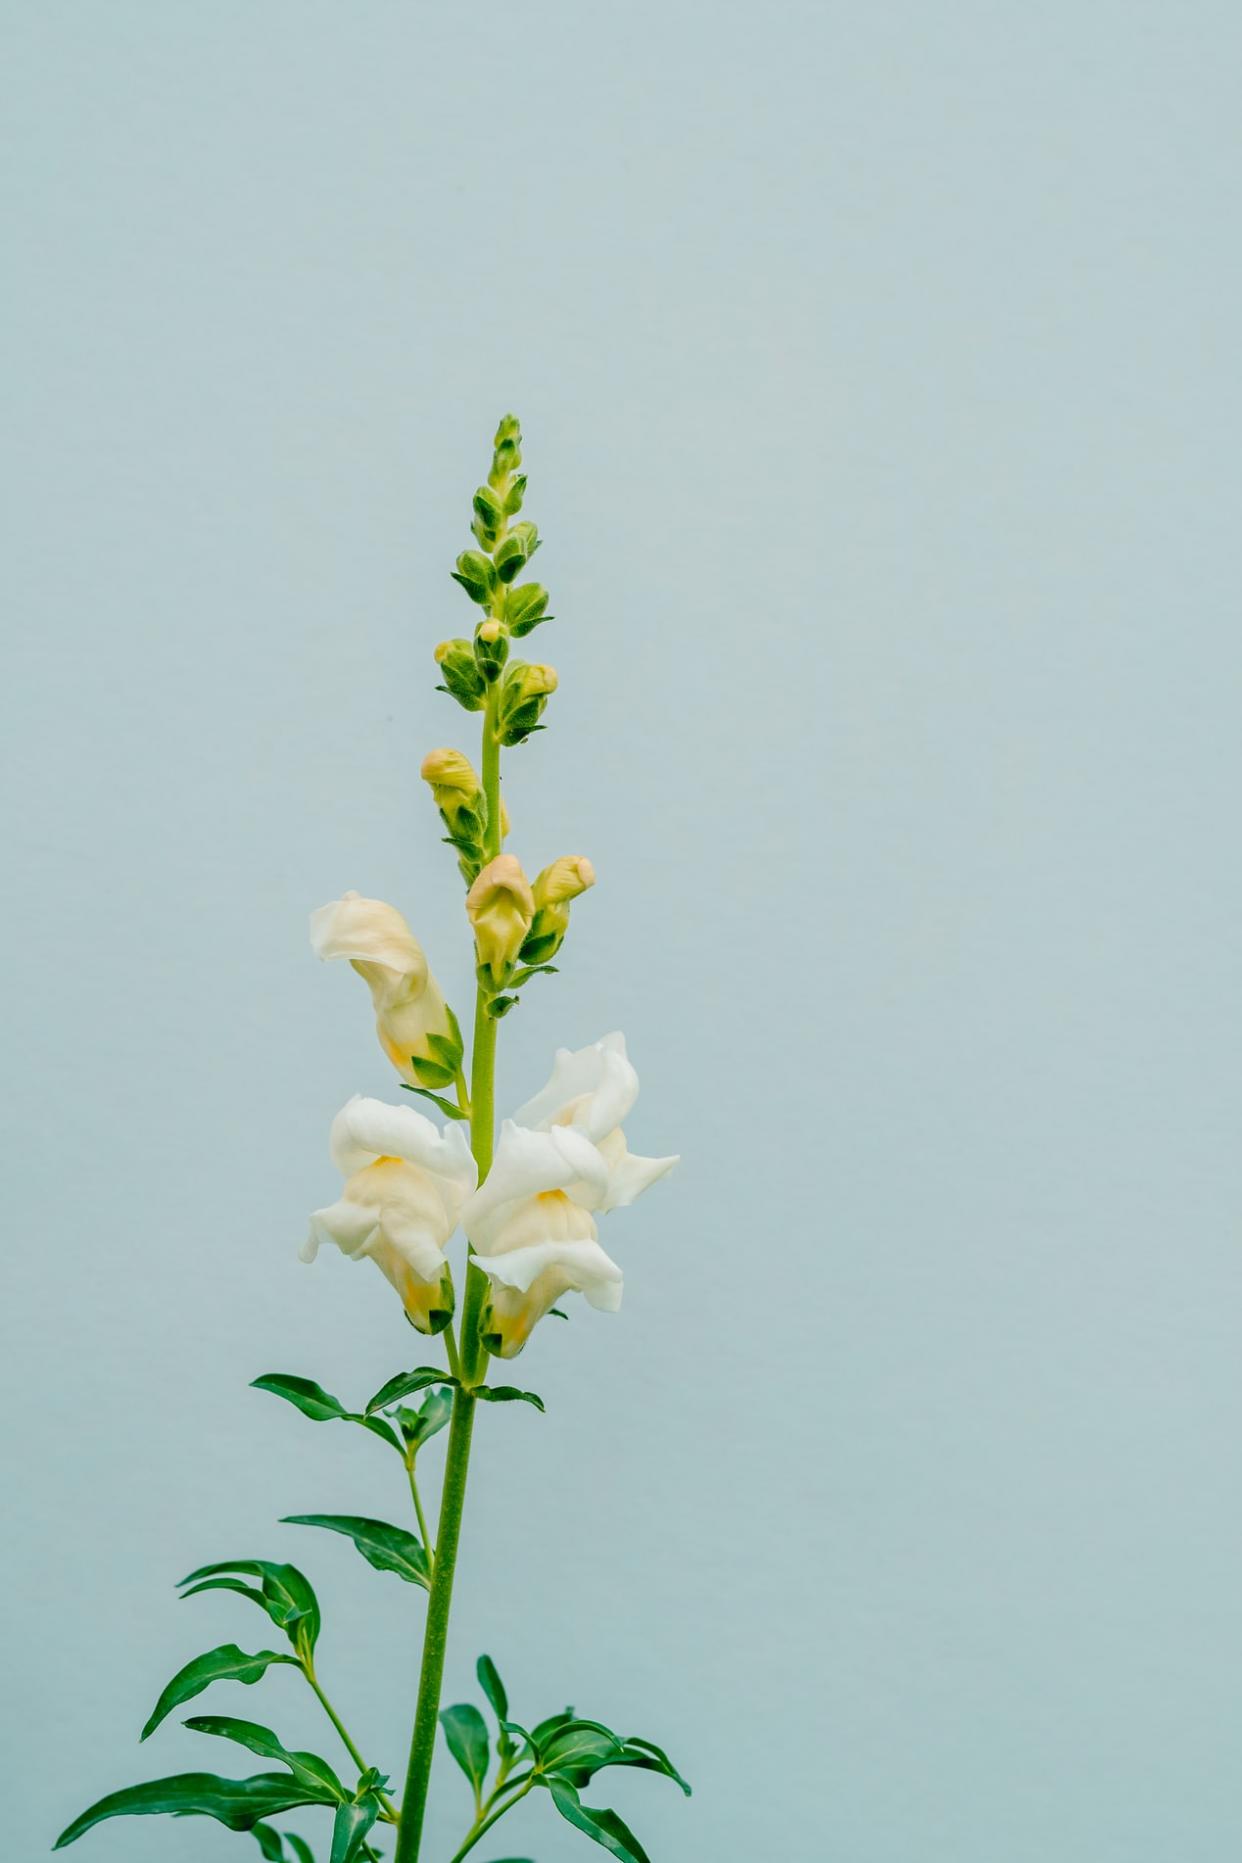
5——Snapdragons
Though usually grown as annuals or biennials, snapdragons are actually short-lived perennials. They’re easy to grow, and can be sown under glass in December, to flower from June onwards.

Shorter daylight hours provide little light for your seedlings. Sowing in a bright spot without too much direct sunlight can damage seedlings.
Most seeds sown indoors over winter will benefit from the warmth of a heated propagator or warm windowsill, so provide this where possible.

Discover five of the best flowers to sow in December, below.
1——Sweet peas
Sweet peas can be sown indoors in December, ideally in containers, such as cardboard tubes, that can be planted out in the soil, minimising root disturbance.

2——Laurentia
Laurentia are bushy, half-hardy annuals, with star-shaped, scented flowers. The seeds can be sown under glass in winter, in a bright spot. A heated propagator will help to warm the soil when sowing.

3——Pelargoniums
Pelargoniums are often propagated by taking cuttings, but why not try growing them from seed, too? Ideally, surface sow in a heated propagator, in a bright spot out of direct sunlight.

4——Hardy cyclamens
Hardy cyclamens like Cyclamen coum and Cyclamen hederifolium can be sown in December. Before sowing, soak the seeds overnight, then sow straight after in small pots. Keep the pots at a temperature of 13-16°C.

5——Snapdragons
Though usually grown as annuals or biennials, snapdragons are actually short-lived perennials. They’re easy to grow, and can be sown under glass in December, to flower from June onwards.

0
0
文章
莹723
2020年11月09日

It’s becoming more and more chilly outside, but there are still some vegetable seeds that you can sow in November, including beans and salad leaves.To increase the chances of success, try to use a heated propagator or greenhouse.
Discover five vegetable seeds to sow in November, below. They will reward you with an early harvest the following year.
1-Broad beans
It’s a good idea to buy some Broad bean seeds. Broad beans can be sown in the ground in autumn or alternatively in pots.

2-Salad leaves
Salad leaves like mizuna, mustard and spinach are an easy win. Try sowing indoors on a bright windowsill for winter pickings.

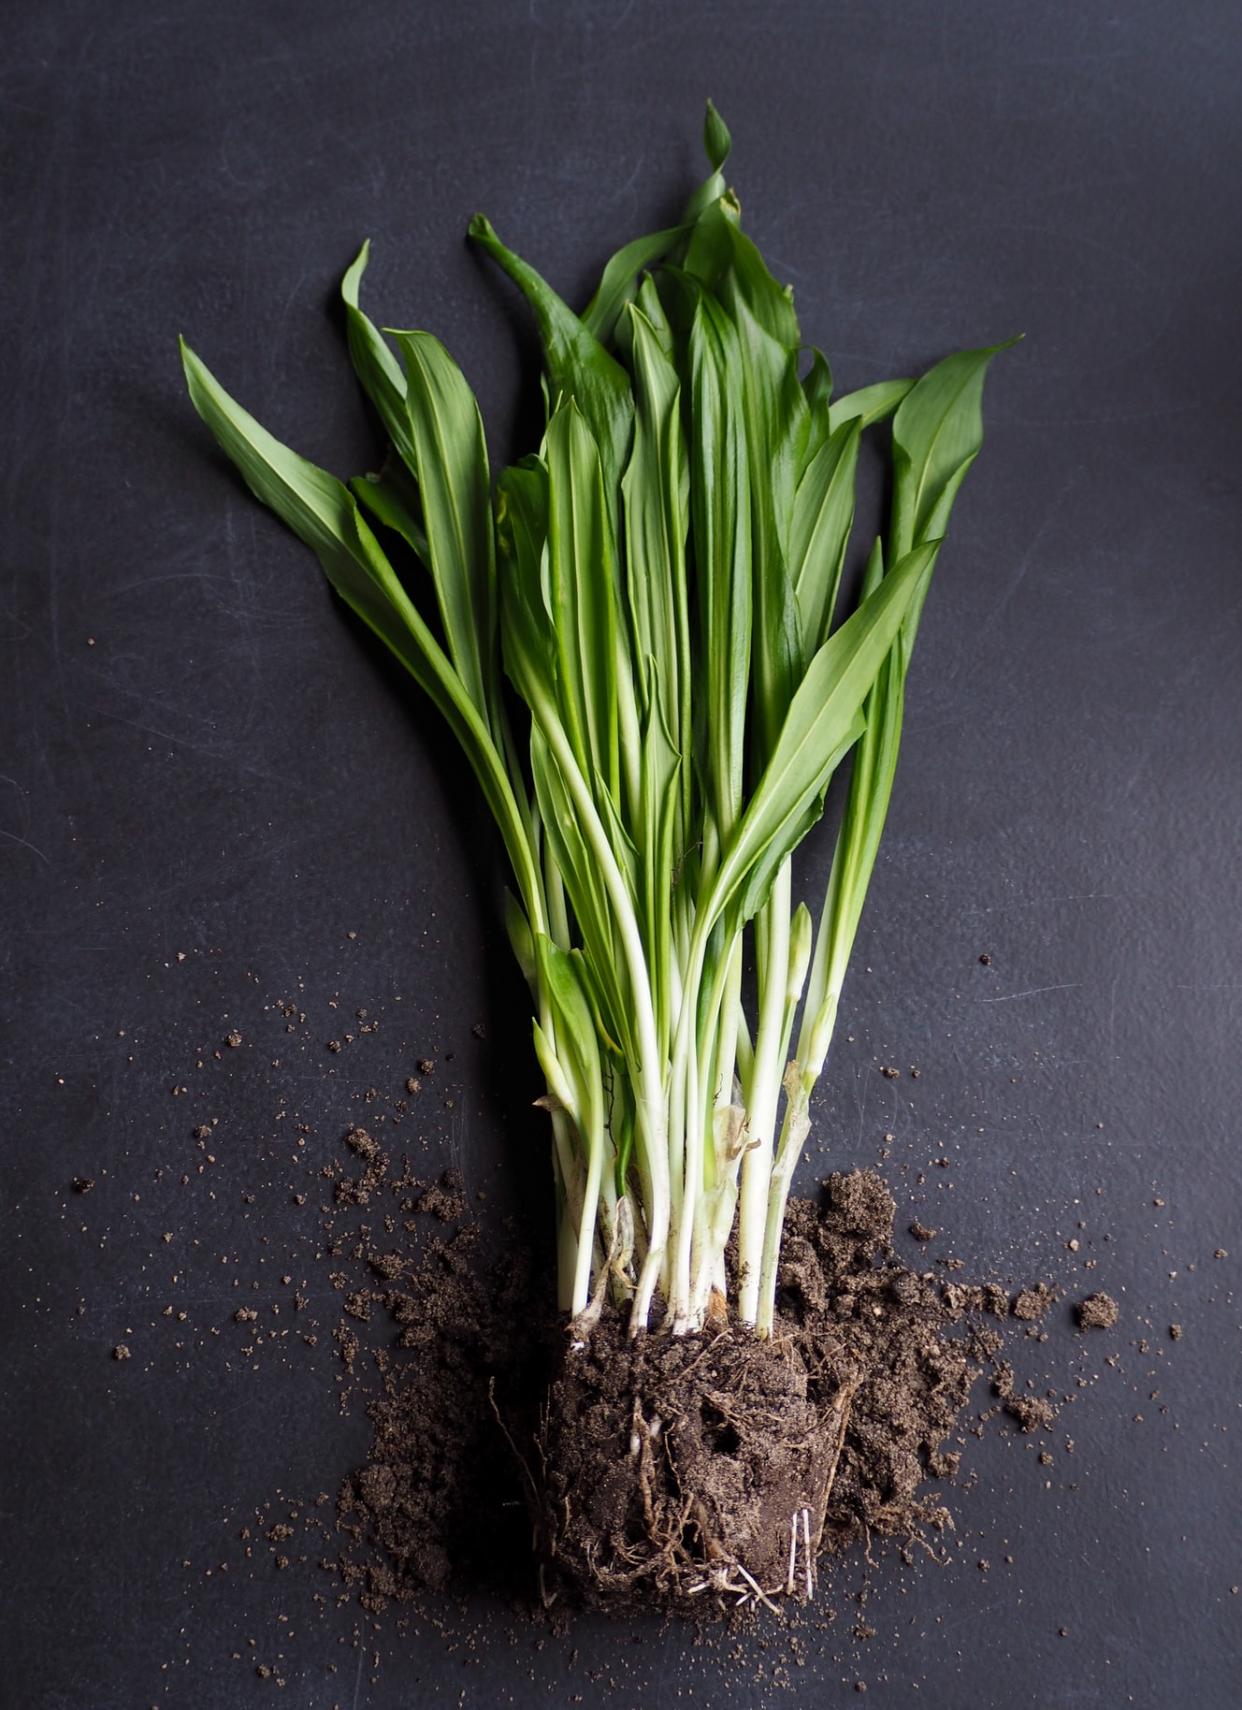
3-Spring onion ‘Performer’
Hardier varieties of spring onion, such as ‘Performer’, can be sown in autumn for winter and spring harvests. It does well in pots, making protecting the young plants easier, too. Protect in a greenhouse or with cloches.
4-First early peas
Sow first early peas like ‘Meteor’ and ‘Kelvedon Wonder’ in autumn to overwinter, providing harvests in early spring. Protect the peas from slugs,
birds and mice by growing in covered containers.

5-Chillies
Chilli peppers, such as ‘Apache’ and ‘Medusa’ can be sown anytime of year, to be grown indoors on the windowsill. In November, when the days are shorter, you’ll want to provide them with warmth, and the brightest spot possible.

Discover five vegetable seeds to sow in November, below. They will reward you with an early harvest the following year.
1-Broad beans
It’s a good idea to buy some Broad bean seeds. Broad beans can be sown in the ground in autumn or alternatively in pots.

2-Salad leaves
Salad leaves like mizuna, mustard and spinach are an easy win. Try sowing indoors on a bright windowsill for winter pickings.

3-Spring onion ‘Performer’
Hardier varieties of spring onion, such as ‘Performer’, can be sown in autumn for winter and spring harvests. It does well in pots, making protecting the young plants easier, too. Protect in a greenhouse or with cloches.

4-First early peas
Sow first early peas like ‘Meteor’ and ‘Kelvedon Wonder’ in autumn to overwinter, providing harvests in early spring. Protect the peas from slugs,
birds and mice by growing in covered containers.

5-Chillies
Chilli peppers, such as ‘Apache’ and ‘Medusa’ can be sown anytime of year, to be grown indoors on the windowsill. In November, when the days are shorter, you’ll want to provide them with warmth, and the brightest spot possible.

0
0
文章
莹723
2020年10月16日

Sowing cyclamen from seed is very easy, but it’s not a quick job– it can take a year or more before you see beautiful blooms.
To produce indoor cyclamen plants you need to use seeds of tender large-flowered varieties with wonderful colours.
Learn how to sow cyclamen seeds, below.
You Will Need
•Cyclamen seed
•10cm pot
•Seed compost
•Vermiculite
•Sheet of glass
•Black polythene
Step 1
Before sowing, soak the cyclamen seeds in warm water for at least 12 hours, to soften the seed coat, then rinse. Sow seeds into pots of compost, spacing them evenly.

Step 2
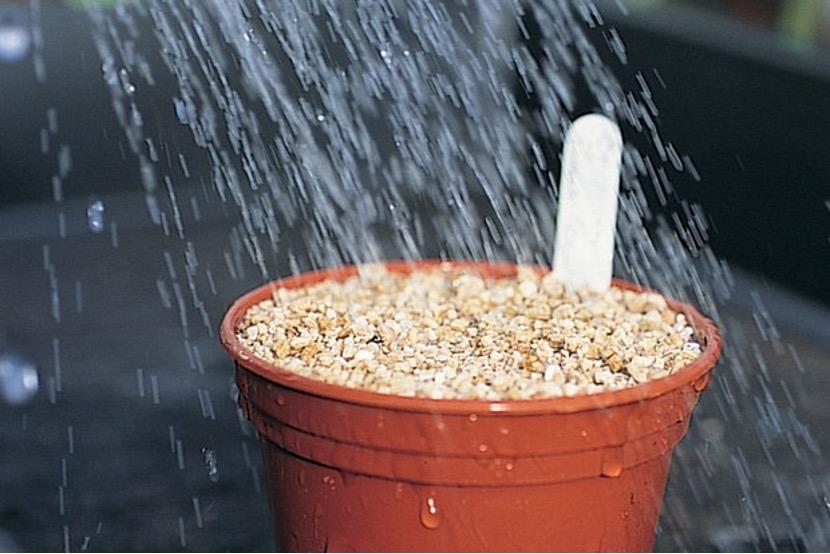
Sprinkle a layer of fine vermiculite or compost over the seeds until the surface is covered completely.

Step 3
Water, then cover with a sheet of glass and a layer of black polythene to shut out the light and encourage germination. Keep temperature lower than 16° – 21°.
Step 4
Check pot regularly. Germination can take 30 – 60 days, and once the seedlings appear, remove the covering and pop your pot into a bright position.

Step 5
Leaves develop from a tiny tuber, and once two or three leaves have formed the plants can be potted up separately.

Step 6
Plant individually into 7.5cm pots of multi-purpose compost, keeping the tiny tuber level with the surface of the compost.

Step 7
Pot on into larger containers as your plants grow, watering them regularly and feeding them once a week. Most varieties should begin flowering about nine months after sowing. Keep them in a cool spot.

Remove faded flowers or yellowing leaves by twisting stems and giving them a firm tug.
To produce indoor cyclamen plants you need to use seeds of tender large-flowered varieties with wonderful colours.
Learn how to sow cyclamen seeds, below.
You Will Need
•Cyclamen seed
•10cm pot
•Seed compost
•Vermiculite
•Sheet of glass
•Black polythene
Step 1
Before sowing, soak the cyclamen seeds in warm water for at least 12 hours, to soften the seed coat, then rinse. Sow seeds into pots of compost, spacing them evenly.

Step 2
Sprinkle a layer of fine vermiculite or compost over the seeds until the surface is covered completely.

Step 3
Water, then cover with a sheet of glass and a layer of black polythene to shut out the light and encourage germination. Keep temperature lower than 16° – 21°.

Step 4
Check pot regularly. Germination can take 30 – 60 days, and once the seedlings appear, remove the covering and pop your pot into a bright position.

Step 5
Leaves develop from a tiny tuber, and once two or three leaves have formed the plants can be potted up separately.

Step 6
Plant individually into 7.5cm pots of multi-purpose compost, keeping the tiny tuber level with the surface of the compost.

Step 7
Pot on into larger containers as your plants grow, watering them regularly and feeding them once a week. Most varieties should begin flowering about nine months after sowing. Keep them in a cool spot.

Remove faded flowers or yellowing leaves by twisting stems and giving them a firm tug.

0
0
文章
ritau
2020年07月29日

1. Prepare your potting soil in a separate bucket. Pour some soil into a large bucket and add water to it until it is damp. Mix the soil with your hand or a trowel until it is evenly damp. Do not allow the soil to become soggy, or the seeds will rot. You will need a well-draining soil. Lemon trees love water, but they hate to sit in it.
-Try to get a pasteurized soil mix. Pasteurization gets rid of any bacteria that can kill seeds.
-Consider getting a soil that is a blend of peat, perlite, vermiculite, and organic fertilizer. This will give your seedling proper drainage and nutrients.
2. Choose a small pot with drainage holes. The pot should be about 3 to 4 inches (7.62 to 10.16 centimeters) wide, and 5 to 6 inches (12.7 to 15.24 centimeters) deep.This pot will be enough for one seed. Some people like to plant several seeds in one pot at a time. If you want to do this too, choose a larger pot.
Your pot must have drainage holes. If your pot does not have any, you will need to drill some.
3. Fill the pot with soil. Stop when the top of the soil is about 1 inch (2.54 centimeters) from the rim.
4. Make a ½ inch (1.27 centimeter) deep hole in the soil. You can do this using your finger or a pencil.
5. Choose a plump-looking seed from a lemon. It may be necessary to use an organic lemon because seeds from a non-organic lemon may not sprout. Also, avoid taking any seeds that look too tiny (like a grain of rice) or that look shriveled (like a raisin). These seeds either won't sprout or won't grow into healthy seedlings.
Consider planting 5 to 10 lemon seeds at one time, in case some of the seeds don't sprout or don't make it past seedling-hood.
Keep in mind that trees that come from seeds are not identical to the parent tree that they came from. Sometimes, the fruit that the new saplings produce is of a lesser quality. Other times, they do not produce edible fruit at all. This does not prevent the young tree from being visually pleasing. Keep this in mind when growing your tree.

6. Wash the seed to get rid of the slimy coating. You can do this by washing the lemon seed or by sucking on it until the coating is gone. This is important. The gel-like coating contains sugars, which can cause the seed to rot.
Consider leaving the lemon seeds in a cup of warm water overnight. This will help them sprout faster.
7. Drop the seed into the hole and cover it up. Make sure that the pointy tip is pointing downward into the soil, and the rounded part is pointing upward towards you. The roots will come out of the pointy part.
8. Cover the pot with a piece of breathable plastic to trap warmth and moisture. Begin by placing a sheet of clear plastic cling wrap over the pot. Wrap a rubber band around the plastic wrap to secure it to the pot. Poke a few holes into the plastic wrap. You can use a pencil, a toothpick, or even a fork. These holes will allow the plant to breathe.
9. Place the pot in a warm location. You can place the pot in a sunny location too, but sunlight is not vital at this point. In fact, too much sunlight can "cook" the young, delicate seedlings. You should see a sprout emerge in about two weeks.
The ideal temperature is between 68°F and 82.4°F (20°C and 28°C).

10. Water the soil when you see it become dry. The plastic wrap should trap the moisture, and the condensation should rain down onto the soil, making it damp again. In very dry environments, this may not happen. If you see the soil start to become dry, remove the plastic wrap and water the plant. Be sure to re-cover the pot with the plastic wrap when you are done watering.
11. Remove the plastic covering once the sprout appears and transfer the pot to a warm, sunny location. Remember to keep the soil damp, but do not let it become soggy. Click here to learn how to take care of your seedling.
-Try to get a pasteurized soil mix. Pasteurization gets rid of any bacteria that can kill seeds.
-Consider getting a soil that is a blend of peat, perlite, vermiculite, and organic fertilizer. This will give your seedling proper drainage and nutrients.
2. Choose a small pot with drainage holes. The pot should be about 3 to 4 inches (7.62 to 10.16 centimeters) wide, and 5 to 6 inches (12.7 to 15.24 centimeters) deep.This pot will be enough for one seed. Some people like to plant several seeds in one pot at a time. If you want to do this too, choose a larger pot.
Your pot must have drainage holes. If your pot does not have any, you will need to drill some.
3. Fill the pot with soil. Stop when the top of the soil is about 1 inch (2.54 centimeters) from the rim.
4. Make a ½ inch (1.27 centimeter) deep hole in the soil. You can do this using your finger or a pencil.
5. Choose a plump-looking seed from a lemon. It may be necessary to use an organic lemon because seeds from a non-organic lemon may not sprout. Also, avoid taking any seeds that look too tiny (like a grain of rice) or that look shriveled (like a raisin). These seeds either won't sprout or won't grow into healthy seedlings.
Consider planting 5 to 10 lemon seeds at one time, in case some of the seeds don't sprout or don't make it past seedling-hood.
Keep in mind that trees that come from seeds are not identical to the parent tree that they came from. Sometimes, the fruit that the new saplings produce is of a lesser quality. Other times, they do not produce edible fruit at all. This does not prevent the young tree from being visually pleasing. Keep this in mind when growing your tree.

6. Wash the seed to get rid of the slimy coating. You can do this by washing the lemon seed or by sucking on it until the coating is gone. This is important. The gel-like coating contains sugars, which can cause the seed to rot.
Consider leaving the lemon seeds in a cup of warm water overnight. This will help them sprout faster.
7. Drop the seed into the hole and cover it up. Make sure that the pointy tip is pointing downward into the soil, and the rounded part is pointing upward towards you. The roots will come out of the pointy part.
8. Cover the pot with a piece of breathable plastic to trap warmth and moisture. Begin by placing a sheet of clear plastic cling wrap over the pot. Wrap a rubber band around the plastic wrap to secure it to the pot. Poke a few holes into the plastic wrap. You can use a pencil, a toothpick, or even a fork. These holes will allow the plant to breathe.
9. Place the pot in a warm location. You can place the pot in a sunny location too, but sunlight is not vital at this point. In fact, too much sunlight can "cook" the young, delicate seedlings. You should see a sprout emerge in about two weeks.
The ideal temperature is between 68°F and 82.4°F (20°C and 28°C).

10. Water the soil when you see it become dry. The plastic wrap should trap the moisture, and the condensation should rain down onto the soil, making it damp again. In very dry environments, this may not happen. If you see the soil start to become dry, remove the plastic wrap and water the plant. Be sure to re-cover the pot with the plastic wrap when you are done watering.
11. Remove the plastic covering once the sprout appears and transfer the pot to a warm, sunny location. Remember to keep the soil damp, but do not let it become soggy. Click here to learn how to take care of your seedling.
0
0
文章
ritau
2020年06月22日

The pea is most commonly the small spherical seed or the seed-pod of the pod fruit Pisum sativum. Each pod contains several peas, which can be green or yellow. Botanically, pea pods are fruit, since they contain seeds and develop from the ovary of a (pea) flower. The name is also used to describe other edible seeds from the Fabaceae such as the pigeon pea (Cajanus cajan), the cowpea (Vigna unguiculata), and the seeds from several species of Lathyrus.
P. sativum is an annual plant, with a life cycle of one year. It is a cool-season crop grown in many parts of the world; planting can take place from winter to early summer depending on location. The average pea weighs between 0.1 and 0.36 gram. The immature peas (and in snow peas the tender pod as well) are used as a vegetable, fresh, frozen or canned; varieties of the species typically called field peas are grown to produce dry peas like the split pea shelled from a matured pod. These are the basis of pease porridge and pea soup, staples of medieval cuisine; in Europe, consuming fresh immature green peas was an innovation of Early Modern cuisine.
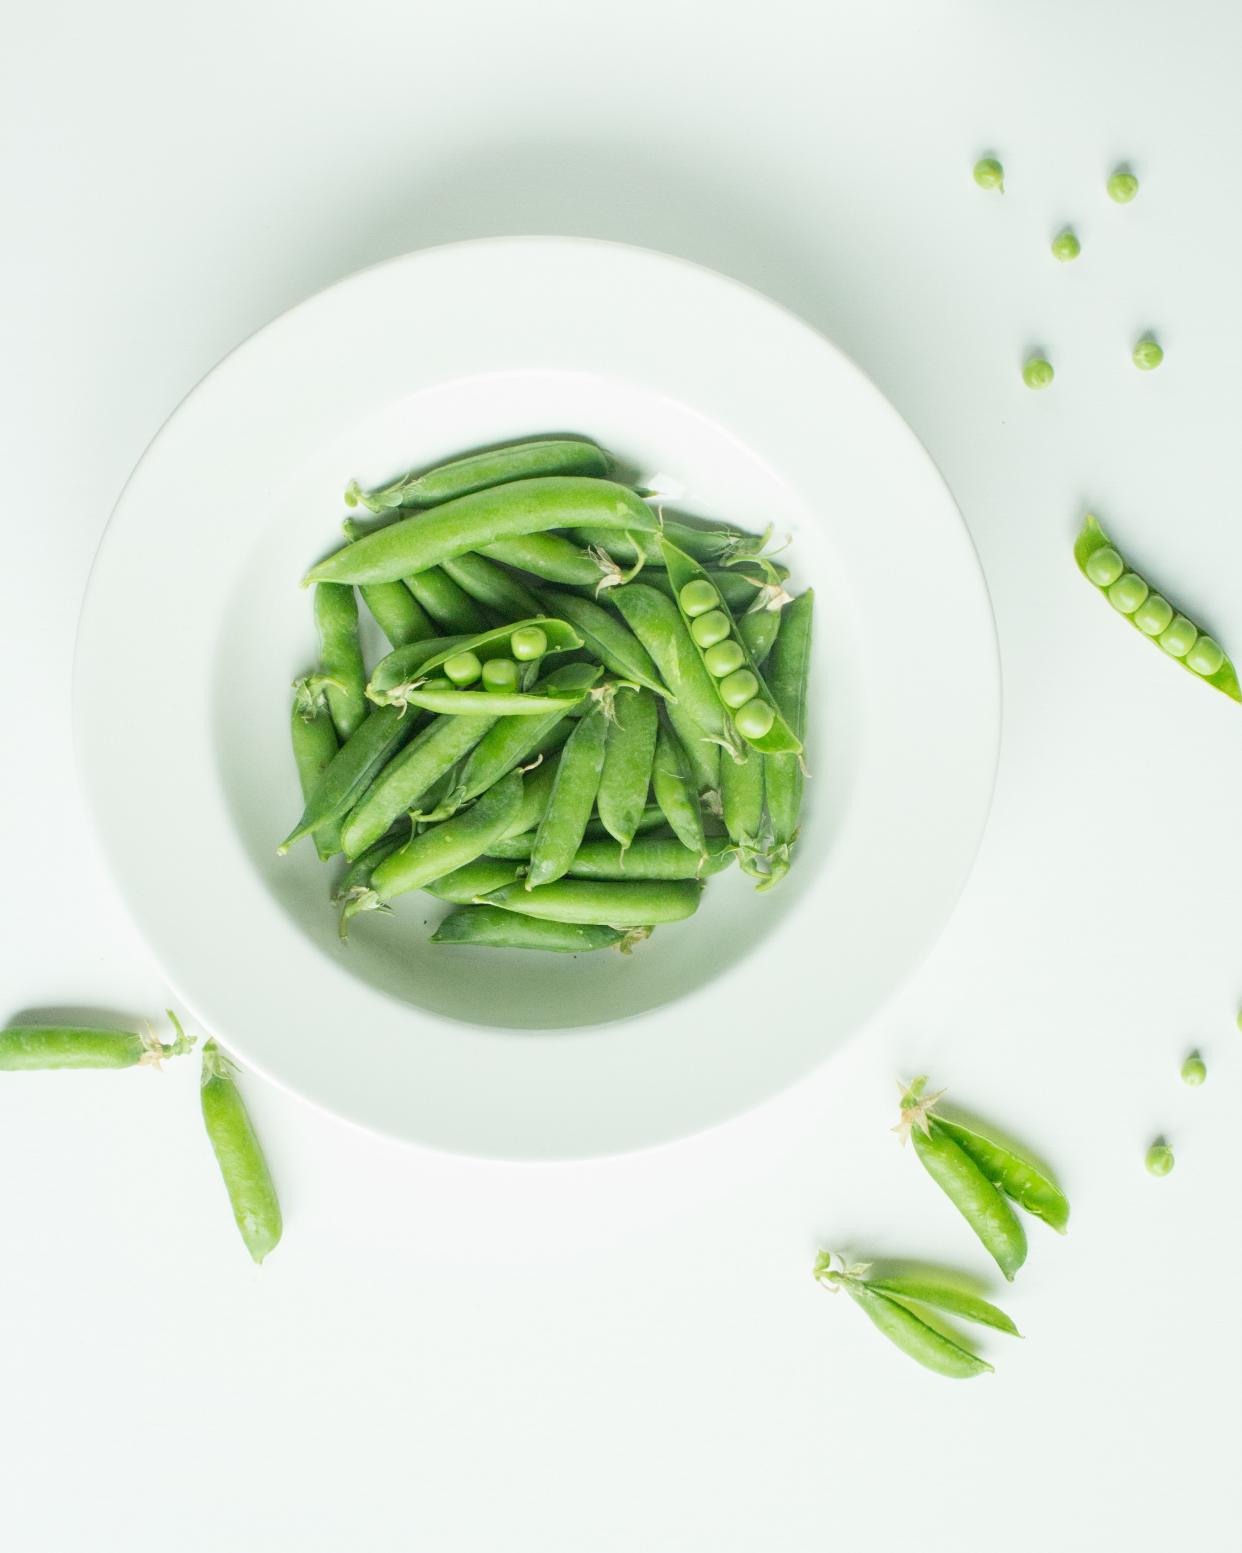
The wild pea is restricted to the Mediterranean basin and the Near East. The earliest archaeological finds of peas date from the late Neolithic era of current Greece, Syria, Turkey and Jordan. In Egypt, early finds date from c. 4800–4400 BC in the Nile delta area, and from c. 3800–3600 BC in Upper Egypt. The pea was also present in Georgia in the 5th millennium BC. Farther east, the finds are younger. Peas were present in Afghanistan c. 2000 BC; in Harappan civilization around modern-day Pakistan and western- and northwestern India in 2250–1750 BC. In the second half of the 2nd millennium BC, this legume crop appears in the Ganges Basin and southern India.
In early times, peas were grown mostly for their dry seeds. From plants growing wild in the Mediterranean basin, constant selection since the Neolithic dawn of agriculture improved their yield. In the early 3rd century BC Theophrastus mentions peas among the legumes that are sown late in the winter because of their tenderness. In the first century AD, Columella mentions them in De re rustica, when Roman legionaries still gathered wild peas from the sandy soils of Numidia and Judea to supplement their rations.
In the Middle Ages, field peas are constantly mentioned, as they were the staple that kept famine at bay, as Charles the Good, count of Flanders, noted explicitly in 1124.
Green "garden" peas, eaten immature and fresh, were an innovative luxury of Early Modern Europe. In England, the distinction between field peas and garden peas dates from the early 17th century: John Gerard and John Parkinson both mention garden peas. Sugar peas, which the French called mange-tout, for they were consumed pods and all, were introduced to France from the market gardens of Holland in the time of Henri IV, through the French ambassador. Green peas were introduced from Genoa to the court of Louis XIV of France in January 1660, with some staged fanfare; a hamper of them were presented before the King, and then were shelled by the Savoyan comte de Soissons, who had married a niece of Cardinal Mazarin; little dishes of peas were then presented to the King, the Queen, Cardinal Mazarin and Monsieur, the king's brother. Immediately established and grown for earliness warmed with manure and protected under glass, they were still a luxurious delicacy in 1696, when Mme de Maintenon and Mme de Sevigné each reported that they were "a fashion, a fury".
Modern split peas, with their indigestible skins rubbed off, are a development of the later 19th century.
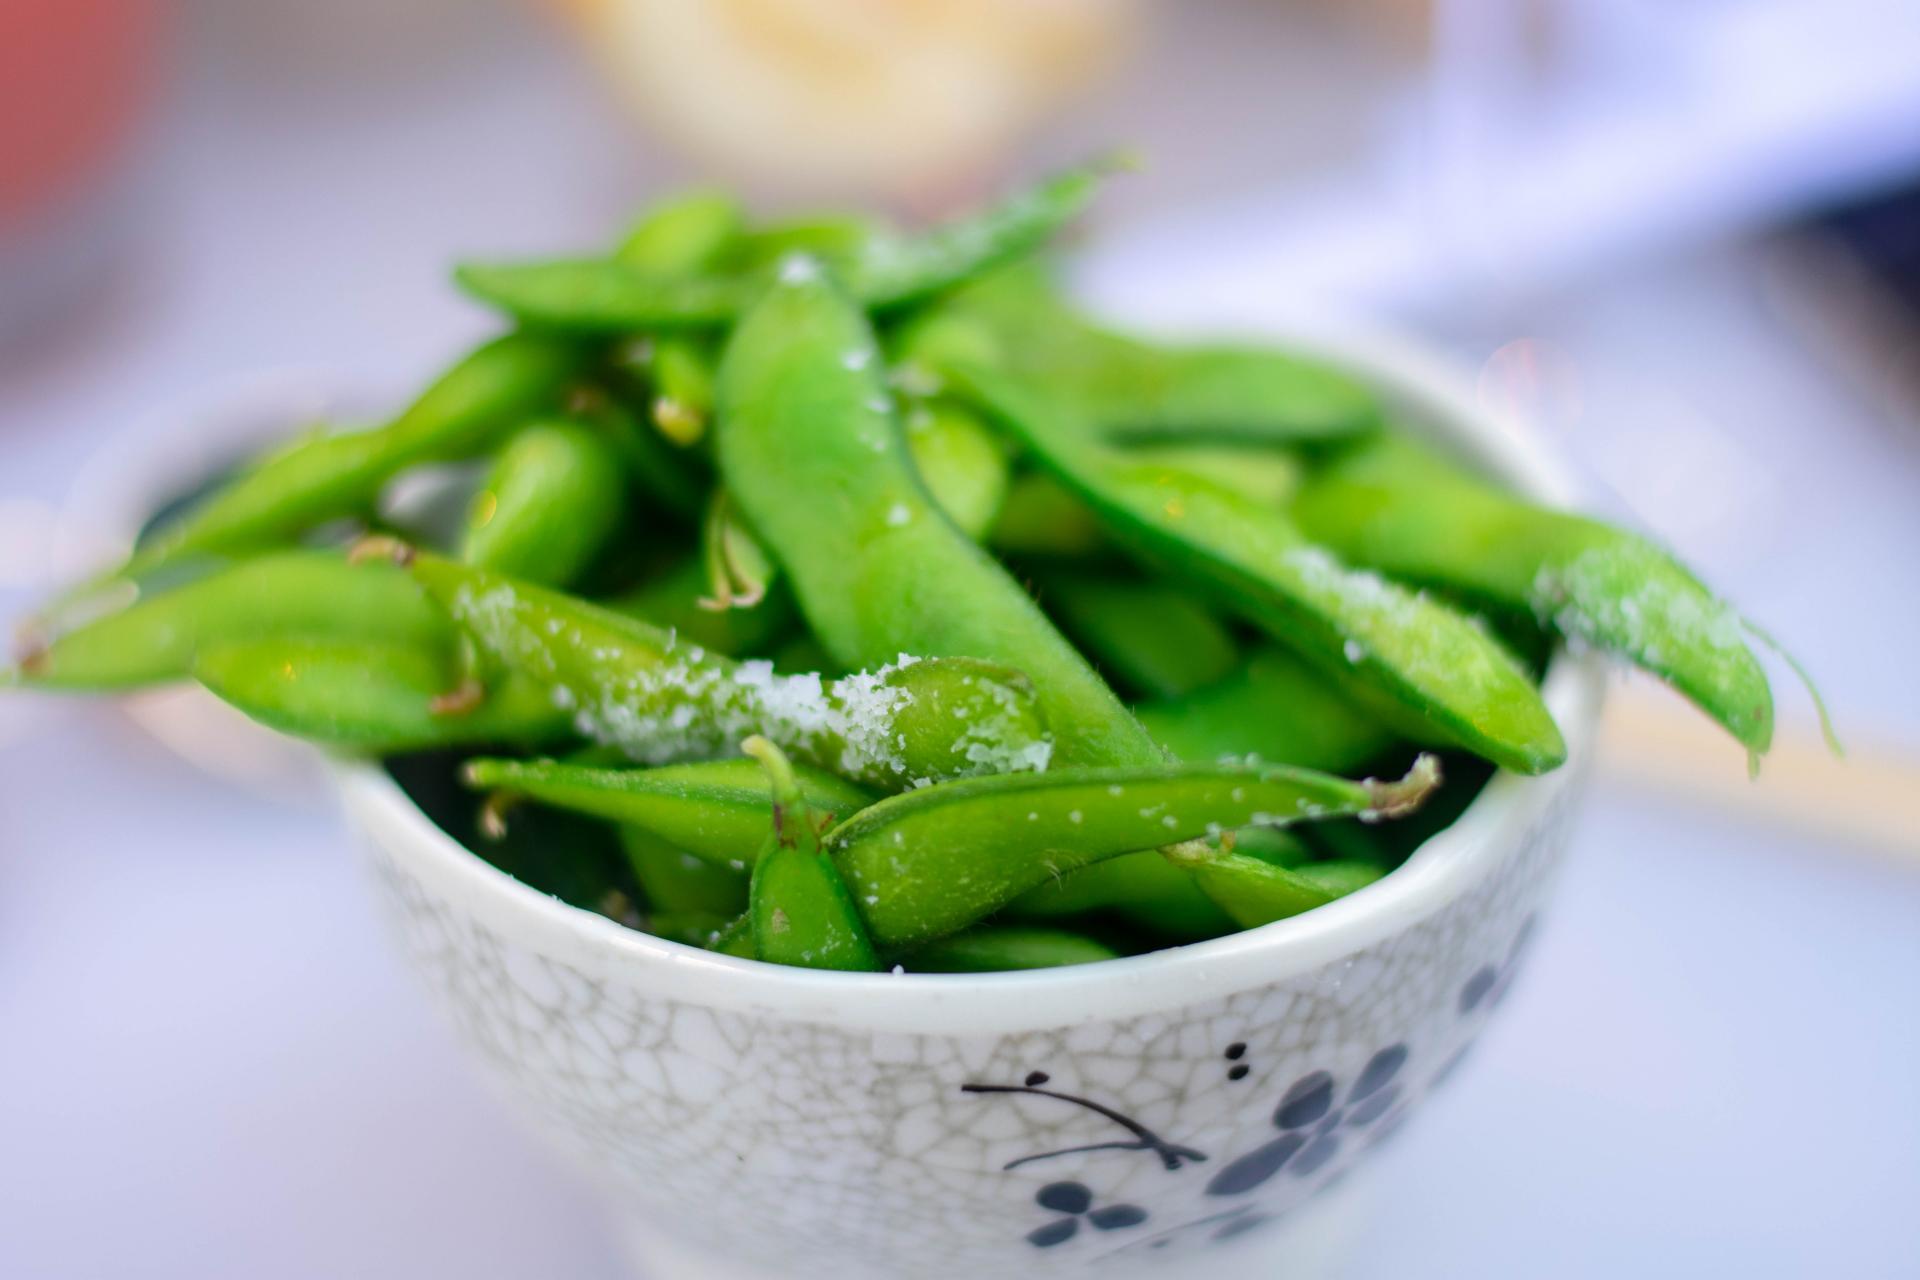
Peas are starchy, but high in fiber, protein, vitamin A, vitamin B6, vitamin C, vitamin K, phosphorus, magnesium, copper, iron, zinc and lutein.Dry weight is about one-quarter protein and one-quarter sugar. Pea seed peptide fractions have less ability to scavenge free radicals than glutathione, but greater ability to chelate metals and inhibit linoleic acid oxidation.
P. sativum is an annual plant, with a life cycle of one year. It is a cool-season crop grown in many parts of the world; planting can take place from winter to early summer depending on location. The average pea weighs between 0.1 and 0.36 gram. The immature peas (and in snow peas the tender pod as well) are used as a vegetable, fresh, frozen or canned; varieties of the species typically called field peas are grown to produce dry peas like the split pea shelled from a matured pod. These are the basis of pease porridge and pea soup, staples of medieval cuisine; in Europe, consuming fresh immature green peas was an innovation of Early Modern cuisine.

The wild pea is restricted to the Mediterranean basin and the Near East. The earliest archaeological finds of peas date from the late Neolithic era of current Greece, Syria, Turkey and Jordan. In Egypt, early finds date from c. 4800–4400 BC in the Nile delta area, and from c. 3800–3600 BC in Upper Egypt. The pea was also present in Georgia in the 5th millennium BC. Farther east, the finds are younger. Peas were present in Afghanistan c. 2000 BC; in Harappan civilization around modern-day Pakistan and western- and northwestern India in 2250–1750 BC. In the second half of the 2nd millennium BC, this legume crop appears in the Ganges Basin and southern India.
In early times, peas were grown mostly for their dry seeds. From plants growing wild in the Mediterranean basin, constant selection since the Neolithic dawn of agriculture improved their yield. In the early 3rd century BC Theophrastus mentions peas among the legumes that are sown late in the winter because of their tenderness. In the first century AD, Columella mentions them in De re rustica, when Roman legionaries still gathered wild peas from the sandy soils of Numidia and Judea to supplement their rations.
In the Middle Ages, field peas are constantly mentioned, as they were the staple that kept famine at bay, as Charles the Good, count of Flanders, noted explicitly in 1124.
Green "garden" peas, eaten immature and fresh, were an innovative luxury of Early Modern Europe. In England, the distinction between field peas and garden peas dates from the early 17th century: John Gerard and John Parkinson both mention garden peas. Sugar peas, which the French called mange-tout, for they were consumed pods and all, were introduced to France from the market gardens of Holland in the time of Henri IV, through the French ambassador. Green peas were introduced from Genoa to the court of Louis XIV of France in January 1660, with some staged fanfare; a hamper of them were presented before the King, and then were shelled by the Savoyan comte de Soissons, who had married a niece of Cardinal Mazarin; little dishes of peas were then presented to the King, the Queen, Cardinal Mazarin and Monsieur, the king's brother. Immediately established and grown for earliness warmed with manure and protected under glass, they were still a luxurious delicacy in 1696, when Mme de Maintenon and Mme de Sevigné each reported that they were "a fashion, a fury".
Modern split peas, with their indigestible skins rubbed off, are a development of the later 19th century.

Peas are starchy, but high in fiber, protein, vitamin A, vitamin B6, vitamin C, vitamin K, phosphorus, magnesium, copper, iron, zinc and lutein.Dry weight is about one-quarter protein and one-quarter sugar. Pea seed peptide fractions have less ability to scavenge free radicals than glutathione, but greater ability to chelate metals and inhibit linoleic acid oxidation.
0
0
文章
ritau
2020年05月05日

1. Find a plastic, disposable cup.
Fill it with compost or natural fertilizer. Using your fingers, dig a small hole into the compost/natural fertilizer.
2. Place three seeds about half an inch down.
Make sure they're not in too deep before covering the hole with the fertilizer once more.
3. Water the pumpkin seeds every other day.
However, make sure the soil doesn't get too wet. Otherwise, the seeds will die.
4. Wait a few weeks until all the pumpkin seeds have sprouted.
Then, transplant them into clay pots. However, be careful not to disturb the pumpkin roots - they might go into shock and die.

5. Put in six foot dowel rods next to the pumpkins in the clay pots.
The tendrils of the pumpkin plants will then coil around the dowel rods. After a while, the pumpkins will produce blossoms, which is a sign that they will be ready soon.
6. Pollinate the blossoms.
Since your pumpkin plants are indoors and have no access to pollination by bees or other insects, you are in charge of pollinating blossoms so that your plants can produce pumpkins.
7. Make sure your plant gets enough light and water.
Ensure this especially when fruit develops from the blossoms.
8. Harvest your pumpkins. Once the they have turned the mature color, they are ready to be collected. Cut off the pumpkin about two inches above the pumpkin's top. via.wikihow
Fill it with compost or natural fertilizer. Using your fingers, dig a small hole into the compost/natural fertilizer.
2. Place three seeds about half an inch down.
Make sure they're not in too deep before covering the hole with the fertilizer once more.
3. Water the pumpkin seeds every other day.
However, make sure the soil doesn't get too wet. Otherwise, the seeds will die.
4. Wait a few weeks until all the pumpkin seeds have sprouted.
Then, transplant them into clay pots. However, be careful not to disturb the pumpkin roots - they might go into shock and die.

5. Put in six foot dowel rods next to the pumpkins in the clay pots.
The tendrils of the pumpkin plants will then coil around the dowel rods. After a while, the pumpkins will produce blossoms, which is a sign that they will be ready soon.
6. Pollinate the blossoms.
Since your pumpkin plants are indoors and have no access to pollination by bees or other insects, you are in charge of pollinating blossoms so that your plants can produce pumpkins.
7. Make sure your plant gets enough light and water.
Ensure this especially when fruit develops from the blossoms.
8. Harvest your pumpkins. Once the they have turned the mature color, they are ready to be collected. Cut off the pumpkin about two inches above the pumpkin's top. via.wikihow

0
0
文章
ritau
2020年02月16日

Hello, everybody,today we're going to give you some tips on how to grow cucumbers.

1. Choose a right size flowerpot and fertile soil, and place the soil in the flowerpot.
2. Put the seeds in the pot and water the good seeds to make sure they have enough water.
3. Apply organic fertilizer to the seeds so that the cucumber can get enough nourishment.
4. Place the seeds in a sunny place for enough sunlight.

Cucumbers contain less than 5 percent sugar and are rich in dietary fiber. According to studies, dietary fiber can improve the sensitivity of insulin receptors in human body and improve the utilization of insulin in human body.At the same time, dietary fiber itself is a kind of polysaccharide, and can not be broken down, equivalent to a part of the food space in the human body.This is a good substitute for many diabetic patients who need to reduce their diet. In addition, when fiber enters the body, it will also wrap up part of the sugar in the food, making the speed of sugar absorption slow, which can effectively regulate the postprandial blood glucose balance.


1. Choose a right size flowerpot and fertile soil, and place the soil in the flowerpot.
2. Put the seeds in the pot and water the good seeds to make sure they have enough water.
3. Apply organic fertilizer to the seeds so that the cucumber can get enough nourishment.
4. Place the seeds in a sunny place for enough sunlight.

Cucumbers contain less than 5 percent sugar and are rich in dietary fiber. According to studies, dietary fiber can improve the sensitivity of insulin receptors in human body and improve the utilization of insulin in human body.At the same time, dietary fiber itself is a kind of polysaccharide, and can not be broken down, equivalent to a part of the food space in the human body.This is a good substitute for many diabetic patients who need to reduce their diet. In addition, when fiber enters the body, it will also wrap up part of the sugar in the food, making the speed of sugar absorption slow, which can effectively regulate the postprandial blood glucose balance.

0
0


