成长记
kensong
2019年03月11日

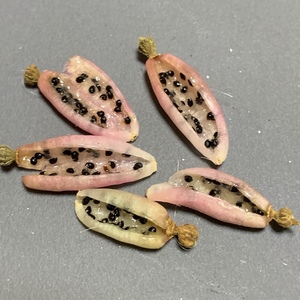
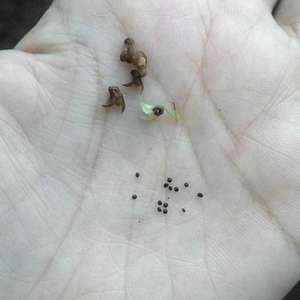
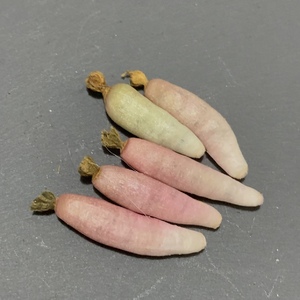
Harvested its seed pods. Will cut open and hopefully find some seeds to plant.

0
0
求助
Lucky Coyote
2018年08月28日

I still haven't gotten an ID on this cactus.
I went to the person I bought it from and he admitted he just bought a variety pack of cactus seeds with no names :(
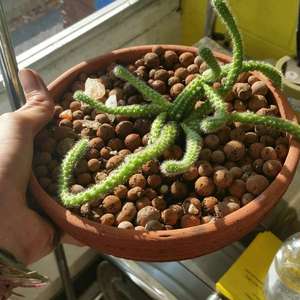
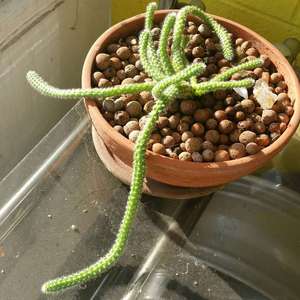
I went to the person I bought it from and he admitted he just bought a variety pack of cactus seeds with no names :(


0
0
Sylac8636:To me, it looks like a rat tail cactus
文章
Miss Chen
2018年08月12日

Black-eyed susans (Rudbeckia hirta) grow as biennials or short-lived perennials. They break dormancy the first year and flower the next. You can sow the seeds outdoors in fall or spring, but they still require some fall preparation for a spring planting. Black-eyed Susans grow in U.S. Department of Agriculture plant hardiness zones 3 through 7, where they perform much like perennials because they readily self-sow.
Fall Sowing

Black-eyed Susans sprout in the spring if you plant them in fall in climates that experience at least three months of temperatures below 40 degrees Fahrenheit. Plant the seeds in early to midfall, about six weeks before the first expected frost. Work a 2-inch-thick layer of compost into the top 8 inches of a well-drained garden bed that receives full summer sun. The plants grow in average soil conditions, so fertilizer amendments aren't necessary. Sow approximately six seeds per square foot and cover them with a 1/4- to 1/2-inch layer of soil. Not all seeds germinate the first year, which is why you need to sow so thickly.
Spring Planting

Seeds sown in spring require pretreatment if you want flowers the first year. Keep the seeds in a place where it's 40 F or cooler, either outdoors or in the refrigerator, for three months before planting to help the seeds break dormancy. Plant the seeds 1/4-inch deep in the prepared garden bed in spring, after the last frost date. Space the seeds 4 to 6 inches apart in all directions and thin them to the appropriate spacing after they germinate.
Indoor Planting

Indoor-sown black-eyed Susans still require cold treatment to germinate. Pot the seeds in cell packs or 2-inch seedling pots in fall, sowing one or two seeds per container. Use a moistened, sterile seed-starting media to minimize fungal growth. After potting, place the containers in a sealed bag to retain moisture and place the pots outdoors or in the fridge to maintain the 40 F temperature. Take the pots out of cold storage four to six weeks before the last frost date. Provide them with all-day sun and water when the soil surface feels dry. The seedlings should be about 6 inches tall and ready for outdoor transplant by the last expected frost in spring. Plant the seedlings at the same depth they are at in the pot, spacing them 12 inches apart in the garden bed.
Early Care

Moderately moist soil helps ensure germination and healthy seedling growth. Water the bed beginning in spring as needed so the top 6 inches of soil stay moist. Direct-sown seeds will require thinning after they sprout. Pinch off the extra seedlings at ground level once the plants begin growing in their second or third set of leaves. Black-eyed Susan plants grow to a 12 inch spread, so leave about 12 inches between plants. Slugs can destroy the seedlings. Set slug traps around the garden or hand pick the pests from the bed after dark. Once established, black-eyed Susans require little care and rarely suffer from pest problems.
Fall Sowing

Black-eyed Susans sprout in the spring if you plant them in fall in climates that experience at least three months of temperatures below 40 degrees Fahrenheit. Plant the seeds in early to midfall, about six weeks before the first expected frost. Work a 2-inch-thick layer of compost into the top 8 inches of a well-drained garden bed that receives full summer sun. The plants grow in average soil conditions, so fertilizer amendments aren't necessary. Sow approximately six seeds per square foot and cover them with a 1/4- to 1/2-inch layer of soil. Not all seeds germinate the first year, which is why you need to sow so thickly.
Spring Planting

Seeds sown in spring require pretreatment if you want flowers the first year. Keep the seeds in a place where it's 40 F or cooler, either outdoors or in the refrigerator, for three months before planting to help the seeds break dormancy. Plant the seeds 1/4-inch deep in the prepared garden bed in spring, after the last frost date. Space the seeds 4 to 6 inches apart in all directions and thin them to the appropriate spacing after they germinate.
Indoor Planting

Indoor-sown black-eyed Susans still require cold treatment to germinate. Pot the seeds in cell packs or 2-inch seedling pots in fall, sowing one or two seeds per container. Use a moistened, sterile seed-starting media to minimize fungal growth. After potting, place the containers in a sealed bag to retain moisture and place the pots outdoors or in the fridge to maintain the 40 F temperature. Take the pots out of cold storage four to six weeks before the last frost date. Provide them with all-day sun and water when the soil surface feels dry. The seedlings should be about 6 inches tall and ready for outdoor transplant by the last expected frost in spring. Plant the seedlings at the same depth they are at in the pot, spacing them 12 inches apart in the garden bed.
Early Care

Moderately moist soil helps ensure germination and healthy seedling growth. Water the bed beginning in spring as needed so the top 6 inches of soil stay moist. Direct-sown seeds will require thinning after they sprout. Pinch off the extra seedlings at ground level once the plants begin growing in their second or third set of leaves. Black-eyed Susan plants grow to a 12 inch spread, so leave about 12 inches between plants. Slugs can destroy the seedlings. Set slug traps around the garden or hand pick the pests from the bed after dark. Once established, black-eyed Susans require little care and rarely suffer from pest problems.
0
0
文章
Miss Chen
2018年07月22日

Your kitchen trash can may contain a vegetable garden just waiting to happen. The roots, shoots and seeds of many plants can regrow instead of languishing in the garbage. Success will vary because grocery store plants are often grown from sterile hybrids or they are treated to retard growth, but with experimentation you may grow a successful garden for just the cost of time.
Plant Choices

Not all scraps are suitable gardening stock. Seeds from summer and winter squashes (Curcubita spp.), peppers (Capsicum annuum) and beans (Phaseolus vulgaris) will often sprout and grow, but the fruits may not be the same quality as the original. You can regrow whole garlic bulbs (Allium sativum), a biennial in U.S. Department of Agriculture plant hardiness zones 3 through 8, from a single leftover clove, for example. Some plants grow back from their roots if you carefully save them. Ginger (Zingiber officinale), which grows in USDA zones 9 through 12, along with green onions (Allium cepa) and the leafy tops of radishes (Raphanus sativus) are some examples.
Pick a Spot

The season and your climate help determine whether pots or beds are the better choice. Spring and summer vegetables, like squash and peppers, grow best outdoors in a bed or container garden. Garlic performs best in a bed in almost any climate, while tender ginger requires a pot so you can overwinter it indoors in cool climates. Cool-season vegetables, like radish tops, do well both outdoors or inside. If you plant in containers, use pots with at least one bottom drainage hole.
Successful Planting

Preparing to plant is just as important as selecting the right kitchen scraps. Most vegetables need rich, well-draining soil in an area that receives six or more hours of daily sun. When planting seeds, sow larger seeds like beans and squash 1 to 2 inches deep, and smaller seeds, such as peppers, 1/4 inch deep. Leave the top of the root attached to leafy greens, such as radish, and push the cut end of the root into the soil slightly. Garlic cloves are planted 1 to 2 inches deep in late fall. For ginger, cut the root into sections , with each section containing at least one growing node, which resembles a raised bump. Plant those sections. If you plant in pots, fill them with a well-drained, moistened potting soil.
Keep Them Growing

Vegetables usually need about 1 inch of water a week. Container plants need watering when the top 1 inch of soil feels dry. Water these until the excess water drains from the pot's bottom. Although fertilizer helps a plant grow, wait to fertilize until after new growth begins to emerge from the planted scraps, or wait for about four to six weeks if you plant seeds. Each vegetable has its own fertilizer requirements, but a general application of a 24-8-16 soluble fertilizer, diluted at the rate of 1/2 teaspoon per 1 gallon of water and applied at 14-day intervals, is suitable for most container vegetables. For garden beds, sprinkle 4 tablespoons of a slow-release 12-4-8 blend over every 4 square feet of soil six weeks after planting, keeping the fertilizer off the leaves and stems of the plants.
Plant Choices

Not all scraps are suitable gardening stock. Seeds from summer and winter squashes (Curcubita spp.), peppers (Capsicum annuum) and beans (Phaseolus vulgaris) will often sprout and grow, but the fruits may not be the same quality as the original. You can regrow whole garlic bulbs (Allium sativum), a biennial in U.S. Department of Agriculture plant hardiness zones 3 through 8, from a single leftover clove, for example. Some plants grow back from their roots if you carefully save them. Ginger (Zingiber officinale), which grows in USDA zones 9 through 12, along with green onions (Allium cepa) and the leafy tops of radishes (Raphanus sativus) are some examples.
Pick a Spot

The season and your climate help determine whether pots or beds are the better choice. Spring and summer vegetables, like squash and peppers, grow best outdoors in a bed or container garden. Garlic performs best in a bed in almost any climate, while tender ginger requires a pot so you can overwinter it indoors in cool climates. Cool-season vegetables, like radish tops, do well both outdoors or inside. If you plant in containers, use pots with at least one bottom drainage hole.
Successful Planting

Preparing to plant is just as important as selecting the right kitchen scraps. Most vegetables need rich, well-draining soil in an area that receives six or more hours of daily sun. When planting seeds, sow larger seeds like beans and squash 1 to 2 inches deep, and smaller seeds, such as peppers, 1/4 inch deep. Leave the top of the root attached to leafy greens, such as radish, and push the cut end of the root into the soil slightly. Garlic cloves are planted 1 to 2 inches deep in late fall. For ginger, cut the root into sections , with each section containing at least one growing node, which resembles a raised bump. Plant those sections. If you plant in pots, fill them with a well-drained, moistened potting soil.
Keep Them Growing

Vegetables usually need about 1 inch of water a week. Container plants need watering when the top 1 inch of soil feels dry. Water these until the excess water drains from the pot's bottom. Although fertilizer helps a plant grow, wait to fertilize until after new growth begins to emerge from the planted scraps, or wait for about four to six weeks if you plant seeds. Each vegetable has its own fertilizer requirements, but a general application of a 24-8-16 soluble fertilizer, diluted at the rate of 1/2 teaspoon per 1 gallon of water and applied at 14-day intervals, is suitable for most container vegetables. For garden beds, sprinkle 4 tablespoons of a slow-release 12-4-8 blend over every 4 square feet of soil six weeks after planting, keeping the fertilizer off the leaves and stems of the plants.
3
0
文章
Miss Chen
2018年07月22日

Pumpkins take up a large space in the home garden. To grow them successfully, you need to know how to prepare the soil, when to start the seeds, how far apart to space them and when to harvest the pumpkins.

Step 1
Check the back of the seed packet for the number of days until maturity. If you are growing pumpkins for Halloween, add a week or two and then count backwards to arrive at the best planting date. It will most likely be in late spring or early summer. Pumpkin seedlings do not tolerate frost, but the pumpkins will rot before Halloween if you plant them too soon in a warm climate.
Step 2
Prepare the soil for the pumpkin bed in an area that receives sun. Because pumpkins are heavy feeders, dig a hole 2 feet across and 1 foot deep. Fill it with a mix of compost and soil to which you've added a handful of slow-release fertilizer. Form a mound over the hole about 4 inches high in the center.
Step 3
Make additional mounds. Space them 10 feet apart. Pumpkins like to sprawl and require plenty of room.
Step 4
Sow six seeds in a circle in each mound. Push them about one inch deep into the soil and spaced four to six inches apart. After the seeds sprout, remove all but the strongest two seedlings. If you don't, you'll have all foliage and no pumpkins.

Step 5
Weed the bed regularly. Pumpkins can tolerate short periods of hot, dry weather, but if you have extended periods of heat, water them. As the pumpkins grow, slip a shingle or tile under each one to lift it slightly from the soil. This foils some insects and improves the appearance of the pumpkin on that side.
Step 6
Harvest all the pumpkins when they turn orange and before a heavy frost hits. To harvest pumpkins, cut the stem about three inches from the pumpkin. Pumpkins broken from their stems do not keep well.

Step 1
Check the back of the seed packet for the number of days until maturity. If you are growing pumpkins for Halloween, add a week or two and then count backwards to arrive at the best planting date. It will most likely be in late spring or early summer. Pumpkin seedlings do not tolerate frost, but the pumpkins will rot before Halloween if you plant them too soon in a warm climate.
Step 2
Prepare the soil for the pumpkin bed in an area that receives sun. Because pumpkins are heavy feeders, dig a hole 2 feet across and 1 foot deep. Fill it with a mix of compost and soil to which you've added a handful of slow-release fertilizer. Form a mound over the hole about 4 inches high in the center.
Step 3
Make additional mounds. Space them 10 feet apart. Pumpkins like to sprawl and require plenty of room.
Step 4
Sow six seeds in a circle in each mound. Push them about one inch deep into the soil and spaced four to six inches apart. After the seeds sprout, remove all but the strongest two seedlings. If you don't, you'll have all foliage and no pumpkins.

Step 5
Weed the bed regularly. Pumpkins can tolerate short periods of hot, dry weather, but if you have extended periods of heat, water them. As the pumpkins grow, slip a shingle or tile under each one to lift it slightly from the soil. This foils some insects and improves the appearance of the pumpkin on that side.
Step 6
Harvest all the pumpkins when they turn orange and before a heavy frost hits. To harvest pumpkins, cut the stem about three inches from the pumpkin. Pumpkins broken from their stems do not keep well.
1
0
文章
Miss Chen
2018年07月19日

Radishes are one of the first vegetables ready for harvest in the spring. Most varieties have a maturity date of approximately 25 days from planting, and you can sow the seeds every 10 to 14 days until the weather turns hot. Radishes are also planted in mid-summer for a fall crop. Winter storage radishes grow larger and do not mature until 50 to 70 days after planting. Edible pod radishes are grown for their seedpods, which mature in 50 days. Growing conditions affect the final maturity date, so consider the harvest dates printed on seed packets to be estimates.
Small Radishes

When you plant the seeds, record the expected maturity date.
Record the expected maturity date for each radish variety the day you plant the seeds. Use a waterproof marker to write the date on a plastic row label or jot it in a notebook.
picking vegetables
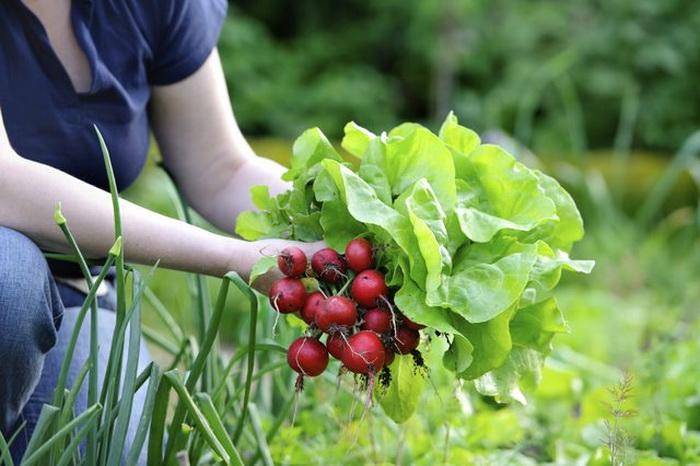
Check the radishes five to seven days before the maturity date by pulling one from the ground. Harvest the sample radish by grasping the bottom of the foliage near the soil and firmly pulling upward. If the radish is 1/2 to 1 inch across, the crop is ready to harvest.
Fresh radish from ground
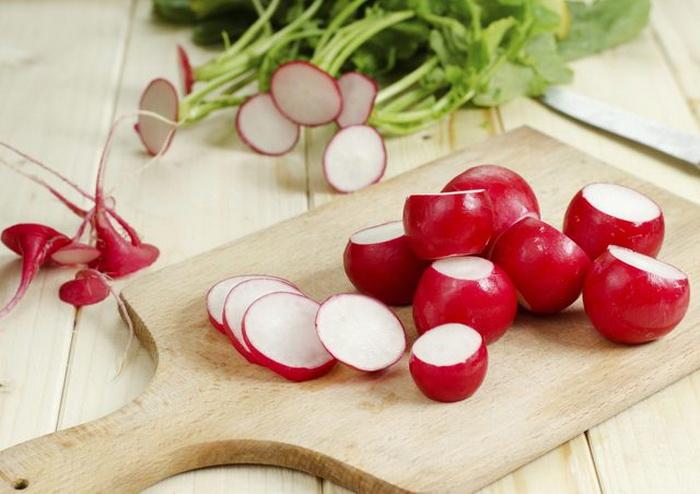
Remove the leaves with garden snips, wash the radishes and place them in plastic bags. They will keep for two to four weeks in the refrigerator.
Winter Radishes
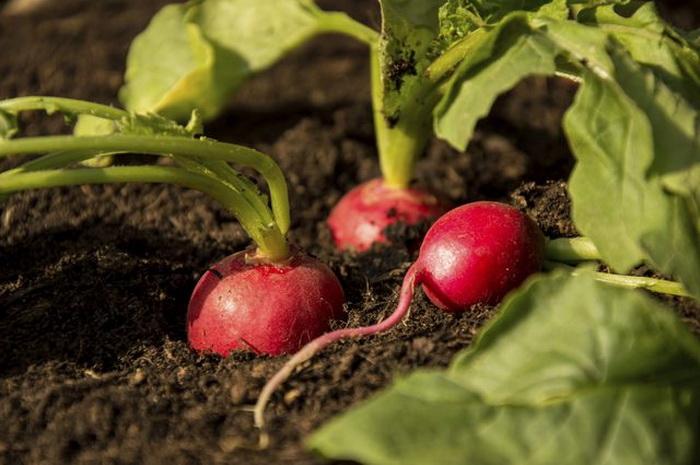
Harvest winter radishes any time after the expected harvest date. You may leave them in the ground until two weeks before the first frost date in the fall.
picking vegetables
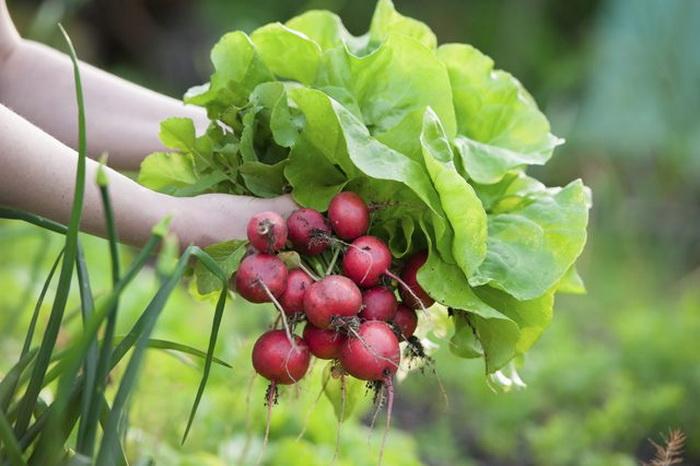
Pick winter radishes by grasping the foliage near the soil and pulling upward.
food refrigerator

Store the radishes where they will remain cool and moist, for up to two months.
Edible Pod Radishes

Check the plants every two to three days after the blossoms appear. The pods resemble green beans, with the lower pods ripening first.
Fresh Salad

Harvest the pods when they are the thickness of a pencil for peak flavor. Pick a rat-tail radish by grasping the small stem at one end of the pod and bending it to the side until it snaps it off where the stem attaches to the branch.
"Russian traditional Okroshka, summer soup"

Use edible pod radishes soon after picking them or store them in a plastic bag in the refrigerator for up to one week.
Small Radishes

When you plant the seeds, record the expected maturity date.
Record the expected maturity date for each radish variety the day you plant the seeds. Use a waterproof marker to write the date on a plastic row label or jot it in a notebook.
picking vegetables

Check the radishes five to seven days before the maturity date by pulling one from the ground. Harvest the sample radish by grasping the bottom of the foliage near the soil and firmly pulling upward. If the radish is 1/2 to 1 inch across, the crop is ready to harvest.
Fresh radish from ground

Remove the leaves with garden snips, wash the radishes and place them in plastic bags. They will keep for two to four weeks in the refrigerator.
Winter Radishes

Harvest winter radishes any time after the expected harvest date. You may leave them in the ground until two weeks before the first frost date in the fall.
picking vegetables

Pick winter radishes by grasping the foliage near the soil and pulling upward.
food refrigerator

Store the radishes where they will remain cool and moist, for up to two months.
Edible Pod Radishes

Check the plants every two to three days after the blossoms appear. The pods resemble green beans, with the lower pods ripening first.
Fresh Salad

Harvest the pods when they are the thickness of a pencil for peak flavor. Pick a rat-tail radish by grasping the small stem at one end of the pod and bending it to the side until it snaps it off where the stem attaches to the branch.
"Russian traditional Okroshka, summer soup"

Use edible pod radishes soon after picking them or store them in a plastic bag in the refrigerator for up to one week.
0
0
文章
Miss Chen
2018年07月16日

Spaghetti squash (Cucurbita pepo) produces large seeds that store for up to six years, provided they're properly collected and prepared. Named for its cooked flesh, which resembles spaghetti, spaghetti squash is also called spaghetti gourd, vegetable spaghetti, Manchurian squash and squaghetti. The fruits are smooth-skinned, about 10 inches long, 5 inches in diameter and weigh about 2 pounds.

Harvesting Fruit
Spaghetti squash fruits are ready for harvest about 70 to 80 days after sowing. Only seeds from ripe fruit are likely to sprout when sown later. Harvest spaghetti squash when the vine stem withers and the fruit skin is tough.
If you aren't sure whether a spaghetti squash fruit is ripe, push a thumbnail into the skin. If the fruit is ready for harvesting, your nail won't pierce the skin.
Separating Seed
Seed from spaghetti squash fruits must be separated from the pulp and soaked in water. Healthy seeds sink to the bottom in a few days.
Cut a spaghetti squash in half lengthways with a sharp knife.
Scoop the seeds from the center with a spoon.
Put the seeds in a jar or bucket with an equal amount of water.
Stir the seed and water mixture once a day for two to four days. A mold may form, but this is harmless.
When some seeds sink to the bottom and some float, pour off the water, pulp, floating seeds and mold.
Spread the remaining seeds on a paper towel or screen to dry.

Storing Seed
Drying and freezing spaghetti squash seeds helps keep them fresh and free of pests and diseases. When the seeds are completely dry, place them in paper envelopes or glass jars. Write the name of the seed type and the date on the envelopes or jar labels, and put them in a freezer. After two days, transfer the seeds in their storage containers to a refrigerator. Plant the seeds within three years.

Harvesting Fruit
Spaghetti squash fruits are ready for harvest about 70 to 80 days after sowing. Only seeds from ripe fruit are likely to sprout when sown later. Harvest spaghetti squash when the vine stem withers and the fruit skin is tough.
If you aren't sure whether a spaghetti squash fruit is ripe, push a thumbnail into the skin. If the fruit is ready for harvesting, your nail won't pierce the skin.
Separating Seed
Seed from spaghetti squash fruits must be separated from the pulp and soaked in water. Healthy seeds sink to the bottom in a few days.
Cut a spaghetti squash in half lengthways with a sharp knife.
Scoop the seeds from the center with a spoon.
Put the seeds in a jar or bucket with an equal amount of water.
Stir the seed and water mixture once a day for two to four days. A mold may form, but this is harmless.
When some seeds sink to the bottom and some float, pour off the water, pulp, floating seeds and mold.
Spread the remaining seeds on a paper towel or screen to dry.

Storing Seed
Drying and freezing spaghetti squash seeds helps keep them fresh and free of pests and diseases. When the seeds are completely dry, place them in paper envelopes or glass jars. Write the name of the seed type and the date on the envelopes or jar labels, and put them in a freezer. After two days, transfer the seeds in their storage containers to a refrigerator. Plant the seeds within three years.
0
0
文章
Miss Chen
2018年07月13日

Cabbages produce seeds from flowers but you don't usually see them do it because it takes more than a year. If you want to get your own seed from your cabbages, choose open-pollinated varieties rather than F1 hybrids, so they'll breed true. Cabbages cross easily, not only with other cabbages but with kale, kohlrabi, cauliflower, broccoli, collards and Brussels sprouts, so you'll need to protect your seed cabbages if other plants of the same species are blooming within 1,000 feet.

Step 1
Plant your cabbage to mature as late in the fall as practical. Choose the best dozen heads to use for seed. If your winters are mild, rarely getting more than a few degrees below freezing, cover the heads with straw or other loose mulch to protect them from freezing. If your winters are severe, pull them up with roots intact and store them in a root cellar or bury them under at least a foot of dirt and mulch, deeper in the coldest climates. You want them to be kept cool but never frozen solid and damp enough so they don't dry out but not so damp that they mold.
Step 2
Dig up or uncover the cabbage heads when the danger of hard freezing is past. Plant or transplant them 1/12 to 2 feet apart, spaced in a square or grid rather than a row if you'll need to protect them from cross-pollination. Plant them deep so the heads are at ground level. Cut an "x" in the top of each head, about an inch deep, to let the flowering stock emerge easily.
Step 3
Set poles upright around the cabbages about 4 feet high and connect the tops with wire or heavy cord. When the seed stalks emerge in early summer but before they bloom, cover the framework with netting that's woven tightly enough that bees can't get through. When the flowers open, raise the cover long enough each morning to allow bees to enter and let them stay inside to pollinate the plants, then raise the cover to release them. Repeat while the plants are blooming, then remove the covering while the seeds mature. If no other plants that cross with cabbages are blooming at the same time within 1,000 feet, you can omit the protection and just let bees come and go to pollinate them naturally.

Step 4
Tie the seed stalks loosely to poles to keep them from bending or breaking in strong wind or rain as the seeds mature. Wait several weeks for the seeds to ripen.
Step 5
Pick the seedpods when they first turn brown, before they burst open and spill their seeds. Some mature before others, so pick them every few days. Lay them on a tray in the sun to finish drying. If you don't mind losing some, you can wait until the majority have turned brown, cut the whole seed stalk and lay it on a tray or sheet to dry. For the most viable seed, let the pods mature as long as possible on the plant.
Step 6
Put the pods in a cloth bag and lightly pound it or crush it to knock the seeds loose, then carefully pour them out. Use a coarse sieve to separate them from larger debris or pour them from one container to another in a light breeze to let the lighter pieces of broken pod blow away. Keep the seeds in a dark, dry place until you want to plant them. They should keep several years.

Step 1
Plant your cabbage to mature as late in the fall as practical. Choose the best dozen heads to use for seed. If your winters are mild, rarely getting more than a few degrees below freezing, cover the heads with straw or other loose mulch to protect them from freezing. If your winters are severe, pull them up with roots intact and store them in a root cellar or bury them under at least a foot of dirt and mulch, deeper in the coldest climates. You want them to be kept cool but never frozen solid and damp enough so they don't dry out but not so damp that they mold.
Step 2
Dig up or uncover the cabbage heads when the danger of hard freezing is past. Plant or transplant them 1/12 to 2 feet apart, spaced in a square or grid rather than a row if you'll need to protect them from cross-pollination. Plant them deep so the heads are at ground level. Cut an "x" in the top of each head, about an inch deep, to let the flowering stock emerge easily.
Step 3
Set poles upright around the cabbages about 4 feet high and connect the tops with wire or heavy cord. When the seed stalks emerge in early summer but before they bloom, cover the framework with netting that's woven tightly enough that bees can't get through. When the flowers open, raise the cover long enough each morning to allow bees to enter and let them stay inside to pollinate the plants, then raise the cover to release them. Repeat while the plants are blooming, then remove the covering while the seeds mature. If no other plants that cross with cabbages are blooming at the same time within 1,000 feet, you can omit the protection and just let bees come and go to pollinate them naturally.

Step 4
Tie the seed stalks loosely to poles to keep them from bending or breaking in strong wind or rain as the seeds mature. Wait several weeks for the seeds to ripen.
Step 5
Pick the seedpods when they first turn brown, before they burst open and spill their seeds. Some mature before others, so pick them every few days. Lay them on a tray in the sun to finish drying. If you don't mind losing some, you can wait until the majority have turned brown, cut the whole seed stalk and lay it on a tray or sheet to dry. For the most viable seed, let the pods mature as long as possible on the plant.
Step 6
Put the pods in a cloth bag and lightly pound it or crush it to knock the seeds loose, then carefully pour them out. Use a coarse sieve to separate them from larger debris or pour them from one container to another in a light breeze to let the lighter pieces of broken pod blow away. Keep the seeds in a dark, dry place until you want to plant them. They should keep several years.
0
0
成长记
Pommy Mommy
2018年07月12日

I love pansies from seeds! You have no idea what's going to spring up and each one is utterly unique and beautiful!


2
0
文章
Miss Chen
2018年07月12日

Avocados originated in Mexico and Central America. The first records of avocados were discovered in Aztec writings, and avocado seeds were discovered buried inside Aztec cities along with other rubble. (The modern name "avocado" actually comes from the Aztec word "ahuacati," meaning testicles, which described how the avocado fruit looked hanging on the tree.) Avocados are now grown in warm and tropical climates around the world.
Preferred Climate
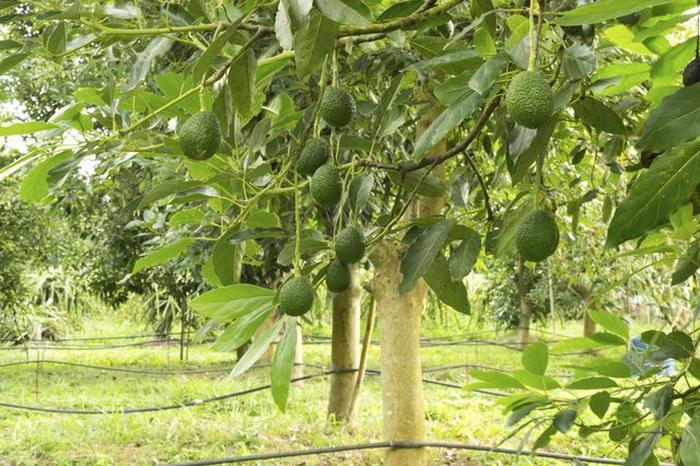
The preferred climate and zone for avocados is a climate with warm temperatures year-round. The tree is a tropical plant and does not like frost or temperatures under 50 degrees Fahrenheit. Avocado trees prefer high humidity of 60 to 80 percent. They can also grow in dryer climates (with no less than 40 percent humidity), but more problems may occur with the fruit or tree. The tree needs a high level of moisture and plenty of nutrients in the soil.
Mexico, Central and South America

Mexico, Central America, and some regions of South America have the frost-free climate, high water quality and rich soil necessary to keep avocados healthy. About half of all avocados sold in the United States come from Mexico, with Indonesia and the USA growing an additional third. The rest of Central America and South America make the rest of the percentage of avocados grown for U.S. import.
United States

It is possible to grow avocados in the United States in certain conditions. The best growing zones for avocado trees are U.S. hardiness zones 9 to 11. These zones are frost-free and have relatively even climates. All areas in these zones may not be suitable, however, because avocado trees need moisture and rich soil. Many of the warmer zones in the United States are too dry for avocado growing.
Australia
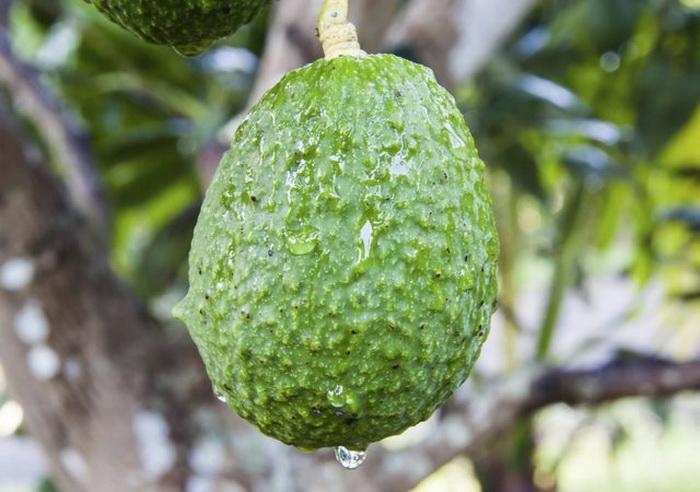
Australia has a large avocado-growing industry, with over 70 varieties grown all over the country. Avocado trees were first introduced to Australia in 1840. The seeds were planted in the royal garden, and it was determined that Australia was an ideal growing climate for avocados. As of 2010, Australia does not export its avocados to any other country, although a plan to export avocados to New Zealand and Asia is in development.
Growing Latitudes
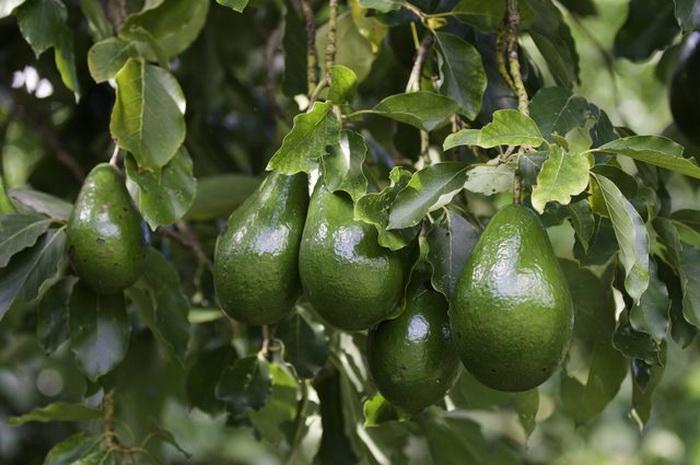
Latitudes at the 0 degree latitudinal mark (right around the equator) grow the healthiest avocados. However, avocado trees can grow between the latitudes of 30 degrees north to 35 degrees south—as far north as Maryland and as far south as South Africa and Australia.
Preferred Climate

The preferred climate and zone for avocados is a climate with warm temperatures year-round. The tree is a tropical plant and does not like frost or temperatures under 50 degrees Fahrenheit. Avocado trees prefer high humidity of 60 to 80 percent. They can also grow in dryer climates (with no less than 40 percent humidity), but more problems may occur with the fruit or tree. The tree needs a high level of moisture and plenty of nutrients in the soil.
Mexico, Central and South America

Mexico, Central America, and some regions of South America have the frost-free climate, high water quality and rich soil necessary to keep avocados healthy. About half of all avocados sold in the United States come from Mexico, with Indonesia and the USA growing an additional third. The rest of Central America and South America make the rest of the percentage of avocados grown for U.S. import.
United States

It is possible to grow avocados in the United States in certain conditions. The best growing zones for avocado trees are U.S. hardiness zones 9 to 11. These zones are frost-free and have relatively even climates. All areas in these zones may not be suitable, however, because avocado trees need moisture and rich soil. Many of the warmer zones in the United States are too dry for avocado growing.
Australia

Australia has a large avocado-growing industry, with over 70 varieties grown all over the country. Avocado trees were first introduced to Australia in 1840. The seeds were planted in the royal garden, and it was determined that Australia was an ideal growing climate for avocados. As of 2010, Australia does not export its avocados to any other country, although a plan to export avocados to New Zealand and Asia is in development.
Growing Latitudes

Latitudes at the 0 degree latitudinal mark (right around the equator) grow the healthiest avocados. However, avocado trees can grow between the latitudes of 30 degrees north to 35 degrees south—as far north as Maryland and as far south as South Africa and Australia.
1
0
文章
Miss Chen
2018年07月06日

Okra, also known as gumbo, is a warm-weather vegetable that thrives in the long, hot summers of the southern United States. Although okra loves hot weather, it can successfully be grown in cooler Northern climates as well. Plant okra seeds directly in your garden seven to 10 days after the last expected frost in your area, as the seeds won't grow in cold weather. Okra will be ready to harvest approximately 60 days after planting.

Step 1
Spade the soil in a sunny area in your garden. Work the soil to a depth of at least 6 inches, then work in an all-purpose granular fertilizer with a ratio such as 10-10-10. Apply 1 to 2 lbs. of fertilizer for every 100 square feet of garden space.
Step 2
Make shallow rows with the corner of your hoe. Allow 3 feet between each row. Plant the okra seeds 4 to 6 inches apart in the rows, then cover the seeds with 1 inch of soil. Water lightly with a hose and spray attachment.
Step 3
Thin the okra seedlings when the plants are 2 to 4 inches tall. Allow 12 to 18 inches between each plant.
Step 4
Water okra deeply enough to saturate the soil once every seven to 10 days during extended hot, dry periods. Otherwise, okra requires no irrigation.

Step 5
Harvest okra with kitchen shears or a sharp knife when the pods are 2 to 4 inches long. Okra ripens quickly in late summer so check the plants every two to three days. Handle the pods gently as okra is tender and bruises easily. Pick regularly, as the plant will go to seed and won't continue to produce if the pods are allowed to remain on the plant.

Step 1
Spade the soil in a sunny area in your garden. Work the soil to a depth of at least 6 inches, then work in an all-purpose granular fertilizer with a ratio such as 10-10-10. Apply 1 to 2 lbs. of fertilizer for every 100 square feet of garden space.
Step 2
Make shallow rows with the corner of your hoe. Allow 3 feet between each row. Plant the okra seeds 4 to 6 inches apart in the rows, then cover the seeds with 1 inch of soil. Water lightly with a hose and spray attachment.
Step 3
Thin the okra seedlings when the plants are 2 to 4 inches tall. Allow 12 to 18 inches between each plant.
Step 4
Water okra deeply enough to saturate the soil once every seven to 10 days during extended hot, dry periods. Otherwise, okra requires no irrigation.

Step 5
Harvest okra with kitchen shears or a sharp knife when the pods are 2 to 4 inches long. Okra ripens quickly in late summer so check the plants every two to three days. Handle the pods gently as okra is tender and bruises easily. Pick regularly, as the plant will go to seed and won't continue to produce if the pods are allowed to remain on the plant.
1
0
文章
Miss Chen
2018年07月06日

Purple hull peas (Vigna unguiculata ssp. unguiculata), a type of southern pea, produce pale green beans with a pink eye in dull purple pods. They take about 90 days to reach maturity from planting. The seeds require warm soil and frost-free weather to sprout successfully, and they don't transplant well, so sow them directly in the garden in late spring or early summer after frost danger passes.

Garden Selection
Purple hull peas can tolerate light afternoon shade, especially in hot climates, but they grow best when they receive full, all-day sunlight. They thrive in any well-drained loam garden soil with a pH of between 6.0 and 6.5. Heavy clay or soil that doesn't drain quickly after rain or watering can slow germination or cause the seeds or seedlings to rot. Purple hull peas grow on vines, so select a site with room for stakes or supports and where the peas won't block sunlight to lower-growing plants.
Soil Preparation
Adding compost and a light fertilization about 10 days before planting gives the purple hull peas the nutrients they need for initial growth. Cover the bed with a 2-inch layer of compost and sprinkle 1 pound of 5-10-10 fertilizer along every 50-foot row. Turn the compost into the top 6 inches of soil. Right before planting, lightly moisten the seed and place it in a bag with Rhizobium bacteria powder, shaking the bag gently to coat the seeds. The bacteria treatment allows the purple hull peas to fix their own nitrogen in the soil after planting, minimizing the need for later fertilization.
Planting Basics
The seeds sprout and begin putting on healthy growth when soil temperatures are 60 degrees Fahrenheit and air temperatures are above 70 F. Plant the seeds about 1 ½ inches deep, spacing them 4 to 6 inches apart. Plant along the base of a bean trellis for support, or erect bean tepees and sow one seed at the base of each tepee pole. You can also install a 4-foot stake for each individual plant if you are only growing a few. If you plant multiple rows, set them about 2 feet apart so you have room to move between the plants for weeding, maintenance and harvest.

Early Care
Sprouting usually occurs within a week if you keep the soil moist. Water as needed so the top 6 inches of soil remains moist but not wet until germination. After sprouting, continue to water once or twice weekly, giving the plants about 1 inch of water a week or enough so the soil doesn't dry completely. Purple hull peas don't require watering if there is sufficient rain to keep the soil moist. Overhead watering can lead to flower loss or fungal problems as the plants mature, so water near the base of the plants to keep the foliage dry. Pull weeds as soon as they sprout so they don't compete with the peas for water or nutrients.

Garden Selection
Purple hull peas can tolerate light afternoon shade, especially in hot climates, but they grow best when they receive full, all-day sunlight. They thrive in any well-drained loam garden soil with a pH of between 6.0 and 6.5. Heavy clay or soil that doesn't drain quickly after rain or watering can slow germination or cause the seeds or seedlings to rot. Purple hull peas grow on vines, so select a site with room for stakes or supports and where the peas won't block sunlight to lower-growing plants.
Soil Preparation
Adding compost and a light fertilization about 10 days before planting gives the purple hull peas the nutrients they need for initial growth. Cover the bed with a 2-inch layer of compost and sprinkle 1 pound of 5-10-10 fertilizer along every 50-foot row. Turn the compost into the top 6 inches of soil. Right before planting, lightly moisten the seed and place it in a bag with Rhizobium bacteria powder, shaking the bag gently to coat the seeds. The bacteria treatment allows the purple hull peas to fix their own nitrogen in the soil after planting, minimizing the need for later fertilization.
Planting Basics
The seeds sprout and begin putting on healthy growth when soil temperatures are 60 degrees Fahrenheit and air temperatures are above 70 F. Plant the seeds about 1 ½ inches deep, spacing them 4 to 6 inches apart. Plant along the base of a bean trellis for support, or erect bean tepees and sow one seed at the base of each tepee pole. You can also install a 4-foot stake for each individual plant if you are only growing a few. If you plant multiple rows, set them about 2 feet apart so you have room to move between the plants for weeding, maintenance and harvest.

Early Care
Sprouting usually occurs within a week if you keep the soil moist. Water as needed so the top 6 inches of soil remains moist but not wet until germination. After sprouting, continue to water once or twice weekly, giving the plants about 1 inch of water a week or enough so the soil doesn't dry completely. Purple hull peas don't require watering if there is sufficient rain to keep the soil moist. Overhead watering can lead to flower loss or fungal problems as the plants mature, so water near the base of the plants to keep the foliage dry. Pull weeds as soon as they sprout so they don't compete with the peas for water or nutrients.
0
0


