成长记
Shami
2018年04月16日

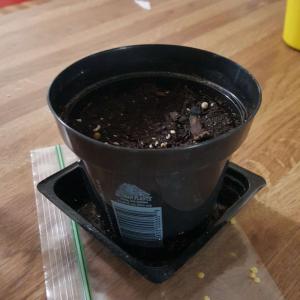
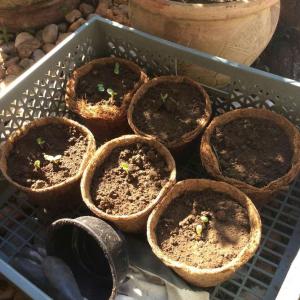
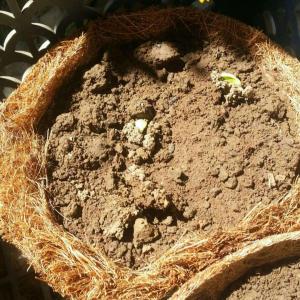
A nice way to start the day! 3 of the seeds emerged today. Date: April 17, 2018

0
0
求助
Shami
2018年04月16日

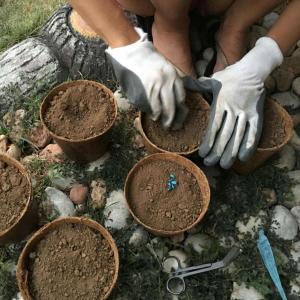
I burried these hybrid sunflower seeds a little too deep. I'm worried that they won't be able to grow. And how much water do they need? #sunflower #hybridsunflower #hybrid



0
0
文章
Miss Chen
2018年04月15日

Okra seeds need optimal conditions to germinate. The seed coat is thick and hard, inhibiting germination unless the seeds are treated to enhance germination. Some seeds are scarified with acid by the seed producer to increase germination rates. Check the package expiration date, old seeds are less likely to germinate. Under ideal conditions, your okra should germinate within seven days.

Conditions that Encourage Sprouting
Okra grows best in well-drained soils with a pH between 6.5 to 7.5. It is a hot-weather crop that prefers full sun. Sow the seeds directly into the garden or plant them in peat pots for later transplanting. Plant the seeds 3/4 to 1 inch deep in hills 12 to 24 inches apart. Plant two seeds per hole and thin the plants, leaving the strongest plant when they reach approximately 3 inches tall.
Soak the Seeds For Better Germination
Iowa State University Extension recommends soaking the seeds overnight before planting to soften the seed coat and increase the germination rate. Soaking for four to six hours will do the job. Either cover the seeds in water or wrap them in damp paper towels.
Freeze the Seeds for Better Germination
Another way to increase the chances of germination is to freeze the seeds before planting, according to the Clemson University Extension. Freezing breaks the seed coat and increases potential germination. Place the seeds in the freezer overnight before planting in warm soil.
Temperatures for Germination
Okra sprouts best in warm soil. Plant it in the spring or early summer when the soil temperature has reached at least 70 degrees F and the daytime temperatures are reaching 75 to 90 degrees. Okra seeds do not sprout in soil temperatures below 65 degrees.

Days to Maturity
Viable okra seeds germinate within seven days and then require approximately 48 to 75 days to maturity, depending on the variety. The plants and pods grow very fast and require picking every day or two to prevent the pods from becoming large and fibrous.

Conditions that Encourage Sprouting
Okra grows best in well-drained soils with a pH between 6.5 to 7.5. It is a hot-weather crop that prefers full sun. Sow the seeds directly into the garden or plant them in peat pots for later transplanting. Plant the seeds 3/4 to 1 inch deep in hills 12 to 24 inches apart. Plant two seeds per hole and thin the plants, leaving the strongest plant when they reach approximately 3 inches tall.
Soak the Seeds For Better Germination
Iowa State University Extension recommends soaking the seeds overnight before planting to soften the seed coat and increase the germination rate. Soaking for four to six hours will do the job. Either cover the seeds in water or wrap them in damp paper towels.
Freeze the Seeds for Better Germination
Another way to increase the chances of germination is to freeze the seeds before planting, according to the Clemson University Extension. Freezing breaks the seed coat and increases potential germination. Place the seeds in the freezer overnight before planting in warm soil.
Temperatures for Germination
Okra sprouts best in warm soil. Plant it in the spring or early summer when the soil temperature has reached at least 70 degrees F and the daytime temperatures are reaching 75 to 90 degrees. Okra seeds do not sprout in soil temperatures below 65 degrees.

Days to Maturity
Viable okra seeds germinate within seven days and then require approximately 48 to 75 days to maturity, depending on the variety. The plants and pods grow very fast and require picking every day or two to prevent the pods from becoming large and fibrous.
0
0
文章
Miss Chen
2018年03月23日

Habanero peppers are one of the world's hottest peppers. They take a while to ripen after you transplant them or grow them from seeds. The peppers turn from green to red or orange when they ripen. Habanero peppers thrive in hot weather and acidic soil. The peppers do not require much water. In fact, too much water can cause the produce to have a bitter flavor. While the peppers are very hot in flavor, they are also rich in vitamin C. You can create salsa with the peppers or add them to your favorite dish to add a spicy flavor.

Hunker Source Material - Midcentury Design
00:00
Habanero Care
Grow the peppers when the threat of frost passes, because they do not tolerate the frost. Habanero plants require temperatures between 70 and 85 degrees Fahrenheit before they produce peppers. Habaneros can often tolerate higher temperatures during the daytime. Remove small flowers until the plants become established if you are growing them from transplants. Water the plants only once a week to stress the plants to produce the hottest peppers. Watering the plants more often will create milder peppers.
Harvest Time
Inspect the habanero peppers between 100 to 120 days after you plant them. The time it takes for the peppers to ripen will depend on sunlight, water and soil conditions. Habanero peppers will remain green when they sprout on the plants, but they will change in color when it gets closer to harvest time. Check on the habanero peppers daily to determine when they are ready for harvesting.

Harvest Signs
Habanero peppers will transform from green to red or orange in color. You will no longer notice any green on the peppers when they ripen completely. Inspect the size of the habanero peppers. Peppers that are three-quarters inch or larger in diameter are ready for harvest because they have reached the desired size. Harvest the habanero peppers as they ripen so that the plant can dedicate its energy into producing new peppers.
Harvest Tips
Wear gloves when handling the habanero peppers to prevent irritation to your skin or eyes. Cut the habanero peppers from the plants with pruning shears. Cut the peppers off at the stem, leaving up to an inch of the stem attached to the peppers. Avoid pulling or tearing the peppers from the plant, because you can damage it. Store the harvested peppers in a paper bag in the refrigerator crisper drawer. Wash the habanero peppers off with cool water before you use them.

Hunker Source Material - Midcentury Design
00:00
Habanero Care
Grow the peppers when the threat of frost passes, because they do not tolerate the frost. Habanero plants require temperatures between 70 and 85 degrees Fahrenheit before they produce peppers. Habaneros can often tolerate higher temperatures during the daytime. Remove small flowers until the plants become established if you are growing them from transplants. Water the plants only once a week to stress the plants to produce the hottest peppers. Watering the plants more often will create milder peppers.
Harvest Time
Inspect the habanero peppers between 100 to 120 days after you plant them. The time it takes for the peppers to ripen will depend on sunlight, water and soil conditions. Habanero peppers will remain green when they sprout on the plants, but they will change in color when it gets closer to harvest time. Check on the habanero peppers daily to determine when they are ready for harvesting.

Harvest Signs
Habanero peppers will transform from green to red or orange in color. You will no longer notice any green on the peppers when they ripen completely. Inspect the size of the habanero peppers. Peppers that are three-quarters inch or larger in diameter are ready for harvest because they have reached the desired size. Harvest the habanero peppers as they ripen so that the plant can dedicate its energy into producing new peppers.
Harvest Tips
Wear gloves when handling the habanero peppers to prevent irritation to your skin or eyes. Cut the habanero peppers from the plants with pruning shears. Cut the peppers off at the stem, leaving up to an inch of the stem attached to the peppers. Avoid pulling or tearing the peppers from the plant, because you can damage it. Store the harvested peppers in a paper bag in the refrigerator crisper drawer. Wash the habanero peppers off with cool water before you use them.
0
0
文章
Miss Chen
2018年03月21日

Sprout beans at home for a constant source of cheap and nutritious fresh vegetables. Home production using organic seeds purchased from a trusted source avoids the rare health concerns over mass-produced sprouts. Compare soy, mung, lentil and adzuki bean sprouts to learn their particular flavors. Wash your hands before handling sprouts, rinse thoroughly before eating and keep seeds in a cool and dry place.

Nutritional Values
Soy and mung bean sprouts are year-round sources of low-fat food that contain no cholesterol. They both contain B vitamins, including thiamin, riboflavin, niacin, pantothenic acid and folic acid. They're also good sources of dietary fiber and vegetarian protein. Soybeans contain 20 to 25 percent vegetable protein; mung beans contain 22 percent. Six oz. of mung beans contain 60 calories and the same amount of soybeans has 200 calories. Both kinds of sprouts are at their most nutritious as soon as tiny green leaves show at the tips.
Growing Soybean and Mung Bean Sprouts
Some beans are easier to sprout than others. Mung beans need eight to 12 hours of soaking, sprout in two to five days and keep for two to six weeks. Soybeans are more difficult to sprout, often splitting open, discoloring and developing a bitter taste if not used when very young. Soybeans require soaking for between two and four hours, sprout in two to six days, keep refrigerated for two to four weeks and yield double the amount of sprouts to beans.
Uses of Soybean and Mung Bean Sprouts
Mung beans are the most common and easily available type of sprouts. They feature largely in Asian cuisines and have a sweet, nutty flavor and crisp texture. Uses include adding to cooked dishes at the end of the process. These thick-stemmed sprouts can withstand several minutes worth of cooking. Mung beans sprouts can be stir-fried or cooked in traditional Chinese dishes like chicken chow mein and chop suey, or eaten raw in salads and sandwiches. Soybeans have a more pronounced bean-like flavor and are often preferred cooked, even by enthusiastic sprout eaters. Soybeans are harder to digest when raw, so try cooking them in stews and soups, or adding to a stir-fry. Served raw or cooked, 12 oz. of either mung or soy bean sprouts are enough to serve in salads or as a side dish for between four and six guests. Rinse both types of sprouts well before cooking or eating raw.

Health Benefits
The benefits of mung beans are those associated with all bean sprouts. They contain the dietary necessities of fresh vegetable protein and fiber, as well as C and B vitamins. Soybean sprouts also confer the same protective benefits as other soy products like tofu, tempeh, soy milk and soy sauce. These benefits include possible reductions of the risk of heart disease by lowering LDL cholesterol. In Asia, where consumption rates of soybean products are high, rates of prostrate and breast cancers are low. Active ingredients thought to be responsible for this protection action are the substances daidzein and genistein. Women with estrogen-positive breast cancer must avoid soybean sprouts, because they contain plant hormones that may stimulate the growth of their tumors.

Nutritional Values
Soy and mung bean sprouts are year-round sources of low-fat food that contain no cholesterol. They both contain B vitamins, including thiamin, riboflavin, niacin, pantothenic acid and folic acid. They're also good sources of dietary fiber and vegetarian protein. Soybeans contain 20 to 25 percent vegetable protein; mung beans contain 22 percent. Six oz. of mung beans contain 60 calories and the same amount of soybeans has 200 calories. Both kinds of sprouts are at their most nutritious as soon as tiny green leaves show at the tips.
Growing Soybean and Mung Bean Sprouts
Some beans are easier to sprout than others. Mung beans need eight to 12 hours of soaking, sprout in two to five days and keep for two to six weeks. Soybeans are more difficult to sprout, often splitting open, discoloring and developing a bitter taste if not used when very young. Soybeans require soaking for between two and four hours, sprout in two to six days, keep refrigerated for two to four weeks and yield double the amount of sprouts to beans.
Uses of Soybean and Mung Bean Sprouts
Mung beans are the most common and easily available type of sprouts. They feature largely in Asian cuisines and have a sweet, nutty flavor and crisp texture. Uses include adding to cooked dishes at the end of the process. These thick-stemmed sprouts can withstand several minutes worth of cooking. Mung beans sprouts can be stir-fried or cooked in traditional Chinese dishes like chicken chow mein and chop suey, or eaten raw in salads and sandwiches. Soybeans have a more pronounced bean-like flavor and are often preferred cooked, even by enthusiastic sprout eaters. Soybeans are harder to digest when raw, so try cooking them in stews and soups, or adding to a stir-fry. Served raw or cooked, 12 oz. of either mung or soy bean sprouts are enough to serve in salads or as a side dish for between four and six guests. Rinse both types of sprouts well before cooking or eating raw.

Health Benefits
The benefits of mung beans are those associated with all bean sprouts. They contain the dietary necessities of fresh vegetable protein and fiber, as well as C and B vitamins. Soybean sprouts also confer the same protective benefits as other soy products like tofu, tempeh, soy milk and soy sauce. These benefits include possible reductions of the risk of heart disease by lowering LDL cholesterol. In Asia, where consumption rates of soybean products are high, rates of prostrate and breast cancers are low. Active ingredients thought to be responsible for this protection action are the substances daidzein and genistein. Women with estrogen-positive breast cancer must avoid soybean sprouts, because they contain plant hormones that may stimulate the growth of their tumors.
0
0
文章
Miss Chen
2018年03月06日

Teaching children about plants is problematic, since seeds are usually buried in potting soil. The germination process is invisible. However, with a wet paper towel, a Ziploc bag, dried pinto beans and a bright, sunny window, you can provide a teaching moment even in the dead of winter. Pinto beans sprout and grow quickly. This project holds interest for several days. After the beans sprout, continue the teaching process by planting the beans inside or in the garden.

Step 1
Wet a paper towel. Squeeze most of the water out.
Step 2
Fold the paper towel to fit into the Ziploc bag. Place in the bag.
Step 3
Insert one or two pinto beans per bag on between the paper towel and the side of the bag. Do not seal the bag.
Step 4
Tap a nail into the wall on each side of a bright, sunny window. Stretch a piece of twine across the window, tying it to the nails.

Step 5
Hang the Ziploc bags on the twine with a clothespin with the bean facing the window.
Step 6
Monitor the Ziploc bag, making sure that the paper towel stays moist while the pinto bean sprouts. Pinto beans germinate quickly, sometimes overnight.
Step 7
Plant the bean sprout in a paper cup with potting soil or in the garden. Handle the root gently. It breaks easily. Water the sprout thoroughly after planting.

Step 1
Wet a paper towel. Squeeze most of the water out.
Step 2
Fold the paper towel to fit into the Ziploc bag. Place in the bag.
Step 3
Insert one or two pinto beans per bag on between the paper towel and the side of the bag. Do not seal the bag.
Step 4
Tap a nail into the wall on each side of a bright, sunny window. Stretch a piece of twine across the window, tying it to the nails.

Step 5
Hang the Ziploc bags on the twine with a clothespin with the bean facing the window.
Step 6
Monitor the Ziploc bag, making sure that the paper towel stays moist while the pinto bean sprouts. Pinto beans germinate quickly, sometimes overnight.
Step 7
Plant the bean sprout in a paper cup with potting soil or in the garden. Handle the root gently. It breaks easily. Water the sprout thoroughly after planting.
0
0
文章
Cole Csolak
2018年02月19日

What you need : eight to twelve in. pot, miracle grow soil, and marigold seeds.
Step one : fill pot With the soil
Step two : poke half inch holes in the soil
Step three : put three mariglod seeds in each hole
Step four : cover the holes and saterate the soil so germination is possible
When seeds sprout, always keep the water moist.
Tips : best time to plant is in early may
Seeds will reproduce as soon as the flower buds bloom
Marigolds always need to be watered so count three in you head while you water them
You can grow marigolds in your house in the whole winter to keep them alive for the comming spring
Well have a fun time planting marigolds
1
1
Aki
2018年01月12日

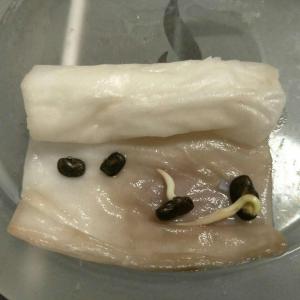
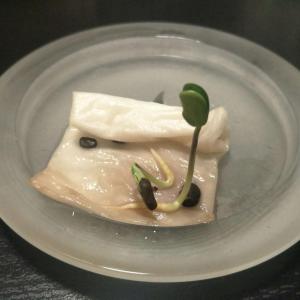
Got this Anchan or butterfly pea flower seeds from my nephew, the progress of growing from seed on 10 Jan - 12 Jan


0
0
文章
Miss Chen
2017年12月15日

Small Clementine oranges (Citrus reticulata "Clementine") don't have seeds. Their thin peel is simple to remove, making them a welcome treat as they ripen in winter. Like most citrus varieties, Clementine only grows in U.S. Department of Agriculture plant hardiness zones 8 through 11, but you can enjoy them in any climate by growing the trees indoors. Look for trees grafted onto dwarf or semi-dwarf root stocks -- often labeled as patio or container citrus by nurseries. "Clementine" grafted to dwarf root stock grows slowly and rarely reaches heights above 5 or 6 feet.

Plant Clementine in a 20- to 24-inch-diameter container at least as deep as it is wide. Select a container with bottom drainage, and place it on a wheeled cart so it's simpler to move the heavy plant. Use a well-draining potting soil rich in organic matter, and plant the tree so that the graft union, or raised knot on the lower trunk, is just above the soil surface in the pot.
Set the tree near a window that receives full, all-day sunlight. "Clementine" leaves yellow and the tree fails to fruit without sufficient sun. Set the container outside during frost-free summers to increase light exposure, and bring it indoors for winter. Alternatively, hang a full-spectrum fluorescent grow light 2 feet above the tree and leave it on all day to ensure the indoor plant receives sufficient light.
Feel the soil in the pot daily, and water when the top 1 inch begins to feel dry. Pour water onto the soil with a watering can just until the excess begins to drain from the bottom of the pot. Empty the excess water from the drip tray beneath the pot after watering, because standing water can lead to waterlogged soil and root rot problems.
Fertilize indoor potted Clementines year-round with a fertilizer formulated for citrus, such as a 13-7-13 blend. These trees don't enter a true dormant stage, so they require ongoing fertilization. Sprinkle 1 1/2 cups on top of the soil, a few inches from the trunk, for trees under 3 feet tall, or up to 3 cups for trees up to 5 feet tall. Water immediately after application so the fertilizer soaks into the soil. Reapply the fertilizer every two to three months.
Trim off any suckers that grow along the trunk below the graft union. Cut these off flush to the trunk, using a shears sterilized in a 10 percent bleach solution.

Cut off broken or dead branches any time, removing them back the to trunk or the nearest healthy wood. You can trim off small, unsightly branches from along the trunk to give the Clementine a more balanced appearance. Pinch back the growing tips of the branches by 1 inch when new growth appears in the spring to encourage full, balanced growth. Indoor citrus trees tolerate pruning at any time for shape or size control.
Monitor the tree for common indoor pests, including aphids and mites. Take the tree outside or set it in a bathtub, and then spray the leaves with a sharp spray of water to dislodge and wash away these pests. If you take your Clementine outdoors in the summer, fully rinse the foliage before bringing the tree back indoors for winter.

Plant Clementine in a 20- to 24-inch-diameter container at least as deep as it is wide. Select a container with bottom drainage, and place it on a wheeled cart so it's simpler to move the heavy plant. Use a well-draining potting soil rich in organic matter, and plant the tree so that the graft union, or raised knot on the lower trunk, is just above the soil surface in the pot.
Set the tree near a window that receives full, all-day sunlight. "Clementine" leaves yellow and the tree fails to fruit without sufficient sun. Set the container outside during frost-free summers to increase light exposure, and bring it indoors for winter. Alternatively, hang a full-spectrum fluorescent grow light 2 feet above the tree and leave it on all day to ensure the indoor plant receives sufficient light.
Feel the soil in the pot daily, and water when the top 1 inch begins to feel dry. Pour water onto the soil with a watering can just until the excess begins to drain from the bottom of the pot. Empty the excess water from the drip tray beneath the pot after watering, because standing water can lead to waterlogged soil and root rot problems.
Fertilize indoor potted Clementines year-round with a fertilizer formulated for citrus, such as a 13-7-13 blend. These trees don't enter a true dormant stage, so they require ongoing fertilization. Sprinkle 1 1/2 cups on top of the soil, a few inches from the trunk, for trees under 3 feet tall, or up to 3 cups for trees up to 5 feet tall. Water immediately after application so the fertilizer soaks into the soil. Reapply the fertilizer every two to three months.
Trim off any suckers that grow along the trunk below the graft union. Cut these off flush to the trunk, using a shears sterilized in a 10 percent bleach solution.

Cut off broken or dead branches any time, removing them back the to trunk or the nearest healthy wood. You can trim off small, unsightly branches from along the trunk to give the Clementine a more balanced appearance. Pinch back the growing tips of the branches by 1 inch when new growth appears in the spring to encourage full, balanced growth. Indoor citrus trees tolerate pruning at any time for shape or size control.
Monitor the tree for common indoor pests, including aphids and mites. Take the tree outside or set it in a bathtub, and then spray the leaves with a sharp spray of water to dislodge and wash away these pests. If you take your Clementine outdoors in the summer, fully rinse the foliage before bringing the tree back indoors for winter.
0
2
Gerald Pitter
2017年11月23日

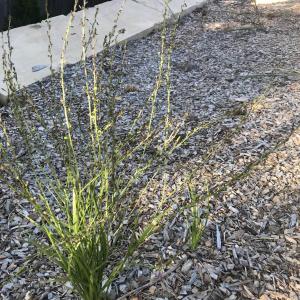
Anyone know what this is? I thought it might be lavender as i thre dome seeds down a while ago. Bees come for the purple flowers

0
0
Mr.Snow:Sorry, it is not lavender. See if your county extension can ID this pretty monocot.


