文章
linpei
2017年07月04日

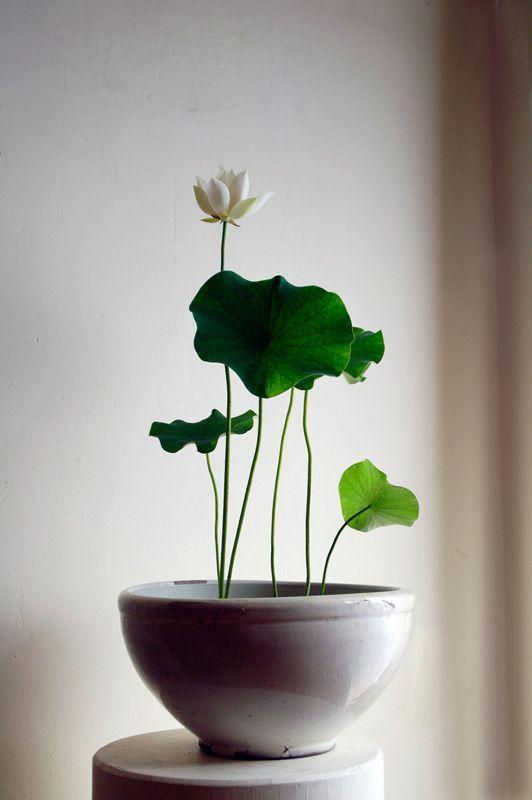
Lotus flowers are beautiful aquatic plants that represent beauty and purity, and they are available in a range of sizes and colors. The most common colors are red, pink, yellow, and white. The plants can be grown from seeds or tubers, but seeds will not produce a flower the first year while they develop into tubers.
1.Growing from Seed
Scar the seeds. File the pointed tip of the seed down to one layer using a standard metal file. If you do not scar the seed, it will not grow and may rot.
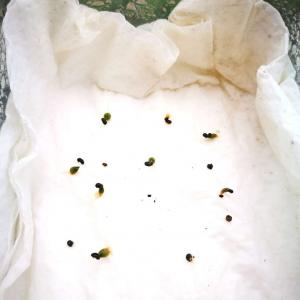
2.Place the seeds into a glass of warm water. The water should not be chlorinated and must be changed every day until the lotus seeds sprout. After the first day of soaking, the seeds should swell to nearly twice their original size.
Seeds that float are almost always infertile. File any floating seeds down until you see a hint of the white meat on the inside of the seed. If these seeds do not swell like the others, discard them to avoid letting them cloud up the water.
3.Continue changing the water daily even after the seeds sprout. You must be more delicate than before to avoid disturbing the growth, however. Growth should start after four or five days of soaking, but you will need to wait a few more days until the seedling is at least 6 in. (15.24 cm) long before transferring.
4.Pick the right pot. A 3 to 5 gallon (11 to 19 liter) container should provide a young lotus plant with enough room to grow. A black plastic bucket works best because of its ability to retain heat and warm the seedlings. You also need to choose a bucket that does not have any drainage holes. The plant can actually gravitate toward the drainage holes and begin growing outside of them, causing the plant to under-perform.
5.Anchor the seeds. Lotus seeds without an anchor may find their way out of the soil and end up floating on the surface of the water. Gently wrap a small amount of modeling clay around each seed, but do not cover the sprout.
6.Fill your pot with dense soil. The ideal soil is about two parts clay and one part river sand. Fill the pot with about 6 in. (15.24 cm) of this potting medium.
7.Gently press the seeds into the top of the soil. The seeds should rest near the top of the soil, but you should brush a light layer of soil over the seeds after you press them in.
8.Lower the pot into shallow water. The water should be a maximum of 18 in. (45.72 cm) deep and at a temperature of 70 degrees Fahrenheit (21.1 degrees Celsius).
6
7
成长记
Elena Galkina
2017年06月17日

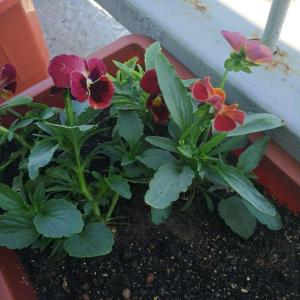
All light seeds died. Only dark seeds' plants survived and now they bloom with dark red flowers

1
0
成长记
Lucky Coyote
2017年06月13日

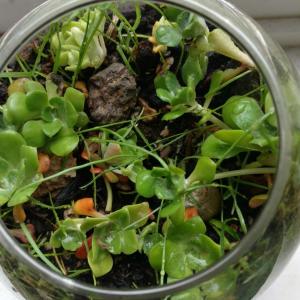
having a real life Viridi problem lol it seems that this little one had some grass seeds mixed into the roots

1
0
求助
Trinity Rangel
2017年06月06日

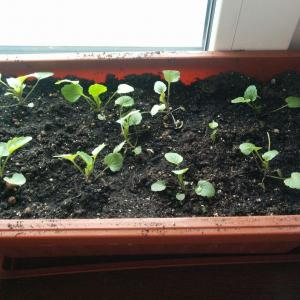
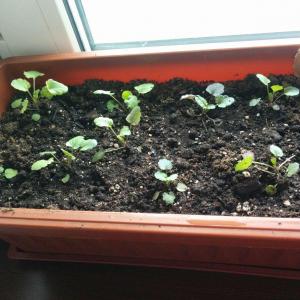
Planted tomato seeds and they sprouted. I have one problem, on the right you can see they look a little droopy. what am I doing wrong?¶(°•°)

0
0
elvenking42:there's a chance they're succumbing to the Damping Off fungus? it's pretty common with seedlings. it's best to make sure they have a decent amount of airflow to prevent it
Trinity Rangel
2017年06月06日

planted some tomatoe seeds and they sprouted a few day ago.d=(^▽^)=b
the two on the right are looking pretty bad, what can I do to help them????????˚‧º•(˚ ˃̣̣̥᷄⌓˂̣̣̥᷅ )‧º•˚

the two on the right are looking pretty bad, what can I do to help them????????˚‧º•(˚ ˃̣̣̥᷄⌓˂̣̣̥᷅ )‧º•˚

0
0
文章
Hande Salcan
2017年05月23日


One of the hardest decisions a new gardener must make is where to buy their garden seeds and supplies.
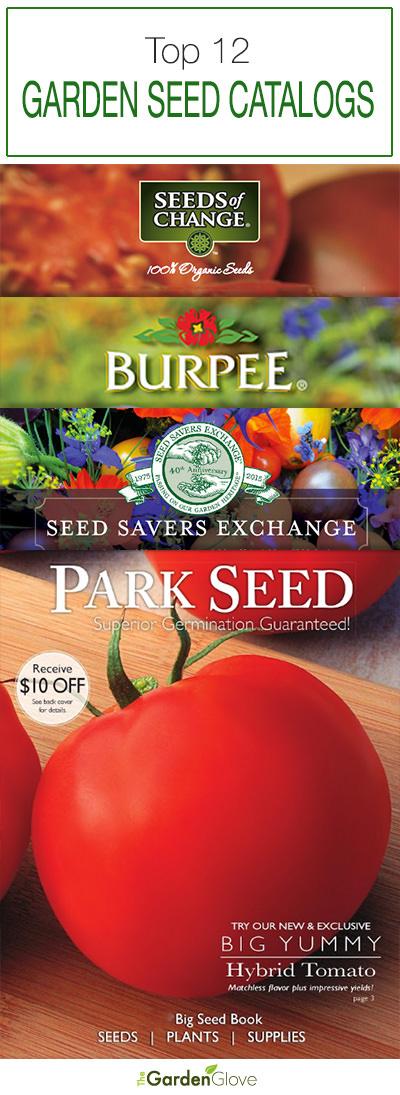
Here at The Garden Glove, we have several favorite seed catalogs and suppliers, and we update this list every January. This list has been updated for 2017. Here is some info on our top picks that we use ourselves, and our experience with them, along with their website information. Log onto their websites and request their catalogs today to have seeds in time for spring planting! Or order online like I do… And check out our favorite choices for buying live plants online at the end!
Update: Some companies, in order to save on waste, no longer print paper catalogs… Their catalogs are online only. While I do love curling up with a cup a tea and a stack of catalogs, consider doing the same with a tablet. I encourage companies to save all the trees they can, and besides… you get faster service with online ordering anyway!
#1
Park Seed
Park Seed always has a great selection of both flower and vegetable seeds, and some great herbs as well. Prices are affordable, and seed packets have plenty of seeds. Seed is always fresh, and we get good to excellent germination rates from them. Shipping is fast, usually just a couple of days from order to in my mailbox! Highly recommended. They also offer some live plants as well.
#2
Burpee Seeds
Burpee has always had one of the most colorful catalogs, and a wide selection of seeds. They are especially good at their vegetable selections, so all you veggie gardeners, take note! Their new varieties are the ones to beat each year!
#3
Thompson and Morgan
Thompson and Morgan is an English seed supplier, but the ultimate in unusual seeds for the serious gardener. If gardening is your passion, you need this catalog.
#4
Johnnys Selected Seeds
As recommended by a reader, this company needs to be added to our list! Not only do they have an extensive seed catalog, they have lots of tips and resources there as well. Johnny has a longstanding reputation as a quality company in the gardening community! Oh, and it’s an employee owned company!
#5
Pinetree Garden Seeds
Pinetree Garden Seeds was one of the first seed companies I ever used. They specialize in smaller packets for the average home gardener, at smaller prices. Most of us will never need the hundreds of seeds in the average seed packet, so why pay for it? They have a good selection, fast shipping and good customer service.
#6
Renee’s Garden Seeds
Renees Garden has grown into one of the most trusted suppliers of seeds for organic and heirloom varieties… So if you crave a little history with your salad, this is the spot for you!
#7
Select Seeds
If you grow flowers and want antique varieties your grandmother grew, this is the place. I love the idea of nostalgia in the garden…so did Thomas Jefferson, one of the most eminent gardeners in our country’s history.
#8
Seed Savers Exchange
Seed savers is a non profit company that is a wonderful source of information on heirloom and open pollinated seed, as well as one of the top sources for such seeds. Not only does the free catalog list all their seeds, their sites educates us on why it is important to save heirloom varieties, and even has an online garden planner that’s got a 30 day free trial. (No, you don’t have to give your credit card!) This is a time honored company and trusted company worth looking into if you wish to preserve our heritage plants!
#9
Seeds of Change
Going organic in the New Year? Seeds of Change is a catalog you need for your veggie garden. Great selection of 100% certified organic seeds.
#10
Cooks Garden
Are you a gourmet cook, or just want to be? Cooks Garden has veggie varieties that are difficult to find on your garden center rack… amazing in flavor and color… Beautiful catalog!
#11
Nichols Garden Nursery
This is a family owned business that has a stellar reputation for quality and customer service. They do not sell any seed that has been genetically modified, and they specialize in fine and rare seeds, herbs and goods for the gardener cook. Love their amazing selection!
#12
Bountiful Gardens
We wanted to include this selection this year because this company is a product of Ecology Action, a not for profit that teaches sustainable agriculture to end world hunger… Their catalog is full of great growing tips, and all their seed is heirloom, non GMO, and certified organic. To quote their website “It doesn’t take much to get started, no gizmos or expensive equipment. If you have some soil, all you need is simple tools, seeds, and the information to use them.”
Order some catalogs today, or visit their online catalogs for faster service, and start dreaming of your spring garden!
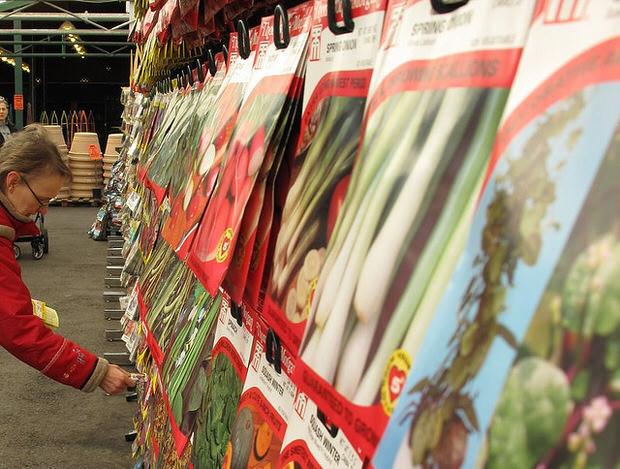
Plants
If you want to order top quality, affordable perennials and shrubs, I highly recommend Bluestone Perennials. I have ordered from them again and again, and never been disappointed. Check their internet specials often!
White Flower Farms has top of the line plants for decent prices, and partners with the like of Family Circle and BHG.
If you are looking for the latest varieties or unique plants, Wayside Gardens is the place… can be a little pricey, but thats because they offer varieties and quality seldom found online.
2
2
文章
Hande Salcan
2017年05月23日


When the end of the season nears, serious gardeners should think about saving seeds from their own plants, to prepare for next season’s seed starting. Why save your own seed?
Saving your own seed is a budget friendly way to replant next year, after all, you pay for the seed or plant once, and you can keep saving the seed year after year!
Saving seed protects biodiversity. In other words, we save seed and protect those varieties from being lost to the generations of hybridizing. So many plants our great grandparents grew simply no longer exist… and that’s as tragic a loss as extinct animals.
It allows you to grow plants that do well in your garden, and over time, those seeds adapt to your growing conditions. Basically, you are growing “The Johnsons special corn seed”, and it would be true! After a few years, your seed has adapted to grow better in your garden then anywhere else on earth…and that is an amazing thing.
You are guaranteed not to have seed that’s been treated in any way. After all, you are your own seed company!
You can trade seed with friends, or participate in a seed lending program like some libraries are now sponsoring. Find out more about seed lending from the Washington state seed lending “library”. Many cities have these now. Imagine the possibilities. Search for one in your area.
It’s fun and educational. And it just makes you feel self-sufficient, doesn’t it?
Do remember, hybridized plants seeds’ will revert back to their parent plant. Look for open pollinated plants to grow true from seed. You can find more information on that at Organic Gardening. (Also a good beginners guide!)
Let’s start with the basics. The Farmer’s Almanac has a tutorial on beginning seed saving for vegetables. Start here, and get a feel for how easy it really is!
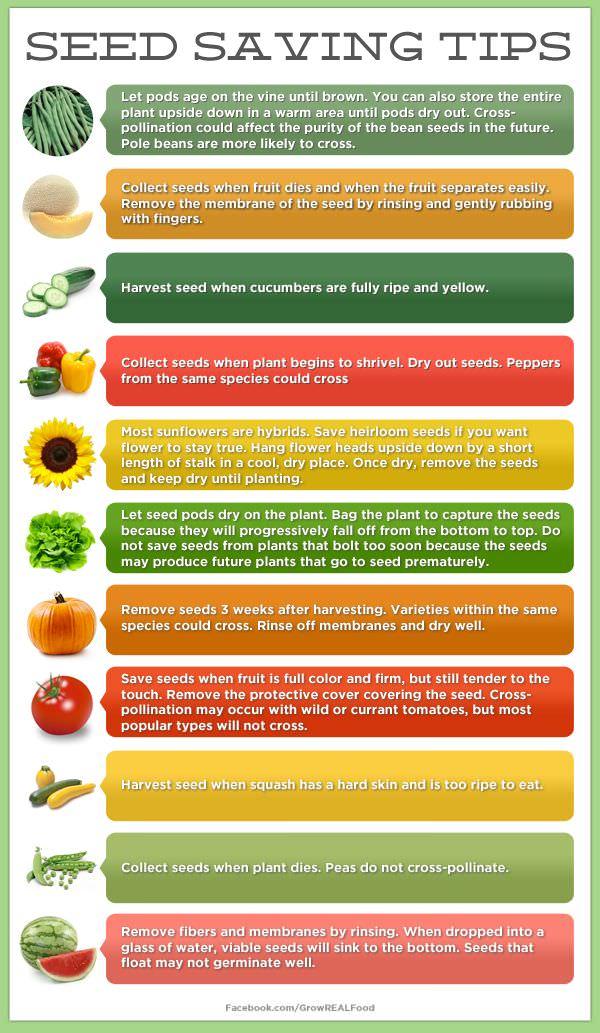
Now that you have the basics down, ‘Grow Real Food’ has a chart of seed saving tips that is really helpful, and gives you specific information plant by plant. This would be great to print out and include in your gardening journal!
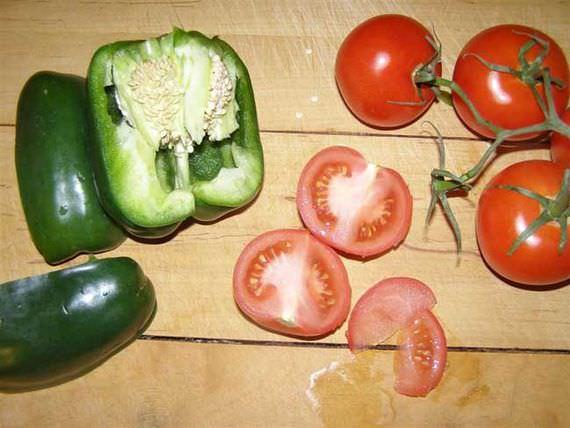
‘Tipnut’ has a good tutorial on saving tomato seeds, and includes a tip on getting heirloom varieties from a farmers market… That way, you know how they look and taste, and also that they grow well in your area. Then you can harvest seed directly from your farmers market tomato!
‘Weekend Gardener’ has a primer on saving flower seeds from annuals, for those of you who just can’t let those petunias go!

Now that you have your seeds, you need a way to store them! ‘Erin Vale Designs’ shows us how to make these DIY seed packets from scrapbook paper. I love this because you could choose any color or design to match your personality. These also would make lovely place cards for a garden party! Be sure to scroll to the bottom and click on the download buttons to find the designs for the packet.

If you just want to print out packets, ‘The Prudent Homemaker’ has this free pdf for printing these really nice seed packets… Great for gift giving, and gives space to write information on the variety, date, etc…

Don’t like the idea of packets? Found this idea on Cottage in the Oaks. Paint the tops of old spice jars with chalkboard paint! That way, each year they can be reused for different seeds!

1
2
文章
Hande Salcan
2017年05月23日


It can be easy and inexpensive to start garden seeds indoors for spring planting. Here at The Garden Glove, we use several methods.
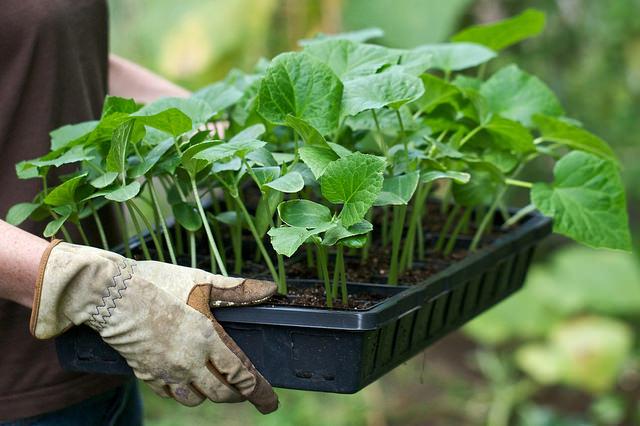
Method #1 – Purchase an inexpensive dome style seed starter from your local garden center or discount store. These usually sell for less than $10, and contain everything except the seeds to get you growing, including a humidity dome to keep in heat, and soil or soil less cubes. The only downside to these is that the growing blocks are usually pretty small, so if you are going to plant fast growing annuals such as sunflowers, morning glories or squash, you might want to wait to just two weeks before last frost. Otherwise, you will have to transplant your seedlings into larger containers as they outgrow the seed dome.
This method works very well for growing perennials, since they are slower growing than annuals as a rule.
Make sure the growing medium is moist, place the seeds at the depth recommended by the packet, and place the dome on. You will see moisture condense inside the dome. This is great for starting out, as the heat and moisture is trapped in. However, once seedlings start to appear, you MUST remove the dome to prevent “damping off” a fungal disease that will kill the seedlings. Add water as necessary to keep the soil moist, but not wet.

Method #2 – The second method is the most economical one. This is where we plant seed into reusable or recycled containers. These containers must have drainage, and be able to be moved easily. Tupperware, egg cartons or pots made from recycled newspaper are several popular ideas. Placed on a tray, such as an old cookie sheet- they make great planting flats, if not too terribly attractive. It helps when using this method to enclose the entire tray in a clear plastic bag until seedlings appear. This does the same job as the $10 dome, by keeping in heat and moisture.
Hee is a tutorial from Hobby Room Diaries on making newspaper pots!

Method #3 – This is my preferred method, and one I just started using two years ago. I picked up a portable greenhouse. It has several metal shelves for seedling flats covered by a poly “tent” to keep in heat and moisture. This makes it very easy for me to move the entire set up outdoors for daylight, and the tent keeps the heat in, even when it hovers near freezing outside. I can grow several hundred seedlings in this setup. I caution you against leaving it outdoors during windy conditions, however. Also keep in mind during sunny days it can heat up inside the greenhouse quite quickly, so make sure you tie up one side and occasionally monitor the temps in your greenhouse. When the weather is warm enough, remove the poly tenting entirely.

Once the seedlings are up, they must have very bright, though not direct light. Using a windowsill during bad weather is acceptable, but to grow healthy and strong, seedlings should be placed in either artificial light, or on a protected porch for much of the day. Make sure you bring them in at night, and don’t leave them out on frosty weather.
You can create an artificial light system easily with a cheap shop light from the home improvement store, and a both a warm and cool 40 watt fluorescent tube. It does not have to be one of the more expensive plant growing tubes. Hang the lights from chains off a scrap 2×4 stand. Keep the lights very close to the seedlings, and leave on for at least 12 hours a day.
Starting garden seeds indoors will save you money and allow you to grow plant varieties in your garden that are special and unusual. It’s easy, so try starting your seeds indoors today!
2
0
文章
Martha
2017年05月22日

Learn how to grow romanesco, growing romanesco broccoli is rewarding. It is a very decorative and ornamental cauliflower with exotic taste.
USDA Zones — 3 – 11
Propagation Method — Seeds
Difficulty — Moderate
Other Names — Brassica oleracea botrytis (latin name), Romanesco broccoli Romanesco Cauliflower, Romanesque cauliflower, Buzzy Broc
Romanesco broccoli is also called “Broccoli Apple” and “Cauliflower with Turrets”. It is a Mediterranean plant, native to Italy, especially of Rome and is an Italian cousin of broccoli and cauliflower.
It is a very decorative and ornamental cauliflower with exotic taste. You can even grow it in the flower garden and admire it.
Romanesco is rich in vitamin C and minerals. It has a mild taste than other cauliflowers and slightly sweet flavor.
Planting
Seed sowing is done in spring and summer. If growing romanesco in cooler zones, sow the seeds 4 – 6 weeks prior to planting outside. Sow the seeds 2 cm deep. While planting the seedlings outside leave 50 cm (2 feet) of space in all directions.
If growing in subtropical and tropical zones you can plant it in fall or in winter.
Companion Plants
Dill, artichokes, chard, beet, borage, chamomile, nasturtium, carrot, celery, cucumber, spinach, beans, hyssop, lettuce, mint, marigold, oregano, peas, potatoes, rosemary, sage, thyme.
Incompatible Plants
Garlic, chives, shallots, strawberries, turnip, onion, parsnip, leek, radish, rutabaga, tomatoes.
Requirements for Growing RomanescoSoil
Humus and compost rich soil that is well drained is recommended.
Sun
Growing romanesco in sunny spot for more yield.
Watering
Like most of the brassicas it enjoys frequent and regular watering.
Romanesco Care
Romanesco broccoli care is similar to other cauliflowers and cabbages.
Fertilizer
Mix compost and 10 – 10 – 10 slow release fertilizer at the time of planting. Fertilize it with high in nitrogen fertilizer one month after planting.
Mulching
Do mulching to keep the soil weed free and conserve moisture.
Pests and Diseases
Flea beetles, gall weevil, whiteflie, aphids and moths. Snails and slugs are fond of seedlings. Besides this it is infected by blight, clubroot and mildew.
Harvesting
Generally, romanesco is ready to harvest in 75 – 100 days after planting. Pick the head when they are tight and dense and use fresh as soon as possible.
Crop rotation
0
0
文章
Andrea
2017年05月22日

When thinking about planting seeds, sometimes it can be confusing. What should I plant when? Well, the answer is… there are a lot of different answers! What to plant when depends on your location and zone, your weather, and your planting method. Some seeds must be started indoors early, and others can be planted right out in the garden. Here are our picks for seed starting calendars so you know just what to plant when! Our feature photo above comes from Anne at ‘The Micro Gardener’. She has compiled a list of garden planting calendars and resources you shouldn’t miss.
First thing you need to know is your growing “zone”. In the US, you can find your zone for your state and area by visiting the ‘USDA” website. If you need to find out your frost dates, you can use this chart from ‘Food Skills and Self Sufficiency‘.

Next, you want a way to keep track of what you plant, and a place to hold onto any printable calendars and resources. I recommend a garden journal. You can buy one at any bookstore, or you download the free printable garden journal from ‘About.com’ and simply slip it into a binder cover.

Margaret Roach from ‘A Way to Garden’ has a program you can use to help you no matter what zone you garden in. All you have to know is your approximate last frost date. You plug that date into her planting calculator, and it tells you the best dates to plant from seed indoors, or to transplant or plant from seed outdoors. She has both veggies and annual flowers on her calculator for you. Margaret has been a garden writer for both Newsday and Martha Stewart Living.

From ‘Anglican Home’, this vegetable planting cheat sheet gives you info on what to plant when, also ideas on container planting and companion planting as well!

Many vegetables can be planted for winter harvest… it’s not just spring that these decisions have to be made! ‘Territorial Seeds‘ has a winter gardening planting calendar for a general idea on when, and what to plant for winter harvest. If you live in a severe winter climate, check with your local nursery to verify these dates.

So no matter where you live or what you plant, here are the garden planting calendars and resources to get the right plant, into the right spot, at the right time!
1
0
文章
Juze
2017年05月22日

Learn how to grow an apple tree in container in this article. Growing apple trees in pots require some care and maintenance that is given below.

How to Choose a Right Apple Tree
Growing apple tree from seeds is a bad idea. Instead, buy a dwarf or semi-dwarf grafted tree from a nursery. For choosing a right apple tree for your home you need to know a few things. Apple trees are grown from grafting on a rootstock as this has so many benefits. If you are unaware about apple rootstock grafting you might like to read more on this on the official website of Ministry Of Agriculture Food And Rural Affairs (Ontario) and a very informative article of Cornell University.
Basically, dwarf apple trees are those apple trees in which dwarf rootstocks are grafted to control their height, size and to improve fruit production and resistance against diseases and pests. When you go to a nursery or shop online, search for rootstock choices like M27, M26, Bud9, G16 or M9. Apple trees grown on these rootstocks are dwarf and don’t grow above 8 ft usually. You can also look for semi-dwarf trees it is also possible to grow them in containers.
If you want to know more about rootstock choices read this educational article on Pennsylvania State University’s website.
Buy Self Fertile Variety
Apple trees require cross pollination you’ll need to buy two apple trees for pollination. If you’re going to plant only one plant, buy a self-pollinating variety.
Consider Chilling Period too
In order to set flowers, apple trees require an annual cycle of cold weather in winter, which is called chilling. A chilling period requirement of an apple tree is measured from the total number of hours it gets per year when the temperature remains below 45 F (7 C) but above the freezing point.
Average chilling hour requirements for apple tree varieties are around 800-1000 hours.
If you live in a mild winter climate where simply choose low apple cultivars and if you live in a harsh winter climate choose high chill apple varieties. This simple will improve the productivity of your apple tree growing in containers.
Choosing a Pot
Don’t start growing apple tree in a too large pot initially. A standard size pot (5-6 gallon) that is 12 inches deep and wide is great to start with. Gradually change the size of the container each year or when you identify that the plant is root bound. You’ll find out if the plant is rootbound or not when it’ll stop its vertical growth.
You can upgrade your pot in sequence, choosing one size bigger pot than the previous one each time. Keep in mind, don’t plant the plant in a too big pot directly. Once your apple tree in a pot reaches desired height that you wanted, stop changing the pots. A 20-25 gallon pot would be sufficient as a final one. After that, you’ll have to do regular pruning and root trimming time to time to maintain it.
Requirements for Growing Apple Trees in Pots

Position
Like other fruit trees, apple tree loves to grow in sun. For your potted apple tree, choose a sunny location but less windy. In hot summer days (in warmer regions, USDA Zone 8-9) move the container to a place that is shaded from the afternoon sun. Also, keep in mind you maintain good air circulation around your apple tree. If you are growing it on your balcony or rooftop garden, don’t place it very closely near the walls.
Temperature
Growing apple tree requires cool winter and moderate summer. You can’t grow apple trees where the temperature remains the same or too hot. Apple tree can tolerate extremely low temperatures by going dormant in winter.
Watering
Growing apple trees in pots require regular watering. Generally, you should water more abundantly during the formation of flower buds and moderately all the other time, reduce watering in winter.
Water deeply to promote the growth of healthy roots. In any case, avoid the chance of overwatering the plant. Commonly the apple trees growing in containers die due to root rot that occurs in waterlogged soil and excess watering. Also, avoid overhead watering as wetting the foliage favors the growth of powdery mildew.
Soil
Apples prefer deep, fertile and well-draining soil, avoid waterlogging soil. On the ground, sandy loam to sandy clay loam soil is preferred. For growing an apple tree in a container use a potting mix that is rich in organic matter with slightly acidic to neutral pH (6-6.8).
Apple Tree Care

Fertilizer
Fertilize your apple tree with half-strength balanced liquid fertilizer when the tree is young in every 2 weeks during the growing season. Apply any fruit fertilizer once the tree gets older. Start to reduce the feeding of fertilizers from late fall and stop fertilizing in winter.
Repotting
Repot the young apple tree in a year or so. Repot in one size bigger pot, after spreading roots from sides and bottom.
Overwintering
When growing apple trees in pots you must know that during hard frosts and too cold temperatures you’ll need to protect the roots of the plant. For this, wrap the container with bubble wrap.
Pruning Dwarf Apple Tree
Pruning is an essential part of apple tree care. But a dwarf apple tree requires less pruning than semi-dwarf or standard size tree. Pruning must be done to control the shape and size of your plant. Dead, damaged or diseased branches must be pruned time to time. Also, prune off the branches that are crossing each other or growing inside towards the main trunk. The best time for pruning is late winter and summer.
Pollination
Most of the apple tree varieties require cross pollination in order to fruit, which means you have to buy at least two apple trees. But the best way to avoid this is to buy a self-fertile variety.
Picking Flowers and Fruit Thinning
Dwarf apple trees start to produce flowers in 2-3 years. In the first flowering year remove all blooms to prevent the tree from setting fruits. This way you’ll allow the plant to direct its energy in growing.
Fruit thinning allows the plant to grow better quality fruits. Wait for a few weeks after fruit setting and remove the fruits that are growing too closely.
Pests and diseases
Apple tree in a container, unfortunately, hit by the same pests and diseases that target it on the ground. Aphids, moths, apple blossom weevil, scab, powdery mildew, brown rot and a few more. However, the plants in a container, usually are close to home, usually in a limited space so it is easy to take care of them.
Harvesting
To know about harvesting apples, read this article.

How to Choose a Right Apple Tree
Growing apple tree from seeds is a bad idea. Instead, buy a dwarf or semi-dwarf grafted tree from a nursery. For choosing a right apple tree for your home you need to know a few things. Apple trees are grown from grafting on a rootstock as this has so many benefits. If you are unaware about apple rootstock grafting you might like to read more on this on the official website of Ministry Of Agriculture Food And Rural Affairs (Ontario) and a very informative article of Cornell University.
Basically, dwarf apple trees are those apple trees in which dwarf rootstocks are grafted to control their height, size and to improve fruit production and resistance against diseases and pests. When you go to a nursery or shop online, search for rootstock choices like M27, M26, Bud9, G16 or M9. Apple trees grown on these rootstocks are dwarf and don’t grow above 8 ft usually. You can also look for semi-dwarf trees it is also possible to grow them in containers.
If you want to know more about rootstock choices read this educational article on Pennsylvania State University’s website.
Buy Self Fertile Variety
Apple trees require cross pollination you’ll need to buy two apple trees for pollination. If you’re going to plant only one plant, buy a self-pollinating variety.
Consider Chilling Period too
In order to set flowers, apple trees require an annual cycle of cold weather in winter, which is called chilling. A chilling period requirement of an apple tree is measured from the total number of hours it gets per year when the temperature remains below 45 F (7 C) but above the freezing point.
Average chilling hour requirements for apple tree varieties are around 800-1000 hours.
If you live in a mild winter climate where simply choose low apple cultivars and if you live in a harsh winter climate choose high chill apple varieties. This simple will improve the productivity of your apple tree growing in containers.
Choosing a Pot
Don’t start growing apple tree in a too large pot initially. A standard size pot (5-6 gallon) that is 12 inches deep and wide is great to start with. Gradually change the size of the container each year or when you identify that the plant is root bound. You’ll find out if the plant is rootbound or not when it’ll stop its vertical growth.
You can upgrade your pot in sequence, choosing one size bigger pot than the previous one each time. Keep in mind, don’t plant the plant in a too big pot directly. Once your apple tree in a pot reaches desired height that you wanted, stop changing the pots. A 20-25 gallon pot would be sufficient as a final one. After that, you’ll have to do regular pruning and root trimming time to time to maintain it.
Requirements for Growing Apple Trees in Pots

Position
Like other fruit trees, apple tree loves to grow in sun. For your potted apple tree, choose a sunny location but less windy. In hot summer days (in warmer regions, USDA Zone 8-9) move the container to a place that is shaded from the afternoon sun. Also, keep in mind you maintain good air circulation around your apple tree. If you are growing it on your balcony or rooftop garden, don’t place it very closely near the walls.
Temperature
Growing apple tree requires cool winter and moderate summer. You can’t grow apple trees where the temperature remains the same or too hot. Apple tree can tolerate extremely low temperatures by going dormant in winter.
Watering
Growing apple trees in pots require regular watering. Generally, you should water more abundantly during the formation of flower buds and moderately all the other time, reduce watering in winter.
Water deeply to promote the growth of healthy roots. In any case, avoid the chance of overwatering the plant. Commonly the apple trees growing in containers die due to root rot that occurs in waterlogged soil and excess watering. Also, avoid overhead watering as wetting the foliage favors the growth of powdery mildew.
Soil
Apples prefer deep, fertile and well-draining soil, avoid waterlogging soil. On the ground, sandy loam to sandy clay loam soil is preferred. For growing an apple tree in a container use a potting mix that is rich in organic matter with slightly acidic to neutral pH (6-6.8).
Apple Tree Care

Fertilizer
Fertilize your apple tree with half-strength balanced liquid fertilizer when the tree is young in every 2 weeks during the growing season. Apply any fruit fertilizer once the tree gets older. Start to reduce the feeding of fertilizers from late fall and stop fertilizing in winter.
Repotting
Repot the young apple tree in a year or so. Repot in one size bigger pot, after spreading roots from sides and bottom.
Overwintering
When growing apple trees in pots you must know that during hard frosts and too cold temperatures you’ll need to protect the roots of the plant. For this, wrap the container with bubble wrap.
Pruning Dwarf Apple Tree
Pruning is an essential part of apple tree care. But a dwarf apple tree requires less pruning than semi-dwarf or standard size tree. Pruning must be done to control the shape and size of your plant. Dead, damaged or diseased branches must be pruned time to time. Also, prune off the branches that are crossing each other or growing inside towards the main trunk. The best time for pruning is late winter and summer.
Pollination
Most of the apple tree varieties require cross pollination in order to fruit, which means you have to buy at least two apple trees. But the best way to avoid this is to buy a self-fertile variety.
Picking Flowers and Fruit Thinning
Dwarf apple trees start to produce flowers in 2-3 years. In the first flowering year remove all blooms to prevent the tree from setting fruits. This way you’ll allow the plant to direct its energy in growing.
Fruit thinning allows the plant to grow better quality fruits. Wait for a few weeks after fruit setting and remove the fruits that are growing too closely.
Pests and diseases
Apple tree in a container, unfortunately, hit by the same pests and diseases that target it on the ground. Aphids, moths, apple blossom weevil, scab, powdery mildew, brown rot and a few more. However, the plants in a container, usually are close to home, usually in a limited space so it is easy to take care of them.
Harvesting
To know about harvesting apples, read this article.
2
0
文章
Juze
2017年05月22日

Learn how to grow dragon fruit, it’s one of the most strange looking subtropical fruit you’d like to grow in your garden. Growing dragon fruit is fairly easy both outdoors or in the pot.

USDA Zones— 9 to 11
Propagation Method — Seeds, vegetative propagation
Difficulty — Moderate
Soil pH — 6 to 7
Other names — Indonesia buah naga, Khmer sror kaa neak, Thai kaeo mangkon, nanettika fruit, Kaktus madu, Long guo, Cereus triangularis, Thanh long, Strawberry Pear, Cactus fruit, Night blooming Cereus, Belle of the Night, Jesus in the Cradle.
Dragon fruit, also known as pitahaya or pitaya, belongs to the cactus family. Its flowers are unique and one among the largest in the world. It has a diameter of 25 cm and is about 30 cm long. One more feature of its bloom is: it only opens for one night and exudes inviting fruity fragrance.
Growing Regions
Dragon fruit is native to Central America and grown throughout the subtropical and tropical part of China, Israel, Vietnam, Malaysia, Thailand and
Nicaragua.
How to Plant and Grow Dragon Fruit
Dragon fruit plant is actually a climbing cactus and needs support to climb on, usually as the plant becomes mature it forms aerial roots from the branches and find something to climb. So, it’s best if you’re growing dragonfruit, find something to support your plant.
Dragon fruit is a sub tropical plant, it loves heat and sun but it’s better to plant it in a spot that remains dry and receives only partial sun.
If you’re living in more temperate climate or if you’re an urban gardener and don’t have much space, grow dragon fruit in pot, it’s fairly easy to grow and adapts itself well in containers. In pot you can move and overwinter it to save from frost as pitaya plant can survive only short period of freezing temperature (below 28 F is detrimental) and frost.
PropagationGrowing Dragon Fruit from Seed
With a knife, divide dragon fruit in half and scoop out the black seeds from the pulp. Wash the pulp off the seeds. Put these seeds on a moist paper towel and leave them overnight.
Fill the germinating tray or small pot with well draining but poor starting mix. You can make it yourself by mixing one part peat and one part perlite. Sprinkle the seed on soil surface and cover that with a thin layer of growing medium that barely covers the seeds.
Thoroughly moisten the soil using sprayer and cover the pot with plastic wrap. Keep the soil moist until seeds germinate, which will take around 15 to 30 days.
After the seeds germinate, uncover the plastic and transplant them to bigger pots when necessary.
Growing Dragon Fruit from Cuttings
To learn how to propagate dragon fruit from cuttings, read this.
Soil
For growing dragonfruit, well draining soil that is sandy is better. A mixture of sand in garden soil would be appropriate. It is forgiving to poor soil.
Water
Since the dragon fruit is a cactus, water it moderately with care like you do with other succulents. Water only when soil dries out completely.
Fertilizer for Growing Dragonfruit
Fertilize dragon fruit with balanced fertilizer every month when the plant is active in its growing season. Stop fertilizing in winter if growing in colder climate. Application of aged manure or compost can also be done time to time.
Dragon Fruit Pollination
Many dragon fruit varieties are self pollinating but there are some that requires cross pollination. If your dragon fruit is unable to do self pollination, you’ll need to grow two or more dragon fruit plants closely for cross pollination. As dragon fruit flowers are nocturnal, its pollination depends on moths and bats. For assurance, you can also do self pollination at night.
Harvest
Harvest dragon fruit when its skin color changes from bright green to red or pink. Its fruit is oval to ovate in shape and 10 to 15 cm long and forms 30 to 50 days after flowering.
Pericarp of dragon fruit is rough and scaly and is usually pink in color. However, there are also red, or yellow dragon fruits depending on the variety. The flesh is located in the interior is white and contains black seeds.
Pests and Diseases

USDA Zones— 9 to 11
Propagation Method — Seeds, vegetative propagation
Difficulty — Moderate
Soil pH — 6 to 7
Other names — Indonesia buah naga, Khmer sror kaa neak, Thai kaeo mangkon, nanettika fruit, Kaktus madu, Long guo, Cereus triangularis, Thanh long, Strawberry Pear, Cactus fruit, Night blooming Cereus, Belle of the Night, Jesus in the Cradle.
Dragon fruit, also known as pitahaya or pitaya, belongs to the cactus family. Its flowers are unique and one among the largest in the world. It has a diameter of 25 cm and is about 30 cm long. One more feature of its bloom is: it only opens for one night and exudes inviting fruity fragrance.
Growing Regions
Dragon fruit is native to Central America and grown throughout the subtropical and tropical part of China, Israel, Vietnam, Malaysia, Thailand and
Nicaragua.
How to Plant and Grow Dragon Fruit
Dragon fruit plant is actually a climbing cactus and needs support to climb on, usually as the plant becomes mature it forms aerial roots from the branches and find something to climb. So, it’s best if you’re growing dragonfruit, find something to support your plant.
Dragon fruit is a sub tropical plant, it loves heat and sun but it’s better to plant it in a spot that remains dry and receives only partial sun.
If you’re living in more temperate climate or if you’re an urban gardener and don’t have much space, grow dragon fruit in pot, it’s fairly easy to grow and adapts itself well in containers. In pot you can move and overwinter it to save from frost as pitaya plant can survive only short period of freezing temperature (below 28 F is detrimental) and frost.
PropagationGrowing Dragon Fruit from Seed
With a knife, divide dragon fruit in half and scoop out the black seeds from the pulp. Wash the pulp off the seeds. Put these seeds on a moist paper towel and leave them overnight.
Fill the germinating tray or small pot with well draining but poor starting mix. You can make it yourself by mixing one part peat and one part perlite. Sprinkle the seed on soil surface and cover that with a thin layer of growing medium that barely covers the seeds.
Thoroughly moisten the soil using sprayer and cover the pot with plastic wrap. Keep the soil moist until seeds germinate, which will take around 15 to 30 days.
After the seeds germinate, uncover the plastic and transplant them to bigger pots when necessary.
Growing Dragon Fruit from Cuttings
To learn how to propagate dragon fruit from cuttings, read this.
Soil

For growing dragonfruit, well draining soil that is sandy is better. A mixture of sand in garden soil would be appropriate. It is forgiving to poor soil.
Water
Since the dragon fruit is a cactus, water it moderately with care like you do with other succulents. Water only when soil dries out completely.
Fertilizer for Growing Dragonfruit
Fertilize dragon fruit with balanced fertilizer every month when the plant is active in its growing season. Stop fertilizing in winter if growing in colder climate. Application of aged manure or compost can also be done time to time.
Dragon Fruit Pollination
Many dragon fruit varieties are self pollinating but there are some that requires cross pollination. If your dragon fruit is unable to do self pollination, you’ll need to grow two or more dragon fruit plants closely for cross pollination. As dragon fruit flowers are nocturnal, its pollination depends on moths and bats. For assurance, you can also do self pollination at night.
Harvest
Harvest dragon fruit when its skin color changes from bright green to red or pink. Its fruit is oval to ovate in shape and 10 to 15 cm long and forms 30 to 50 days after flowering.
Pericarp of dragon fruit is rough and scaly and is usually pink in color. However, there are also red, or yellow dragon fruits depending on the variety. The flesh is located in the interior is white and contains black seeds.
Pests and Diseases
0
0


