文章
Dummer. ゛☀
2017年08月17日

Claret cup cactus is native to the desert areas of the American Southwest. What is a claret cup cactus? It grows wild in Juniper Pinyon woodlands, creosote scrub and Joshua tree forests. This tiny succulent is only hardy to United States Department of Agriculture zones 9 to 10, but you can grow one in your home and enjoy its impressive floral displays. Enjoy this claret cup cactus information and see if this plant is right for your home.

Claret Cup Cactus Information
Plants of the Southwest are particularly appealing to those of us who do not live in these wild desert zones. The sheer variety and wonder of the desert landscape is a treasure even indoor gardeners are keen to experience. Claret cup hedgehog cactus is one of those desert beauties that warm, arid climate gardeners can grow outside in their landscape. The rest of us can try growing claret cup cacti as summer patio plants or indoor specimens.

So what is a claret cup cactus?
Claret cup is found from California west to Texas and into Mexico. It is a desert dweller that grows in gravel soil. The plant is also known as claret cup hedgehog cactus because of its scientific name, Echinocereus triglochidiatus. The part “echinos” is Greek and means hedgehog. The cactus is small and spiny with a rounded little body, so the name is appropriate. The remainder of the scientific name, triglochidiatus, refers to the clustered trios of spines. The name literally means “three barbed bristles.” These cacti rarely get over 6 inches tall but some are up to 2 feet in habitat. The barrel-shaped form may or may not develop one or many rounded stems with bluish green skin and 3 kinds of spines. If you are very lucky, you may find one in full flower decorated with huge waxy, deeply pink cup-shaped blooms. Claret cup hedgehog cactus flowers are pollinated by hummingbirds, which are attracted to the large amount of nectar and the brightly colored blooms.

Claret Cup Cactus Care
If you are interested in growing claret cup cacti, your first challenge will be to find one. Most nurseries do not grow this species and you should not purchase a wild harvested plant which encourages habitat destruction. The first rule in any cactus cultivation is not to over water. While cacti do need moisture, they are suited to dry conditions and cannot thrive in moist soil. Use a sandy potting mix or cactus mix to enhance drainage and plant the cactus in an unglazed pot to allow excess moisture to evaporate. In open garden situations, this plant will need to be watered every two weeks or as the soil is dry to the touch 3 inches down. Cacti respond well to fertilizer applied in spring and once per month in a liquid dilution during watering. Suspend fertilizing in winter and minimize water applications since this is the plant’s dormant period. Most pests do not bother claret cup cactus but occasionally mealybugs and scale will infest the plant. Overall, claret cup cactus care is minimal and the plant should thrive with some amount of neglect.

Claret Cup Cactus Information
Plants of the Southwest are particularly appealing to those of us who do not live in these wild desert zones. The sheer variety and wonder of the desert landscape is a treasure even indoor gardeners are keen to experience. Claret cup hedgehog cactus is one of those desert beauties that warm, arid climate gardeners can grow outside in their landscape. The rest of us can try growing claret cup cacti as summer patio plants or indoor specimens.

So what is a claret cup cactus?
Claret cup is found from California west to Texas and into Mexico. It is a desert dweller that grows in gravel soil. The plant is also known as claret cup hedgehog cactus because of its scientific name, Echinocereus triglochidiatus. The part “echinos” is Greek and means hedgehog. The cactus is small and spiny with a rounded little body, so the name is appropriate. The remainder of the scientific name, triglochidiatus, refers to the clustered trios of spines. The name literally means “three barbed bristles.” These cacti rarely get over 6 inches tall but some are up to 2 feet in habitat. The barrel-shaped form may or may not develop one or many rounded stems with bluish green skin and 3 kinds of spines. If you are very lucky, you may find one in full flower decorated with huge waxy, deeply pink cup-shaped blooms. Claret cup hedgehog cactus flowers are pollinated by hummingbirds, which are attracted to the large amount of nectar and the brightly colored blooms.

Claret Cup Cactus Care
If you are interested in growing claret cup cacti, your first challenge will be to find one. Most nurseries do not grow this species and you should not purchase a wild harvested plant which encourages habitat destruction. The first rule in any cactus cultivation is not to over water. While cacti do need moisture, they are suited to dry conditions and cannot thrive in moist soil. Use a sandy potting mix or cactus mix to enhance drainage and plant the cactus in an unglazed pot to allow excess moisture to evaporate. In open garden situations, this plant will need to be watered every two weeks or as the soil is dry to the touch 3 inches down. Cacti respond well to fertilizer applied in spring and once per month in a liquid dilution during watering. Suspend fertilizing in winter and minimize water applications since this is the plant’s dormant period. Most pests do not bother claret cup cactus but occasionally mealybugs and scale will infest the plant. Overall, claret cup cactus care is minimal and the plant should thrive with some amount of neglect.
0
0
求助
Planto619
2017年08月17日

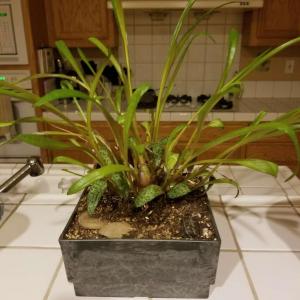
What kind of succulent is this? I've searched everywhere but I can't seem to find it!

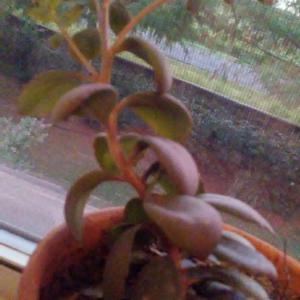
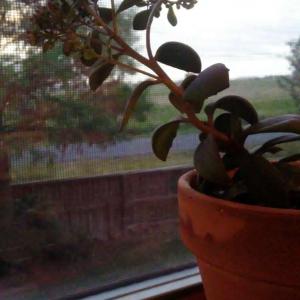


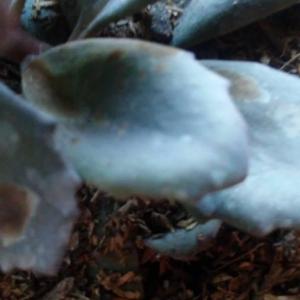


0
0
sunnyzou:one type of Hylotelephium erythrostictum (Miq.) H. Ohba
求助
stamey_lisa
2017年08月17日

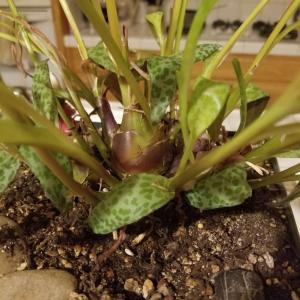
Can someone tell me what type of succulent this is? Thanks!
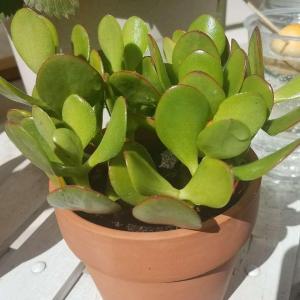

0
0
Ueca:Crassula arborescens
spiritmmm:It's a kind of sedum,may be crassula portulacea
Succulentsister
2017年08月16日
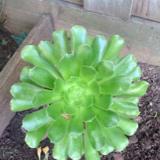
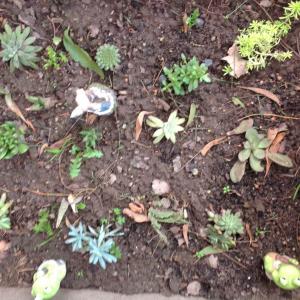
My outside succulent garden outside is dying a little i think from the freezing cold weather can anyone help



2
0
文章
Dummer. ゛☀
2017年08月16日

Christmas cactus are relatively trouble-free succulent plants, but if your Christmas cactus leaves are red or purple instead of green, or if you notice Christmas cactus leaves turning purple on edges, your plant is telling you that something isn’t quite right. Read on to learn about possible causes and solutions for reddish-purple Christmas cactus leaves.

Why Do Christmas Cactus Leaves Turn Purple?
Oftentimes, a purplish tint to your Christmas cactus leaves is normal. That said, if it’s noticeably throughout the leaves, it may signal an issue with your plant. Below are the most common reasons for leaves becoming red or purple on Christmas cacti:
Nutritional issues – If you don’t fertilize your Christmas cactus regularly, the plant may be lacking necessary nutrients. Feed the plant monthly from spring until mid-autumn with a general purpose fertilizer for indoor plants. Additionally, because Christmas cacti require more magnesium than most plants, it normally helps to provide a supplemental feeding of 1 teaspoon of Epsom salts dissolved in one gallon of water.
Apply the mixture once every month throughout spring and summer, but don’t use the Epsom salt mixture the same week you apply regular plant fertilizer. Crowded roots – If your Christmas cactus is rootbound, it may not be absorbing nutrients effectively. This is one possible reason for reddish-purple Christmas cactus leaves. Keep in mind, however, that Christmas cactus thrives with crowded roots, so don’t repot unless your plant has been in the same container for at least two or three years. If you determine that the plant is rootbound, repotting Christmas cactus is best done in spring. Move the plant to a container filled with a well-drained potting mix such as regular potting soil mixed with perlite or sand. The pot should be just one size larger. Location – Christmas cactus requires bright light during fall and winter, but too much direct light during the summer months may be the reason for Christmas cactus leaves turning purple on edges. Moving the plant to a more appropriate location may prevent sunburn and solve the problem. Be sure the location is away from open doors and drafty windows. Similarly, avoid hot, dry areas such as near a fireplace or heating vent.

Why Do Christmas Cactus Leaves Turn Purple?
Oftentimes, a purplish tint to your Christmas cactus leaves is normal. That said, if it’s noticeably throughout the leaves, it may signal an issue with your plant. Below are the most common reasons for leaves becoming red or purple on Christmas cacti:
Nutritional issues – If you don’t fertilize your Christmas cactus regularly, the plant may be lacking necessary nutrients. Feed the plant monthly from spring until mid-autumn with a general purpose fertilizer for indoor plants. Additionally, because Christmas cacti require more magnesium than most plants, it normally helps to provide a supplemental feeding of 1 teaspoon of Epsom salts dissolved in one gallon of water.

Apply the mixture once every month throughout spring and summer, but don’t use the Epsom salt mixture the same week you apply regular plant fertilizer. Crowded roots – If your Christmas cactus is rootbound, it may not be absorbing nutrients effectively. This is one possible reason for reddish-purple Christmas cactus leaves. Keep in mind, however, that Christmas cactus thrives with crowded roots, so don’t repot unless your plant has been in the same container for at least two or three years. If you determine that the plant is rootbound, repotting Christmas cactus is best done in spring. Move the plant to a container filled with a well-drained potting mix such as regular potting soil mixed with perlite or sand. The pot should be just one size larger. Location – Christmas cactus requires bright light during fall and winter, but too much direct light during the summer months may be the reason for Christmas cactus leaves turning purple on edges. Moving the plant to a more appropriate location may prevent sunburn and solve the problem. Be sure the location is away from open doors and drafty windows. Similarly, avoid hot, dry areas such as near a fireplace or heating vent.
0
0
文章
Dummer. ゛☀
2017年08月15日

Burro’s tail cactus (Sedum morganianum) is not technically a cactus but a succulent. Although all cacti are succulents, not all succulents are cactus. Both do have similar requirements such as gritty soil, good drainage, sunshine and protection from extreme cold temperatures. Growing burro’s tail provides fascinating texture as a graceful houseplant or lush green exterior plant in many landscape situations.

Burro’s Tail Information
Burro’s tail is a heat and drought tolerant plant well suited for warm to temperate regions. The thick stems appear woven or plaited with leaves. The succulent is green to gray green or even blue green and may have a slight chalky look. Try a burro’s tail houseplant or use it on the patio or full sun garden bed.

Burro’s Tail Houseplant
The misnamed burro’s tail cactus produces long, sweeping stems that are arrayed with thick, fleshy green leaves. The succulent thrives indoors in a well-drained container where bright sunlight bathes the plant. A burro’s tail houseplant will grow equally well in a mixed succulent container or as a hanging specimen. Slowly introduce the plant to full sun once purchased to allow it to acclimate first, as light conditions vary from nursery to nursery, etc. Provide even moisture and fertilize with cactus food during the growing season. Divide the plant when it gets too large for a container and transplant it every couple of years to provide it with fresh nutrient-rich soil. Burro’s tail care is easy and makes it an excellent plant for the novice gardener.

Burro’s Tail Propagation
Burro’s tail features long stems laden with small, rounded leaves. The leaves fall off at the slightest touch and will litter the ground after transplanting or repotting. Gather the leaves and insert them partway into a moist soilless medium. Burro’s tail plants can tolerate periods of drought, but the new potential plants need to be kept lightly moist until they root and establish. Propagating burro’s tail will ensure multiple enough of this versatile plant to play with and apply to many different indoor or outdoor landscaping situations. Propagating will also make numerous starts to share with friends and family or spread around the garden. Growing Burro’s Tail Outdoors One of the most fun plants around, this succulent is simple to grow. Outdoor plants may need winter protection with a light layer of mulch to protect them from cold. Plant the burro’s tail in full sun where there is shelter from drying and damaging winds.

Growing Burro’s Tail Outdoors
One of the most fun plants around, this succulent is simple to grow. Outdoor plants may need winter protection with a light layer of mulch to protect them from cold. Plant the burro’s tail in full sun where there is shelter from drying and damaging winds.

Burro’s Tail Care and Uses
The frequent traveler or green thumb-challenged garden will find burro’s tail care ideal. Water carefully when growing burro’s tail. Keep the plant moderately and evenly moist. Excess water can cause the stems to rot and even kill the succulent. Burro’s tail works well in a hanging basket and decorates a mixed cactus and succulent container. It will flourish in rockery cracks and makes a unique ground cover. Try planting the bushy stems in a bed with mixed seasonal color or bright flowering perennials. It is a perfect choice for large leaved plants and useful as part of a xeriscape garden.

Burro’s Tail Information
Burro’s tail is a heat and drought tolerant plant well suited for warm to temperate regions. The thick stems appear woven or plaited with leaves. The succulent is green to gray green or even blue green and may have a slight chalky look. Try a burro’s tail houseplant or use it on the patio or full sun garden bed.

Burro’s Tail Houseplant
The misnamed burro’s tail cactus produces long, sweeping stems that are arrayed with thick, fleshy green leaves. The succulent thrives indoors in a well-drained container where bright sunlight bathes the plant. A burro’s tail houseplant will grow equally well in a mixed succulent container or as a hanging specimen. Slowly introduce the plant to full sun once purchased to allow it to acclimate first, as light conditions vary from nursery to nursery, etc. Provide even moisture and fertilize with cactus food during the growing season. Divide the plant when it gets too large for a container and transplant it every couple of years to provide it with fresh nutrient-rich soil. Burro’s tail care is easy and makes it an excellent plant for the novice gardener.

Burro’s Tail Propagation
Burro’s tail features long stems laden with small, rounded leaves. The leaves fall off at the slightest touch and will litter the ground after transplanting or repotting. Gather the leaves and insert them partway into a moist soilless medium. Burro’s tail plants can tolerate periods of drought, but the new potential plants need to be kept lightly moist until they root and establish. Propagating burro’s tail will ensure multiple enough of this versatile plant to play with and apply to many different indoor or outdoor landscaping situations. Propagating will also make numerous starts to share with friends and family or spread around the garden. Growing Burro’s Tail Outdoors One of the most fun plants around, this succulent is simple to grow. Outdoor plants may need winter protection with a light layer of mulch to protect them from cold. Plant the burro’s tail in full sun where there is shelter from drying and damaging winds.

Growing Burro’s Tail Outdoors
One of the most fun plants around, this succulent is simple to grow. Outdoor plants may need winter protection with a light layer of mulch to protect them from cold. Plant the burro’s tail in full sun where there is shelter from drying and damaging winds.

Burro’s Tail Care and Uses
The frequent traveler or green thumb-challenged garden will find burro’s tail care ideal. Water carefully when growing burro’s tail. Keep the plant moderately and evenly moist. Excess water can cause the stems to rot and even kill the succulent. Burro’s tail works well in a hanging basket and decorates a mixed cactus and succulent container. It will flourish in rockery cracks and makes a unique ground cover. Try planting the bushy stems in a bed with mixed seasonal color or bright flowering perennials. It is a perfect choice for large leaved plants and useful as part of a xeriscape garden.
1
0
文章
Dummer. ゛☀
2017年08月15日

Fenestraria baby toes really does look a bit like the tiny digits of an infant. The succulent plant is also known as living stones, with larger plants producing small rock-like protuberant leaves. In fact, it shares the same family as Lithops, which is also referred to as living stones. The plant is widely available at nurseries and a live object of artistic interest. Instructions on how to grow a baby toes plant are easy enough for children and young people, who adore the fascinating little plant.

Baby Toes Succulent Description
Baby toes plants (Fenestraria rhopalophylla) are native to subtropical desert zones. They require bright sun and moderate water in well-drained soil with plenty of gritty matter. Mother Nature engineered them to be very tolerant of low nutrient soils with extreme weather conditions. The perennial succulents form columns of leaves that are thick and rise up like small toes with flattened tops. The tops possess a translucent membrane over the top of the leaf. The vertical leaves may be mistaken for stems but are really modified foliage. Baby toes succulent may be mottled, grayish green to fully gray or even brown.

Baby Toes Plant Propagation
Like many succulents, Fenestraria baby toes produces offsets as the clusters of leaves mature and spread. These are easy to divide from the main clump and will readily produce another plant. Baby toes bloom in late summer to autumn with daisy-like flowers in a variety of hues. The seeds from the plant germinate sporadically and grow extremely slowly. Faster baby toes plants are achieved by dividing off the side growth.

How to Grow a Baby Toes
Starting baby toes from seed can be rewarding but you need a few key elements for a successful venture. First, the container should be shallow and well-draining. Make up a growing medium with equal parts coir, potting soil, sand, fine gravel and perlite. Moisten the mixture in the pot lightly and strew the seeds evenly on the surface of the soil. Sprinkle a light dusting of sand over the seeds. They will push the sand out of their way as the seedlings emerge. Cover the pot with clear plastic and place in a low light area until germination. Mist the plants after they emerge and remove the cover for half an hour daily to prevent fungal growth.

Care of Baby Toes
Move pots to a fully sunlit area where temperatures range at least 65 F. (19 C.). As with most succulent plants, the biggest problem is over or under watering. While Baby toes are tolerant of drought conditions, they need moisture to store in their leaves to sustain them during the growing season. Baby toes have few pest or disease problems, but do watch out for rot when plants are over watered or in pots that don’t drain well. Fertilize in early spring with a half dilution of cactus and succulent food. Suspend watering in the dormant season from November to February. Other than that, care of baby toes, is so easy the infant whose toes they resemble could almost grow these great little succulents.

Baby Toes Succulent Description
Baby toes plants (Fenestraria rhopalophylla) are native to subtropical desert zones. They require bright sun and moderate water in well-drained soil with plenty of gritty matter. Mother Nature engineered them to be very tolerant of low nutrient soils with extreme weather conditions. The perennial succulents form columns of leaves that are thick and rise up like small toes with flattened tops. The tops possess a translucent membrane over the top of the leaf. The vertical leaves may be mistaken for stems but are really modified foliage. Baby toes succulent may be mottled, grayish green to fully gray or even brown.

Baby Toes Plant Propagation
Like many succulents, Fenestraria baby toes produces offsets as the clusters of leaves mature and spread. These are easy to divide from the main clump and will readily produce another plant. Baby toes bloom in late summer to autumn with daisy-like flowers in a variety of hues. The seeds from the plant germinate sporadically and grow extremely slowly. Faster baby toes plants are achieved by dividing off the side growth.

How to Grow a Baby Toes
Starting baby toes from seed can be rewarding but you need a few key elements for a successful venture. First, the container should be shallow and well-draining. Make up a growing medium with equal parts coir, potting soil, sand, fine gravel and perlite. Moisten the mixture in the pot lightly and strew the seeds evenly on the surface of the soil. Sprinkle a light dusting of sand over the seeds. They will push the sand out of their way as the seedlings emerge. Cover the pot with clear plastic and place in a low light area until germination. Mist the plants after they emerge and remove the cover for half an hour daily to prevent fungal growth.

Care of Baby Toes
Move pots to a fully sunlit area where temperatures range at least 65 F. (19 C.). As with most succulent plants, the biggest problem is over or under watering. While Baby toes are tolerant of drought conditions, they need moisture to store in their leaves to sustain them during the growing season. Baby toes have few pest or disease problems, but do watch out for rot when plants are over watered or in pots that don’t drain well. Fertilize in early spring with a half dilution of cactus and succulent food. Suspend watering in the dormant season from November to February. Other than that, care of baby toes, is so easy the infant whose toes they resemble could almost grow these great little succulents.
2
2
文章
Dummer. ゛☀
2017年08月15日

Agave is a long-leaved succulent plant that naturally forms a rosette shape and produces a flower spire of attractive cup shaped blooms. The plant is drought tolerant and perennial, making it ideal for the mature arid garden. Many agave plants are native to North America and are adaptable to colder climates in the Pacific Northwest and even Canada.

Types of Agave
Almost every climate is capable of growing agave as some are hardy down to single digits for short periods of time and with shelter. Agave is in the Agavaceae family of succulents which include dracaena, yucca and ponytail palms.
The century plant (Agave americana) is one of the most notorious landscape agaves. It produces a lovely inflorescence (flower) and then the main plant dies, leaving behind pups or offsets. The American agave or American aloe, as it is also called, has a white stripe running down the center of the leaves. It is a warm season agave only. There are many other types of agave, which makes it easy to find and garden with this stunning plant. Some of these include: Agave parryi Agave ocahui Agave macroacantha Agave gigantensis

Planting Agave
Agave have a large tap root and do not transplant well, so choose an appropriate site when planting agave. The majority of the roots are surface roots and do not require a deep hole if planted when young. Check your soil for drainage, or if planting in heavy clay soils amend the soil with sand or grit. Mix in enough sand to make the soil halfway comprised of grit. Water the plant diligently for the first week and then cut it to half the second week. Taper off even more until you are only watering once every week or two.

How to Grow Agave
Growing agave is easy if you plant the right variety in the right location. Agaves need full sun and gritty soil that percolates easily. They can even do quite well when potted but use an unglazed clay pot that will allow evaporation of excess moisture. Water needs are moderate to light depending upon the heat of the season but the plants should be allowed to dry out before irrigation. In spring they benefit from the application of a granulated time release fertilizer that will provide nutrient needs for the season. Many varieties of agave will die after blooming and then produce pups or offshoots from their base to replace themselves. On varieties where the parent plant doesn’t die after flowering, it is a good idea to get long handled pruners and remove the spent bloom. After establishment, neglect is actually how to grow agave and produce happy plants.

Agave Plant Care in Pots
Agave that are grown in pots require even more grit in the soil and can actually be planted in a cactus mix. The addition of small rocks or pebbles to the soil increases the drainage capabilities of the container. Agave plants in containers will require more water than those in the ground and will need to be re-potted every year or so to replenish soil and root prune the plant. Agave plant care for container grown plants is otherwise the same and it affords you the ability to bring sensitive forms indoors when temperatures plummet.

Types of Agave
Almost every climate is capable of growing agave as some are hardy down to single digits for short periods of time and with shelter. Agave is in the Agavaceae family of succulents which include dracaena, yucca and ponytail palms.
The century plant (Agave americana) is one of the most notorious landscape agaves. It produces a lovely inflorescence (flower) and then the main plant dies, leaving behind pups or offsets. The American agave or American aloe, as it is also called, has a white stripe running down the center of the leaves. It is a warm season agave only. There are many other types of agave, which makes it easy to find and garden with this stunning plant. Some of these include: Agave parryi Agave ocahui Agave macroacantha Agave gigantensis

Planting Agave
Agave have a large tap root and do not transplant well, so choose an appropriate site when planting agave. The majority of the roots are surface roots and do not require a deep hole if planted when young. Check your soil for drainage, or if planting in heavy clay soils amend the soil with sand or grit. Mix in enough sand to make the soil halfway comprised of grit. Water the plant diligently for the first week and then cut it to half the second week. Taper off even more until you are only watering once every week or two.

How to Grow Agave
Growing agave is easy if you plant the right variety in the right location. Agaves need full sun and gritty soil that percolates easily. They can even do quite well when potted but use an unglazed clay pot that will allow evaporation of excess moisture. Water needs are moderate to light depending upon the heat of the season but the plants should be allowed to dry out before irrigation. In spring they benefit from the application of a granulated time release fertilizer that will provide nutrient needs for the season. Many varieties of agave will die after blooming and then produce pups or offshoots from their base to replace themselves. On varieties where the parent plant doesn’t die after flowering, it is a good idea to get long handled pruners and remove the spent bloom. After establishment, neglect is actually how to grow agave and produce happy plants.

Agave Plant Care in Pots
Agave that are grown in pots require even more grit in the soil and can actually be planted in a cactus mix. The addition of small rocks or pebbles to the soil increases the drainage capabilities of the container. Agave plants in containers will require more water than those in the ground and will need to be re-potted every year or so to replenish soil and root prune the plant. Agave plant care for container grown plants is otherwise the same and it affords you the ability to bring sensitive forms indoors when temperatures plummet.
0
1
文章
Dummer. ゛☀
2017年08月15日

Succulent and southern gardeners will recognize the damage of the agave snout weevil. What is the agave snout weevil? This pest is a double edged sword, doing damage to agave and other plants in both its beetle and larval form. Damage occurs quickly, followed by death because the bite of the weevil deposits bacteria that literally rot the agave. As the tissues soften and decay, the parent and its progeny are merrily munching away on your plant. Snout weevil control is essential in southwestern areas, especially where agave is grown to make tequila. A population of agave snout weevils can decimate the agave crop and then what will we put in margaritas?

What is the Agave Snout Weevil?
The weevil is a form of beetle and grows approximately an inch long. It is a black insect with the scientific name Scyphophorus acupuntatus. The insects usually choose unhealthy or old agaves to deposit their eggs. Once an agave has bloomed, it is at the end of its life cycle and these plants are especially prone to agave snout weevil infestations. The bite of the beetle injects bacteria which cause the plant tissues to soften and liquefy. This makes it easier for the larvae and parent to eat the tissues, but it will eventually cause the collapse of even the most might of agave. Snout weevil damage is extensive and soon leads to death of the plant.

Snout Weevil Damage
The agave is a succulent plant also known as the Century plant. This is due to the bloom habit of the plant. It blooms only once in its life and then dies, and it can take years for the plant to produce that one flower. The adult weevil bites the heart of the agave and lays its eggs there. When the larvae hatch, they spread bacteria and do physical damage as they chew further into the core of the plant. The larvae are the same ones you find in a tequila bottle and they busily chew until they have disconnected the interior tissue that connected the leaves to the crown. One day it will look fine, the next day the plant is wilted and the stiff rapier sharp leaves are flat to the ground. The foliage will pull easily out of the crown and the center of the rosette is mushy and foul smelling. By the time this happens, snout weevil control is pointless for that plant, but if you have other succulents and agave, there are steps you can take to protect them.
Controlling Snout Nosed Weevils
Agave snout weevil treatment is widely available in Arizona, New Mexico and zones where the plants are grow outdoors. The indoor agave gardener may have to look a little harder for products that will work against the weevils. Triazanon is available at most nursery and garden centers. Apply the granular form and dig it into the soil around the agave. When you water, the chemical will slowly release down to the roots of the plant and then into the vascular tissue, protecting it from the pest. Apply this snout weevil control once per month during the growing season. Agave snout weevil treatment with sprays is tricky because the insect is protected by the thick leaves. If your agave has already succumbed, replace it with a resistant variety so you don’t have to again go through the trauma of losing a favorite plant.

What is the Agave Snout Weevil?
The weevil is a form of beetle and grows approximately an inch long. It is a black insect with the scientific name Scyphophorus acupuntatus. The insects usually choose unhealthy or old agaves to deposit their eggs. Once an agave has bloomed, it is at the end of its life cycle and these plants are especially prone to agave snout weevil infestations. The bite of the beetle injects bacteria which cause the plant tissues to soften and liquefy. This makes it easier for the larvae and parent to eat the tissues, but it will eventually cause the collapse of even the most might of agave. Snout weevil damage is extensive and soon leads to death of the plant.

Snout Weevil Damage
The agave is a succulent plant also known as the Century plant. This is due to the bloom habit of the plant. It blooms only once in its life and then dies, and it can take years for the plant to produce that one flower. The adult weevil bites the heart of the agave and lays its eggs there. When the larvae hatch, they spread bacteria and do physical damage as they chew further into the core of the plant. The larvae are the same ones you find in a tequila bottle and they busily chew until they have disconnected the interior tissue that connected the leaves to the crown. One day it will look fine, the next day the plant is wilted and the stiff rapier sharp leaves are flat to the ground. The foliage will pull easily out of the crown and the center of the rosette is mushy and foul smelling. By the time this happens, snout weevil control is pointless for that plant, but if you have other succulents and agave, there are steps you can take to protect them.
Controlling Snout Nosed Weevils
Agave snout weevil treatment is widely available in Arizona, New Mexico and zones where the plants are grow outdoors. The indoor agave gardener may have to look a little harder for products that will work against the weevils. Triazanon is available at most nursery and garden centers. Apply the granular form and dig it into the soil around the agave. When you water, the chemical will slowly release down to the roots of the plant and then into the vascular tissue, protecting it from the pest. Apply this snout weevil control once per month during the growing season. Agave snout weevil treatment with sprays is tricky because the insect is protected by the thick leaves. If your agave has already succumbed, replace it with a resistant variety so you don’t have to again go through the trauma of losing a favorite plant.
0
0


