文章
Colorful
2017年05月23日
There are herbs and vegetables that regrow in water INDOORS , you can grow them from scraps and use in salads and toppings. Take a look!
In this article, you’ll learn about the herbs and vegetables that can re-grow (for a while) without soil, using just water and water, good for those who have no space to grow their own food, growing plants in water also help if you want to grow the roots of these scrap food plants for propagation.
Growing your own fruits, vegetables and herbs is one of the trendiest thing in the gardening. Growing food generates anticipation, curiosity, and interest, as well as it is fundamentally healthy- organic and free from harmful chemicals that are often used in producing large crops.
In addition, it’s much more rewarding! There is nothing better than a meal made with organic fruits of your own.1. Carrot Greens
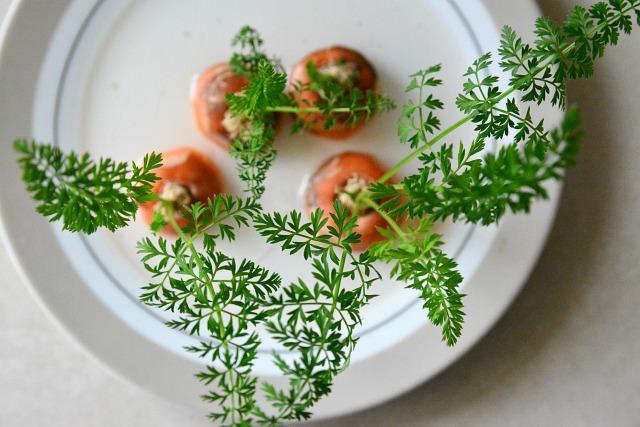
Although you can not bring back and GROW carrots in water but instead of throwing away the green ends from the top, put them in a shallow container of water in a bright spot to regrow the carrot greens. Keep changing the water every other day and in a few days, you’ll be able to see tiny green leaves, a wonderful addition to a salad, pesto or chutney.
2. Green Onion
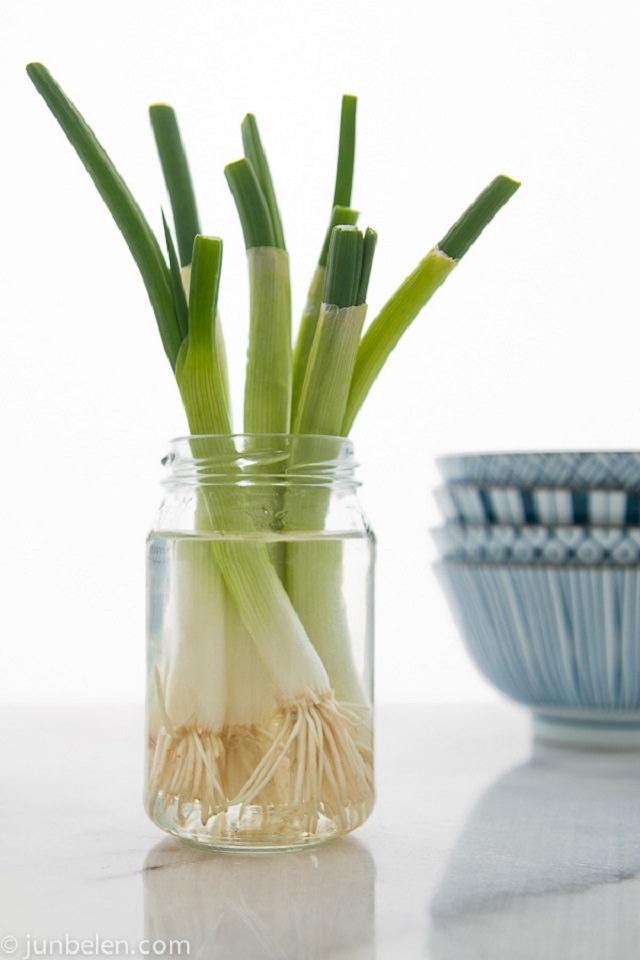
Noodles, Salads, and Pasta or even much more, there’re so many recipes in which you can try green onions. Isn’t it better to grow them fresh in your home?
Growing green onions in water is super easy, too. You don’t need a garden for this; all you need is a sunny windowsill, transparent jar or glass, and green onion bulbs. Read more about this here!
3. Bok Choi
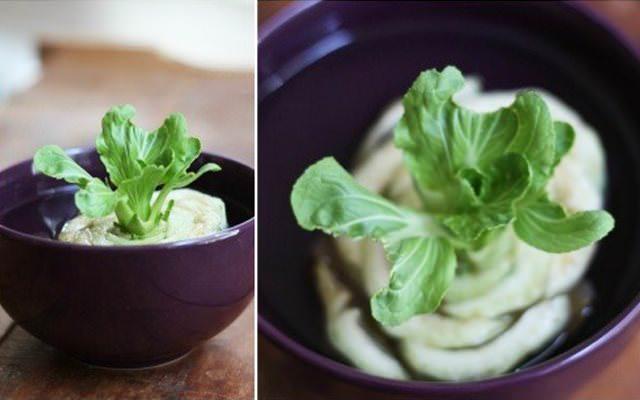
Bok choy, Bok Choi or Chinese cabbage is a green vegetable widely consumed in many Asian countries. Can be eaten raw, in salad and cooked. It contains lots of vitamins and minerals. To regrow again, cut the base of the stem and place this in a small bowl of water. It’s that simple! You will see how the new growth begins in only 2 days. See the tutorial! Either use the young leaves or transplant the regrowing Bok Choi in a container.
4. Celery

Celery is a herb that has been used since ancient times for its natural medicinal qualities. It is characterized by having a diuretic, digestive, purifying and anti-inflammatory action. To grow again, use the base! Place that in a small bowl of water. You will see how it grows back in 3 or 4 days. Young leaves can be used again or plant it if you have a small pot.
Also Read: Cool DIY Planter Ideas from Household Items
5. Fennel
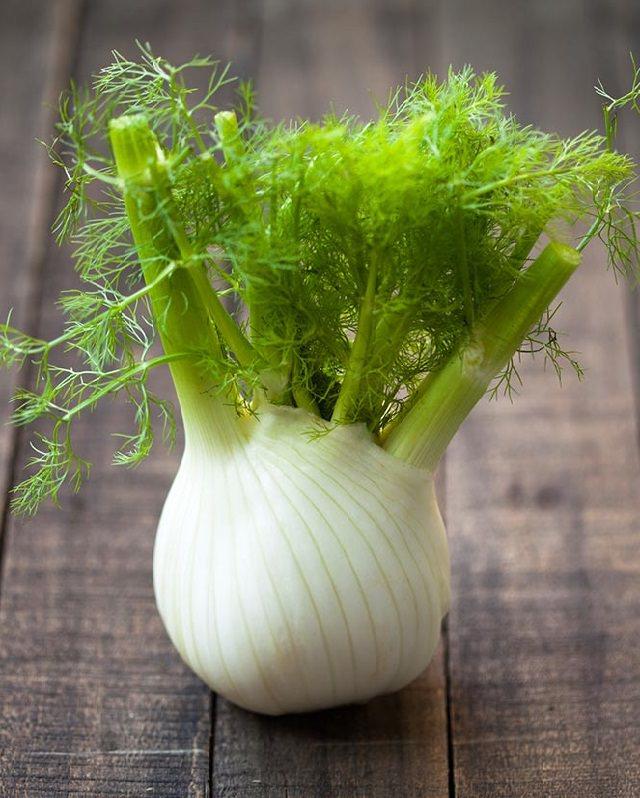
Fennel looks similar to dill, it can be a great addition to your cuisines. You can regrow it as easily as celery. Take a fennel bulb and set it in a cup or small bowl of clear water, a level of water should be at the level of the bulb. Keep the bowl in a spot that receives some sun and change the water in every couple of days.
6. Lettuce
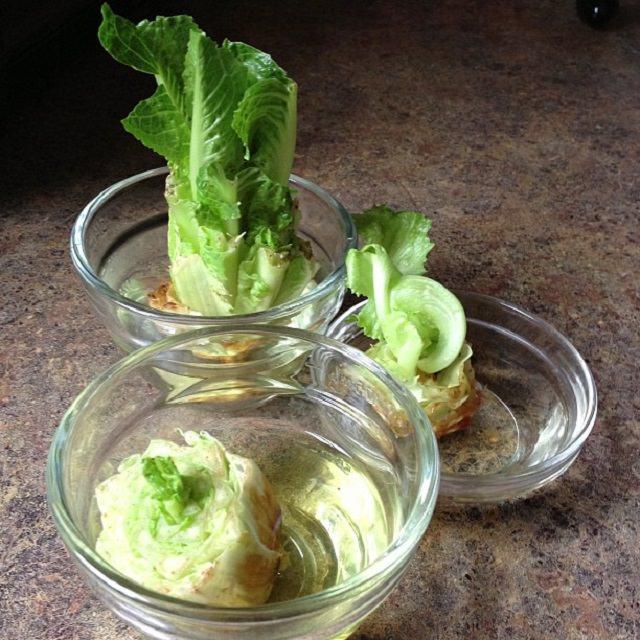
Lettuce taste best when fresh! However, growing lettuce in water won’t satiate your lettuce needs but you’ll love growing it that way. You can use this tiny supply in your salads or top the sandwiches with it. To regrow, eat your purchased lettuce, cutting the leaves at about 1 inch from the bottom. Place remaining stem in a shallow dish of water (about 1/2 inch). Now place that on a windowsill or under grow lights. Change water in a bowl every 1 to 2 days. Read more on Getty Stewart’s site!
7. Lemongrass
Get the lemongrass stalks and keep them in water in a bright spot that receives some sun, change the water every day, and watch as new leaves begin growing almost immediately. The roots start emerging after a week, and the stalk eventually divides itself (via offshoot stalks) after a few weeks. You can either use it or transplant that in pot.
8. Garlic Sprout

To make it grow, find a garlic clove with green sprout and keep it in a glass. Fill the water up to the level of clove. In 2-3 days the sprout will start to grow and the clove will produce roots. When the sprouts are 3 inches in height, you can cut it for use leaving 1/3 of the shoot. It can be used in salads baked potatoes, or to spice up any preparation, because it has an aroma and garlic-like flavor.
9. Beet Greens
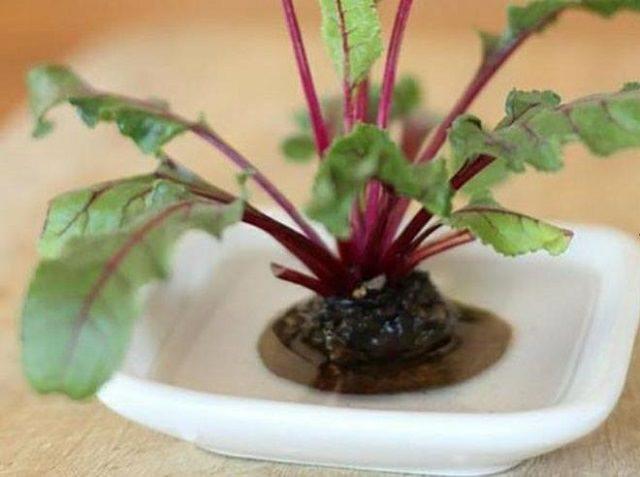
Beetroot is a highly nutritious vegetable, but its green part is also very healthy. It contains more iron than spinach, also the vitamin A that helps strengthen the immune system and stimulates the production of antibodies and white blood cells. To regrow, slice off the top portion of a beet with a knife. Take no more than one-third of the beet. Fill a glass, mug or bowl with water. Place the beet top into the water, with the cut side facing downward. Set the glass on a windowsill, counter or table that is close to the window, so the beet top will receive adequate sunlight. Read more of it here.
In this article, you’ll learn about the herbs and vegetables that can re-grow (for a while) without soil, using just water and water, good for those who have no space to grow their own food, growing plants in water also help if you want to grow the roots of these scrap food plants for propagation.
Growing your own fruits, vegetables and herbs is one of the trendiest thing in the gardening. Growing food generates anticipation, curiosity, and interest, as well as it is fundamentally healthy- organic and free from harmful chemicals that are often used in producing large crops.
In addition, it’s much more rewarding! There is nothing better than a meal made with organic fruits of your own.1. Carrot Greens

Although you can not bring back and GROW carrots in water but instead of throwing away the green ends from the top, put them in a shallow container of water in a bright spot to regrow the carrot greens. Keep changing the water every other day and in a few days, you’ll be able to see tiny green leaves, a wonderful addition to a salad, pesto or chutney.
2. Green Onion

Noodles, Salads, and Pasta or even much more, there’re so many recipes in which you can try green onions. Isn’t it better to grow them fresh in your home?
Growing green onions in water is super easy, too. You don’t need a garden for this; all you need is a sunny windowsill, transparent jar or glass, and green onion bulbs. Read more about this here!
3. Bok Choi

Bok choy, Bok Choi or Chinese cabbage is a green vegetable widely consumed in many Asian countries. Can be eaten raw, in salad and cooked. It contains lots of vitamins and minerals. To regrow again, cut the base of the stem and place this in a small bowl of water. It’s that simple! You will see how the new growth begins in only 2 days. See the tutorial! Either use the young leaves or transplant the regrowing Bok Choi in a container.
4. Celery

Celery is a herb that has been used since ancient times for its natural medicinal qualities. It is characterized by having a diuretic, digestive, purifying and anti-inflammatory action. To grow again, use the base! Place that in a small bowl of water. You will see how it grows back in 3 or 4 days. Young leaves can be used again or plant it if you have a small pot.
Also Read: Cool DIY Planter Ideas from Household Items
5. Fennel

Fennel looks similar to dill, it can be a great addition to your cuisines. You can regrow it as easily as celery. Take a fennel bulb and set it in a cup or small bowl of clear water, a level of water should be at the level of the bulb. Keep the bowl in a spot that receives some sun and change the water in every couple of days.
6. Lettuce

Lettuce taste best when fresh! However, growing lettuce in water won’t satiate your lettuce needs but you’ll love growing it that way. You can use this tiny supply in your salads or top the sandwiches with it. To regrow, eat your purchased lettuce, cutting the leaves at about 1 inch from the bottom. Place remaining stem in a shallow dish of water (about 1/2 inch). Now place that on a windowsill or under grow lights. Change water in a bowl every 1 to 2 days. Read more on Getty Stewart’s site!
7. Lemongrass
Get the lemongrass stalks and keep them in water in a bright spot that receives some sun, change the water every day, and watch as new leaves begin growing almost immediately. The roots start emerging after a week, and the stalk eventually divides itself (via offshoot stalks) after a few weeks. You can either use it or transplant that in pot.
8. Garlic Sprout

To make it grow, find a garlic clove with green sprout and keep it in a glass. Fill the water up to the level of clove. In 2-3 days the sprout will start to grow and the clove will produce roots. When the sprouts are 3 inches in height, you can cut it for use leaving 1/3 of the shoot. It can be used in salads baked potatoes, or to spice up any preparation, because it has an aroma and garlic-like flavor.
9. Beet Greens

Beetroot is a highly nutritious vegetable, but its green part is also very healthy. It contains more iron than spinach, also the vitamin A that helps strengthen the immune system and stimulates the production of antibodies and white blood cells. To regrow, slice off the top portion of a beet with a knife. Take no more than one-third of the beet. Fill a glass, mug or bowl with water. Place the beet top into the water, with the cut side facing downward. Set the glass on a windowsill, counter or table that is close to the window, so the beet top will receive adequate sunlight. Read more of it here.
3
0
文章
Hande Salcan
2017年05月23日

If you are a gardener, chances are you have thought about starting a compost bin. Not only is it great for the planet, but it can help you create “garden gold” and transform your soil into a healthier home for all your plants! Although there are compost bins you can purchase, they tend to be expensive, hard to transport and sometimes downright inefficient. If you don’t know how composting works, take a couple minutes and visit our quick primer on composting techniques, then jump on back here and pick one of these 12 creative DIY compost bins, and get started! Feature photo below, is from ‘A-Z West‘.
Our first tutorial from ‘Practically Functional’ is a DIY compost bin that has the details… A latching lid, sturdy construction, access to soil at the bottom, and my fav… You can easily open the lid with one hand to dump in the kitchen scraps! Lot’s of step by step directions, photos and drawings.

For those of you who want to use the three bin system and get really serious, this DIY compost bin from ‘Apartment Therapy’ even looks good… Links on how to get the plans for this project are included in their post.

So we love the compact, easy nature of this DIY garbage can compost bin by ‘Full Measure of Happiness’, but unfortunately, that site has gone to the big bloggers resting place in the sky… No worries, keep reading!

Fortunately for all of us, Toni at ‘The Happy Housewife’ has a full tutorial on making a DIY compost bin from a garbage can! Love the pics of her boys “rotating” the bin!

So, maybe you don’t have adorable little boys (or girls!) to push your compost bin around the yard? (Or maybe you do, but they no longer think it’s a cool play-toy. ): ) Using the same idea, this garbage can composter from ‘Instructables’ is on a stand that you rotate the compost bin on. Pretty clever!

If you want to recycle while creating your bin, make this DIY compost bin from pallets from ‘DIY Ready’. Did we mention cheap?

Don’t want to go through a bunch of construction? Make your own compost bin from wire hardware cloth or chicken wire with this tutorial by ‘Mother Earth Living’.

Keep recycling and protecting the earth by making this shower door compost bin from ‘Organic Gardening Magazine’. The shower door acts like a bit of a greenhouse and heats up the compost, making it decompose faster. You can pick one up at a Habitat for Humanity Restore or a similar store near you.

This low cost compost bin from ‘Instructables’ allows you to remove any side, and the whole thing is easily movable as well. Made from inexpensive fence pickets, this is an easy garden project.

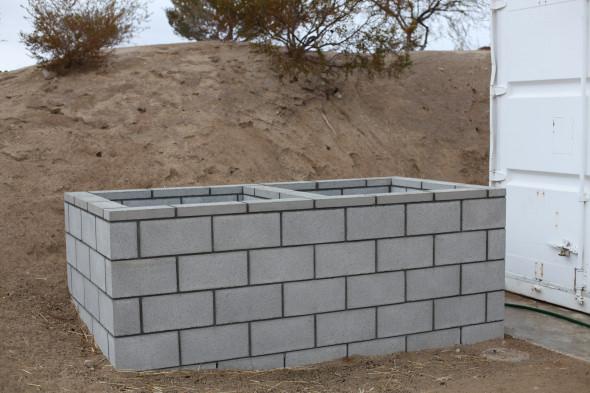
From ‘Blue Planet, Green Living’, this DIY compost bin is different in that it’s made using concrete blocks. This makes it easy to make the bin larger or smaller, depending on the needs of that season, keep out critters, or even remove blocks to allow for more ventilation.

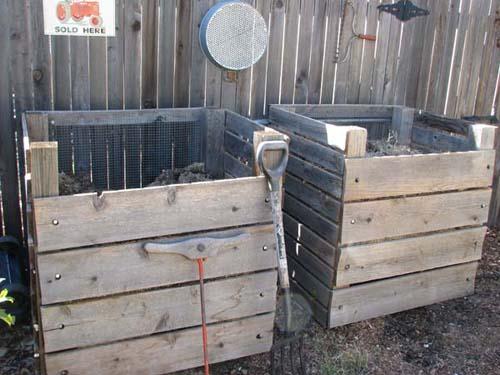
Lastly, these compost bins from ‘Birds and Blooms’ are made of cedar, and allow the boards at the bottom to slide out. This lets you remove finished compost from the bottom of the pile, while continuing to add to the top of the pile.

Our first tutorial from ‘Practically Functional’ is a DIY compost bin that has the details… A latching lid, sturdy construction, access to soil at the bottom, and my fav… You can easily open the lid with one hand to dump in the kitchen scraps! Lot’s of step by step directions, photos and drawings.

For those of you who want to use the three bin system and get really serious, this DIY compost bin from ‘Apartment Therapy’ even looks good… Links on how to get the plans for this project are included in their post.

So we love the compact, easy nature of this DIY garbage can compost bin by ‘Full Measure of Happiness’, but unfortunately, that site has gone to the big bloggers resting place in the sky… No worries, keep reading!

Fortunately for all of us, Toni at ‘The Happy Housewife’ has a full tutorial on making a DIY compost bin from a garbage can! Love the pics of her boys “rotating” the bin!

So, maybe you don’t have adorable little boys (or girls!) to push your compost bin around the yard? (Or maybe you do, but they no longer think it’s a cool play-toy. ): ) Using the same idea, this garbage can composter from ‘Instructables’ is on a stand that you rotate the compost bin on. Pretty clever!

If you want to recycle while creating your bin, make this DIY compost bin from pallets from ‘DIY Ready’. Did we mention cheap?

Don’t want to go through a bunch of construction? Make your own compost bin from wire hardware cloth or chicken wire with this tutorial by ‘Mother Earth Living’.

Keep recycling and protecting the earth by making this shower door compost bin from ‘Organic Gardening Magazine’. The shower door acts like a bit of a greenhouse and heats up the compost, making it decompose faster. You can pick one up at a Habitat for Humanity Restore or a similar store near you.

This low cost compost bin from ‘Instructables’ allows you to remove any side, and the whole thing is easily movable as well. Made from inexpensive fence pickets, this is an easy garden project.

From ‘Blue Planet, Green Living’, this DIY compost bin is different in that it’s made using concrete blocks. This makes it easy to make the bin larger or smaller, depending on the needs of that season, keep out critters, or even remove blocks to allow for more ventilation.

Lastly, these compost bins from ‘Birds and Blooms’ are made of cedar, and allow the boards at the bottom to slide out. This lets you remove finished compost from the bottom of the pile, while continuing to add to the top of the pile.

2
2
文章
粉团
2017年05月23日

Making your own compost is the best way to enrich your soil organically. It’s simple and easy, check out!IntroductionComposting is not difficult and is probably the best way to provide nutrients to your plants. You can start composting even in a small compost bin if you’re a container gardener. A great source of organic fertilizer for your edibles.
Preparing garden compost is also simple as it only needs a few ingredients. These include nitrogen, carbon, air, and water. To get these ingredients, collect kitchen and yard waste, but remember that full decomposition is a lengthy period that may take months. Needless to say, it is a process that requires a number of steps. Eventually, the overall product is a proven and useful tool for farming. Now let us look at the steps!
Look at our 4 Step Composting Guide if you’re new to Composting.Steps to Preparing Suitable Garden CompostPurchase or get a compost binCome up with a bottom layerFill your compost binInspect the compost pile in three day timeMix the contents of the garden compostCheck if the compost is ready1. Purchase Or Get A Compost Bin
Do not be afraid if you’re unable to get a compost bin. We are here to help you! You only need to buy a pre-made container from any agricultural store or supplier. Then, go on and build a box of your own by using wood. Ensure that you put the box on moisture free, bare soil.
2. Establish A Bottom Layer

Make sure the bottom layer has sufficient air flow. At the bottom of the compost bin, create small holes using a gardening fork. This is to assist in drainage and proper aeration. The next procedure is to place twigs, feeble sticks and other straw-like substances at the bottom. They should be 4-6 inches, translating to about 10 centimeters deep.
3. Fill Your Compost Bin

Add nitrogenous compounds, these are mostly greens. They include plants such as cut grass, raw peelings from vegetables, coffee grounds, diluted urine, manure, and weeds. Proceed also in adding carbon compounds, which are the mostly ‘the browns’. They include cardboards, dead leaves, cereal boxes, hedge clippings, and brown pruning.
Also Read: 13 Things You Should Not Put in a Compost Pile
In this stage, you will also be required to mix the fast-rotting green materials with the slow-rotting brown materials. Let us take the example of freshly cut grass. This may be combined with feeble sticks or other wood compounds. Why is this so? The main reason behind this is to prevent odors.
To hasten the process of decomposition, consider adding bacteria’ such as pseudomonas. You may also use a variety of macro and micro nutrients as alternatives. Besides, chopping off large materials also increases the process of decomposition. For example, branches should be cut to small pieces, cardboards shredded and eggshells crushed. Last but not least, continue adding water as you fill in your compost heap.
Also Read: Ways to Use Worm Casting
4. Inspect The Compost Heap After Three Days

You can also check your compost temperature with a compost thermometer. Here is more on it.
In three days’ time, place your hand over the top of the heap to feel if it’s hot. If so, this shows the start to the decomposition process. Visit the compost heap after one week, and repeat the same procedure. If it has a cool feel, start mixing it. However, if it still feels hot, wait an extra week.
5. Mix The Contents Of The Garden Compost

Use a garden fork or a shovel to thoroughly and effectively mix up the matter inside the container. Stir and move the contents from top to bottom in a continuous manner. You may be wondering why this step involves mixing up the contents. This helps in the rate of decomposition by adding oxygen which is the final ingredient. Lastly, if the contents appear dry, it is advisable to add water before you start mixing. Repeat this process for the next four to six weeks.
Also Read: 11 Best Composting Tips You Must Read Now
6. Check If The Compost Is Ready
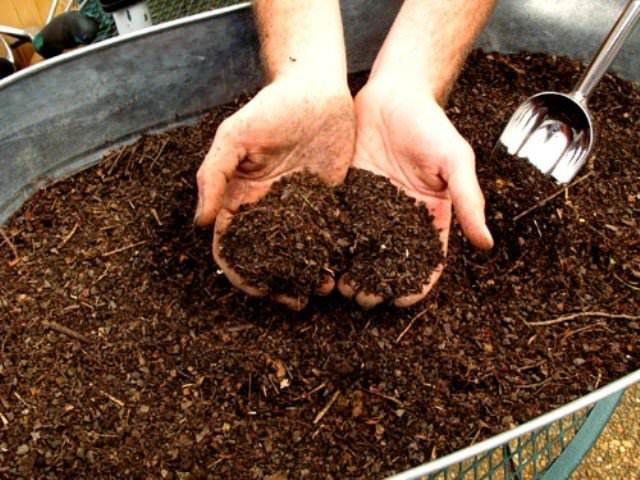
To determine if your compost heap is ready, look for a dark brown color, which often has the smell of earth.
Conclusion
Garden compost is an effective and cheap way of providing organic fertilizer to your vegetables and other garden plants. The article shows you some easy steps of preparing a simple compost heap and it is our hope that it’s well to your liking. If so, share this information with other interested parties and let’s keep the conversation going!
What are those challenges that you’ve faced in trying to make garden compost? Where do you go wrong?
Preparing garden compost is also simple as it only needs a few ingredients. These include nitrogen, carbon, air, and water. To get these ingredients, collect kitchen and yard waste, but remember that full decomposition is a lengthy period that may take months. Needless to say, it is a process that requires a number of steps. Eventually, the overall product is a proven and useful tool for farming. Now let us look at the steps!
Look at our 4 Step Composting Guide if you’re new to Composting.Steps to Preparing Suitable Garden CompostPurchase or get a compost binCome up with a bottom layerFill your compost binInspect the compost pile in three day timeMix the contents of the garden compostCheck if the compost is ready1. Purchase Or Get A Compost Bin

Do not be afraid if you’re unable to get a compost bin. We are here to help you! You only need to buy a pre-made container from any agricultural store or supplier. Then, go on and build a box of your own by using wood. Ensure that you put the box on moisture free, bare soil.
2. Establish A Bottom Layer

Make sure the bottom layer has sufficient air flow. At the bottom of the compost bin, create small holes using a gardening fork. This is to assist in drainage and proper aeration. The next procedure is to place twigs, feeble sticks and other straw-like substances at the bottom. They should be 4-6 inches, translating to about 10 centimeters deep.
3. Fill Your Compost Bin

Add nitrogenous compounds, these are mostly greens. They include plants such as cut grass, raw peelings from vegetables, coffee grounds, diluted urine, manure, and weeds. Proceed also in adding carbon compounds, which are the mostly ‘the browns’. They include cardboards, dead leaves, cereal boxes, hedge clippings, and brown pruning.
Also Read: 13 Things You Should Not Put in a Compost Pile
In this stage, you will also be required to mix the fast-rotting green materials with the slow-rotting brown materials. Let us take the example of freshly cut grass. This may be combined with feeble sticks or other wood compounds. Why is this so? The main reason behind this is to prevent odors.
To hasten the process of decomposition, consider adding bacteria’ such as pseudomonas. You may also use a variety of macro and micro nutrients as alternatives. Besides, chopping off large materials also increases the process of decomposition. For example, branches should be cut to small pieces, cardboards shredded and eggshells crushed. Last but not least, continue adding water as you fill in your compost heap.
Also Read: Ways to Use Worm Casting
4. Inspect The Compost Heap After Three Days

You can also check your compost temperature with a compost thermometer. Here is more on it.
In three days’ time, place your hand over the top of the heap to feel if it’s hot. If so, this shows the start to the decomposition process. Visit the compost heap after one week, and repeat the same procedure. If it has a cool feel, start mixing it. However, if it still feels hot, wait an extra week.
5. Mix The Contents Of The Garden Compost

Use a garden fork or a shovel to thoroughly and effectively mix up the matter inside the container. Stir and move the contents from top to bottom in a continuous manner. You may be wondering why this step involves mixing up the contents. This helps in the rate of decomposition by adding oxygen which is the final ingredient. Lastly, if the contents appear dry, it is advisable to add water before you start mixing. Repeat this process for the next four to six weeks.
Also Read: 11 Best Composting Tips You Must Read Now
6. Check If The Compost Is Ready

To determine if your compost heap is ready, look for a dark brown color, which often has the smell of earth.
Conclusion
Garden compost is an effective and cheap way of providing organic fertilizer to your vegetables and other garden plants. The article shows you some easy steps of preparing a simple compost heap and it is our hope that it’s well to your liking. If so, share this information with other interested parties and let’s keep the conversation going!
What are those challenges that you’ve faced in trying to make garden compost? Where do you go wrong?
0
0
文章
Mirella
2017年05月23日

Learn how to grow bell peppers in containers. Growing bell peppers in pots is a great idea if you’re short of space or live in a cold temperate climate as it requires warm soil to thrive.
USDA Zones— Pepper plants are short-lived perennials in tropics but in cold temperate regions, they are grown as annual.
Difficulty— Easy
Soil pH— Slightly acidic to neutral
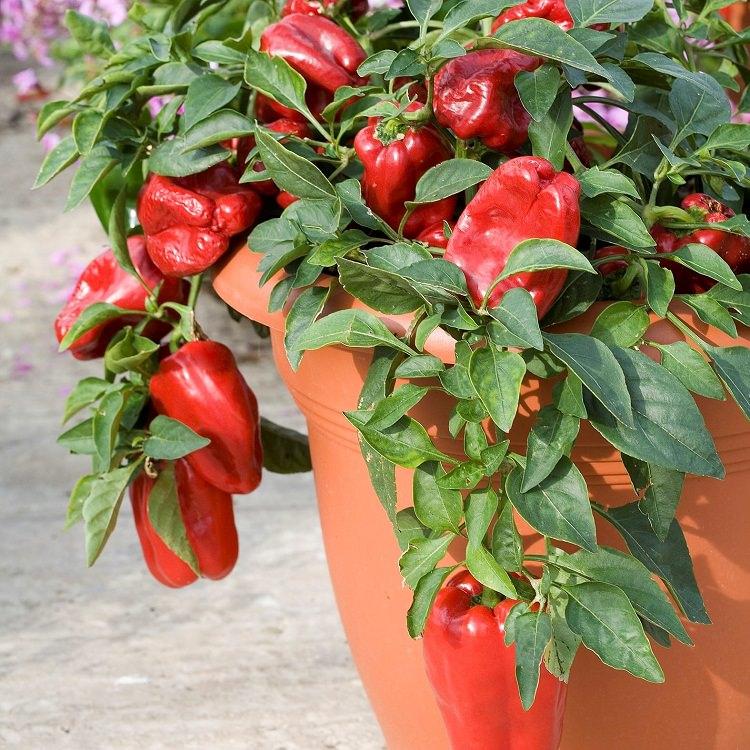
Due to the fact that the pepper is a warm weather vegetable crop and requires considerably more heat than cucumbers and tomatoes, growing bell peppers in pots is a great idea if you live in a cold climate.
How to Grow Bell Peppers in Containers
Growing bell pepper in the pot is easy. The first thing you have to do is to buy the plant from a nursery or propagate it from seeds.
Choosing a Pot
Planting bell pepper in containers requires a pot that is at least 10-12 inches deep and wide and has sufficient drainage holes. You can grow up to 2-3 plants (smaller varieties) in such a pot. Avoid using the black color container if you’re growing bell pepper in a tropical climate.
Propagation
Buy good quality seeds from a local garden store or buy them online. Also, buy seed starting mix or make yourself. Fill small pots or seedling tray with the seed mix and plant two seeds in each pot, 2-3 cm deep.
Start seeds 6-10 weeks before last spring frost date. Usually, in subtropical and tropical climate, you can start seeds anytime except in harsh summer.
The seeds will germinate in 1 to 3 weeks depending on the weather conditions and seed quality. After they germinate thin out and only keep one plant per pot. When seedlings have 2 true leaves they are ready to be transplanted into the desired containers.
Requirements for Growing Bell Pepper in Containers
Position
Peppers love the sun. The most productive pepper plants are grown in warmth and heat. When you’re growing bell peppers in pots, keep them in a position that receives at least 6 hours of sunlight daily. That place should be sheltered from strong wind.
Soil
Good soil is the key to productive pepper plants. Buy best quality potting mix that is well drained, loose and fertile or make your own potting mix. Potting mix must be rich in organic matter. Add well-rotted manure or compost in the combination of peat moss/coco peat and vermiculite or perlite (alternatively, sand). You can also add 5-10 gm neem cake at the time of soil preparation, it will protect the young plant from soil-borne diseases and pests.
Watering
Growing bell peppers require regular watering to keep the soil slightly moist, soil should never dry out completely. In any case, avoid wetting the foliage, overhead watering may cause fungal infection. Water at the foot of the plant. Also, pepper plants suffer from overwatering so be careful that your plants don’t sit in water.
Temperature
Growing bell peppers require soil temperature above 60 F (15 C) for best growth. The optimum seed germination temperature is above 68 F (20 C). It can tolerate temperature up to 95 F (35 C) and down to 50 F (10 C) easily. The ideal growing temperature is between 70-90 F (21-32C).
Bell Pepper CareMulching
For your convenience and to reduce the evaporation of water, do mulching. Cover the base of the plant with organic matter such as leaves, pine barks, straws, paper or whatever that is readily available to you.
Fertilizer
Pepper plants like tomatoes are heavy feeders and you’ll need to fertilize the plant in every 15 days or so. When fertilizing, remember too much nitrogen-rich fertilizer can promote foliage growth. You can also feed the plant with tomato fertilizer. Also, once in a month feed the plant with compost or manure tea. Use of Epsom salt (2tsp/gallon water at the time of watering, you can also spray the plants with this solution) each month improves the health and increases the yield of tomato and pepper plants so it must be applied too.
Pinching and Pruning
In the early stage, when the plant is young pinch growing tips regularly to make it bushier. Pruning is not necessary but can be carried out if required.
Deadheading
If your pepper plant is flowering too early deadhead the flowers, it is important. This will direct the plant’s energy into growing and becoming healthy. You can also stop the formation of new fruits if you want to speed up the maturation of pepper fruits that are already growing on the plant by pinching off emerging flowers.
Pollination
Pepper plants are self-fertile so you don’t need to care about pollination but to get better fruits and to improve productivity you can gently shake the plants when they’re in bloom.

Support
You may need to support the plants. For this, either use tomato cages or simply poke a stick near the main stem and tie the plant to it.
Pests and Diseases
Growing bell peppers in pots require care from aphids as they are the number one enemy of pepper plants. In hot and dry weather you’ll also need to keep an eye on spider mites.
Harvesting
Bell peppers are ready for harvesting in 60-90 days after transplanting. You can harvest them green when they reach full size and remain firm. If left to ripen, the color will change into orange, yellow or red.
A Fact: Pepper is one of the richest sources of Vitamin C (more than the oranges).
USDA Zones— Pepper plants are short-lived perennials in tropics but in cold temperate regions, they are grown as annual.
Difficulty— Easy
Soil pH— Slightly acidic to neutral

Due to the fact that the pepper is a warm weather vegetable crop and requires considerably more heat than cucumbers and tomatoes, growing bell peppers in pots is a great idea if you live in a cold climate.
How to Grow Bell Peppers in Containers
Growing bell pepper in the pot is easy. The first thing you have to do is to buy the plant from a nursery or propagate it from seeds.
Choosing a Pot
Planting bell pepper in containers requires a pot that is at least 10-12 inches deep and wide and has sufficient drainage holes. You can grow up to 2-3 plants (smaller varieties) in such a pot. Avoid using the black color container if you’re growing bell pepper in a tropical climate.
Propagation
Buy good quality seeds from a local garden store or buy them online. Also, buy seed starting mix or make yourself. Fill small pots or seedling tray with the seed mix and plant two seeds in each pot, 2-3 cm deep.
Start seeds 6-10 weeks before last spring frost date. Usually, in subtropical and tropical climate, you can start seeds anytime except in harsh summer.
The seeds will germinate in 1 to 3 weeks depending on the weather conditions and seed quality. After they germinate thin out and only keep one plant per pot. When seedlings have 2 true leaves they are ready to be transplanted into the desired containers.
Requirements for Growing Bell Pepper in Containers

Position
Peppers love the sun. The most productive pepper plants are grown in warmth and heat. When you’re growing bell peppers in pots, keep them in a position that receives at least 6 hours of sunlight daily. That place should be sheltered from strong wind.
Soil
Good soil is the key to productive pepper plants. Buy best quality potting mix that is well drained, loose and fertile or make your own potting mix. Potting mix must be rich in organic matter. Add well-rotted manure or compost in the combination of peat moss/coco peat and vermiculite or perlite (alternatively, sand). You can also add 5-10 gm neem cake at the time of soil preparation, it will protect the young plant from soil-borne diseases and pests.
Watering
Growing bell peppers require regular watering to keep the soil slightly moist, soil should never dry out completely. In any case, avoid wetting the foliage, overhead watering may cause fungal infection. Water at the foot of the plant. Also, pepper plants suffer from overwatering so be careful that your plants don’t sit in water.
Temperature
Growing bell peppers require soil temperature above 60 F (15 C) for best growth. The optimum seed germination temperature is above 68 F (20 C). It can tolerate temperature up to 95 F (35 C) and down to 50 F (10 C) easily. The ideal growing temperature is between 70-90 F (21-32C).
Bell Pepper CareMulching
For your convenience and to reduce the evaporation of water, do mulching. Cover the base of the plant with organic matter such as leaves, pine barks, straws, paper or whatever that is readily available to you.
Fertilizer
Pepper plants like tomatoes are heavy feeders and you’ll need to fertilize the plant in every 15 days or so. When fertilizing, remember too much nitrogen-rich fertilizer can promote foliage growth. You can also feed the plant with tomato fertilizer. Also, once in a month feed the plant with compost or manure tea. Use of Epsom salt (2tsp/gallon water at the time of watering, you can also spray the plants with this solution) each month improves the health and increases the yield of tomato and pepper plants so it must be applied too.
Pinching and Pruning
In the early stage, when the plant is young pinch growing tips regularly to make it bushier. Pruning is not necessary but can be carried out if required.
Deadheading
If your pepper plant is flowering too early deadhead the flowers, it is important. This will direct the plant’s energy into growing and becoming healthy. You can also stop the formation of new fruits if you want to speed up the maturation of pepper fruits that are already growing on the plant by pinching off emerging flowers.
Pollination
Pepper plants are self-fertile so you don’t need to care about pollination but to get better fruits and to improve productivity you can gently shake the plants when they’re in bloom.

Support
You may need to support the plants. For this, either use tomato cages or simply poke a stick near the main stem and tie the plant to it.
Pests and Diseases
Growing bell peppers in pots require care from aphids as they are the number one enemy of pepper plants. In hot and dry weather you’ll also need to keep an eye on spider mites.
Harvesting
Bell peppers are ready for harvesting in 60-90 days after transplanting. You can harvest them green when they reach full size and remain firm. If left to ripen, the color will change into orange, yellow or red.
A Fact: Pepper is one of the richest sources of Vitamin C (more than the oranges).
3
0
文章
Joss
2017年05月22日


Many of us have trouble keeping plants alive in our garden, and have quite the “black thumb”. Either we are too busy to maintain them, or our gardens have issues that make it difficult; hot, dry sites, poor soil or bad weather. Don’t let that stop you from growing flowers! There is hope for even the most murderous of gardeners… you can grow flowers, and you can plant them today and trust they will still be there next year and the year after that. Yes, you still have to make sure they get the occasional drink of water, and make sure you aren’t planting them deep in the barren wasteland of the Arctic…but other than that? Here are TGG’s best picks for easy to grow flowers for any garden. (Oh, and these plants are favs of expert gardeners too!)
Number 5
Thyme (pictured above)
While most of you recognize this as a spice from the kitchen cupboard, there are many very ornamental varieties that can offer texture, color and scent in your garden. Oh, and did I mention they grow like weeds? In a good way, of course. Drought resistant and sun lovers, these plants come in creeping forms to tuck between pavers, and larger varieties that fit right into any garden bed. Flowers are usually white, pink or red, and cover the plants spring through fall. They are fragrant when crushed, make great filler for flower arrangements, and attract butterflies like crazy! These plants come back every year, and yes, you can use them in the kitchen!
Number 4
Cosmos

This flower is an annual, which means it dies after one season, but it reseeds itself so prolifically you would never know it! Each season new seedlings will come up on their own, with no help from you at all. Beautiful daisy like flowers are borne on tall ferny foliage in purples, pinks and whites. All they need is a little water and at least half a day of sun, and they will provide you with armfuls of cut flowers all season long. This is our best budget pick… easily grown from one packet of seeds, and renews itself each year after that with no more seeding needed. Simply rake your spot smooth, sprinkle seeds, lightly cover with dirt and water…That’s it! They will do the rest… This flower is great as filler in a garden bed that has empty spots, or makes a dramatic show as aw hole bed in itself.
Number 3
Mexican Feather Grass
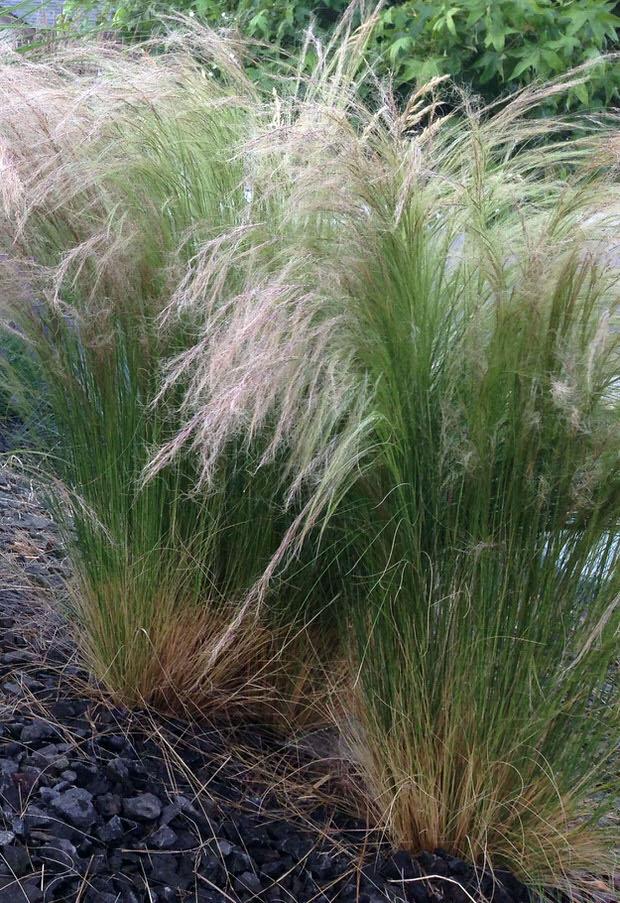
Mexican feather grass is my choice for an unbeatable ornamental grass for my area, but there are similar grasses if you live in a zone colder than 6. This feather grass (Nasella, formerly Stipa) is incredible drought and heat tolerant, self seeds like crazy (may drive you nuts, but eay to pull out if they seed in an unlikely place) and add n updated look to any garden. These little grasses grow to 24 inches and as wide, and are topped with fluffy white “flowers” through the summer. Which, by the way, look fantastic right through the winter after the grass has turned golden brown. You can plant these gems in a modern, more orderly way, or let them create a more natural garden effect. You can pot them into containers, and use them to add texture and movement to a stale garden bed. At TGG we are big fans of all ornamental grasses, but this is one of our go-tos!
Number 2
Coneflowers

The hottest perennial in any nursery right now are coneflowers, and with good reason. Originally purple wildflowers from the prairie states, these new hybrids have been bred to provide incredible color varieties, compact form and still retain the drought and disease resistance of the original plant. We love some of the new tropical colors, like “Flame Thrower” or “Indian Summer”. Also, green and white varieties, and even double flowering forms! Some varieties are great for containers, try Pow Wow Wild Berry, one of our new favs… They require occasional watering, and they bloom better if their spent blooms are removed, although not necessary in may of the newer varieties. Fun fact: The parent plant, Echinacea, is the same herbal supplement many use to ward off colds and fevers!
Our top pick for easiest flower to grow – Number one!
Yarrow

2
2
文章
Juze
2017年05月22日

Learn how to grow grapes in pots. Growing grapes in containers is not very complicated though it requires slight care and maintenance. Check out below!
USDA Zones— 3 – 10
Difficulty— Moderate
Soil pH— Slightly acidic to neutral

Choosing a Pot
For growing grapes in containers, choose a large and sturdy container that can support this vigorous vine. A 15-20 gallon pot that is at least 16-18 inches deep and 18-24 inches wide is sufficient. Start with a smaller sized pot and then repot the plant in a larger one.
Choosing varieties
The best option is to go to a garden center and ask for a variety that can grow well in pots and in your climate. There are many varieties of grapevine you can choose from. Choosing a variety that is resistant to diseases and can grow well in your zone is most essential. However, you can grow almost any variety in the container but growing a dwarf grape cultivar like ‘pixie’ can save you from the hassle of training a grape vine in a pot.
Planting
The best time to plant grapevine is spring or early summer, planting on this time helps the plant to grow all season without the exposure to frost. But if you live in a frost-free hot tropical climate the best time for planting grape vine is winters.
Requirements for Growing Grapes in Pots

Position
Choose a location that is sunny, warm and dry. If your spot receives shade in an afternoon the plant will still do well, but at least 6 hours of sunlight is required. Avoid keeping the plant in wet, shady and less windy spot with less or no air circulation as it promotes fungal diseases and grapevine requires good air circulation around it.
Support and Training

Grapevine needs training and support to grow. When growing grapes in a pot, it is best to opt for a tall lightweight trellis, of wood or plastic. You can also DIY trellis for it. A grape vine grows long and requires support, it will be much better if you have an arbor or pergola like structure. Besides that, there are many other techniques to train the grape vine (See the picture above). Train the vine on a stake or something like a fan trellis. You can also support the vine on a stake with the help of “Umbrella Kniffen Training Method”. To learn more about this method, read this helpful article on pallensmith.com. Growing grapes in pots by the standard vine training method on a regular trellis is an easy and hassle free idea too.
Soil
Don’t use heavy garden soil when growing grapes in containers. Instead, use a light potting mix that is loose, rich in organic matter and most importantly drains well.
Watering
Water regularly and deeply to keep the soil slightly moist but avoid overwatering. Soggy, damp soil can be detrimental to the plant.
Fertilization
Side dress the plant periodically with aged manure or compost. In the first year, you can fertilize the plant with a general purpose fertilizer in spring and summer. From the next year, start to fertilize the plant with the fertilizer that is low in nitrogen but high in potassium and phosphorus from the spring when flower buds appear.
Growing Grapes in Tropics
Grapes are actually temperate fruits but the best thing about them is they can be grown in both temperate and tropical regions. Temperate climate zones without very harsh summers or humidity are optimum for growing grapevines. However, the two tropical countries India and Brazil are one of the largest producers of grapes in the world. Other tropical countries like Yemen, Thailand, Peru and Tanzania also produces grapes but to a smaller extent. This means if you live in a tropical climate you can still grow grapevine. You’ll only need to find a right variety that grows successfully in your area.
Still in tropics, areas with very high humidity or with heavy rainfall are less suitable for growing grapevine and if you’re living in an unfavorable climate like this, your plant will going to suffer from fungal diseases regularly and you’ll have to look after it more. Besides this, there is a possibility that fruits you’ll obtain will be of lesser quality and mild taste.
Grape Vine Care in Pots
Grape vine care in the pot is not so difficult if you follow the tips given below.

Pollination
When growing grapes in containers you must know most grape varieties are self-fertile and produce fruits on their own. However, shaking the plant gently at the time of flowering results in better yield.
Mulching
Grapevine requires mulching when grown on the ground. You can also mulch in the pot with pine bark, compost or with pebbles (this way it will look great too) to prevent excessive water evaporation from the soil and to protect roots from temperature fluctuations.
Overwintering
In climates with harsh winters, you have to protect the plant. For this, you’ll need to remove the dormant grapevine from its support and start to keep it indoors in warm space. Also, reduce watering and avoid the application of any fertilizer during this period.
Pruning
During the first few months after planting until the end of the growing season, do not prune the plant and allow it to grow freely to let the plant establish well in a pot and allow it to develop a strong root system.
Grapevine woods that are more than two years old do not produce fruits so you’ll have to remove all the old branches.
Prune the growth in late winter to early spring during the dormancy so that only two buds will remain. Buds are little protrusions on the trunk. This heavy pruning may seem too much to do but in the spring and summer, each of these buds will grow into a new branch. Dedicate the first year for training the vine to follow your trellis or stack with pruning and tying. Due to the limited space of the container, try to keep only 1 or 2 branches growing from the main trunk. Also, prune away any runners that creep away from the trellis.
The most important pruning will be one that you will perform in late winter when the plant shed its leaves, it is the one on which the fruiting depends. You will need to do the summer pruning too. Though it should have to be light and unobtrusive, just pinching and pruning.
To learn and read more pruning grapevines check out this article on freeplants.com and this one on RHS.
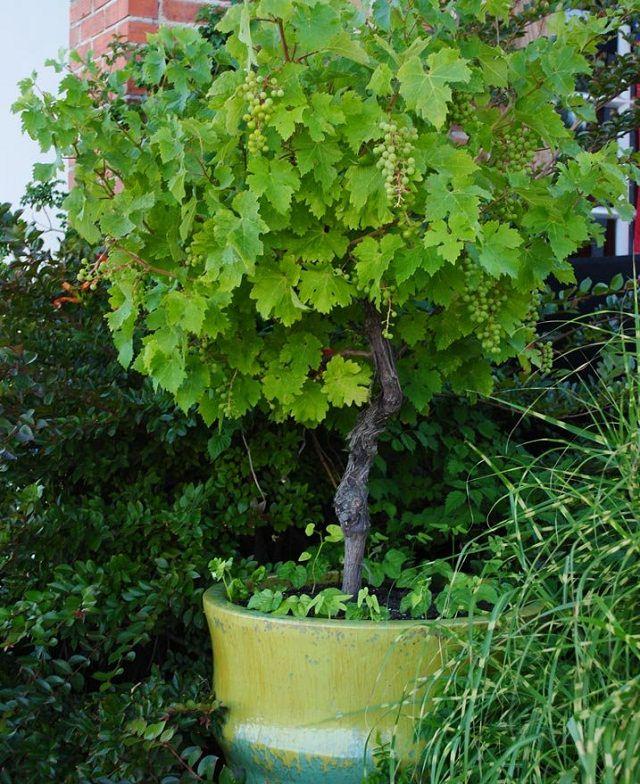
Growing grapevine as a tree is also possible. Check out this step by step article on eHow.
Diseases and Pests
In diseases, fungal diseases like black spot and powdery mildew, especially in dry and warm weather are possible. In pests, keep an eye on common garden insects like aphids. Japanese beetles, moths, caterpillars can also be a problem.
Harvesting
Harvesting should be done when your grape plant is at least 2-3 years old. Generally, grapes ripen anytime between late August to late October. Exactly when it depends on the variety and the type of climate you’re growing them in.
To find out whether your grapes are ready for harvesting or not is to taste them. If they taste sweet and nice, pick them. If they don’t, then leave them for a few more days. Once the grapes start to change their color they usually take anywhere between 1 to 3 weeks to become properly ripe (how long, depends on the variety and how good the climate is. For example, green grapes normally turn slightly translucent and their skins become yellow once they are ripe. Ripe grapes also feel soft to the touch. Eventually, taste is all that matters. If you like the taste, then pick them.
USDA Zones— 3 – 10
Difficulty— Moderate
Soil pH— Slightly acidic to neutral

Choosing a Pot
For growing grapes in containers, choose a large and sturdy container that can support this vigorous vine. A 15-20 gallon pot that is at least 16-18 inches deep and 18-24 inches wide is sufficient. Start with a smaller sized pot and then repot the plant in a larger one.
Choosing varieties
The best option is to go to a garden center and ask for a variety that can grow well in pots and in your climate. There are many varieties of grapevine you can choose from. Choosing a variety that is resistant to diseases and can grow well in your zone is most essential. However, you can grow almost any variety in the container but growing a dwarf grape cultivar like ‘pixie’ can save you from the hassle of training a grape vine in a pot.
Planting
The best time to plant grapevine is spring or early summer, planting on this time helps the plant to grow all season without the exposure to frost. But if you live in a frost-free hot tropical climate the best time for planting grape vine is winters.
Requirements for Growing Grapes in Pots

Position
Choose a location that is sunny, warm and dry. If your spot receives shade in an afternoon the plant will still do well, but at least 6 hours of sunlight is required. Avoid keeping the plant in wet, shady and less windy spot with less or no air circulation as it promotes fungal diseases and grapevine requires good air circulation around it.
Support and Training


Grapevine needs training and support to grow. When growing grapes in a pot, it is best to opt for a tall lightweight trellis, of wood or plastic. You can also DIY trellis for it. A grape vine grows long and requires support, it will be much better if you have an arbor or pergola like structure. Besides that, there are many other techniques to train the grape vine (See the picture above). Train the vine on a stake or something like a fan trellis. You can also support the vine on a stake with the help of “Umbrella Kniffen Training Method”. To learn more about this method, read this helpful article on pallensmith.com. Growing grapes in pots by the standard vine training method on a regular trellis is an easy and hassle free idea too.
Soil
Don’t use heavy garden soil when growing grapes in containers. Instead, use a light potting mix that is loose, rich in organic matter and most importantly drains well.
Watering
Water regularly and deeply to keep the soil slightly moist but avoid overwatering. Soggy, damp soil can be detrimental to the plant.
Fertilization
Side dress the plant periodically with aged manure or compost. In the first year, you can fertilize the plant with a general purpose fertilizer in spring and summer. From the next year, start to fertilize the plant with the fertilizer that is low in nitrogen but high in potassium and phosphorus from the spring when flower buds appear.
Growing Grapes in Tropics
Grapes are actually temperate fruits but the best thing about them is they can be grown in both temperate and tropical regions. Temperate climate zones without very harsh summers or humidity are optimum for growing grapevines. However, the two tropical countries India and Brazil are one of the largest producers of grapes in the world. Other tropical countries like Yemen, Thailand, Peru and Tanzania also produces grapes but to a smaller extent. This means if you live in a tropical climate you can still grow grapevine. You’ll only need to find a right variety that grows successfully in your area.
Still in tropics, areas with very high humidity or with heavy rainfall are less suitable for growing grapevine and if you’re living in an unfavorable climate like this, your plant will going to suffer from fungal diseases regularly and you’ll have to look after it more. Besides this, there is a possibility that fruits you’ll obtain will be of lesser quality and mild taste.
Grape Vine Care in Pots
Grape vine care in the pot is not so difficult if you follow the tips given below.

Pollination
When growing grapes in containers you must know most grape varieties are self-fertile and produce fruits on their own. However, shaking the plant gently at the time of flowering results in better yield.
Mulching
Grapevine requires mulching when grown on the ground. You can also mulch in the pot with pine bark, compost or with pebbles (this way it will look great too) to prevent excessive water evaporation from the soil and to protect roots from temperature fluctuations.
Overwintering
In climates with harsh winters, you have to protect the plant. For this, you’ll need to remove the dormant grapevine from its support and start to keep it indoors in warm space. Also, reduce watering and avoid the application of any fertilizer during this period.
Pruning
During the first few months after planting until the end of the growing season, do not prune the plant and allow it to grow freely to let the plant establish well in a pot and allow it to develop a strong root system.
Grapevine woods that are more than two years old do not produce fruits so you’ll have to remove all the old branches.
Prune the growth in late winter to early spring during the dormancy so that only two buds will remain. Buds are little protrusions on the trunk. This heavy pruning may seem too much to do but in the spring and summer, each of these buds will grow into a new branch. Dedicate the first year for training the vine to follow your trellis or stack with pruning and tying. Due to the limited space of the container, try to keep only 1 or 2 branches growing from the main trunk. Also, prune away any runners that creep away from the trellis.
The most important pruning will be one that you will perform in late winter when the plant shed its leaves, it is the one on which the fruiting depends. You will need to do the summer pruning too. Though it should have to be light and unobtrusive, just pinching and pruning.
To learn and read more pruning grapevines check out this article on freeplants.com and this one on RHS.
Growing grapevine as a tree is also possible. Check out this step by step article on eHow.

Diseases and Pests
In diseases, fungal diseases like black spot and powdery mildew, especially in dry and warm weather are possible. In pests, keep an eye on common garden insects like aphids. Japanese beetles, moths, caterpillars can also be a problem.
Harvesting
Harvesting should be done when your grape plant is at least 2-3 years old. Generally, grapes ripen anytime between late August to late October. Exactly when it depends on the variety and the type of climate you’re growing them in.
To find out whether your grapes are ready for harvesting or not is to taste them. If they taste sweet and nice, pick them. If they don’t, then leave them for a few more days. Once the grapes start to change their color they usually take anywhere between 1 to 3 weeks to become properly ripe (how long, depends on the variety and how good the climate is. For example, green grapes normally turn slightly translucent and their skins become yellow once they are ripe. Ripe grapes also feel soft to the touch. Eventually, taste is all that matters. If you like the taste, then pick them.
1
0
文章
Abigal
2017年05月22日

Want more flowers in your garden? Here’re 7 tips you should know to keep your plants blooming.1. Use rich soil
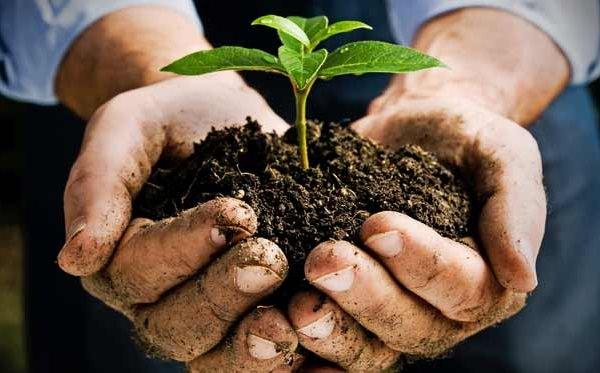
Soil that is light and rich in compost or manure provides plenty of nutrients constantly to the plants. A soil that is rich in organic matter also encourages bacterial activity that promotes soil fertility. Add some compost or manure to the soil when planting your plants and go adding them time to time.
2. Deadhead often

Most plants grow better and have more flowers if their wilted and faded blooms are plucked often. When you see the wilted flowers, remove them, so the plant can direct its energy on other flowers and they will be receiving more nutrients. Wilted flowers waste energy and sap. They also attract insect and pests. Also, by cutting off the spent flowers you prevent plants from seeding.
3. Fertilize the plants
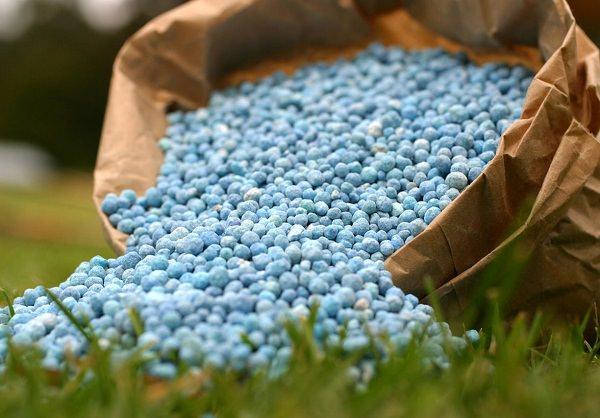
To have more flowers, feed the plants regularly during the growing season with half strength liquid fertilizer, a flowering fertilizer should be used that has more phosphorus than nitrogen, as phosphorus is the element that promotes more flower buds. Also, you can mix time-based fertilizer in the soil at the beginning of the growing season.
4. Provide more sun

Light is essential for the plant’s growth, direct sunlight for several hours a day can be a prerequisite for many plants that come to flower, however, shade loving plants tend to reduce the number of flowers when exposed to more sun.
5. Nurse the roots
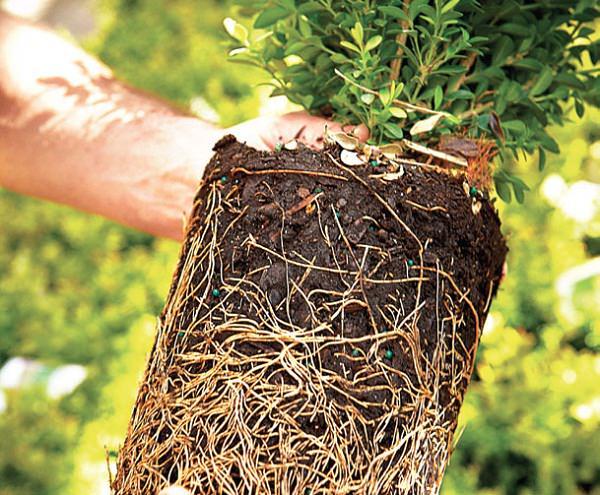
To have healthy plants and abundant blooms– nurse the roots, and remember that it is through them the plants absorb nutrients and water from the soil. When you perform the transplant or when you dig soil around the plant be careful not to cut or damage the roots as if being damaged plant would take a while to recover or it may die.
6. Apply mulch

Plants growing in a mulched soil are usually more vigorous, less prone to pests and diseases.
7. Do moderate watering
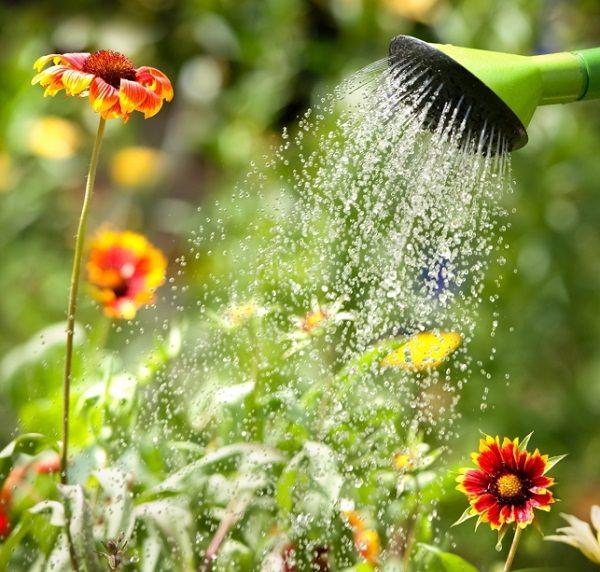
Excess watering tends to favor the development of foliage but can also produce the absence of flowering. Similarly, the lack of water can cause the plant to drop the flower buds. The best way is to do moderate watering (avoiding both overwatering and underwatering) during the flowering season.

Soil that is light and rich in compost or manure provides plenty of nutrients constantly to the plants. A soil that is rich in organic matter also encourages bacterial activity that promotes soil fertility. Add some compost or manure to the soil when planting your plants and go adding them time to time.
2. Deadhead often

Most plants grow better and have more flowers if their wilted and faded blooms are plucked often. When you see the wilted flowers, remove them, so the plant can direct its energy on other flowers and they will be receiving more nutrients. Wilted flowers waste energy and sap. They also attract insect and pests. Also, by cutting off the spent flowers you prevent plants from seeding.
3. Fertilize the plants

To have more flowers, feed the plants regularly during the growing season with half strength liquid fertilizer, a flowering fertilizer should be used that has more phosphorus than nitrogen, as phosphorus is the element that promotes more flower buds. Also, you can mix time-based fertilizer in the soil at the beginning of the growing season.
4. Provide more sun

Light is essential for the plant’s growth, direct sunlight for several hours a day can be a prerequisite for many plants that come to flower, however, shade loving plants tend to reduce the number of flowers when exposed to more sun.
5. Nurse the roots

To have healthy plants and abundant blooms– nurse the roots, and remember that it is through them the plants absorb nutrients and water from the soil. When you perform the transplant or when you dig soil around the plant be careful not to cut or damage the roots as if being damaged plant would take a while to recover or it may die.
6. Apply mulch

Plants growing in a mulched soil are usually more vigorous, less prone to pests and diseases.
7. Do moderate watering

Excess watering tends to favor the development of foliage but can also produce the absence of flowering. Similarly, the lack of water can cause the plant to drop the flower buds. The best way is to do moderate watering (avoiding both overwatering and underwatering) during the flowering season.
1
1
文章
Abigal
2017年05月22日

Learn how to grow gaura in your garden. Gaura plant care and growing is easy. This drought tolerant shrub thrives in well-drained soil and loves to bath in the day long sun.
The gaura is a beautiful perennial plant that is easy to grow and with minimal care, it offers a long blooming period and colorful flowers that attract butterflies.
Gaura Plant Care

USDA Zones— 5 – 10
Difficulty— Easy
Other Names— Wandflower, Butterfly gaura, Whirling butterfly, Siskiyou pink
The genus “Gaura” consists of about 20 species of plants. It is native to North America. Its fine erected foliage and irregularly shaped flowers make it attractive. You can vary the uses according to the species, low growing varieties (not more than 24 inches) are placed in borders or in rock gardens while the large shrub-like varieties are perfect for growing in the cluster behind low growing plants in flower beds.
Two Popular VarietiesGaura Biennis (Biennial Gaura): A tall variety that can grow 3-6 feet high. The foliage is red when matured, it has hairy flowering stems and light pink or white colored flowers that turn into coral red in late summer and fall.Gaura Lindheimeri (White Gaura): A Texas native, tolerant to drought. It grows up to 5 feet tall, flowers appears from summer to fall.How to Grow GauraPropagation
Gaura can be propagated from seeds.The seeds are available in local garden shops or can be bought online. Propagation by cuttings should be done in spring and late summer or by division in the fall.
Planting Gaura
Prepare the planting site by performing a deep plowing. Remove stones, debris, and weeds. This plant doesn’t transplant well, that’s why it is better to sow the seeds directly at the planting site, once all the dangers of frost are eliminated and the weather warms up.
If you are planting a potted gaura plant, make sure to make a planting hole in soil– twice wide and of the same depth as it was planted in the previous pot. Place the plant in the hole and fill that with well-drained soil. If the soil is very heavy or poor prepare it by adding compost or well-rotted manure and coarse sand in smaller proportion.
How to Grow Gaura in Pots
Growing gaura in pots is possible. Choose the pot that is 12 inches deep and 10 inches wide to provide a sufficient space to the plant. Keep the pot in sunny spot and water it only when the top surface of soil dries out.
Requirements for Growing Gaura

Position
Planting position must be sunny, for prolific blooms exposure to at least 6 hours of sunlight is ideal. If the location is windy provide support to plants.
Soil
Gaura grows well in light and sandy soil. Due to its taproot, the soil must be deep and also little fertile. Water logging soil that is clay rich and cloaks the drainage hinders the development and must be avoided.
Watering
Growing gaura is easy. As it adapts well to the drought-like conditions due to the long taproot it has, infrequent and economical watering is recommended. Water it deeply but only when the top two inch of soil seems dry.
Spacing
The planting distance for low growing varieties is around 12 inches. For more shrub like large varieties, space the plants 15 inches apart from each other.
Gaura Plant CareFertilizer
Gaura doesn’t require additional fertilizer to bloom. It thrives in poor soil. Application of manure or compost during planting is sufficient. Even adding too much natural fertilizer can cause the plant to grow limply.
Deadheading and Pruning
Remove spent flower spikes as soon as they fade, cut the entire stalk to promote more blooms. Once the blooming period ends in late summer, trim the shrub slightly (3″) to refresh it. The plant will start to flower again in fall with more vigor.
Overwintering
Gaura plant care is if you live in the warmer region. During the winter, let the faded stems on site, they provide protection against the cold. It is also recommended to mulch around the roots to insulate them, especially if you live below USDA Zone 8.
Diseases and Pests
The gaura is a beautiful perennial plant that is easy to grow and with minimal care, it offers a long blooming period and colorful flowers that attract butterflies.
Gaura Plant Care

USDA Zones— 5 – 10
Difficulty— Easy
Other Names— Wandflower, Butterfly gaura, Whirling butterfly, Siskiyou pink
The genus “Gaura” consists of about 20 species of plants. It is native to North America. Its fine erected foliage and irregularly shaped flowers make it attractive. You can vary the uses according to the species, low growing varieties (not more than 24 inches) are placed in borders or in rock gardens while the large shrub-like varieties are perfect for growing in the cluster behind low growing plants in flower beds.
Two Popular VarietiesGaura Biennis (Biennial Gaura): A tall variety that can grow 3-6 feet high. The foliage is red when matured, it has hairy flowering stems and light pink or white colored flowers that turn into coral red in late summer and fall.Gaura Lindheimeri (White Gaura): A Texas native, tolerant to drought. It grows up to 5 feet tall, flowers appears from summer to fall.How to Grow GauraPropagation
Gaura can be propagated from seeds.The seeds are available in local garden shops or can be bought online. Propagation by cuttings should be done in spring and late summer or by division in the fall.
Planting Gaura
Prepare the planting site by performing a deep plowing. Remove stones, debris, and weeds. This plant doesn’t transplant well, that’s why it is better to sow the seeds directly at the planting site, once all the dangers of frost are eliminated and the weather warms up.
If you are planting a potted gaura plant, make sure to make a planting hole in soil– twice wide and of the same depth as it was planted in the previous pot. Place the plant in the hole and fill that with well-drained soil. If the soil is very heavy or poor prepare it by adding compost or well-rotted manure and coarse sand in smaller proportion.
How to Grow Gaura in Pots
Growing gaura in pots is possible. Choose the pot that is 12 inches deep and 10 inches wide to provide a sufficient space to the plant. Keep the pot in sunny spot and water it only when the top surface of soil dries out.
Requirements for Growing Gaura

Position
Planting position must be sunny, for prolific blooms exposure to at least 6 hours of sunlight is ideal. If the location is windy provide support to plants.
Soil
Gaura grows well in light and sandy soil. Due to its taproot, the soil must be deep and also little fertile. Water logging soil that is clay rich and cloaks the drainage hinders the development and must be avoided.
Watering
Growing gaura is easy. As it adapts well to the drought-like conditions due to the long taproot it has, infrequent and economical watering is recommended. Water it deeply but only when the top two inch of soil seems dry.
Spacing
The planting distance for low growing varieties is around 12 inches. For more shrub like large varieties, space the plants 15 inches apart from each other.
Gaura Plant CareFertilizer
Gaura doesn’t require additional fertilizer to bloom. It thrives in poor soil. Application of manure or compost during planting is sufficient. Even adding too much natural fertilizer can cause the plant to grow limply.
Deadheading and Pruning
Remove spent flower spikes as soon as they fade, cut the entire stalk to promote more blooms. Once the blooming period ends in late summer, trim the shrub slightly (3″) to refresh it. The plant will start to flower again in fall with more vigor.
Overwintering
Gaura plant care is if you live in the warmer region. During the winter, let the faded stems on site, they provide protection against the cold. It is also recommended to mulch around the roots to insulate them, especially if you live below USDA Zone 8.
Diseases and Pests
1
0
文章
Micky
2017年05月22日

Learn how to grow datura. Growing datura is easy and this medicinal herb doesn’t require any special care or attention.
Flowering: Summer to late fall
Flower color: White, pink, yellow, purple
Exposure: Full Sun
Soil pH: Neutral
Height: 30 cm to 1.5 m
Plant type: Flower, Medicinal Herb
Type of foliage: deciduous
USDA Hardiness Zones: 9 – 11
Propagation Method: Seed sowing, cuttings
Toxicity: All parts of the plant are toxic, its ingestion leads to a delirium or hallucinatory feeling for several hours
Species and Varieties: The genus includes about twenty species. Datura stramonium, the Jimsonweed is often considered a weed and is one of the most poisonous plants in Solanaceae family.
Other Names— Jimson weed, Devil’s snare, thornapple, moon flower, hell’s bells, devil’s trumpet, devil’s weed, tolguacha, Jamestown weed, stinkweed, locoweed, pricklyburr, and devil’s cucumber
The plant is recognizable by its large leaves of 20 cm, dark green with jagged edges. It has a bushier growth and the plant usually grow 60 cm high but it can grow up to nearly 1.5 m. The flowers are bright colored and appear in late summer. Followed by fruits that come in the size of a small apricot, covered with long needle like thorns.
Growing Datura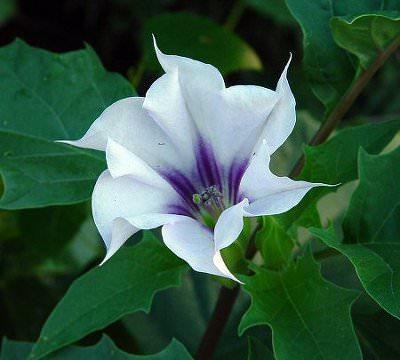
Growing datura is extremely easy. Just plant it in full sun in well-drained soil.
Soil
Humus-rich, well drained and calcareous soil is required for growing datura. However, it tolerates a variety of soil types.
Watering
Water your datura up regularly when it is establishing. Once matured, it doesn’t require watering as it seeks water deeply into the soil with the help of its long taproot.
Invasiveness
This plant is considered a weed. It can easily become invasive if grown in favorable conditions.
Pests and Diseases
The plant doesn’t bother by pests and diseases much. Still, spider mites, whiteflies, and mealybugs may attack it.
Uses and Effects
Datura stramonium contains powerful alkaloids. The plant if ingested can cause hallucinations, tachycardia, muscle weakness, and amnesia.

Flowering: Summer to late fall
Flower color: White, pink, yellow, purple
Exposure: Full Sun
Soil pH: Neutral
Height: 30 cm to 1.5 m
Plant type: Flower, Medicinal Herb
Type of foliage: deciduous
USDA Hardiness Zones: 9 – 11
Propagation Method: Seed sowing, cuttings
Toxicity: All parts of the plant are toxic, its ingestion leads to a delirium or hallucinatory feeling for several hours
Species and Varieties: The genus includes about twenty species. Datura stramonium, the Jimsonweed is often considered a weed and is one of the most poisonous plants in Solanaceae family.
Other Names— Jimson weed, Devil’s snare, thornapple, moon flower, hell’s bells, devil’s trumpet, devil’s weed, tolguacha, Jamestown weed, stinkweed, locoweed, pricklyburr, and devil’s cucumber
The plant is recognizable by its large leaves of 20 cm, dark green with jagged edges. It has a bushier growth and the plant usually grow 60 cm high but it can grow up to nearly 1.5 m. The flowers are bright colored and appear in late summer. Followed by fruits that come in the size of a small apricot, covered with long needle like thorns.
Growing Datura

Growing datura is extremely easy. Just plant it in full sun in well-drained soil.
Soil
Humus-rich, well drained and calcareous soil is required for growing datura. However, it tolerates a variety of soil types.
Watering
Water your datura up regularly when it is establishing. Once matured, it doesn’t require watering as it seeks water deeply into the soil with the help of its long taproot.
Invasiveness
This plant is considered a weed. It can easily become invasive if grown in favorable conditions.
Pests and Diseases
The plant doesn’t bother by pests and diseases much. Still, spider mites, whiteflies, and mealybugs may attack it.
Uses and Effects
Datura stramonium contains powerful alkaloids. The plant if ingested can cause hallucinations, tachycardia, muscle weakness, and amnesia.
1
1
文章
Abigal
2017年05月21日


If your garden is on any kind of a slope, it’s possible a garden retaining wall might make your property more usable, and more valuable. Retaining walls hold back soil to allow a level planting area in a space that normally would have poor soil, drainage, and access. So banish the idea that only ground cover plants can grow on your slope! Build one of these DIY garden retaining walls and change the whole dynamic of your yard.
Our first bit of retaining wall inspiration is from ‘Isbir Construction‘… there isn’t a tutorial, but it’s a great photo in that it shows you how simple a retaining wall can be. This is simply cedar timbers cut to different lengths for interest, a row of bricks to prevent erosion, and then soil and mulch to backfill. Obviously this simple project is better for a minor slope correction. Perfect for this flower beds where the water just seems to run right off…

Want the same timber feel, but on a larger scale for a bigger job? Then follow along with this tutorial and video from ‘This Old House’ and build your own timber retaining wall. This particular one is not a small job, but with some DIY ability, you could save thousands over having this installed. Photo: Landscape Supplies

Do you want a wall with a different look and feel? Build a concrete block retaining wall with this tutorial from ‘Family Handyman’. This also has no possibility of rot, making it a very long lasting solution.

Also from ‘Family Handyman’, make a retaining wall from less expensive pressure treated 2×4’s…. This is a great plan for the gardener on a tighter budget. I love the look of this, it could go well with a modern or rustic style garden.

From ‘BHG”, build this concrete block retaining wall in less than a weekend! I love the cap on the top of the blocks, it gives it a finished look, and also a place for seating.

Use all those boulder size rocks you keep digging up by building a rock or stone retaining wall with this tutorial from ‘Las Pilitas Nursery’… They even have drawings to show how to layer the wire and mortar to make a strong wall…
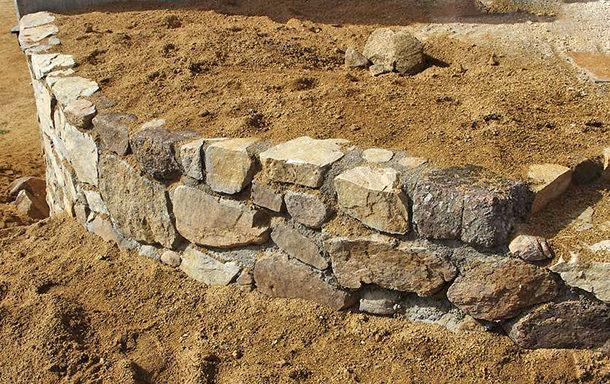
‘DIY Network’ offers a great step by step tutorial for building a stone block wall, with lots of photos along the way.


Finally, a little inspiration from “Down Under”, ‘Gabion 1‘ in Australia has two ideas for you using wire mesh to create a “gabion”. These can be filled with stones, bricks or recycled materials. Use your imagination on what kind of repurposed objects could fill the wall!


1
0
DaviddelC
2017年04月23日

Doesn't seem to like the pot so I planted it in the soil . Fingers crossed!


0
0
成长记
Elena Galkina
2017年03月19日

Planted: 18.03.17
Greenhouse: yes
Soil: peat tablet
ps. very fast and comfortable for planting
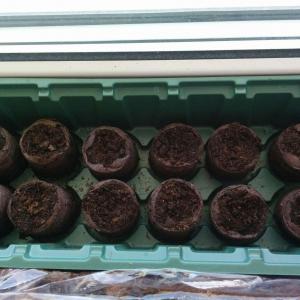
Greenhouse: yes
Soil: peat tablet
ps. very fast and comfortable for planting

1
0
成长记
Elena Galkina
2017年03月19日

First sprout. This 4 peat pots are very nonwatertight and soil is always wet. Its good for seeds


1
0


