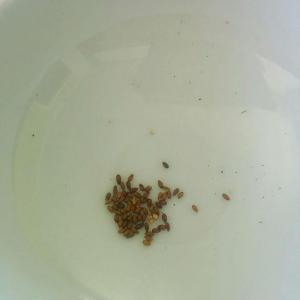
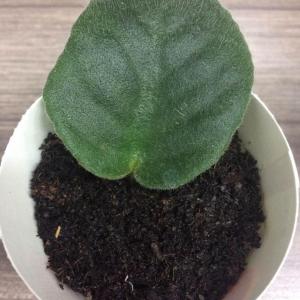
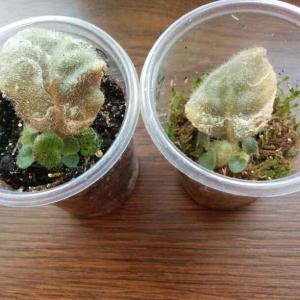
成长记
xcheid
2017年03月10日

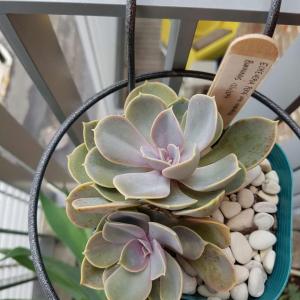
Getting pinker and fleshier! It's finally settling into the soil-less mix.

1
0
成长记
Elena Galkina
2017年03月08日

That tiny child with a strong will to live. During the winter it had a lot of adventures. Its leaves were so strong, that it was pulled out from the soil and has viewable one root tied the plant with soil. I had to cut the pot edge and now it hard seats in the soil


1
0
Keiran
2017年03月04日

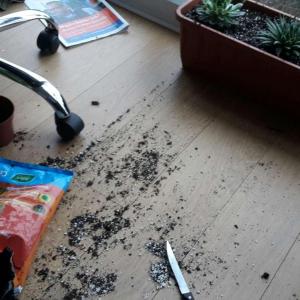
Repotting is messy business, but my succulents will be much happier in soil that actually drains properly.

0
0
文章
Hande Salcan
2017年02月21日

Of all the plant pathogens, the ones you will deal with mostly are fungi. All plants are susceptible to attack from fungus. Most #fungi love wet conditions, and overwatering can produce such conditions.

If the soil your plant is rooted in does not drain well, and water stands too long at the base and around the roots, then your #plant is at risk of developing water mold root rot, a condition that is caused by a variety of fungi. The fungi start a rot that invades the roots and then works its way up the plant. This can be a quick or a slow process, depending on conditions. Often, after the rot is established, you will see dark discolorations in the plant’s roots and stems. This is where the infected plant tissue meets the healthy tissue.
The following is a list of potential problems and common symptoms caused by fungal diseases.
Damping-off: This disease can kill seedlings before they even break through the soil, but it also strikes seedlings just an inch or so tall.
Root Rot: This generally attacks older plants, killing the tiny rootlets and appearing above ground as stunting and wilting.
Club Root: This disease commonly infects cabbage family plants, causing large swellings on roots and or dead plants.
Blights: Includes early and late blight, which attack tomatoes and their relatives. The fungi can damage or kill leaves and cause rot in the fruit.
Mildews: This would include downy and powdery mildew. Infection results in spots or white patches on leaves, shoots, and other plant parts. Downy mildew can kill plants rapidly; powdery mildew commonly causes poor growth and lower yield, but seldom kills the plant.
Rusts: This disease will produce orange and white spots, usually on leaves and stems, weakening plants and reducing crop yields.
Leaf Spot: These symptoms are caused by a wide range of fungi.
How to Minimize Fungal Problems
Fungi spread by spore production, giving the disease the ability to travel great distances. The spores can be picked up by animals or water, including gardeners! One of the best ways to prevent fungal problems is to select plants that are resistant to the fungal diseases in your area.
After treating plants with fungal problems, rinse your gardening tools with alcohol or bleach, in case any spores remain, and destroy any diseased leaves rather than leaving them on the ground or placing them in your composting bin.
Organic Fungus-Killing Sprays

Instead of treating areas with chemical powders, you can use organic fungicides made straight from products in your kichen. Here is a list of some safe and easy to make sprays:
Basic Soda Spray
2 Tablespoons baking soda
1 gallon water
Add 1 teaspoon of vegetable oil (adds stickiness)
Mix all together and spray on problem areas.
Soda Spray for Rust
2 tablespoons baking soda
1 gallon water
6 tablespoons of vegetable oil
2 tablespoons kelp extract
Mix together and spray rust-covered areas.
Garlic is known to fight many types of disease-causing fungi, including mildew, mold, and rust. Garlic has not only shown that it can fight fungi but it also has some repellant qualities for other diseases and insects.
Basic Garlic Spray
1 garlic bulb
1 quart water
Crush the garlic and place in a pan of water, bring to a boil, then turn off heat. Let the mixture cool. Strain out the garlic.
Pour liquid into a spray bottle and spray the infected areas of the plant.
Vinegar Spray
Apple cider vinegar makes a great spray to combat many fungal diseases, including black spot on roses.
3 tablespoons apple cider vinegar
1 gallon water.
Mix together. Spray plants, being sure to do so in the morning so that the plant can dry out before evening.
Nothing spoils the look of a plant or shrub more than a fungus disease. Hopefully, by using some of the methods described in this article, you will be able to keep your plants looking healthy!

If the soil your plant is rooted in does not drain well, and water stands too long at the base and around the roots, then your #plant is at risk of developing water mold root rot, a condition that is caused by a variety of fungi. The fungi start a rot that invades the roots and then works its way up the plant. This can be a quick or a slow process, depending on conditions. Often, after the rot is established, you will see dark discolorations in the plant’s roots and stems. This is where the infected plant tissue meets the healthy tissue.
The following is a list of potential problems and common symptoms caused by fungal diseases.
Damping-off: This disease can kill seedlings before they even break through the soil, but it also strikes seedlings just an inch or so tall.
Root Rot: This generally attacks older plants, killing the tiny rootlets and appearing above ground as stunting and wilting.
Club Root: This disease commonly infects cabbage family plants, causing large swellings on roots and or dead plants.
Blights: Includes early and late blight, which attack tomatoes and their relatives. The fungi can damage or kill leaves and cause rot in the fruit.
Mildews: This would include downy and powdery mildew. Infection results in spots or white patches on leaves, shoots, and other plant parts. Downy mildew can kill plants rapidly; powdery mildew commonly causes poor growth and lower yield, but seldom kills the plant.
Rusts: This disease will produce orange and white spots, usually on leaves and stems, weakening plants and reducing crop yields.
Leaf Spot: These symptoms are caused by a wide range of fungi.
How to Minimize Fungal Problems
Fungi spread by spore production, giving the disease the ability to travel great distances. The spores can be picked up by animals or water, including gardeners! One of the best ways to prevent fungal problems is to select plants that are resistant to the fungal diseases in your area.
After treating plants with fungal problems, rinse your gardening tools with alcohol or bleach, in case any spores remain, and destroy any diseased leaves rather than leaving them on the ground or placing them in your composting bin.
Organic Fungus-Killing Sprays

Instead of treating areas with chemical powders, you can use organic fungicides made straight from products in your kichen. Here is a list of some safe and easy to make sprays:
Basic Soda Spray
2 Tablespoons baking soda
1 gallon water
Add 1 teaspoon of vegetable oil (adds stickiness)
Mix all together and spray on problem areas.
Soda Spray for Rust
2 tablespoons baking soda
1 gallon water
6 tablespoons of vegetable oil
2 tablespoons kelp extract
Mix together and spray rust-covered areas.
Garlic is known to fight many types of disease-causing fungi, including mildew, mold, and rust. Garlic has not only shown that it can fight fungi but it also has some repellant qualities for other diseases and insects.
Basic Garlic Spray
1 garlic bulb
1 quart water
Crush the garlic and place in a pan of water, bring to a boil, then turn off heat. Let the mixture cool. Strain out the garlic.
Pour liquid into a spray bottle and spray the infected areas of the plant.
Vinegar Spray
Apple cider vinegar makes a great spray to combat many fungal diseases, including black spot on roses.
3 tablespoons apple cider vinegar
1 gallon water.
Mix together. Spray plants, being sure to do so in the morning so that the plant can dry out before evening.
Nothing spoils the look of a plant or shrub more than a fungus disease. Hopefully, by using some of the methods described in this article, you will be able to keep your plants looking healthy!
1
0
文章
Hande Salcan
2017年02月18日


All too often, soil composition is neglected. Every season, our plants and gardens rob the #soil of it nutrients. All gardeners are to be custodians of the soil, taking the time to replace food and other elements as they are used. Since our soil is so important, we need to treat it, as we want to be treated, not like dirt.
Soil is a composition of weather-beaten rock, minerals, decayed plant materials and other organic ingredients. All this takes a long time to develop, but can be damaged by our action or neglect in a single season.
For soil to be healthy, it should contain a balanced mix of air, water, nutrients, and organic matter. There are a couple things we can do to protect this mixture.
Adding organic matter on a regular basis is probably one of the most important things we can do. Adding compost and animal manure can do many things, for instance:
Increases the soil’s capability to hold nutrients.
Makes food available to plants over a longer period of time.
Lessens the amount of nutrients lost by erosion or leaching.
Provides micronutrients that are needed by plants in small amounts.
Releases nutrients already in the soil by increasing the action of beneficial microorganisms.
Increases the water-holding capacity for sandy soils.
Increases the drainage of clay soils.
Saves money.

Do not apply fertilizer to #lawns until we get a good soaking rain, and for best, safest, long-lasting results use organic fertilizers. The wet soil puts the nutrients into a solution and helps distribute the nutrients to the plant roots to be absorbed.
The ability of soil to drain water is important. However, when you read phrases like “plant in a well-drained soil” or “does not like wet feet”, they are talking about the plant’s need for air. The roots of plants require oxygen and any soil that is waterlogged will be lacking oxygen.
Many plants will put up with high moisture-conditions during the growing season, but when the plants are dormant, the same conditions may kill them. By improving the drainage, the plant will have a better growing environment.
Another problem is soil becoming compacted by tractors and other equipment or just by tilling it year after year. You will find soil compaction in most soils, from gardens to farm fields.
Tilling the soil when it is too wet will clump and ruin the composition of the soil. This condition takes a long period of time to bring it back to health. To tell if the soil is too wet take a handful and squeeze it, if it crumbles in your hand then it is ready to till but if it clumps then it is too wet. Some people now believe that tilling at all is not good for the structure of the soil. It exposes the helpful microorganisms to the environment and they are destroyed.

However, gardeners may wonder if it is best to till the garden in the fall or spring. Tilling the soil in the fall has advantages over springtime. When spring arrives, it allows for earlier planting since the basic soil preparation is done. Tilling in the fall allows a large amount of organic matter to be turned into the soil and start decomposing because the microbes are active currently.
An excellent source of organic matter is the fall leaves. Try tilling a thick layer of leaves into the soil this fall and by spring, it will have decomposed.
Sowing a cover crop, like winter rye, is very beneficial by adding valuable nutrients and organic matter when tilled into the soil the following spring. Fall tilling will disrupt the bad insects, diseases, and weeds, reducing their population.
Fall is a good time to test your soil and should be done every couple of years. In conclusion, doing all the previous steps should be done the organic gardening way. It is back to basics when it comes to gardening.
1
0
文章
Lisa
2017年02月18日

By adding manure in your lawn you can create a lush green field. Of course, fertilizers are more effective though using them harm your soil and if over applied burns the grass, too.
But manure as a fertilizer supports the growth of grass. It’s rich in nitrogen and an organic and safer option than conventional fertilizers. It aids our ecosystem and adds micronutrients in soil too.

1. Put the dried manure in a large container, using hand rake break the large pieces into similar small dusty or gravel like pieces.
2. Pour that manure into the fertilizer spreader’s hopper, remove bigger clumps that are not broken similarly.
3. Adjust the flow knob of spreader for a slow and regular flow of manure. Cover the whole lawn equally in a slow gait.
4. After this, water the lawn deeply, watering helps manure to admix in soil and settle down in the roots.
5. You can re-apply manure once a month; it works as a slow release fertilizer on grass so you’ll start to see changes gradually.

*If you live in a colder part then don’t apply manure in winter as the grass becomes dormant. Similarly if you live in tropics, avoid using manure in the peak of summer.
*Cow manure is best natural fertilizer to apply and if you don’t find it you can also use other manures.
*Ensure the manure you buy is well decomposed; otherwise it will burn your plants.
But manure as a fertilizer supports the growth of grass. It’s rich in nitrogen and an organic and safer option than conventional fertilizers. It aids our ecosystem and adds micronutrients in soil too.

1. Put the dried manure in a large container, using hand rake break the large pieces into similar small dusty or gravel like pieces.
2. Pour that manure into the fertilizer spreader’s hopper, remove bigger clumps that are not broken similarly.
3. Adjust the flow knob of spreader for a slow and regular flow of manure. Cover the whole lawn equally in a slow gait.
4. After this, water the lawn deeply, watering helps manure to admix in soil and settle down in the roots.
5. You can re-apply manure once a month; it works as a slow release fertilizer on grass so you’ll start to see changes gradually.

*If you live in a colder part then don’t apply manure in winter as the grass becomes dormant. Similarly if you live in tropics, avoid using manure in the peak of summer.
*Cow manure is best natural fertilizer to apply and if you don’t find it you can also use other manures.
*Ensure the manure you buy is well decomposed; otherwise it will burn your plants.
1
0
文章
Martha
2017年02月17日

Learn how to grow #peanuts in this article. Growing Peanuts in containers is fun as well as easy to do and somewhat similar to #potatoes .
Difficulty— Easy
Other Names— Arachis hypogaea (Scientific Name), Groundnut
Soil pH— 6 – 6.5
Peanut (Arachis hypogaea) is an annual plant belonging to the Fabaceae family, a legume. It is a hardy plant that requires minimal attention. Peanut, which is also called groundnut contains many trace elements like copper, zinc, manganese and vitamin B and is very nutritious.
How to Grow Peanuts in ContainersPropagation and Planting Peanuts in containers
Fill the seed tray or container with potting soil or potting mix. Sow seeds at the depth of 3 cm. Cover them up with a thin layer of soil. Also note that peanut seeds you obtain for sowing must remain in their shell and you should open them just before planting.
For proper germination and maximum yield, temperature must be above 70 F (21 ° C), 80 F is optimum. After a week or two, the seeds will germinate.
Let the seedlings grow a bit and replant them in individual pots.

If you’re growing peanuts in cooler zone you should remember that peanuts require at least 100 frost free days to mature. You’ll need to start the seeds indoors, earlier, at least 30 days before the final frost date in the spring.
Choosing Containers
Peanut develops its pod from 5 to 10 cm under the ground. So select pot at least 30 cm deep and 40 – 50 cm. wide (1 feet deep and 1 – 2 feet wide). Make sure the pots have sufficient drainage holes. You can grow 2 – 3 plants in such a pot.
Requirements for Growing Peanuts in ContainersPosition
Peanut is a tropical plant, it loves to grow in slightly humid and warm conditions. When growing peanuts in containers place them in the sunniest but less windy spot of your balcony or terrace. The plant does not survive below 32 F (0 ° C). It flowers and fruits at a temperature between 70 – 95 F (20 to 35 ° C).
Soil
For growing peanuts in containers fertile and light soil is required, which is neutral in pH and well-drained. Best to buy a good quality organic potting mix or make your own.
Watering
When growing peanuts in pots, keep the soil slightly moist. During early growth and flowering period, increase watering. However, the plant tolerates short dry periods.

Peanut Plant CareEarthing up
The base of the peanut plant should be covered with soil to increase production. Once the plant reaches 10 inches of height earthen up the soil around the base, as is the case of potatoes, so as to favor the development of the pods.
Fertilizer
Initially it will not need any type of fertilization, but when you see the first yellow flowers forming, it is then useful to help the plant with the organic fertilizer that is rich in phosphorus and potassium as peanuts are legumes and form their own nitrogen you don’t need to fertilize them with additional nitrogen fertilizer.
Pests and Diseases
The most common diseases in addition to molds and fungi are leaf spots. In pests it is attacked by aphids, potato leafhopper and spider mites.
Harvesting PeanutsWhen and How to Harvest Peanuts?
Difficulty— Easy
Other Names— Arachis hypogaea (Scientific Name), Groundnut
Soil pH— 6 – 6.5
Peanut (Arachis hypogaea) is an annual plant belonging to the Fabaceae family, a legume. It is a hardy plant that requires minimal attention. Peanut, which is also called groundnut contains many trace elements like copper, zinc, manganese and vitamin B and is very nutritious.
How to Grow Peanuts in ContainersPropagation and Planting Peanuts in containers
Fill the seed tray or container with potting soil or potting mix. Sow seeds at the depth of 3 cm. Cover them up with a thin layer of soil. Also note that peanut seeds you obtain for sowing must remain in their shell and you should open them just before planting.
For proper germination and maximum yield, temperature must be above 70 F (21 ° C), 80 F is optimum. After a week or two, the seeds will germinate.
Let the seedlings grow a bit and replant them in individual pots.

If you’re growing peanuts in cooler zone you should remember that peanuts require at least 100 frost free days to mature. You’ll need to start the seeds indoors, earlier, at least 30 days before the final frost date in the spring.
Choosing Containers
Peanut develops its pod from 5 to 10 cm under the ground. So select pot at least 30 cm deep and 40 – 50 cm. wide (1 feet deep and 1 – 2 feet wide). Make sure the pots have sufficient drainage holes. You can grow 2 – 3 plants in such a pot.
Requirements for Growing Peanuts in ContainersPosition
Peanut is a tropical plant, it loves to grow in slightly humid and warm conditions. When growing peanuts in containers place them in the sunniest but less windy spot of your balcony or terrace. The plant does not survive below 32 F (0 ° C). It flowers and fruits at a temperature between 70 – 95 F (20 to 35 ° C).
Soil
For growing peanuts in containers fertile and light soil is required, which is neutral in pH and well-drained. Best to buy a good quality organic potting mix or make your own.
Watering
When growing peanuts in pots, keep the soil slightly moist. During early growth and flowering period, increase watering. However, the plant tolerates short dry periods.

Peanut Plant CareEarthing up
The base of the peanut plant should be covered with soil to increase production. Once the plant reaches 10 inches of height earthen up the soil around the base, as is the case of potatoes, so as to favor the development of the pods.
Fertilizer
Initially it will not need any type of fertilization, but when you see the first yellow flowers forming, it is then useful to help the plant with the organic fertilizer that is rich in phosphorus and potassium as peanuts are legumes and form their own nitrogen you don’t need to fertilize them with additional nitrogen fertilizer.
Pests and Diseases
The most common diseases in addition to molds and fungi are leaf spots. In pests it is attacked by aphids, potato leafhopper and spider mites.
Harvesting PeanutsWhen and How to Harvest Peanuts?
0
1
文章
Eyin Thor
2017年02月15日

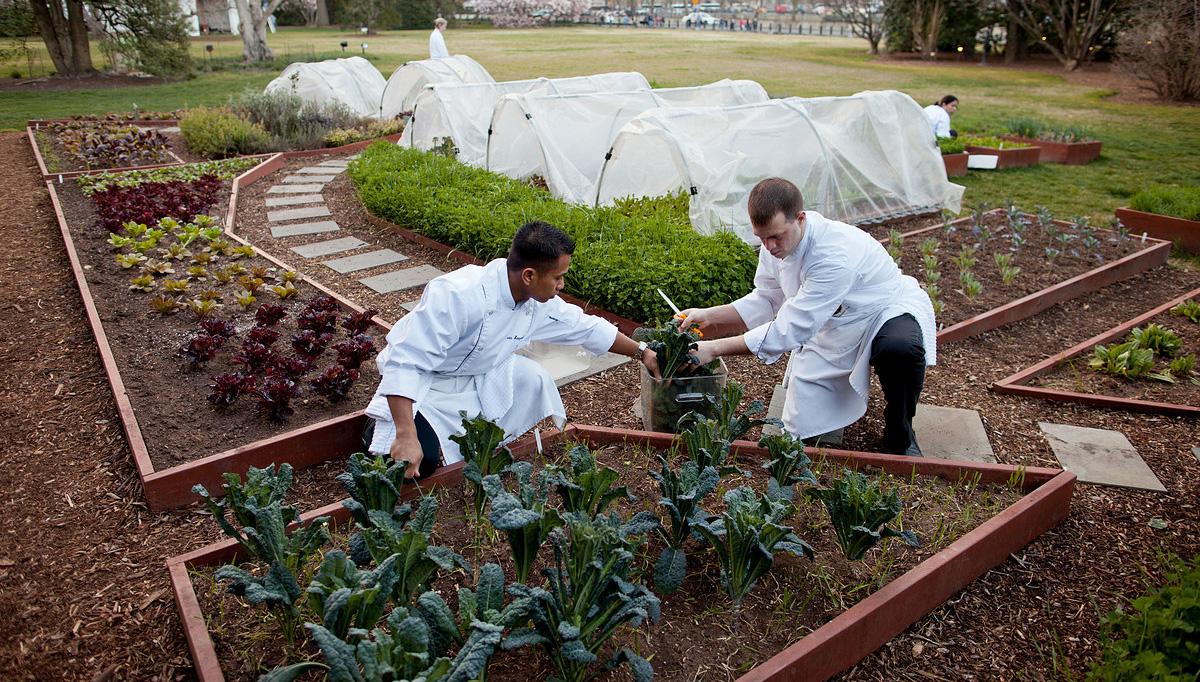
To have a productive garden, healthy soil is essential and if you want to improve your garden soil here we’ve 6 Most Important Tips.6 Ways to Get Super Soil
1. Look out for the color of your garden soil
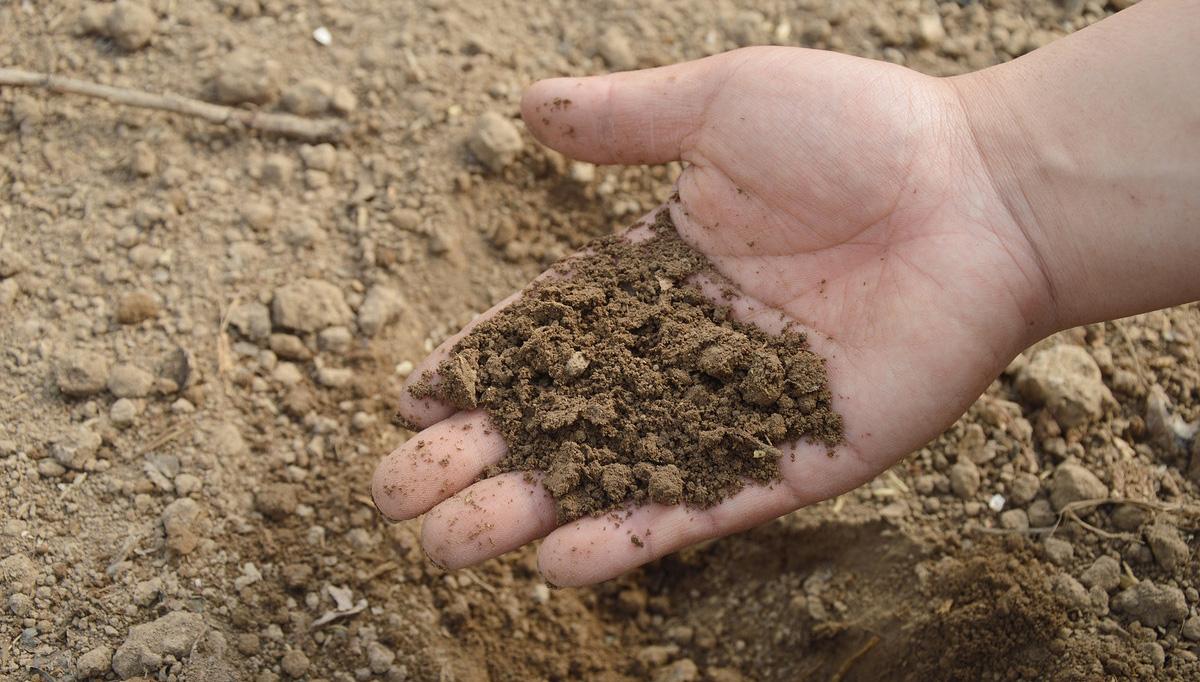
A pitch-dark soil is best. As a general rule of thumb– Darker soil has more organic content as the substances resulting from decomposition of the organic matter are oxidized and acquire a dark coloration. Here’s an informative article that’ll teach you more about soil color and its effects on plants.
2. Soil texture is also important
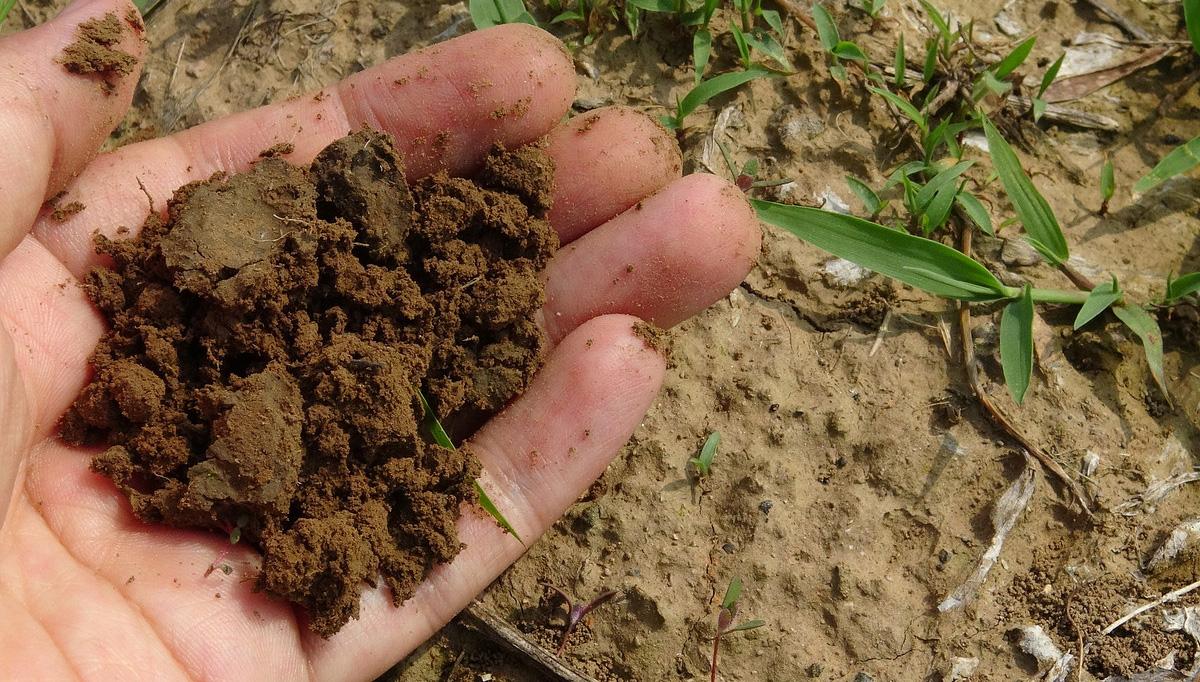
Identifying the texture of the garden soil is important too. The best garden soil is loamy in texture. It is neither too porous and nor too compact. The soil must be crumbly, airy, and light. To determine the texture, it is important that you feel it For this, take a handful of soil and drop enough water on it and form a ball. When you press it, it will fall apart quickly (if it is sandy) and you will feel the grit rub. A silt will form a ball, but when you try to roll it out into a ribbon it will crack. A clay soil will roll out into a long ribbon.
However, if the texture of your soil is ideal you’ll be able to form the ball easily and when you press, it will break and fall apart gradually.
3. Notice the depth of your soil
The depth of the soil is as important as the texture and color of the soil. Go to the planting site and dig it with the help of a shovel. If you can dig at least 10-12 inches down (the more the better) without touching the hard layers of earth, it would be better. It is required for the healthy growth of plants as roots penetrate deeply. If the depth of your soil is not sufficient you’ll need to make it deeper.
4. Weed out the weeds
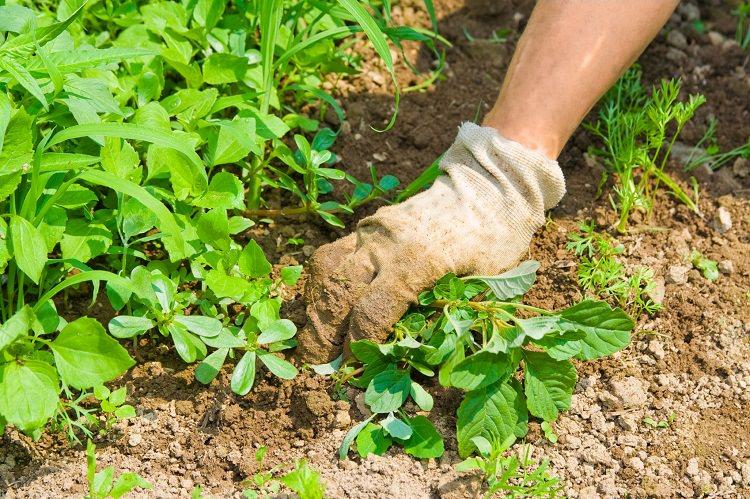
Look out for the existing vegetation at the planting site. If there are unwanted plants (which we call weeds) remove them. The population of weeds will also determine how healthy your soil is. You may need to improve the soil more if even the weeds are unable to thrive at your neglected planting site. Read these weeding tips for help.
5. Don’t avoid the soil testing
For the backyard gardeners, this step is essential to follow– Not only you’ll find out whether your soil is acidic, alkaline or neutral but also the different trace elements and minerals. The test also informs you about the contamination of soil.
Contact your local extension office for soil testing. Unlike many soil testing labs the extension office of your county will do this for free (or at low cost). You can also purchase a test kit that allows you to determine the soil composition. However, this may be costly and you’ll not get plenty of details. Once you find out the pH level and all the details of your soil you can easily balance it to grow your favorite plants.
6. Add Organic matter
Adding the organic matter always help and you should add well-rotted manure and compost regularly as it adds nutrients to soil naturally and also provides food for microorganisms that live in the soil. The addition of organic matter also improves the texture of the soil.

1. Look out for the color of your garden soil
A pitch-dark soil is best. As a general rule of thumb– Darker soil has more organic content as the substances resulting from decomposition of the organic matter are oxidized and acquire a dark coloration. Here’s an informative article that’ll teach you more about soil color and its effects on plants.
2. Soil texture is also important
Identifying the texture of the garden soil is important too. The best garden soil is loamy in texture. It is neither too porous and nor too compact. The soil must be crumbly, airy, and light. To determine the texture, it is important that you feel it For this, take a handful of soil and drop enough water on it and form a ball. When you press it, it will fall apart quickly (if it is sandy) and you will feel the grit rub. A silt will form a ball, but when you try to roll it out into a ribbon it will crack. A clay soil will roll out into a long ribbon.
However, if the texture of your soil is ideal you’ll be able to form the ball easily and when you press, it will break and fall apart gradually.

3. Notice the depth of your soil
The depth of the soil is as important as the texture and color of the soil. Go to the planting site and dig it with the help of a shovel. If you can dig at least 10-12 inches down (the more the better) without touching the hard layers of earth, it would be better. It is required for the healthy growth of plants as roots penetrate deeply. If the depth of your soil is not sufficient you’ll need to make it deeper.
4. Weed out the weeds
Look out for the existing vegetation at the planting site. If there are unwanted plants (which we call weeds) remove them. The population of weeds will also determine how healthy your soil is. You may need to improve the soil more if even the weeds are unable to thrive at your neglected planting site. Read these weeding tips for help.

5. Don’t avoid the soil testing
For the backyard gardeners, this step is essential to follow– Not only you’ll find out whether your soil is acidic, alkaline or neutral but also the different trace elements and minerals. The test also informs you about the contamination of soil.
Contact your local extension office for soil testing. Unlike many soil testing labs the extension office of your county will do this for free (or at low cost). You can also purchase a test kit that allows you to determine the soil composition. However, this may be costly and you’ll not get plenty of details. Once you find out the pH level and all the details of your soil you can easily balance it to grow your favorite plants.
6. Add Organic matter
Adding the organic matter always help and you should add well-rotted manure and compost regularly as it adds nutrients to soil naturally and also provides food for microorganisms that live in the soil. The addition of organic matter also improves the texture of the soil.

4
0
成长记
Sandra🐬
2016年12月14日

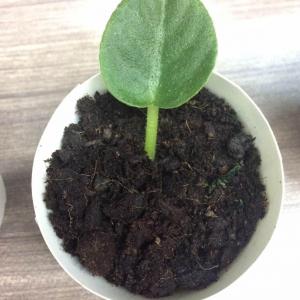
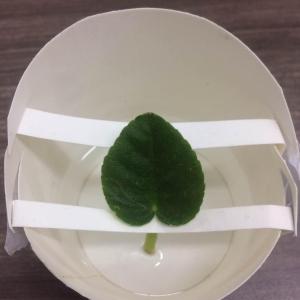
4th week: Planted one mother leaf on soil. Another little leaf roots too. I'm going to plant it next week.


5
0
妖怪花园:这个办法好!
求助
Nicolás Ríos
2016年12月09日

Dying Pilea microphylla
I overwatered it. Then I changed its soil to a dry one. Was that correct? Should I put it in the sun?

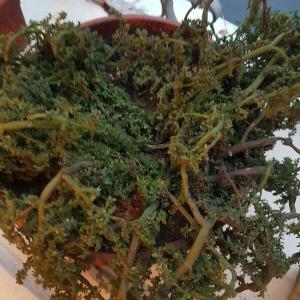
I overwatered it. Then I changed its soil to a dry one. Was that correct? Should I put it in the sun?


2
0
Colorful:You did well.If you find its roots are rot,you 'better cut off the rotten roots.Wait for it to come back to growing,then put it into the sun,but not direct sunlight.This plant likes warm and humid climate, the sandy soil should be loose and rich. (Poor soil drainage could result in your plant’s roots drowning.) The suitable temperature for the growth is 15℃ to 25℃, and can not be less than 5℃ in winter.
Erin:Yes, I think you did right .Do not put the plant in the sun.Put it in cool well-ventilated place.You can put the plant in the suitable place when the plant grow back.Good luck.
我是小花:Hola! Esto debe ser los helechos, las plantas no les gusta el sol, al igual que el aire húmedo.


