求助
kensong
2018年06月30日

My Ficus Lyrata variegata's leaves suddenly became limp amd soft. Old leaves were dropping a few days back. When I got it the soil felt too damp so I repotted.
When I saw that it went drooping I watered it thoroughly. Any idea what’s wrong? It looks like it has gotten worst since watering it two days ago.
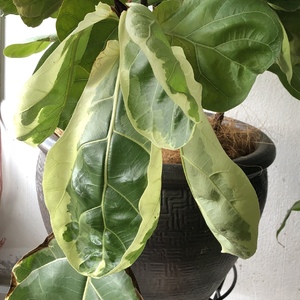
When I saw that it went drooping I watered it thoroughly. Any idea what’s wrong? It looks like it has gotten worst since watering it two days ago.

1
1
kensong:No. I could have removed some leaves to propogate or even cut of the stem but I was hoping it would recover after repotting.
dellaterra:@kensong oh no! We're you able to salvage any parts of it? Lucky you were able to find one, I haven't had any luck at all.
kensong:@dellaterra unfortunately it didn't make it. Looking out for one at the moment. Hard to find this one.
dellaterra:Has it adjusted after repotting? How are your results now? Hoping it recovered!~
成长记
2B_BotanicalFie
2018年06月28日
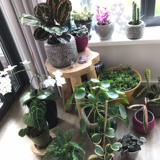
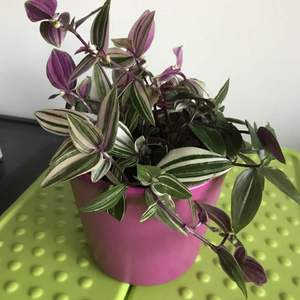
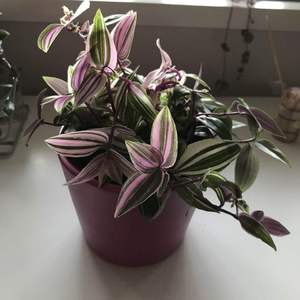
And alreasy rooted, so together with my mom i gave the cuttings their own pot with soil.


2
0
文章
Miss Chen
2018年06月24日


6.Plant the Container
Once you are happy with the arrangement, remove the plants from the container, then begin removing them from their nursery pots and placing them back into the container, one-by-one. The soil in the nursery pots may be fairly coarse and loose, so be careful when removing the plants. Hold the plant gently at the top with the stem between two fingers. Turn the pot over on its side and gently tap the bottom of the pot and ease the plant out. (If you are handling a spiny succulent, make sure to use gloves when doing this.)
Once all plants are placed in the container, duplicating the design you want, gently pack additional succulent potting soil around each plant. As you do this, make sure to keep the plants at the same level they were growing at in their nursery pots—don't bury them deeper than they were already growing.
Make certain that you have filled in all the holes and spaces between the plants and also between the plants and the sides of the container. If you don’t, the roots will dry out, which can be lethal to your plant.

7.Finishing Touches
Gently remove any soil that is covering leaves and stems of the plants. You can do this with a soft-bristled brush, or even by gently blowing on the plants.
To give your container a finished look, cover the surface of the potting soil with a topdressing of some form of coarser stone, such as fine gravel, pebbles, sea glass, or marbles. The topdressing material can be brightly colored or neutral, depending on the look you want to achieve. Using a contrasting colored material for a topdressing can add zing to a pot; a more subtle topdressing can add elegance. The right topdressing can tie all the elements in your pot together or it can make plants stand out in contrast.

8.Caring for Your Succulents
To care for your succulent container garden, the goal is to mimic the conditions they would experience naturally.
During spring and summer—the growing season for most succulents— keep the soil moist, not wet. It's better to let the soil get a little dry between watering than it is to over-water. During the winter, when succulent plants are normally dormant, water much less frequently, keeping the soil on the dry side but not letting it dry out entirely.
Fertilization should be fairly minimal with succulent plants, and may not be needed at all. It will depend largely on the type of plants you are growing—research each species to learn its needs. If feeding is called for, do it only during the active growing season, using a diluted liquid fertilizer designed for succulents.
0
0
成长记
kensong
2018年06月22日

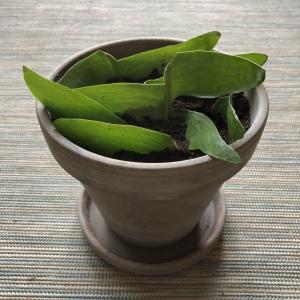
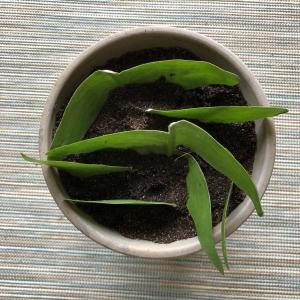
Looks like the FLF leaf cuttings I gave to [1000033249:@WS ] can root. It's tricky trying to pot them in soil though. The roots look fragile.
![Looks like the FLF leaf cuttings I gave to [1000033249: @WS ] can root. It's tricky trying to pot them in soil though. The roots look fragile. Looks like the FLF leaf cuttings I gave to [1000033249: @WS ] can root. It's tricky trying to pot them in soil though. The roots look fragile.](https://img.lrgarden.cn/feed_pic/p300/19/7/2002088979_2002010315_1529682823.jpg?101)
![Looks like the FLF leaf cuttings I gave to [1000033249: @WS ] can root. It's tricky trying to pot them in soil though. The roots look fragile. Looks like the FLF leaf cuttings I gave to [1000033249: @WS ] can root. It's tricky trying to pot them in soil though. The roots look fragile.](https://img.lrgarden.cn/feed_pic/p300/20/7/2002088980_2002010315_1529682823.jpg?101)
1
0
文章
Miss Chen
2018年06月20日

Soybean, lentil and pinto bean seeds grow rapidly, but the time it takes for a bean seed to germinate depends in part on where it sprouts. Germination of a seed in garden soil is measured from the day the seed is planted until just before its first shoot emerges above the soil. Germination outside the soil in a sprouting jar or other container usually is much shorter. Sometimes this is done as part of a science project or to produce edible sprouts.

Soybeans
Soybeans are a good model for a science germination experiment, because they sprout in three to four days in petri dishes, according to the Science Project Lab website. But Michigan State University notes that germination in the soil takes six to 14 days. Cold and excess or inadequate moisture are among the conditions that can slow germination outdoors. Living Gently Quarterly notes that soybean sprouts are becoming more common in cooking. But it warns not to sprout commercial seeds intended for planting, because they are chemically treated.
Lentils
The Sprout People website says it takes two to three days to germinate lentil seeds in sprouters, which are typically lidded containers with holes for air circulation. If growing in the garden, lentil seeds germinate in about 10 days at 68 degrees Fahrenheit, according to the Harvest to Table website. They are hardy annuals and members of the pea family. Sprouting any bean seed involves a process of soaking and regularly rinsing the seeds until they germinate in a sprouter that is kept out of direct sunlight and stored at 70 degrees Fahrenheit. Lentil sprouts can be eaten raw or cooked.

Pinto Beans
In soil, pinto beans germinate in four to eight days, according to the Texas A&M University Extension. But Sprout People says that when germinated in a sprouter, the process only takes 2 to 4 days. Unlike soybean and lentil sprouts, pinto bean sprouts are not edible unless cooked. Sprout People says they add a "delicate sweetness" to soup and that the process of sprouting alleviates some of the gaseousness associated with beans.

Soybeans
Soybeans are a good model for a science germination experiment, because they sprout in three to four days in petri dishes, according to the Science Project Lab website. But Michigan State University notes that germination in the soil takes six to 14 days. Cold and excess or inadequate moisture are among the conditions that can slow germination outdoors. Living Gently Quarterly notes that soybean sprouts are becoming more common in cooking. But it warns not to sprout commercial seeds intended for planting, because they are chemically treated.
Lentils
The Sprout People website says it takes two to three days to germinate lentil seeds in sprouters, which are typically lidded containers with holes for air circulation. If growing in the garden, lentil seeds germinate in about 10 days at 68 degrees Fahrenheit, according to the Harvest to Table website. They are hardy annuals and members of the pea family. Sprouting any bean seed involves a process of soaking and regularly rinsing the seeds until they germinate in a sprouter that is kept out of direct sunlight and stored at 70 degrees Fahrenheit. Lentil sprouts can be eaten raw or cooked.

Pinto Beans
In soil, pinto beans germinate in four to eight days, according to the Texas A&M University Extension. But Sprout People says that when germinated in a sprouter, the process only takes 2 to 4 days. Unlike soybean and lentil sprouts, pinto bean sprouts are not edible unless cooked. Sprout People says they add a "delicate sweetness" to soup and that the process of sprouting alleviates some of the gaseousness associated with beans.
0
0
成长记
Plantlin
2018年06月20日

All the rooted ones are in soil now. Only two pieces didn’t make it. Now.... lets wait for two new beauties to develop:)


0
0
文章
Miss Chen
2018年06月19日

Asparagus is a perennial vegetable plant that can be a long-lasting, permanent addition to a home garden. This vegetable requires well-draining soil to thrive, as waterlogged soil causes root rot. Growing asparagus in raised beds offers them proper drainage and an easier planting bed that doesn't require deep tilling.

Preparing a Raised Bed
Prepare the raised bed before the last frost of the season ends. Though asparagus can tolerate some light shade, it's best to locate the raised bed in an area that gets six to eight hours of sunlight each day. Raise the bed to at least 12 inches in height to accommodate drainage and growth.
Use a good-quality topsoil that is blended with compost or other organic matter such as manure or peat moss. Laying black plastic over the entire raised bed helps to retain heat within the soil for an early spring planting.
Remove the black plastic when there's no more danger of frost and dig trenches six inches deep and five feet apart with a garden trowel. In each trench, sprinkle one pound of triple superphosphate (0-46-0) for every 50 feet of soil.
Planting Asparagus
Purchase 1-year-old asparagus crowns. For the best harvest, ensure the asparagus crowns are healthy and male. Female asparagus use too much energy on producing seeds, leaving a less-than-desirable crop production. To tell the difference, look at the seeds and size of each plant. The female asparagus plant bears berry-like seeds, while the male produces thicker spears and larger flowers. Soak the asparagus crowns in a bucket filled with warm water for one hour before planting.
Plant the asparagus crowns into the trenches, about 12 inches apart, and cover with dirt. Water the plantings until the soil is moist, taking care not to saturate. Continue to water the crop once or twice per week to keep the soil moist.
Spread two to three inches of peat moss throughout the asparagus bed when the tips begin to emerge from the soil, usually in one to two weeks. This will help the soil to retain more moisture and will act as a weed barrier within the raised bed.

Keep the asparagus bed free of weeds, pulling them out regularly by hand. A weedy bed means both weeds and vegetables are competing for the same nutrients and water and can cause a weak crop for future growing seasons.
Harvesting Asparagus
Leave the asparagus crowns to grow tall and ferny their first growing season within the raised bed. This first season will provide the asparagus crowns the energy they need to grow a more productive harvest in the years to come.
Harvest a few asparagus spears when the plants are in their second growing season and reach heights of seven to nine inches tall. Cut the spears off the plant at soil level with a sharp knife. Leave half of the asparagus spears on the plant to provide energy for the third season's crop.

Preparing a Raised Bed
Prepare the raised bed before the last frost of the season ends. Though asparagus can tolerate some light shade, it's best to locate the raised bed in an area that gets six to eight hours of sunlight each day. Raise the bed to at least 12 inches in height to accommodate drainage and growth.
Use a good-quality topsoil that is blended with compost or other organic matter such as manure or peat moss. Laying black plastic over the entire raised bed helps to retain heat within the soil for an early spring planting.
Remove the black plastic when there's no more danger of frost and dig trenches six inches deep and five feet apart with a garden trowel. In each trench, sprinkle one pound of triple superphosphate (0-46-0) for every 50 feet of soil.
Planting Asparagus
Purchase 1-year-old asparagus crowns. For the best harvest, ensure the asparagus crowns are healthy and male. Female asparagus use too much energy on producing seeds, leaving a less-than-desirable crop production. To tell the difference, look at the seeds and size of each plant. The female asparagus plant bears berry-like seeds, while the male produces thicker spears and larger flowers. Soak the asparagus crowns in a bucket filled with warm water for one hour before planting.
Plant the asparagus crowns into the trenches, about 12 inches apart, and cover with dirt. Water the plantings until the soil is moist, taking care not to saturate. Continue to water the crop once or twice per week to keep the soil moist.
Spread two to three inches of peat moss throughout the asparagus bed when the tips begin to emerge from the soil, usually in one to two weeks. This will help the soil to retain more moisture and will act as a weed barrier within the raised bed.

Keep the asparagus bed free of weeds, pulling them out regularly by hand. A weedy bed means both weeds and vegetables are competing for the same nutrients and water and can cause a weak crop for future growing seasons.
Harvesting Asparagus
Leave the asparagus crowns to grow tall and ferny their first growing season within the raised bed. This first season will provide the asparagus crowns the energy they need to grow a more productive harvest in the years to come.
Harvest a few asparagus spears when the plants are in their second growing season and reach heights of seven to nine inches tall. Cut the spears off the plant at soil level with a sharp knife. Leave half of the asparagus spears on the plant to provide energy for the third season's crop.
0
0
成长记
kensong
2018年06月02日

Repotted my Calathea to a better draining pot and discovered mealy bugs in the soil. Had to thoroughly clean the roots.


1
0
成长记
kensong
2018年06月02日

Repotted my Chinese Jade to a better draining soil. A mix or perlite, pumice and cactus soil.


2
0
成长记
kensong
2018年06月02日

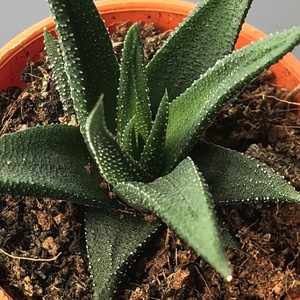
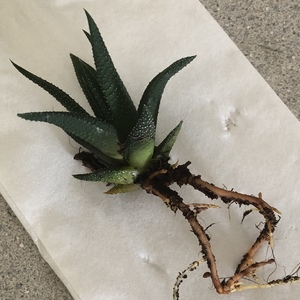
Repotted my Haworthia Zebra to a better draining soil of Perlite, Pumice and Cactus Soil. Roots look robust.


2
1
成长记
kensong
2018年05月27日

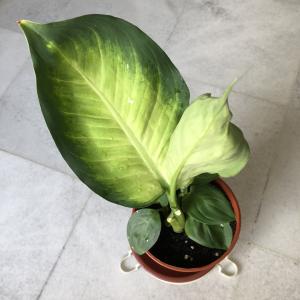
Repotted my Dumb Cane because of moldy soil and also mealy bug infestation which was manually removed.

0
0
成长记
Plantlin
2018年05月21日

One of them has new growth:) Added some soil and water as most of them have roots.


1
0


