文章
Miss Chen
2021年04月07日

People often say that Succulent is a plant suitable for lazy people, of course! This laziness is not for you to buy it home and leave it aside to enjoy the benefits, but not to be too diligent, especially for some fleshy who have just been in the pot, and are still in the serving period. The novice must stabilize the mind and not be too impatient. Do small actions that shouldn't be done.

After repairing the roots, I am anxious to go to the basin
Most of the succulents purchased online are shipped bare-rooted. After receiving the goods, many meat lovers grab the dry hairy roots with their hands, and then hurriedly put them in the basin.
Correct way:
After receiving the succulents, check the root system for insect eggs, trim off the shriveled fibrous roots, apply some carbendazim powder, and dry in a cool and ventilated place for at least 1 day, lazily and then put it in the basin.

I can’t help but water after I’m in the pot
After potting, the leaves at the bottom of the succulents that are in the potting period will slightly wilt. Many meat lovers rush to water, but the root system cannot absorb it, causing the fleshy seedlings to rot.
Correct way:
When we pot the succulents, it is best to plant them in moist soil. The humidity should be so that the soil can form a clump with the hand, and it can spread out after touching it. Do not water within a week after potting, and water thoroughly after a week.
Succulents are not better than grass and flowers, and watering can not be too often. It should be adjusted according to the state of succulents and the environment. For example, watering less on rainy days, dry soil is always safer than damp.

After the basin is installed, there is no bottom line to control water
After being potted, the fleshy leaves are getting greener, and there is no state at all. Some meat lovers ignore the water and force the fleshy leaves that have not been taken.
Regarding the succulents on the bare roots, we first consider feeding, and secondly, how to raise them well. We must not pursue beauty too much, and lose big because of smallness.

After potting, move around to bask in the sun
After potting, some meat lovers put Succulents in the living room today, and put them on the balcony tomorrow. Moving around caused Succulents to be slow to finish the pot, and they have been in a state of adapting to the new environment.
Correct way:
After potting, place the succulents in a ventilated place with astigmatism, and gradually increase the light after a week. Don't over toss, let it take root and grow quietly.

After using the pot, I always like to shake the pot and dig the soil
After potting, I always want to shake the pots and dig out the soil to see if Dusuu has taken the pots. The results will delay the growth of the root system at least, and the delay period will not pass, and it will die!
Correct way:
After putting on the pot, keep it with astigmatism, give water a week later, always pay attention to ventilation, observe more and less hands, for example, if the leaves are hard or the seedlings grow up, it means that the pots are served!

After potting, the old love pulls the dead leaves
During the slow potting period, the leaves under the plant will shrink and dry, and many meat lovers will pull it off when they see it. This causes the fleshy lower leaves to continue to shrink and consume nutrients.
The leaves are shriveled, which is the normal nutrient consumption during the potting period of the succulents. As long as the leaves are not lost and are not completely shriveled, they can continue to provide nutrients for the succulents. Don't owe it.


After repairing the roots, I am anxious to go to the basin
Most of the succulents purchased online are shipped bare-rooted. After receiving the goods, many meat lovers grab the dry hairy roots with their hands, and then hurriedly put them in the basin.
Correct way:
After receiving the succulents, check the root system for insect eggs, trim off the shriveled fibrous roots, apply some carbendazim powder, and dry in a cool and ventilated place for at least 1 day, lazily and then put it in the basin.

I can’t help but water after I’m in the pot
After potting, the leaves at the bottom of the succulents that are in the potting period will slightly wilt. Many meat lovers rush to water, but the root system cannot absorb it, causing the fleshy seedlings to rot.
Correct way:
When we pot the succulents, it is best to plant them in moist soil. The humidity should be so that the soil can form a clump with the hand, and it can spread out after touching it. Do not water within a week after potting, and water thoroughly after a week.
Succulents are not better than grass and flowers, and watering can not be too often. It should be adjusted according to the state of succulents and the environment. For example, watering less on rainy days, dry soil is always safer than damp.

After the basin is installed, there is no bottom line to control water
After being potted, the fleshy leaves are getting greener, and there is no state at all. Some meat lovers ignore the water and force the fleshy leaves that have not been taken.
Regarding the succulents on the bare roots, we first consider feeding, and secondly, how to raise them well. We must not pursue beauty too much, and lose big because of smallness.

After potting, move around to bask in the sun
After potting, some meat lovers put Succulents in the living room today, and put them on the balcony tomorrow. Moving around caused Succulents to be slow to finish the pot, and they have been in a state of adapting to the new environment.
Correct way:
After potting, place the succulents in a ventilated place with astigmatism, and gradually increase the light after a week. Don't over toss, let it take root and grow quietly.

After using the pot, I always like to shake the pot and dig the soil
After potting, I always want to shake the pots and dig out the soil to see if Dusuu has taken the pots. The results will delay the growth of the root system at least, and the delay period will not pass, and it will die!
Correct way:
After putting on the pot, keep it with astigmatism, give water a week later, always pay attention to ventilation, observe more and less hands, for example, if the leaves are hard or the seedlings grow up, it means that the pots are served!

After potting, the old love pulls the dead leaves
During the slow potting period, the leaves under the plant will shrink and dry, and many meat lovers will pull it off when they see it. This causes the fleshy lower leaves to continue to shrink and consume nutrients.
The leaves are shriveled, which is the normal nutrient consumption during the potting period of the succulents. As long as the leaves are not lost and are not completely shriveled, they can continue to provide nutrients for the succulents. Don't owe it.

0
0
文章
Miss Chen
2021年03月29日

People often say that succulent is a plant suitable for lazy people, of course! This laziness is not for you to buy it home and leave it aside to enjoy the benefits, but not to be too diligent, especially for some fleshy who have just been in the pot, and are still in the serving period. The novice must stabilize the mind and not be too impatient. Do small actions that shouldn't be done.

After repairing the roots, I am anxious to go to the basin.
Most of the succulents purchased online are shipped bare-rooted. After receiving the goods, many meat lovers grab the dry hairy roots with their hands, and then hurriedly put them in the basin.
Correct way:
After receiving the succulents, check the root system for insect eggs, trim off the shriveled fibrous roots, apply some carbendazim powder, and dry in a cool and ventilated place for at least 1 day, lazily and then put it in the basin.

I can’t help but water after I’m in the pot.
After potting, the leaves at the bottom of the succulents that are in the potting period will slightly wilt. Many meat lovers rush to water, but the root system cannot absorb it, causing the fleshy seedlings to rot.
Correct way:
When we pot the succulents, it is best to plant them in moist soil. The humidity should be so that the soil can form a clump with the hand, and it can spread out after touching it. Do not water within a week after potting, and water thoroughly after a week.
Succulents are not better than grass and flowers, and watering can not be too often. It should be adjusted according to the state of succulents and the environment. For example, watering less on rainy days, dry soil is always safer than damp.

After the basin is installed, there is no bottom line to control water.
After being potted, the fleshy leaves are getting greener, and there is no state at all. Some meat lovers ignore the water and force the fleshy leaves that have not been taken.
Regarding the succulents on the bare roots, we first consider feeding, and secondly, how to raise them well. We must not pursue beauty too much, and lose big because of smallness.

After potting, move around to bask in the sun.
After potting, some meat lovers put Succulents in the living room today, and then put them on the balcony tomorrow. Moving around causes Succulents to be slow to finish the pots, and they have been in a state of adapting to the new environment.
Correct way:
After potting, place the succulents in a ventilated place with astigmatism, and gradually increase the light after a week. Don't toss too much, let it take root and grow quietly.

After using the pot, I always like to shake the pot and dig the soil.
After potting, I always want to shake the pots and dig out the soil to see if Dusuu has taken the pots. The results will delay the growth of the root system at least, and the delay period will not pass, and it will die!
Correct way:
After putting on the pot, keep it with light, give water a week later, always pay attention to ventilation, observe more and less hands, for example, if the leaves are hard or the seedlings grow up, it means that the pots are served!

After potting, the old love pulls the dead leaves.
During the slow potting of the succulents, the leaves under the plants will shrink and dry, and many meat lovers will pull them off when they see it, causing the leaves at the lower part of the succulents to continue to shrink and consume nutrients.
The leaves are shriveled, which is the normal nutrient consumption during the potting period of the succulents. As long as the leaves are not lost and are not completely shriveled, they can continue to provide nutrients for the succulents.

After repairing the roots, I am anxious to go to the basin.
Most of the succulents purchased online are shipped bare-rooted. After receiving the goods, many meat lovers grab the dry hairy roots with their hands, and then hurriedly put them in the basin.
Correct way:
After receiving the succulents, check the root system for insect eggs, trim off the shriveled fibrous roots, apply some carbendazim powder, and dry in a cool and ventilated place for at least 1 day, lazily and then put it in the basin.

I can’t help but water after I’m in the pot.
After potting, the leaves at the bottom of the succulents that are in the potting period will slightly wilt. Many meat lovers rush to water, but the root system cannot absorb it, causing the fleshy seedlings to rot.
Correct way:
When we pot the succulents, it is best to plant them in moist soil. The humidity should be so that the soil can form a clump with the hand, and it can spread out after touching it. Do not water within a week after potting, and water thoroughly after a week.
Succulents are not better than grass and flowers, and watering can not be too often. It should be adjusted according to the state of succulents and the environment. For example, watering less on rainy days, dry soil is always safer than damp.

After the basin is installed, there is no bottom line to control water.
After being potted, the fleshy leaves are getting greener, and there is no state at all. Some meat lovers ignore the water and force the fleshy leaves that have not been taken.
Regarding the succulents on the bare roots, we first consider feeding, and secondly, how to raise them well. We must not pursue beauty too much, and lose big because of smallness.

After potting, move around to bask in the sun.
After potting, some meat lovers put Succulents in the living room today, and then put them on the balcony tomorrow. Moving around causes Succulents to be slow to finish the pots, and they have been in a state of adapting to the new environment.
Correct way:
After potting, place the succulents in a ventilated place with astigmatism, and gradually increase the light after a week. Don't toss too much, let it take root and grow quietly.

After using the pot, I always like to shake the pot and dig the soil.
After potting, I always want to shake the pots and dig out the soil to see if Dusuu has taken the pots. The results will delay the growth of the root system at least, and the delay period will not pass, and it will die!
Correct way:
After putting on the pot, keep it with light, give water a week later, always pay attention to ventilation, observe more and less hands, for example, if the leaves are hard or the seedlings grow up, it means that the pots are served!

After potting, the old love pulls the dead leaves.
During the slow potting of the succulents, the leaves under the plants will shrink and dry, and many meat lovers will pull them off when they see it, causing the leaves at the lower part of the succulents to continue to shrink and consume nutrients.
The leaves are shriveled, which is the normal nutrient consumption during the potting period of the succulents. As long as the leaves are not lost and are not completely shriveled, they can continue to provide nutrients for the succulents.
0
0
文章
莹723
2021年03月23日

Pilea peperomiodes, also known as the Chinese money plant, missionary plant, pancake plant, the pass-it-along plant and the UFO plant, has a dome of beautiful and unusual leaves that look like small lily pads.
The Chinese money plant hails from southern China, and was first brought to the UK at the start of the twentieth century. It’s very easy to propagate, so circulated quietly among house plant enthusiasts (hence its nickname, the pass-it-along plant) but it was practically unheard until it became popular on social media a few years ago. Despite this, Pilea peperomiodes can be quite hard to get hold of – it’s best to go to a specialist house plant shop or online supplier. It’s also expensive, so if you have a friend with a plant, ask them to pot up one of the many babies that pop up around its base for you.

Pilea peperomiodes is an easy going plant that is good for beginners as it’s quite forgiving of neglect in terms of watering and feeding. But treat it well and it will reward you with fast growth, glossy green leaves and lots of babies at the base.
Each Pilea peperomiodes grows slightly differently and your plant is likely to grow more upright as it matures. Older plants may produce tiny flowers.
1.How to grow Pilea peperomiodes
Plant your Pilea peperomiodes in well drained compost and place in a warm, bright spot that’s not too sunny. Only water when the soil is beginning to dry out.

2.Where to grow Pilea peperomoides
Pilea peperomiodes does best in a warm spot that doesn’t go below 12°C in winter. Put it somewhere bright – it will take a bit of direct sun, but don’t let it sit in midday or afternoon sun, as this will scorch the leaves.

3.How to plant Pilea peperomiodes
There’s no need to take the plant out of it plastic pot when you bring your plant home (unless it’s root bound) – just put it inside a more decorative pot. Repot when root bound (you’ll see roots emerging out of the bottom of the pot). Plant in a mix of 2:1 soil-based compost (or peat-free, multi-purpose compost) and perlite, and make sure there are drainage holes at the bottom of the pot.

4.Caring for Pilea peperomiodes
From spring to autumn, water regularly but allow the top few centimetres of the compost to dry out between waterings, and let any excess drain away afterwards – like most house plants, Pilea peperomiodes does not like sitting in cold, soggy compost. Water less in winter. Feed once a month with a weak or diluted house plant food. Wipe the leaves occasionally to keep them shiny and free from dust. You could mist the leaves, although this is not essential. The plant will naturally gravitate towards the light, giving it a tilted appearance, so rotate it every few days to maintain its mounded look. Repot in spring if the plant has become root bound.

5.How to propagate Pilea peperomiodes
Pilea peperomiodes is very easy to propagate. It readily produces baby plants, known as offsets or pups, at its base – these can be carefully removed using a fork, and placed in an inch of water. A few weeks later, roots will have formed and you can pot up your new plants. They will grow fast.

6.Growing Pilea peperomiodes: problem solving
Yellow or brown leaves at the base of the plant are normal – these are older leaves that die and drop off naturally. If yellow leaves are appearing all over the plant, it could be due to over- or under watering, so check your watering regime.
Flopping, lacklustre leaves are due to under watering or over watering – check the soil to see which applies to your plant.
Bending, curling leaves can be due to lack of light.

Pale leaves can be a sign of too much bright sunlight. Brown spots on the leaves are sunburn.
Scale insect can be a problem – look for small brown lumps on the leaves. Gently wipe them away with cotton wool soaked in an insecticide based on fatty acids or plant oils. Act promptly as soon as you see them, as the problem can become widespread and affect the plant’s health.
Powdery mildew can appear as white patches on the leaves. Remove the affected leaves and improve air circulation around the plant.
The Chinese money plant hails from southern China, and was first brought to the UK at the start of the twentieth century. It’s very easy to propagate, so circulated quietly among house plant enthusiasts (hence its nickname, the pass-it-along plant) but it was practically unheard until it became popular on social media a few years ago. Despite this, Pilea peperomiodes can be quite hard to get hold of – it’s best to go to a specialist house plant shop or online supplier. It’s also expensive, so if you have a friend with a plant, ask them to pot up one of the many babies that pop up around its base for you.

Pilea peperomiodes is an easy going plant that is good for beginners as it’s quite forgiving of neglect in terms of watering and feeding. But treat it well and it will reward you with fast growth, glossy green leaves and lots of babies at the base.
Each Pilea peperomiodes grows slightly differently and your plant is likely to grow more upright as it matures. Older plants may produce tiny flowers.
1.How to grow Pilea peperomiodes
Plant your Pilea peperomiodes in well drained compost and place in a warm, bright spot that’s not too sunny. Only water when the soil is beginning to dry out.

2.Where to grow Pilea peperomoides
Pilea peperomiodes does best in a warm spot that doesn’t go below 12°C in winter. Put it somewhere bright – it will take a bit of direct sun, but don’t let it sit in midday or afternoon sun, as this will scorch the leaves.

3.How to plant Pilea peperomiodes
There’s no need to take the plant out of it plastic pot when you bring your plant home (unless it’s root bound) – just put it inside a more decorative pot. Repot when root bound (you’ll see roots emerging out of the bottom of the pot). Plant in a mix of 2:1 soil-based compost (or peat-free, multi-purpose compost) and perlite, and make sure there are drainage holes at the bottom of the pot.

4.Caring for Pilea peperomiodes
From spring to autumn, water regularly but allow the top few centimetres of the compost to dry out between waterings, and let any excess drain away afterwards – like most house plants, Pilea peperomiodes does not like sitting in cold, soggy compost. Water less in winter. Feed once a month with a weak or diluted house plant food. Wipe the leaves occasionally to keep them shiny and free from dust. You could mist the leaves, although this is not essential. The plant will naturally gravitate towards the light, giving it a tilted appearance, so rotate it every few days to maintain its mounded look. Repot in spring if the plant has become root bound.

5.How to propagate Pilea peperomiodes
Pilea peperomiodes is very easy to propagate. It readily produces baby plants, known as offsets or pups, at its base – these can be carefully removed using a fork, and placed in an inch of water. A few weeks later, roots will have formed and you can pot up your new plants. They will grow fast.

6.Growing Pilea peperomiodes: problem solving
Yellow or brown leaves at the base of the plant are normal – these are older leaves that die and drop off naturally. If yellow leaves are appearing all over the plant, it could be due to over- or under watering, so check your watering regime.
Flopping, lacklustre leaves are due to under watering or over watering – check the soil to see which applies to your plant.
Bending, curling leaves can be due to lack of light.

Pale leaves can be a sign of too much bright sunlight. Brown spots on the leaves are sunburn.
Scale insect can be a problem – look for small brown lumps on the leaves. Gently wipe them away with cotton wool soaked in an insecticide based on fatty acids or plant oils. Act promptly as soon as you see them, as the problem can become widespread and affect the plant’s health.
Powdery mildew can appear as white patches on the leaves. Remove the affected leaves and improve air circulation around the plant.
0
0
文章
莹723
2021年02月18日

The rubber tree is a great starter plant for anyone who's not known for having a green thumb. These trees have glossy, leathery leaves and an attractive upright form, which makes a nice addition to any room with sufficient light. In the jungles of India and Malaysia, this plant can grow up to 100 feet tall. But indoors, a rubber tree typically tops out at 6 to 10 feet tall.
They’re fast growers with the right conditions and can last 15 years or more with proper care. Like the snake plant and spider plant, which are also low-maintenance plants, rubber trees look good with little effort from you!
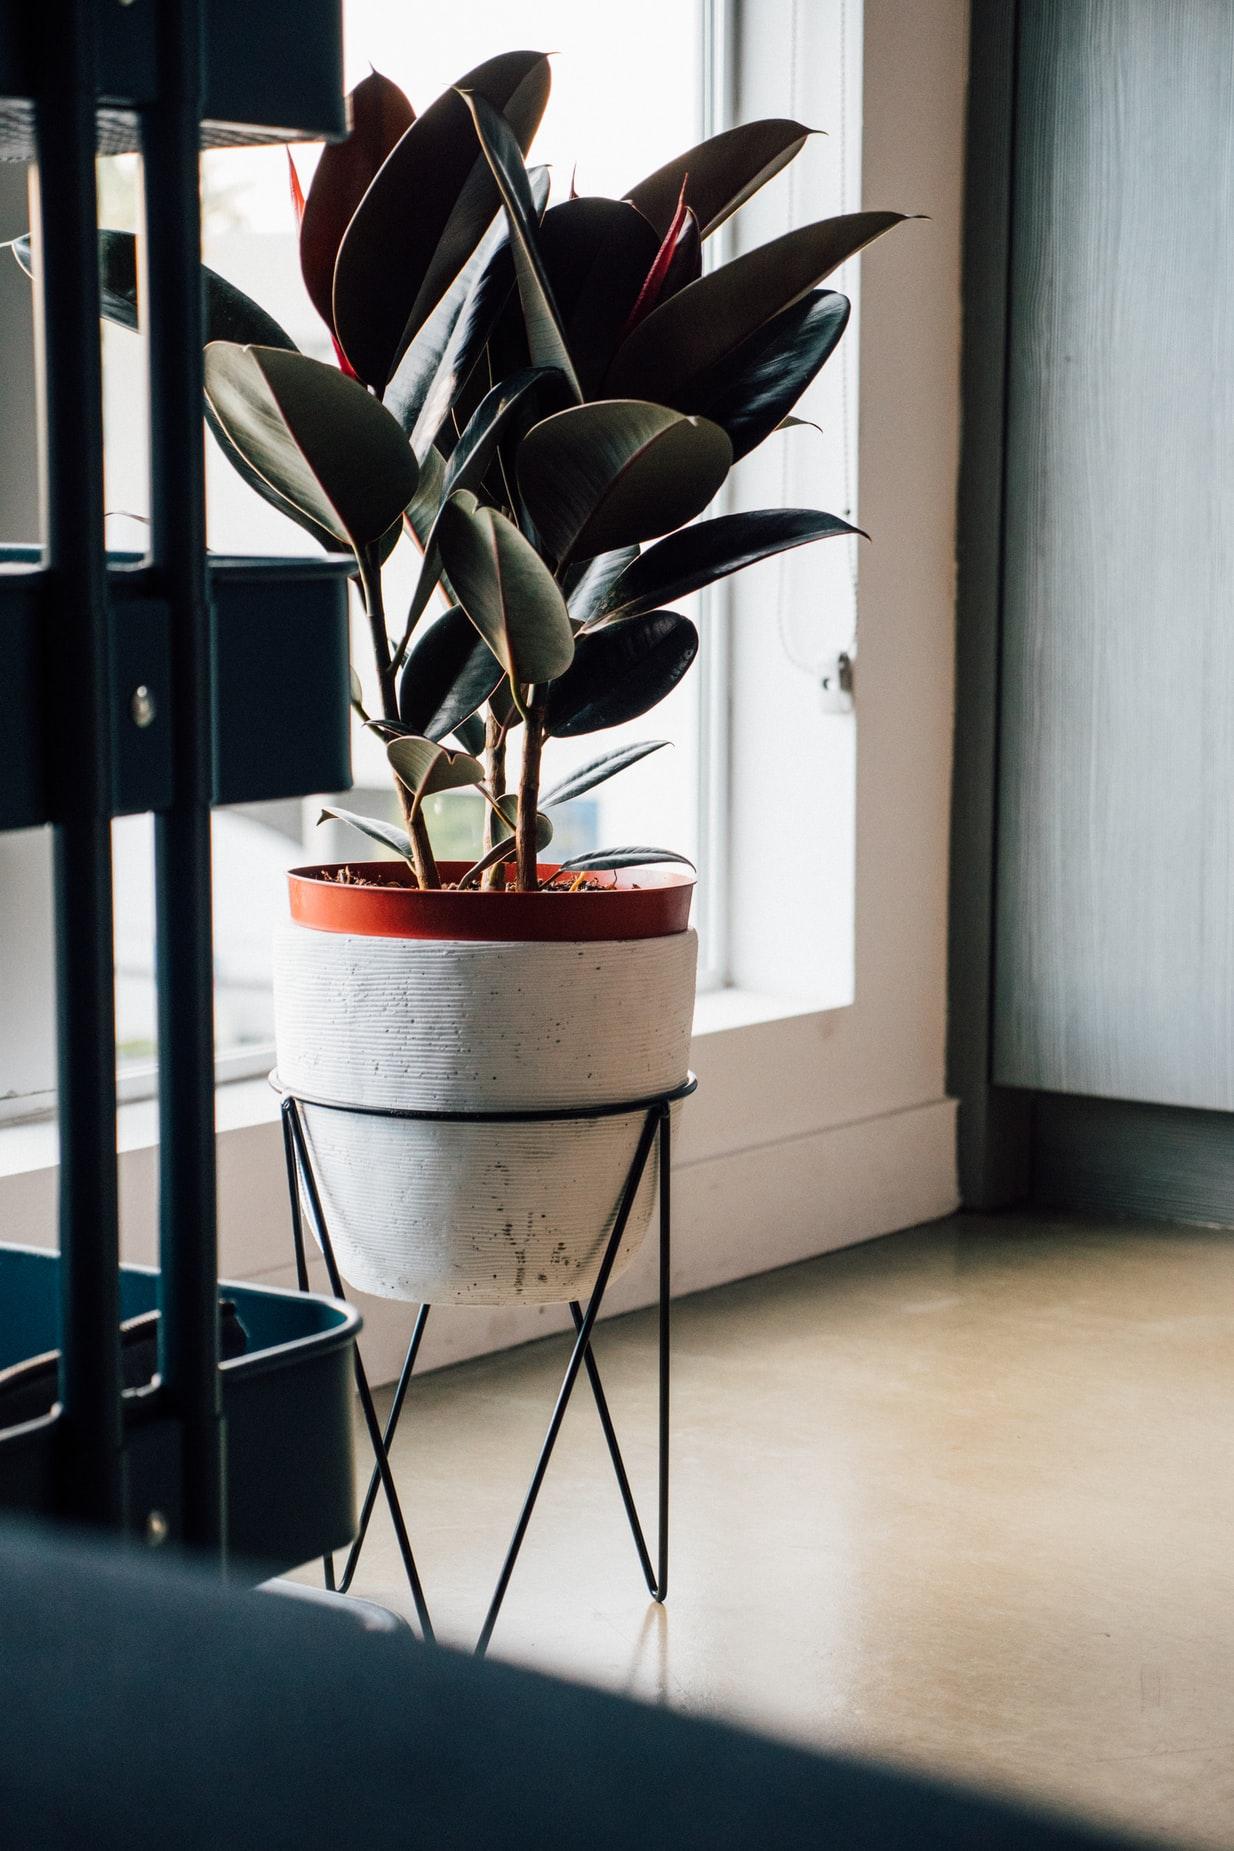
Here's what else you need to know about this old favorite.
1.What kinds of rubber trees can I grow?
Rubber tree, also known by its scientific name 'Ficus elastica' is available in many different varieties. ‘Decora’ has the classic dark green leaves with white ribs. ‘Doescheri’ is a pretty variegated variety. ‘Rubra’ has pretty burgundy leaves. But no matter which one you choose, they all need similar care.

2.Where can I buy a rubber tree?
Because it’s an old favorite, you’ll find rubber trees at most nurseries, big box stores, and online retailers. If shopping in person, don't buy plants without lower leaves, which drop off if it’s been overwatered or otherwise stressed. Also, choose one that is glossy and upright, not falling over. They're relatively inexpensive compared to other houseplants of similar size, such as the fiddleleaf fig or the ficus tree, also called weeping fig.

3.Rubber trees need bright light.
Rubber trees like bright light, although they can adjust to lower light levels. They don’t like sudden drops in temperature, so don’t put them too close to drafty windows. If your room seems dark, get a grow light to provide overhead light so the plant can grow upright. Otherwise, they tend to get leggy as they stretch toward the light.
It's not necessary but if you decide to put them outdoors in the summer, keep them out of direct sunlight. Bring them indoors again before a frost. In USDA Hardiness zones 10 and 11 (find your zone here), you can leave your plants outdoors unless freezing weather is forecast.

4.It's easy to care for your rubber tree.
The great news is that rubber trees don't need a lot of fussing over. Water your rubber tree when the soil is slightly dry to the touch. Watering too often may cause leaf yellowing. Dump out the saucer beneath the pot so there's no standing water. If you like, feed your rubber tree with a general-purpose fertilizer at 1/4 to 1/2 strength a few times a year, especially during active growth in spring and summer. Or not! It's really not necessary but certainly won't hurt.

5.Is rubber tree safe around pets?
The sticky sap may irritate a pet's skin or tummy, so it’s best to keep this plant away from curious pets who like to nibble on houseplants. To keep your rubber tree clean and shiny, dust the broad leaves with a damp rag occasionally. Rubber trees rarely are affected by bugs or diseases, so they’re the perfect plant for you to sit back and enjoy without a lot of fussing.

They’re fast growers with the right conditions and can last 15 years or more with proper care. Like the snake plant and spider plant, which are also low-maintenance plants, rubber trees look good with little effort from you!

Here's what else you need to know about this old favorite.
1.What kinds of rubber trees can I grow?
Rubber tree, also known by its scientific name 'Ficus elastica' is available in many different varieties. ‘Decora’ has the classic dark green leaves with white ribs. ‘Doescheri’ is a pretty variegated variety. ‘Rubra’ has pretty burgundy leaves. But no matter which one you choose, they all need similar care.

2.Where can I buy a rubber tree?
Because it’s an old favorite, you’ll find rubber trees at most nurseries, big box stores, and online retailers. If shopping in person, don't buy plants without lower leaves, which drop off if it’s been overwatered or otherwise stressed. Also, choose one that is glossy and upright, not falling over. They're relatively inexpensive compared to other houseplants of similar size, such as the fiddleleaf fig or the ficus tree, also called weeping fig.

3.Rubber trees need bright light.
Rubber trees like bright light, although they can adjust to lower light levels. They don’t like sudden drops in temperature, so don’t put them too close to drafty windows. If your room seems dark, get a grow light to provide overhead light so the plant can grow upright. Otherwise, they tend to get leggy as they stretch toward the light.
It's not necessary but if you decide to put them outdoors in the summer, keep them out of direct sunlight. Bring them indoors again before a frost. In USDA Hardiness zones 10 and 11 (find your zone here), you can leave your plants outdoors unless freezing weather is forecast.

4.It's easy to care for your rubber tree.
The great news is that rubber trees don't need a lot of fussing over. Water your rubber tree when the soil is slightly dry to the touch. Watering too often may cause leaf yellowing. Dump out the saucer beneath the pot so there's no standing water. If you like, feed your rubber tree with a general-purpose fertilizer at 1/4 to 1/2 strength a few times a year, especially during active growth in spring and summer. Or not! It's really not necessary but certainly won't hurt.

5.Is rubber tree safe around pets?
The sticky sap may irritate a pet's skin or tummy, so it’s best to keep this plant away from curious pets who like to nibble on houseplants. To keep your rubber tree clean and shiny, dust the broad leaves with a damp rag occasionally. Rubber trees rarely are affected by bugs or diseases, so they’re the perfect plant for you to sit back and enjoy without a lot of fussing.

0
0
文章
莹723
2021年01月25日

These low-light varieties won't want anything to do with your already crowded windowsill.
1.Calathea
Its patterned leaves (in colors like rose, white, and yellow) makes this plant a welcome addition to any room — and too much direct light might actually fade its lovely markings.

2.Dieffenbachia
Filtered light is best for this plant. Try using a curtain as a barrier between it and the sun, especially during the the spring and summer when the plant is producing new, tender leaves.

3.Dragon Tree
Spiky leaves that grow upwards and have a red outline makes the name of this plant absolutely perfect. But direct sunlight could damage them – so give this guy some sun and some shade.

4.Spider Plants
This plant's adaptability makes it super easy to grow and therefore quite popular — it's also easy to propagate and share with others. It can stand up to a lot of neglect, and will thrive in indirect light.

5.Heart-Leaf Philodendron
The sweetheart plant (a nickname given because of the shape of its glossy leaves) can stand dim rooms, but requires pinching to prevent it from growing in long, single stems.

6.Bromeliads
Didn't expect to find a tropical plant on this list? This houseplant can actually survive on florescent light alone and thrives in humid conditions like bathrooms.

7.Peace Lily
If you often forget to water your plants, pick up one of these low-maintenance ones: It actually needs to dry out between waterings, meaning you can wait longer.

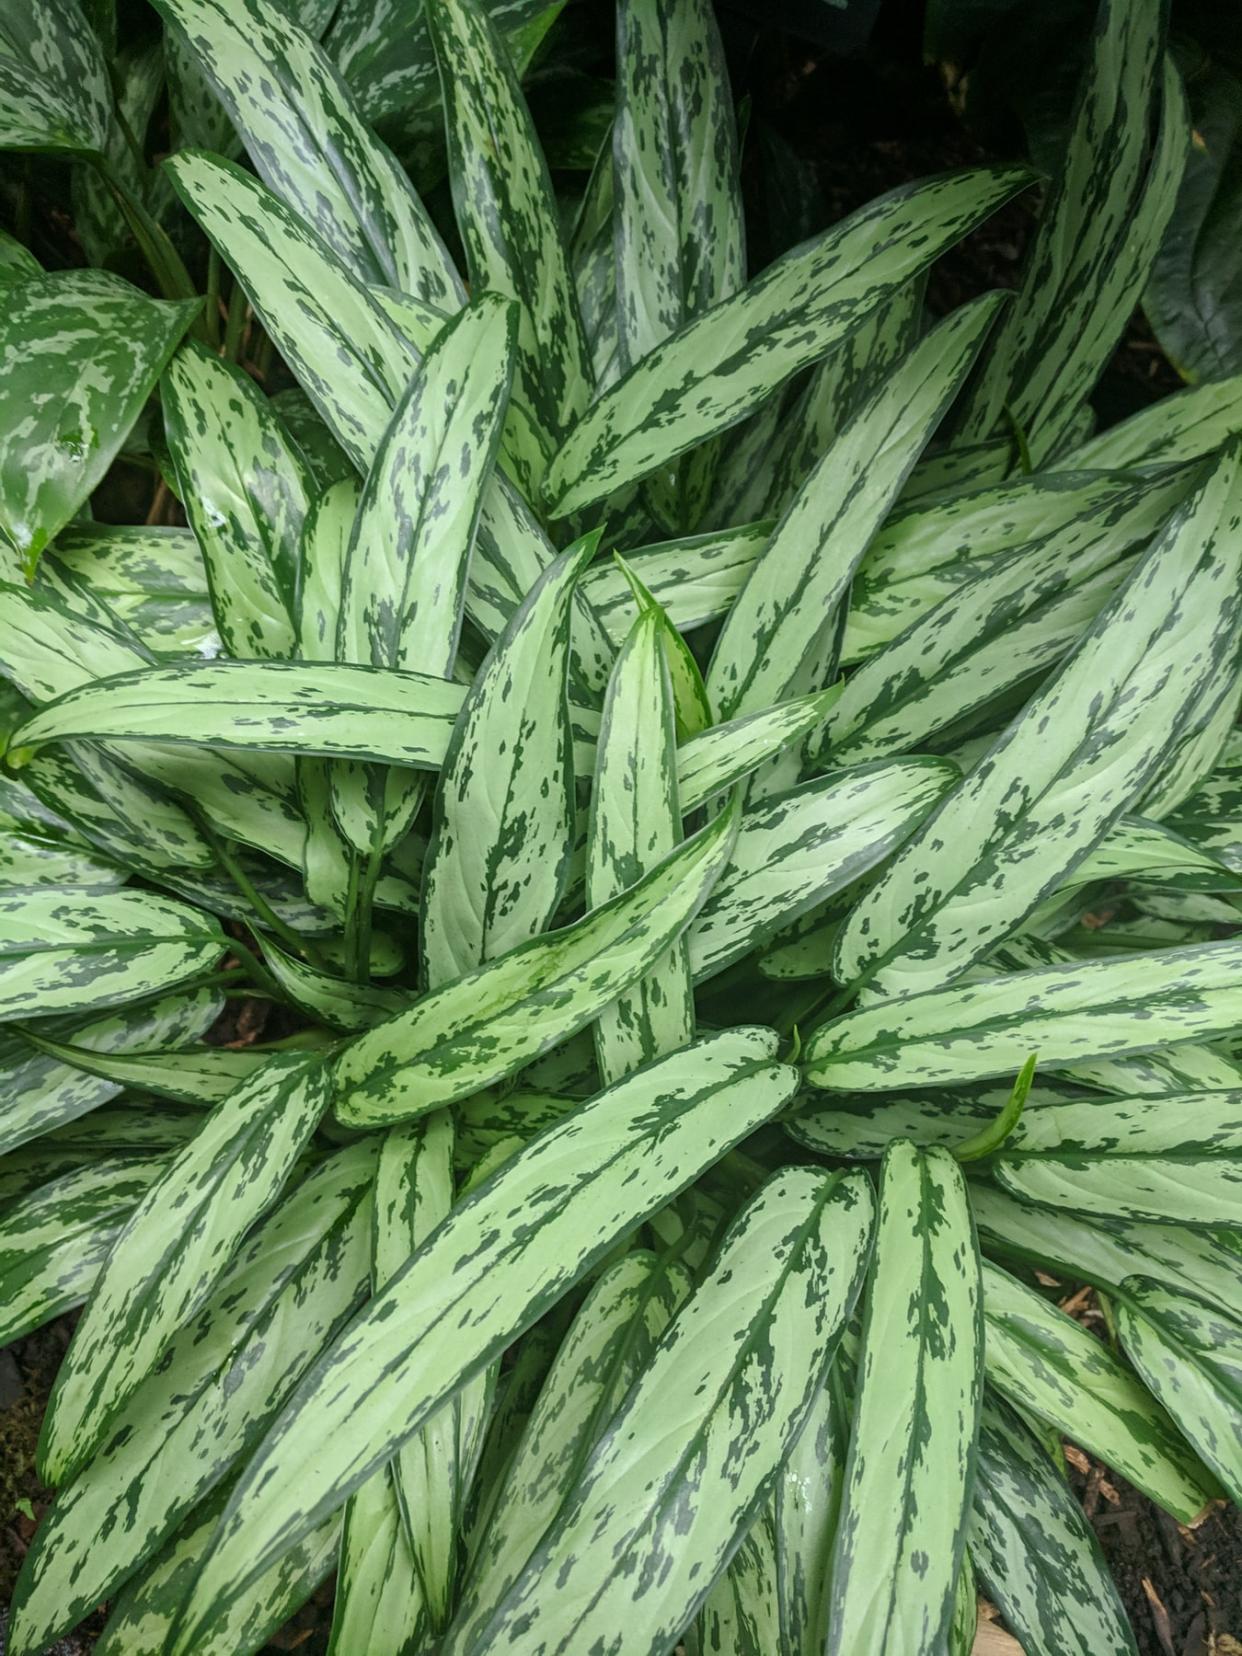
8.Chinese Evergreen
Since this plant is one of the most durable indoor plants (it does quite well in low light) and only needs to be fertilized once or twice a year, it's ideal for beginner gardeners.
9.Snake Plant
While the name is fun, this succulent is pretty tame when it comes to maintenance. More light will help it grow, but it can tolerate darkness—just watch out for root rot caused by overwatering.

10.Cast-Iron Plant
The leathery leaves on this houseplant are super tolerant not only to low light but also heat, cold, you name it. However, patience is required as it grows super slowly.

1.Calathea
Its patterned leaves (in colors like rose, white, and yellow) makes this plant a welcome addition to any room — and too much direct light might actually fade its lovely markings.

2.Dieffenbachia
Filtered light is best for this plant. Try using a curtain as a barrier between it and the sun, especially during the the spring and summer when the plant is producing new, tender leaves.

3.Dragon Tree
Spiky leaves that grow upwards and have a red outline makes the name of this plant absolutely perfect. But direct sunlight could damage them – so give this guy some sun and some shade.

4.Spider Plants
This plant's adaptability makes it super easy to grow and therefore quite popular — it's also easy to propagate and share with others. It can stand up to a lot of neglect, and will thrive in indirect light.

5.Heart-Leaf Philodendron
The sweetheart plant (a nickname given because of the shape of its glossy leaves) can stand dim rooms, but requires pinching to prevent it from growing in long, single stems.

6.Bromeliads
Didn't expect to find a tropical plant on this list? This houseplant can actually survive on florescent light alone and thrives in humid conditions like bathrooms.

7.Peace Lily
If you often forget to water your plants, pick up one of these low-maintenance ones: It actually needs to dry out between waterings, meaning you can wait longer.

8.Chinese Evergreen
Since this plant is one of the most durable indoor plants (it does quite well in low light) and only needs to be fertilized once or twice a year, it's ideal for beginner gardeners.

9.Snake Plant
While the name is fun, this succulent is pretty tame when it comes to maintenance. More light will help it grow, but it can tolerate darkness—just watch out for root rot caused by overwatering.

10.Cast-Iron Plant
The leathery leaves on this houseplant are super tolerant not only to low light but also heat, cold, you name it. However, patience is required as it grows super slowly.

1
0
文章
莹723
2020年12月29日

• Botanical name: Hippeastrum 'Happy Garden'
• Common name: Amarylis
• Family: Amaryllidaceae
• Plant Type: House plant
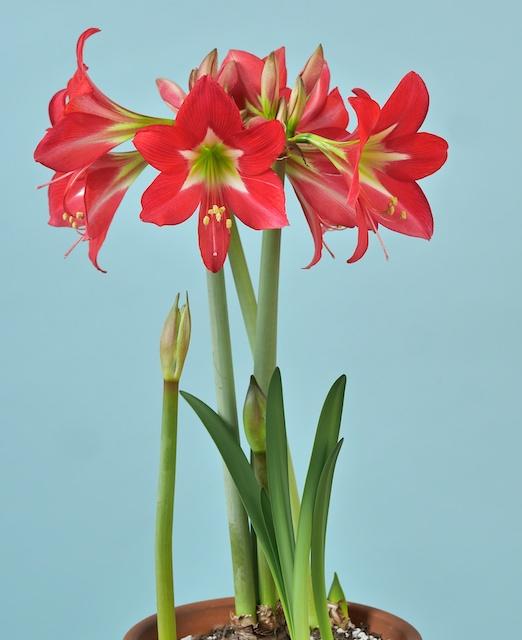
Hippeastrum, or amaryllis, are most commonly grown as flowering houseplants, and are often given as gifts at Christmas. The bulbous plants hail from South Africa, and bear four to six large flowers on a tall, light green hollow stem.
It’s easy to force amaryllis bulbs to flower indoors over Christmas, and once they’ve finished flowering they can be stored and encouraged to flower the following year.

Hippeastrum ‘Happy Garden’ bears multiple heads of red flowers with a green-white centre. For best results, grow at room temperature, around 20°C in a well-lit room, ideally in full sun. Water sparingly at first, then increase the amount as the flower stems develop.

——How to grow Hippeastrum 'Happy Garden'
• Plant size
60cm height
25cm spread
• Aspect
South facing, west facing
• Sun exposure: Full sun
• Hardiness: Half hardy
• Soil type: Well drained / light / sandy

——Is Hippeastrum 'Happy Garden' poisonous?
Hippeastrum 'Happy Garden' can be toxic.
Toxic to:
Toxic to Cats
Toxic to Dogs
——Plants that go well with Hippeastrum 'Happy Garden'
Hippeastrum ‘Red Lion’
Amarylis

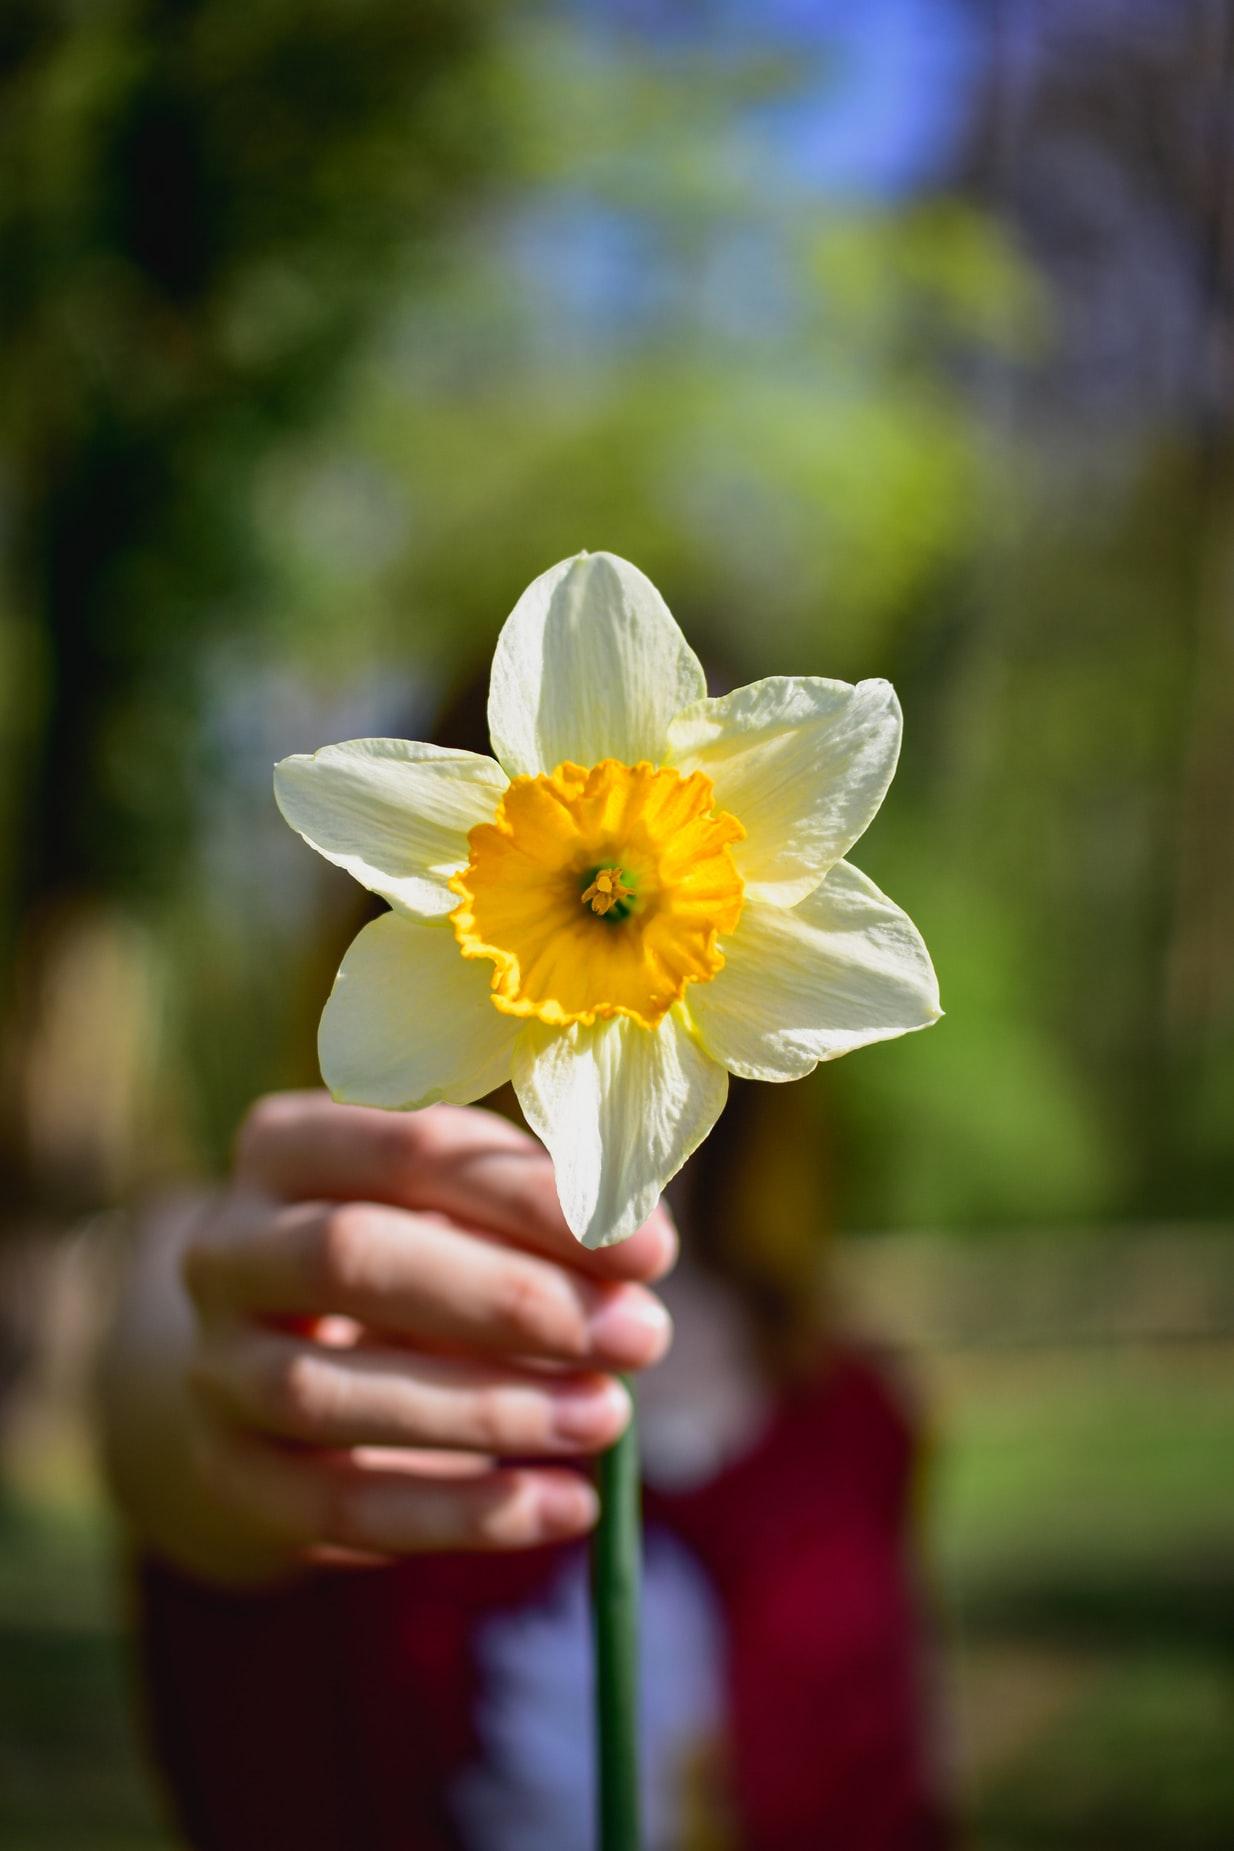
Narcissus papyraceus
Paperwhite narcissus
Euphorbia pulcherrimum
Poinsettia
• Common name: Amarylis
• Family: Amaryllidaceae
• Plant Type: House plant

Hippeastrum, or amaryllis, are most commonly grown as flowering houseplants, and are often given as gifts at Christmas. The bulbous plants hail from South Africa, and bear four to six large flowers on a tall, light green hollow stem.
It’s easy to force amaryllis bulbs to flower indoors over Christmas, and once they’ve finished flowering they can be stored and encouraged to flower the following year.

Hippeastrum ‘Happy Garden’ bears multiple heads of red flowers with a green-white centre. For best results, grow at room temperature, around 20°C in a well-lit room, ideally in full sun. Water sparingly at first, then increase the amount as the flower stems develop.

——How to grow Hippeastrum 'Happy Garden'
• Plant size
60cm height
25cm spread
• Aspect
South facing, west facing
• Sun exposure: Full sun
• Hardiness: Half hardy
• Soil type: Well drained / light / sandy

——Is Hippeastrum 'Happy Garden' poisonous?
Hippeastrum 'Happy Garden' can be toxic.
Toxic to:
Toxic to Cats
Toxic to Dogs
——Plants that go well with Hippeastrum 'Happy Garden'
Hippeastrum ‘Red Lion’
Amarylis

Narcissus papyraceus
Paperwhite narcissus

Euphorbia pulcherrimum
Poinsettia

0
0
文章
莹723
2020年12月16日

•Botanical name: Chlorophytum saundersiae 'Starlight'
•Common name: Weeping anthericum
•Family: Asparagaceae
•Plant Type: Perennial, Deciduous

Flower colour: White
Foliage colour: Variegation
•Key features:
•Dramatic foliage
•Flowers
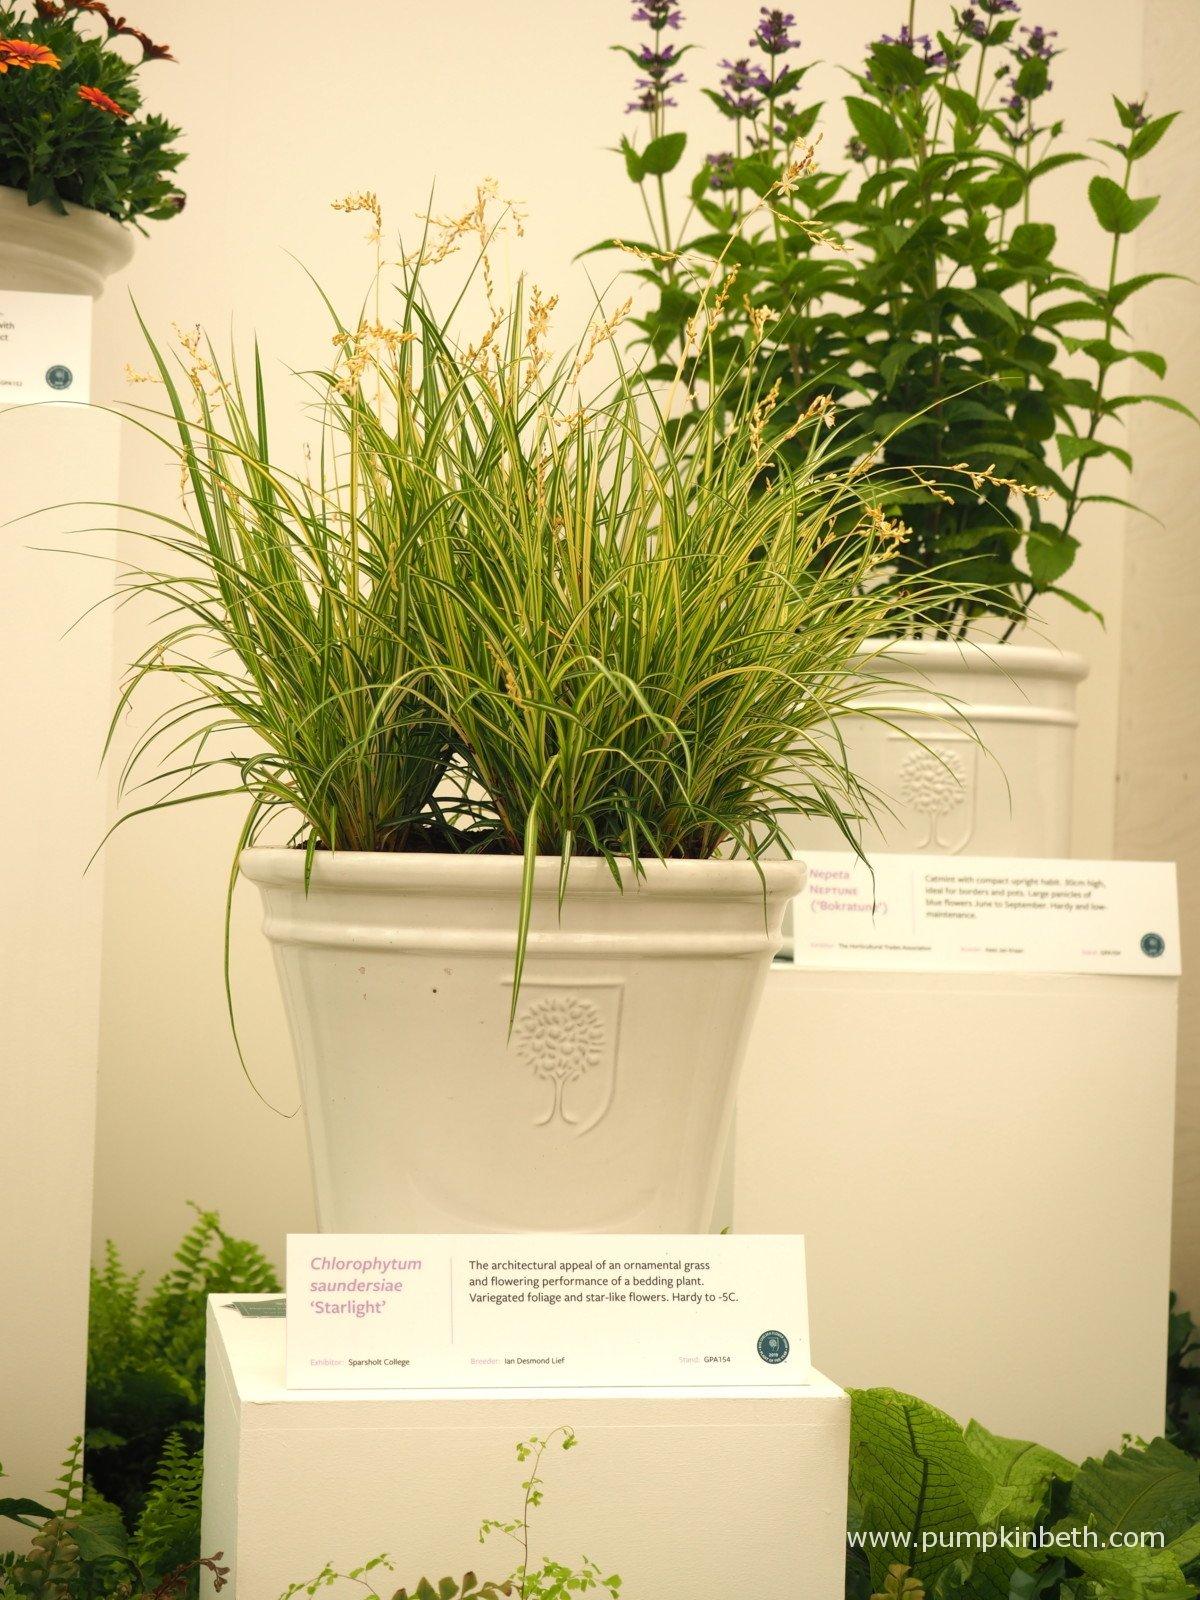
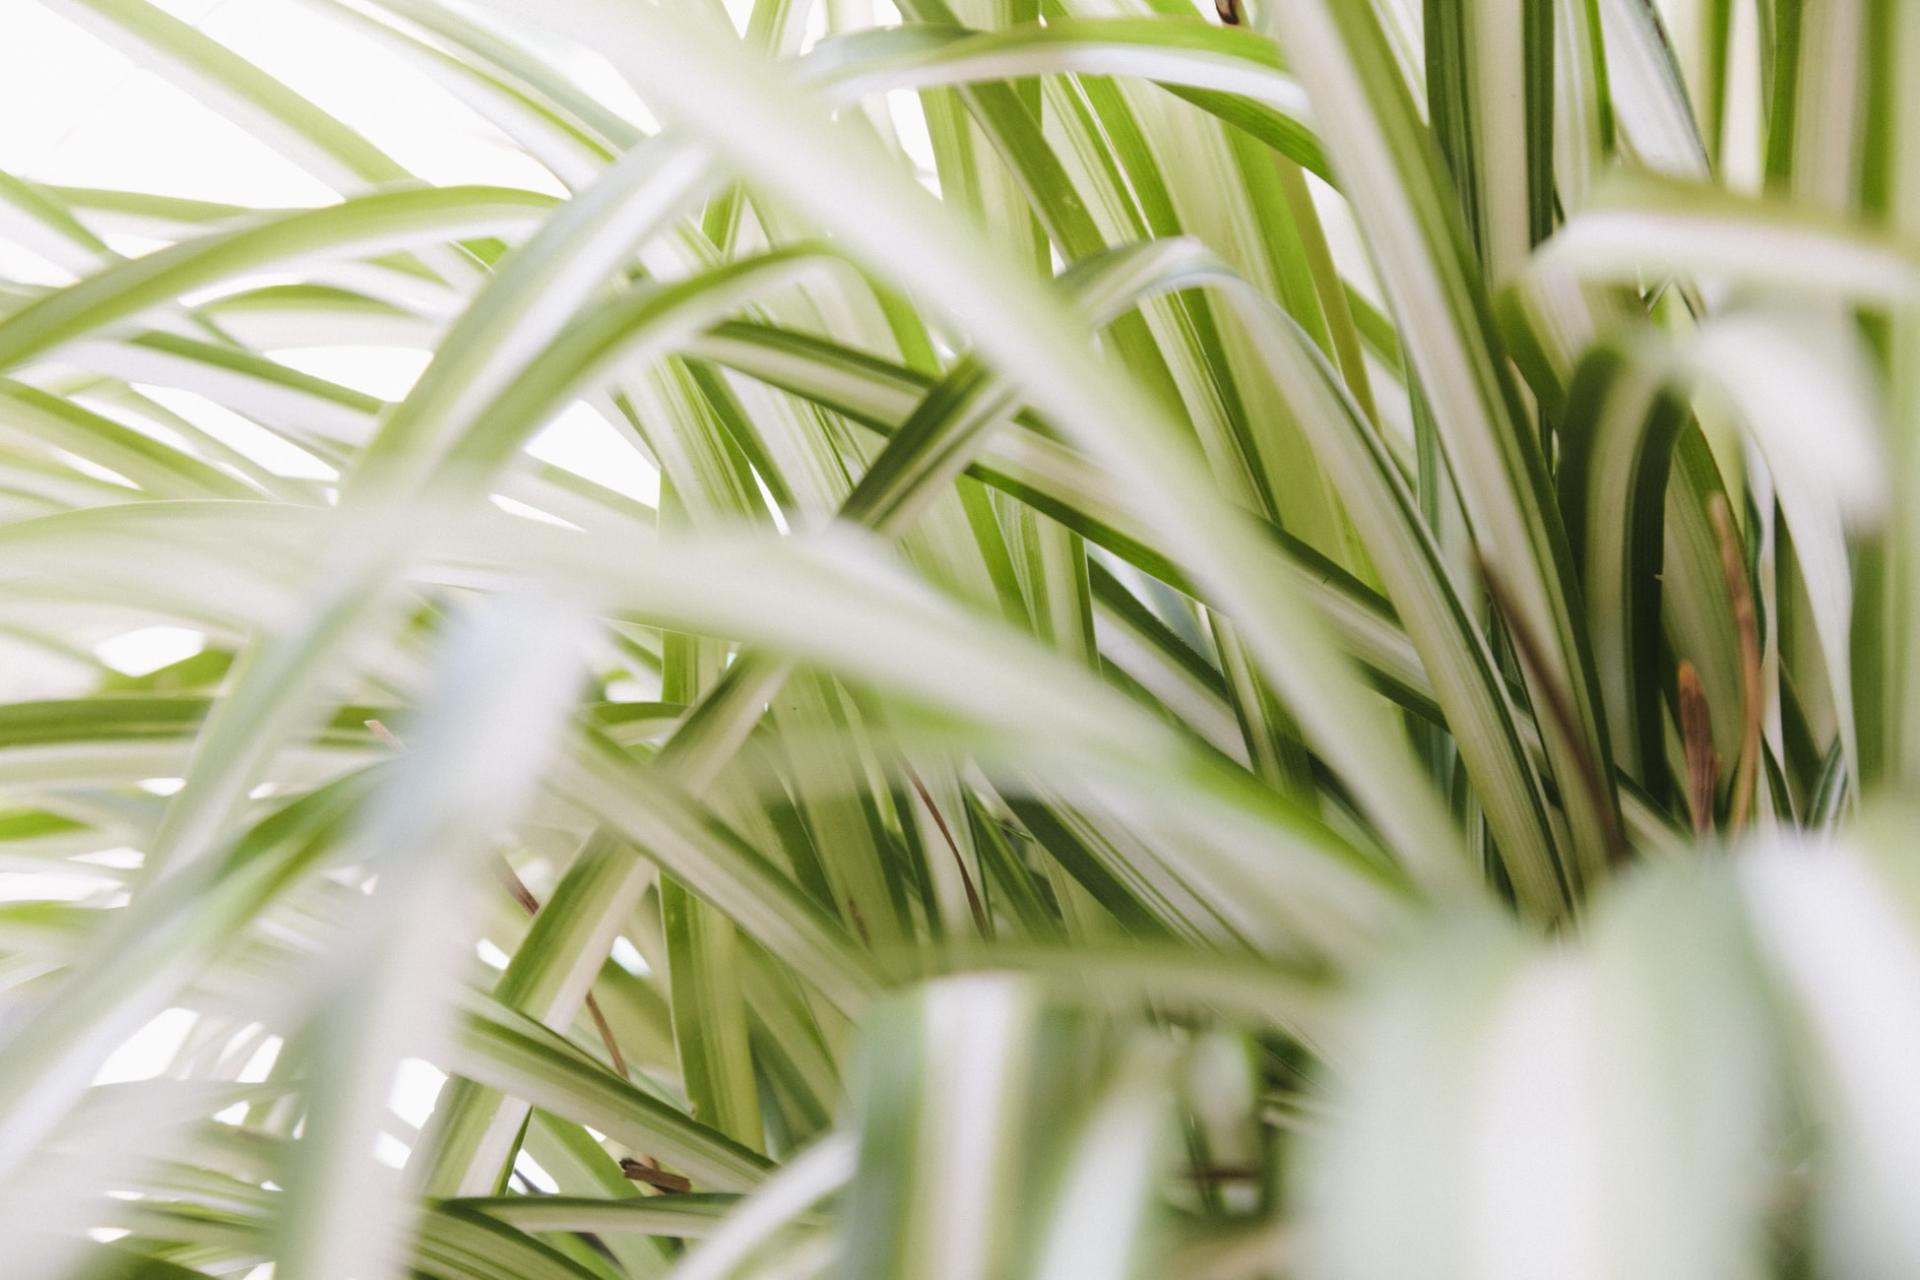
A close relative of the spider plant, Chlorophytum comosum, Chlorophytum saundersiae bears the same starry white flowers on long stems and long, grass-like foliage. However, this African native is tougher and can be grown outdoors all year.
‘Starlight’ is a variegated cultivar with cream leaves and deep green margins. In the summer months it produces sprays of white flowers that give plants a light, airy appearance.
For best results grow Chlorophytum saundersiae ‘Starlight’ in moist, well-drained soil in full sun or dappled shade. Congested clumps can be divided in spring to produce new plants.
How to grow Chlorophytum 'Starlight'
•Plant size
100cm height
45cm spread
•Aspect
South facing, west facing
•Sun exposure: Dappled shade, full sun
•Hardiness: Hardy
•Soil type: Acidic / chalky / alkaline / clay / heavy / moist / well drained / light / sandy
Is Chlorophytum 'Starlight' poisonous?
Chlorophytum 'Starlight' has no toxic effects reported.

Plants that go well with Chlorophytum 'Starlight'
Verbena bonariensis ‘Lollipop’

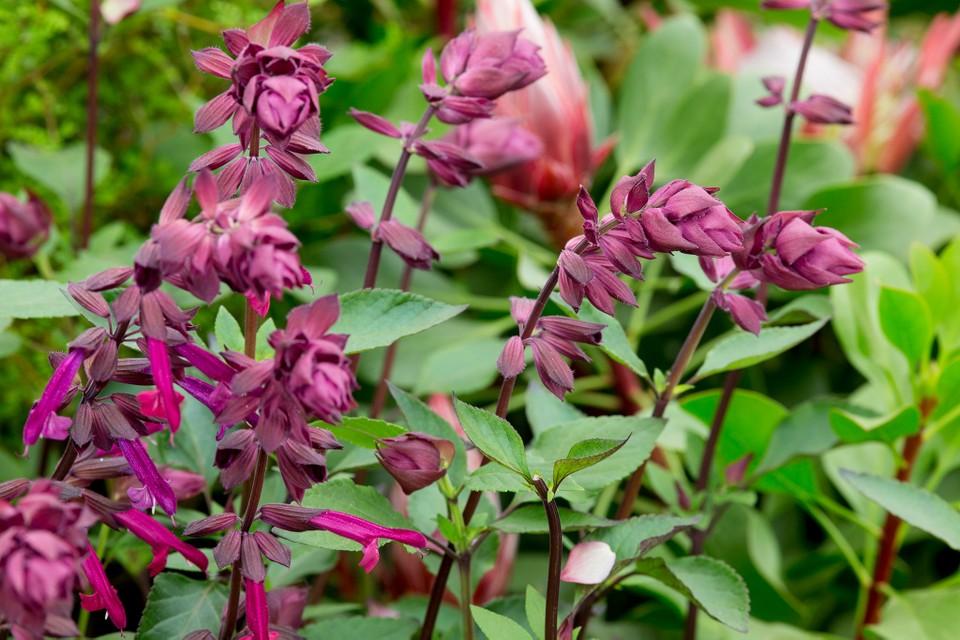
Salvia ‘Love And Wishes’
Anemanthele lessoniana

•Common name: Weeping anthericum
•Family: Asparagaceae
•Plant Type: Perennial, Deciduous

Flower colour: White
Foliage colour: Variegation
•Key features:
•Dramatic foliage
•Flowers

A close relative of the spider plant, Chlorophytum comosum, Chlorophytum saundersiae bears the same starry white flowers on long stems and long, grass-like foliage. However, this African native is tougher and can be grown outdoors all year.
‘Starlight’ is a variegated cultivar with cream leaves and deep green margins. In the summer months it produces sprays of white flowers that give plants a light, airy appearance.
For best results grow Chlorophytum saundersiae ‘Starlight’ in moist, well-drained soil in full sun or dappled shade. Congested clumps can be divided in spring to produce new plants.

How to grow Chlorophytum 'Starlight'
•Plant size
100cm height
45cm spread
•Aspect
South facing, west facing
•Sun exposure: Dappled shade, full sun
•Hardiness: Hardy
•Soil type: Acidic / chalky / alkaline / clay / heavy / moist / well drained / light / sandy
Is Chlorophytum 'Starlight' poisonous?
Chlorophytum 'Starlight' has no toxic effects reported.

Plants that go well with Chlorophytum 'Starlight'
Verbena bonariensis ‘Lollipop’

Salvia ‘Love And Wishes’

Anemanthele lessoniana

0
0
文章
莹723
2020年12月10日

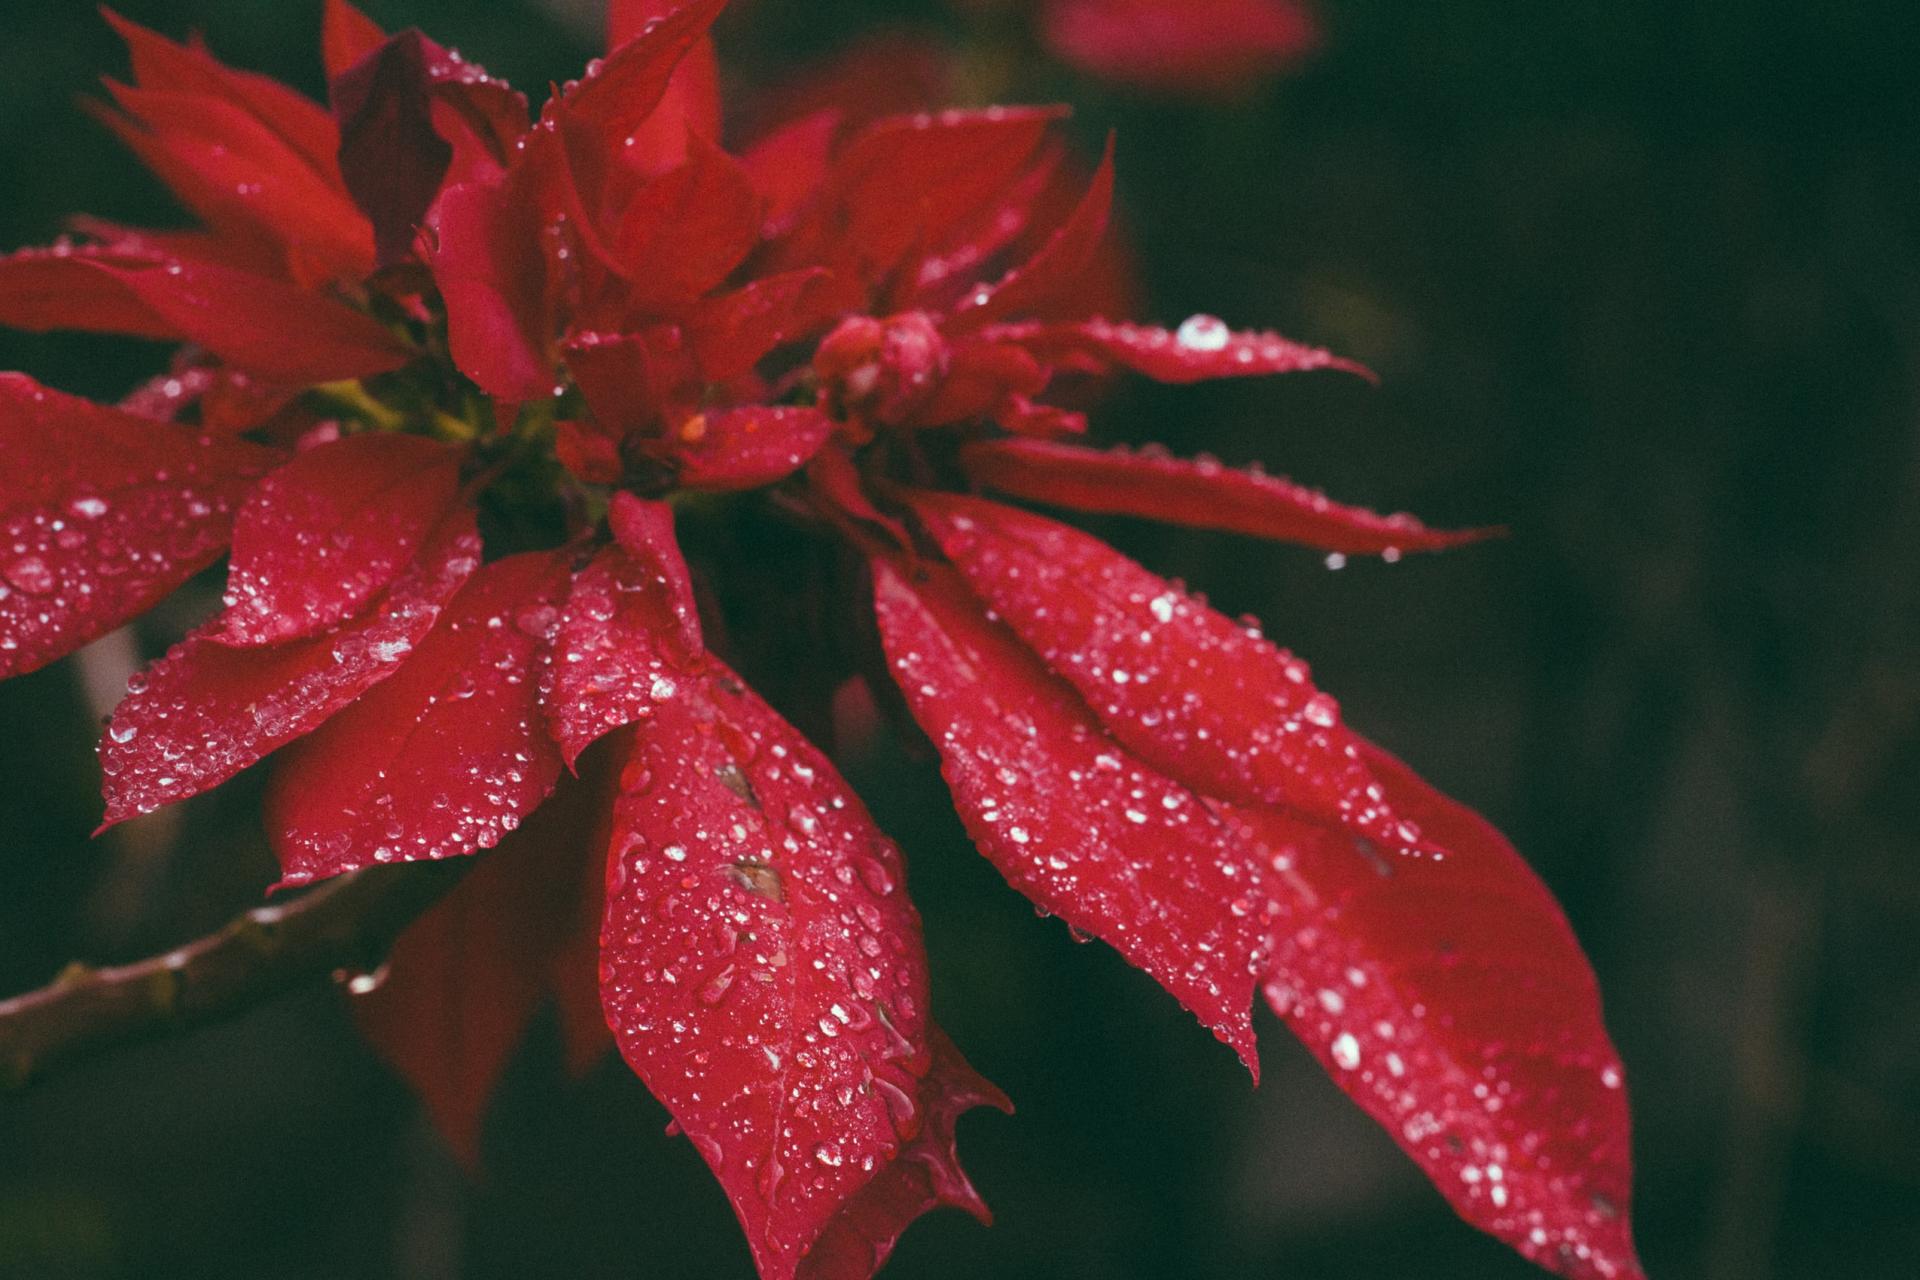
With these cheery, brilliantly colored plants in your home, it will feel like Christmas everyday! In the wild, they typically bloom in December, which made them a natural to become a Christmas plant. With the right care, you will enjoy your plant in bloom for six weeks to two months. They also come in a myriad of types including some speckles or in fun shades of pink, green, oranges, yellows, and plum!
Here’s what else you should know to enjoy your poinsettia all season long.

1.Pick the right plant.
Look for plants that have tightly-closed tiny yellow flowers in the middle. They should be greenish. As they open, they turn yellow. Avoid any that are shedding pollen, which means it’s past its prime.

2.Protect your plant on the trip home.
Cover your plant when bringing it home, especially if it’s below 40 degrees. Most nurseries will provide a plastic sleeve, but, if not, cover it with a bag. And don’t let it sit in the chilly car while you run errands!

3.Give your poinsettia a sunny window.
Poinsettias are tropical so they love light and will tolerate full sun. And they’ll put up with almost any kind of light. In a very dark corner, however, they do tend to stretch and become leggy.

4.Keep your poinsettia watered.
Poinsettias prefer consistent, light moisture. Add a cup or so of water every two to three days. Dump out any water that sits in the saucer or foil cover. The biggest mistake is to let them dry out for a day or so. The plant will begin dropping leaves to try to save its root system.
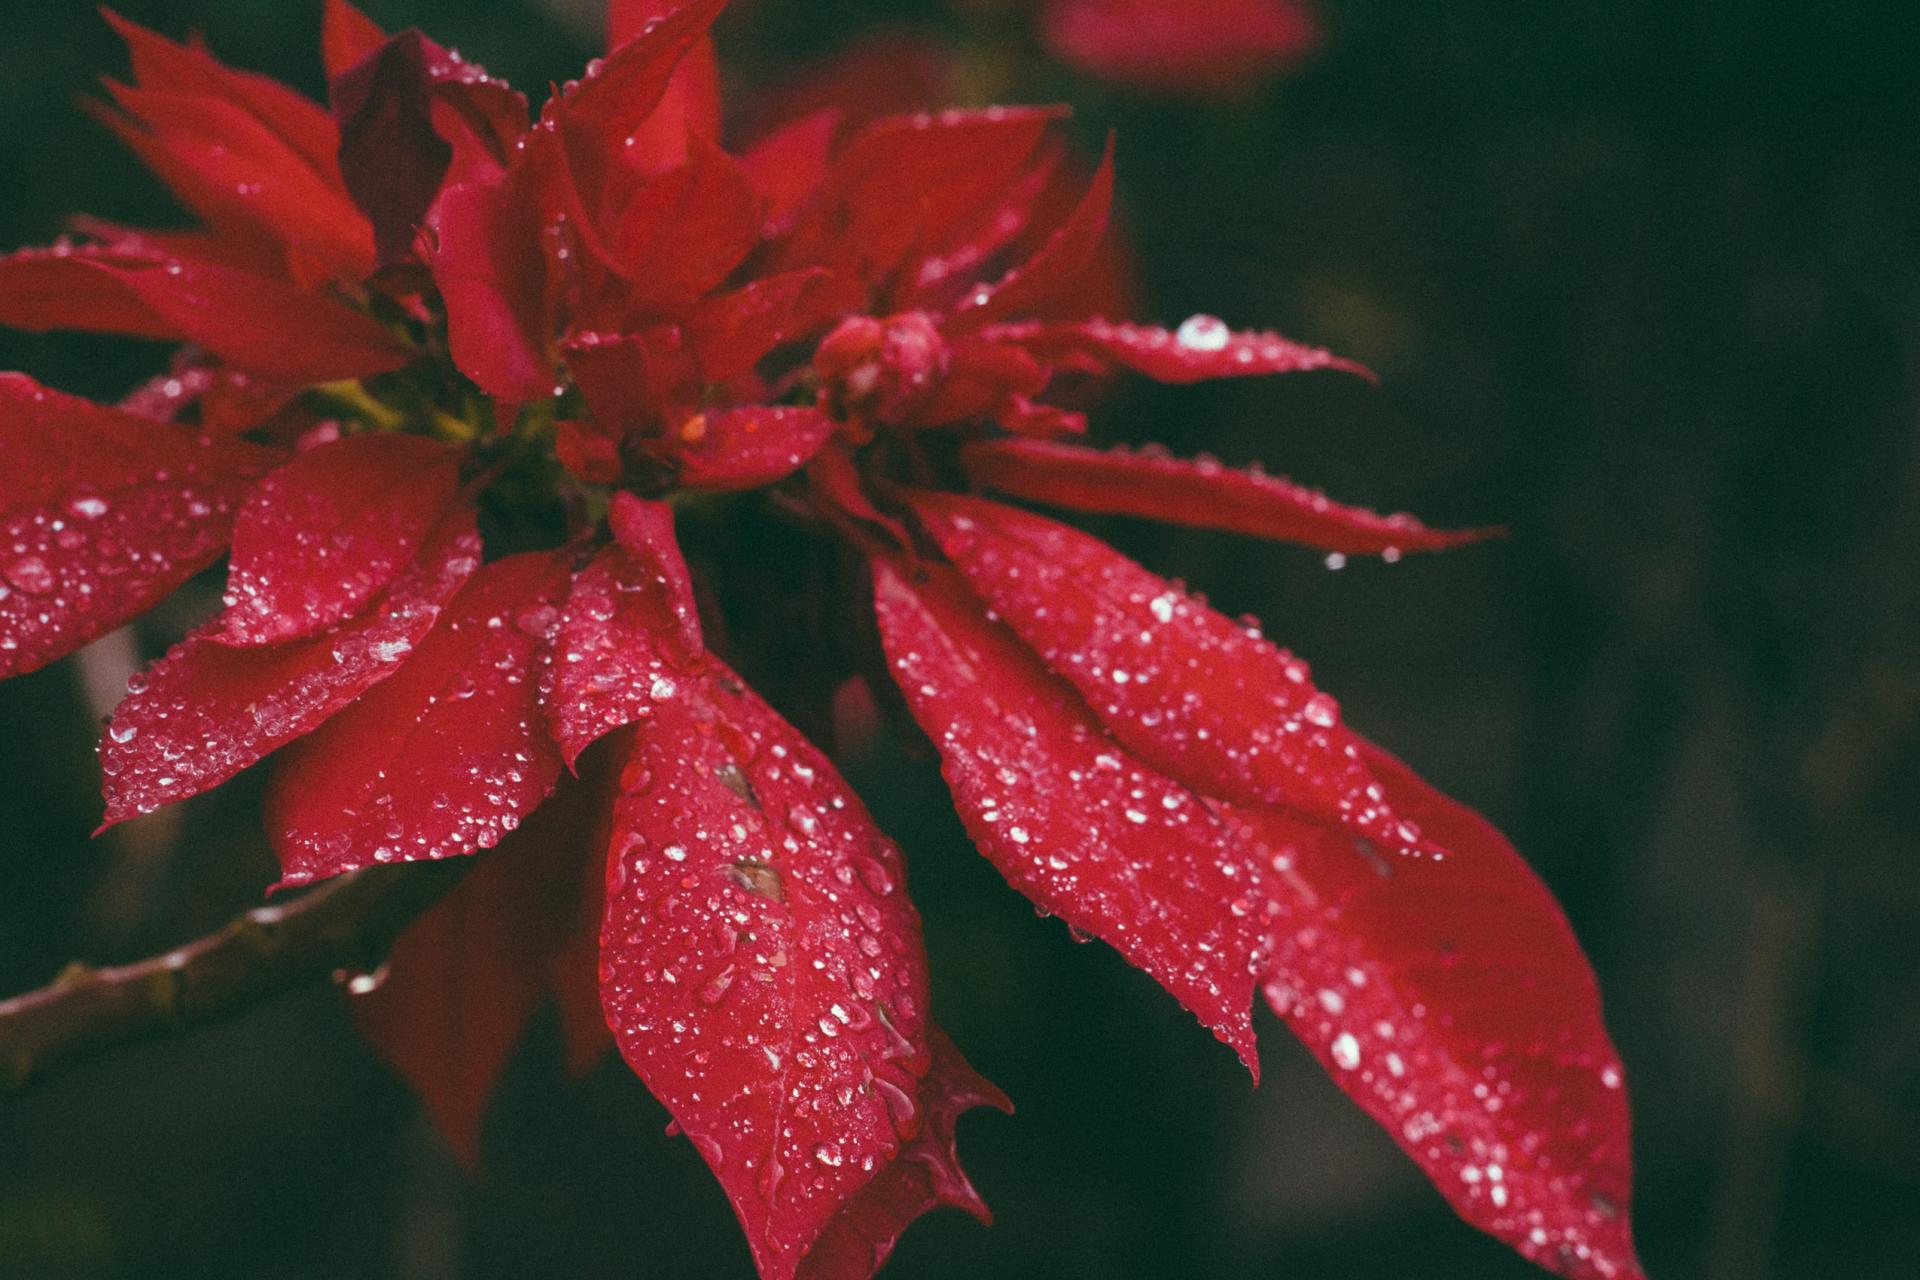
5.Are poinsettias toxic?
If a stem is broken, poinsettias do emit a white, milky sap which can be irritating to mouths or skin if not washed off. And if your pet eats pieces of poinsettia, he or she will likely have GI upset and nothing worse (but always call your vet if you're worried!). Like any plant, it's still best to keep them out of the reach of curious pets and kids if there’s a risk they’ll take a nibble.

6.Should you save your poinsettia for next year?
In warm climates, you can plant them outdoors. But for most of the country, poinsettias are notoriously finicky about reblooming. If you want to try, keep it in your sunniest window, maintain moisture, and place it outdoors after all risk of frost is past. Then in fall, bring it indoors and give it 12 hours of absolute darkness (not even exposed to a night light!) each night.

Here’s what else you should know to enjoy your poinsettia all season long.

1.Pick the right plant.
Look for plants that have tightly-closed tiny yellow flowers in the middle. They should be greenish. As they open, they turn yellow. Avoid any that are shedding pollen, which means it’s past its prime.

2.Protect your plant on the trip home.
Cover your plant when bringing it home, especially if it’s below 40 degrees. Most nurseries will provide a plastic sleeve, but, if not, cover it with a bag. And don’t let it sit in the chilly car while you run errands!

3.Give your poinsettia a sunny window.
Poinsettias are tropical so they love light and will tolerate full sun. And they’ll put up with almost any kind of light. In a very dark corner, however, they do tend to stretch and become leggy.

4.Keep your poinsettia watered.
Poinsettias prefer consistent, light moisture. Add a cup or so of water every two to three days. Dump out any water that sits in the saucer or foil cover. The biggest mistake is to let them dry out for a day or so. The plant will begin dropping leaves to try to save its root system.

5.Are poinsettias toxic?
If a stem is broken, poinsettias do emit a white, milky sap which can be irritating to mouths or skin if not washed off. And if your pet eats pieces of poinsettia, he or she will likely have GI upset and nothing worse (but always call your vet if you're worried!). Like any plant, it's still best to keep them out of the reach of curious pets and kids if there’s a risk they’ll take a nibble.

6.Should you save your poinsettia for next year?
In warm climates, you can plant them outdoors. But for most of the country, poinsettias are notoriously finicky about reblooming. If you want to try, keep it in your sunniest window, maintain moisture, and place it outdoors after all risk of frost is past. Then in fall, bring it indoors and give it 12 hours of absolute darkness (not even exposed to a night light!) each night.

0
0
文章
莹723
2020年11月13日

•Plant size
80cm height
80cm spread
•Average Yield
4.5kg-13.5kg per 3m row
•Spacing
1.6m apart
Rhubarb is easy to grow, producing masses of delicious stalks every year. Only the rhubarb stalks are edible. Never eat rhubarb leaves as these are extremely poisonous – compost these instead.
Plant rhubarb in fertile, free-draining soil with added organic matter, such as well-rotted horse manure. Allow plenty of space around the plant so it can spread out. Water during dry periods and mulch annually, in autumn. It’s a good idea to remove any flower stems when they appear to direct energy back into stem production. To harvest rhubarb, take the entire stem, gently twisting and then pulling it upwards from the base.
Find out more about growing rhubarb, below.
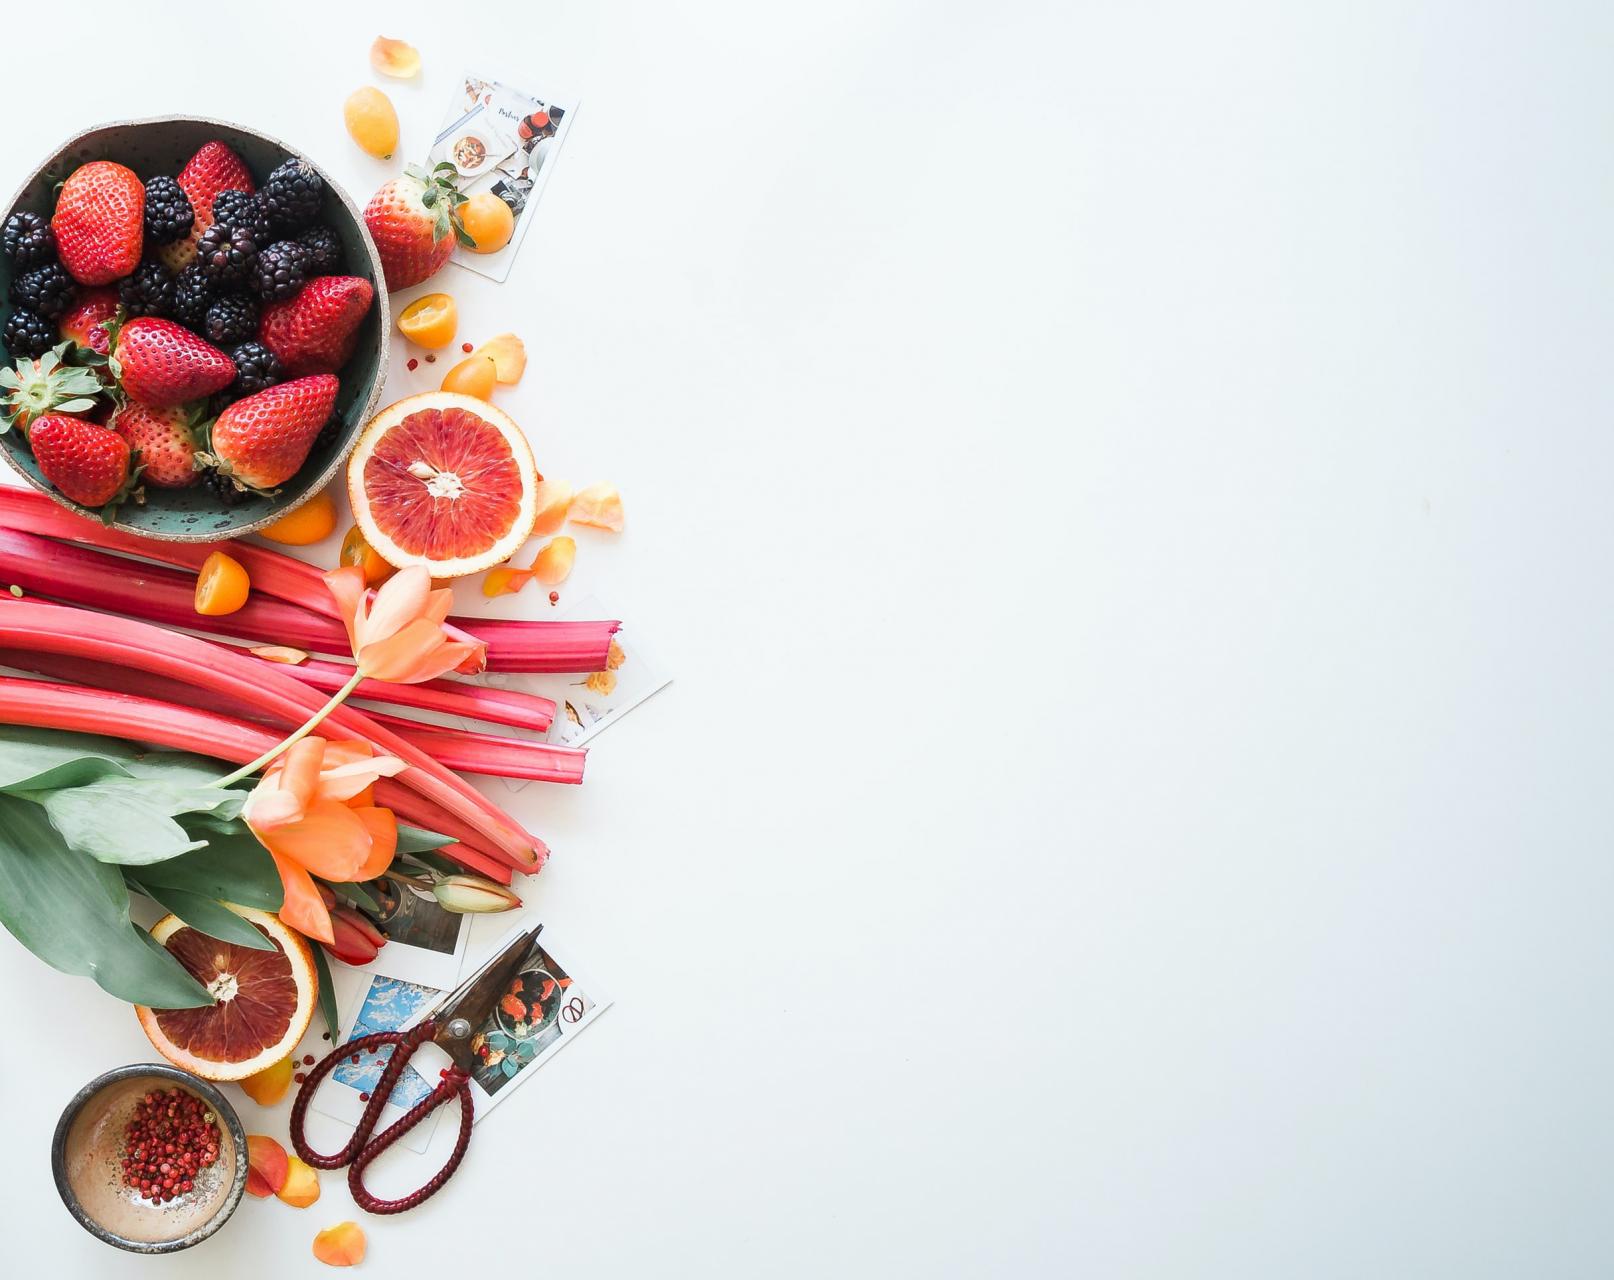
——How to grow rhubarb
The best way to plant rhubarb is to plant rhubarb crowns. Crowns are offsets cut from divisions of vigorous parent plants – usually they will be a piece of root with at least one dormant bud visible. Plant them in late autumn, 90cm or more apart, depending on the eventual spread of your chosen cultivar. Rhubarb will grow well in a sunny, open site, on a wide range of soils, as long as it has been well-prepared with plenty of manure or compost.
If you like the challenge of growing from seed, sow rhubarb outdoors in spring in a seedbed, thinning to 15cm apart and then once more to 30cm apart. The quality of seed-grown rhubarb can vary, so be ruthless in selecting the strongest plants to grow on. Plant out your chosen plants in a permanent site in autumn or spring.

——Caring for rhubarb
Rhubarb doesn’t need much attention and once established rhubarb plants will be productive for around 10 years. Maintaining soil fertility is the key to keeping plants healthy. Mulch around the base of plants with home-made compost, well-rotted manure and leaf mould, to suppress weeds and retain soil moisture. Giving plants a liquid feed in spring will also aid strong growth.
To get the sweetest and earliest crop of rhubarb you need to force rhubarb plants to produce stems before they would normally be ready. This simply means covering the crowns in early winter, to block out the light. You can use a bin or bucket, or a traditional terracotta rhubarb forcer – any cover that’s at least 45cm high. Your rhubarb plants will have developed tender stems after around five weeks.
If you have a greenhouse or garage, you can lift rhubarb plants to force indoors, for an even earlier crop. Dig up crowns in November and leave them on the soil surface to chill for two weeks. This will break dormancy. Then pot up each crown in compost, before moving into a cool indoor spot, and then cover.
It’s best to wait until your plants are well-established before forcing rhubarb, as it takes quite a lot of energy from the plant. Forced rhubarb plants will not usually produce much of a crop later on, but can be divided and replanted in summer.

——Harvesting rhubarb
Harvest rhubarb stems when they’re green or red. For strong and healthy growth, don’t harvest rhubarb in the first year, and take only a few stalks in the second. If you have established plants, three or more years old, rhubarb is ready to harvest from spring onwards, as soon as the stalks are long enough – between 30-60cm, depending on the variety. There’s no need to use a knife, simply pull and twist the stems off the plant, as this stimulates fresh new growth.
Forced rhubarb is usually ready in late winter to early spring. The stems will be shorter, but sweeter.

——Storing rhubar
Rhubarb is at its most delicious when cooked after being freshly picked. However, it can be frozen, raw and cut into chunks, or after cooking.
Traditionally rhubarb is stewed or baked and served with custard or in a pie or crumble.

——Growing rhubarb: problem solving
Rhubarb plants can be prone to honey fungus, crown rot and viruses. Any of these diseases will weaken the plant and it is best to dig up affected plants and start again on a new site. Crown rot is the most common. It’s a fungal infection at the base of the stalks, and causes the crowns to turn brown and soft. Unfortunately there’s no remedy.
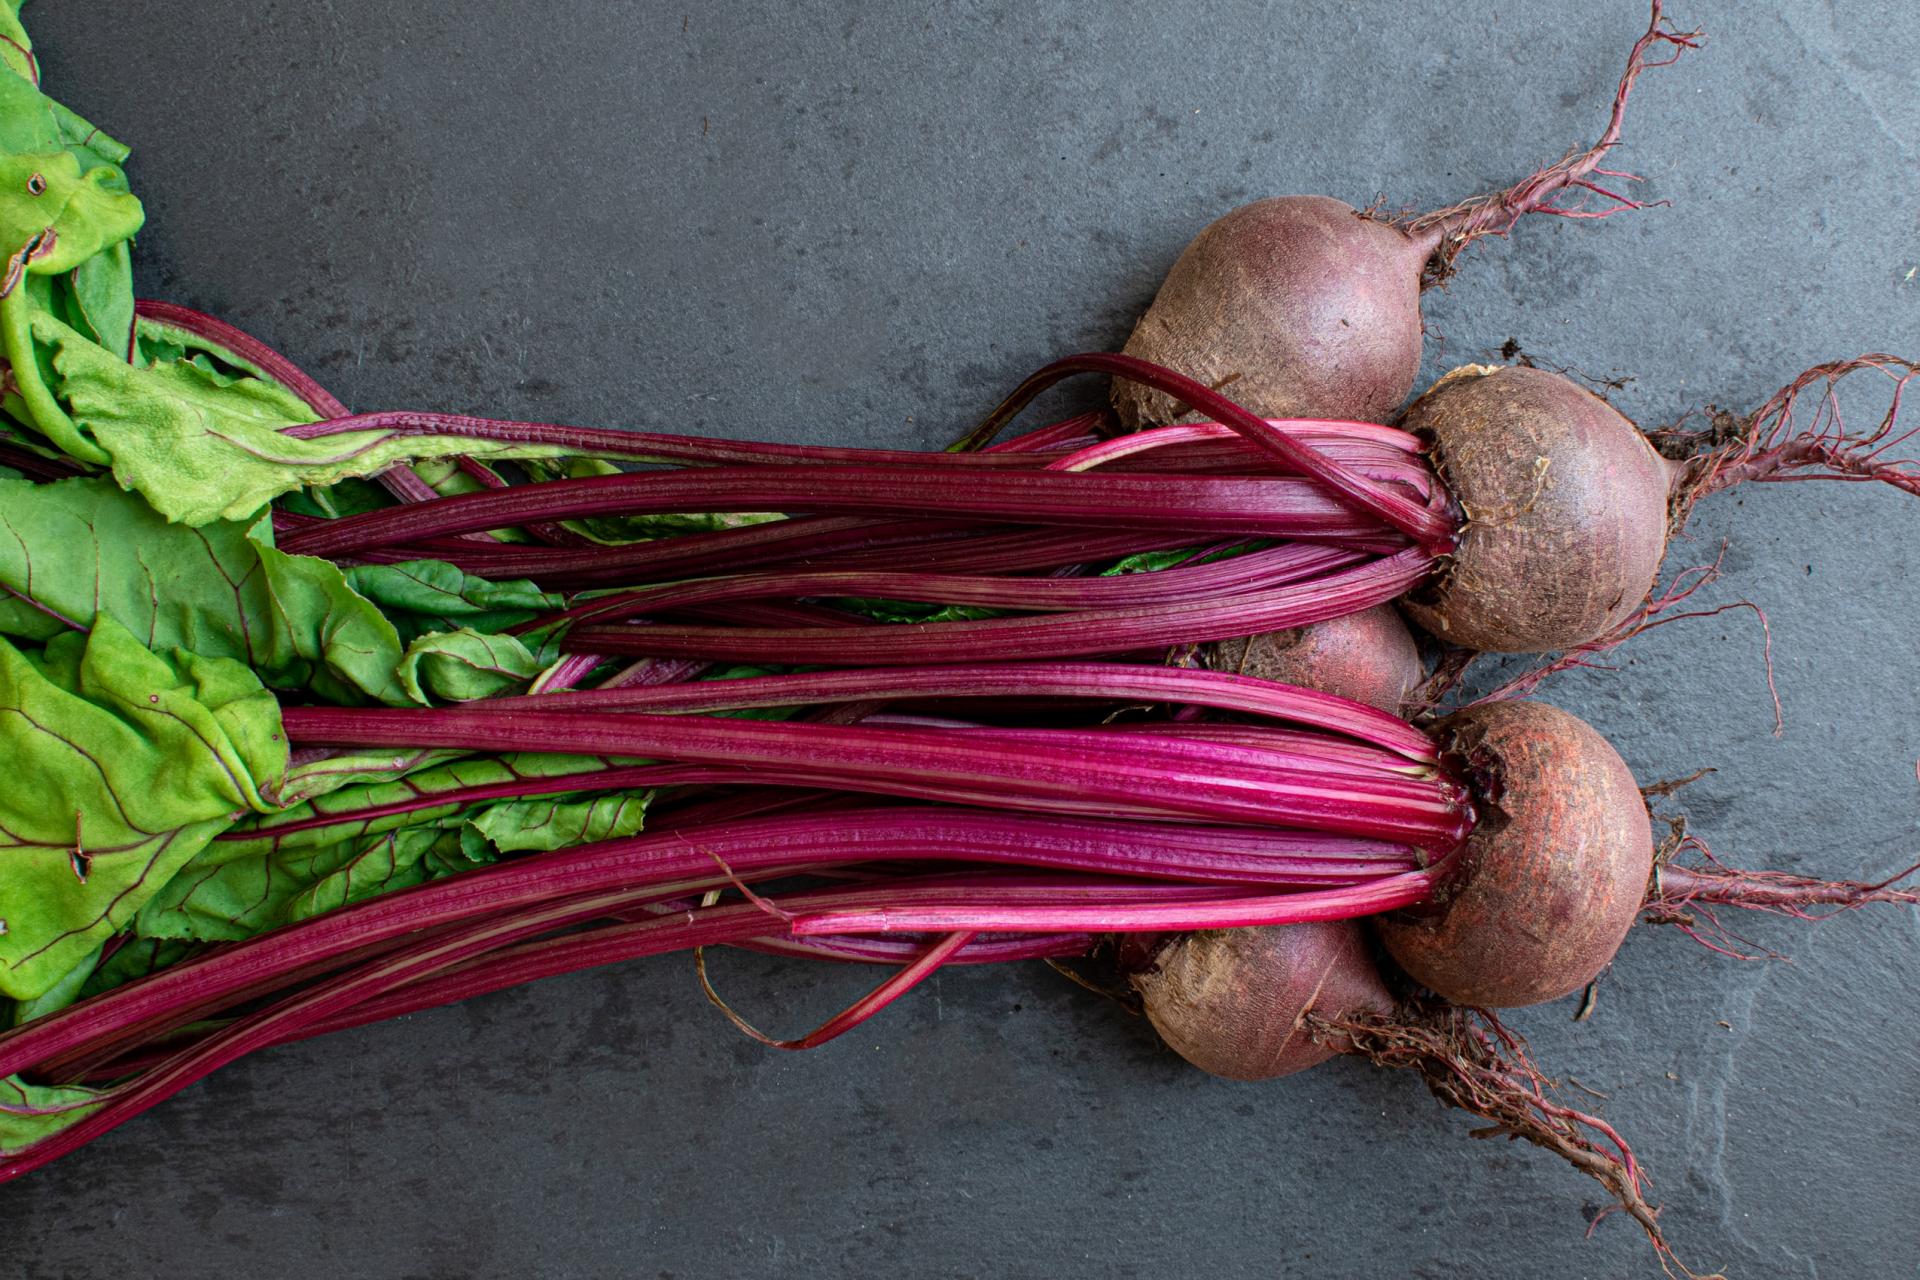
——Rhubarb varieties to try
•Rheum x hybridum ‘Timperley Early’ – ideal for forcing, this will produce tender pink stems in February. But even unforced, it is one of the earliest varieties, ready to harvest from March
•Rheum x hybridum ‘Stockbridge Arrow’ – long, thick stems with a good colour and sweet flavour. Leaves are arrow-shaped and very ornamental, which makes it a great choice for mixed borders and smaller gardens. H: 60cm x S:1.2m
•Rheum x hybridum ‘Cawood Delight’ – a relatively new variety, producing dark pinky-red stems with a good shine and flavour. Although valued for its high quality stems, it produces smaller yields and is not suitable for forcing. H:1.4m x S:1.4m
•Rheum x hybridum ‘Victoria’ – an old and reliable variety, reputedly named after Queen Victoria. It produces high yields of long stems with a sweet flavour and good texture and can be harvested as baby stems, forced or simply left to mature. H:1.4m x S:1.4m
•Rheum x hybridum ‘Fulton’s Strawberry Surprise’ – a newer introduction with vivid red stems on strong, vigorous plants. H:1.4m x S:1.4m
•Rheum x hybridum ‘Livingstone’ – a new variety that crops in autumn and spring
80cm height
80cm spread
•Average Yield
4.5kg-13.5kg per 3m row
•Spacing
1.6m apart
Rhubarb is easy to grow, producing masses of delicious stalks every year. Only the rhubarb stalks are edible. Never eat rhubarb leaves as these are extremely poisonous – compost these instead.
Plant rhubarb in fertile, free-draining soil with added organic matter, such as well-rotted horse manure. Allow plenty of space around the plant so it can spread out. Water during dry periods and mulch annually, in autumn. It’s a good idea to remove any flower stems when they appear to direct energy back into stem production. To harvest rhubarb, take the entire stem, gently twisting and then pulling it upwards from the base.
Find out more about growing rhubarb, below.

——How to grow rhubarb
The best way to plant rhubarb is to plant rhubarb crowns. Crowns are offsets cut from divisions of vigorous parent plants – usually they will be a piece of root with at least one dormant bud visible. Plant them in late autumn, 90cm or more apart, depending on the eventual spread of your chosen cultivar. Rhubarb will grow well in a sunny, open site, on a wide range of soils, as long as it has been well-prepared with plenty of manure or compost.
If you like the challenge of growing from seed, sow rhubarb outdoors in spring in a seedbed, thinning to 15cm apart and then once more to 30cm apart. The quality of seed-grown rhubarb can vary, so be ruthless in selecting the strongest plants to grow on. Plant out your chosen plants in a permanent site in autumn or spring.

——Caring for rhubarb
Rhubarb doesn’t need much attention and once established rhubarb plants will be productive for around 10 years. Maintaining soil fertility is the key to keeping plants healthy. Mulch around the base of plants with home-made compost, well-rotted manure and leaf mould, to suppress weeds and retain soil moisture. Giving plants a liquid feed in spring will also aid strong growth.
To get the sweetest and earliest crop of rhubarb you need to force rhubarb plants to produce stems before they would normally be ready. This simply means covering the crowns in early winter, to block out the light. You can use a bin or bucket, or a traditional terracotta rhubarb forcer – any cover that’s at least 45cm high. Your rhubarb plants will have developed tender stems after around five weeks.
If you have a greenhouse or garage, you can lift rhubarb plants to force indoors, for an even earlier crop. Dig up crowns in November and leave them on the soil surface to chill for two weeks. This will break dormancy. Then pot up each crown in compost, before moving into a cool indoor spot, and then cover.
It’s best to wait until your plants are well-established before forcing rhubarb, as it takes quite a lot of energy from the plant. Forced rhubarb plants will not usually produce much of a crop later on, but can be divided and replanted in summer.

——Harvesting rhubarb
Harvest rhubarb stems when they’re green or red. For strong and healthy growth, don’t harvest rhubarb in the first year, and take only a few stalks in the second. If you have established plants, three or more years old, rhubarb is ready to harvest from spring onwards, as soon as the stalks are long enough – between 30-60cm, depending on the variety. There’s no need to use a knife, simply pull and twist the stems off the plant, as this stimulates fresh new growth.
Forced rhubarb is usually ready in late winter to early spring. The stems will be shorter, but sweeter.

——Storing rhubar
Rhubarb is at its most delicious when cooked after being freshly picked. However, it can be frozen, raw and cut into chunks, or after cooking.
Traditionally rhubarb is stewed or baked and served with custard or in a pie or crumble.

——Growing rhubarb: problem solving
Rhubarb plants can be prone to honey fungus, crown rot and viruses. Any of these diseases will weaken the plant and it is best to dig up affected plants and start again on a new site. Crown rot is the most common. It’s a fungal infection at the base of the stalks, and causes the crowns to turn brown and soft. Unfortunately there’s no remedy.

——Rhubarb varieties to try
•Rheum x hybridum ‘Timperley Early’ – ideal for forcing, this will produce tender pink stems in February. But even unforced, it is one of the earliest varieties, ready to harvest from March
•Rheum x hybridum ‘Stockbridge Arrow’ – long, thick stems with a good colour and sweet flavour. Leaves are arrow-shaped and very ornamental, which makes it a great choice for mixed borders and smaller gardens. H: 60cm x S:1.2m
•Rheum x hybridum ‘Cawood Delight’ – a relatively new variety, producing dark pinky-red stems with a good shine and flavour. Although valued for its high quality stems, it produces smaller yields and is not suitable for forcing. H:1.4m x S:1.4m
•Rheum x hybridum ‘Victoria’ – an old and reliable variety, reputedly named after Queen Victoria. It produces high yields of long stems with a sweet flavour and good texture and can be harvested as baby stems, forced or simply left to mature. H:1.4m x S:1.4m
•Rheum x hybridum ‘Fulton’s Strawberry Surprise’ – a newer introduction with vivid red stems on strong, vigorous plants. H:1.4m x S:1.4m
•Rheum x hybridum ‘Livingstone’ – a new variety that crops in autumn and spring
0
0
文章
莹723
2020年11月04日

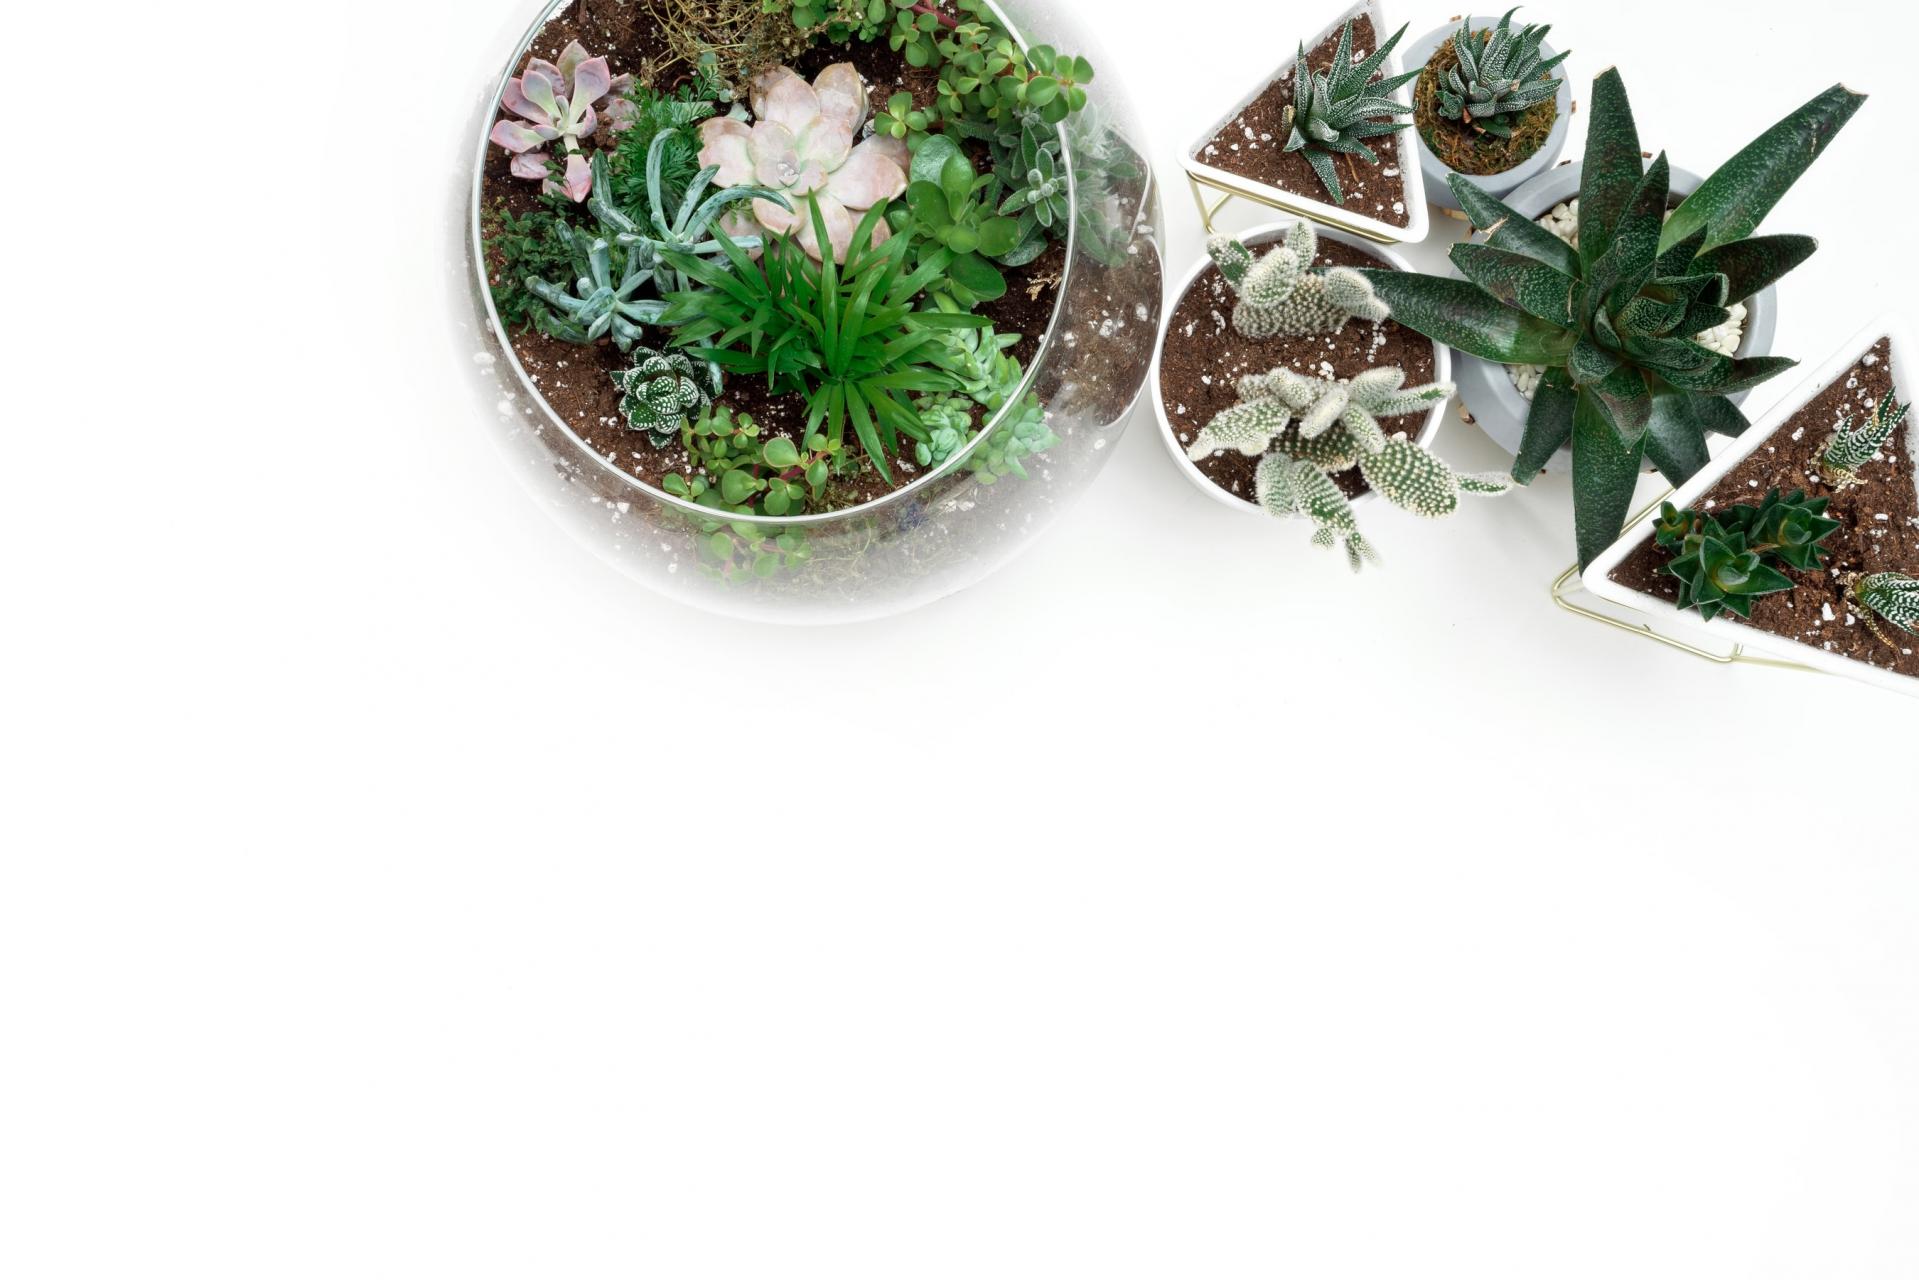
Bottle gardens, or terrariums, are enjoying a revival, and they’re easy to create.The key is to combine small plants that thrive in similar growing conditions – usually either damp shade or drought.
You can plant a bottle garden in virtually any glass vessel, though closed ones are best for moisture lovers and open ones best for plants used to drier conditions. Don’t worry if you can’t find what we used – look in charity shops, garden centres, your kitchen cupboard or on the internet for something that appeals.

You Will Need
•Vintage glass bottle
•Horticultural grit
•Peat free houseplant compost
•Moss, (from the lawn)
•Spathiphyllum 'Chopin'
•Fittonia verschaffeltii
•Syngonium 'White Butterfly'
•Chlorophytum comosum 'Ocean'
•Peperomia rotundifolia
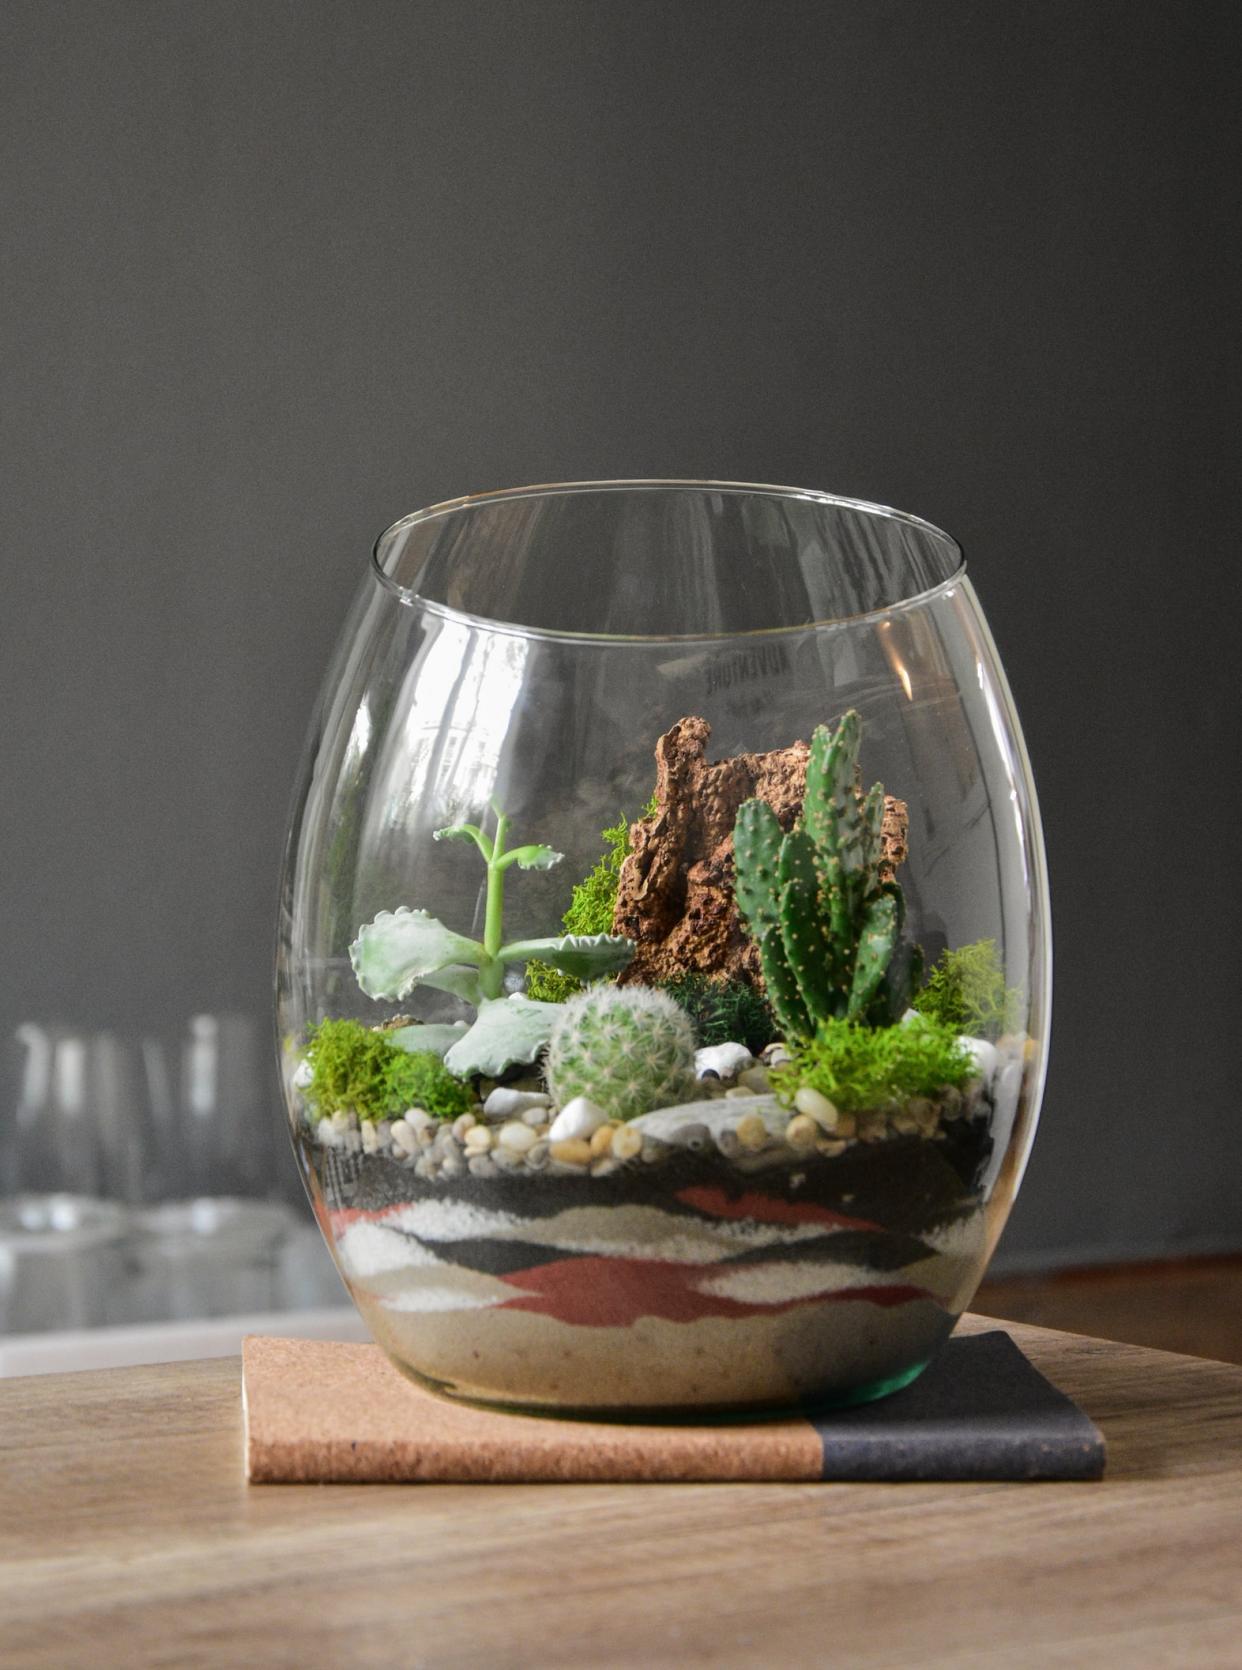
Total time:
20 minutes
Step 1
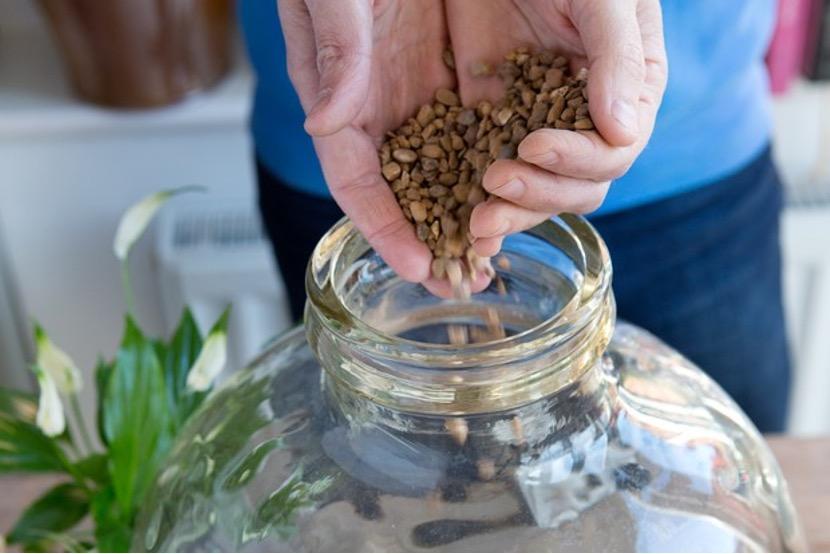
Put 5cm of horticultural grit in the bottom of the bottle for drainage. Add houseplant compost till the bottle is about a third full – breaking up any lumps with your hands. Choose lush foliage plants that thrive in low light and humidity.
Step 2
Position the plants one at a time, planting them as you would in a container – firm the compost around them. Fill gaps between plants with a layer of moss.

Step 3
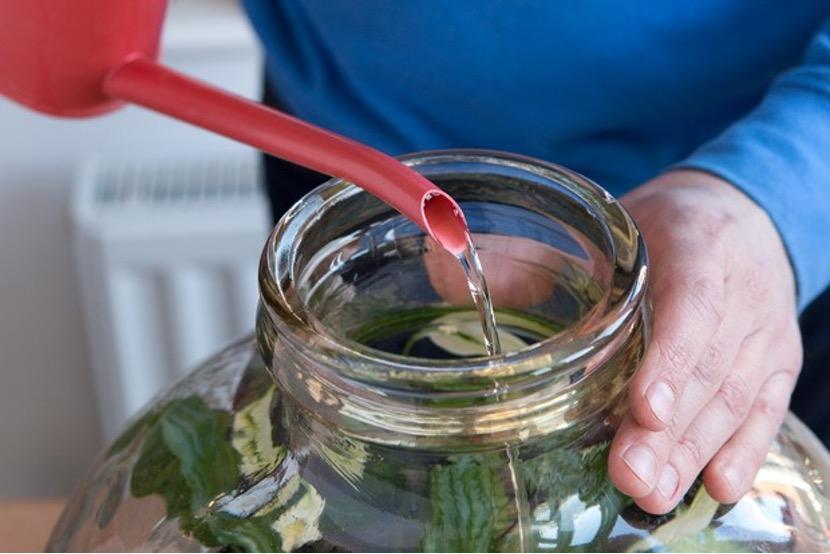
Water sparingly down the sides of the bottle as the curved sides will prevent a lot of evaporation. Ensure the compost doesn’t dry out or become saturated with water. Place in a bright spot out of direct sunlight.
Alternative plants for a bottle garden
• Maidenhair fern (Adiantum raddianum)
• Golden polypody (Phlebodium aureum)
• Hares foot fern (Humata tyermannii)
• Mind-your-own-business (Soleirolia soleirolii)
• Centella (Centella asiatica)
• Cacti and succulents
You can plant a bottle garden in virtually any glass vessel, though closed ones are best for moisture lovers and open ones best for plants used to drier conditions. Don’t worry if you can’t find what we used – look in charity shops, garden centres, your kitchen cupboard or on the internet for something that appeals.

You Will Need
•Vintage glass bottle
•Horticultural grit
•Peat free houseplant compost
•Moss, (from the lawn)
•Spathiphyllum 'Chopin'
•Fittonia verschaffeltii
•Syngonium 'White Butterfly'
•Chlorophytum comosum 'Ocean'
•Peperomia rotundifolia

Total time:
20 minutes
Step 1
Put 5cm of horticultural grit in the bottom of the bottle for drainage. Add houseplant compost till the bottle is about a third full – breaking up any lumps with your hands. Choose lush foliage plants that thrive in low light and humidity.

Step 2
Position the plants one at a time, planting them as you would in a container – firm the compost around them. Fill gaps between plants with a layer of moss.

Step 3
Water sparingly down the sides of the bottle as the curved sides will prevent a lot of evaporation. Ensure the compost doesn’t dry out or become saturated with water. Place in a bright spot out of direct sunlight.

Alternative plants for a bottle garden
• Maidenhair fern (Adiantum raddianum)
• Golden polypody (Phlebodium aureum)
• Hares foot fern (Humata tyermannii)
• Mind-your-own-business (Soleirolia soleirolii)
• Centella (Centella asiatica)
• Cacti and succulents

0
0
文章
莹723
2020年09月22日

Strawberries are easy and fun to grow. Plant strawberry runners or young plants in spring or autumn, and you’ll be rewarded with masses of delicious strawberries from late spring. Grow strawberries in a well prepared strawberry bed or planter, in full sun. And add some garden compost.

—How to grow strawberries from runners
Plant bare-rooted strawberry runners in spring or late summer/autumn.
Prepare the soil by digging in well-rotted garden compost and apply a dressing of sulphate of potash fertiliser.Bury their roots, about 30-45cm apart, then firm the soil around. Water well for the first few weeks.
Strawberries are also suited to growing in pots and hanging baskets. Use deep pots at least 15cm wide and plant one strawberry per pot. They thrive in moist but well-drained conditions, so use a soil-based compost with a deep layer of gravel or broken crocks in the base.

—Look after strawberry plants
To encourage flowering and fruit set, feed your strawberry plants with tomato fertiliser (follow the pack instructions) and water regularly. Avoid wetting any of ripening fruits to prevent grey mould.
Tuck some straw around the plants just before the fruit starts to develop. This helps to keep the berries clean and deters slugs and snails.
For next year’s crop, after fruiting finishes, cut off foliage about 5cm above ground level and give plants a good feed with a general-purpose fertiliser.
After three to four years, fruit size and quality declines so you need to replace your plants with new stock.

—Harvest
Once strawberries have been picked, the ripening process stops. So, wait until the berries are fully red before harvesting. Simply pinch through the stalks,avoid bruising the fruit.

—Store
As strawberries are perishable, it’s best to eat them straight from the plant, avoid the sun. You can store unwashed fruit for a few days in the fridge. If you’re lucky enough to have a glut, whizz them into delicious smoothies or use to make jam,or freeze them.

-Solve problem
Protect strawberry plants against slugs and snail attacks.
Grey mould can be a problem in wet weather, causing the berries to rot. Water plants in the morning rather than in the evening to give them time to dry out.

——Great types to grow
Summer-cropping strawberries:
• ‘Elsanta’ – heavy cropper with large, tasty, red fruits
• ‘Elvira’ – heavy crops and good disease resistance
• ‘Hapil’ – large glossy fruits, even in dry conditions
• ‘Honeoye’ – prolific fruiter with large, firm berries
• ‘Pegasus’ – sweet, juicy, top-quality berries
• ‘Symphony’ – good yields and fairly pest resistant
Everbearing strawberries:
• ‘Aromel’ – abundant dark red, juicy berries
• ‘Christine’ – sweet fruits that ripen in late May
• ‘Mara des Bois’ – large, deliciously aromatic fruits


—How to grow strawberries from runners
Plant bare-rooted strawberry runners in spring or late summer/autumn.
Prepare the soil by digging in well-rotted garden compost and apply a dressing of sulphate of potash fertiliser.Bury their roots, about 30-45cm apart, then firm the soil around. Water well for the first few weeks.
Strawberries are also suited to growing in pots and hanging baskets. Use deep pots at least 15cm wide and plant one strawberry per pot. They thrive in moist but well-drained conditions, so use a soil-based compost with a deep layer of gravel or broken crocks in the base.

—Look after strawberry plants
To encourage flowering and fruit set, feed your strawberry plants with tomato fertiliser (follow the pack instructions) and water regularly. Avoid wetting any of ripening fruits to prevent grey mould.
Tuck some straw around the plants just before the fruit starts to develop. This helps to keep the berries clean and deters slugs and snails.
For next year’s crop, after fruiting finishes, cut off foliage about 5cm above ground level and give plants a good feed with a general-purpose fertiliser.
After three to four years, fruit size and quality declines so you need to replace your plants with new stock.

—Harvest
Once strawberries have been picked, the ripening process stops. So, wait until the berries are fully red before harvesting. Simply pinch through the stalks,avoid bruising the fruit.

—Store
As strawberries are perishable, it’s best to eat them straight from the plant, avoid the sun. You can store unwashed fruit for a few days in the fridge. If you’re lucky enough to have a glut, whizz them into delicious smoothies or use to make jam,or freeze them.

-Solve problem
Protect strawberry plants against slugs and snail attacks.
Grey mould can be a problem in wet weather, causing the berries to rot. Water plants in the morning rather than in the evening to give them time to dry out.

——Great types to grow
Summer-cropping strawberries:
• ‘Elsanta’ – heavy cropper with large, tasty, red fruits
• ‘Elvira’ – heavy crops and good disease resistance
• ‘Hapil’ – large glossy fruits, even in dry conditions
• ‘Honeoye’ – prolific fruiter with large, firm berries
• ‘Pegasus’ – sweet, juicy, top-quality berries
• ‘Symphony’ – good yields and fairly pest resistant
Everbearing strawberries:
• ‘Aromel’ – abundant dark red, juicy berries
• ‘Christine’ – sweet fruits that ripen in late May
• ‘Mara des Bois’ – large, deliciously aromatic fruits

0
0
文章
ritau
2020年09月01日

Yam is the common name for some plant species in the genus Dioscorea (family Dioscoreaceae) that form edible tubers. Yams are perennial herbaceous vines cultivated for the consumption of their starchy tubers in many temperate and tropical regions, especially in Africa, South America and the Caribbean, Asia, and Oceania. The tubers themselves, also called "yams", come in a variety of forms owing to numerous cultivars and related species.
The name "yam" appears to derive from Portuguese inhame or Canarian (Spain) ñame, which derived from West African languages during trade. Although in both languages, this name is commonly referred to the plant taro (Colocasia esculenta) from the genus Colocasia, as opposed to Dioscorea.
The main derivations borrow from verbs meaning "to eat". True yams have various common names across multiple world regions.
A monocot related to lilies and grasses, yams are vigorous herbaceous vines providing an edible tuber. They are native to Africa, Asia, and the Americas. Some yams are also invasive plants, often considered a "noxious weed", outside cultivated areas. Some 870 species of yams are known, and 95% of these crops are grown in Africa.
Yam plants can grow up to 15 m (49 ft) in length and 7.6 to 15.2 cm (3 to 6 in) high. The tuber may grow into the soil up to 1.5 m (4 ft 11 in) deep. The plant disperses by seed.
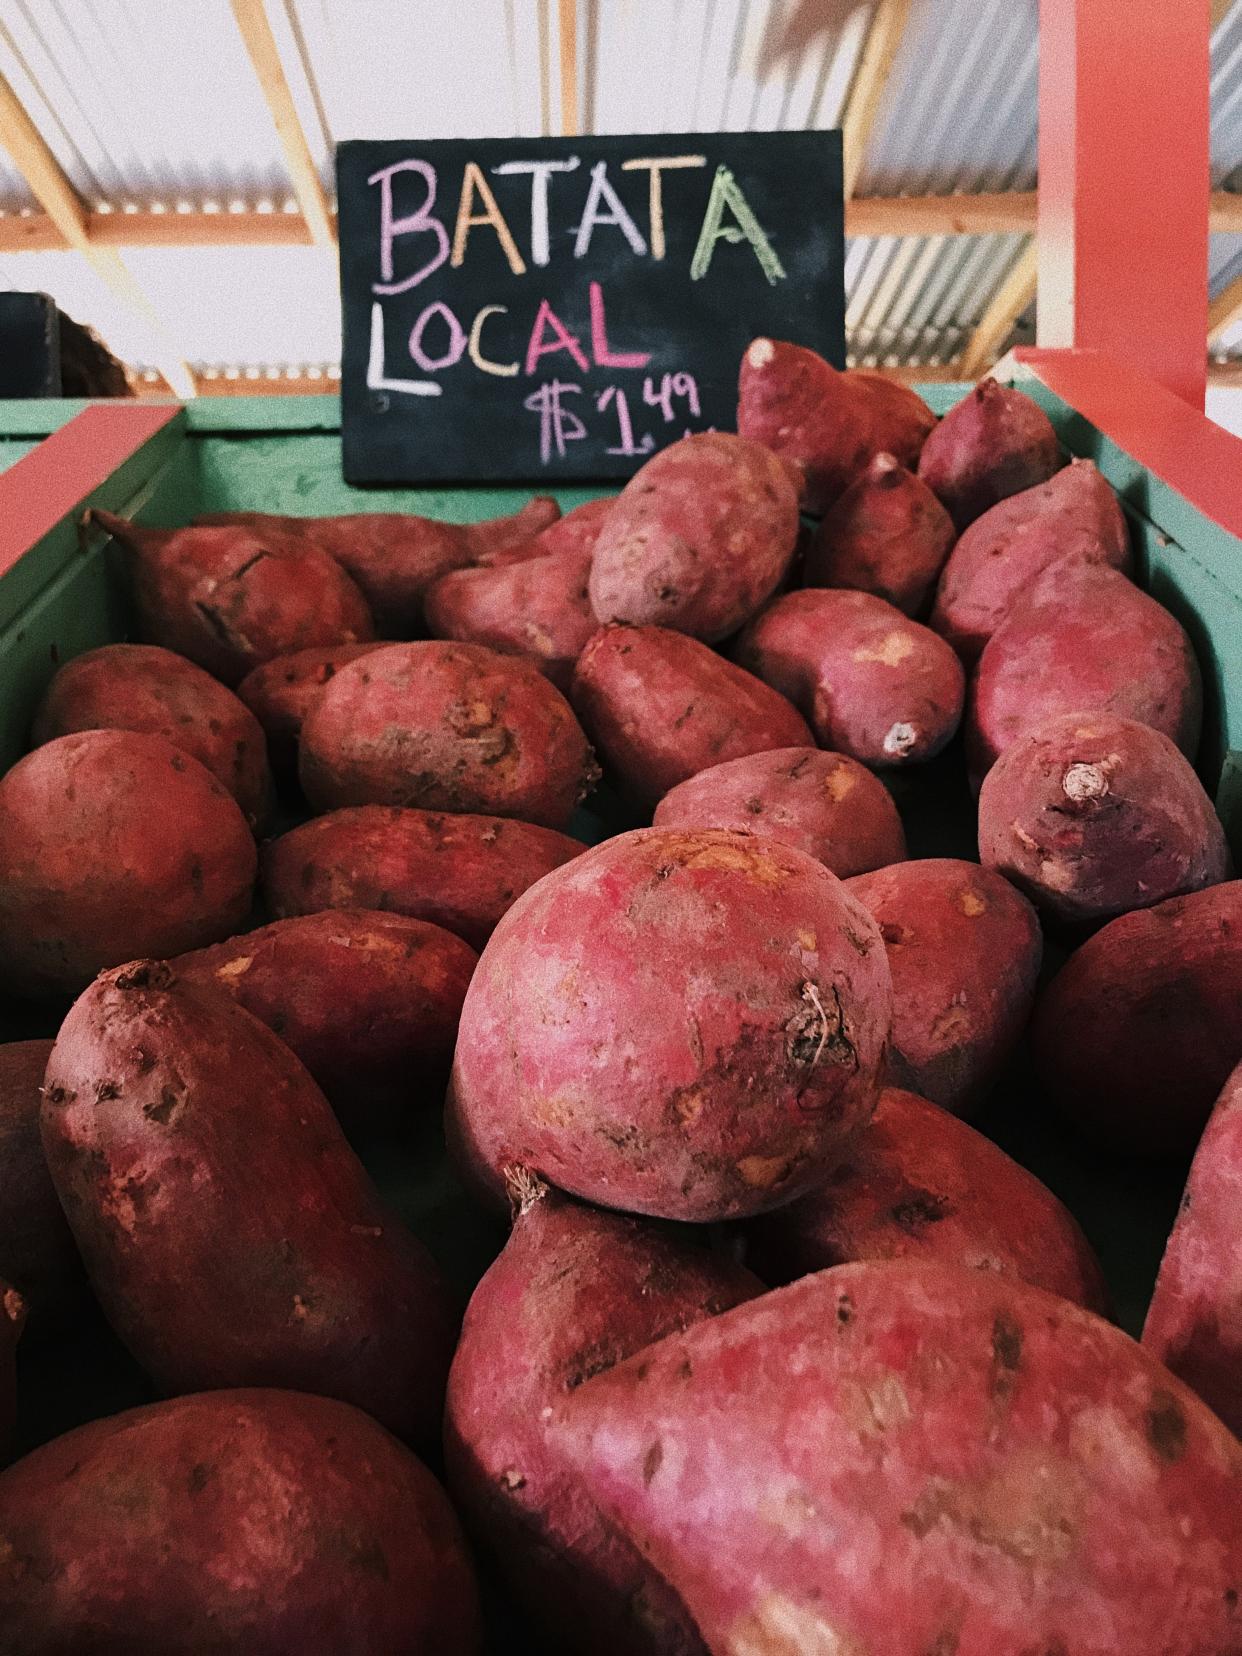
The edible tuber has a rough skin that is difficult to peel but readily softened by heating. The skins vary in color from dark brown to light pink. The majority of the vegetable is composed of a much softer substance known as the "meat". This substance ranges in color from white or yellow to purple or pink in mature yams.
A monocot related to lilies and grasses, yams are vigorous herbaceous vines providing an edible tuber.They are native to Africa, Asia, and the Americas. Some yams are also invasive plants, often considered a "noxious weed", outside cultivated areas. Some 870 species of yams are known, and 95% of these crops are grown in Africa.
Yam plants can grow up to 15 m (49 ft) in length and 7.6 to 15.2 cm (3 to 6 in) high.The tuber may grow into the soil up to 1.5 m (4 ft 11 in) deep.The plant disperses by seed.
The edible tuber has a rough skin that is difficult to peel but readily softened by heating. The skins vary in color from dark brown to light pink. The majority of the vegetable is composed of a much softer substance known as the "meat". This substance ranges in color from white or yellow to purple or pink in mature yams.
Raw yam has only moderate nutrient density, with appreciable content (10% or more of the Daily Value, DV) limited to potassium, vitamin B6, manganese, thiamin, dietary fiber, and vitamin C (table). But raw yam has the highest potassium levels amongst the 10 major staple foods of the world (see nutritional chart). Yam supplies 118 calories per 100 grams. Yam generally has a lower glycemic index, about 54% of glucose per 150 gram serving, compared to potato products.
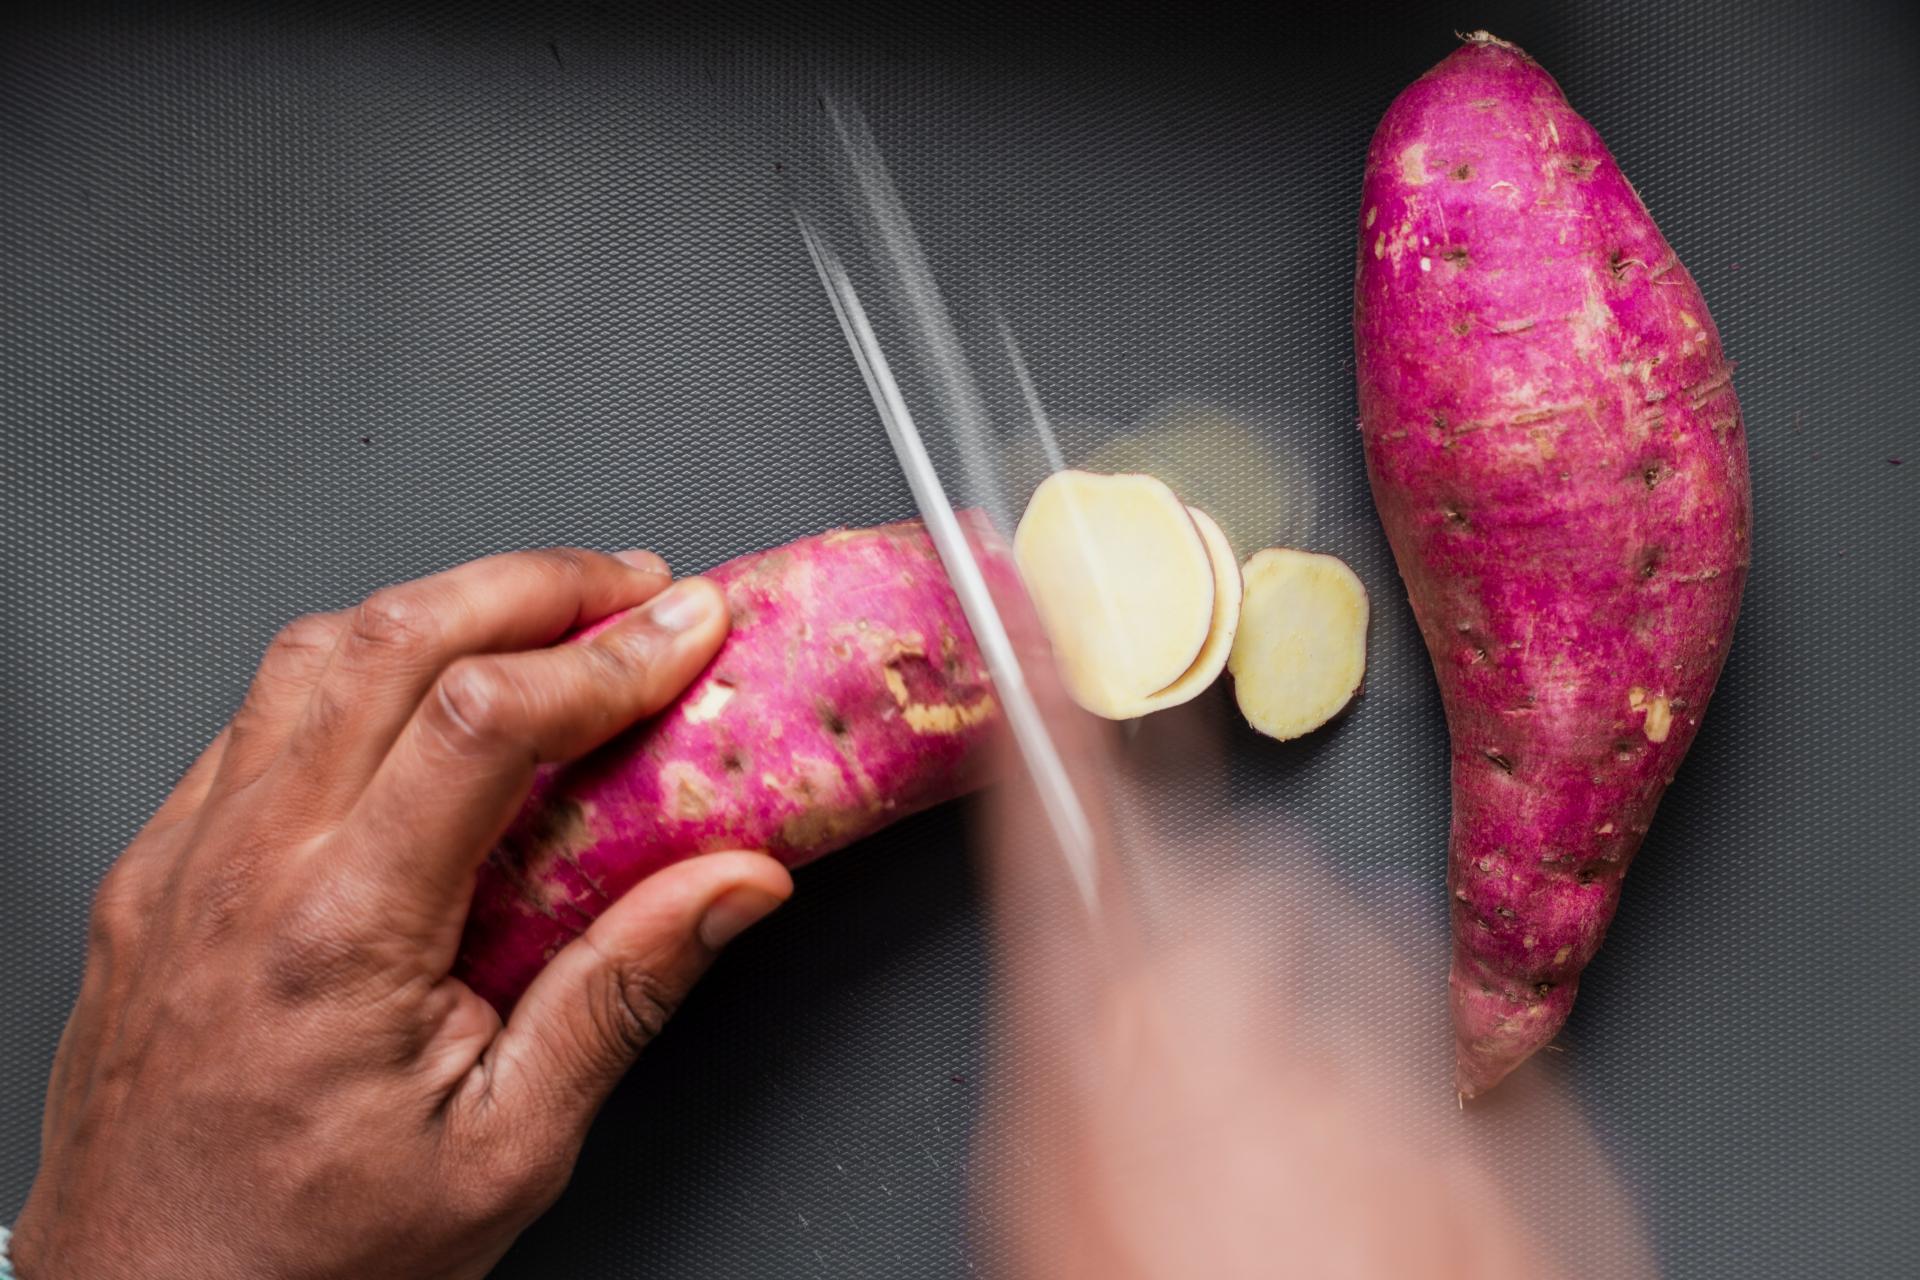
The protein content and quality of roots and tubers is lower than other food staples, with the content of yam and potato being around 2% on a fresh-weight basis. Yams, with cassava, provide a much greater proportion of the protein intake in Africa, ranging from 5.9% in East and South Africa to about 15.9% in humid West Africa.
As a relatively low-protein food, yam is not a good source of essential amino acids. Experts emphasize the need to supplement a yam-dominant diet with more protein-rich foods to support healthy growth in children.
Yam is an important dietary element for Nigerian and West African people. It contributes more than 200 calories per person per day for more than 150 million people in West Africa, and is an important source of income. Yam is an attractive crop in poor farms with limited resources. It is rich in starch, and can be prepared in many ways. It is available all year round, unlike other, unreliable, seasonal crops. These characteristics make yam a preferred food and a culturally important food security crop in some sub-Saharan African countries.
The name "yam" appears to derive from Portuguese inhame or Canarian (Spain) ñame, which derived from West African languages during trade. Although in both languages, this name is commonly referred to the plant taro (Colocasia esculenta) from the genus Colocasia, as opposed to Dioscorea.
The main derivations borrow from verbs meaning "to eat". True yams have various common names across multiple world regions.
A monocot related to lilies and grasses, yams are vigorous herbaceous vines providing an edible tuber. They are native to Africa, Asia, and the Americas. Some yams are also invasive plants, often considered a "noxious weed", outside cultivated areas. Some 870 species of yams are known, and 95% of these crops are grown in Africa.
Yam plants can grow up to 15 m (49 ft) in length and 7.6 to 15.2 cm (3 to 6 in) high. The tuber may grow into the soil up to 1.5 m (4 ft 11 in) deep. The plant disperses by seed.

The edible tuber has a rough skin that is difficult to peel but readily softened by heating. The skins vary in color from dark brown to light pink. The majority of the vegetable is composed of a much softer substance known as the "meat". This substance ranges in color from white or yellow to purple or pink in mature yams.
A monocot related to lilies and grasses, yams are vigorous herbaceous vines providing an edible tuber.They are native to Africa, Asia, and the Americas. Some yams are also invasive plants, often considered a "noxious weed", outside cultivated areas. Some 870 species of yams are known, and 95% of these crops are grown in Africa.
Yam plants can grow up to 15 m (49 ft) in length and 7.6 to 15.2 cm (3 to 6 in) high.The tuber may grow into the soil up to 1.5 m (4 ft 11 in) deep.The plant disperses by seed.
The edible tuber has a rough skin that is difficult to peel but readily softened by heating. The skins vary in color from dark brown to light pink. The majority of the vegetable is composed of a much softer substance known as the "meat". This substance ranges in color from white or yellow to purple or pink in mature yams.
Raw yam has only moderate nutrient density, with appreciable content (10% or more of the Daily Value, DV) limited to potassium, vitamin B6, manganese, thiamin, dietary fiber, and vitamin C (table). But raw yam has the highest potassium levels amongst the 10 major staple foods of the world (see nutritional chart). Yam supplies 118 calories per 100 grams. Yam generally has a lower glycemic index, about 54% of glucose per 150 gram serving, compared to potato products.

The protein content and quality of roots and tubers is lower than other food staples, with the content of yam and potato being around 2% on a fresh-weight basis. Yams, with cassava, provide a much greater proportion of the protein intake in Africa, ranging from 5.9% in East and South Africa to about 15.9% in humid West Africa.
As a relatively low-protein food, yam is not a good source of essential amino acids. Experts emphasize the need to supplement a yam-dominant diet with more protein-rich foods to support healthy growth in children.
Yam is an important dietary element for Nigerian and West African people. It contributes more than 200 calories per person per day for more than 150 million people in West Africa, and is an important source of income. Yam is an attractive crop in poor farms with limited resources. It is rich in starch, and can be prepared in many ways. It is available all year round, unlike other, unreliable, seasonal crops. These characteristics make yam a preferred food and a culturally important food security crop in some sub-Saharan African countries.
0
0
文章
ritau
2020年08月30日

1. Plant produce that you and your family enjoy. To save the most money gardening, select vegetables that you like to eat and would normally buy at the grocery store. Do not plant vegetables that you would not purchase on a regular basis.
2. Choose vegetables that can be preserved, stored or frozen. By selecting vegetables that can be easily canned or frozen, you stretch your garden investment and may consume produce from your garden throughout the year.
- Plant cool-weather vegetables like onions, potatoes, carrots, sweet potatoes and winter squash that can be easily stored.
- Plant tomatoes, cucumbers, beans, corn, peas and beets that can be canned or frozen.
3. Grow vegetables that provide a high return on investment. Plant vegetables that are expensive to buy in the store, or that you consume in large quantities. Consider options like tomatoes, green beans, onions, peppers, squash, potatoes, peas, lettuce, beets, spinach, carrots, broccoli, cucumbers and Swiss chard.
4. Plant herbs for a high return on investment. In most areas, you can purchase a packet of seeds or a small herb pot for about $1.50, which will produce leaves for an entire growing season. In contrast, fresh herbs at the grocery story typically cost about $3 for a single-use packet.
5. Select herbs that you use for culinary or household purposes.
- Plant herbs that you frequently use in the kitchen, such as basil, rosemary, oregano or parsley. You can use the fresh herbs throughout the growing season, and you can dry the herbs for future use.
- Plant herbs that you use for household purposes. Herbs like lavender or lemon verbena can be used as air fresheners, added to soaps or infused in oils.
6. Plant seeds for a higher return on investment. A packet of seeds is less expensive than a plant, and the yield is much greater. A seed packet can produce dozens of plants for less than a single established plant or a cell pack of seedlings.
7. Exchange seeds with friends. Because seed packets typically provide more seeds than you need for a single growing season, exchange seeds with gardening friends. By exchanging seeds, you get more varieties of produce and lower your seed costs.
8. Plant produce in stages. Rather than planting an entire crop of seeds at once, plant them in stages over the course of several weeks. This enables you to harvest in stages, and therefore consume the produce over time, rather than all at once. Succession planting allows a constant harvest in your garden, reducing the chance of produce waste.
9. Collect rainwater for irrigation. Purchase a commercially manufactured rain barrel, or modify an existing barrel to collect rain. The collected water can be used to water your garden, reducing your household water bill.

10. Create compost from yard, garden and kitchen waste. Starting a compost pile is an easy way to make free fertilizer. The compost will improve the soil and eliminate the need to purchase commercial fertilizers for your garden.
- Collect grass clippings, fallen leaves and kitchen waste like egg shells, coffee grounds, banana peels and leftover vegetables in a corner of your yard.
- Rotate the compost using a pitchfork periodically.
- Apply the compost to your garden as a free fertilizer.
2. Choose vegetables that can be preserved, stored or frozen. By selecting vegetables that can be easily canned or frozen, you stretch your garden investment and may consume produce from your garden throughout the year.
- Plant cool-weather vegetables like onions, potatoes, carrots, sweet potatoes and winter squash that can be easily stored.
- Plant tomatoes, cucumbers, beans, corn, peas and beets that can be canned or frozen.
3. Grow vegetables that provide a high return on investment. Plant vegetables that are expensive to buy in the store, or that you consume in large quantities. Consider options like tomatoes, green beans, onions, peppers, squash, potatoes, peas, lettuce, beets, spinach, carrots, broccoli, cucumbers and Swiss chard.
4. Plant herbs for a high return on investment. In most areas, you can purchase a packet of seeds or a small herb pot for about $1.50, which will produce leaves for an entire growing season. In contrast, fresh herbs at the grocery story typically cost about $3 for a single-use packet.

5. Select herbs that you use for culinary or household purposes.
- Plant herbs that you frequently use in the kitchen, such as basil, rosemary, oregano or parsley. You can use the fresh herbs throughout the growing season, and you can dry the herbs for future use.
- Plant herbs that you use for household purposes. Herbs like lavender or lemon verbena can be used as air fresheners, added to soaps or infused in oils.
6. Plant seeds for a higher return on investment. A packet of seeds is less expensive than a plant, and the yield is much greater. A seed packet can produce dozens of plants for less than a single established plant or a cell pack of seedlings.
7. Exchange seeds with friends. Because seed packets typically provide more seeds than you need for a single growing season, exchange seeds with gardening friends. By exchanging seeds, you get more varieties of produce and lower your seed costs.
8. Plant produce in stages. Rather than planting an entire crop of seeds at once, plant them in stages over the course of several weeks. This enables you to harvest in stages, and therefore consume the produce over time, rather than all at once. Succession planting allows a constant harvest in your garden, reducing the chance of produce waste.
9. Collect rainwater for irrigation. Purchase a commercially manufactured rain barrel, or modify an existing barrel to collect rain. The collected water can be used to water your garden, reducing your household water bill.

10. Create compost from yard, garden and kitchen waste. Starting a compost pile is an easy way to make free fertilizer. The compost will improve the soil and eliminate the need to purchase commercial fertilizers for your garden.
- Collect grass clippings, fallen leaves and kitchen waste like egg shells, coffee grounds, banana peels and leftover vegetables in a corner of your yard.
- Rotate the compost using a pitchfork periodically.
- Apply the compost to your garden as a free fertilizer.
0
0
文章
ritau
2020年08月25日

1. Spray the plants with a strong stream of water. Use a hose to spray the plants affected by aphids with cold water—this should knock the aphids right off. A hard rainstorm can also wash the aphids off of the plant.
- While you want there to be water pressure, make sure you don’t damage the plants by setting the pressure too high.
- Repeat as needed to remove aphids when they crop up.
2. Remove the aphids using your hands. If you see a cluster of aphids on a plant, you can swipe them off using your fingers. When you brush the aphids off, drop them into a soapy bucket of water to kill them.
- If the aphids have infested an entire leaf or stem, snip off the section using scissors or pruning shears and drop it in the soapy bucket of water.
- Wear gloves to protect your hands.
3. Dust the plants with flour to help deal with an aphid invasion. Take a cupful of flour from your pantry or kitchen and bring it out to your garden. Use your hands to evenly sprinkle the plants affected by aphids, giving them a fine layer of flour.
- You don't have to coat the entire plant in flour, just the spot where the aphids are gathering.
- Ingesting the flour will constipate the aphids.
4. Wipe the plants down with a mild soap and water. Mix together a few drops of a mild dish detergent with a cup of water. Dip a rag or paper towel into the mixture, using it to gently wipe down the stem and leaves of the plant affected by the aphids.
- Make sure you wipe both sides of the leaves.
5. Mix together essential oils to use on the plants. Combine peppermint, rosemary, thyme, and clove oils in a bowl or cup, using 4-5 drops of each one. Pour the mixture into a spray bottle with water in it before shaking it all together. Spray the water and oil mixture onto plants that aphids have been eating.
- Designate 1 spray bottle as your essential oil sprayer. The oils tend to perfume and permeate the plastic, making them less than ideal for other uses going forward.
6. Create a homemade garlic spray to use on the aphids. Do this by chopping up 3-4 cloves of garlic before mixing them with 2 teaspoons (9.9 ml) of mineral oil. Leave the mixture alone for 24 hours before straining out the garlic chunks. Pour the mixture into a spray bottle with 16 ounces (450 g) of regular water and 1 teaspoon (4.9 ml) of dish soap before spraying the garlic concoction onto the plants.
- You can also make a tomato leaf spray to use on the plants.
7. Spray neem oil onto plants affected by aphids. By mixing neem oil with a little bit of water, you’ll create an organic concoction that helps repel aphids. Pour the water and neem oil into a spray bottle and apply it to sections of the plant that are affected by aphids.
- Find neem oil at a home and garden store, some big box stores, or online. Note that neem oil will perfume any sprayers for a long time. It’s best to designate a particular bottle for this use.
- You can also use horticultural oil to spray onto the plants.

8. Enlist an insecticidal soap to help control aphids. These soaps can be bought from a gardening supplier or online. Read the instructions to find out how much of the soap to mix with water before spraying it on the plants to help fend off aphids.
- These soaps are designed to kill the aphids.
- Insecticidal soaps are less toxic to mammals (humans and pets) than chemical insecticides. That said, follow the manufacturer’s directions about any safety precautions or gear you should wear when using them.
- While you want there to be water pressure, make sure you don’t damage the plants by setting the pressure too high.
- Repeat as needed to remove aphids when they crop up.
2. Remove the aphids using your hands. If you see a cluster of aphids on a plant, you can swipe them off using your fingers. When you brush the aphids off, drop them into a soapy bucket of water to kill them.
- If the aphids have infested an entire leaf or stem, snip off the section using scissors or pruning shears and drop it in the soapy bucket of water.
- Wear gloves to protect your hands.
3. Dust the plants with flour to help deal with an aphid invasion. Take a cupful of flour from your pantry or kitchen and bring it out to your garden. Use your hands to evenly sprinkle the plants affected by aphids, giving them a fine layer of flour.
- You don't have to coat the entire plant in flour, just the spot where the aphids are gathering.
- Ingesting the flour will constipate the aphids.
4. Wipe the plants down with a mild soap and water. Mix together a few drops of a mild dish detergent with a cup of water. Dip a rag or paper towel into the mixture, using it to gently wipe down the stem and leaves of the plant affected by the aphids.
- Make sure you wipe both sides of the leaves.

5. Mix together essential oils to use on the plants. Combine peppermint, rosemary, thyme, and clove oils in a bowl or cup, using 4-5 drops of each one. Pour the mixture into a spray bottle with water in it before shaking it all together. Spray the water and oil mixture onto plants that aphids have been eating.
- Designate 1 spray bottle as your essential oil sprayer. The oils tend to perfume and permeate the plastic, making them less than ideal for other uses going forward.
6. Create a homemade garlic spray to use on the aphids. Do this by chopping up 3-4 cloves of garlic before mixing them with 2 teaspoons (9.9 ml) of mineral oil. Leave the mixture alone for 24 hours before straining out the garlic chunks. Pour the mixture into a spray bottle with 16 ounces (450 g) of regular water and 1 teaspoon (4.9 ml) of dish soap before spraying the garlic concoction onto the plants.
- You can also make a tomato leaf spray to use on the plants.
7. Spray neem oil onto plants affected by aphids. By mixing neem oil with a little bit of water, you’ll create an organic concoction that helps repel aphids. Pour the water and neem oil into a spray bottle and apply it to sections of the plant that are affected by aphids.
- Find neem oil at a home and garden store, some big box stores, or online. Note that neem oil will perfume any sprayers for a long time. It’s best to designate a particular bottle for this use.
- You can also use horticultural oil to spray onto the plants.

8. Enlist an insecticidal soap to help control aphids. These soaps can be bought from a gardening supplier or online. Read the instructions to find out how much of the soap to mix with water before spraying it on the plants to help fend off aphids.
- These soaps are designed to kill the aphids.
- Insecticidal soaps are less toxic to mammals (humans and pets) than chemical insecticides. That said, follow the manufacturer’s directions about any safety precautions or gear you should wear when using them.
0
0
文章
ritau
2020年08月19日

A mango is a juicy stone fruit (drupe) produced from numerous species of tropical trees belonging to the flowering plant genus Mangifera, cultivated mostly for their edible fruit. Most of these species are found in nature as wild mangoes. The genus belongs to the cashew family Anacardiaceae. Mangoes are native to South Asia, from where the "common mango" or "Indian mango", Mangifera indica, has been distributed worldwide to become one of the most widely cultivated fruits in the tropics. Other Mangifera species (e.g. horse mango, Mangifera foetida) are grown on a more localized basis.
Worldwide, there are several hundred cultivars of mango. Depending on the cultivar, mango fruit varies in size, shape, sweetness, skin color, and flesh color which may be pale yellow, gold, or orange. Mango is the national fruit of India, Haiti, and the Philippines, and the national tree of Bangladesh. It is the summer national fruit of Pakistan.
The English word "mango" (plural "mangoes" or "mangos") originated from the Tamil word manga (or mangga) during the spice trade period with South India in the 15th and 16th centuries.
Mango trees grow to 35–40 m (115–131 ft) tall, with a crown radius of 10 m (33 ft). The trees are long-lived, as some specimens still fruit after 300 years. In deep soil, the taproot descends to a depth of 6 m (20 ft), with profuse, wide-spreading feeder roots and anchor roots penetrating deeply into the soil. The leaves are evergreen, alternate, simple, 15–35 cm (5.9–13.8 in) long, and 6–16 cm (2.4–6.3 in) broad; when the leaves are young they are orange-pink, rapidly changing to a dark, glossy red, then dark green as they mature. The flowers are produced in terminal panicles 10–40 cm (3.9–15.7 in) long; each flower is small and white with five petals 5–10 mm (0.20–0.39 in) long, with a mild, sweet fragrance. Over 500 varieties of mangoes are known, many of which ripen in summer, while some give a double crop. The fruit takes four to five months from flowering to ripen.
The ripe fruit varies according to cultivar in size, shape, color, sweetness, and eating quality. Depending on cultivar, fruits are variously yellow, orange, red, or green. The fruit has a single flat, oblong pit that can be fibrous or hairy on the surface, and does not separate easily from the pulp. The fruits may be somewhat round, oval, or kidney-shaped, ranging from 5–25 centimetres (2–10 in) in length and from 140 grams (5 oz) to 2 kilograms (5 lb) in weight per individual fruit. The skin is leather-like, waxy, smooth, and fragrant, with color ranging from green to yellow, yellow-orange, yellow-red, or blushed with various shades of red, purple, pink or yellow when fully ripe.
Ripe intact mangoes give off a distinctive resinous, sweet smell. Inside the pit 1–2 mm (0.039–0.079 in) thick is a thin lining covering a single seed, 4–7 cm (1.6–2.8 in) long. Mangoes have recalcitrant seeds which do not survive freezing and drying. Mango trees grow readily from seeds, with germination success highest when seeds are obtained from mature fruits.
Mangoes are generally sweet, although the taste and texture of the flesh varies across cultivars; some, such as Alphonso, have a soft, pulpy, juicy texture similar to an overripe plum, while others, such as Tommy Atkins, are firmer, like a cantaloupe or avocado, with a fibrous texture.
The skin of unripe, pickled, or cooked mango can be eaten, but it has the potential to cause contact dermatitis of the lips, gingiva, or tongue in susceptible people.

Mangoes are widely used in cuisine. Sour, unripe mangoes are used in chutneys, pickles, dhals and other side dishes in Bengali cuisine, or may be eaten raw with salt, chili, or soy sauce. A summer drink called aam panna comes from mangoes. Mango pulp made into jelly or cooked with red gram dhal and green chillies may be served with cooked rice. Mango lassi is popular throughout South Asia, prepared by mixing ripe mangoes or mango pulp with buttermilk and sugar. Ripe mangoes are also used to make curries. Aamras is a popular thick juice made of mangoes with sugar or milk, and is consumed with chapatis or pooris. The pulp from ripe mangoes is also used to make jam called mangada. Andhra aavakaaya is a pickle made from raw, unripe, pulpy, and sour mango, mixed with chili powder, fenugreek seeds, mustard powder, salt, and groundnut oil. Mango is also used in Andhra Pradesh to make dahl preparations. Gujaratis use mango to make chunda (a spicy, grated mango delicacy).
Mangoes are used to make murabba (fruit preserves), muramba (a sweet, grated mango delicacy), amchur (dried and powdered unripe mango), and pickles, including a spicy mustard-oil pickle and alcohol. Ripe mangoes are often cut into thin layers, desiccated, folded, and then cut. These bars are similar to dried guava fruit bars available in some countries. The fruit is also added to cereal products such as muesli and oat granola. Mangoes are often prepared charred in Hawaii.
Unripe mango may be eaten with bagoong (especially in the Philippines), fish sauce, vinegar, soy sauce, or with dash of salt (plain or spicy). Dried strips of sweet, ripe mango (sometimes combined with seedless tamarind to form mangorind) are also popular. Mangoes may be used to make juices, mango nectar, and as a flavoring and major ingredient in ice cream and sorbetes.
Mango is used to make juices, smoothies, ice cream, fruit bars, raspados, aguas frescas, pies, and sweet chili sauce, or mixed with chamoy, a sweet and spicy chili paste. It is popular on a stick dipped in hot chili powder and salt or as a main ingredient in fresh fruit combinations. In Central America, mango is either eaten green mixed with salt, vinegar, black pepper, and hot sauce, or ripe in various forms.
Pieces of mango can be mashed and used as a topping on ice cream or blended with milk and ice as milkshakes. Sweet glutinous rice is flavored with coconut, then served with sliced mango as a dessert. In other parts of Southeast Asia, mangoes are pickled with fish sauce and rice vinegar. Green mangoes can be used in mango salad with fish sauce and dried shrimp. Mango with condensed milk may be used as a topping for shaved ice.
The energy value per 100 g (3.5 oz) serving of the common mango is 250 kJ (60 kcal), and that of the apple mango is slightly higher (330 kJ (79 kcal) per 100 g). Fresh mango contains a variety of nutrients (right table), but only vitamin C and folate are in significant amounts of the Daily Value as 44% and 11%, respectively.
The mango is the national fruit of India, Pakistan, and the Philippines. It is also the national tree of Bangladesh. In India, harvest and sale of mangoes is during March–May and this is annually covered by news agencies.
The mango has a traditional context in the culture of South Asia. In his edicts, the Mauryan emperor Ashoka references the planting of fruit- and shade-bearing trees along imperial roads:
"On the roads banyan-trees were caused to be planted by me, (in order that) they might afford shade to cattle and men, (and) mango-groves were caused to be planted."
In medieval India, the Indo-Persian poet Amir Khusrow termed the mango "Naghza Tarin Mewa Hindustan" – "the fairest fruit of Hindustan". Mangoes were enjoyed at the court of the Delhi Sultan Alauddin Khijli, and the Mughal Empire was especially fond of the fruits: Babur praises the mango in his Babarnameh, while Sher Shah Suri inaugurated the creation of the Chaunsa variety after his victory over the Mughal emperor Humayun. Mughal patronage to horticulture led to the grafting of thousands of mangoes varieties, including the famous Totapuri, which was the first variety to be exported to Iran and Central Asia. Akbar (1556–1605) is said to have planted a mango orchard of 100,000 trees at Lakhi Bagh in Darbhanga, Bihar,while Jahangir and Shah Jahan ordered the planting of mango-orchards in Lahore and Delhi and the creation of mango-based desserts.

The Jain goddess Ambika is traditionally represented as sitting under a mango tree. Mango blossoms are also used in the worship of the goddess Saraswati. Mango leaves are used to decorate archways and doors in Indian houses and during weddings and celebrations such as Ganesh Chaturthi. Mango motifs and paisleys are widely used in different Indian embroidery styles, and are found in Kashmiri shawls, Kanchipuram and silk sarees. In Tamil Nadu, the mango is referred to as one of the three royal fruits, along with banana and jackfruit, for their sweetness and flavor.This triad of fruits is referred to as ma-pala-vazhai. The classical Sanskrit poet Kālidāsa sang the praises of mangoes.
Mangoes were popularized in China during the Cultural Revolution as symbols of Chairman Mao Zedong's love for the people.
Worldwide, there are several hundred cultivars of mango. Depending on the cultivar, mango fruit varies in size, shape, sweetness, skin color, and flesh color which may be pale yellow, gold, or orange. Mango is the national fruit of India, Haiti, and the Philippines, and the national tree of Bangladesh. It is the summer national fruit of Pakistan.
The English word "mango" (plural "mangoes" or "mangos") originated from the Tamil word manga (or mangga) during the spice trade period with South India in the 15th and 16th centuries.
Mango trees grow to 35–40 m (115–131 ft) tall, with a crown radius of 10 m (33 ft). The trees are long-lived, as some specimens still fruit after 300 years. In deep soil, the taproot descends to a depth of 6 m (20 ft), with profuse, wide-spreading feeder roots and anchor roots penetrating deeply into the soil. The leaves are evergreen, alternate, simple, 15–35 cm (5.9–13.8 in) long, and 6–16 cm (2.4–6.3 in) broad; when the leaves are young they are orange-pink, rapidly changing to a dark, glossy red, then dark green as they mature. The flowers are produced in terminal panicles 10–40 cm (3.9–15.7 in) long; each flower is small and white with five petals 5–10 mm (0.20–0.39 in) long, with a mild, sweet fragrance. Over 500 varieties of mangoes are known, many of which ripen in summer, while some give a double crop. The fruit takes four to five months from flowering to ripen.
The ripe fruit varies according to cultivar in size, shape, color, sweetness, and eating quality. Depending on cultivar, fruits are variously yellow, orange, red, or green. The fruit has a single flat, oblong pit that can be fibrous or hairy on the surface, and does not separate easily from the pulp. The fruits may be somewhat round, oval, or kidney-shaped, ranging from 5–25 centimetres (2–10 in) in length and from 140 grams (5 oz) to 2 kilograms (5 lb) in weight per individual fruit. The skin is leather-like, waxy, smooth, and fragrant, with color ranging from green to yellow, yellow-orange, yellow-red, or blushed with various shades of red, purple, pink or yellow when fully ripe.
Ripe intact mangoes give off a distinctive resinous, sweet smell. Inside the pit 1–2 mm (0.039–0.079 in) thick is a thin lining covering a single seed, 4–7 cm (1.6–2.8 in) long. Mangoes have recalcitrant seeds which do not survive freezing and drying. Mango trees grow readily from seeds, with germination success highest when seeds are obtained from mature fruits.
Mangoes are generally sweet, although the taste and texture of the flesh varies across cultivars; some, such as Alphonso, have a soft, pulpy, juicy texture similar to an overripe plum, while others, such as Tommy Atkins, are firmer, like a cantaloupe or avocado, with a fibrous texture.
The skin of unripe, pickled, or cooked mango can be eaten, but it has the potential to cause contact dermatitis of the lips, gingiva, or tongue in susceptible people.

Mangoes are widely used in cuisine. Sour, unripe mangoes are used in chutneys, pickles, dhals and other side dishes in Bengali cuisine, or may be eaten raw with salt, chili, or soy sauce. A summer drink called aam panna comes from mangoes. Mango pulp made into jelly or cooked with red gram dhal and green chillies may be served with cooked rice. Mango lassi is popular throughout South Asia, prepared by mixing ripe mangoes or mango pulp with buttermilk and sugar. Ripe mangoes are also used to make curries. Aamras is a popular thick juice made of mangoes with sugar or milk, and is consumed with chapatis or pooris. The pulp from ripe mangoes is also used to make jam called mangada. Andhra aavakaaya is a pickle made from raw, unripe, pulpy, and sour mango, mixed with chili powder, fenugreek seeds, mustard powder, salt, and groundnut oil. Mango is also used in Andhra Pradesh to make dahl preparations. Gujaratis use mango to make chunda (a spicy, grated mango delicacy).
Mangoes are used to make murabba (fruit preserves), muramba (a sweet, grated mango delicacy), amchur (dried and powdered unripe mango), and pickles, including a spicy mustard-oil pickle and alcohol. Ripe mangoes are often cut into thin layers, desiccated, folded, and then cut. These bars are similar to dried guava fruit bars available in some countries. The fruit is also added to cereal products such as muesli and oat granola. Mangoes are often prepared charred in Hawaii.
Unripe mango may be eaten with bagoong (especially in the Philippines), fish sauce, vinegar, soy sauce, or with dash of salt (plain or spicy). Dried strips of sweet, ripe mango (sometimes combined with seedless tamarind to form mangorind) are also popular. Mangoes may be used to make juices, mango nectar, and as a flavoring and major ingredient in ice cream and sorbetes.
Mango is used to make juices, smoothies, ice cream, fruit bars, raspados, aguas frescas, pies, and sweet chili sauce, or mixed with chamoy, a sweet and spicy chili paste. It is popular on a stick dipped in hot chili powder and salt or as a main ingredient in fresh fruit combinations. In Central America, mango is either eaten green mixed with salt, vinegar, black pepper, and hot sauce, or ripe in various forms.
Pieces of mango can be mashed and used as a topping on ice cream or blended with milk and ice as milkshakes. Sweet glutinous rice is flavored with coconut, then served with sliced mango as a dessert. In other parts of Southeast Asia, mangoes are pickled with fish sauce and rice vinegar. Green mangoes can be used in mango salad with fish sauce and dried shrimp. Mango with condensed milk may be used as a topping for shaved ice.
The energy value per 100 g (3.5 oz) serving of the common mango is 250 kJ (60 kcal), and that of the apple mango is slightly higher (330 kJ (79 kcal) per 100 g). Fresh mango contains a variety of nutrients (right table), but only vitamin C and folate are in significant amounts of the Daily Value as 44% and 11%, respectively.
The mango is the national fruit of India, Pakistan, and the Philippines. It is also the national tree of Bangladesh. In India, harvest and sale of mangoes is during March–May and this is annually covered by news agencies.
The mango has a traditional context in the culture of South Asia. In his edicts, the Mauryan emperor Ashoka references the planting of fruit- and shade-bearing trees along imperial roads:
"On the roads banyan-trees were caused to be planted by me, (in order that) they might afford shade to cattle and men, (and) mango-groves were caused to be planted."
In medieval India, the Indo-Persian poet Amir Khusrow termed the mango "Naghza Tarin Mewa Hindustan" – "the fairest fruit of Hindustan". Mangoes were enjoyed at the court of the Delhi Sultan Alauddin Khijli, and the Mughal Empire was especially fond of the fruits: Babur praises the mango in his Babarnameh, while Sher Shah Suri inaugurated the creation of the Chaunsa variety after his victory over the Mughal emperor Humayun. Mughal patronage to horticulture led to the grafting of thousands of mangoes varieties, including the famous Totapuri, which was the first variety to be exported to Iran and Central Asia. Akbar (1556–1605) is said to have planted a mango orchard of 100,000 trees at Lakhi Bagh in Darbhanga, Bihar,while Jahangir and Shah Jahan ordered the planting of mango-orchards in Lahore and Delhi and the creation of mango-based desserts.

The Jain goddess Ambika is traditionally represented as sitting under a mango tree. Mango blossoms are also used in the worship of the goddess Saraswati. Mango leaves are used to decorate archways and doors in Indian houses and during weddings and celebrations such as Ganesh Chaturthi. Mango motifs and paisleys are widely used in different Indian embroidery styles, and are found in Kashmiri shawls, Kanchipuram and silk sarees. In Tamil Nadu, the mango is referred to as one of the three royal fruits, along with banana and jackfruit, for their sweetness and flavor.This triad of fruits is referred to as ma-pala-vazhai. The classical Sanskrit poet Kālidāsa sang the praises of mangoes.
Mangoes were popularized in China during the Cultural Revolution as symbols of Chairman Mao Zedong's love for the people.
0
0


