文章
Miss Chen
2021年09月04日

Clusia is a large genus of trees and shrubs native to tropical America characterized by their branches, which grow horizontally, and their leaves, which are thick and tough. There are about 150 Clusia species, but Clusia rosea, or the autograph tree, is the only one commonly grown. It is notable for its tendency to grow on top of other plants (often strangling them). It is widely considered to be an invasive species. Another unusual quality, this species is part of the only genus of plants capable of absorbing carbon dioxide at night.1
The autograph tree has stiff, dark green or olive-colored leathery leaves that grow to about 8 inches long. The leaves are tough enough that they can be carved into, hence the common name “autograph tree.” It has long flower heads with pink or white flowers that bloom in the summer, followed by small green fruits that ripen to black and eventually split open to reveal bright red seeds. The seeds are very attractive to birds and other fauna. The autograph tree is commonly grown as an indoor plant. Where it is able to survive outdoors—in zones 10 and 11—it can be planted in spring or fall.
Botanical Name Clusia rosea
Common Name Autograph tree, copey, balsam apple, pitch apple
Plant Type Perennial evergreen
Mature Size 8 to 10 feet tall and wide (can reach 25 feet tall as a tree)
Sun Exposure Full sun
Soil Type Sand, clay, loam; well-draining
Soil pH Slightly acidic to neutral
Bloom Time Summer
Flower Color White or pink
Hardiness Zones 10 to 11
Native Area Caribbean
Toxicity Toxic to humans, toxic to pets

Autograph Tree Care
The autograph tree tends to spread out fairly wide as it grows. It should be pruned about once a year, in early spring, to keep it nicely formed. Fertilization will help it grow fully. The plant makes an excellent hedge because of its dense growth habit and its minimal maintenance needs. Alternatively, if you grow it tall as a tree, you can underplant things close to its base. The autograph tree is salt-tolerant and can be grown in exposed positions near the ocean.
Grown as a houseplant, the autograph tree needs warmth, humidity, and a moderate amount of sunlight daily. A room with a south- or west-facing window is ideal for giving it a few hours of bright sun plus some indirect light and some shade.
Light
Full sun is best, but this plant can tolerate partial shade as well. When it is grown indoors as a houseplant, it will cope with medium light levels and some degree of shade.
Soil
A sandy, soft, loose, well-draining soil is best. It should be fertile and rich in organic matter. When growing in pots, blend the potting mix with a small amount of growing medium for orchids.
Water
The autograph tree should be watered regularly for the first year or so until the plant is fully established. You can scale back its water after that, although regular watering will help it grow more fully. This species is fairly drought-tolerant, but you should never let the soil get completely dry. Autograph tree houseplants typically need water once a week in summer and three times per month in winter.
Temperature and Humidity
This plant can be kept outside only in tropical areas, as will not tolerate temperatures below 50 degrees Fahrenheit. Indoors, it prefers temperatures between 60 and 85. It also prefers high humidity. If you have an indoor container plant, you can place it on a shallow gravel tray filled with water and mist regularly.
Fertilizer
Fertilize three times per year in the spring, summer, and fall. Use organic, granular fertilizer. Or, you can fertilize more frequently but must use an evenly balanced diluted liquid fertilizer.
Potting and Repotting
Due to its quick growth, C. rosea can often overgrow its container. To repot, lift out the root ball as a whole and move to a larger container that can accommodate the root system. As the plant matures, it may become too large to be kept in containers at all unless it is well-pruned. If the climate is suitable, large plants can be replanted outdoors.

Propagating the Autograph Tree
C. rosea is a hemiepiphyte. It begins its life as an epiphyte—a plant that grows on another tree or structure without being parasitic—and grows toward the ground until it eventually plants itself in the soil. Over time, it overgrows and eventually suffocates its host. This growth pattern is what has made the autograph tree a dangerous invasive species in several tropical areas.
The tree can propagate fairly easily by seed or by cuttings. To propagate by cuttings, simply sever the stems and replant in the warm, wet soil to allow them to root. This is a fast-growing and hardy plant that is quite easy to propagate, especially in containers.
The autograph tree has stiff, dark green or olive-colored leathery leaves that grow to about 8 inches long. The leaves are tough enough that they can be carved into, hence the common name “autograph tree.” It has long flower heads with pink or white flowers that bloom in the summer, followed by small green fruits that ripen to black and eventually split open to reveal bright red seeds. The seeds are very attractive to birds and other fauna. The autograph tree is commonly grown as an indoor plant. Where it is able to survive outdoors—in zones 10 and 11—it can be planted in spring or fall.
Botanical Name Clusia rosea
Common Name Autograph tree, copey, balsam apple, pitch apple
Plant Type Perennial evergreen
Mature Size 8 to 10 feet tall and wide (can reach 25 feet tall as a tree)
Sun Exposure Full sun
Soil Type Sand, clay, loam; well-draining
Soil pH Slightly acidic to neutral
Bloom Time Summer
Flower Color White or pink
Hardiness Zones 10 to 11
Native Area Caribbean
Toxicity Toxic to humans, toxic to pets

Autograph Tree Care
The autograph tree tends to spread out fairly wide as it grows. It should be pruned about once a year, in early spring, to keep it nicely formed. Fertilization will help it grow fully. The plant makes an excellent hedge because of its dense growth habit and its minimal maintenance needs. Alternatively, if you grow it tall as a tree, you can underplant things close to its base. The autograph tree is salt-tolerant and can be grown in exposed positions near the ocean.
Grown as a houseplant, the autograph tree needs warmth, humidity, and a moderate amount of sunlight daily. A room with a south- or west-facing window is ideal for giving it a few hours of bright sun plus some indirect light and some shade.
Light
Full sun is best, but this plant can tolerate partial shade as well. When it is grown indoors as a houseplant, it will cope with medium light levels and some degree of shade.
Soil
A sandy, soft, loose, well-draining soil is best. It should be fertile and rich in organic matter. When growing in pots, blend the potting mix with a small amount of growing medium for orchids.
Water
The autograph tree should be watered regularly for the first year or so until the plant is fully established. You can scale back its water after that, although regular watering will help it grow more fully. This species is fairly drought-tolerant, but you should never let the soil get completely dry. Autograph tree houseplants typically need water once a week in summer and three times per month in winter.
Temperature and Humidity
This plant can be kept outside only in tropical areas, as will not tolerate temperatures below 50 degrees Fahrenheit. Indoors, it prefers temperatures between 60 and 85. It also prefers high humidity. If you have an indoor container plant, you can place it on a shallow gravel tray filled with water and mist regularly.
Fertilizer
Fertilize three times per year in the spring, summer, and fall. Use organic, granular fertilizer. Or, you can fertilize more frequently but must use an evenly balanced diluted liquid fertilizer.
Potting and Repotting
Due to its quick growth, C. rosea can often overgrow its container. To repot, lift out the root ball as a whole and move to a larger container that can accommodate the root system. As the plant matures, it may become too large to be kept in containers at all unless it is well-pruned. If the climate is suitable, large plants can be replanted outdoors.

Propagating the Autograph Tree
C. rosea is a hemiepiphyte. It begins its life as an epiphyte—a plant that grows on another tree or structure without being parasitic—and grows toward the ground until it eventually plants itself in the soil. Over time, it overgrows and eventually suffocates its host. This growth pattern is what has made the autograph tree a dangerous invasive species in several tropical areas.
The tree can propagate fairly easily by seed or by cuttings. To propagate by cuttings, simply sever the stems and replant in the warm, wet soil to allow them to root. This is a fast-growing and hardy plant that is quite easy to propagate, especially in containers.
0
0
文章
Miss Chen
2021年08月15日

The arrowhead vine is a pretty trailing or climbing vine that tends to grow quickly under the right conditions. Native to a wide region of South America, it has become a popular houseplant, thanks to its easy-going nature and appealing hanging shape.
The arrowhead vine's leaf structure changes as it matures, going from a simple arrow shape to a deeply lobed or divided mature leaf. Its leaves can vary in hue depending on their age, ranging from dark green and white to lime green and bright pink. Arrowhead vine is only viable outdoors in USDA hardiness zones 10 through 12, so in most locations in the United States, it is grown year-round as a houseplant. The vine does best if left relatively alone, making it a great pick for novice gardeners or those who just forget to tend to their in-home garden frequently.
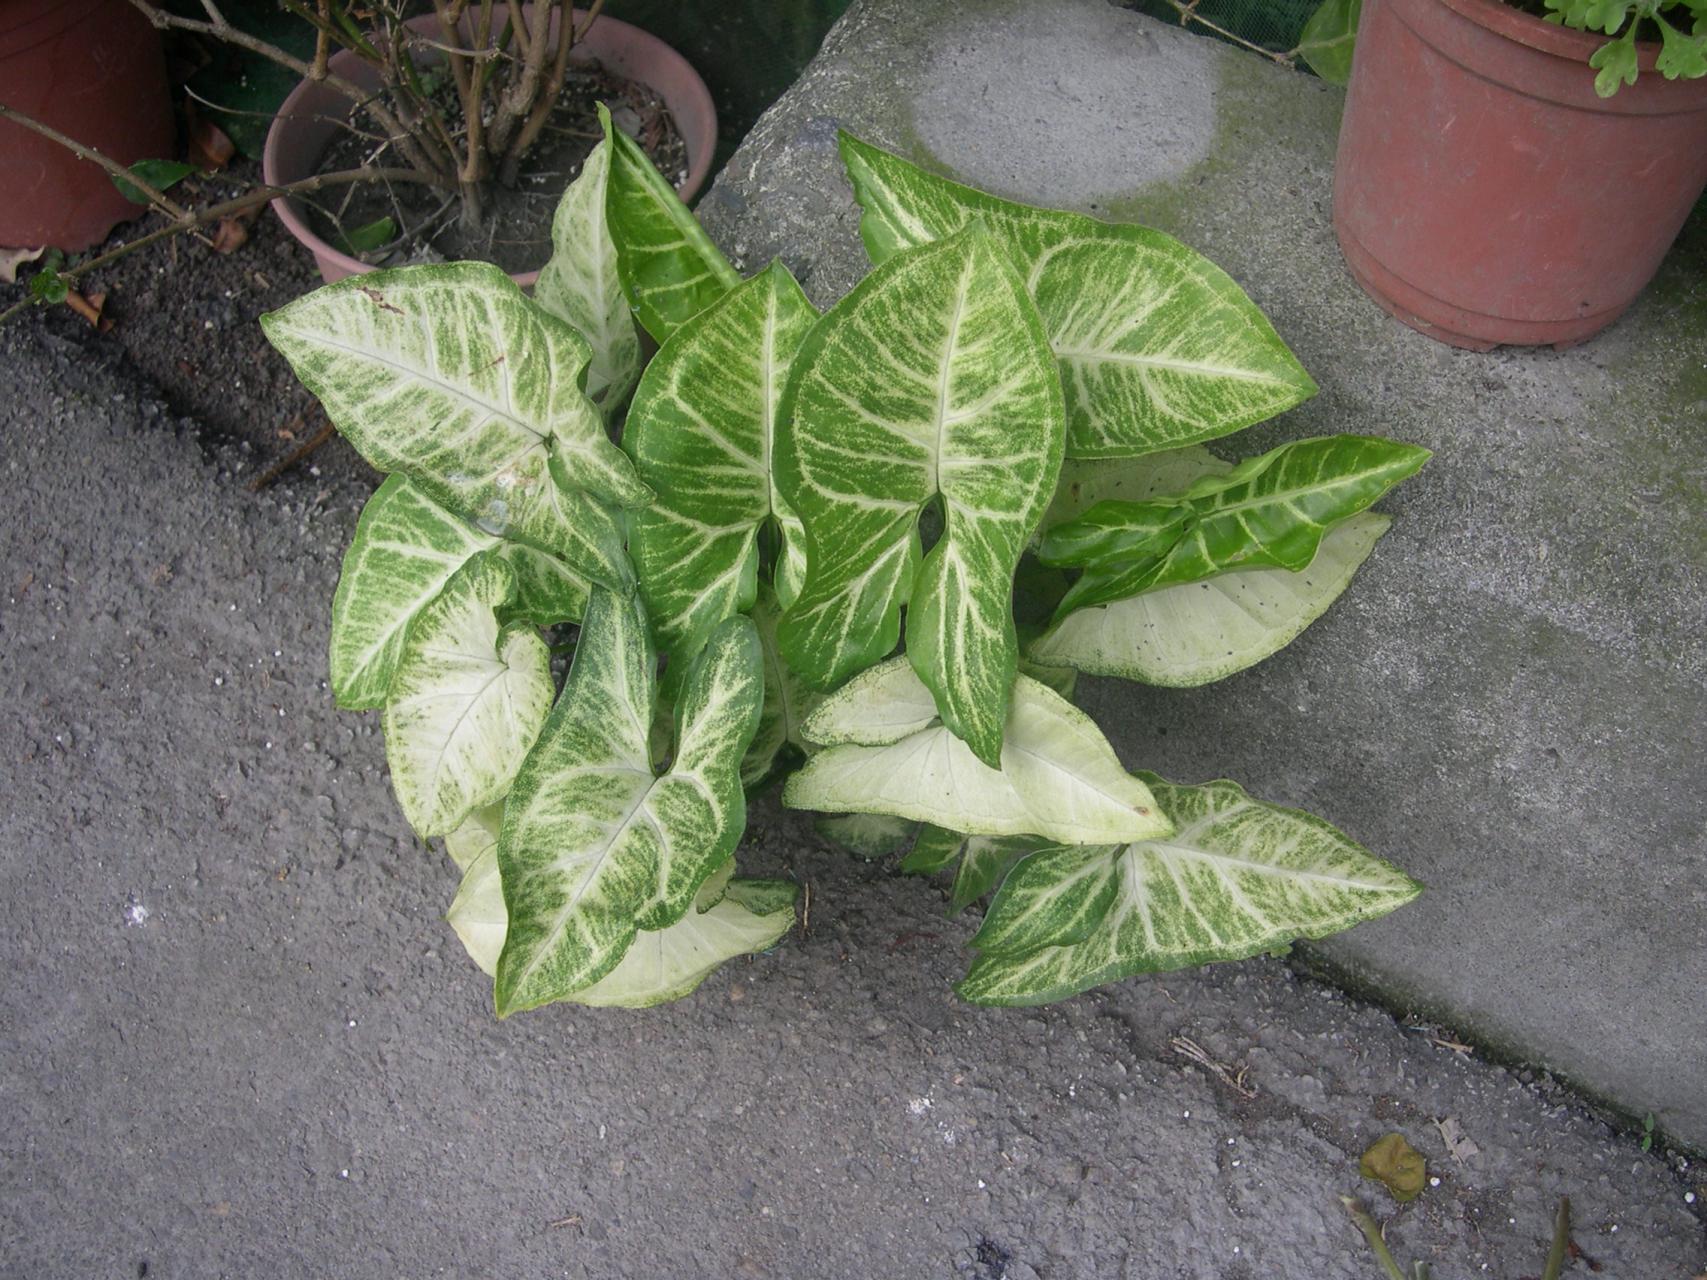
Botanical Name Syngonium podophyllum
Common Name Arrowhead vine
Plant Type Vine
Mature Size 3–6 ft. tall, 1–2 ft. wide
Sun Exposure Partial shade
Soil Type Moist but well-drained
Soil pH Neutral to acidic
Bloom Time Summer (rarely flowers)
Flower Color White
Hardiness Zones 10–12 (USDA)
Native Area South America, Mexico
Toxicity Toxic to dogs and cats
Arrowhead Vine Care
Arrowhead vine is a relatively easy houseplant to care for—it will thrive under the same conditions as its very popular relative, the philodendron. Arrowhead vines are climbers in the wild and will eventually grow from shade into full sun in the canopy of trees, with leaves maturing and gaining size as the plants gain altitude. As a houseplant, they're often used as trailing plants once mature and can be trained up a pole or moss stick for added visual interest. Alternately, you can pinch new growth to maintain the young plant's upright stems.
Tropical in nature, arrowhead vines are perfect for a sunroom or greenhouse conservatory where ample heat, light, and humidity will encourage their growth. Provide your arrowhead vine with the right growing conditions, and you will have a lush and healthy plant.
Light
Arrowhead vine likes bright light but no direct sun. Diffused light is best, as harsh rays can burn or bleach the delicate leaves and vines. Variegated colorways can handle a bit more direct sun, while deeper green varieties are better adapted to partial shade.
Soil
Plant your arrowhead vine in a traditional soil-based potting mix. Arrowhead vines are prone to root rot, so you'll want to make sure whichever potting soil you choose is well-draining. Additionally, consider planting your vine in a terracotta or clay vessel to wick away extra moisture from the soil.
Water
Water your arrowhead vine regularly during the spring and summer months, and reduce your watering cadence come winter. During the spring and summer, you want to allow your vine to dry out partially between waterings but never completely. Likewise, the plant should not be kept too wet, either.
Temperature and Humidity
True to its tropical nature, arrowhead vine prefers warm and humid conditions. If possible, maintain temperatures above 60 degrees Fahrenheit. While the plant can tolerate average humidity, it will thrive best with added moisture in the air. Consider keeping your plant somewhere in your home with naturally higher humidity (like a kitchen or bathroom), or utilize a method of increasing humidity, like a portable machine or placing a bed of wet river rocks beneath the pot.
Fertilizer
Feed your arrowhead vine once a month with liquid fertilizer throughout the spring, summer, and fall months. You can halt feeding throughout winter when the plant will naturally slow its growth.
Propagating Arrowhead Vine
Arrowhead vine plants root readily from stem cuttings and can easily be propagated in the spring or summer months. If your plant has aerial roots along the stem, take a section of the stem with attached roots to increase your odds of success.
To propagate arrowhead vine, place your cutting into a glass of water—within a few weeks, you'll notice new roots have begun to form. Wait at least a month until the roots have strengthened, topping off the water periodically. At that point, you can plant the cutting into the soil as you normally would.

Repotting Arrowhead Vine
These plants are aggressive, rapid-growing vines, so the frequency of repotting depends somewhat on how big you want the vine to get. Repot yearly for a larger vine. Otherwise, refresh potting media every spring and repot every other year to ensure the plant does not become root-bound.
Common Pests and Diseases
Arrowhead vine is relatively resistant to pests on its own. However, dwelling in the home amongst other plants can expose it to pests like spider mites, mealybugs, aphids, and scale. If you notice any of these afflictions, treat your plant immediately with neem oil or another natural solution.
The arrowhead vine's leaf structure changes as it matures, going from a simple arrow shape to a deeply lobed or divided mature leaf. Its leaves can vary in hue depending on their age, ranging from dark green and white to lime green and bright pink. Arrowhead vine is only viable outdoors in USDA hardiness zones 10 through 12, so in most locations in the United States, it is grown year-round as a houseplant. The vine does best if left relatively alone, making it a great pick for novice gardeners or those who just forget to tend to their in-home garden frequently.

Botanical Name Syngonium podophyllum
Common Name Arrowhead vine
Plant Type Vine
Mature Size 3–6 ft. tall, 1–2 ft. wide
Sun Exposure Partial shade
Soil Type Moist but well-drained
Soil pH Neutral to acidic
Bloom Time Summer (rarely flowers)
Flower Color White
Hardiness Zones 10–12 (USDA)
Native Area South America, Mexico
Toxicity Toxic to dogs and cats
Arrowhead Vine Care
Arrowhead vine is a relatively easy houseplant to care for—it will thrive under the same conditions as its very popular relative, the philodendron. Arrowhead vines are climbers in the wild and will eventually grow from shade into full sun in the canopy of trees, with leaves maturing and gaining size as the plants gain altitude. As a houseplant, they're often used as trailing plants once mature and can be trained up a pole or moss stick for added visual interest. Alternately, you can pinch new growth to maintain the young plant's upright stems.
Tropical in nature, arrowhead vines are perfect for a sunroom or greenhouse conservatory where ample heat, light, and humidity will encourage their growth. Provide your arrowhead vine with the right growing conditions, and you will have a lush and healthy plant.
Light
Arrowhead vine likes bright light but no direct sun. Diffused light is best, as harsh rays can burn or bleach the delicate leaves and vines. Variegated colorways can handle a bit more direct sun, while deeper green varieties are better adapted to partial shade.
Soil
Plant your arrowhead vine in a traditional soil-based potting mix. Arrowhead vines are prone to root rot, so you'll want to make sure whichever potting soil you choose is well-draining. Additionally, consider planting your vine in a terracotta or clay vessel to wick away extra moisture from the soil.
Water
Water your arrowhead vine regularly during the spring and summer months, and reduce your watering cadence come winter. During the spring and summer, you want to allow your vine to dry out partially between waterings but never completely. Likewise, the plant should not be kept too wet, either.
Temperature and Humidity
True to its tropical nature, arrowhead vine prefers warm and humid conditions. If possible, maintain temperatures above 60 degrees Fahrenheit. While the plant can tolerate average humidity, it will thrive best with added moisture in the air. Consider keeping your plant somewhere in your home with naturally higher humidity (like a kitchen or bathroom), or utilize a method of increasing humidity, like a portable machine or placing a bed of wet river rocks beneath the pot.
Fertilizer
Feed your arrowhead vine once a month with liquid fertilizer throughout the spring, summer, and fall months. You can halt feeding throughout winter when the plant will naturally slow its growth.
Propagating Arrowhead Vine
Arrowhead vine plants root readily from stem cuttings and can easily be propagated in the spring or summer months. If your plant has aerial roots along the stem, take a section of the stem with attached roots to increase your odds of success.
To propagate arrowhead vine, place your cutting into a glass of water—within a few weeks, you'll notice new roots have begun to form. Wait at least a month until the roots have strengthened, topping off the water periodically. At that point, you can plant the cutting into the soil as you normally would.

Repotting Arrowhead Vine
These plants are aggressive, rapid-growing vines, so the frequency of repotting depends somewhat on how big you want the vine to get. Repot yearly for a larger vine. Otherwise, refresh potting media every spring and repot every other year to ensure the plant does not become root-bound.
Common Pests and Diseases
Arrowhead vine is relatively resistant to pests on its own. However, dwelling in the home amongst other plants can expose it to pests like spider mites, mealybugs, aphids, and scale. If you notice any of these afflictions, treat your plant immediately with neem oil or another natural solution.
0
0
文章
Miss Chen
2021年08月06日

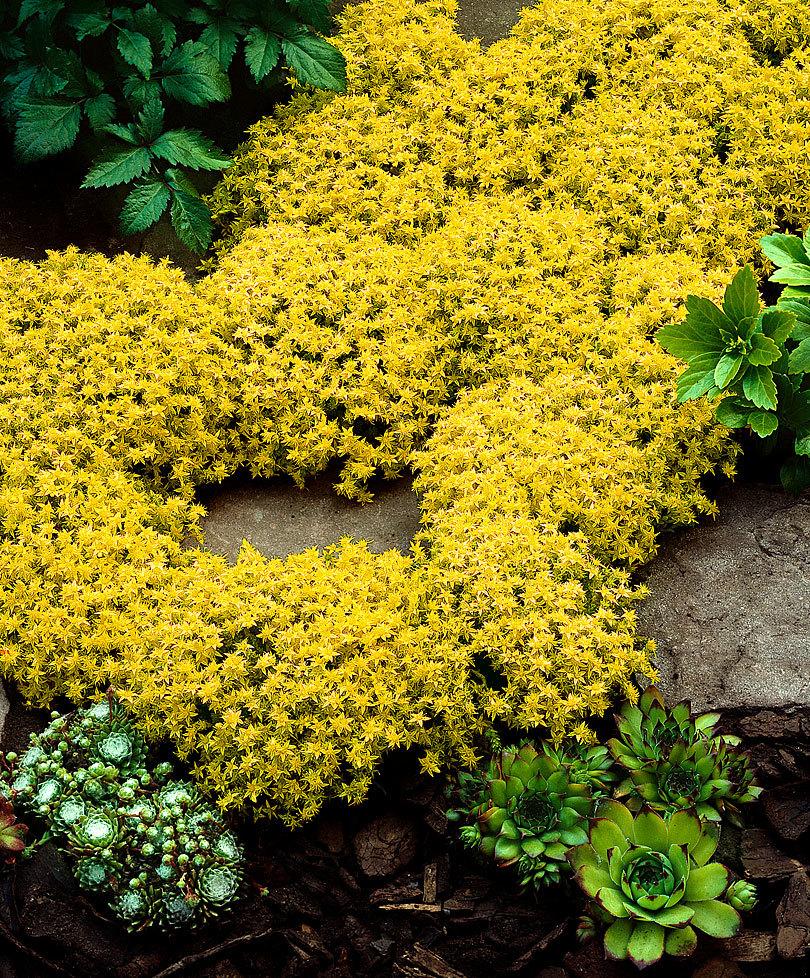
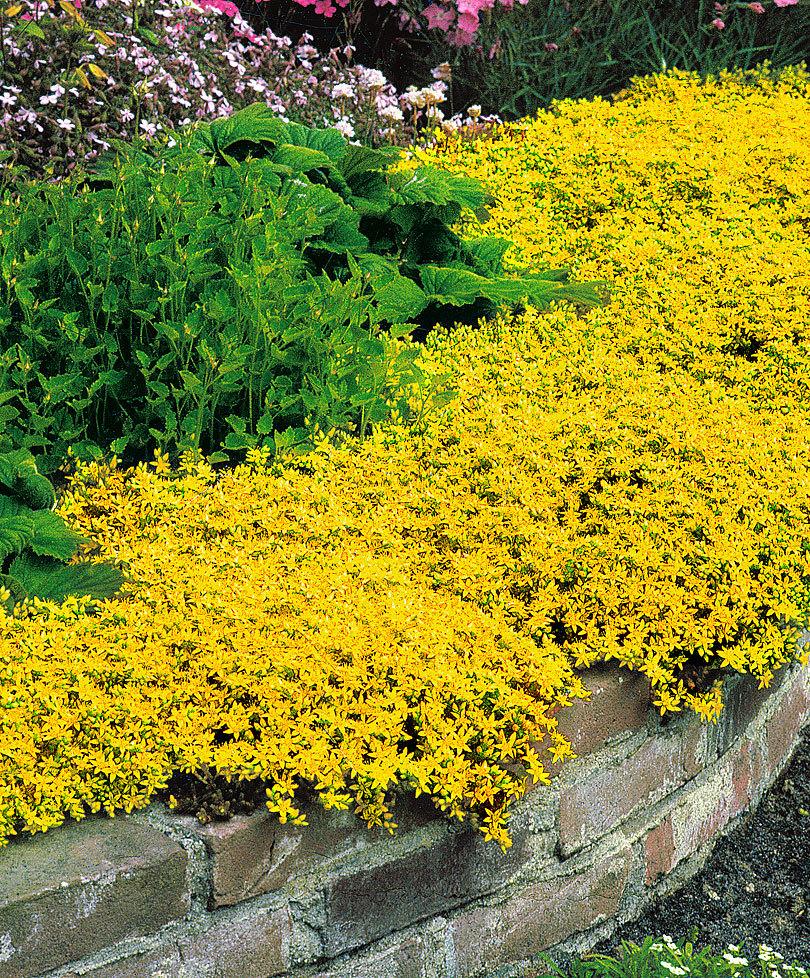
'Angelina' stonecrop (Sedum rupestre 'Angelina') is a perennial, evergreen plant with succulent foliage that forms a low-growing mat. The name "stonecrop" comes from Middle English and refers to the plant's ability to grow in rocky, gravelly areas. The 'Angelina' cultivar of S. rupestre features chartreuse or golden needle-like foliage, depending on how much sun it gets (more sun results in more golden leaves). It sports tiny yellow flowers throughout the summer. And in the fall, the foliage takes on an orange or rust tone.
Sunshine and good drainage are key to this plant's success. Because of its chartreuse or golden color, it looks especially good when combined with plants that have dark foliage. Mass the plants together for use as a ground cover or perennial border. 'Angelina' also makes for a nice rock garden plant and can be placed between stones in a retaining wall. It can also be planted in patio containers and hanging baskets.
'Angelina' is generally planted in the spring, but this tough plant can really be planted almost any time. It has a moderately fast growth rate, but it may take a year or two before it flowers.
Botanical Name Sedum rupestre 'Angelina'
Common Name Angelina stonecrop
Plant Type Herbaceous perennial
Mature Size 4–6 inches tall, 1– 3-feet wide
Sun Exposure Full sun to part shade
Soil Type Average, dry to medium moisture, well-draining
Soil pH 6.0 to 7.0 (slightly acidic to neutral)
Bloom Time Summer
Flower Color Yellow
Hardiness Zones 3 to 9 (USDA)
Native Area Europe, Asia
'Angelina' Stonecrop Care
Ideally, you should plant 'Angelina' in a full-sun location, in dry to medium-moisture soil that is well-drained. The plant has a good tolerance for gravelly or sandy soils. Space the plants 8 to 12 inches apart, as they will quickly spread. 'Angelina' stonecrop is a fast-growing ground cover that stays short (around 6 inches tall) and quickly spreads to form a mat.
Once established, this plant requires little in the way of watering or feeding. Just make sure it doesn't sit in soggy soil. Like most stonecrops, 'Angelina' is relatively free of pest and disease problems, although slugs and snails may eat the foliage. Scale insects also sometimes appear.
Light
Grow 'Angelina' stonecrop in full sun if possible, though it will tolerate some shade. Its golden foliage will show best color if it is grown full sun.
Soil
This plant prefers a well-draining soil with a neutral pH. It does well in sandy and gravelly soils that aren’t very fertile. Its roots are shallow, but they’re able to spread through small crevices in rocky terrain.
Water
'Angelina' needs regular watering after you first plant it. But it is a drought-tolerant ground cover once established. Heavy clay soil or other waterlogged sites can kill the plant. However, plants grown in a container might need more frequent waterings than those planted in the ground.
Temperature and Humidity
Suitable for USDA zones 5 to 8, 'Angelina' stonecrop is somewhat tolerant to cold weather during the growing season. It can handle temperatures several degrees below freezing and still bounce back just fine. It also tolerates high heat and humidity well, as long as it’s not stuck in standing water.
Fertilizer
Stonecrop plants generally prefer lean soil, so fertilizer usually won't be necessary for this plant. Chemical fertilizer can cause 'Angelina' to stretch and flop. If your soil is lacking nutrients, consider using compost instead of chemical fertilizer
Related Stonecrop Varieties
There are several other varieties of stonecrop that are easy to grow in the garden:
Dragon's Blood sedum (Sedum spurium 'Fuldaglut'): This is another good groundcover plant, growing 3 to 5 inches tall with plentiful rose-red flowers.
Blue spruce stonecrop: (Sedum 'Blue Spruce'): This cultivar has bluish foliage that grows around 6 to 9 inches tall with a 1- to 1 1/2-foot spread. Small, star-shaped, yellow flowers emerge in June and July. It adapts to many soil conditions, as long as there is good drainage.
Purple emperor stonecrop (Sedum 'Purple Emperor’): This is a hybrid stonecrop with dark purple foliage. It grows upright at a little more than 1 foot in height and spread. And it sports tiny masses of pinkish-purple flowers from around July to September.
Autumn joy stonecrop (Hylotelephium 'Herbstfreude'): This stonecrop—no longer classified in the Sedum genus—also grows in average, well-draining soil with dry to medium moisture. It reaches around 18 to 24 inches in height and spread. And it features fall blooms that start out pink and gradually turn to a rose red.
Propagating 'Angelina' Stonecrop
'Angelina' stonecrop plants are easy to propagate by rooting. In fact, stems that break off from the main plant fall to the ground often root all by themselves. If you're looking for a plant that's well-behaved and doesn't spread into neighboring garden areas, this might not be the best choice for you.
To purposely propagate' Angelina', snip off a piece of stem 2 to 5 inches. Then, plant it in a well-draining potting mix and keep the soil moist while you’re waiting for roots to take hold. After around two to three weeks, you should feel resistance when you gently tug on the stem, meaning it has rooted. At this point, it’s ready for planting in the garden. Propagating with this method usually is successful at any point during the growing season, thanks to the plant's hardiness, but it's best done in late spring or early summer.
Pruning
Most gardeners prune 'Angelina' stonecrop plants only if they feel the plants have become too large. Using hand pruners, simply trim off any overgrown stems from where you don’t want them to shape the plant. Also, remove any dead or diseased material whenever you spot it. Pruning typically can be done at any time of year without harming the plant. But as a precaution, avoid pruning during extreme hot or cold temperatures.
Furthermore, your plant might not bloom during its first year. But whenever it does bloom, it will produce clusters of star-shaped yellow flowers on tall stalks. These yellow flower clusters, which arise in the summer, are reasonably attractive. However, some gardeners find the flower stalks to be awkwardly tall. And once the blooms fade, you are left with rather ugly brown stalks, which you can prune whenever you like.
Sunshine and good drainage are key to this plant's success. Because of its chartreuse or golden color, it looks especially good when combined with plants that have dark foliage. Mass the plants together for use as a ground cover or perennial border. 'Angelina' also makes for a nice rock garden plant and can be placed between stones in a retaining wall. It can also be planted in patio containers and hanging baskets.
'Angelina' is generally planted in the spring, but this tough plant can really be planted almost any time. It has a moderately fast growth rate, but it may take a year or two before it flowers.

Botanical Name Sedum rupestre 'Angelina'
Common Name Angelina stonecrop
Plant Type Herbaceous perennial
Mature Size 4–6 inches tall, 1– 3-feet wide
Sun Exposure Full sun to part shade
Soil Type Average, dry to medium moisture, well-draining
Soil pH 6.0 to 7.0 (slightly acidic to neutral)
Bloom Time Summer
Flower Color Yellow
Hardiness Zones 3 to 9 (USDA)
Native Area Europe, Asia
'Angelina' Stonecrop Care
Ideally, you should plant 'Angelina' in a full-sun location, in dry to medium-moisture soil that is well-drained. The plant has a good tolerance for gravelly or sandy soils. Space the plants 8 to 12 inches apart, as they will quickly spread. 'Angelina' stonecrop is a fast-growing ground cover that stays short (around 6 inches tall) and quickly spreads to form a mat.
Once established, this plant requires little in the way of watering or feeding. Just make sure it doesn't sit in soggy soil. Like most stonecrops, 'Angelina' is relatively free of pest and disease problems, although slugs and snails may eat the foliage. Scale insects also sometimes appear.
Light
Grow 'Angelina' stonecrop in full sun if possible, though it will tolerate some shade. Its golden foliage will show best color if it is grown full sun.
Soil
This plant prefers a well-draining soil with a neutral pH. It does well in sandy and gravelly soils that aren’t very fertile. Its roots are shallow, but they’re able to spread through small crevices in rocky terrain.
Water
'Angelina' needs regular watering after you first plant it. But it is a drought-tolerant ground cover once established. Heavy clay soil or other waterlogged sites can kill the plant. However, plants grown in a container might need more frequent waterings than those planted in the ground.
Temperature and Humidity
Suitable for USDA zones 5 to 8, 'Angelina' stonecrop is somewhat tolerant to cold weather during the growing season. It can handle temperatures several degrees below freezing and still bounce back just fine. It also tolerates high heat and humidity well, as long as it’s not stuck in standing water.
Fertilizer
Stonecrop plants generally prefer lean soil, so fertilizer usually won't be necessary for this plant. Chemical fertilizer can cause 'Angelina' to stretch and flop. If your soil is lacking nutrients, consider using compost instead of chemical fertilizer
Related Stonecrop Varieties
There are several other varieties of stonecrop that are easy to grow in the garden:
Dragon's Blood sedum (Sedum spurium 'Fuldaglut'): This is another good groundcover plant, growing 3 to 5 inches tall with plentiful rose-red flowers.
Blue spruce stonecrop: (Sedum 'Blue Spruce'): This cultivar has bluish foliage that grows around 6 to 9 inches tall with a 1- to 1 1/2-foot spread. Small, star-shaped, yellow flowers emerge in June and July. It adapts to many soil conditions, as long as there is good drainage.
Purple emperor stonecrop (Sedum 'Purple Emperor’): This is a hybrid stonecrop with dark purple foliage. It grows upright at a little more than 1 foot in height and spread. And it sports tiny masses of pinkish-purple flowers from around July to September.
Autumn joy stonecrop (Hylotelephium 'Herbstfreude'): This stonecrop—no longer classified in the Sedum genus—also grows in average, well-draining soil with dry to medium moisture. It reaches around 18 to 24 inches in height and spread. And it features fall blooms that start out pink and gradually turn to a rose red.
Propagating 'Angelina' Stonecrop
'Angelina' stonecrop plants are easy to propagate by rooting. In fact, stems that break off from the main plant fall to the ground often root all by themselves. If you're looking for a plant that's well-behaved and doesn't spread into neighboring garden areas, this might not be the best choice for you.
To purposely propagate' Angelina', snip off a piece of stem 2 to 5 inches. Then, plant it in a well-draining potting mix and keep the soil moist while you’re waiting for roots to take hold. After around two to three weeks, you should feel resistance when you gently tug on the stem, meaning it has rooted. At this point, it’s ready for planting in the garden. Propagating with this method usually is successful at any point during the growing season, thanks to the plant's hardiness, but it's best done in late spring or early summer.

Pruning
Most gardeners prune 'Angelina' stonecrop plants only if they feel the plants have become too large. Using hand pruners, simply trim off any overgrown stems from where you don’t want them to shape the plant. Also, remove any dead or diseased material whenever you spot it. Pruning typically can be done at any time of year without harming the plant. But as a precaution, avoid pruning during extreme hot or cold temperatures.
Furthermore, your plant might not bloom during its first year. But whenever it does bloom, it will produce clusters of star-shaped yellow flowers on tall stalks. These yellow flower clusters, which arise in the summer, are reasonably attractive. However, some gardeners find the flower stalks to be awkwardly tall. And once the blooms fade, you are left with rather ugly brown stalks, which you can prune whenever you like.
0
0
文章
Miss Chen
2021年07月01日

Agave plants (Agave spp.) generally are succulents with large leaves that end in spiny tips. There's a lot of variety in the agave genus. There are the large, stiff specimens that can grow to 10 feet or more in height and width. And there are the small dish-sized agaves, as well as a few agave species with soft leaves and no spines. Agave foliage tends toward a blue-green in hardier varieties and a gray-green in warm-climate varieties. There are also some that are variegated with gold or white markings.
It's typically best to plant this slow-growing succulent in the spring or early fall. When agave matures after several years or even several decades, a tall flower stalk often grows out of the plant’s center. The flowers are bell-shaped and long-lasting in shades of white, yellow, and green. For most agave species, once the flowers produce berry seed pods, the plant dies.
Botanical Name Agave
Common Name Agave, century plant
Plant Type Perennial succulent
Mature Size Different varieties average 1 to 20 feet tall and 1 to 10 feet wide.
Sun Exposure Full sun
Soil Type Sandy or rocky, dry, well-draining
Soil pH 6.6 to 6.8
Bloom Time Most plants only bloom once in their lifetime.
Flower Color Green, white, yellow
Hardiness Zones 5 to 11
Native Area Hot, arid regions of the Americas; also some tropical areas
How to Grow Agave
Agaves are grown for their dramatic foliage, not their flowers. One large agave is all you need to make a sculptural focal point in the garden. Just make sure there is plenty of room to walk around it, so no one accidentally brushes against the spiny tips. Agaves also can make a nice border grouping and are a textural contrast with other plants. Pairing them with ornamental grasses softens their hard edges. Plus, small agave species are excellent for containers, indoors or outside.
Agaves thrive on neglect. The key is to make sure they have well-draining soil and ample sunlight. When grown in an environment they like, they need very little supplemental care from you.
Light
Agave plants prefer a spot with full sun, but they can tolerate a little shade. The hotter the climate is, the more shade they can handle.
Soil
Agave plants will tolerate any well-draining soil, but their preference is rocky or sandy soil. Poor soil drainage can lead to root rot, which can kill a plant.
Water
Mature agave plants are very drought tolerant. You generally only need to water them if you've had a long stretch without rainfall and the soil is completely dry. However, when you are first establishing a plant, water it every four or five days for the first month. Then, water once a week, gradually spacing watering to every other week, depending on rainfall.
Temperature and Humidity
The majority of agave plants can't tolerate frost and only can grow as far north as USDA growing zones 8 or 9. But there are some, such as Agave parryi, that are reliably perennial to zone 5. Moreover, most agaves prefer a climate with low humidity. High humidity can lead to crown rot on a plant.
Fertilizer
Feeding typically isn't necessary for agave plants. In fact, feeding encourages flowering, which you don’t want to happen too soon because most agave plants die after flowering.
Growing Agave in Containers
As with many succulent plants, agaves have shallow roots. So you can grow them in a shallow container because they don’t need much soil. Just make sure the container can anchor the weight of the plant. Use a well-draining potting mix made for succulents. Water the container about once a week in the summer and monthly in the winter. Wait until the surface of the soil is dry before watering.
Plan to repot your agave plant every couple of years with new soil. If the pot is overcrowded with roots, go ahead and cut the roots back. Then, give the plant a week or so to adjust before you water it again.
Common Pests and Diseases
Agaves generally have very few problems with pests and diseases. However, the agave snout weevil can burrow into a plant’s center to lay its eggs, causing the plant to collapse. Unfortunately, you probably won’t notice this until it’s too late to save the plant. So instead remove the plant to avoid the pests spreading to any other agaves you might have.
Varieties of Agave
There are many agave species that range in size and appearance, including:
Agave attenuata: This is a popular spineless variety, also known as the foxtail or dragon-tree agave. It grows around 4 to 5 feet tall and a bit wider.
Agave parviflora: Its leaves have white markings and curling filaments that give it a hairy look. It only gets about 6 inches tall and blooms in six to eight years with green flowers.
Agave tequilana azul: Weber's blue agave is used to make tequila, but it is also a very attractive garden plant, reaching upward of 6 feet tall and flowering in six to eight years with yellow blooms.
Agave victoria-reginae: As this plant matures its broad leaves cup inward, forming a dome. It reaches a height of about a foot, and cream flowers appear in 20 to 30 years.
0
0
文章
Miss Chen
2021年05月05日

Why are other people's succulents
Variety of colors, fat, cute and stylish;
Your fleshy is just a dish, grow into a dog?
The only reason is:
you! Do not! meeting! support! but! You are not to blame!
Today I will teach you some methods
Let flower friends take their own fleshy
Raise more beautifully, more beautifully!
ps: Note that the following methods are mainly for sedum succulents

Get more sun! Get more sun!
Want to be more fleshy and fatter and beautiful
The most important thing is to get more sun,
In addition to shading in summer, we need to bask in spring and autumn
The longer the drying time, the better,
It’s better to be more than 8 hours, and not to dry through the glass,
It’s the direct sunlight outside, which doesn’t work well through the glass.
Because glass blocks a lot of ultraviolet rays.
Of course, if you don’t have an open-air breeding environment at home,
Put it in the place where the light is the strongest and the longest time in the home,
show! show! show! Some scented meat,
The scent will only appear after drying!
The longer the sun is, the stronger the fragrance!

1. In summer, the sun is too violent and you can’t just dry it outdoors.
Need to shade or move indoors.
2. In winter, the outdoor temperature is lower than -3 degrees and can not be watered and dried outdoors.
Easy to frostbite,
The pot soil must be kept dry before it can be dried outside.

Water less! Water less!
Many people think that watering can make the flesh fatter
Actually it's not like this,
Too much water will only make the flesh grow higher up blindly
In this case, it will be lost.
It’s not that you can gain weight with more water,
Only after controlling the water
Let the flesh have the concept of lack of water,
Long time
Flesh will use its own leaves to store water,
The leaves will gradually thicken
But it can't be too dry,
If it is too dry, the leaves will also shrivel
So this watering must be well controlled!
In addition to the fleshy flesh that is still in the slow-rooting state,
When the root system has grown,
Generally, watering 1-2 times a month during the growing season is enough.
Pour it through every time! Water in the morning or evening!

Precautions
1. The seedlings need more peat,
Because Xiao Miao’s water storage capacity is weak,
The old piles can be more granular, so that the plant type is better!
2. The growth of plants can be directly proportional to the ratio of particles,
The bigger the plant, the more particles you can add!
Watering too! Xiao Miao can not control the water!

Great temperature difference! Great temperature difference!
If you want succulents to have beautiful colors
The temperature difference is also a very important reason.
If spring and autumn
The outdoor temperature difference between morning and evening exceeds 15℃, open-air maintenance,
Within three days, the whole pot of fleshy meat will change color.
Of course, this is basically dependent on the sky,
Unless there are special conditions at home, temperature control can be carried out.
Some methods of manually controlling the temperature difference are basically not mature,
So it’s better to do the previous things well,
Your succulents must not be ugly.
Variety of colors, fat, cute and stylish;
Your fleshy is just a dish, grow into a dog?
The only reason is:
you! Do not! meeting! support! but! You are not to blame!
Today I will teach you some methods
Let flower friends take their own fleshy
Raise more beautifully, more beautifully!
ps: Note that the following methods are mainly for sedum succulents

Get more sun! Get more sun!
Want to be more fleshy and fatter and beautiful
The most important thing is to get more sun,
In addition to shading in summer, we need to bask in spring and autumn
The longer the drying time, the better,
It’s better to be more than 8 hours, and not to dry through the glass,
It’s the direct sunlight outside, which doesn’t work well through the glass.
Because glass blocks a lot of ultraviolet rays.
Of course, if you don’t have an open-air breeding environment at home,
Put it in the place where the light is the strongest and the longest time in the home,
show! show! show! Some scented meat,
The scent will only appear after drying!
The longer the sun is, the stronger the fragrance!

1. In summer, the sun is too violent and you can’t just dry it outdoors.
Need to shade or move indoors.
2. In winter, the outdoor temperature is lower than -3 degrees and can not be watered and dried outdoors.
Easy to frostbite,
The pot soil must be kept dry before it can be dried outside.

Water less! Water less!
Many people think that watering can make the flesh fatter
Actually it's not like this,
Too much water will only make the flesh grow higher up blindly
In this case, it will be lost.
It’s not that you can gain weight with more water,
Only after controlling the water
Let the flesh have the concept of lack of water,
Long time
Flesh will use its own leaves to store water,
The leaves will gradually thicken
But it can't be too dry,
If it is too dry, the leaves will also shrivel
So this watering must be well controlled!
In addition to the fleshy flesh that is still in the slow-rooting state,
When the root system has grown,
Generally, watering 1-2 times a month during the growing season is enough.
Pour it through every time! Water in the morning or evening!

Precautions
1. The seedlings need more peat,
Because Xiao Miao’s water storage capacity is weak,
The old piles can be more granular, so that the plant type is better!
2. The growth of plants can be directly proportional to the ratio of particles,
The bigger the plant, the more particles you can add!
Watering too! Xiao Miao can not control the water!

Great temperature difference! Great temperature difference!
If you want succulents to have beautiful colors
The temperature difference is also a very important reason.
If spring and autumn
The outdoor temperature difference between morning and evening exceeds 15℃, open-air maintenance,
Within three days, the whole pot of fleshy meat will change color.
Of course, this is basically dependent on the sky,
Unless there are special conditions at home, temperature control can be carried out.
Some methods of manually controlling the temperature difference are basically not mature,
So it’s better to do the previous things well,
Your succulents must not be ugly.
0
0
文章
Miss Chen
2021年04月20日

As a novice, I recommend some more popular and relatively easy-to-breed varieties. You can use small pots to raise single plants in a single room, or you can group pots to grow plants with similar habits. If you are a fighter in general cargo, you are strongly recommended to buy these two varieties. The price of real cabbage is a big surprise, and you will not die no matter how you raise it.
1. White Peony
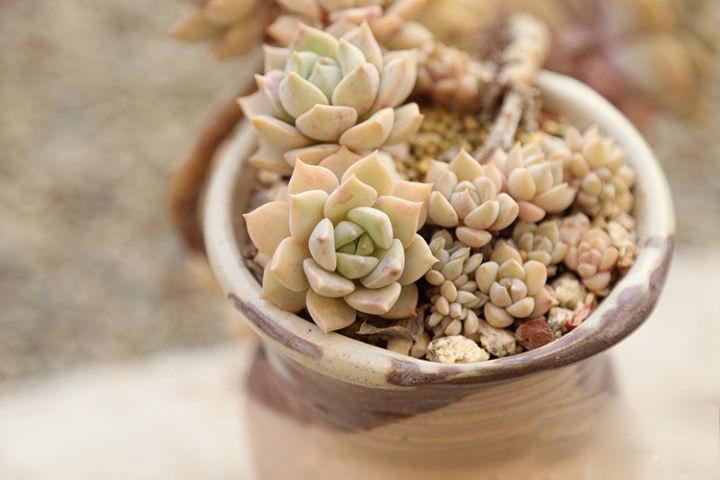
White peonies are tender and tender when they are raised. In the past two years, South Korea brought white peonies of superb quality to the country and sold them at high prices, posing as new varieties. However, because the variety is still relatively general, the temperature difference and light requirements are relatively high if you want to grow a particularly good color. The main surprise that white peony brings is that it is super easy to live.
2. Givalian
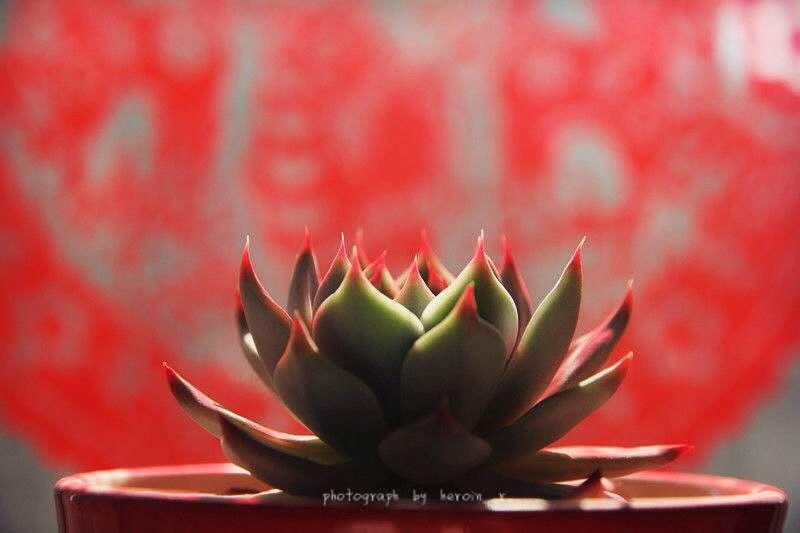
White peony is alive as soon as it is inserted, and Jivalian is basically red as soon as it is exposed to the sun, and it is shining with a little sunshine. In autumn and winter, almost half of the leaves are red tips, which is especially beautiful. And even though it is a common product, Jiwalian rarely grows excessively. In summer, the leaves will elongate and the plant shape is scattered. Most of the time, it is very compact. The magnificent and charming type in everyone's impression, Succulents are always chubby and chubby, but not all of them. Succulents also have romantic varieties like roses.
3. Mountain rose

The rose among the succulents is the mountain rose. The thin leaves are layered on top of each other, rolling out a beautiful heart like a rose, which is very beautiful. Mountain roses are talking about this type of plant, not the name of the variety. In this type of plant, there will be a variety of small roses with petals of different shapes. However, although the plant type is very beautiful, mountain roses are more difficult to produce color, and they are usually green.
4. Lina Lian
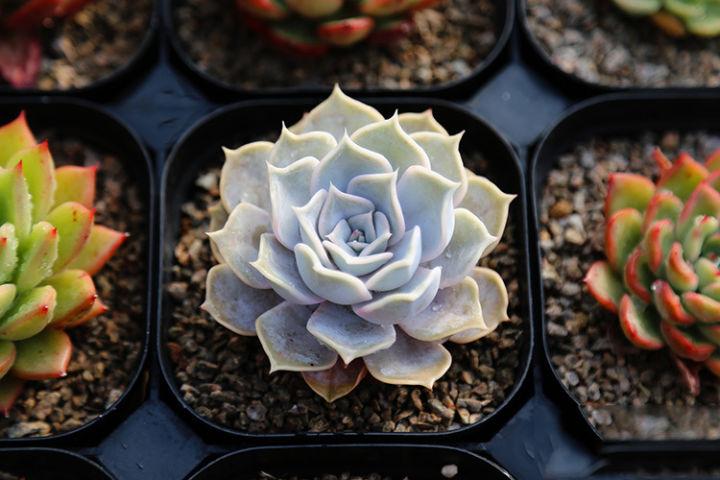
Lina is also a very common general product, because of its unique leaf shape, it has almost become a must-have for the group of pots. In many varieties with round leaves, it can play a good role in adjusting, and Lina is very easy to use. Color, in addition to the unavoidable turning green in summer, other seasons can easily become the kind of light pink that is very girly. However, Lina's words are a bit like white peony. It lives no matter what, but it is a variety that is easier to grow. For the color control, the delicate pink series must not be overlooked. Every year in autumn and winter, these pink varieties are simply going to be beautiful.
5. Debbie

The pink variety is a classic must-have. It grows fast, and is not so easy to grow. It is easier to control the plant type and color, and novices can also grow beautiful.
6, peach eggs
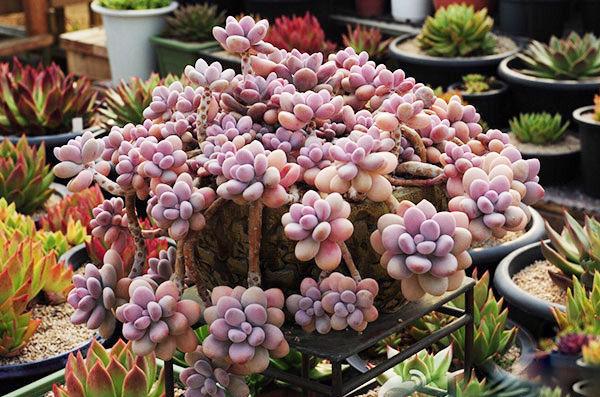
The characteristic of a good variety is that even if the conditions are not adequate, the appearance of the plant will still be good. In terms of price, peach eggs are no longer in the ranks of general merchandise, but the genes of good varieties make them tender and tender almost all year round, and they are not easy to grow. After a long time, the peach egg will become a very beautiful old pile, which is collected by almost every high-level player. Noble and glamorous type In nature, blue plants are relatively rare, whether they are flowers or leaves, so blue succulents are generally quite popular. The white whale almost loses every blue, and it really feels too beautiful.
1. White Peony

White peonies are tender and tender when they are raised. In the past two years, South Korea brought white peonies of superb quality to the country and sold them at high prices, posing as new varieties. However, because the variety is still relatively general, the temperature difference and light requirements are relatively high if you want to grow a particularly good color. The main surprise that white peony brings is that it is super easy to live.
2. Givalian

White peony is alive as soon as it is inserted, and Jivalian is basically red as soon as it is exposed to the sun, and it is shining with a little sunshine. In autumn and winter, almost half of the leaves are red tips, which is especially beautiful. And even though it is a common product, Jiwalian rarely grows excessively. In summer, the leaves will elongate and the plant shape is scattered. Most of the time, it is very compact. The magnificent and charming type in everyone's impression, Succulents are always chubby and chubby, but not all of them. Succulents also have romantic varieties like roses.
3. Mountain rose

The rose among the succulents is the mountain rose. The thin leaves are layered on top of each other, rolling out a beautiful heart like a rose, which is very beautiful. Mountain roses are talking about this type of plant, not the name of the variety. In this type of plant, there will be a variety of small roses with petals of different shapes. However, although the plant type is very beautiful, mountain roses are more difficult to produce color, and they are usually green.
4. Lina Lian

Lina is also a very common general product, because of its unique leaf shape, it has almost become a must-have for the group of pots. In many varieties with round leaves, it can play a good role in adjusting, and Lina is very easy to use. Color, in addition to the unavoidable turning green in summer, other seasons can easily become the kind of light pink that is very girly. However, Lina's words are a bit like white peony. It lives no matter what, but it is a variety that is easier to grow. For the color control, the delicate pink series must not be overlooked. Every year in autumn and winter, these pink varieties are simply going to be beautiful.
5. Debbie

The pink variety is a classic must-have. It grows fast, and is not so easy to grow. It is easier to control the plant type and color, and novices can also grow beautiful.
6, peach eggs

The characteristic of a good variety is that even if the conditions are not adequate, the appearance of the plant will still be good. In terms of price, peach eggs are no longer in the ranks of general merchandise, but the genes of good varieties make them tender and tender almost all year round, and they are not easy to grow. After a long time, the peach egg will become a very beautiful old pile, which is collected by almost every high-level player. Noble and glamorous type In nature, blue plants are relatively rare, whether they are flowers or leaves, so blue succulents are generally quite popular. The white whale almost loses every blue, and it really feels too beautiful.
0
0
文章
莹723
2021年01月13日

Nasturtium (Tropaeolum majus) is one of the easiest hardy annual flowers to grow, producing masses of vividly coloured blooms through summer and autumn. They’re perfect for growing with children. Nasturtiums come in both bushy and climbing varieties, which makes them splendidly versatile.
Some varieties have attractively marbled or mottled leaves. Nasturtiums not only look spectacular but the flowers, leaves and seeds are edible too. Bees love the colourful nasturtium blooms, and caterpillars of the large and small white butterflies feed on the leaves.
Being annuals, nasturtiums complete their lifecycle in one growing season.

——How to grow nasturtiums
Nasturtiums are ideal for lots of different sunny spots around the garden, including pots. Climbing varieties of nasturtium can be trained up vertical supports and are great to twine through other plants too.
Nasturtiums that are climbers can also be used as trailers – to spread across gravel or cascade down a slope or bank. Free-draining soil is essential for nasturtiums and, unlike many other flowers, they thrive on poor soils.

——Where to grow nasturtiums
Nasturtiums must have sun for at least half the day in order to grow well and do best in sites sheltered from winds. A free-draining soil is essential, and nasturtiums flower best in poor soils (that are low in fertility) as a fertile soil results in lots of leafy growth at the expense of flowers. Hence there’s no need to add fertilizer before sowing.
Nasturtiums do well in gravelly or stony ground or growing on banks. In containers, mix two-thirds peat-free multi-purpose compost with one third fine gravel or grit, to reduce fertility and ensure good drainage.

——How to plant nasturtiums
For best results, sow nasturtium directly where they are to flower, as they’re fast-growing and there’s no need to bother about transplanting. Sow the seed 1.5 cm deep into moist soil to speed germination, so water before planting if conditions are dry.
The first seeds can be sown in mid-spring and you can carry on sowing until mid-summer to ensure flowers right up to the first frosts. Thin the seedlings to 30 cm apart.
However, sowing in pot also works – simply sow one seed per pot and transplant outside when all risk of frost has passed.

——How to care for nasturtiums
Nasturtiums are easy-care and need little maintenance. Plants growing in containers should be watered to keep the compost evenly moist, but not fed. Removing the dead flower heads of nasturtiums will encourage more blooms to be produced for a longer period.
——How to propagate nasturtiums
Nasturtium seeds can be collected when ripe and saved to sow next year. In mild areas, nasturtiums are also likely to self-sow, so you may get seedlings springing up in future years. These can be easily pulled up if not wanted.

——How to harvest and use nasturtiums
Nasturtium leaves, flowers and seeds are all edible. The flowers make a brightly coloured garnish to salads and other uncooked dishes. Nasturtium leaves have a peppery taste and should be picked when young to incorporate in salads. Nasturtium seeds can be used as a substitute for capers and should be picked when mature but still green, for pickling in vinegar.

——Growing nasturtiums: problem solving
Nasturtiums are likely to attract large and small white butterflies (known as cabbage white butterflies) which lay their large greenish eggs on the leaf undersides, which hatch into caterpillars that eat the leaves. This can be useful to deter caterpillars from eating brassica crops but not desirable if you’re growing nasturtiums for flowers. The best method of control is to inspect plants regularly and squash the eggs or young caterpillars, or move them on to plants you don’t mind being eaten.
Nasturtiums are also attractive to aphids, particularly blackfly. By planting nasturtiums alongside bean crops you can lure aphids away from your crop, but you may not appreciate aphids on nasturtiums you’re growing for leaves and flowers. Spray them off with a jet of water or let ladybirds, hoverflies and lacewings remove them for you – all three lay their eggs on aphid colonies and their young quickly eat them up.

——Nasturtium varieties to grow
Choose from mixed flower colours or opt for individually coloured varieties to create coordinated planted schemes.
• Nasturtium ‘Alaska’ – flowers in yellow, orange and red are shown off against cream and green marbled leaves. Bushy, 30 cm high.
• Nasturtium ‘Empress of India’ – crimson-red flowers and dark reddish leaves. 25 cm high.
• Nasturtium ‘Milkmaid’ – Creamy-white flowers on climbing/trailing stems. 180 cm high.
• Nasturtium ‘Paintbox Mixed’ – a mix of brightly coloured flowers that are more upward facing and hence visible than most. 30 cm high.
• Nasturtium ‘Salmon Baby’. Bright salmon pink flowers. 30 cm high.
• Nasturtium ‘Tip Top Velvet’. Dark red blooms that show off well against fresh green foliage. 30 cm high.
• Nasturtium ‘Trailing Mixed’, ‘Tall Mixed’. Masses of orange, yellow and red blooms on long stems that can climb or trail. 180 cm high.
Some varieties have attractively marbled or mottled leaves. Nasturtiums not only look spectacular but the flowers, leaves and seeds are edible too. Bees love the colourful nasturtium blooms, and caterpillars of the large and small white butterflies feed on the leaves.
Being annuals, nasturtiums complete their lifecycle in one growing season.

——How to grow nasturtiums
Nasturtiums are ideal for lots of different sunny spots around the garden, including pots. Climbing varieties of nasturtium can be trained up vertical supports and are great to twine through other plants too.
Nasturtiums that are climbers can also be used as trailers – to spread across gravel or cascade down a slope or bank. Free-draining soil is essential for nasturtiums and, unlike many other flowers, they thrive on poor soils.

——Where to grow nasturtiums
Nasturtiums must have sun for at least half the day in order to grow well and do best in sites sheltered from winds. A free-draining soil is essential, and nasturtiums flower best in poor soils (that are low in fertility) as a fertile soil results in lots of leafy growth at the expense of flowers. Hence there’s no need to add fertilizer before sowing.
Nasturtiums do well in gravelly or stony ground or growing on banks. In containers, mix two-thirds peat-free multi-purpose compost with one third fine gravel or grit, to reduce fertility and ensure good drainage.

——How to plant nasturtiums
For best results, sow nasturtium directly where they are to flower, as they’re fast-growing and there’s no need to bother about transplanting. Sow the seed 1.5 cm deep into moist soil to speed germination, so water before planting if conditions are dry.
The first seeds can be sown in mid-spring and you can carry on sowing until mid-summer to ensure flowers right up to the first frosts. Thin the seedlings to 30 cm apart.
However, sowing in pot also works – simply sow one seed per pot and transplant outside when all risk of frost has passed.

——How to care for nasturtiums
Nasturtiums are easy-care and need little maintenance. Plants growing in containers should be watered to keep the compost evenly moist, but not fed. Removing the dead flower heads of nasturtiums will encourage more blooms to be produced for a longer period.
——How to propagate nasturtiums
Nasturtium seeds can be collected when ripe and saved to sow next year. In mild areas, nasturtiums are also likely to self-sow, so you may get seedlings springing up in future years. These can be easily pulled up if not wanted.

——How to harvest and use nasturtiums
Nasturtium leaves, flowers and seeds are all edible. The flowers make a brightly coloured garnish to salads and other uncooked dishes. Nasturtium leaves have a peppery taste and should be picked when young to incorporate in salads. Nasturtium seeds can be used as a substitute for capers and should be picked when mature but still green, for pickling in vinegar.

——Growing nasturtiums: problem solving
Nasturtiums are likely to attract large and small white butterflies (known as cabbage white butterflies) which lay their large greenish eggs on the leaf undersides, which hatch into caterpillars that eat the leaves. This can be useful to deter caterpillars from eating brassica crops but not desirable if you’re growing nasturtiums for flowers. The best method of control is to inspect plants regularly and squash the eggs or young caterpillars, or move them on to plants you don’t mind being eaten.
Nasturtiums are also attractive to aphids, particularly blackfly. By planting nasturtiums alongside bean crops you can lure aphids away from your crop, but you may not appreciate aphids on nasturtiums you’re growing for leaves and flowers. Spray them off with a jet of water or let ladybirds, hoverflies and lacewings remove them for you – all three lay their eggs on aphid colonies and their young quickly eat them up.

——Nasturtium varieties to grow
Choose from mixed flower colours or opt for individually coloured varieties to create coordinated planted schemes.
• Nasturtium ‘Alaska’ – flowers in yellow, orange and red are shown off against cream and green marbled leaves. Bushy, 30 cm high.
• Nasturtium ‘Empress of India’ – crimson-red flowers and dark reddish leaves. 25 cm high.
• Nasturtium ‘Milkmaid’ – Creamy-white flowers on climbing/trailing stems. 180 cm high.
• Nasturtium ‘Paintbox Mixed’ – a mix of brightly coloured flowers that are more upward facing and hence visible than most. 30 cm high.
• Nasturtium ‘Salmon Baby’. Bright salmon pink flowers. 30 cm high.
• Nasturtium ‘Tip Top Velvet’. Dark red blooms that show off well against fresh green foliage. 30 cm high.
• Nasturtium ‘Trailing Mixed’, ‘Tall Mixed’. Masses of orange, yellow and red blooms on long stems that can climb or trail. 180 cm high.
0
0
文章
莹723
2020年12月15日

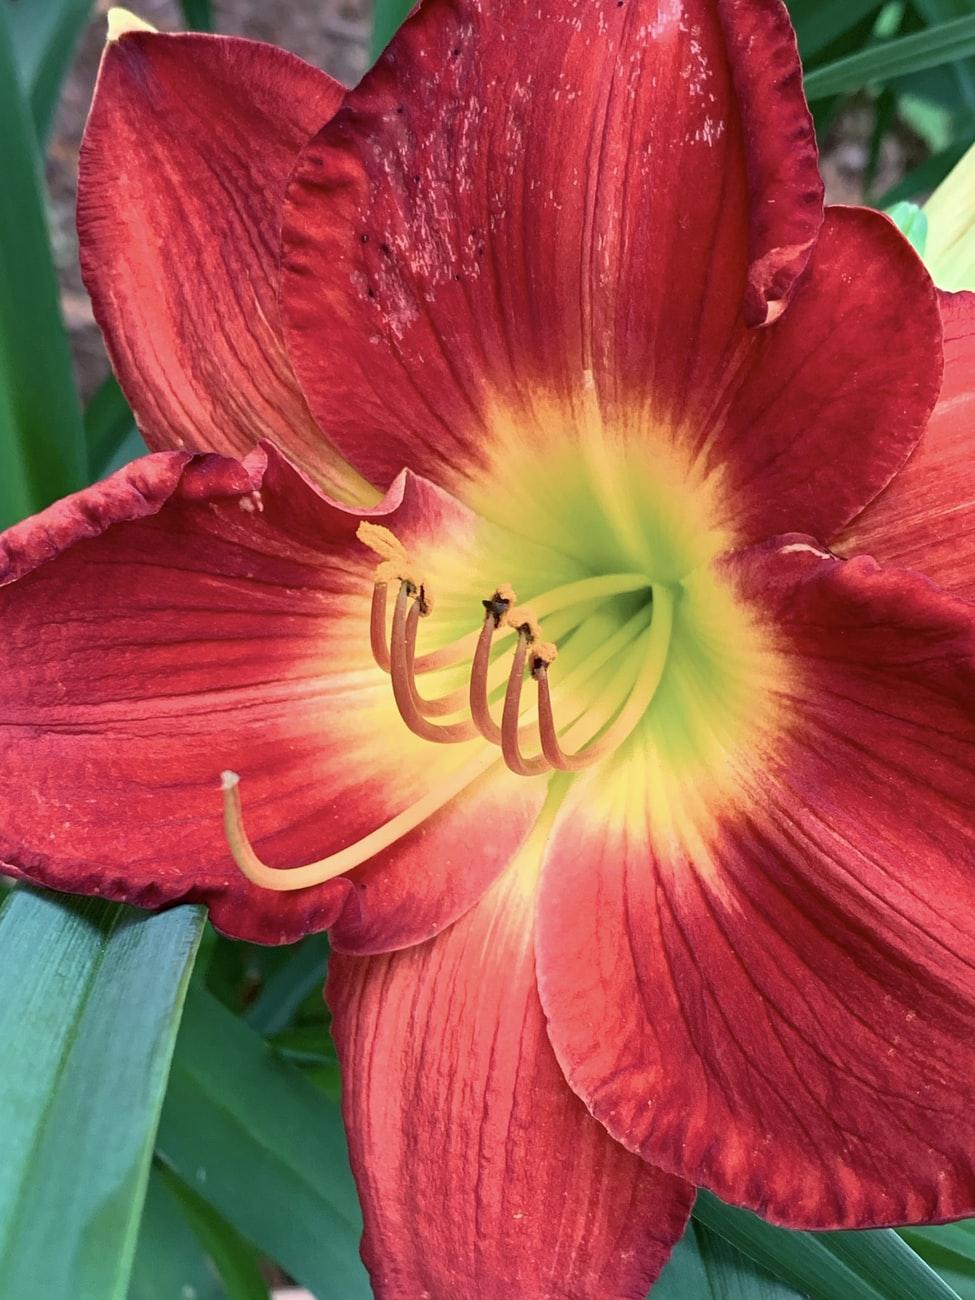
In the depths of winter and early spring, the flamboyant blooms of amaryllis (Hippeastrum) are welcome. They’re easy to grow, and take between six to eight weeks to flower. Planted in mid-late September, they should produce their large trumpet flowers for Christmas.
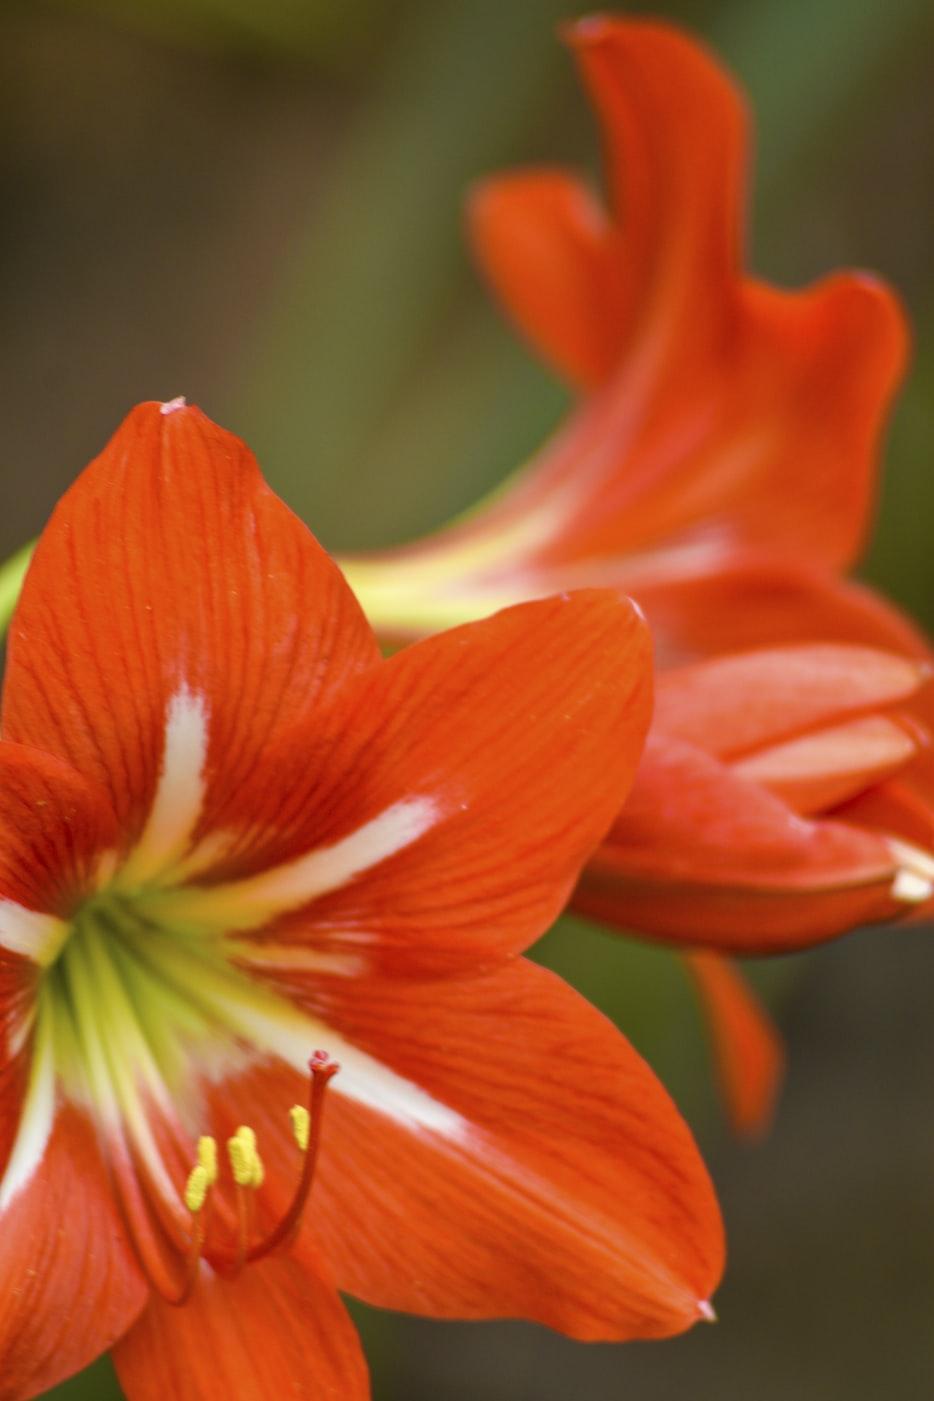
The rich red variety ‘Royal Velvet’ is great for decorating your home or to give as a gift:
Like many bulbs, including lilies, all parts of amaryllis are poisonous to cats and dogs, so please grow them in areas they can’t reach.
You Will Need
•Amaryllis bulb
•Multi-purpose, peat-free compost
•20cm diameter pot
•Pot, for soaking
Step 1
Soak the amaryllis bulbs for a few hours to help rehydrate the roots and speed up the growth process.
Step 2
Fill a pot with compost and sit the bulb on top. Don’t use a pot that’s too big: amaryllis do best when pot bound.

Step 3
Top up with compost and water in. Leave in a warm, dark place for a couple of weeks and don’t water further.
Step 4
When a shoot emerges, bring inside to a warm, light spot and water regularly. Expect flowers in six to eight weeks.

The rich red variety ‘Royal Velvet’ is great for decorating your home or to give as a gift:
Like many bulbs, including lilies, all parts of amaryllis are poisonous to cats and dogs, so please grow them in areas they can’t reach.

You Will Need
•Amaryllis bulb
•Multi-purpose, peat-free compost
•20cm diameter pot
•Pot, for soaking

Step 1
Soak the amaryllis bulbs for a few hours to help rehydrate the roots and speed up the growth process.
Step 2
Fill a pot with compost and sit the bulb on top. Don’t use a pot that’s too big: amaryllis do best when pot bound.

Step 3
Top up with compost and water in. Leave in a warm, dark place for a couple of weeks and don’t water further.
Step 4
When a shoot emerges, bring inside to a warm, light spot and water regularly. Expect flowers in six to eight weeks.

0
0
文章
莹723
2020年12月08日

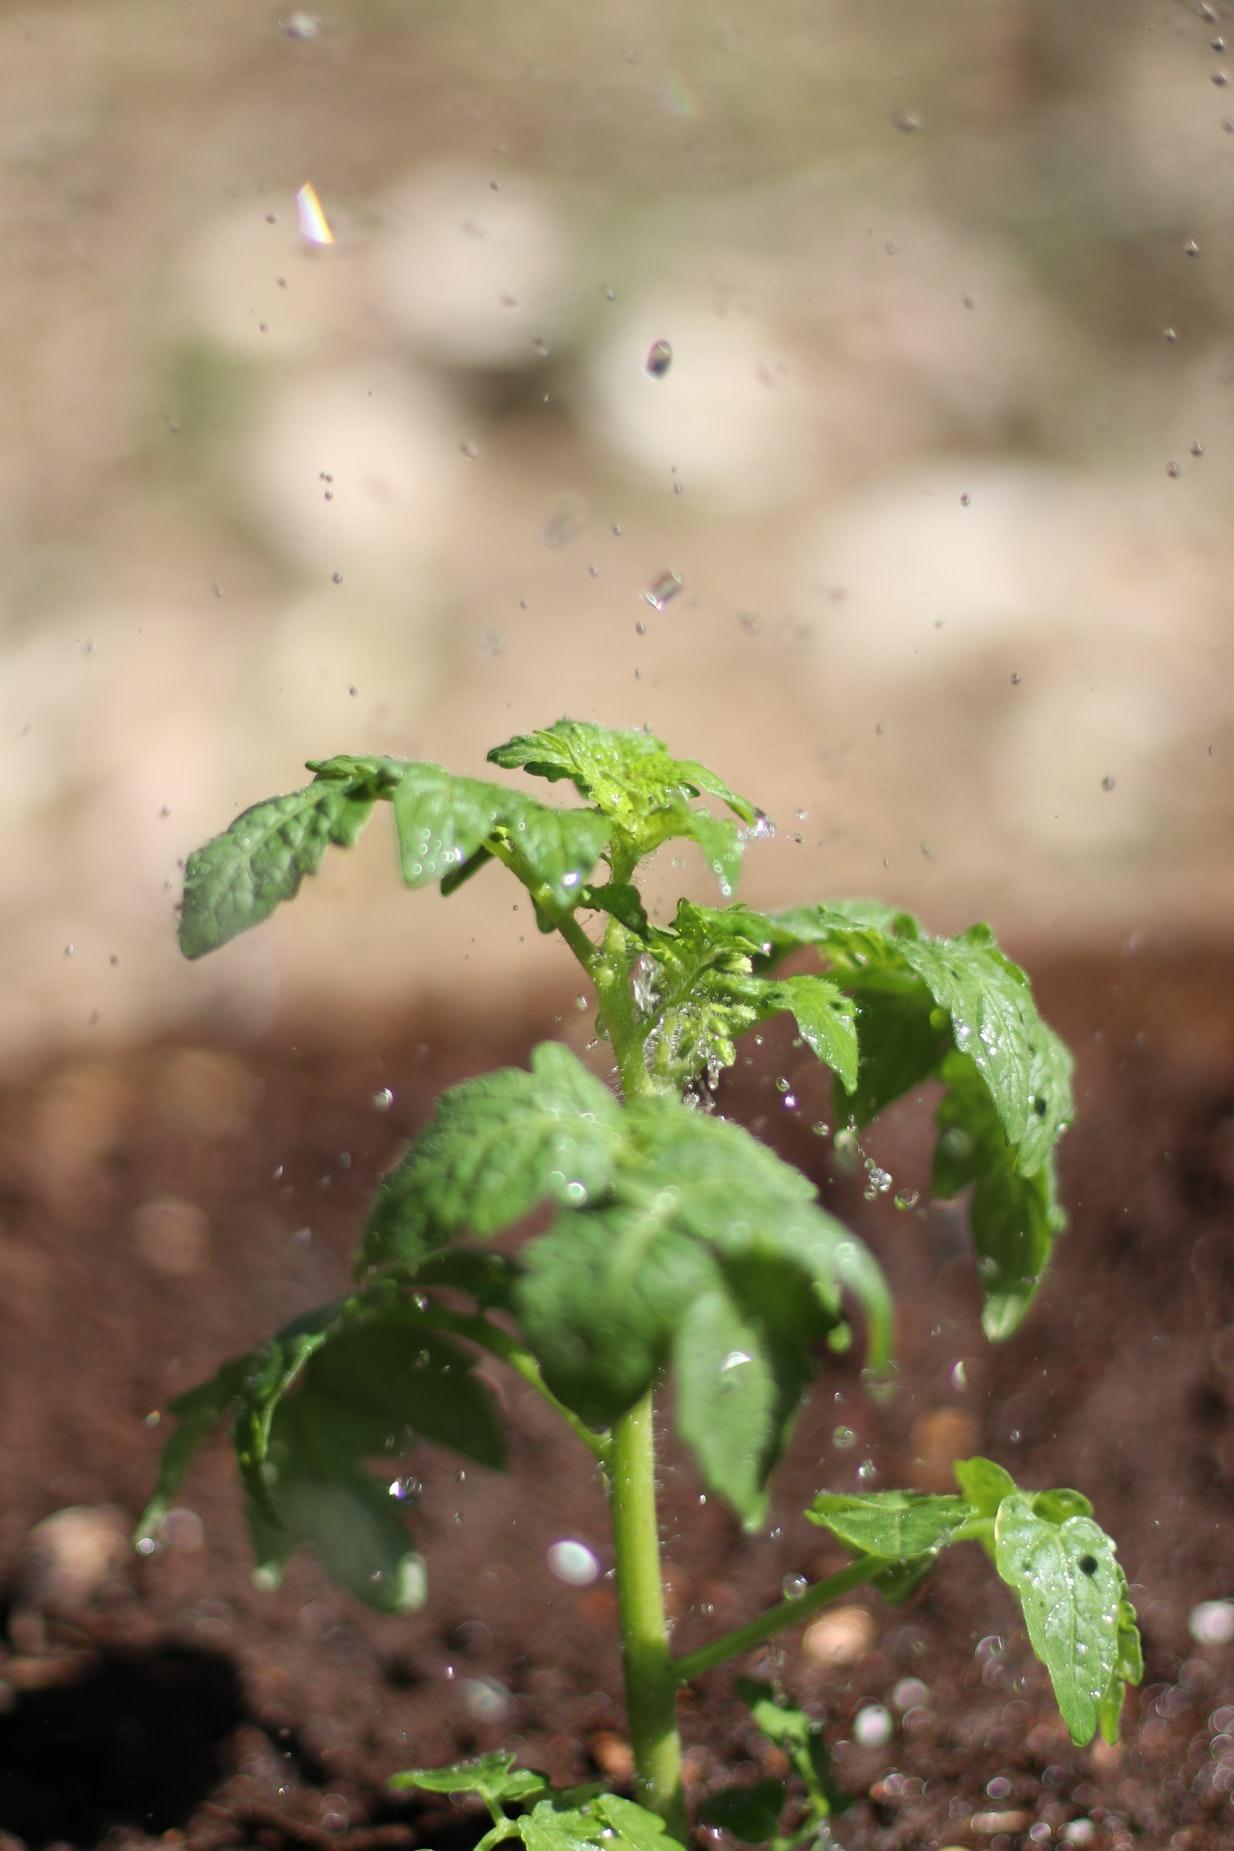
Sweet pea plugs can be glorious when planted in pots and containers, and will last for months.
To grow sweet pea plugs in pots outdoors, they must first be hardened off and given some protection. A sheltered spot or a frame outside for a few weeks is ideal. To get the best blooms, a method exhibition growers use is to nip out the energy-sapping side shoots and tendrils.
Discover how to grow sweet peas in pots from plugs, for a beautiful summer display, in just three easy steps.

You Will Need
•Sweet pea plugs
•Multi-purpose, peat-free compost
•Loam-based compost
•Pea sticks
Total time:
20 minutes
Step 1
Sweet peas thrive in pots. Choose a rich potting compost and mix in loam-based compost to provide extra water retention. Firm in the compost well.

Step 2
Use pea sticks, wire mesh or pea netting for support. Plant the plugs close to their supports. Individual plants grown as one plug can be carefully separated.

Step 3
Soak the newly planted plugs and once they start to grow away use a liquid feed regularly to encourage strong growth and continuous flowering.
To grow sweet pea plugs in pots outdoors, they must first be hardened off and given some protection. A sheltered spot or a frame outside for a few weeks is ideal. To get the best blooms, a method exhibition growers use is to nip out the energy-sapping side shoots and tendrils.
Discover how to grow sweet peas in pots from plugs, for a beautiful summer display, in just three easy steps.

You Will Need
•Sweet pea plugs
•Multi-purpose, peat-free compost
•Loam-based compost
•Pea sticks
Total time:
20 minutes
Step 1
Sweet peas thrive in pots. Choose a rich potting compost and mix in loam-based compost to provide extra water retention. Firm in the compost well.

Step 2
Use pea sticks, wire mesh or pea netting for support. Plant the plugs close to their supports. Individual plants grown as one plug can be carefully separated.

Step 3
Soak the newly planted plugs and once they start to grow away use a liquid feed regularly to encourage strong growth and continuous flowering.

0
0
文章
莹723
2020年11月19日

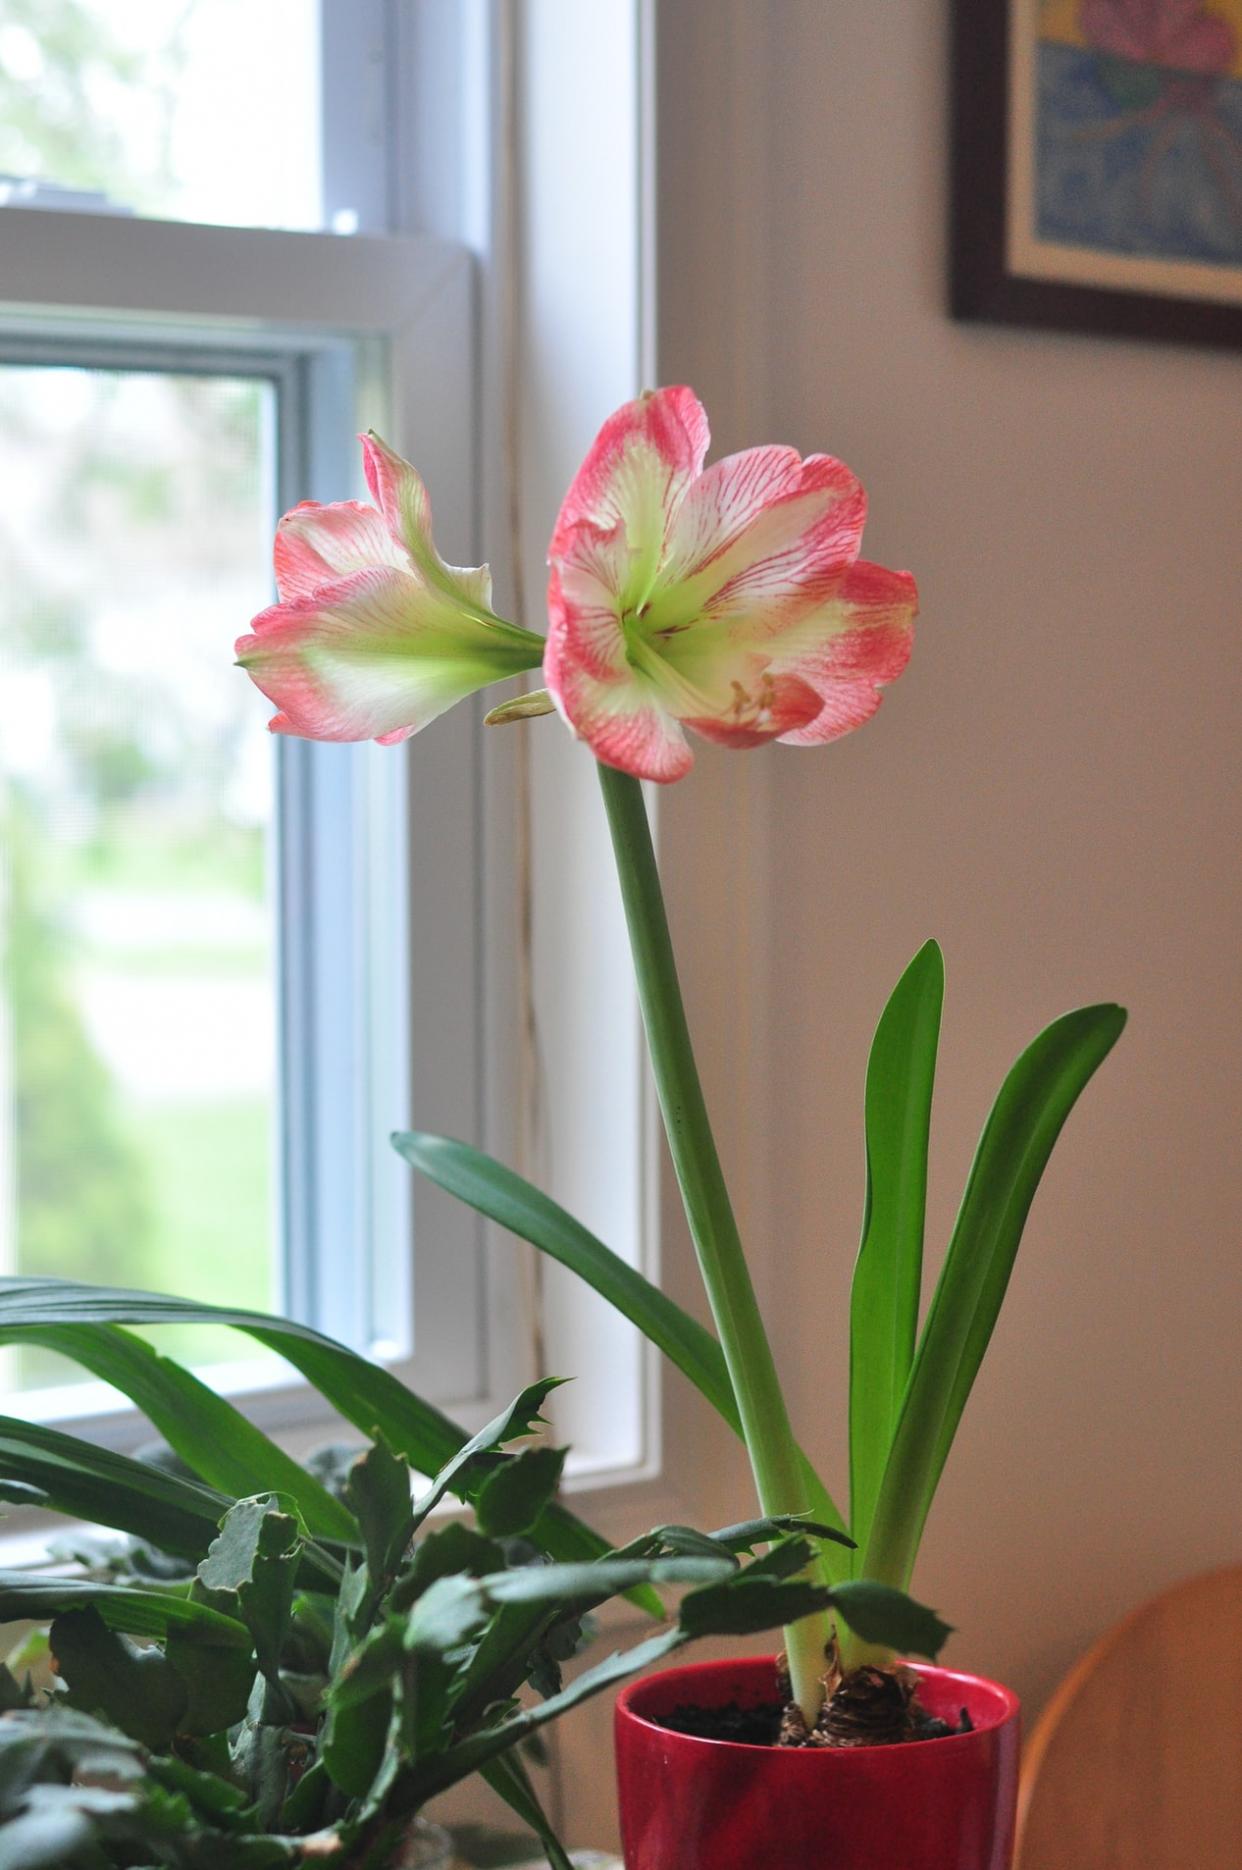
The blooms of amaryllis (Hippeastrum) are a stunning sight in the depths of winter and early spring. They’re easy to grow, and take between six to eight weeks to flower. Planted during October into an attractive container, they should produce their large trumpet flowers during the coming festive season.
You will like the rich red variety ‘Royal Velvet’, which is great for decorating your home or to give as a gift!
Like many bulbs, including lilies, all parts of amaryllis are poisonous to cats and dogs, so make sure to grow them in areas they can’t reach.
Let’s find out how to force amaryllis bulbs for a wonderful Christmas display.
You Will Need
•Amaryllis bulb
•Multi-purpose, peat-free compost
•20cm diameter pot
•Pot, for soaking
Total time:
30 minutes

Step 1
Soak the amaryllis bulbs for a few hours to help rehydrate the roots and speed up the growth process.

Step 2
Fill a pot with compost and sit the bulb on top. Don’t use a pot that’s too big: amaryllis do best when pot bound.

Step 3
Top up with compost and water in. Leave in a warm, dark place for a couple of weeks and don’t water further.

Step 4
When a shoot emerges, bring inside to a warm, light spot and water regularly. Expect flowers in six to eight weeks.

You will like the rich red variety ‘Royal Velvet’, which is great for decorating your home or to give as a gift!
Like many bulbs, including lilies, all parts of amaryllis are poisonous to cats and dogs, so make sure to grow them in areas they can’t reach.

Let’s find out how to force amaryllis bulbs for a wonderful Christmas display.
You Will Need
•Amaryllis bulb
•Multi-purpose, peat-free compost
•20cm diameter pot
•Pot, for soaking
Total time:
30 minutes

Step 1
Soak the amaryllis bulbs for a few hours to help rehydrate the roots and speed up the growth process.

Step 2
Fill a pot with compost and sit the bulb on top. Don’t use a pot that’s too big: amaryllis do best when pot bound.

Step 3
Top up with compost and water in. Leave in a warm, dark place for a couple of weeks and don’t water further.

Step 4
When a shoot emerges, bring inside to a warm, light spot and water regularly. Expect flowers in six to eight weeks.

0
0
文章
莹723
2020年11月13日

•Plant size
80cm height
80cm spread
•Average Yield
4.5kg-13.5kg per 3m row
•Spacing
1.6m apart
Rhubarb is easy to grow, producing masses of delicious stalks every year. Only the rhubarb stalks are edible. Never eat rhubarb leaves as these are extremely poisonous – compost these instead.
Plant rhubarb in fertile, free-draining soil with added organic matter, such as well-rotted horse manure. Allow plenty of space around the plant so it can spread out. Water during dry periods and mulch annually, in autumn. It’s a good idea to remove any flower stems when they appear to direct energy back into stem production. To harvest rhubarb, take the entire stem, gently twisting and then pulling it upwards from the base.
Find out more about growing rhubarb, below.

——How to grow rhubarb
The best way to plant rhubarb is to plant rhubarb crowns. Crowns are offsets cut from divisions of vigorous parent plants – usually they will be a piece of root with at least one dormant bud visible. Plant them in late autumn, 90cm or more apart, depending on the eventual spread of your chosen cultivar. Rhubarb will grow well in a sunny, open site, on a wide range of soils, as long as it has been well-prepared with plenty of manure or compost.
If you like the challenge of growing from seed, sow rhubarb outdoors in spring in a seedbed, thinning to 15cm apart and then once more to 30cm apart. The quality of seed-grown rhubarb can vary, so be ruthless in selecting the strongest plants to grow on. Plant out your chosen plants in a permanent site in autumn or spring.

——Caring for rhubarb
Rhubarb doesn’t need much attention and once established rhubarb plants will be productive for around 10 years. Maintaining soil fertility is the key to keeping plants healthy. Mulch around the base of plants with home-made compost, well-rotted manure and leaf mould, to suppress weeds and retain soil moisture. Giving plants a liquid feed in spring will also aid strong growth.
To get the sweetest and earliest crop of rhubarb you need to force rhubarb plants to produce stems before they would normally be ready. This simply means covering the crowns in early winter, to block out the light. You can use a bin or bucket, or a traditional terracotta rhubarb forcer – any cover that’s at least 45cm high. Your rhubarb plants will have developed tender stems after around five weeks.
If you have a greenhouse or garage, you can lift rhubarb plants to force indoors, for an even earlier crop. Dig up crowns in November and leave them on the soil surface to chill for two weeks. This will break dormancy. Then pot up each crown in compost, before moving into a cool indoor spot, and then cover.
It’s best to wait until your plants are well-established before forcing rhubarb, as it takes quite a lot of energy from the plant. Forced rhubarb plants will not usually produce much of a crop later on, but can be divided and replanted in summer.

——Harvesting rhubarb
Harvest rhubarb stems when they’re green or red. For strong and healthy growth, don’t harvest rhubarb in the first year, and take only a few stalks in the second. If you have established plants, three or more years old, rhubarb is ready to harvest from spring onwards, as soon as the stalks are long enough – between 30-60cm, depending on the variety. There’s no need to use a knife, simply pull and twist the stems off the plant, as this stimulates fresh new growth.
Forced rhubarb is usually ready in late winter to early spring. The stems will be shorter, but sweeter.

——Storing rhubar
Rhubarb is at its most delicious when cooked after being freshly picked. However, it can be frozen, raw and cut into chunks, or after cooking.
Traditionally rhubarb is stewed or baked and served with custard or in a pie or crumble.

——Growing rhubarb: problem solving
Rhubarb plants can be prone to honey fungus, crown rot and viruses. Any of these diseases will weaken the plant and it is best to dig up affected plants and start again on a new site. Crown rot is the most common. It’s a fungal infection at the base of the stalks, and causes the crowns to turn brown and soft. Unfortunately there’s no remedy.
——Rhubarb varieties to try
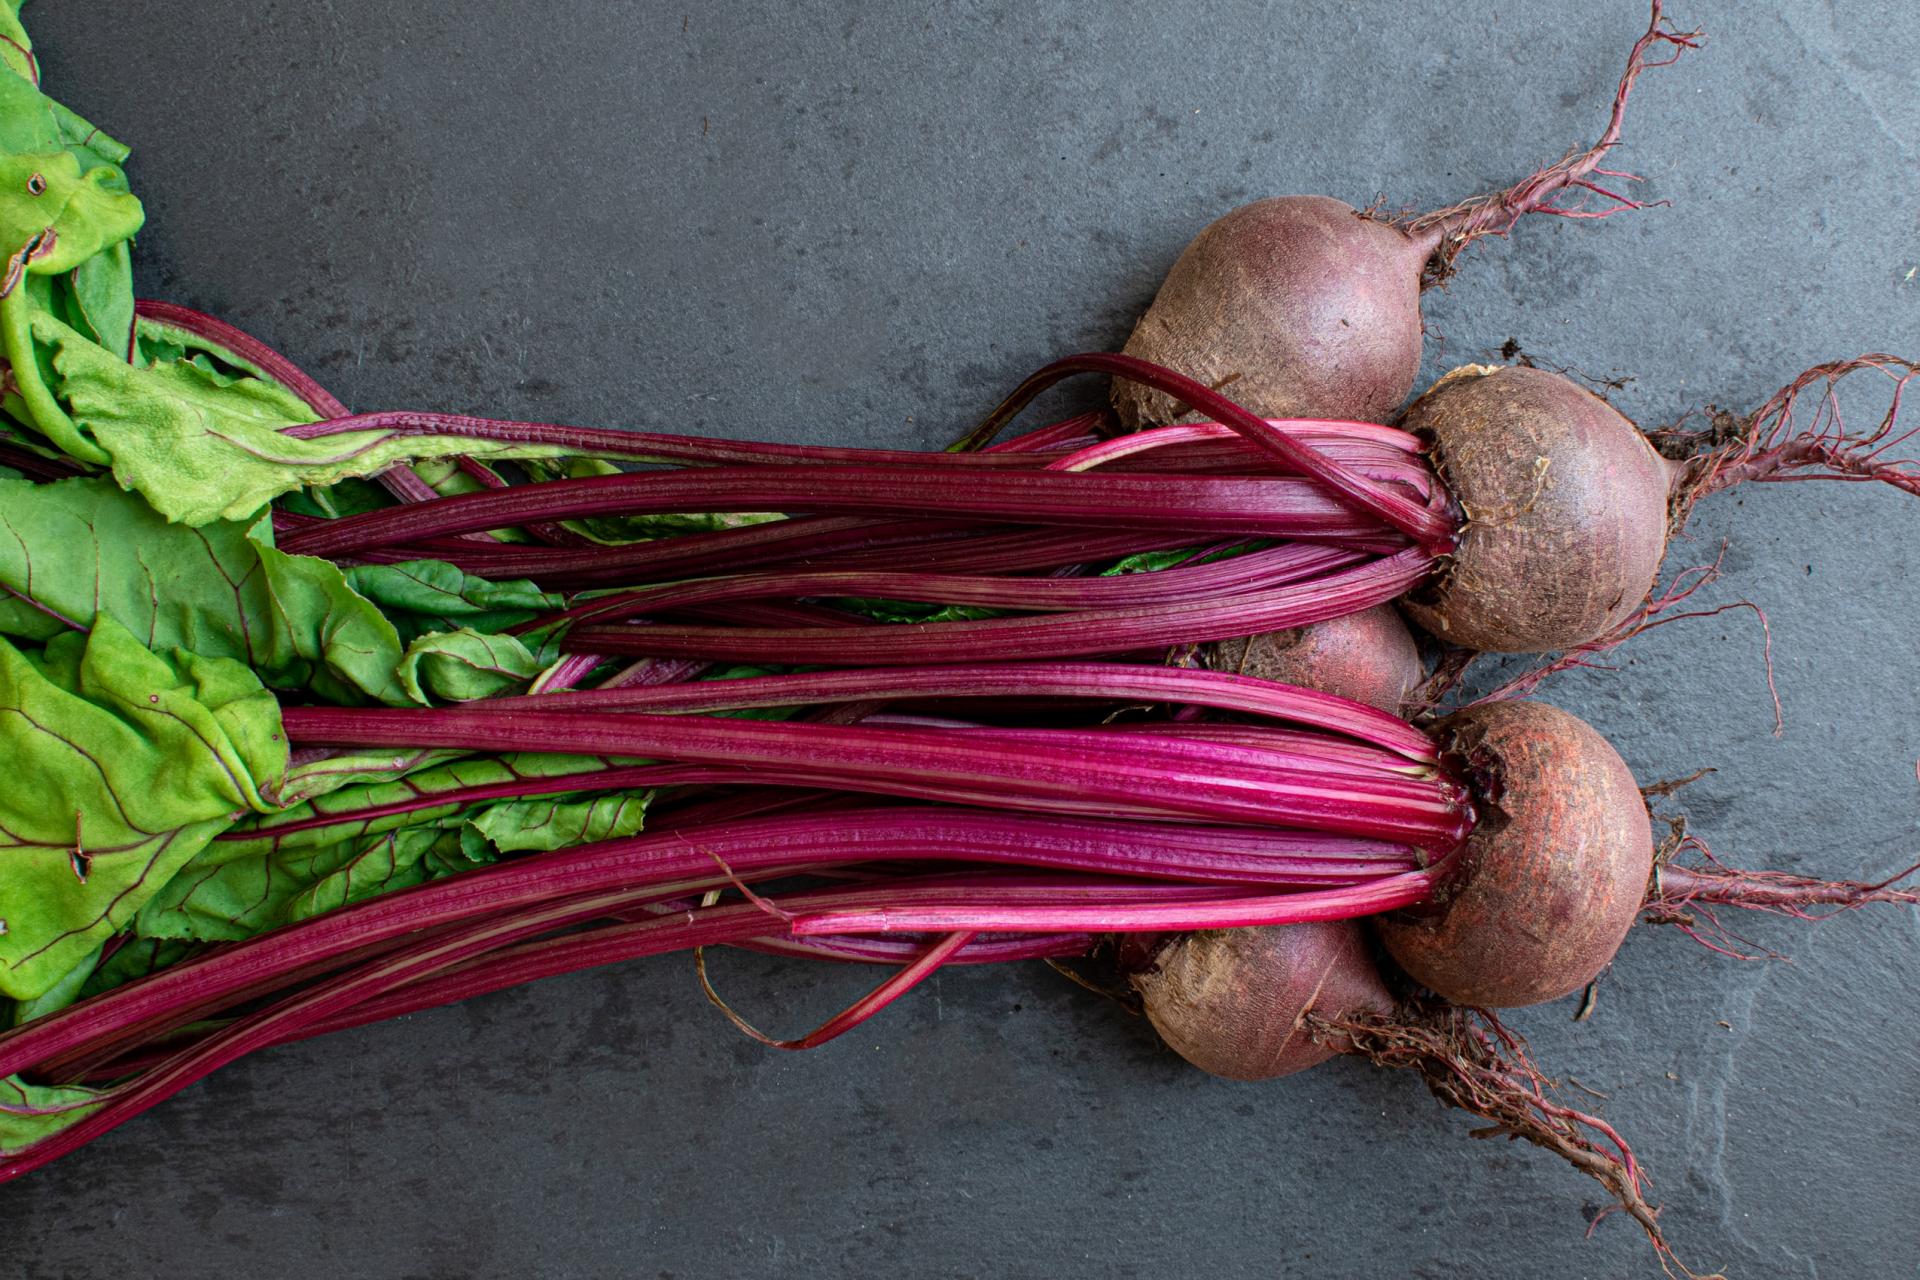
•Rheum x hybridum ‘Timperley Early’ – ideal for forcing, this will produce tender pink stems in February. But even unforced, it is one of the earliest varieties, ready to harvest from March
•Rheum x hybridum ‘Stockbridge Arrow’ – long, thick stems with a good colour and sweet flavour. Leaves are arrow-shaped and very ornamental, which makes it a great choice for mixed borders and smaller gardens. H: 60cm x S:1.2m
•Rheum x hybridum ‘Cawood Delight’ – a relatively new variety, producing dark pinky-red stems with a good shine and flavour. Although valued for its high quality stems, it produces smaller yields and is not suitable for forcing. H:1.4m x S:1.4m
•Rheum x hybridum ‘Victoria’ – an old and reliable variety, reputedly named after Queen Victoria. It produces high yields of long stems with a sweet flavour and good texture and can be harvested as baby stems, forced or simply left to mature. H:1.4m x S:1.4m
•Rheum x hybridum ‘Fulton’s Strawberry Surprise’ – a newer introduction with vivid red stems on strong, vigorous plants. H:1.4m x S:1.4m
•Rheum x hybridum ‘Livingstone’ – a new variety that crops in autumn and spring
80cm height
80cm spread
•Average Yield
4.5kg-13.5kg per 3m row
•Spacing
1.6m apart
Rhubarb is easy to grow, producing masses of delicious stalks every year. Only the rhubarb stalks are edible. Never eat rhubarb leaves as these are extremely poisonous – compost these instead.
Plant rhubarb in fertile, free-draining soil with added organic matter, such as well-rotted horse manure. Allow plenty of space around the plant so it can spread out. Water during dry periods and mulch annually, in autumn. It’s a good idea to remove any flower stems when they appear to direct energy back into stem production. To harvest rhubarb, take the entire stem, gently twisting and then pulling it upwards from the base.
Find out more about growing rhubarb, below.

——How to grow rhubarb
The best way to plant rhubarb is to plant rhubarb crowns. Crowns are offsets cut from divisions of vigorous parent plants – usually they will be a piece of root with at least one dormant bud visible. Plant them in late autumn, 90cm or more apart, depending on the eventual spread of your chosen cultivar. Rhubarb will grow well in a sunny, open site, on a wide range of soils, as long as it has been well-prepared with plenty of manure or compost.
If you like the challenge of growing from seed, sow rhubarb outdoors in spring in a seedbed, thinning to 15cm apart and then once more to 30cm apart. The quality of seed-grown rhubarb can vary, so be ruthless in selecting the strongest plants to grow on. Plant out your chosen plants in a permanent site in autumn or spring.

——Caring for rhubarb
Rhubarb doesn’t need much attention and once established rhubarb plants will be productive for around 10 years. Maintaining soil fertility is the key to keeping plants healthy. Mulch around the base of plants with home-made compost, well-rotted manure and leaf mould, to suppress weeds and retain soil moisture. Giving plants a liquid feed in spring will also aid strong growth.
To get the sweetest and earliest crop of rhubarb you need to force rhubarb plants to produce stems before they would normally be ready. This simply means covering the crowns in early winter, to block out the light. You can use a bin or bucket, or a traditional terracotta rhubarb forcer – any cover that’s at least 45cm high. Your rhubarb plants will have developed tender stems after around five weeks.
If you have a greenhouse or garage, you can lift rhubarb plants to force indoors, for an even earlier crop. Dig up crowns in November and leave them on the soil surface to chill for two weeks. This will break dormancy. Then pot up each crown in compost, before moving into a cool indoor spot, and then cover.
It’s best to wait until your plants are well-established before forcing rhubarb, as it takes quite a lot of energy from the plant. Forced rhubarb plants will not usually produce much of a crop later on, but can be divided and replanted in summer.

——Harvesting rhubarb
Harvest rhubarb stems when they’re green or red. For strong and healthy growth, don’t harvest rhubarb in the first year, and take only a few stalks in the second. If you have established plants, three or more years old, rhubarb is ready to harvest from spring onwards, as soon as the stalks are long enough – between 30-60cm, depending on the variety. There’s no need to use a knife, simply pull and twist the stems off the plant, as this stimulates fresh new growth.
Forced rhubarb is usually ready in late winter to early spring. The stems will be shorter, but sweeter.

——Storing rhubar
Rhubarb is at its most delicious when cooked after being freshly picked. However, it can be frozen, raw and cut into chunks, or after cooking.
Traditionally rhubarb is stewed or baked and served with custard or in a pie or crumble.

——Growing rhubarb: problem solving
Rhubarb plants can be prone to honey fungus, crown rot and viruses. Any of these diseases will weaken the plant and it is best to dig up affected plants and start again on a new site. Crown rot is the most common. It’s a fungal infection at the base of the stalks, and causes the crowns to turn brown and soft. Unfortunately there’s no remedy.

——Rhubarb varieties to try
•Rheum x hybridum ‘Timperley Early’ – ideal for forcing, this will produce tender pink stems in February. But even unforced, it is one of the earliest varieties, ready to harvest from March
•Rheum x hybridum ‘Stockbridge Arrow’ – long, thick stems with a good colour and sweet flavour. Leaves are arrow-shaped and very ornamental, which makes it a great choice for mixed borders and smaller gardens. H: 60cm x S:1.2m
•Rheum x hybridum ‘Cawood Delight’ – a relatively new variety, producing dark pinky-red stems with a good shine and flavour. Although valued for its high quality stems, it produces smaller yields and is not suitable for forcing. H:1.4m x S:1.4m
•Rheum x hybridum ‘Victoria’ – an old and reliable variety, reputedly named after Queen Victoria. It produces high yields of long stems with a sweet flavour and good texture and can be harvested as baby stems, forced or simply left to mature. H:1.4m x S:1.4m
•Rheum x hybridum ‘Fulton’s Strawberry Surprise’ – a newer introduction with vivid red stems on strong, vigorous plants. H:1.4m x S:1.4m
•Rheum x hybridum ‘Livingstone’ – a new variety that crops in autumn and spring
0
0
文章
莹723
2020年10月26日

Most gardens contain a mix of different plants, including perennials, annuals, shrubs and trees. Understanding the different types means you’ll understand how they grow, helping you to care for them correctly and ensure that it looks good all year round.
1.Annuals
Annuals complete their entire life cycle – growing from seed, flowering, making more seed, then dying – in one year (their name comes from the Latin ‘annus’, meaning ‘year’). They produce two types of bright, showy flowers in summer.
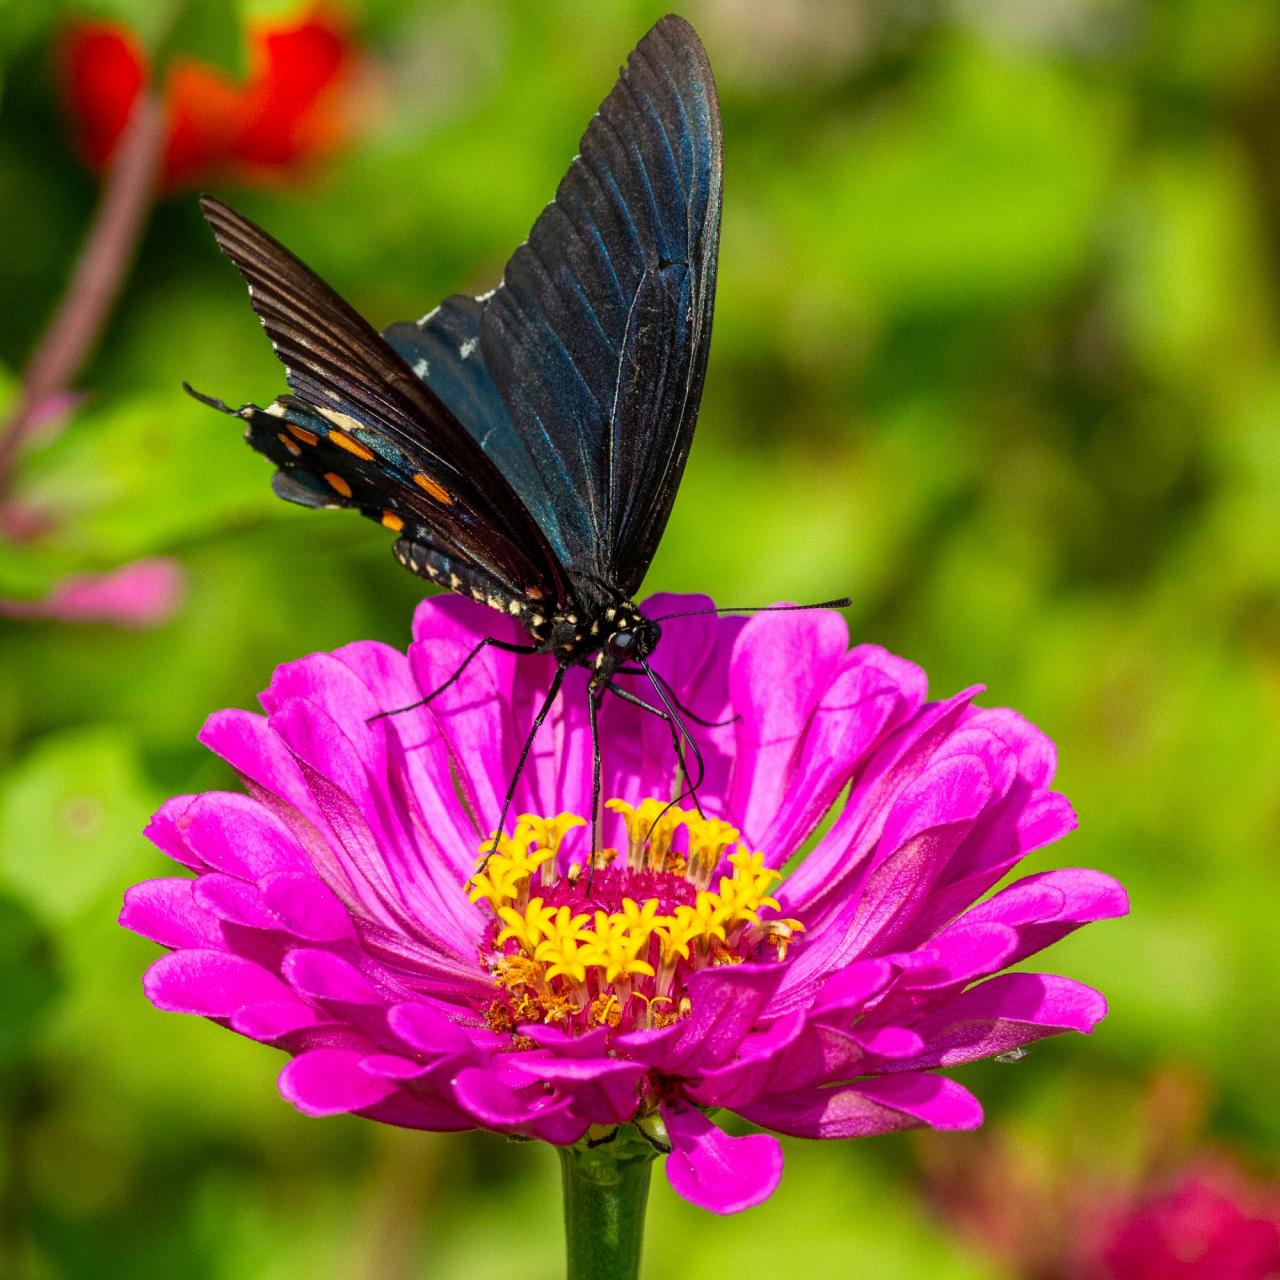
(Pink zinnias)
Hardy annuals can withstand the cold, so you can sow them outdoors in spring – March or April are the usual times but they can also be sown in September. They include cornflowers, love-in-a mist and nasturtiums.
Half-hardy annuals cannot survive the cold, so they are generally sown indoors in spring and planted out in May or June. They include cosmos and zinnias.
2.Biennials
Biennials take two years to complete their life cycle – they are sown in one year and flower and die in the next (their name comes from the Latin word, ‘biennis’, which means ‘two years’. They often flower in late spring, before annuals and perennials get going. The most common biennial in our gardens is the foxglove.
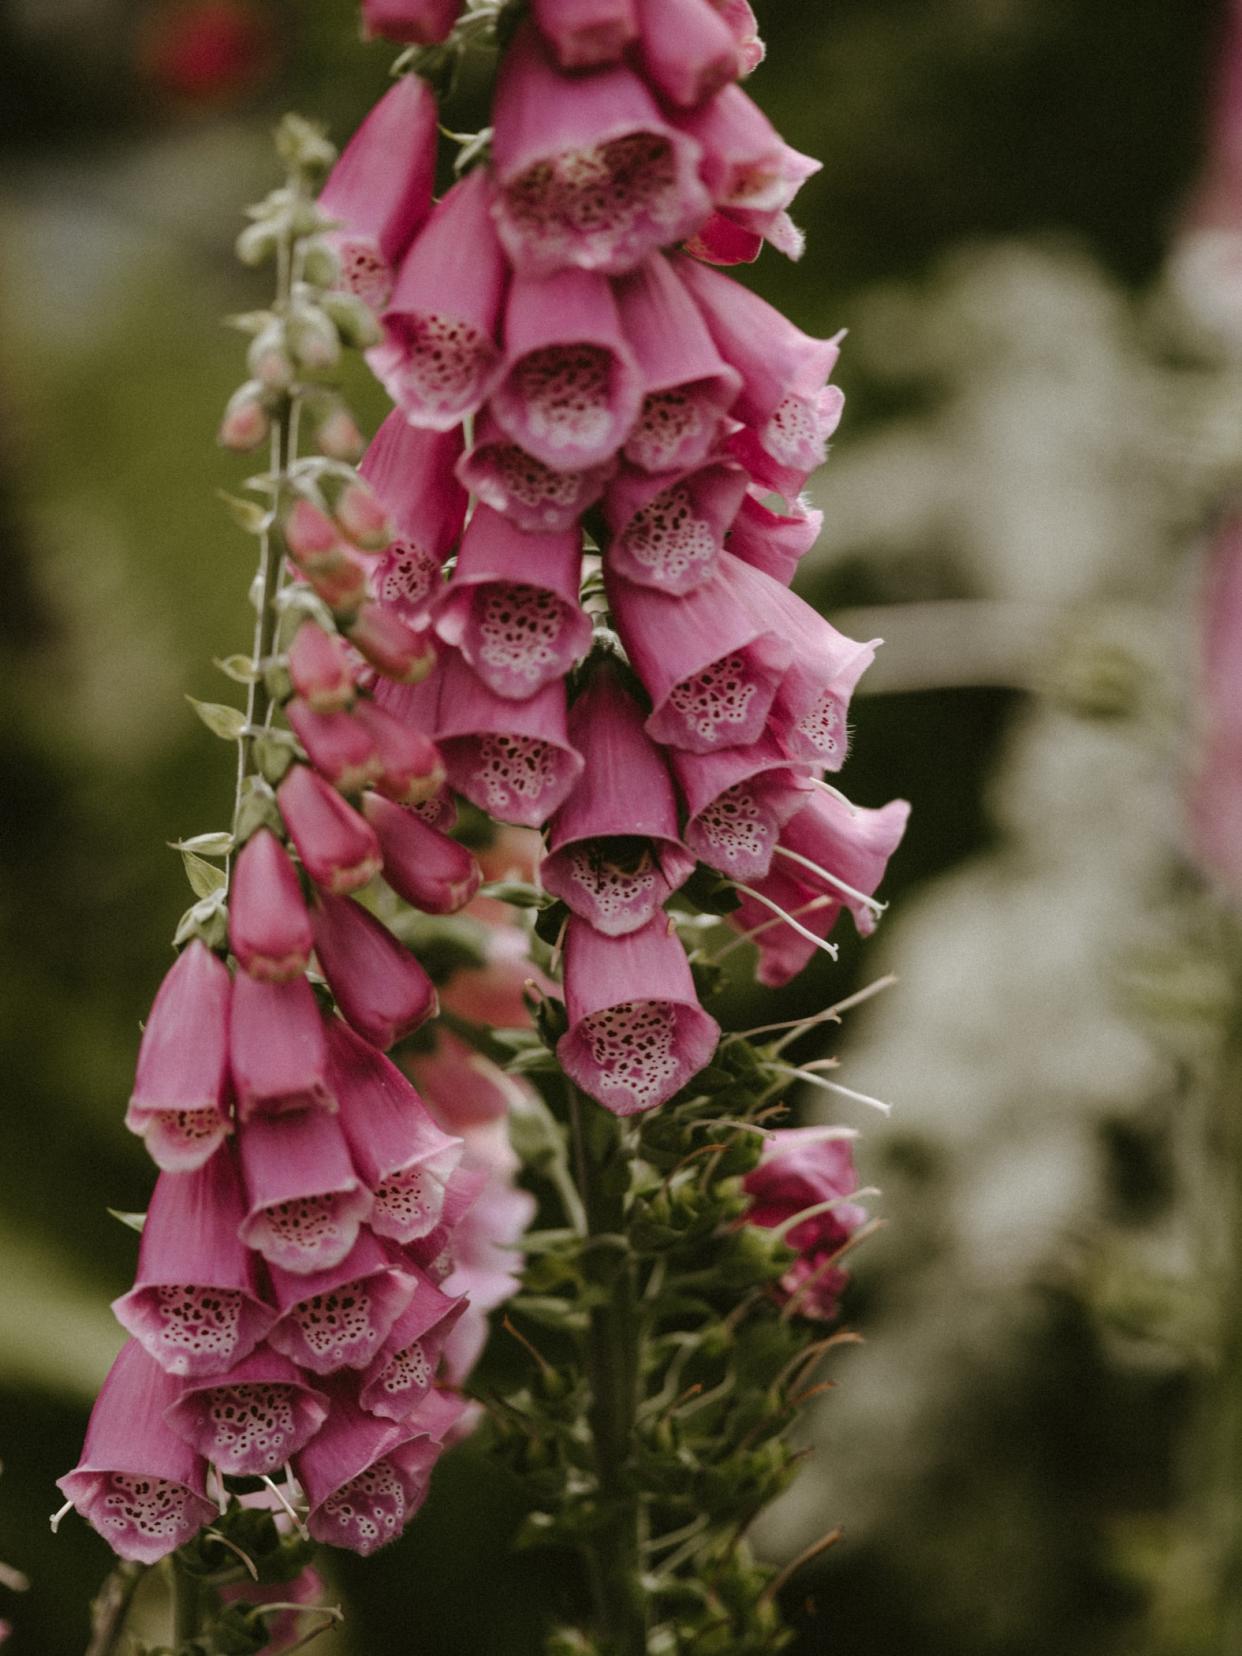
(Magenta and pink foxglove flowers)
3.Perennials
Perennials live for three years or more – their name comes the Latin, ‘perennis’, which means ‘many years’. They are sometimes referred to ‘herbaceous perennials’. They can flower for several months in summer. There are two types:

(Tall, pink-red lupins)
Hardy perennials can survive the winter and are left in the ground all year round. Don’t be alarmed when they seem to ‘disappear’ in winter – it’s a survival mechanism to get through the cold weather. Their foliage dies back but the rootstock remains dormant underground. New shoots then appear in spring. Popular perennials include lupins, delphiniums, cranesbills, hostas and peonies.
Half-hardy perennials cannot cope with the cold and so must be brought indoors in winter. It’s best to grow this type of plant in a pot, so that you can move it around easily. Alternatively, you could plant fresh plants every year. Half hardy perennials include many fuchsias and heliotrope.
4.Shrubs
Shrubs, such as roses and lavender, have a woody branches and no trunk. They lose their leaves in winter), evergreen (they keep their leaves year-round) or semi-evergreen (they keep their leaves in mild winters). Shrubs add structure and can last for many years, offering flowers, attractive foliage, colourful autumn leaves or berries. Evergreen types can be used as topiary, clipped into attractive shapes.

(Pale-apricot rose ‘Grace’)
5.Trees
Trees have a trunk and are larger than shrubs. They can be deciduous or evergreen. However small your garden, you can squeeze in a tree – it will change beautifully throughout the year and also acts as a high-rise home for wildlife.

(silver birch tree)
6.Climbers
Climbers grow upwards, and need support in the form of a trellis, arch, fence or wall. Popular climbers include clematis, honeysuckle, wisteria and jasmine. They take up very little room so are especially useful in small gardens. Use them around seating areas – over a pergola, for example – and to cover walls and fences.
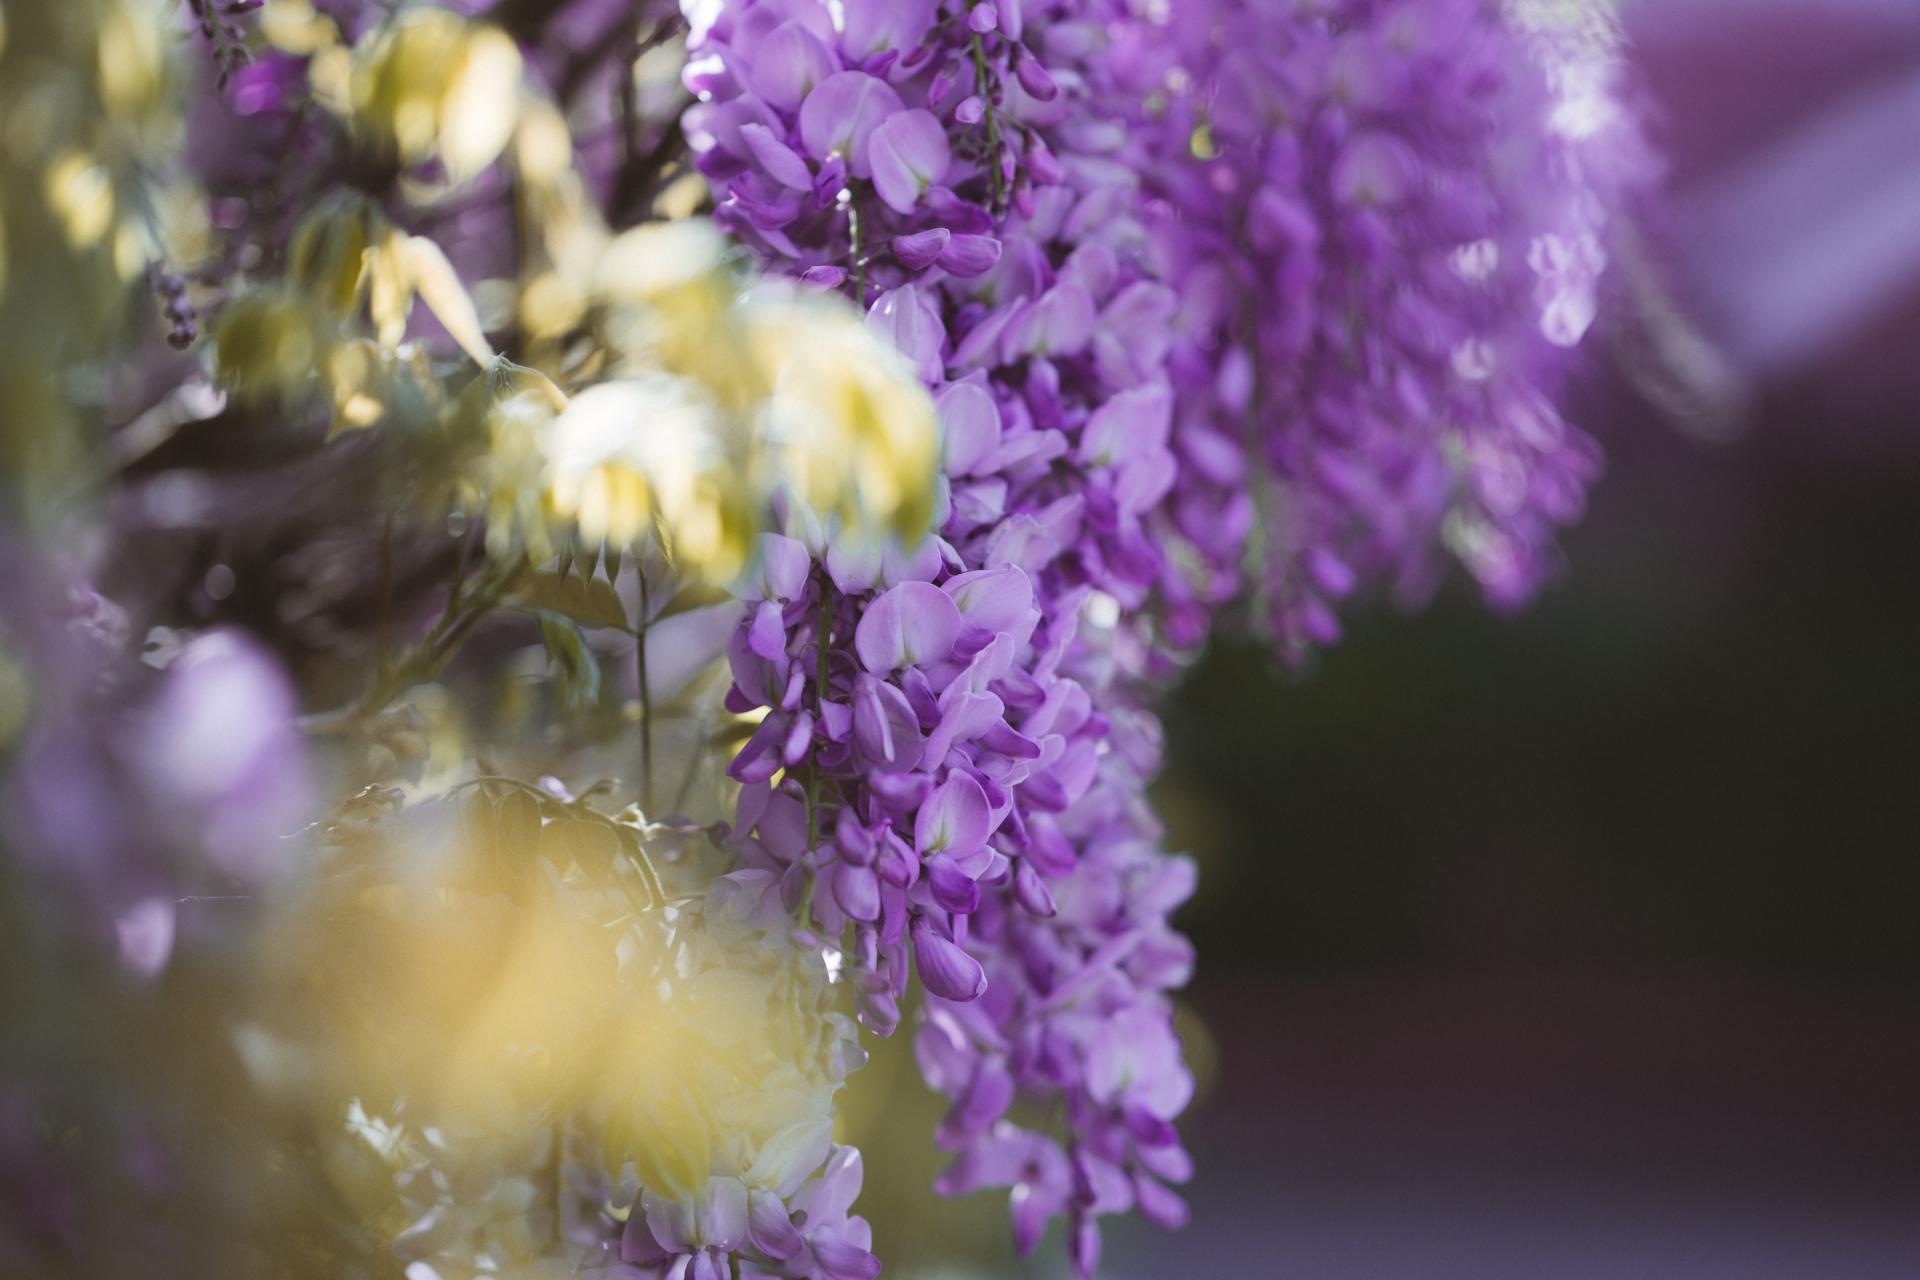
(Lilac wisteria flowers)
7.Bulbs
Bulbs are underground storage organs and there are several different kinds – true bulbs, corms, tubers and rhizomes. They are planted in autumn or spring for spring or summer flowers. They include a wide range of popular garden plants including daffodils (pictured), tulips, bluebells, crocus, irises and dahlias.

(Daffodils)
8.Bedding plants
Bedding plants are planted temporarily in flower beds or borders, pots or window boxes, giving a display of flowers for a few months. Bedding plants are often half-hardy annuals or tender perennials, but can also be bulbs or shrubs. Popular bedding plants include pelargoniums (geraniums), begonias, petunias and pansies.

(Purple and yellow pansies)
Like our articles? Let us know in the comments!
1.Annuals
Annuals complete their entire life cycle – growing from seed, flowering, making more seed, then dying – in one year (their name comes from the Latin ‘annus’, meaning ‘year’). They produce two types of bright, showy flowers in summer.

(Pink zinnias)
Hardy annuals can withstand the cold, so you can sow them outdoors in spring – March or April are the usual times but they can also be sown in September. They include cornflowers, love-in-a mist and nasturtiums.
Half-hardy annuals cannot survive the cold, so they are generally sown indoors in spring and planted out in May or June. They include cosmos and zinnias.
2.Biennials
Biennials take two years to complete their life cycle – they are sown in one year and flower and die in the next (their name comes from the Latin word, ‘biennis’, which means ‘two years’. They often flower in late spring, before annuals and perennials get going. The most common biennial in our gardens is the foxglove.

(Magenta and pink foxglove flowers)
3.Perennials
Perennials live for three years or more – their name comes the Latin, ‘perennis’, which means ‘many years’. They are sometimes referred to ‘herbaceous perennials’. They can flower for several months in summer. There are two types:

(Tall, pink-red lupins)
Hardy perennials can survive the winter and are left in the ground all year round. Don’t be alarmed when they seem to ‘disappear’ in winter – it’s a survival mechanism to get through the cold weather. Their foliage dies back but the rootstock remains dormant underground. New shoots then appear in spring. Popular perennials include lupins, delphiniums, cranesbills, hostas and peonies.
Half-hardy perennials cannot cope with the cold and so must be brought indoors in winter. It’s best to grow this type of plant in a pot, so that you can move it around easily. Alternatively, you could plant fresh plants every year. Half hardy perennials include many fuchsias and heliotrope.
4.Shrubs
Shrubs, such as roses and lavender, have a woody branches and no trunk. They lose their leaves in winter), evergreen (they keep their leaves year-round) or semi-evergreen (they keep their leaves in mild winters). Shrubs add structure and can last for many years, offering flowers, attractive foliage, colourful autumn leaves or berries. Evergreen types can be used as topiary, clipped into attractive shapes.

(Pale-apricot rose ‘Grace’)
5.Trees
Trees have a trunk and are larger than shrubs. They can be deciduous or evergreen. However small your garden, you can squeeze in a tree – it will change beautifully throughout the year and also acts as a high-rise home for wildlife.

(silver birch tree)
6.Climbers
Climbers grow upwards, and need support in the form of a trellis, arch, fence or wall. Popular climbers include clematis, honeysuckle, wisteria and jasmine. They take up very little room so are especially useful in small gardens. Use them around seating areas – over a pergola, for example – and to cover walls and fences.

(Lilac wisteria flowers)
7.Bulbs
Bulbs are underground storage organs and there are several different kinds – true bulbs, corms, tubers and rhizomes. They are planted in autumn or spring for spring or summer flowers. They include a wide range of popular garden plants including daffodils (pictured), tulips, bluebells, crocus, irises and dahlias.

(Daffodils)
8.Bedding plants
Bedding plants are planted temporarily in flower beds or borders, pots or window boxes, giving a display of flowers for a few months. Bedding plants are often half-hardy annuals or tender perennials, but can also be bulbs or shrubs. Popular bedding plants include pelargoniums (geraniums), begonias, petunias and pansies.

(Purple and yellow pansies)
Like our articles? Let us know in the comments!
0
0
文章
莹723
2020年09月28日

Have you ever thought about using rusty milk cans, chicken feeders, or galvanized mop buckets to grow plants?
Blogger Carlene Blair has created quite the oasis for herself right outside her door. This gorgeous garden is anything but "junky."She insisted in repurposing old junk into planters! It's a great hobby combining love of flower gardening with junking.

Let’s find out how she's going to top this!
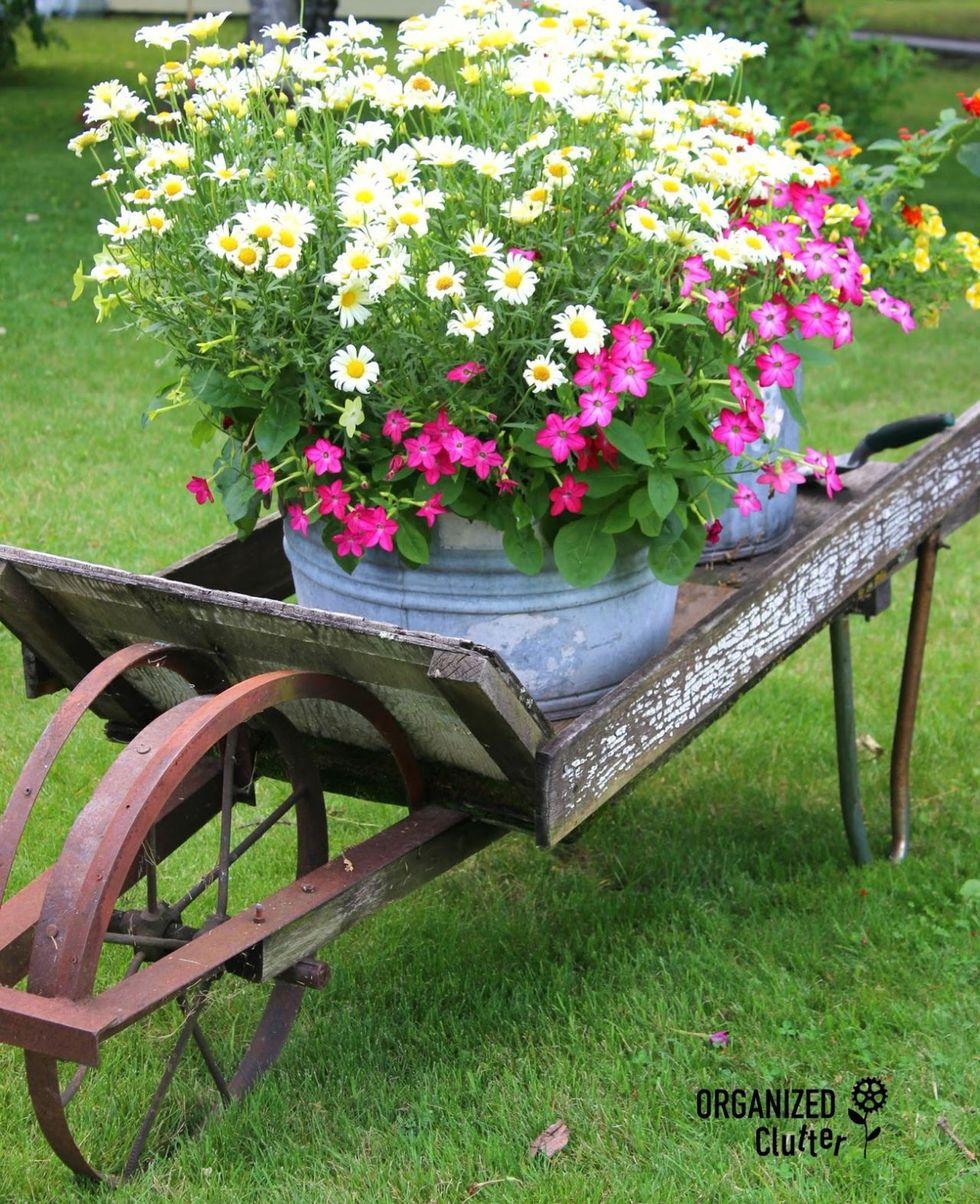
Blair's very first junk garden piece is this old wheelbarrow bursting with Marguerite daisies and nicotiana.
Have you ever seen such an assortment of trash-to-treasure planters?

The wild, abandoned look of this old typewriter in the bed of succulents is amazing.
In her front yard, perennials and annuals spill out of watering cans and funnels and off the steps of a ladder.
A whitewashed bench holds galvanized buckets and a toolbox, which are adorably stenciled.

What was once a gun rack is now attached to an old barn door and used to hold vintage garden tools.
Even a bike can be a beautiful planter.

This "Flower Market" sign is made of two spindle legs and a weathered piece of barn siding.
Last year, Blair tackled this project: repurposing a children's swing into a flower pot holder.

Rusty milk cans, chicken feeders, and galvanized mop buckets were given new life as planters.
As were these scavenged coffee pots, which are mounted on stakes.
Blogger Carlene Blair has created quite the oasis for herself right outside her door. This gorgeous garden is anything but "junky."She insisted in repurposing old junk into planters! It's a great hobby combining love of flower gardening with junking.

Let’s find out how she's going to top this!

Blair's very first junk garden piece is this old wheelbarrow bursting with Marguerite daisies and nicotiana.

Have you ever seen such an assortment of trash-to-treasure planters?

The wild, abandoned look of this old typewriter in the bed of succulents is amazing.

In her front yard, perennials and annuals spill out of watering cans and funnels and off the steps of a ladder.

A whitewashed bench holds galvanized buckets and a toolbox, which are adorably stenciled.

What was once a gun rack is now attached to an old barn door and used to hold vintage garden tools.

Even a bike can be a beautiful planter.

This "Flower Market" sign is made of two spindle legs and a weathered piece of barn siding.

Last year, Blair tackled this project: repurposing a children's swing into a flower pot holder.

Rusty milk cans, chicken feeders, and galvanized mop buckets were given new life as planters.

As were these scavenged coffee pots, which are mounted on stakes.
0
0
文章
莹723
2020年09月22日

Strawberries are easy and fun to grow. Plant strawberry runners or young plants in spring or autumn, and you’ll be rewarded with masses of delicious strawberries from late spring. Grow strawberries in a well prepared strawberry bed or planter, in full sun. And add some garden compost.

—How to grow strawberries from runners
Plant bare-rooted strawberry runners in spring or late summer/autumn.
Prepare the soil by digging in well-rotted garden compost and apply a dressing of sulphate of potash fertiliser.Bury their roots, about 30-45cm apart, then firm the soil around. Water well for the first few weeks.
Strawberries are also suited to growing in pots and hanging baskets. Use deep pots at least 15cm wide and plant one strawberry per pot. They thrive in moist but well-drained conditions, so use a soil-based compost with a deep layer of gravel or broken crocks in the base.

—Look after strawberry plants
To encourage flowering and fruit set, feed your strawberry plants with tomato fertiliser (follow the pack instructions) and water regularly. Avoid wetting any of ripening fruits to prevent grey mould.
Tuck some straw around the plants just before the fruit starts to develop. This helps to keep the berries clean and deters slugs and snails.
For next year’s crop, after fruiting finishes, cut off foliage about 5cm above ground level and give plants a good feed with a general-purpose fertiliser.
After three to four years, fruit size and quality declines so you need to replace your plants with new stock.

—Harvest
Once strawberries have been picked, the ripening process stops. So, wait until the berries are fully red before harvesting. Simply pinch through the stalks,avoid bruising the fruit.

—Store
As strawberries are perishable, it’s best to eat them straight from the plant, avoid the sun. You can store unwashed fruit for a few days in the fridge. If you’re lucky enough to have a glut, whizz them into delicious smoothies or use to make jam,or freeze them.

-Solve problem
Protect strawberry plants against slugs and snail attacks.
Grey mould can be a problem in wet weather, causing the berries to rot. Water plants in the morning rather than in the evening to give them time to dry out.

——Great types to grow
Summer-cropping strawberries:
• ‘Elsanta’ – heavy cropper with large, tasty, red fruits
• ‘Elvira’ – heavy crops and good disease resistance
• ‘Hapil’ – large glossy fruits, even in dry conditions
• ‘Honeoye’ – prolific fruiter with large, firm berries
• ‘Pegasus’ – sweet, juicy, top-quality berries
• ‘Symphony’ – good yields and fairly pest resistant
Everbearing strawberries:
• ‘Aromel’ – abundant dark red, juicy berries
• ‘Christine’ – sweet fruits that ripen in late May
• ‘Mara des Bois’ – large, deliciously aromatic fruits


—How to grow strawberries from runners
Plant bare-rooted strawberry runners in spring or late summer/autumn.
Prepare the soil by digging in well-rotted garden compost and apply a dressing of sulphate of potash fertiliser.Bury their roots, about 30-45cm apart, then firm the soil around. Water well for the first few weeks.
Strawberries are also suited to growing in pots and hanging baskets. Use deep pots at least 15cm wide and plant one strawberry per pot. They thrive in moist but well-drained conditions, so use a soil-based compost with a deep layer of gravel or broken crocks in the base.

—Look after strawberry plants
To encourage flowering and fruit set, feed your strawberry plants with tomato fertiliser (follow the pack instructions) and water regularly. Avoid wetting any of ripening fruits to prevent grey mould.
Tuck some straw around the plants just before the fruit starts to develop. This helps to keep the berries clean and deters slugs and snails.
For next year’s crop, after fruiting finishes, cut off foliage about 5cm above ground level and give plants a good feed with a general-purpose fertiliser.
After three to four years, fruit size and quality declines so you need to replace your plants with new stock.

—Harvest
Once strawberries have been picked, the ripening process stops. So, wait until the berries are fully red before harvesting. Simply pinch through the stalks,avoid bruising the fruit.

—Store
As strawberries are perishable, it’s best to eat them straight from the plant, avoid the sun. You can store unwashed fruit for a few days in the fridge. If you’re lucky enough to have a glut, whizz them into delicious smoothies or use to make jam,or freeze them.

-Solve problem
Protect strawberry plants against slugs and snail attacks.
Grey mould can be a problem in wet weather, causing the berries to rot. Water plants in the morning rather than in the evening to give them time to dry out.

——Great types to grow
Summer-cropping strawberries:
• ‘Elsanta’ – heavy cropper with large, tasty, red fruits
• ‘Elvira’ – heavy crops and good disease resistance
• ‘Hapil’ – large glossy fruits, even in dry conditions
• ‘Honeoye’ – prolific fruiter with large, firm berries
• ‘Pegasus’ – sweet, juicy, top-quality berries
• ‘Symphony’ – good yields and fairly pest resistant
Everbearing strawberries:
• ‘Aromel’ – abundant dark red, juicy berries
• ‘Christine’ – sweet fruits that ripen in late May
• ‘Mara des Bois’ – large, deliciously aromatic fruits

0
0
文章
莹723
2020年09月06日

1. Decide what type of garden to grow. What purpose do you want your garden to serve? Some gardens are functional and produce fruit and vegetables you can use to feed your family or give away to neighbors. Others are more ornamental in purpose, serving to beautify your property and provide a pleasing sight to people passing by. If you're not sure what type of garden you want, consider the following options:
- Vegetable gardens can include peppers, tomatoes, cabbages and lettuces, potatoes, squash, carrots, and many other vegetables. If vegetables can grow in your climate, you can find a way to grow them in your yard.
-In flower gardens, different types of flowers may be strategically planted so that something is in bloom almost all year long. Some flower gardens are structured with plantings in neat rows and patterns; others are wilder in appearance. Your personal style and yard size will determine what type of flower garden you might plant.
-Herb gardens often complement both flower and vegetable gardens, since they tend to bloom beautifully while serving the functional purpose of adding flavor to your food. Herb gardens might include rosemary, thyme, dill, cilantro and a variety of other herbs you may want to use to make dried spices and teas.
-In general, vegetable gardens require fertile soil and regular maintenance. Flowers and herbs can tolerate more neglect and poorer soil.
2. Decide what specific plants to include in your garden. Find out what grows well in your area by using this zone finder to determine what zone you are in. Then research which plants do well in your region. As you find out more about your options, make a list of the plants you want to buy and the best time of year to plant them.
- Some plants don't grow well in certain zones. If you live in a place with mild winters and hot summers, you may have trouble growing plants that require a cold snap to grow properly.
- Unless you plan to make your garden relatively large, try to choose varieties that need similar growing conditions. Do they need the same soil type and sun exposure? If not, you may have to create a garden with several types of growing conditions, which can be challenging in a small garden.
- Visit a farmers market or plant sale in the spring. Often you can learn useful information from vendors and buy healthy plants that grow well in your area.

3. Choose a spot for your garden. Take a look around your yard to decide where you want the garden to be. The location you choose should help the garden serve its purpose while producing strong, healthy plants.
- No matter what type of garden you're planting, most plants will grow better in rich, well-drained soil. Avoid spots in your yard where water seems to stand for awhile after a heavy rain, as this could indicate the soil there is too soggy or clay-based for healthy plant growth.
- Most vegetables grow best with a lot of sunlight, so if you're planting a vegetable garden, choose a spot that isn't shaded by trees, fences or buildings. Flowers are more versatile, and if you'd like a flower plot next to your house, you can choose flowers that grow best in partial or full shade.
- If your soil isn't especially fertile, you can make a raised bed or beds and grow flowers or vegetables there. Raised beds are planting beds that are built on top of the ground within wooden frames that are filled with enriched soil.
- If you don't have a yard, you can still have a garden. Plant flowers, herbs and certain vegetables in large pots on your patio. You can move them around according to the amount of sun the plants need.
4. Make a garden design. Draw an outline of your garden or yard space. Map out different options where you want to plant various items in the location you chose. Tailor the design to fit the needs of your plants, making sure the ones that need shade will be planted in a shady spot and the ones that need full sun are in an area that isn't shaded during the day.
- Take into account the space each mature plant will need. Make sure everything you want to plant will fit in your garden and have enough space to spread out while leaving you room to move around between rows or beds.
- Take timing into account. Planting dates vary with climate zones. If you live in a region with mild winters and hot summers, for example, you'll be able to plant earlier in the year than you would if you lived in a region with cold winters and shorter summers.
- If you're planting a vegetable garden, design it so that it's convenient for you to walk into the garden and harvest vegetables as they ripen. You may want to make a path through the garden for this purpose.
- Flower gardens should be designed with aesthetics in mind. Choose colors that look pretty together, and make patterns that are pleasing to the eye. As you plan keep in mind when different varieties will begin to bloom.
Take your lifestyle into account. Do you have children or pets who might run through the area? Is the garden within reach of your water hose? Is it too close to or too far from your home?

- Vegetable gardens can include peppers, tomatoes, cabbages and lettuces, potatoes, squash, carrots, and many other vegetables. If vegetables can grow in your climate, you can find a way to grow them in your yard.
-In flower gardens, different types of flowers may be strategically planted so that something is in bloom almost all year long. Some flower gardens are structured with plantings in neat rows and patterns; others are wilder in appearance. Your personal style and yard size will determine what type of flower garden you might plant.
-Herb gardens often complement both flower and vegetable gardens, since they tend to bloom beautifully while serving the functional purpose of adding flavor to your food. Herb gardens might include rosemary, thyme, dill, cilantro and a variety of other herbs you may want to use to make dried spices and teas.
-In general, vegetable gardens require fertile soil and regular maintenance. Flowers and herbs can tolerate more neglect and poorer soil.
2. Decide what specific plants to include in your garden. Find out what grows well in your area by using this zone finder to determine what zone you are in. Then research which plants do well in your region. As you find out more about your options, make a list of the plants you want to buy and the best time of year to plant them.
- Some plants don't grow well in certain zones. If you live in a place with mild winters and hot summers, you may have trouble growing plants that require a cold snap to grow properly.
- Unless you plan to make your garden relatively large, try to choose varieties that need similar growing conditions. Do they need the same soil type and sun exposure? If not, you may have to create a garden with several types of growing conditions, which can be challenging in a small garden.
- Visit a farmers market or plant sale in the spring. Often you can learn useful information from vendors and buy healthy plants that grow well in your area.

3. Choose a spot for your garden. Take a look around your yard to decide where you want the garden to be. The location you choose should help the garden serve its purpose while producing strong, healthy plants.
- No matter what type of garden you're planting, most plants will grow better in rich, well-drained soil. Avoid spots in your yard where water seems to stand for awhile after a heavy rain, as this could indicate the soil there is too soggy or clay-based for healthy plant growth.
- Most vegetables grow best with a lot of sunlight, so if you're planting a vegetable garden, choose a spot that isn't shaded by trees, fences or buildings. Flowers are more versatile, and if you'd like a flower plot next to your house, you can choose flowers that grow best in partial or full shade.
- If your soil isn't especially fertile, you can make a raised bed or beds and grow flowers or vegetables there. Raised beds are planting beds that are built on top of the ground within wooden frames that are filled with enriched soil.
- If you don't have a yard, you can still have a garden. Plant flowers, herbs and certain vegetables in large pots on your patio. You can move them around according to the amount of sun the plants need.
4. Make a garden design. Draw an outline of your garden or yard space. Map out different options where you want to plant various items in the location you chose. Tailor the design to fit the needs of your plants, making sure the ones that need shade will be planted in a shady spot and the ones that need full sun are in an area that isn't shaded during the day.
- Take into account the space each mature plant will need. Make sure everything you want to plant will fit in your garden and have enough space to spread out while leaving you room to move around between rows or beds.
- Take timing into account. Planting dates vary with climate zones. If you live in a region with mild winters and hot summers, for example, you'll be able to plant earlier in the year than you would if you lived in a region with cold winters and shorter summers.
- If you're planting a vegetable garden, design it so that it's convenient for you to walk into the garden and harvest vegetables as they ripen. You may want to make a path through the garden for this purpose.
- Flower gardens should be designed with aesthetics in mind. Choose colors that look pretty together, and make patterns that are pleasing to the eye. As you plan keep in mind when different varieties will begin to bloom.
Take your lifestyle into account. Do you have children or pets who might run through the area? Is the garden within reach of your water hose? Is it too close to or too far from your home?

0
0


