成长记
kensong
2018年11月27日

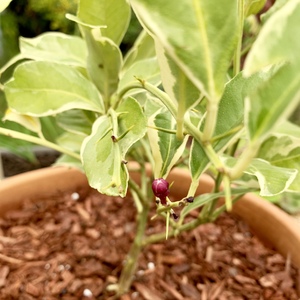
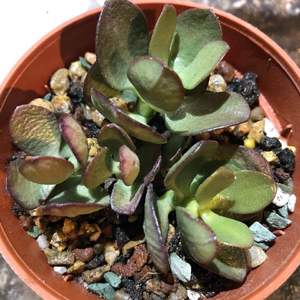
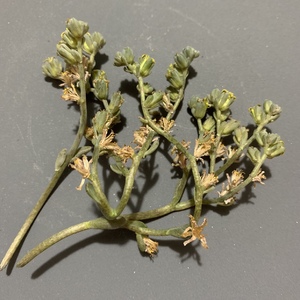
Finally removed all the flowers. Hopefully the plant will have more energy to grow.

0
0
成长记
kensong
2018年11月15日

Say hello to my Sansevieria family. They're perfect indoor plants. Forgiving, grow well in indirect or partial shade, can go for weeks without water if you are traveling and purifies your indoor air. What more can you ask of a plant.


0
0
成长记
kensong
2018年11月07日

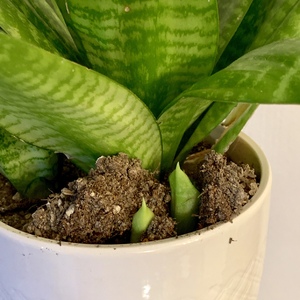
I was wondering why there were so much soil on the floor in my living room. It was these Sansevieria pups that were the culprit pushing soil out of the pot. I heard these are strong enough to sometimes break terracotta pots when they grow.

0
0
成长记
Katt Diabolos
2018年09月11日

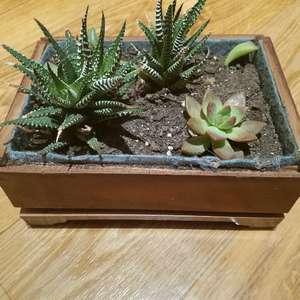
I now added "Temp Grow Station - Haworthia Fasciata, Graptosedum, & Adromischus Cristatus leaves" in my "garden"

0
0
文章
Miss Chen
2018年09月10日

Growing beautiful stargazer lilies seems like a daunting task--how can such a strikingly unique and unusually large flower that seems to defy gravity be easy to grow? It is, however, with a little instruction and a few tips, you too can bring these jaw-dropping beauties into your landscape.Stargazer lilies will last for years with the proper care, and grows easily in zones 4-8.

Determine the location for your stargazer bulbs, and for each bulb, dig a hole three times the bulb's height. Remove any rocks that might impede the growth of the stalk when it emerges. Place the bulb in the hole with the pointy side up–if in doubt, plant the bulb sideways. Cover the bulb with soil and sprinkle with a small amount of fertilizer. Bulbs may be planted in the fall or in the spring.
Step 2
Water the emerging plants regularly, although they don't mind drought periods as long as the roots remain cool. Overwatering may cause the plants to rot, so it's best to err on the side of caution as far as water is concerned.Too much water may also attract slugs, which find lily leaves delicious. If slugs are a problem, place saucers of beer around the plant at night, which attracts them and they drown.
Step 3
Fertilize the plants in June, July and August with a light application of general purpose fertilizer around the base of the plant.
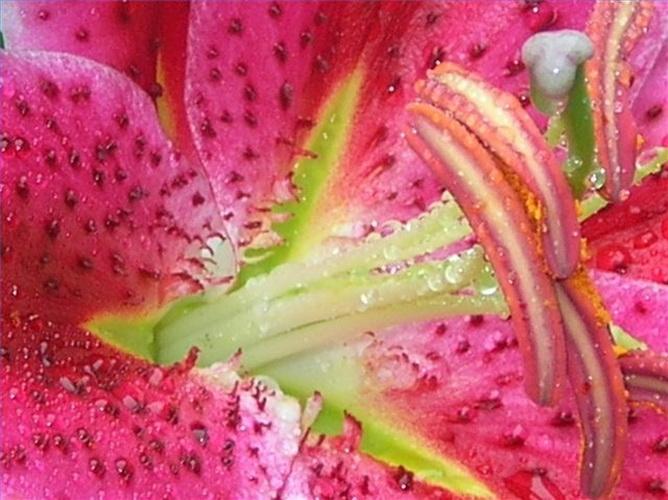
Deadhead the flower after it has finished blooming, which allows the plant to focus on its bulb, not setting seeds. Simply clip off the flower and about 6 inches of the stem below the flower. Leave the rest of the stem until fall, when you can cut back the entire plant to 3 inches.

Determine the location for your stargazer bulbs, and for each bulb, dig a hole three times the bulb's height. Remove any rocks that might impede the growth of the stalk when it emerges. Place the bulb in the hole with the pointy side up–if in doubt, plant the bulb sideways. Cover the bulb with soil and sprinkle with a small amount of fertilizer. Bulbs may be planted in the fall or in the spring.
Step 2
Water the emerging plants regularly, although they don't mind drought periods as long as the roots remain cool. Overwatering may cause the plants to rot, so it's best to err on the side of caution as far as water is concerned.Too much water may also attract slugs, which find lily leaves delicious. If slugs are a problem, place saucers of beer around the plant at night, which attracts them and they drown.
Step 3
Fertilize the plants in June, July and August with a light application of general purpose fertilizer around the base of the plant.

Deadhead the flower after it has finished blooming, which allows the plant to focus on its bulb, not setting seeds. Simply clip off the flower and about 6 inches of the stem below the flower. Leave the rest of the stem until fall, when you can cut back the entire plant to 3 inches.
2
0
文章
Miss Chen
2018年09月10日

Named for their large, broad leaves, elephant ears (Colocasia spp.) are moisture loving plants that can grow in up to 6 inches of standing water. Colocasia esculenta, which is hardy in U.S. Department of Agriculture plant hardiness zones 8 through 10, is a commonly grown variety of elephant ears. Also called taro, this elephant ears variety usually grows 3 to 6 feet tall and wide, and features boldly veined leaves up to 2 feet long. Uncooked elephant ears are poisonous, and the plants are invasive in some areas of the United States.

Transplanting Time
The best time for transplanting elephant ears is when new growth appears in spring. Elephant ears sprout from tubers in spring and quickly grow into large, spreading clumps. In frost-free areas elephant ears can be transplanted any time of year, but transplanting when the plants are small is easiest.
In areas of the United States that experience frosts, elephant ears must be transplanted after the final local average frost date. If late frosts threaten after the plants have been transplanted, cover elephant ears with old sheets or several layers of newspaper overnight.
Growing Spot
A sheltered, partially shaded spot with organically rich, medium moisture or wet soil provides the best growing conditions for transplanted elephant ears. These plants also need protection from strong winds. In a wet site, such as the edge of a pond, elephant ears tolerate up to eight hours of direct sunlight, but the plants grow best in filtered sun or shade during the hottest part of the day.
Improve the soil for elephant ears by mixing in organic matter before transplanting. Spread a 4-inch layer of garden compost or aged manure over the growing spot and mix it 12 inches deep into the soil with a garden fork.
Planting Hole
Elephant ears can establish quickly in wide planting holes. These vigorous plants can grow up to 8 feet tall in one growing season in ideal conditions and produce tubers that weigh 1 to 2 pounds.
Dig a hole as deep as an elephant ear's root ball and twice as wide. Remove the plant from its container and place it in the center of the hole. The plant should sit at its original growing depth. Holding the elephant ears plant upright with one hand, scoop the dug soil into the hole with the other hand until you fill the hole. Gently press the soil around the plant with the flats of your hands to firm the plant in the hole.

Watering Elephant Ears
Regular watering is essential for newly transplanted elephant ears. Spray water over the growing spot using a garden hose fitted with a soft spray attachment. When the water puddles, stop watering and wait an hour. Test the soil moisture level by pushing your fingers into it. If the soil is moist but not wet, water the plants again.
Don't allow the soil around elephant ears to dry out. Water elephant ears when the soil surface begins to dry or more frequently.

Transplanting Time
The best time for transplanting elephant ears is when new growth appears in spring. Elephant ears sprout from tubers in spring and quickly grow into large, spreading clumps. In frost-free areas elephant ears can be transplanted any time of year, but transplanting when the plants are small is easiest.
In areas of the United States that experience frosts, elephant ears must be transplanted after the final local average frost date. If late frosts threaten after the plants have been transplanted, cover elephant ears with old sheets or several layers of newspaper overnight.
Growing Spot
A sheltered, partially shaded spot with organically rich, medium moisture or wet soil provides the best growing conditions for transplanted elephant ears. These plants also need protection from strong winds. In a wet site, such as the edge of a pond, elephant ears tolerate up to eight hours of direct sunlight, but the plants grow best in filtered sun or shade during the hottest part of the day.
Improve the soil for elephant ears by mixing in organic matter before transplanting. Spread a 4-inch layer of garden compost or aged manure over the growing spot and mix it 12 inches deep into the soil with a garden fork.
Planting Hole
Elephant ears can establish quickly in wide planting holes. These vigorous plants can grow up to 8 feet tall in one growing season in ideal conditions and produce tubers that weigh 1 to 2 pounds.
Dig a hole as deep as an elephant ear's root ball and twice as wide. Remove the plant from its container and place it in the center of the hole. The plant should sit at its original growing depth. Holding the elephant ears plant upright with one hand, scoop the dug soil into the hole with the other hand until you fill the hole. Gently press the soil around the plant with the flats of your hands to firm the plant in the hole.

Watering Elephant Ears
Regular watering is essential for newly transplanted elephant ears. Spray water over the growing spot using a garden hose fitted with a soft spray attachment. When the water puddles, stop watering and wait an hour. Test the soil moisture level by pushing your fingers into it. If the soil is moist but not wet, water the plants again.
Don't allow the soil around elephant ears to dry out. Water elephant ears when the soil surface begins to dry or more frequently.
1
1
文章
Miss Chen
2018年09月10日

For a dramatic statement in your flower bed, try growing lupines (Lupinus spp.). These herbaceous perennials have mounds of bright green leaves and produce compact spikes of flowers that can grow upwards to 42 inches tall -- perfect for attracting bees, hummingbirds and butterflies. The flowers of these legumes come in a range of colors from white, cream, pink, rose-mauve, pale yellow, all shades of blue and all shades of violet, including one so dark it's nearly black. Lupines generally thrive in U.S. Department of Agriculture plant hardiness zones 4 to 7, depending on the species and cultivar.

Step 1
Select a well-drained site with full sunlight or semi-shade; tall varieties of lupines may need protection from the wind. The soil does not need to be particularly rich, but it should be neutral to slightly acidic. Test the soil and add sulfur or peat moss several weeks before planting to adjust its pH to between 6.8 and 7.2. Because lupines bloom early in the season and may look unsightly after flowering, place them near the back of the flower bed.
Step 2
Transplant lupines in the spring. Dig a hole that is larger than the plant's container. Carefully remove the lupine from the container and gently loosen the roots with your fingers. Place the plant in the hole, fill the hole with soil and tamp down gently to remove air spaces. Water gently to settle the soil. Depending upon the species of lupine, space the plants 15 to 24 inches apart. Apply light, organic mulch to hold down weeds and to help retain soil moisture.
Step 3
Water lupines regularly. Don't let the soil dry out completely. Apply a light amount of high potash fertilizer as the buds begin to form. Powdery mildew can be a problem, as well as aphids. Control these with a general fungicide and pesticide. Lupines can also develop viruses that cause stunting and discoloration. If this happens, destroy the plants; do not add them to the compost pile.

Step 4
Watch for the lupines to bloom beginning in early summer and continuing through mid-summer. Deadhead the plants regularly, removing spent flower spikes with pruning shears to prevent seed development. This allows the smaller flower spikes to develop and keeps lupines from spreading out of control. However, if you want to collect the seeds, allow the pods to dry on the plant and then collect the pods. Open the pods and store the seeds in an envelope in a cool dry place until time to plant.
Step 5
Sow the lupine seeds either in the early fall or early spring. Scarify (nick) the seeds before planting to quicken germination. Plant the seeds 1/4 to 1/2 inches deep. Because of the shallow planting depth, water gently so as not to disturb the seeds. Young seedlings require consistent moisture to help them establish healthy root systems.

Step 1
Select a well-drained site with full sunlight or semi-shade; tall varieties of lupines may need protection from the wind. The soil does not need to be particularly rich, but it should be neutral to slightly acidic. Test the soil and add sulfur or peat moss several weeks before planting to adjust its pH to between 6.8 and 7.2. Because lupines bloom early in the season and may look unsightly after flowering, place them near the back of the flower bed.
Step 2
Transplant lupines in the spring. Dig a hole that is larger than the plant's container. Carefully remove the lupine from the container and gently loosen the roots with your fingers. Place the plant in the hole, fill the hole with soil and tamp down gently to remove air spaces. Water gently to settle the soil. Depending upon the species of lupine, space the plants 15 to 24 inches apart. Apply light, organic mulch to hold down weeds and to help retain soil moisture.
Step 3
Water lupines regularly. Don't let the soil dry out completely. Apply a light amount of high potash fertilizer as the buds begin to form. Powdery mildew can be a problem, as well as aphids. Control these with a general fungicide and pesticide. Lupines can also develop viruses that cause stunting and discoloration. If this happens, destroy the plants; do not add them to the compost pile.

Step 4
Watch for the lupines to bloom beginning in early summer and continuing through mid-summer. Deadhead the plants regularly, removing spent flower spikes with pruning shears to prevent seed development. This allows the smaller flower spikes to develop and keeps lupines from spreading out of control. However, if you want to collect the seeds, allow the pods to dry on the plant and then collect the pods. Open the pods and store the seeds in an envelope in a cool dry place until time to plant.
Step 5
Sow the lupine seeds either in the early fall or early spring. Scarify (nick) the seeds before planting to quicken germination. Plant the seeds 1/4 to 1/2 inches deep. Because of the shallow planting depth, water gently so as not to disturb the seeds. Young seedlings require consistent moisture to help them establish healthy root systems.
0
0
文章
Miss Chen
2018年09月10日

Himalayan blue poppies are one of the few flowers that produce an intense sky-blue blossom. In their native location in China, they can grow to more than 6 feet tall; in other locations, they average 20 to 28 inches tall. These poppies look best planted in mass displays or threaded throughout a border. These flowers are not a good choice for the impatient gardener; in some locations they may not bloom the first season. The foliage will die down for the winter and you should expect to see blooms the second year. If it is prevented from blooming the first time the bud sets, the poppy is more likely to become a perennial. These flowers are suitable for USDA zones 3 to 8.

Step 1
Select a site for the Himalayan blue poppies. These plants need partial, dappled shade and protection from strong, drying winds. The soil needs to be rich and well-drained and, in colder climates, it needs to be acidic. Several weeks before planting, dig up the soil, remove rocks and other garden debris and test the pH level. If the soil is too alkaline, amend it with sulfur. Add plenty of organic matter to enrich the soil.
Step 2
Plant the poppies in early spring. Dig a hole that is larger than the poppy's container. Remove it from the container and gently loosen the roots with your fingers. Place the poppy in the hole, add soil to fill in the hole and tamp down gently to remove air bubbles. Water gently to settle the soil. Space the poppies 18 to 24 inches apart.
Step 3
Water the poppies regularly, but do not over water; waterlogged plants can suffer from crown rot. However, do not let the soil dry out between waterings. Give them a light application of general fertilizer in the spring. Downy mildew can be a problem, especially in locations with high humidity. Spray with a fungicide at the first sign of mildew.
Step 4
Watch for the Himalayan blue poppies to bloom beginning in early summer and continuing through to early fall. Unless you want the seed to ripen, remove spent flower stems. After all growth dies down, cut the poppies to ground level. Use a plant marker to indicate the location of the poppies.

Step 5
Propagate the poppies from fresh ripe seed in the fall or spring. After the seeds have sprouted, thin the seedlings to 18 to 24 inches apart. Water well initially, but back off so as not to over water.

Step 1
Select a site for the Himalayan blue poppies. These plants need partial, dappled shade and protection from strong, drying winds. The soil needs to be rich and well-drained and, in colder climates, it needs to be acidic. Several weeks before planting, dig up the soil, remove rocks and other garden debris and test the pH level. If the soil is too alkaline, amend it with sulfur. Add plenty of organic matter to enrich the soil.
Step 2
Plant the poppies in early spring. Dig a hole that is larger than the poppy's container. Remove it from the container and gently loosen the roots with your fingers. Place the poppy in the hole, add soil to fill in the hole and tamp down gently to remove air bubbles. Water gently to settle the soil. Space the poppies 18 to 24 inches apart.
Step 3
Water the poppies regularly, but do not over water; waterlogged plants can suffer from crown rot. However, do not let the soil dry out between waterings. Give them a light application of general fertilizer in the spring. Downy mildew can be a problem, especially in locations with high humidity. Spray with a fungicide at the first sign of mildew.
Step 4
Watch for the Himalayan blue poppies to bloom beginning in early summer and continuing through to early fall. Unless you want the seed to ripen, remove spent flower stems. After all growth dies down, cut the poppies to ground level. Use a plant marker to indicate the location of the poppies.

Step 5
Propagate the poppies from fresh ripe seed in the fall or spring. After the seeds have sprouted, thin the seedlings to 18 to 24 inches apart. Water well initially, but back off so as not to over water.
0
0
文章
Miss Chen
2018年09月08日

Peonies (Paeonia spp.) can grow well in containers. Common garden peonies (Paeonia lactiflora), which are hardy in U.S. Department of Agriculture plant hardiness zones 3 through 8, are herbaceous perennials that die down in fall. Tree peonies (Paeonia suffruticosa, USDA zones 4 through 8) are woody shrubs. Select containers that complement your garden's style, such as metal containers for contemporary gardens, faded terracotta for Mediterranean gardens, or decorative clay pots for cottage gardens.

Containers for Growing Peonies
Peonies need large containers with drainage holes. Peony root balls are large, and their containers should fit the root balls without crushing them, plus another inch or two of space around root balls' sides and bases. A 5-gallon container is usually large enough for one peony.
Most frost-proof containers are suitable, including clay, wood and plastic. Common garden peonies don't tolerate transplanting well, and tree peonies are slow-growing, so both plants should stay in their containers for three or four years. Heavy containers such as clay help prevent tree peonies from blowing over in strong winds, but dry out quickly compared to wood and plastic containers. Wood containers made of cypress or cedar are rot-resistant.
Sites and Potting Soils
Full-sun or partially shaded sites are best for growing peonies, and the plants need organically-rich, well-draining potting soil. These large plants are heavy and difficult to move, so choose your growing site well, or place the pots on boards with wheels.
A mixture of soilless potting soil and well-rotted manure or rich garden compost is suitable for growing peonies. You can buy commercial soilless potting soil or you can mix your own using 1 part sphagnum peat moss and 1 part perlite or vermiculite. Mix 2 shovels of potting soil with 1 shovel of manure or compost, and fill the containers with this mixture. Every spring, when new growth appears on the peonies, scrape the loose potting soil mixture from the surface of the containers and replace it with fresh mixture.
Water and Fertilizer
Peonies in containers need more water and fertilizer than plants in the ground. Water the peonies when the soil surface is dry. Slowly pour water over the potting soil until it appears through the drainage holes in the base of the container. In hot weather, peonies may need watering once or more per day.

Fertilize peonies in pots once every month while the plants are in leaf. Dilute 1/2 teaspoon of a liquid 15-30-15 fertilizer in 1 gallon of water, and apply the solution to the potting soil. You can replace water with fertilizer solution if the peonies need watering. Manufacturer's instructions vary between products, so read and follow the instructions on the label.
Frost Protection
An advantage of growing peonies in containers is that you can move them indoors to protect them from frosts. Freezing temperatures can damage peonies and affect flowering in the following season.
When common garden peonies have died down and tree peonies have lost all their leaves, move the containers to an unheated indoor area, such as a garage. Water the containers when the soil surface is dry to a depth of 1 inch. The peonies aren't growing and using water at this time. It's important not to water so much that the potting soil becomes soggy, which can cause rotting. Move the containers outdoors again when new growth appears in spring.

Containers for Growing Peonies
Peonies need large containers with drainage holes. Peony root balls are large, and their containers should fit the root balls without crushing them, plus another inch or two of space around root balls' sides and bases. A 5-gallon container is usually large enough for one peony.
Most frost-proof containers are suitable, including clay, wood and plastic. Common garden peonies don't tolerate transplanting well, and tree peonies are slow-growing, so both plants should stay in their containers for three or four years. Heavy containers such as clay help prevent tree peonies from blowing over in strong winds, but dry out quickly compared to wood and plastic containers. Wood containers made of cypress or cedar are rot-resistant.
Sites and Potting Soils
Full-sun or partially shaded sites are best for growing peonies, and the plants need organically-rich, well-draining potting soil. These large plants are heavy and difficult to move, so choose your growing site well, or place the pots on boards with wheels.
A mixture of soilless potting soil and well-rotted manure or rich garden compost is suitable for growing peonies. You can buy commercial soilless potting soil or you can mix your own using 1 part sphagnum peat moss and 1 part perlite or vermiculite. Mix 2 shovels of potting soil with 1 shovel of manure or compost, and fill the containers with this mixture. Every spring, when new growth appears on the peonies, scrape the loose potting soil mixture from the surface of the containers and replace it with fresh mixture.
Water and Fertilizer
Peonies in containers need more water and fertilizer than plants in the ground. Water the peonies when the soil surface is dry. Slowly pour water over the potting soil until it appears through the drainage holes in the base of the container. In hot weather, peonies may need watering once or more per day.

Fertilize peonies in pots once every month while the plants are in leaf. Dilute 1/2 teaspoon of a liquid 15-30-15 fertilizer in 1 gallon of water, and apply the solution to the potting soil. You can replace water with fertilizer solution if the peonies need watering. Manufacturer's instructions vary between products, so read and follow the instructions on the label.
Frost Protection
An advantage of growing peonies in containers is that you can move them indoors to protect them from frosts. Freezing temperatures can damage peonies and affect flowering in the following season.
When common garden peonies have died down and tree peonies have lost all their leaves, move the containers to an unheated indoor area, such as a garage. Water the containers when the soil surface is dry to a depth of 1 inch. The peonies aren't growing and using water at this time. It's important not to water so much that the potting soil becomes soggy, which can cause rotting. Move the containers outdoors again when new growth appears in spring.
0
0
文章
Miss Chen
2018年09月07日

Hosta plants (also known as plantain lilies) are herbaceous perennials that die down in the winter months and reemerge in the spring with new growth. There are a wide variety to choose from. Hostas are shade-loving plants that grow from bulbs (or tubers). Planting them is fairly easy.

Step 1
Purchase hosta bulbs from your local nursery or from online sources (see Resources below). Read all the packaging instructions before deciding where to put your hostas. Some varieties do require some sunshine during the day. Hosta plants with a blue hue generally require more shade than some of the other types. They can be planted at any time of year, but springtime is best, when new roots are being formed.
Step 2
Prepare the planting area soil. Although the hosta is an easy plant to grow and maintain, starting with the proper soil conditions will give your plant an extra boost. The soil should be well drained, with a pH of 5.5 to 6.5.
Step 3
Plant the hosta bulbs 12 inches or more apart and at the ground level where the shoots first emerge. Of course, the root end of the bulb should be placed down into the ground. Gently fill the area surrounding the bulb with soil and then pack lightly at ground level.

Step 4
Water your hosta bulbs often, approximately an inch of water per week. Always check with packaging directions, as some of larger-leafed varieties require more water. Fertilize at 6-week intervals through the spring and summer months with a 10-10-10 fertilizer.

Step 1
Purchase hosta bulbs from your local nursery or from online sources (see Resources below). Read all the packaging instructions before deciding where to put your hostas. Some varieties do require some sunshine during the day. Hosta plants with a blue hue generally require more shade than some of the other types. They can be planted at any time of year, but springtime is best, when new roots are being formed.
Step 2
Prepare the planting area soil. Although the hosta is an easy plant to grow and maintain, starting with the proper soil conditions will give your plant an extra boost. The soil should be well drained, with a pH of 5.5 to 6.5.
Step 3
Plant the hosta bulbs 12 inches or more apart and at the ground level where the shoots first emerge. Of course, the root end of the bulb should be placed down into the ground. Gently fill the area surrounding the bulb with soil and then pack lightly at ground level.

Step 4
Water your hosta bulbs often, approximately an inch of water per week. Always check with packaging directions, as some of larger-leafed varieties require more water. Fertilize at 6-week intervals through the spring and summer months with a 10-10-10 fertilizer.
0
0
文章
Miss Chen
2018年09月07日

If you grow perennials that include either the purple coneflower (Echinacea purpurea or Rudbeckia purpurea) or the yellow coneflower (Ratibida pinnata), then you'd probably like to keep the plants blooming as long as possible and also keep them looking neat and tidy. These two plants respond well to pruning early in the growing season to promote bushiness and extend flowering, and they can be trimmed later in the growing season and when fall arrives. Both coneflowers are hardy in U.S. Department of Agriculture plant hardiness zones 3 through 9.

Trimming for Bushy Plants
A coneflower plant is usually 2 to 5 feet tall and tends to have a narrow growth habit of 1 1/2 to 2 feet wide. It starts putting out new stems in spring, when weather warms, and doesn't bloom for many weeks, usually opening flowers from midsummer through early fall.
Promote a more bushy, compact growth habit in coneflower plants by trimming back each stem by one-half in late spring; doing so prompts branching of the stems and growth of new stems from each plant's base. Trimming this way early also allows the plants enough time to set flower buds, although their blooms may begin to appear a bit later than normal, usually in September.
You also can extend your coneflower bed's blooming period by cutting back some but not all of your plants in spring, leaving the others not pruned. The latter should bloom at the normal time, starting in midsummer, while the pruned group's flowering will be delayed until early fall.
When trimming, use sharp shears, and clean its blades by wiping them with rubbing alcohol before you begin trimming and after each cut. This sterilization helps prevent the spread of plant diseases.
Deadheading for Tidiness
When flowers fade on a coneflower plant, removing the spent blooms -- called deadheading -- helps improve the plant's appearance. Use your fingertips to pinch off flower stems just ahead of the point where a leaf originates on the stem behind the flower, or cut at that point with sterilized shears. The plant may produce new buds after it has been deadheaded, although the second bloom period is usually reduced.
If you want your coneflower planting to expand, allow some self-seeding by leaving a few flowers on the plants to form seeds, which eventually will drop to the ground and produce new plants the next growing season.

Cleaning Up in Fall
Like all herbaceous perennials, coneflowers eventually die back to the ground when winter arrives, leaving dry stems and foliage. You can leave the plants in place during winter, but cutting back their dry upper parts with sterilized tools helps improve the appearance of the flowerbed while getting rid of any remaining insects and their eggs. Remove and dispose of all cuttings when you do fall cleanup. If winter temperatures drop below freezing where you live, then wait until the first frost to cut back the plants to prevent new growth that is easily damaged by cold.

Trimming for Bushy Plants
A coneflower plant is usually 2 to 5 feet tall and tends to have a narrow growth habit of 1 1/2 to 2 feet wide. It starts putting out new stems in spring, when weather warms, and doesn't bloom for many weeks, usually opening flowers from midsummer through early fall.
Promote a more bushy, compact growth habit in coneflower plants by trimming back each stem by one-half in late spring; doing so prompts branching of the stems and growth of new stems from each plant's base. Trimming this way early also allows the plants enough time to set flower buds, although their blooms may begin to appear a bit later than normal, usually in September.
You also can extend your coneflower bed's blooming period by cutting back some but not all of your plants in spring, leaving the others not pruned. The latter should bloom at the normal time, starting in midsummer, while the pruned group's flowering will be delayed until early fall.
When trimming, use sharp shears, and clean its blades by wiping them with rubbing alcohol before you begin trimming and after each cut. This sterilization helps prevent the spread of plant diseases.
Deadheading for Tidiness
When flowers fade on a coneflower plant, removing the spent blooms -- called deadheading -- helps improve the plant's appearance. Use your fingertips to pinch off flower stems just ahead of the point where a leaf originates on the stem behind the flower, or cut at that point with sterilized shears. The plant may produce new buds after it has been deadheaded, although the second bloom period is usually reduced.
If you want your coneflower planting to expand, allow some self-seeding by leaving a few flowers on the plants to form seeds, which eventually will drop to the ground and produce new plants the next growing season.

Cleaning Up in Fall
Like all herbaceous perennials, coneflowers eventually die back to the ground when winter arrives, leaving dry stems and foliage. You can leave the plants in place during winter, but cutting back their dry upper parts with sterilized tools helps improve the appearance of the flowerbed while getting rid of any remaining insects and their eggs. Remove and dispose of all cuttings when you do fall cleanup. If winter temperatures drop below freezing where you live, then wait until the first frost to cut back the plants to prevent new growth that is easily damaged by cold.
2
0
文章
Miss Chen
2018年09月07日

Coneflowers (Echinacea spp.) are colorful perennials that attract birds and butterflies to your yard or garden. Coneflowers grow in shades of pink, purple, orange, yellow and white. These daisy-like flowers have a puffy central head that protrudes upward as the petals fold back. Coneflowers are native throughout eastern and central North America, growing in U.S. Department of Agriculture plant hardiness zones 3 through 9. Caring for hybrid coneflowers with regular deadheading, shearing once each season and dividing as needed will reward you with blooms for years to come.

When to Fertilize
Fertilize coneflowers in the spring as new growth appears with a fertilizer low in nitrogen like a 5-10-5 blend. Spread a small handful evenly around the plant, being sure that the product doesn't touch the plant. Apply two more applications at six week intervals and always water the fertilizer into the ground after applying. Coneflowers do not require heavy feeding; a spring mulch of rich compost helps smother weeds and provides a slow release of nutrients into the soil. While native varieties are not particular about soil type, coneflowers respond to loamy or sandy soil that drains well.
Watering
Water coneflowers regularly during the first growing season to help establish healthy root systems. Mature coneflowers are drought resistant, preferring an open area in full sun, but consistent watering can improve blooming throughout a hot, dry summer.
Few Pest Problems
Check the plants regularly for signs of insect damage. Although coneflowers are pest-resistant, leaf miners and Japanese beetles sometimes attack the leaves and flowers, and vine weevils may attack the roots. Dust the plants with diatomaceous earth or spray with a ready-to-use insecticidal soap to control insects. Powdery mildew, bacterial leaf spots and gray mold may be problems, especially in humid areas. Treat with a ready-to-use copper-based fungicide following the manufacturer's directions. Cover the entire foliage with the fungicide. Overhead watering can be a cause of disease spread; drip-irrigation or a soaker hose helps control soil-borne and airborne diseases by reducing splashing. Remove diseased parts of the plant when you deadhead and dispose of them by burning or in a trash collection container. Keep diseased plant material out of the compost pile and away from healthy plants.
Care in the Growing Season
Deadhead the coneflowers during the spring and early summer to encourage new growth in middle to late summer. Cut off spent blooms with garden shears as the petals begin to brown, wiping the blades with alcohol wipes between cuts to prevent the spread of disease. Cut out any dead or browning leaves to encourage fresh greenery later in the season. Leave the last spent coneflowers to dry on the plants in the fall -- the seed heads provide food for migrating and over-wintering birds and will reseed into the garden.

Shear coneflowers back to about one-third of their growth during the early summer to encourage bushy growth later in the season. Shearing a plant means to cut and remove most of the greenery and all of the spent blooms and stems.
If you're deadheading and pruning a large number of plants, mix nine parts water with one part household liquid bleach in a bucket, and dip the pruners in the solution between cuts to disinfect the blades.
Divide and Transplant
Divide mature coneflower clumps in the spring before growth begins, or in early fall after blooming is finished. Lift the plant from the ground completely with a shovel or spading fork, being careful not to damage the roots. Set the plant on the ground with the crown facing up. Place the tip of a sharp shovel at the top of the soil and between the center leaves of the coneflower plant. Push down with the shovel to cut the plant in half. Replant one half back into the hole where it was removed, and transplant the other half in a new location. Water both new coneflower plants after dividing and transplanting. Alternatively, you may cut a large clump into several sections with a sharp shovel or a knife and transplant the sections. Sterilize the blade after each cut.
Plant coneflowers as a border along a walkway or as part of a perennial cutting garden and watch the birds enjoy the seed heads.

When to Fertilize
Fertilize coneflowers in the spring as new growth appears with a fertilizer low in nitrogen like a 5-10-5 blend. Spread a small handful evenly around the plant, being sure that the product doesn't touch the plant. Apply two more applications at six week intervals and always water the fertilizer into the ground after applying. Coneflowers do not require heavy feeding; a spring mulch of rich compost helps smother weeds and provides a slow release of nutrients into the soil. While native varieties are not particular about soil type, coneflowers respond to loamy or sandy soil that drains well.
Watering
Water coneflowers regularly during the first growing season to help establish healthy root systems. Mature coneflowers are drought resistant, preferring an open area in full sun, but consistent watering can improve blooming throughout a hot, dry summer.
Few Pest Problems
Check the plants regularly for signs of insect damage. Although coneflowers are pest-resistant, leaf miners and Japanese beetles sometimes attack the leaves and flowers, and vine weevils may attack the roots. Dust the plants with diatomaceous earth or spray with a ready-to-use insecticidal soap to control insects. Powdery mildew, bacterial leaf spots and gray mold may be problems, especially in humid areas. Treat with a ready-to-use copper-based fungicide following the manufacturer's directions. Cover the entire foliage with the fungicide. Overhead watering can be a cause of disease spread; drip-irrigation or a soaker hose helps control soil-borne and airborne diseases by reducing splashing. Remove diseased parts of the plant when you deadhead and dispose of them by burning or in a trash collection container. Keep diseased plant material out of the compost pile and away from healthy plants.
Care in the Growing Season
Deadhead the coneflowers during the spring and early summer to encourage new growth in middle to late summer. Cut off spent blooms with garden shears as the petals begin to brown, wiping the blades with alcohol wipes between cuts to prevent the spread of disease. Cut out any dead or browning leaves to encourage fresh greenery later in the season. Leave the last spent coneflowers to dry on the plants in the fall -- the seed heads provide food for migrating and over-wintering birds and will reseed into the garden.

Shear coneflowers back to about one-third of their growth during the early summer to encourage bushy growth later in the season. Shearing a plant means to cut and remove most of the greenery and all of the spent blooms and stems.
If you're deadheading and pruning a large number of plants, mix nine parts water with one part household liquid bleach in a bucket, and dip the pruners in the solution between cuts to disinfect the blades.
Divide and Transplant
Divide mature coneflower clumps in the spring before growth begins, or in early fall after blooming is finished. Lift the plant from the ground completely with a shovel or spading fork, being careful not to damage the roots. Set the plant on the ground with the crown facing up. Place the tip of a sharp shovel at the top of the soil and between the center leaves of the coneflower plant. Push down with the shovel to cut the plant in half. Replant one half back into the hole where it was removed, and transplant the other half in a new location. Water both new coneflower plants after dividing and transplanting. Alternatively, you may cut a large clump into several sections with a sharp shovel or a knife and transplant the sections. Sterilize the blade after each cut.
Plant coneflowers as a border along a walkway or as part of a perennial cutting garden and watch the birds enjoy the seed heads.
0
0
文章
Miss Chen
2018年09月06日

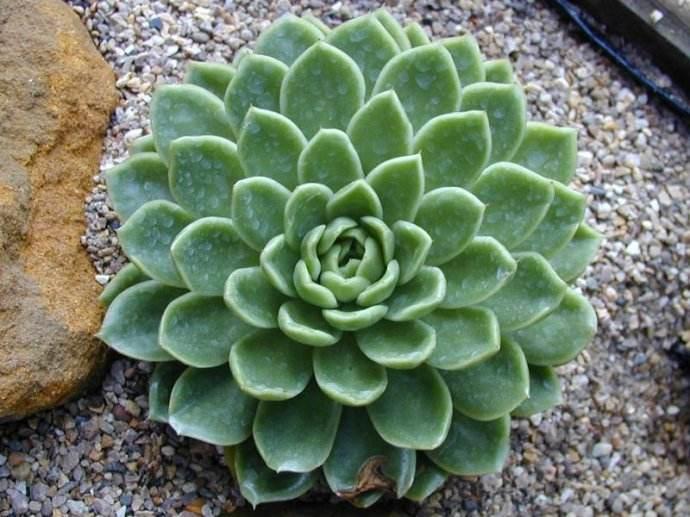
Hens and chicks plant (Sempervivum tectorum) is named for the rosette, or hen, and small offsets, or chicks, that grow on slender runners extending from the succulent. This sturdy plant thrives in tough growing conditions and needs only a thin layer of soil to develop roots. After the hen flowers and sets seed in summer, it dies back and the chicks fill in the empty spot. Hens and chicks grows outdoors in U.S. Department of Agriculture plant hardiness zones 3 through 8. Sometimes called houseleek, you can also grow hens and chicks as a houseplant.
Outdoor Care
Like most succulents, hens and chicks thrive in poor, sandy, well-draining soil and full sun. A spot where the plant gets afternoon shade is best in hot, sunny climates, but too much shade may result in a spindly, pale plant. To plant hens and chicks, loosen the top of the soil with a spade or garden fork, then nestle the plant into the top of the soil. It will soon develop roots that anchor the plant to the soil. Water to a depth of 6 to 8 inches after planting. After that, water only when the soil is dry -- usually every seven to 10 day during hot weather. The plant doesn't need any fertilizer. To keep hens and chicks neat, pinch off flower heads after the plant blooms in midsummer.
Houseplant Hens and Chicks
Hens and chicks performs best and shows its best colors outdoors, but with proper care and a container with drainage holes, you can grow this succulent plant indoors. Plant hens and chicks in a container filled with a mixture of equal parts potting mix and sand, then place the plant in a south-facing window where it gets at least six to eight hours of sun each day. If you don't have a sunny window, place the plant under grow lights or fluorescent bulbs for 14 to 16 hours per day. Allow 6 to 12 inches between the plant and the bulb. Proper watering is critical because succulent plants rot quickly in soggy, waterlogged soil. One watering per week is generally enough during warm weather, but never water the plant unless the soil feels completely dry. Water sparingly during the winter, providing only enough water to keep the plant from shriveling. Let the pot drain thoroughly and never let the plant stand in water.
Making More Hens and Chicks
Hens and chicks is easy to propagate by removing chicks from the hen any time or year. This usually happens because the plant outgrows its garden spot or container or because the hens and chicks are too crowded. Allow the chick to develop until the runner dies back and you can see small roots at the base of the chick. Cut or break the chick from the hen and plant it in a pot filled with a sandy potting soil mix, or in well-drained outdoor spot. To keep from transferring disease to the plant while pruning, wipe the blades of your tools with alcohol and allow to dry before using.
Considerations
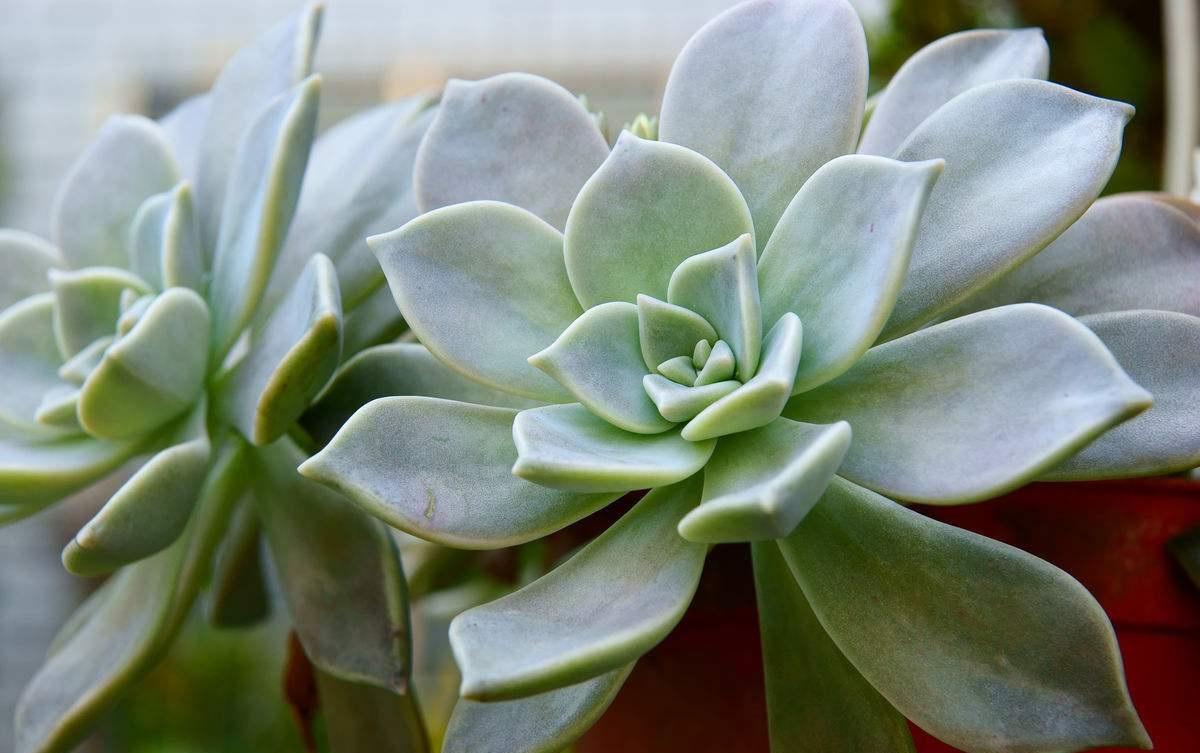
Although hens and chicks can spread up to 2 feet wide, they are not considered an invasive plant. Hens and chicks are generally disease-free with the exception of root or stem rot or rust, which occur if hens and chicks are overwatered or placed in soil that doesn't drain well.

Outdoor Care
Like most succulents, hens and chicks thrive in poor, sandy, well-draining soil and full sun. A spot where the plant gets afternoon shade is best in hot, sunny climates, but too much shade may result in a spindly, pale plant. To plant hens and chicks, loosen the top of the soil with a spade or garden fork, then nestle the plant into the top of the soil. It will soon develop roots that anchor the plant to the soil. Water to a depth of 6 to 8 inches after planting. After that, water only when the soil is dry -- usually every seven to 10 day during hot weather. The plant doesn't need any fertilizer. To keep hens and chicks neat, pinch off flower heads after the plant blooms in midsummer.
Houseplant Hens and Chicks
Hens and chicks performs best and shows its best colors outdoors, but with proper care and a container with drainage holes, you can grow this succulent plant indoors. Plant hens and chicks in a container filled with a mixture of equal parts potting mix and sand, then place the plant in a south-facing window where it gets at least six to eight hours of sun each day. If you don't have a sunny window, place the plant under grow lights or fluorescent bulbs for 14 to 16 hours per day. Allow 6 to 12 inches between the plant and the bulb. Proper watering is critical because succulent plants rot quickly in soggy, waterlogged soil. One watering per week is generally enough during warm weather, but never water the plant unless the soil feels completely dry. Water sparingly during the winter, providing only enough water to keep the plant from shriveling. Let the pot drain thoroughly and never let the plant stand in water.
Making More Hens and Chicks
Hens and chicks is easy to propagate by removing chicks from the hen any time or year. This usually happens because the plant outgrows its garden spot or container or because the hens and chicks are too crowded. Allow the chick to develop until the runner dies back and you can see small roots at the base of the chick. Cut or break the chick from the hen and plant it in a pot filled with a sandy potting soil mix, or in well-drained outdoor spot. To keep from transferring disease to the plant while pruning, wipe the blades of your tools with alcohol and allow to dry before using.

Considerations
Although hens and chicks can spread up to 2 feet wide, they are not considered an invasive plant. Hens and chicks are generally disease-free with the exception of root or stem rot or rust, which occur if hens and chicks are overwatered or placed in soil that doesn't drain well.
0
2


