文章
ritau
2020年04月27日

If you're searching for the perfect indoor plant, you can't go wrong with an areca palm (Dypsis lutescens), which also goes by the names butterfly palm, yellow palm, or golden cane palm. Areca palms are a beautiful tropical plant that can grow up to 6 to 8 ft (1.8 to 2.4 m) tall indoors or up to 25 ft (7.6 m) tall outdoors. Since the plant is nonpoisonous, it’s a great option for homes with children and pets. As an added bonus, areca palms help clean the air in your home!With proper care, your areca palm can thrive for up to 10 years.
1. Use a well-draining, acidic soil that doesn’t clump up. Get a potting mix or outdoor soil from your local gardening store or online. Check that the soil is labeled as well-draining and acidic so your palm can thrive. Break up the soil before you plant your areca palm so you know it’ll be loose around the roots.

2. Plant the palm in a well-draining pot that’s twice the size of the root ball. Choose a pot that has drainage holes in the bottom so that the plant doesn’t become water-logged. Fill the pot 2/3 of the way with potting soil. Place your root ball in the center of the pot, then cover it with more potting soil. Pat the surface of the soil gently to settle the plant but don’t pack it down around the root ball.
3. Put your areca palm in the ground only if you live in USDA zones 10 or 11. Areca palms are commonly grown as a houseplant, but you may want to grow yours outside if your area is hot and humid. Check that your region is in a USDA zone 10 or 11. If so, plant it directly in the ground if you prefer.
4. Put your areca palm in a spot where it gets bright, indirect light. Areca palms need good lighting to thrive, but direct light can hurt your plant’s fronds. Pick a spot near a window or glass door where the light filters into the room. Place your plant where it’s in an indirect beam or near direct sunlight.
5. Maintain a temperature that’s between 55 to 75 °F (13 to 24 °C). Areca palms thrive best when the daytime temperature is 65 to 75 °F (18 to 24 °C) and the nighttime temperature is around 55 °F (13 °C). For indoor areca palms, adjust your thermostat so the room temperature stays ideal. If your plant is outdoors, bring it inside on days that are very hot or very cold. Via. WikiHow

1. Use a well-draining, acidic soil that doesn’t clump up. Get a potting mix or outdoor soil from your local gardening store or online. Check that the soil is labeled as well-draining and acidic so your palm can thrive. Break up the soil before you plant your areca palm so you know it’ll be loose around the roots.

2. Plant the palm in a well-draining pot that’s twice the size of the root ball. Choose a pot that has drainage holes in the bottom so that the plant doesn’t become water-logged. Fill the pot 2/3 of the way with potting soil. Place your root ball in the center of the pot, then cover it with more potting soil. Pat the surface of the soil gently to settle the plant but don’t pack it down around the root ball.
3. Put your areca palm in the ground only if you live in USDA zones 10 or 11. Areca palms are commonly grown as a houseplant, but you may want to grow yours outside if your area is hot and humid. Check that your region is in a USDA zone 10 or 11. If so, plant it directly in the ground if you prefer.
4. Put your areca palm in a spot where it gets bright, indirect light. Areca palms need good lighting to thrive, but direct light can hurt your plant’s fronds. Pick a spot near a window or glass door where the light filters into the room. Place your plant where it’s in an indirect beam or near direct sunlight.
5. Maintain a temperature that’s between 55 to 75 °F (13 to 24 °C). Areca palms thrive best when the daytime temperature is 65 to 75 °F (18 to 24 °C) and the nighttime temperature is around 55 °F (13 °C). For indoor areca palms, adjust your thermostat so the room temperature stays ideal. If your plant is outdoors, bring it inside on days that are very hot or very cold. Via. WikiHow

0
0
文章
ritau
2020年04月23日

Hi, everybody, today let's learn something about how to grow onions!
1. Choose a type of onion to grow.
As with most fruits and vegetables, there are many variations of the onion that are appealing for different reasons. Onions come in three general colors - white, yellow, and red/purple - each with their own distinct taste. Additionally, onions are categorized into two growing types: long-day and short-day. Long-day onions are named such because they begin sprouting when the days between 14 to 16 hours in length (late spring/summer), while short-day onions begin sprouting when days are between 10 to 12 hours in length (winter/early spring).
2. Decide how you will plant the onions.
In general, there are two popular ways of growing onions: using either onion sets (bulbs) or using onion seeds. Gardeners tend to prefer planting onion sets, as they are a bit hardier and stand up to poor weather better than onion seeds. However, if you're able and willing to grow your onions from seeds indoors and transplant them outdoors, you can certainly raise them all on your own from seeds. You can also plant your onions in the ground in warm weather.
3. Know when to grow.
Onions can be tricky to grow if they're not planted at the right time. If planted in cold weather, they can die off or waste energy in blossoms rather than bulbs in the spring. If you're planting seeds, start them indoors at least 6 weeks prior to planting outdoors. Make sure that you sow the onions 6 weeks before your average last frost date, and set them out after that date.
4. Select the ideal location.
Onions aren't too terribly picky when it comes to growing conditions, but they do have some preferences. Select a place with plenty of room and full sunlight. Onions will grow quite large if they're given enough space, so keep in mind that the more area you give them to grow, the larger they will get. Avoid planting them in a location that is shaded by larger plants or trees.

5. Prepare the soil.
Although it takes some forethought, if you are able to prepare the soil of your plot for planting several months in advance, you'll receive a better onion crop down the line. If you're able, begin tilling the soil and adding in manure in the fall. If your soil is very rocky, sandy, or has lots of clay, mix in some potting soil to help even things out. Additionally, test the pH level of your soil and add in any necessary compounds in order to create a pH that falls between 6 to 7.5.
6. Get the soil ready.
When you're ready to plant, till the soil about 6 inches (15.2 cm) deep and add a layer (1 cup per 20 feet) of phosphorous fertilizer. However, only do this if your soil is low on phosphorus. Be sure to test your soil first to find out. Using a mixture such as 10-20-10 or 0-20-0 will provide an extra boost for your developing onions. At this point, be sure to remove any weeds that may be present in the garden plot you're planting in.
7. Dig the holes.
Plant onions so that no more than one inch of soil is placed above the sets or seedlings; if too much of the bulb is buried, the growth of the onion will be reduced and constricted. Space onion sets 4–6 inches (10.2–15.2 cm) apart, and onion seeds 1–2 inches (2.5–5.1 cm) apart. As your onions begin to grow, you can transplant them and space them further apart in order to increase their growing size.
8. Plant the onions.
Place your seeds in the holes you've dug, covering them with ¼ to ½ inch of soil. The sets should be no more than two inches deep. Use your hands or shoes to firmly tamp the soil over the top of the onions; they grow better in firm, rather than loose, soil. Finish up planting by adding a bit of water, and you're set to watch them grow! via.wikihow

1. Choose a type of onion to grow.
As with most fruits and vegetables, there are many variations of the onion that are appealing for different reasons. Onions come in three general colors - white, yellow, and red/purple - each with their own distinct taste. Additionally, onions are categorized into two growing types: long-day and short-day. Long-day onions are named such because they begin sprouting when the days between 14 to 16 hours in length (late spring/summer), while short-day onions begin sprouting when days are between 10 to 12 hours in length (winter/early spring).
2. Decide how you will plant the onions.
In general, there are two popular ways of growing onions: using either onion sets (bulbs) or using onion seeds. Gardeners tend to prefer planting onion sets, as they are a bit hardier and stand up to poor weather better than onion seeds. However, if you're able and willing to grow your onions from seeds indoors and transplant them outdoors, you can certainly raise them all on your own from seeds. You can also plant your onions in the ground in warm weather.
3. Know when to grow.
Onions can be tricky to grow if they're not planted at the right time. If planted in cold weather, they can die off or waste energy in blossoms rather than bulbs in the spring. If you're planting seeds, start them indoors at least 6 weeks prior to planting outdoors. Make sure that you sow the onions 6 weeks before your average last frost date, and set them out after that date.
4. Select the ideal location.
Onions aren't too terribly picky when it comes to growing conditions, but they do have some preferences. Select a place with plenty of room and full sunlight. Onions will grow quite large if they're given enough space, so keep in mind that the more area you give them to grow, the larger they will get. Avoid planting them in a location that is shaded by larger plants or trees.

5. Prepare the soil.
Although it takes some forethought, if you are able to prepare the soil of your plot for planting several months in advance, you'll receive a better onion crop down the line. If you're able, begin tilling the soil and adding in manure in the fall. If your soil is very rocky, sandy, or has lots of clay, mix in some potting soil to help even things out. Additionally, test the pH level of your soil and add in any necessary compounds in order to create a pH that falls between 6 to 7.5.
6. Get the soil ready.
When you're ready to plant, till the soil about 6 inches (15.2 cm) deep and add a layer (1 cup per 20 feet) of phosphorous fertilizer. However, only do this if your soil is low on phosphorus. Be sure to test your soil first to find out. Using a mixture such as 10-20-10 or 0-20-0 will provide an extra boost for your developing onions. At this point, be sure to remove any weeds that may be present in the garden plot you're planting in.
7. Dig the holes.
Plant onions so that no more than one inch of soil is placed above the sets or seedlings; if too much of the bulb is buried, the growth of the onion will be reduced and constricted. Space onion sets 4–6 inches (10.2–15.2 cm) apart, and onion seeds 1–2 inches (2.5–5.1 cm) apart. As your onions begin to grow, you can transplant them and space them further apart in order to increase their growing size.
8. Plant the onions.
Place your seeds in the holes you've dug, covering them with ¼ to ½ inch of soil. The sets should be no more than two inches deep. Use your hands or shoes to firmly tamp the soil over the top of the onions; they grow better in firm, rather than loose, soil. Finish up planting by adding a bit of water, and you're set to watch them grow! via.wikihow

0
0
文章
ritau
2020年04月19日

Quarantine life, indoor activities are recommemded, today let's plant a ginger at home!
1. Choose your ginger plant.
There are many species of ginger. To grow the most common edible variety, Zingiber officinale, all you need is ginger root from the grocery store. You can find ornamental ginger plants with vibrant flowers at a plant nursery, but these are often inedible.
2.Cut the rhizome into pieces (optional).
If you'd like to grow more than one plant, cut the ginger with a sanitized knife or shears. Any piece at least 1 inch (2.5 cm) wide with one or more eyes can grow into a separate plant. After cutting, leave the pieces in a dry location for a few days to allow them to heal. They will form a protective callus over the cut surface, which reduces the risk of infection.

3.Prepare the soil.
Ginger thrives on high-quality, well-draining soil. Mixing garden soil with an equal amount of well-rotted compost should do the trick. If your soil is poor quality or heavy in clay, purchase rich potting soil instead.
4.Choose a location.
Ginger prefers partial shade or areas with morning sun only, away from large roots. The growing location should be sheltered from wind and moist, but not swampy.If the ginger plant has not yet germinated, soil temperatures must be warm — ideally between 71 and 77ºF (22–25ºC).
5.Plant the ginger.
Plant each piece of ginger 2–4 inches (5–10 cm) below loose soil, with the buds pointing upward. If planting in rows, keep each piece 8 inches (20 cm) apart. If planting in pots, plant one piece per large pot (14 in./35 cm diameter).
*Ginger grows slowly, especially outside of the tropics. A sprout might appear within a few days if you're lucky, but continue to water for at least a couple weeks before giving up on the plant.
*Fertilization is not required if the ginger is in rich soil, especially if you've mixed in compost. Have the soil tested first and fertilize accordingly. If soil is poor or you'd like to improve yield, fertilize with a small amount of complete liquid fertilizer each month.
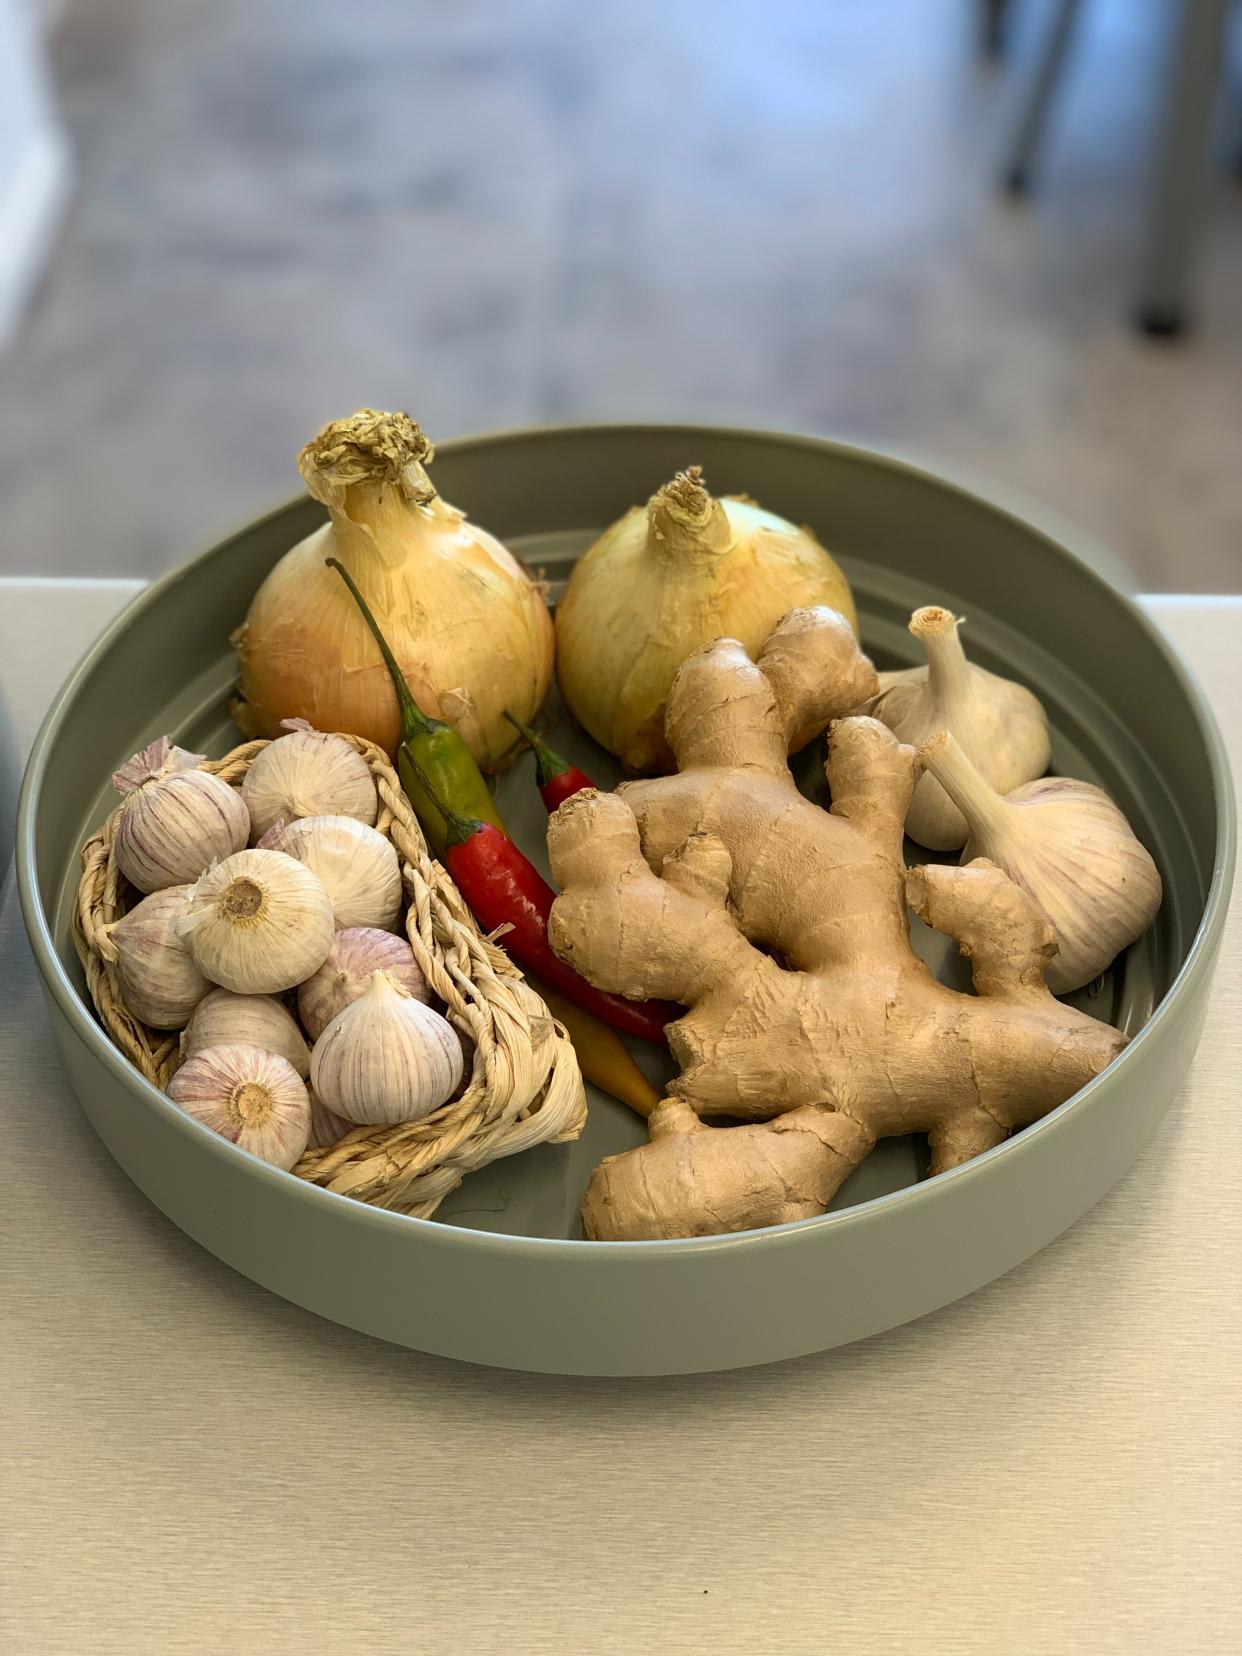
1. Choose your ginger plant.
There are many species of ginger. To grow the most common edible variety, Zingiber officinale, all you need is ginger root from the grocery store. You can find ornamental ginger plants with vibrant flowers at a plant nursery, but these are often inedible.
2.Cut the rhizome into pieces (optional).
If you'd like to grow more than one plant, cut the ginger with a sanitized knife or shears. Any piece at least 1 inch (2.5 cm) wide with one or more eyes can grow into a separate plant. After cutting, leave the pieces in a dry location for a few days to allow them to heal. They will form a protective callus over the cut surface, which reduces the risk of infection.

3.Prepare the soil.
Ginger thrives on high-quality, well-draining soil. Mixing garden soil with an equal amount of well-rotted compost should do the trick. If your soil is poor quality or heavy in clay, purchase rich potting soil instead.
4.Choose a location.
Ginger prefers partial shade or areas with morning sun only, away from large roots. The growing location should be sheltered from wind and moist, but not swampy.If the ginger plant has not yet germinated, soil temperatures must be warm — ideally between 71 and 77ºF (22–25ºC).
5.Plant the ginger.
Plant each piece of ginger 2–4 inches (5–10 cm) below loose soil, with the buds pointing upward. If planting in rows, keep each piece 8 inches (20 cm) apart. If planting in pots, plant one piece per large pot (14 in./35 cm diameter).
*Ginger grows slowly, especially outside of the tropics. A sprout might appear within a few days if you're lucky, but continue to water for at least a couple weeks before giving up on the plant.
*Fertilization is not required if the ginger is in rich soil, especially if you've mixed in compost. Have the soil tested first and fertilize accordingly. If soil is poor or you'd like to improve yield, fertilize with a small amount of complete liquid fertilizer each month.

0
0
文章
ritau
2020年04月08日

Have you ever seen a Marimo, the cute moss ball?
Marimo (also known as Cladophora ball, moss ball, moss ball pets, or lake ball) is a rare growth form of Aegagropila linnaei (a species of filamentous green algae) in which the algae grow into large green balls with a velvety appearance. Marimo are eukaryotic.
The species can be found in a number of lakes and rivers in Japan and Northern Europe. Colonies of marimo balls are known to form in Japan and Iceland, but their population has been declining.
Marimo were first described in the 1820s by Anton E. Sauter, found in Lake Zell, Austria. The genus Aegagropila was established by Friedrich T. Kützing (1843) with A. linnaei as the type species based on its formation of spherical aggregations, but all the Aegagropila species were transferred to subgenus Aegagropila of genus Cladophora later by the same author (Kützing 1849). Subsequently, A. linnaei was placed in the genus Cladophora in the Cladophorales and was renamed Cladophora aegagropila (L.) Rabenhorst and Cl. sauteri (Nees ex Kütz.) Kütz. Extensive DNA research in 2002 returned the name to Aegagropila linnaei. The presence of chitin in the cell walls makes it distinct from the genus Cladophora.
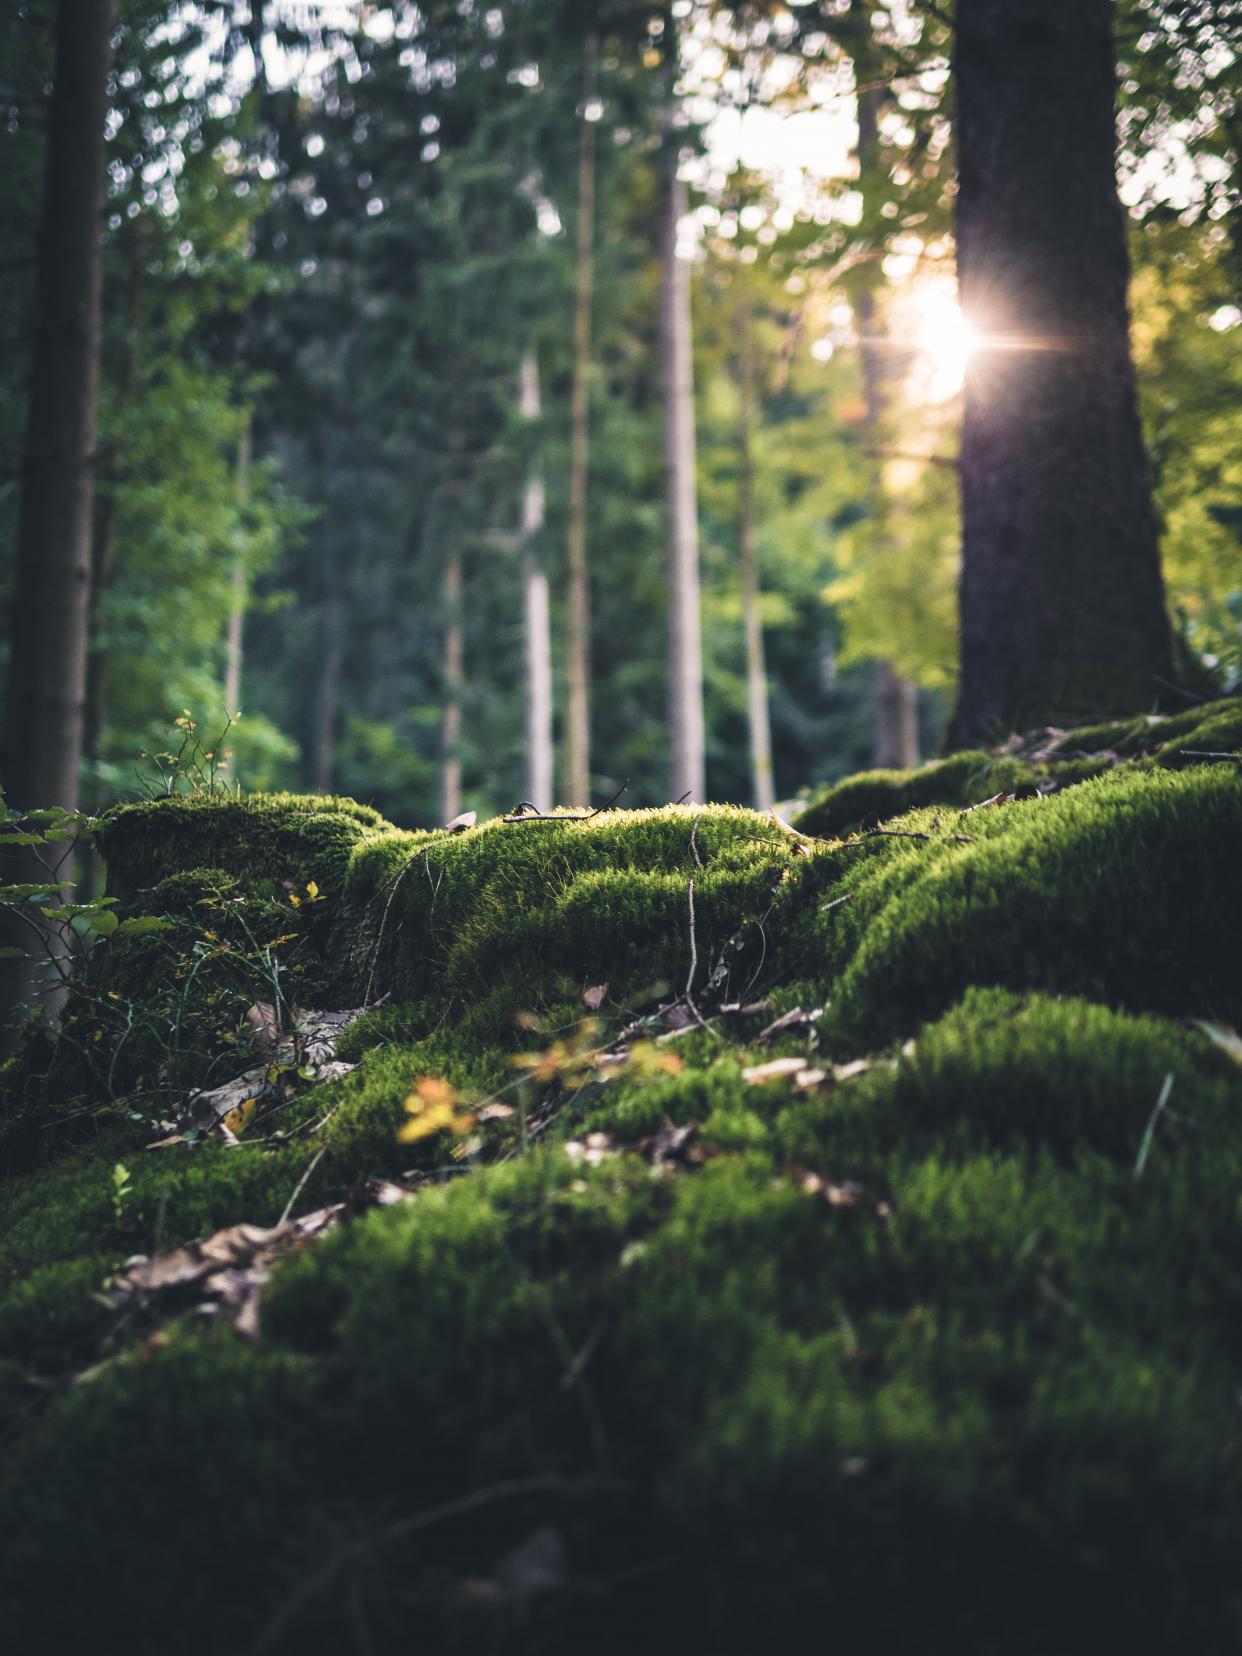
The plant was named marimo by the Japanese botanist Takiya Kawakami in 1898. Mari is a bouncy play ball. Mo is a generic term for plants that grow in water. The native names in Ainu are torasampe (lake goblin) and tokarip (lake roller). They are sometimes sold in aquariums under the name "Japanese moss balls" although they are unrelated to moss. In Iceland the lake balls are called kúluskítur by the local fishermen at Lake Mývatn (kúla = ball, skítur = muck) where the "muck" is any weeds that get entangled in their fishing nets. The generic name Aegagropila is Greek for "goat hair".
Marimo's preferred habitat is in lakes with a low or moderate biological activity, and with moderate or high levels of calcium.
The species is sensitive to the amount of nutrients in the water. An excess of nutrients (due to agriculture and fish farming), along with mud deposition from human activity are thought to be the main causes for its disappearance from many lakes.The species still exists in Lake Zeller in Austria (where it was first discovered in the 1820s) but the lake ball growth form has not been found there since around 1910. The same has happened in most locations in England and Scotland, where mainly the attached form can be found.Dense colonies of marimo were discovered in Lake Mývatn in Iceland in 1978, but they have shrunk considerably since then. By 2014 the marimo had almost completely disappeared from the lake due to an excess of nutrients.The species can still be found in several places in Japan, but populations have also declined there. At Lake Akan, a great effort is spent on the conservation of the lake balls.The marimo has been a protected species in Japan since the 1920s, and in Iceland since 2006. Lake Akan is protected as a national park and Lake Mývatn is protected as a nature reserve.
Marimo balls are a rare curiosity. In Japan, the Ainu people hold a three-day marimo festival every October at Lake Akan.
Because of their appealing appearance, the lake balls also serve as a medium for environmental education. Small balls sold as souvenirs are hand rolled from free-floating filaments.A widely marketed stuffed toy character known as Marimokkori takes the anthropomorphic form of the marimo algae as one part of its design.Marimo are sometimes sold for display in aquariums, those often originate from Ukrainian lakes like the Shatsk's lakes. Balls sold in Japanese aquarium shops are of European origin, collecting them from Lake Akan is prohibited.
Let us protect the cute Marimo!
Marimo (also known as Cladophora ball, moss ball, moss ball pets, or lake ball) is a rare growth form of Aegagropila linnaei (a species of filamentous green algae) in which the algae grow into large green balls with a velvety appearance. Marimo are eukaryotic.
The species can be found in a number of lakes and rivers in Japan and Northern Europe. Colonies of marimo balls are known to form in Japan and Iceland, but their population has been declining.
Marimo were first described in the 1820s by Anton E. Sauter, found in Lake Zell, Austria. The genus Aegagropila was established by Friedrich T. Kützing (1843) with A. linnaei as the type species based on its formation of spherical aggregations, but all the Aegagropila species were transferred to subgenus Aegagropila of genus Cladophora later by the same author (Kützing 1849). Subsequently, A. linnaei was placed in the genus Cladophora in the Cladophorales and was renamed Cladophora aegagropila (L.) Rabenhorst and Cl. sauteri (Nees ex Kütz.) Kütz. Extensive DNA research in 2002 returned the name to Aegagropila linnaei. The presence of chitin in the cell walls makes it distinct from the genus Cladophora.

The plant was named marimo by the Japanese botanist Takiya Kawakami in 1898. Mari is a bouncy play ball. Mo is a generic term for plants that grow in water. The native names in Ainu are torasampe (lake goblin) and tokarip (lake roller). They are sometimes sold in aquariums under the name "Japanese moss balls" although they are unrelated to moss. In Iceland the lake balls are called kúluskítur by the local fishermen at Lake Mývatn (kúla = ball, skítur = muck) where the "muck" is any weeds that get entangled in their fishing nets. The generic name Aegagropila is Greek for "goat hair".
Marimo's preferred habitat is in lakes with a low or moderate biological activity, and with moderate or high levels of calcium.
The species is sensitive to the amount of nutrients in the water. An excess of nutrients (due to agriculture and fish farming), along with mud deposition from human activity are thought to be the main causes for its disappearance from many lakes.The species still exists in Lake Zeller in Austria (where it was first discovered in the 1820s) but the lake ball growth form has not been found there since around 1910. The same has happened in most locations in England and Scotland, where mainly the attached form can be found.Dense colonies of marimo were discovered in Lake Mývatn in Iceland in 1978, but they have shrunk considerably since then. By 2014 the marimo had almost completely disappeared from the lake due to an excess of nutrients.The species can still be found in several places in Japan, but populations have also declined there. At Lake Akan, a great effort is spent on the conservation of the lake balls.The marimo has been a protected species in Japan since the 1920s, and in Iceland since 2006. Lake Akan is protected as a national park and Lake Mývatn is protected as a nature reserve.
Marimo balls are a rare curiosity. In Japan, the Ainu people hold a three-day marimo festival every October at Lake Akan.
Because of their appealing appearance, the lake balls also serve as a medium for environmental education. Small balls sold as souvenirs are hand rolled from free-floating filaments.A widely marketed stuffed toy character known as Marimokkori takes the anthropomorphic form of the marimo algae as one part of its design.Marimo are sometimes sold for display in aquariums, those often originate from Ukrainian lakes like the Shatsk's lakes. Balls sold in Japanese aquarium shops are of European origin, collecting them from Lake Akan is prohibited.
Let us protect the cute Marimo!
0
0
文章
ritau
2020年02月16日

Hello, everybody,today we're going to give you some tips on how to grow cucumbers.

1. Choose a right size flowerpot and fertile soil, and place the soil in the flowerpot.
2. Put the seeds in the pot and water the good seeds to make sure they have enough water.
3. Apply organic fertilizer to the seeds so that the cucumber can get enough nourishment.
4. Place the seeds in a sunny place for enough sunlight.

Cucumbers contain less than 5 percent sugar and are rich in dietary fiber. According to studies, dietary fiber can improve the sensitivity of insulin receptors in human body and improve the utilization of insulin in human body.At the same time, dietary fiber itself is a kind of polysaccharide, and can not be broken down, equivalent to a part of the food space in the human body.This is a good substitute for many diabetic patients who need to reduce their diet. In addition, when fiber enters the body, it will also wrap up part of the sugar in the food, making the speed of sugar absorption slow, which can effectively regulate the postprandial blood glucose balance.


1. Choose a right size flowerpot and fertile soil, and place the soil in the flowerpot.
2. Put the seeds in the pot and water the good seeds to make sure they have enough water.
3. Apply organic fertilizer to the seeds so that the cucumber can get enough nourishment.
4. Place the seeds in a sunny place for enough sunlight.

Cucumbers contain less than 5 percent sugar and are rich in dietary fiber. According to studies, dietary fiber can improve the sensitivity of insulin receptors in human body and improve the utilization of insulin in human body.At the same time, dietary fiber itself is a kind of polysaccharide, and can not be broken down, equivalent to a part of the food space in the human body.This is a good substitute for many diabetic patients who need to reduce their diet. In addition, when fiber enters the body, it will also wrap up part of the sugar in the food, making the speed of sugar absorption slow, which can effectively regulate the postprandial blood glucose balance.

0
0
文章
ritau
2020年02月10日

Hello everyone, today we are going to talk about how to grow succulent plants.

* Soil
Succulents are suitable for use in soils that are permeable to water and air, dry, sterile and insect-free. A mixture of perlite and coconut bran (1:2) is recommended for most succulents.
*Illumination
When raising succulent plant indoors, place it in the window with sufficient sunshine or balcony aptly.If the summer temperature is too high, you can use a shading net with a 70% shading rate, and avoid 12-15 hours of sun exposure.
*Moisture
The principle of succulent plant watering is to water less and thoroughly,and avoid accumulating water. Spring and fall are the growing seasons for succulents, and the best time to water is when the leaves below begin to dry out. Summer is the dormancy season of succulent plants, mainly by spray watering, keep the surface of the basin soil wet.Water less often in winter.

*Temperature
Succulents are native to South Africa, where the optimum growth temperature is between 12 and 28 degrees Celsius. Therefore, the spring and autumn are the most vigorous seasons for succulents.Make sure the room temperature is above 8 degrees Celsius in winter and below 35 degrees Celsius in summer, and pay attention to ventilation and cooling.
Hope those tips may help you! Enjoying your plant!


* Soil
Succulents are suitable for use in soils that are permeable to water and air, dry, sterile and insect-free. A mixture of perlite and coconut bran (1:2) is recommended for most succulents.
*Illumination
When raising succulent plant indoors, place it in the window with sufficient sunshine or balcony aptly.If the summer temperature is too high, you can use a shading net with a 70% shading rate, and avoid 12-15 hours of sun exposure.
*Moisture
The principle of succulent plant watering is to water less and thoroughly,and avoid accumulating water. Spring and fall are the growing seasons for succulents, and the best time to water is when the leaves below begin to dry out. Summer is the dormancy season of succulent plants, mainly by spray watering, keep the surface of the basin soil wet.Water less often in winter.

*Temperature
Succulents are native to South Africa, where the optimum growth temperature is between 12 and 28 degrees Celsius. Therefore, the spring and autumn are the most vigorous seasons for succulents.Make sure the room temperature is above 8 degrees Celsius in winter and below 35 degrees Celsius in summer, and pay attention to ventilation and cooling.
Hope those tips may help you! Enjoying your plant!

0
0
文章
ritau
2020年02月04日

Hello everybody, welcome back to our channel! Today we are going to give you some tips on how to grow tomatoes.
*Temperature: 24℃-26℃
*Sowing time:July & August
*Adequate illumination
*Drain away water in time
*Disinfect the seed: During disinfection, wrap the seeds with gauze and soak them in 50℃ water for 10 minutes, or soak them in 10% sodium phosphate solution for 20 minutes.Rinse with clean water and soak in 30℃ warm water for 23 hours.Get the dry stuff out.

*Prepare a shelf to prop up the development and stay upright
*If the first flower doesn't bear fruit, the plant won't be able to bear fruit until the leaves are full. A tomato flower has both the stamen and the pistil, and there is no natural pollination medium. To make the fruit fuller,it need our help by gently tapping the flower with a finger or cotton swab.
*Before and after flowering, lateral buds will grow out of the leaf base. The lateral buds below the first tidbits should be removed in time so as not to consume nutrients.
*When the red fruit is fully ripe, cut and harvest from below. The ripe fruit tends to split or fall off, so don't harvest too late.

*Temperature: 24℃-26℃
*Sowing time:July & August
*Adequate illumination
*Drain away water in time
*Disinfect the seed: During disinfection, wrap the seeds with gauze and soak them in 50℃ water for 10 minutes, or soak them in 10% sodium phosphate solution for 20 minutes.Rinse with clean water and soak in 30℃ warm water for 23 hours.Get the dry stuff out.

*Prepare a shelf to prop up the development and stay upright
*If the first flower doesn't bear fruit, the plant won't be able to bear fruit until the leaves are full. A tomato flower has both the stamen and the pistil, and there is no natural pollination medium. To make the fruit fuller,it need our help by gently tapping the flower with a finger or cotton swab.
*Before and after flowering, lateral buds will grow out of the leaf base. The lateral buds below the first tidbits should be removed in time so as not to consume nutrients.
*When the red fruit is fully ripe, cut and harvest from below. The ripe fruit tends to split or fall off, so don't harvest too late.

0
0
文章
ritau
2020年01月30日

Hello everybody, welcome back to our channel! Today we are going to teach you how to grow delicious grapes at home. Here are 7 steps to go:
1. Plant your grapevines.
Depending on the species of grapes you are planting, spacing will be different for each plant. For American and European grapes, plant each vine 6–10 feet (1.8–3.0 m) apart. Muscadines require much more space, and should be planted approximately 16 feet (4.9 m) apart. Plant the cuttings in a trench with the basal and center bud covered. The top bud should be just above the soil surface. Press the soil firmly around the newly planted grapevine cuttings.
2. Give your plants a good watering.
Grapevines don’t prefer heavy water or rain, so after the first watering keep the amount of water you give them to a minimum. Keep water near the roots so that the majority of it gets absorbed rather than evaporated by the sun. If your area doesn’t get much rain, set up a drip system directly at the roots so that the grapevines get small amounts of water on a regular basis.

3. Prune your grapevines.
The first year, the grapevine should not be allowed to produce any fully matured fruits as these can damage the young vine with their weight. Cut back all the fruit, as well as all the vines except for the strongest that branch off the cane. In later years prune as needed following established local practices, and prune back 90% of the new growth on older vines each year.
4. Prune vines when dormant.
Always always prune grapevines when they are dormant. They will otherwise bleed their sap - losing vigour. This is typically in late winter when it is no longer cold enough to frost outside.

5. Mulch around the vines.
A layer of mulch around your plants will regulate soil temperature, retain water, and reduce weeds.
6. Apply pest control as needed.
Little pest control is needed as grapevines are naturally hardy. Keep weeds at bay by hand-weeding on a regular basis, and cover you grapevines in bird net to keep birds away if necessary. Seek guidance from your local gardening club or agricultural extension on how to combat the Vine Moth. It is one of the few pests that can decimate grapevines.
7. Harvest your grapes when appropriate. Strong, edible fruit likely won’t appear for anywhere from 1-3 years. When it appears, test its ripeness by picking a few grapes from different areas and tasting them. If the grapes are sweet, start picking as they ready for harvesting and eating.
source:wikihow

Hope you can enjoy a fine harvest!
1. Plant your grapevines.
Depending on the species of grapes you are planting, spacing will be different for each plant. For American and European grapes, plant each vine 6–10 feet (1.8–3.0 m) apart. Muscadines require much more space, and should be planted approximately 16 feet (4.9 m) apart. Plant the cuttings in a trench with the basal and center bud covered. The top bud should be just above the soil surface. Press the soil firmly around the newly planted grapevine cuttings.
2. Give your plants a good watering.
Grapevines don’t prefer heavy water or rain, so after the first watering keep the amount of water you give them to a minimum. Keep water near the roots so that the majority of it gets absorbed rather than evaporated by the sun. If your area doesn’t get much rain, set up a drip system directly at the roots so that the grapevines get small amounts of water on a regular basis.

3. Prune your grapevines.
The first year, the grapevine should not be allowed to produce any fully matured fruits as these can damage the young vine with their weight. Cut back all the fruit, as well as all the vines except for the strongest that branch off the cane. In later years prune as needed following established local practices, and prune back 90% of the new growth on older vines each year.
4. Prune vines when dormant.
Always always prune grapevines when they are dormant. They will otherwise bleed their sap - losing vigour. This is typically in late winter when it is no longer cold enough to frost outside.

5. Mulch around the vines.
A layer of mulch around your plants will regulate soil temperature, retain water, and reduce weeds.
6. Apply pest control as needed.
Little pest control is needed as grapevines are naturally hardy. Keep weeds at bay by hand-weeding on a regular basis, and cover you grapevines in bird net to keep birds away if necessary. Seek guidance from your local gardening club or agricultural extension on how to combat the Vine Moth. It is one of the few pests that can decimate grapevines.
7. Harvest your grapes when appropriate. Strong, edible fruit likely won’t appear for anywhere from 1-3 years. When it appears, test its ripeness by picking a few grapes from different areas and tasting them. If the grapes are sweet, start picking as they ready for harvesting and eating.
source:wikihow

Hope you can enjoy a fine harvest!
0
0
文章
ritau
2020年01月09日

"In case I don't see ya', good afternoon, good evening and goodnight."
Hi, everybody, today we are going to introduce a common plant---Mint, about how to grow it at home and how to drink it!

Growing Mint
*plant
a. white thick rhizome should be chosen
b. trim it to about 8cm long and bury it
*Soil
loose & sand soil
well drained
fertile
*Temperature
20-30C°
Proper light
tends to be wetter
When it's time to harvest, let's pick up a couple of leaves and make a Mojito!

Recipe:
*Material
a. white rum-45ml
b. lemon-quarter
c. sugar-2 spoons
d. soda water-150ml
e. crushed ice-a few
*Steps:
a. clean the mint leaves, mash the leaves with sugar and put them all into a glass
b. squeeze the lemon juice into the glass, and also put lemon into it
c. put ice into the class
d. pour the rum and soda water into the glass
Hi, everybody, today we are going to introduce a common plant---Mint, about how to grow it at home and how to drink it!

Growing Mint
*plant
a. white thick rhizome should be chosen
b. trim it to about 8cm long and bury it
*Soil
loose & sand soil
well drained
fertile
*Temperature
20-30C°
Proper light
tends to be wetter
When it's time to harvest, let's pick up a couple of leaves and make a Mojito!

Recipe:
*Material
a. white rum-45ml
b. lemon-quarter
c. sugar-2 spoons
d. soda water-150ml
e. crushed ice-a few
*Steps:
a. clean the mint leaves, mash the leaves with sugar and put them all into a glass
b. squeeze the lemon juice into the glass, and also put lemon into it
c. put ice into the class
d. pour the rum and soda water into the glass
0
0


