文章
Dummer. ゛☀
2017年08月15日

Agave is a desert plant, native to Mexico and hardy in zones 8-10. While generally a low maintenance, easy-to-grow plant, agave can be susceptible to fungal and bacterial rots, as well as pest problems such as the agave snout weevil and the agave plant bug (Caulotops barberi). If you have noticed bugs eating agave plants in your landscape, continue reading to learn more about Caulotops barberi pests and controlling agave plant bugs in the garden.

What are Caulotops Barberi Pests?
In the landscape, agave plants can potentially grow to a height and spread of 20 feet. However, these landscape grown agaves can be susceptible to the Caulotops barberi pest, resulting in stunted or irregular growth. If you notice stunted or distorted growth, speckled or spotted foliage, or what appears to be scabs or chew marks on your agave plants, you may wonder, “Are bugs on my agave?” The answer may be a resounding, yes! The agave plant bug is also commonly called the agave running bug because for such a small insect, it has long legs, enabling the insect to run very quickly.
These 1.6 mm long insects can go almost unnoticed because they are so small and will quickly hide if they feel threatened. Agave plant bugs are most likely the culprit in U.S. hardiness zones 8-10. Container grown agave plants in cooler climates are rarely effected by this pest, though. In late summer to early fall, large populations of agave plant bugs may infest agave and other succulents, causing massive damage to a xeriscape. In groups, these small tan-black colored insects are much easier to spot, but by then you’ll have quite an infestation to try to rid your landscape of and damage to some of the plants may be irreversible.

Agave Plant Bug Control
Insecticidal soap or broad spectrum insecticides can be effective in controlling agave plant bugs. However, these tiny insects can hide in soil, mulch and garden debris around the infected plant, so it is necessary to treat all areas around the plant as well. Keep beds clear of debris to eliminate hiding places. Insecticides should be applied in the early morning or late at night, when Caulotops barberi pests are most active. Agave plant bug control should be repeated every two weeks to ensure eradication of this pest. Be sure to spray all surfaces of the plant, as these small insects can easily hide in every nook and cranny. A preventative systemic insecticide can be used in spring to help control agave pests.

What are Caulotops Barberi Pests?
In the landscape, agave plants can potentially grow to a height and spread of 20 feet. However, these landscape grown agaves can be susceptible to the Caulotops barberi pest, resulting in stunted or irregular growth. If you notice stunted or distorted growth, speckled or spotted foliage, or what appears to be scabs or chew marks on your agave plants, you may wonder, “Are bugs on my agave?” The answer may be a resounding, yes! The agave plant bug is also commonly called the agave running bug because for such a small insect, it has long legs, enabling the insect to run very quickly.

These 1.6 mm long insects can go almost unnoticed because they are so small and will quickly hide if they feel threatened. Agave plant bugs are most likely the culprit in U.S. hardiness zones 8-10. Container grown agave plants in cooler climates are rarely effected by this pest, though. In late summer to early fall, large populations of agave plant bugs may infest agave and other succulents, causing massive damage to a xeriscape. In groups, these small tan-black colored insects are much easier to spot, but by then you’ll have quite an infestation to try to rid your landscape of and damage to some of the plants may be irreversible.

Agave Plant Bug Control
Insecticidal soap or broad spectrum insecticides can be effective in controlling agave plant bugs. However, these tiny insects can hide in soil, mulch and garden debris around the infected plant, so it is necessary to treat all areas around the plant as well. Keep beds clear of debris to eliminate hiding places. Insecticides should be applied in the early morning or late at night, when Caulotops barberi pests are most active. Agave plant bug control should be repeated every two weeks to ensure eradication of this pest. Be sure to spray all surfaces of the plant, as these small insects can easily hide in every nook and cranny. A preventative systemic insecticide can be used in spring to help control agave pests.
0
0
文章
Miss Chen
2017年08月15日

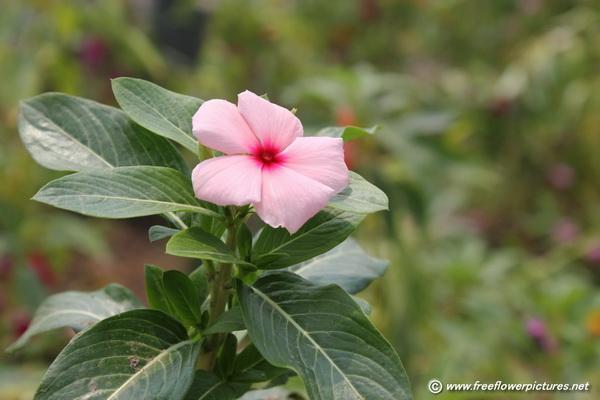
Vinca, also known as catharanthus or Madagascar periwinkle, is a popular annual flower. Growing upwards to 10 to 16 inches tall, with dark green leaves and five-petal blossoms in pink, mauve or white, these flowers spread quickly and require little care. While vincas have few problems, occasionally they will suddenly wilt and die.

Symptoms and Causes
According to the Alabama Agricultural Experiment Station and Clemson University Extension, there are several diseases and fungus that can cause vincas to wilt, including phytophthora stem blight and root rot, pythium root rot, rhizoctonia stem and root rot, gray mold and the tomato spotted wilt virus. Symptoms of these diseases and fungus include dark colored lesions on the stems and branches, yellowing leaves with stunted growth, spots on the foliage, gray mold on the plant or black concentric rings on the leaves.
Many of these diseases and fungus are prevalent in soil that has poor drainage or gardens that have been watered incorrectly.
Prevention and Treatment
Select healthy vinca to plant in the garden. Enrich the garden's soil with well-rotted manure or compost before planting to help increase the soil's moisture-retention. Do not plant the vinca deeply and space 8 to 12 inches apart to allow for air circulation. Vincas need about 1 inch of water each week; if rainfall is insufficient, avoid overhead irrigation systems and water deeply in the early morning to allow the plants time to dry before nightfall.
Remove and destroy any affected plants. Treat the remaining plants with a fungicide; contact your local extension office to determine which fungicide is needed.

Symptoms and Causes
According to the Alabama Agricultural Experiment Station and Clemson University Extension, there are several diseases and fungus that can cause vincas to wilt, including phytophthora stem blight and root rot, pythium root rot, rhizoctonia stem and root rot, gray mold and the tomato spotted wilt virus. Symptoms of these diseases and fungus include dark colored lesions on the stems and branches, yellowing leaves with stunted growth, spots on the foliage, gray mold on the plant or black concentric rings on the leaves.
Many of these diseases and fungus are prevalent in soil that has poor drainage or gardens that have been watered incorrectly.

Prevention and Treatment
Select healthy vinca to plant in the garden. Enrich the garden's soil with well-rotted manure or compost before planting to help increase the soil's moisture-retention. Do not plant the vinca deeply and space 8 to 12 inches apart to allow for air circulation. Vincas need about 1 inch of water each week; if rainfall is insufficient, avoid overhead irrigation systems and water deeply in the early morning to allow the plants time to dry before nightfall.
Remove and destroy any affected plants. Treat the remaining plants with a fungicide; contact your local extension office to determine which fungicide is needed.
0
0
文章
Miss Chen
2017年08月14日

Nothing shouts "Summer!" more emphatically than hanging baskets brimming with masses of petunias (Petunia spp.) Where they don't bloom year-round in U.S. Department of Agriculture plant hardiness zones [10 through 11](http://www.missouribotanicalgarden.org/PlantFinder/PlantFinderDetails.aspx?taxonid=264607&isprofile=0&letter=p), petunias cover themselves in fragrant flowers – some up to 4 inches wide – from early spring until the first killing frost. Although hanging-basket petunias require more attention than their garden-planted counterparts, their enthusiastic performance is well worth the extra effort.
Feed for Flowers
The cascades of color that make petunia hanging baskets so appealing won't materialize without at least six hours of daily sun and regular doses of fertilizer. Producing all those trailing stems of flowers takes lots of energy.
To give them the best start, mix slow-release 5-10-5 granulated plant food into the soil before planting. One manufacturer recommends using 2 teaspoons for each 1 square foot of soil. After adding the petunias, fill the container with soil and water well.
Rain and maintenance watering both leach nutrients from hanging baskets. Yellowing leaves are a sign of nutrient deficiency. When they appear, begin fertilizing the petunias with liquid, 5-10-5 plant food every 10 days to two weeks for the remainder of the growing season. Mix a solution of 4 tablespoons, or the label's specified amount, of the plant food and 1 gallon of water.
Water Wisely
Hanging baskets dry out quickly. In hot, dry weather, petunias may need watering twice a day. Overwatering, however, may rot their roots. When you do water, stop only when water begins draining from the bottom of the baskets.

Groom for Growth
Many petunia varieties need regular grooming to look their best for an entire growing season. If their spent flowers are allowed to go to seed, they'll stop blooming. Deadheading, the practice of pinching old blooms off below the thickened base where seeds form, keeps new ones coming.
If the plants become overgrown, prune them back by one-third. Using clean, sharp stem cutters, make each pruning cut just above a set of leaves. Healthy new growth and flowers soon follow.
Potential Diseases
Petunias' occasional diseases include root rot from excessively wet soil. As long as their baskets have at least four drainage holes, root rot isn't likely.
Gray mold surfaces as fuzzy, grayish to brown blotches on the stems and leaves. The fungus loves humidity, so don't overcrowd baskets. Water the petunias at their bases so the leaves stay dry .
Late blight causes water-soaked, irregular spots on young leaves. Affected leaves eventually turn brown and die. Spraying weekly with ready-to-use chlorothalonil protects the plants when warm days, cool nights and wet weather favor the disease. Spray until the fungicide drips from their leaves.
Yellow mottling on petunia leaves indicates tobacco mosaic virus. Other symptoms include stunted or distorted growth and leaf lesions. No cure exists; dispose of infected plants and their potting mix and baskets in sealed plastic bags, and disinfect any gardening tools they may have contaminated in a solution of 1 part household bleach to 9 parts alcohol.

Potential Pests
Aphids drain sap from tender new stems and leaves, covering them in sticky waste called honeydew. Tiny black flea beetles typically arrive in midsummer to chew holes in the backs of the leaves.
Organic, ready-to-use pyrethrin insecticide kills both insects. Spray the plants until they drip, being sure to cover the backs of the leaves where the insects usually feed.
Feed for Flowers
The cascades of color that make petunia hanging baskets so appealing won't materialize without at least six hours of daily sun and regular doses of fertilizer. Producing all those trailing stems of flowers takes lots of energy.
To give them the best start, mix slow-release 5-10-5 granulated plant food into the soil before planting. One manufacturer recommends using 2 teaspoons for each 1 square foot of soil. After adding the petunias, fill the container with soil and water well.
Rain and maintenance watering both leach nutrients from hanging baskets. Yellowing leaves are a sign of nutrient deficiency. When they appear, begin fertilizing the petunias with liquid, 5-10-5 plant food every 10 days to two weeks for the remainder of the growing season. Mix a solution of 4 tablespoons, or the label's specified amount, of the plant food and 1 gallon of water.
Water Wisely
Hanging baskets dry out quickly. In hot, dry weather, petunias may need watering twice a day. Overwatering, however, may rot their roots. When you do water, stop only when water begins draining from the bottom of the baskets.

Groom for Growth
Many petunia varieties need regular grooming to look their best for an entire growing season. If their spent flowers are allowed to go to seed, they'll stop blooming. Deadheading, the practice of pinching old blooms off below the thickened base where seeds form, keeps new ones coming.
If the plants become overgrown, prune them back by one-third. Using clean, sharp stem cutters, make each pruning cut just above a set of leaves. Healthy new growth and flowers soon follow.
Potential Diseases
Petunias' occasional diseases include root rot from excessively wet soil. As long as their baskets have at least four drainage holes, root rot isn't likely.
Gray mold surfaces as fuzzy, grayish to brown blotches on the stems and leaves. The fungus loves humidity, so don't overcrowd baskets. Water the petunias at their bases so the leaves stay dry .
Late blight causes water-soaked, irregular spots on young leaves. Affected leaves eventually turn brown and die. Spraying weekly with ready-to-use chlorothalonil protects the plants when warm days, cool nights and wet weather favor the disease. Spray until the fungicide drips from their leaves.
Yellow mottling on petunia leaves indicates tobacco mosaic virus. Other symptoms include stunted or distorted growth and leaf lesions. No cure exists; dispose of infected plants and their potting mix and baskets in sealed plastic bags, and disinfect any gardening tools they may have contaminated in a solution of 1 part household bleach to 9 parts alcohol.

Potential Pests
Aphids drain sap from tender new stems and leaves, covering them in sticky waste called honeydew. Tiny black flea beetles typically arrive in midsummer to chew holes in the backs of the leaves.
Organic, ready-to-use pyrethrin insecticide kills both insects. Spray the plants until they drip, being sure to cover the backs of the leaves where the insects usually feed.
0
0
文章
Miss Chen
2017年08月14日

Often referred to and grown as annuals, petunias (Petunia spp.) are technically warm climate perennials. They grow year round in U.S. Department of Agriculture plant hardiness zones 10 through 11. These brightly colored flowers grow quickly and flower abundantly, making them ideal for adding color to window boxes, flowerbeds and planters. If you can't grow them year-round, grow petunias as annuals for dazzling spring, summer and early fall color.

The Difference

A true annual goes to seed after flowing and dies shortly after that in all climates. Petunias act like annuals in frosty areas, dying back with the first cold snap. As a mild climate perennial, however, petunias have the ability to grow year-round in the right climate. They like mild, frost-free winters, and summers that rarely rise above 90 degrees Fahrenheit, with low humidity. Most areas don't provide these specific requirements, so petunias are most commonly grown as warm season annuals in frost-prone areas and as cool season annuals in tropical and subtropical areas.
Warm Season Annuals

Plant petunias outdoors in the spring after the last frost date when the soil warms up to 60 degrees F. Plant petunias from starts or seedlings. If you want to grow them from seed, start petunias indoors in a seed flat 10 to 12 weeks before your spring planting date. Plant starts in a spot that gets full sun at least six hours per day, with well draining soil. After the first frost, remove the spent petunia plants, and plan to replant starts in the spring.
Finicky Warm Climate Perennials

In frost-free regions where summers tend to get hot, plant petunias in the fall. You'll have flowers through the winter and spring months. Often, petunias will fade or burn out in the summer when temperatures go above 90 F. When petunias get faded and wilted during a hot summer, remove them and then replant in the fall when temperatures drop back down reliably below 90 F. Petunias only grow year-round as a true perennial in areas with mild winters and cool summers.
Overwintering Petunias

While petunias are plentiful and relatively inexpensive at the beginning of the growing season it is possible -- though they can be difficult to keep alive indoors -- to overwinter the plants. Dig out the root ball in the fall before frost, and transplant the petunias into nursery pots. Keep them indoors in bright light through the winter. Water when the soil dries out and mist the leaves with clean water every few days. Any room temperature area above 55 F but below 90 F will keep petunias happy through the winter. In the spring, replant petunias outdoors.

The Difference

A true annual goes to seed after flowing and dies shortly after that in all climates. Petunias act like annuals in frosty areas, dying back with the first cold snap. As a mild climate perennial, however, petunias have the ability to grow year-round in the right climate. They like mild, frost-free winters, and summers that rarely rise above 90 degrees Fahrenheit, with low humidity. Most areas don't provide these specific requirements, so petunias are most commonly grown as warm season annuals in frost-prone areas and as cool season annuals in tropical and subtropical areas.
Warm Season Annuals

Plant petunias outdoors in the spring after the last frost date when the soil warms up to 60 degrees F. Plant petunias from starts or seedlings. If you want to grow them from seed, start petunias indoors in a seed flat 10 to 12 weeks before your spring planting date. Plant starts in a spot that gets full sun at least six hours per day, with well draining soil. After the first frost, remove the spent petunia plants, and plan to replant starts in the spring.
Finicky Warm Climate Perennials

In frost-free regions where summers tend to get hot, plant petunias in the fall. You'll have flowers through the winter and spring months. Often, petunias will fade or burn out in the summer when temperatures go above 90 F. When petunias get faded and wilted during a hot summer, remove them and then replant in the fall when temperatures drop back down reliably below 90 F. Petunias only grow year-round as a true perennial in areas with mild winters and cool summers.
Overwintering Petunias

While petunias are plentiful and relatively inexpensive at the beginning of the growing season it is possible -- though they can be difficult to keep alive indoors -- to overwinter the plants. Dig out the root ball in the fall before frost, and transplant the petunias into nursery pots. Keep them indoors in bright light through the winter. Water when the soil dries out and mist the leaves with clean water every few days. Any room temperature area above 55 F but below 90 F will keep petunias happy through the winter. In the spring, replant petunias outdoors.
0
0
文章
Miss Chen
2017年08月14日

Named for its edible leaves, Jamaican sorrel (Hibiscus sabdariffa var. sabdariffa) is also called red sorrel, roselle and Florida cranberry. This shrub is a short-lived perennial in U.S. Department of Agriculture plant hardiness zones 10 through 11 and an annual in colder zones. Growing 5 to 7 feet tall, Jamaican sorrel's narrow, lobed leaves and stems are reddish-green, and it flowers late fall through early winter. Its flower bases, called calyces, are used for making jellies, jams, juices and wines.

Needs and Tolerances
Jamaican sorrel requires a full-sun site but tolerates a variety of other growing conditions. Thriving in sandy soil rich in organic matter, Jamaican sorrel tolerates most soil types and a pH range between 4.5 and 8. This adaptable plant also tolerates strong winds, flooding and stagnant water, and grows at elevations up to 4,100 feet. Jamaican sorrel suffers damage from fog and frost but grows well in humid, warm conditions. In its native homelands it receives 59 to 79 inches of rainfall a year, and it requires constantly moist soil in cultivation.
Spacing and Mulching
Spacing for Jamaican sorrel depends on the reason for growing it, but all plants benefit from mulching. If growing Jamaican sorrel as an ornamental shrub or for its leaves, space plants 3 feet apart, but if you're cropping Jamaican sorrel for its calyces, grow three plants together on mounds 6 inches tall and 2 feet in diameter. Space mounds 3 to 6 feet apart in rows 5 to 10 feet apart. Mulching with manure helps protect Jamaican sorrel from root pests, suppresses weeds, conserves soil moisture and supplies plant nutrients. Spread a 2-inch layer of well-rotted manure around plants, avoiding the stems.
Weeds and Fertilizer
Weeding and fertilizing Jamaican sorrel promotes vigorous, healthy growth. Remove weeds from around plants weekly until they grow 1 1/2 to 2 feet tall, when their foliage shades out further weed growth. If growing the plant for its edible flower buds, fertilize Jamaican sorrel lightly, applying a 24-8-16 feed diluted at a rate of 1/2 tablespoon per gallon of water every two weeks, or at half the rate recommended in the manufacturer's instructions. Fertilize Jamaican sorrel with 24-8-16 feed diluted at a rate of 1 tablespoon per gallon of water, or at the recommended rates, if growing the plant as an ornamental or to harvest its foliage. Water Jamaican sorrel when the soil is dry to a depth of 1 inch.
Harvesting and Rotating
Harvest Jamaican sorrel leaves and calyces at different times, and rotate plants to different growing areas each year. Jamaican sorrel leaves are ready to pick 10 weeks from sowing. If growing shrubs for foliage and calyces, remove stems to 3 to 4 inches above the ground three times at intervals of four weeks, and then allow the plants to regrow and produce calyces for harvest. Calyces are ready to pick when they're plump and have stopped growing. Rotating Jamaican sorrel to different spots every year discourages root nematode infestations. Jamaican sorrel grows from seed and cuttings.
0
0
文章
Miss Chen
2017年08月10日

Losing its leaves in winter, the confederate rose is no rose but instead a member of the hibiscus family. Hibiscus mutabilis matures at up to 15 feet tall and 10 feet wide if never pruned or killed back by hard winter freezes. Appropriate to grow in U.S. Department of Agriculture Hardiness Zones 7 through 10, the winter cold in zones 7 and 8 often causes this tree to become a much smaller multi-stemmed shrub. The large green, maple-like leaves make an attractive foil to the white-to-pink to deep-lavender changing flowers that don the branch tips in late summer through autumn.

Step 1
Prune off any broken or dead branches on the confederate rose bush any time you encounter them. Make the pruning cut 1/4 to 1/2 inch above a lower branch junction, leaf or dormant bud if no leaves are present.
Step 2
Reduce the length of any branch or trunk in early spring to a height of 12 to 36 inches. Since larger diameter branches occur lower in the confederate rose, use loppers if they're wider than 3/4 inch in diameter. Time this reduction or rejuvenation pruning for just before the buds begin to swell and the leaves unfurl. In subtropical areas, this may mean pruning in late winter.
Step 3
Clip off any suckering, thin shoots from the main trunk or larger, healthy stems on the confederate rose any time of year, too. Make the cuts flush with their attachment to the main trunk or even with the soil line.
Step 4
Trim off old flowers once they fade if you do not want the seed capsules to form on the branches. Some find them attractively curious, as the seed capsules are fuzzy and split open to reveal a cottony core with seeds.
0
1
文章
Miss Chen
2017年08月10日

A Lady Banks rose (Rosa banksia) produces cascades of yellow or white flower clusters. It grows in U.S. Department of Agriculture plant hardiness zones 7 through 10. This wild rose looks best when allowed to grow in its natural form, but infrequent pruning can help keep it in bounds while still ensuring ample flowering.

Ready Your Shears
Two types of shears are needed to prune a Lady Banks rose. Basic loppers handle most pruning needs, but you will need smaller hand pruners or bypass shears for shaping the bush. Wipe the shear blades with a cloth soaked in rubbing alcohol to disinfect them before you prune. If you cut out diseased wood or are moving between plants, wipe the shears again. Some varieties of Lady Banks roses have thorny stems, so wear leather gardening gloves and long sleeves if you are trimming a thorned variety.
Timing Is Everything
Lady Banks roses flower on 2- or 3-year-old canes, so they don't require annual pruning except to remove damaged wood. Pruning too frequently will remove the flowering canes so there are no blooms and only foliage. These roses only flower once a year in late spring or early summer. Prune Lady Banks immediately after this annual flowering, before the plant begins to set new buds for the following year.
Thinning It Out
Thinning allows for air circulation within the rose bush, which improves flowering and minimizes disease concerns. Yellow and brown canes are completely dead, so remove these at ground level using the loppers. You can also remove the tallest and thickest canes at ground level to open up the center of the plant for air circulation. Pruning these out also lets in more light, so the smaller canes can leaf out and set flower buds. Also, remove any damaged canes, either cutting them off at ground level or cutting them back to the nearest outward facing bud or leaf on healthy wood.

Shaping Up
Light shaping every two years helps keep the sprawling, climbing canes of the Lady Banks rose under control, but you don't want to over prune and lose the plant's natural form. Begin by cutting back any overgrown canes, especially those that extend over walkways, or are wrapping around structures or tree branches. Cut these back to a bud or leaf at the desired cane length using the bypass shears. You can also prune back dull green canes to manage their height, but don't prune back the bright green canes because these are your future flowering stems. After pruning, remove the clippings from the bed, and compost or dispose of them.

Ready Your Shears
Two types of shears are needed to prune a Lady Banks rose. Basic loppers handle most pruning needs, but you will need smaller hand pruners or bypass shears for shaping the bush. Wipe the shear blades with a cloth soaked in rubbing alcohol to disinfect them before you prune. If you cut out diseased wood or are moving between plants, wipe the shears again. Some varieties of Lady Banks roses have thorny stems, so wear leather gardening gloves and long sleeves if you are trimming a thorned variety.
Timing Is Everything
Lady Banks roses flower on 2- or 3-year-old canes, so they don't require annual pruning except to remove damaged wood. Pruning too frequently will remove the flowering canes so there are no blooms and only foliage. These roses only flower once a year in late spring or early summer. Prune Lady Banks immediately after this annual flowering, before the plant begins to set new buds for the following year.
Thinning It Out
Thinning allows for air circulation within the rose bush, which improves flowering and minimizes disease concerns. Yellow and brown canes are completely dead, so remove these at ground level using the loppers. You can also remove the tallest and thickest canes at ground level to open up the center of the plant for air circulation. Pruning these out also lets in more light, so the smaller canes can leaf out and set flower buds. Also, remove any damaged canes, either cutting them off at ground level or cutting them back to the nearest outward facing bud or leaf on healthy wood.

Shaping Up
Light shaping every two years helps keep the sprawling, climbing canes of the Lady Banks rose under control, but you don't want to over prune and lose the plant's natural form. Begin by cutting back any overgrown canes, especially those that extend over walkways, or are wrapping around structures or tree branches. Cut these back to a bud or leaf at the desired cane length using the bypass shears. You can also prune back dull green canes to manage their height, but don't prune back the bright green canes because these are your future flowering stems. After pruning, remove the clippings from the bed, and compost or dispose of them.
0
1
文章
Colour_
2017年08月09日

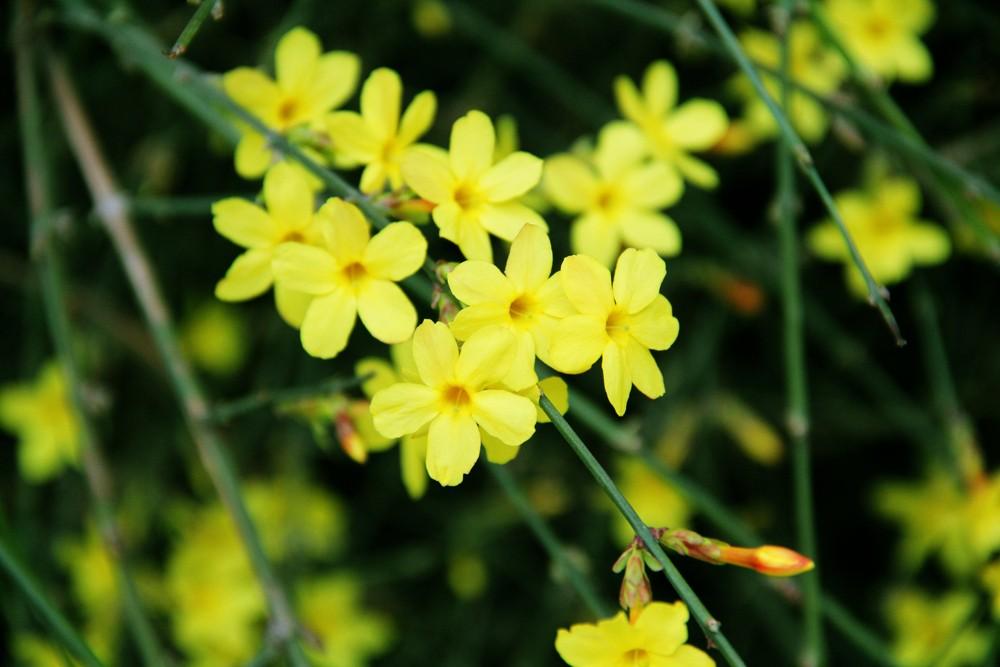
①在严寒到来之前将盆花移至朝南向阳的阳台上。
②7~8月间,每15~20天施1次稀薄豆饼液肥。8~10月改为10~15天施1次。
③早春应对植株的内堂枝、细枝或枯枝进行修剪,对徒长枝进行短截,加强通风透光。
0
0
文章
Miss Chen
2017年08月08日

The spineless tropical cactus night-blooming cereus (Epiphyllum oxypetalum) produces spiderlike fragrant flowers that open in the evening. It grows in U.S. Department of Agriculture plant hardiness zones 10 through 11 and it doesn't tolerate any frost, but it grows well as a houseplant or as a potted outdoor plant that's overwintered indoors in colder climates. Night-blooming cereus requires only basic care and it is a relatively low-maintenance plant, whether grown outdoors or inside.


Step 1
Set potted night-blooming cereus plants in an area that receives all-day, filtered sunlight, bright but indirect sunlight, or morning sun and afternoon shade. Place the plants outdoors if temperatures are above 50 degrees Fahrenheit at night. In warm, frost-free climates, grow the cactus in a well-drained, slightly sandy garden bed that receives some shade.

Step 2
Water the night-blooming cereus when the soil surface looks dry, but before the soil dries out completely. Sprinkle the water on the soil, keeping the cactus leaves dry, until excess water drains from the bottom of the pot or until the top 6 inches of soil feel moist in a garden bed. Water regularly from spring through early fall. Garden-grown and fully mature potted plants don't require winter watering. Water young pot-grown plants only when the soil dries in completely in winter. Properly watered cactus plants rarely suffer from stem rot or fungal problems.

Step 3
Mix 1/4 teaspoon of a balanced, water-soluble fertilizer, such as a 15-15-15 blend, or of a bloom-inducing fertilizer, such as a 7-9-5 blend, with 1 gallon of water. Water the night-blooming cereus with the fertilizer solution once weekly during the active spring and summer growing season. Check the label because rates vary among brands and use one-fourth of the recommended concentration.

Step 4
Cut back any overgrown or damaged leaf stems after the cactus finishes flowering. Wipe a sharp knife with a rag soaked in rubbing alcohol to disinfect it before making a cut. Cut through leaf stems cleanly, cutting them back to the desired height but removing no more than one-third of their length.

Step 5
Bring potted plants indoors before the temperature drops below 40 F in fall or early winter. Temperatures below 35 F can kill the plant. Place the pot near a sunny window and water sparingly when the the soil dries completely. Move the pot back outdoors in spring after frost danger has passed.

Step 6
Inspect the leaves for white cottony masses that can indicate a mealybug infestation, the primary pest of night-blooming cereus. Remove the mealybugs by hand or dip a cotton swab in rubbing alcohol and dab it onto the bugs to kill them. Monitor the plant daily and remove or kill any new mealybugs until the pests are gone.


Step 1
Set potted night-blooming cereus plants in an area that receives all-day, filtered sunlight, bright but indirect sunlight, or morning sun and afternoon shade. Place the plants outdoors if temperatures are above 50 degrees Fahrenheit at night. In warm, frost-free climates, grow the cactus in a well-drained, slightly sandy garden bed that receives some shade.

Step 2
Water the night-blooming cereus when the soil surface looks dry, but before the soil dries out completely. Sprinkle the water on the soil, keeping the cactus leaves dry, until excess water drains from the bottom of the pot or until the top 6 inches of soil feel moist in a garden bed. Water regularly from spring through early fall. Garden-grown and fully mature potted plants don't require winter watering. Water young pot-grown plants only when the soil dries in completely in winter. Properly watered cactus plants rarely suffer from stem rot or fungal problems.

Step 3
Mix 1/4 teaspoon of a balanced, water-soluble fertilizer, such as a 15-15-15 blend, or of a bloom-inducing fertilizer, such as a 7-9-5 blend, with 1 gallon of water. Water the night-blooming cereus with the fertilizer solution once weekly during the active spring and summer growing season. Check the label because rates vary among brands and use one-fourth of the recommended concentration.

Step 4
Cut back any overgrown or damaged leaf stems after the cactus finishes flowering. Wipe a sharp knife with a rag soaked in rubbing alcohol to disinfect it before making a cut. Cut through leaf stems cleanly, cutting them back to the desired height but removing no more than one-third of their length.

Step 5
Bring potted plants indoors before the temperature drops below 40 F in fall or early winter. Temperatures below 35 F can kill the plant. Place the pot near a sunny window and water sparingly when the the soil dries completely. Move the pot back outdoors in spring after frost danger has passed.

Step 6
Inspect the leaves for white cottony masses that can indicate a mealybug infestation, the primary pest of night-blooming cereus. Remove the mealybugs by hand or dip a cotton swab in rubbing alcohol and dab it onto the bugs to kill them. Monitor the plant daily and remove or kill any new mealybugs until the pests are gone.
0
0
文章
Miss Chen
2017年08月08日


With large paddle-shaped fleshy green leaves edged in red, flapjack kalanchoe (Kalanchoe thyrsiflora), more commonly called simply flapjack, it makes a visual splash in the garden. It grows between 10 inches and 2 feet tall in a rosette pattern with the leaves growing out of the center stalk. Flapjack grows outdoors in U. S. Department of Agriculture plant hardiness zones 9 through 11 or as a houseplant. You can also treat it as an annual in cooler climates. A low-maintenance perennial succulent, flapjack needs minimal care to thrive.
Fertilize Sparingly
Fertilize flapjack two to four times per year with the first application in the spring when new growth starts. Apply the last fertilizer in the fall then stop through the winter. Use a slow-release, balanced fertilizer, such as a 10-10-10 product, to supply continuous nutrients between feedings. Use 1 tablespoon for each 1 square foot of area around each plant. For larger beds, use 1 cup per 30 for each square feet.
Water Lightly
Flapjack is a drought-tolerant succulent. Allow the soil to dry out on top between waterings. When watering, soak the soil 6 inches deep.
Container Growing
Flapjack grows well in pots, either indoors or outside. Indoors, set the bots in a bright room with indirect light, ideally in a spot between 50 and 50 degrees Fahrenheit. Outside, keep the pots in a sunny area of the patio or porch or set the planters in the garden.
Fertilizing Container Plants
Fertilize a container-grown flapjack every other week with 1/2 teaspoon of balanced 15-15-15 fertilizer. Mix the fertilizer into 1 gallon of water and use it to water the plant.

Watering Container Plant
Water a flapjack in a planter until the soil is thoroughly damp and extra water starts to leak out the drainage holes in the bottom, then wait to water until the top of the soil looks dry.
Overwintering Indoors
In USDA zones 9 and below, grow flapjack in planters outdoors in the summer and overwinter them inside. In fall, before the first freeze, move the pots to a sunny spot that stays between 50 and 60 F. Stop fertilizing for the winter and water only when the soil feels dry. In spring, after the last frost, return the container-grown flapjack outside.
Pests and Problems
Flapjack doesn't attract pests and rarely suffers from diseases and other problems.
Pruning and Trimming
This tidy succulent doesn't require any pruning or trimming during or after the growing season. The only exception is the flower stalk. After the flapjack flowers, cut out the dead flower stalk where it attaches to the main plant. Flapjack is grown as a foliage plant, and flowers only appear after three to four years, so in general you can get by without any pruning.
1
1
文章
Colour_
2017年08月08日

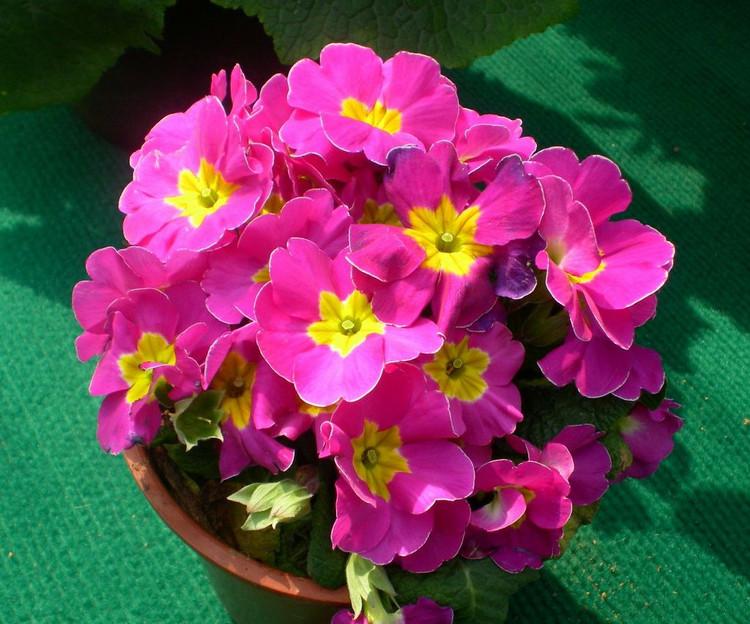
#报春花 为多年生宿根草本,常作一、二年生栽培,为我国原产名花。
报春花喜湿润、阳光充足的冷凉环境,生长适温在8℃~20℃;花芽分化要求在10℃~15℃气温条件下进行。一般用播种繁殖,种子4~5月成熟,6~9月播于装有培养土的浅盆中,覆盖薄土,浸透盆土,盖以玻璃,置阴暗处,保持盆土浸润,1周后出芽。去玻璃置半阴处生长,待真叶长至2~3对时,移植于小盆,待长至6厘米冠径时,再定植于直径12厘米瓦盆中。播种6个月后可开花,从立冬开到立夏,以1~3月开花最盛。喜肥沃的酸性腐殖土。
在生长期中‘盆土要湿润,并常施含磷多的稀薄液肥。夏秋间,将盆置于荫凉通风处,到10月下旬后,人室置向阳处,冬季保持室温在10℃~12℃,就能叶茂花繁。花谢后,剪去残花梗及于枯枝叶,可再抽花葶,继续开花。
种子采收。5~6月种子成熟,结实期间,保持室内通风、干燥,如湿度过大,易导致结实不良,甚至霉变。由于种子成熟期不一致,需随熟随采。采下的种子不可暴晒,以免丧失发芽力,应放在阴凉处吹干后收藏。

0
2


