文章
Dummer. ゛☀
2017年08月04日

Echeveria are very popular succulents that grow in attractive rosettes with beautiful leaves in a variety of colors and sometimes stunning flowers. These plants have been extensively hybridized, so in addition to the main species, there are many varieties that have been specially bred for interesting leaf form and color.
Most Echeveria will remain fairly small (a few inches to a foot across), but some species will grow to small shrub-like plants of 2 feet.
Members of the Crassulaceae family, their care is similar to sedum and kalanchoe succulents.

Growing Conditions
Light: Full sun. Perfect for a sunny window.
Water: Water during the summer and spring, making sure drainage is immaculate. Reduce water in the winter to monthly.
Temperature: Prefers average summer temps (65 degrees F - 70 degrees F). In winter, cool to 50 degrees F.
Soil: A well-drained succulent mix, with an ideal pH around 6.0 (slightly acidic).
Fertilizer: Feed with a controlled-release fertilizer in the beginning of the season or weekly with a weak liquid solution. Use a balanced 20-20-20 fertilizer at 1/4 strength on mature plants, and a fertilizer with less nitrogen on young plants.
Propagation
Most Echeveria can be easily propagated from leaf cuttings, although a few are better from seeds or stem cuttings. To propagate a leaf cutting, place the individual leaf in a succulent or cacti mix and cover the dish until the new plant sprouts.

Repotting
Repot as needed, preferably during the warm season. To repot a succulent, make sure the soil is dry before repotting, then gently remove the pot. Knock away the old soil from the roots, making sure to remove any rotted or dead roots in the process. Treat any cuts with a fungicide.
Place the plant in its new pot and backfill with potting soil, spreading the roots out as you repot.
Leave the plant dry for a week or so, then begin to water lightly to reduce the risk of root rot.
Varieties
There are many popular Echeveria, both species and hybrids. In nature, Echeveria are native to Mexico, the United States, and down into South America. Some of the more beautiful Echeveria include the blue Echeveria (E. glauca and E. laui), firecracker plant (E. setosa), painted lady (E. derenbergii), and E. agavoides.

Grower's Tips
Most of the common Echeveria species are not complicated succulents to grow, provided you follow a few basic rules. First, be careful never to let water sit in the rosette as it can cause rot or fungal diseases that will kill the plant.
Additionally, remove dead leaves from the bottom of the plant as it grows. These dead leaves provide a haven for pests, and Echeveria are susceptible to mealy bugs. As with all succulents, careful watering habits and plenty of light will help ensure success.
Most Echeveria will remain fairly small (a few inches to a foot across), but some species will grow to small shrub-like plants of 2 feet.
Members of the Crassulaceae family, their care is similar to sedum and kalanchoe succulents.

Growing Conditions
Light: Full sun. Perfect for a sunny window.
Water: Water during the summer and spring, making sure drainage is immaculate. Reduce water in the winter to monthly.
Temperature: Prefers average summer temps (65 degrees F - 70 degrees F). In winter, cool to 50 degrees F.
Soil: A well-drained succulent mix, with an ideal pH around 6.0 (slightly acidic).
Fertilizer: Feed with a controlled-release fertilizer in the beginning of the season or weekly with a weak liquid solution. Use a balanced 20-20-20 fertilizer at 1/4 strength on mature plants, and a fertilizer with less nitrogen on young plants.
Propagation
Most Echeveria can be easily propagated from leaf cuttings, although a few are better from seeds or stem cuttings. To propagate a leaf cutting, place the individual leaf in a succulent or cacti mix and cover the dish until the new plant sprouts.

Repotting
Repot as needed, preferably during the warm season. To repot a succulent, make sure the soil is dry before repotting, then gently remove the pot. Knock away the old soil from the roots, making sure to remove any rotted or dead roots in the process. Treat any cuts with a fungicide.
Place the plant in its new pot and backfill with potting soil, spreading the roots out as you repot.
Leave the plant dry for a week or so, then begin to water lightly to reduce the risk of root rot.
Varieties
There are many popular Echeveria, both species and hybrids. In nature, Echeveria are native to Mexico, the United States, and down into South America. Some of the more beautiful Echeveria include the blue Echeveria (E. glauca and E. laui), firecracker plant (E. setosa), painted lady (E. derenbergii), and E. agavoides.

Grower's Tips
Most of the common Echeveria species are not complicated succulents to grow, provided you follow a few basic rules. First, be careful never to let water sit in the rosette as it can cause rot or fungal diseases that will kill the plant.
Additionally, remove dead leaves from the bottom of the plant as it grows. These dead leaves provide a haven for pests, and Echeveria are susceptible to mealy bugs. As with all succulents, careful watering habits and plenty of light will help ensure success.
4
4
文章
Dummer. ゛☀
2017年08月04日

Succulents are booming in popularity for two simple reasons: they are beautiful and nearly indestructible.
Technically, a succulent is any plant with thick, fleshy (succulent) water storage organs. Succulents store water in their leaves, their stems or their roots. These plants have adapted to survive arid conditions throughout the world, from Africa to the deserts of North America. Fortunately for us, this adaptive mechanism has resulted in an incredible variety of interesting leaf forms and plant shapes, including paddle leaves, tight rosettes, and bushy or trailing columns of teardrop leaves.

As a group, succulents include some of the most well-known plants, such as the aloe and agave, and many almost unknown plants. Cacti are a unique subset of the succulent group. Succulents make excellent display plants in dish gardens.
The Rules for Growing Succulent Houseplants
No matter what kind of succulent you're growing, the rules are pretty similar between the different species. Here are the general rules for growing top-quality succulents:
Southern Light
Succulents prefer bright light, such as found on a south-facing window. Watch the leaves for indications that the light level is correct. Some species will scorch if suddenly exposed to direct sunlight. The leaves will turn brown or white as the plant bleaches out and the soft tissues are destroyed. Alternatively, an underlit succulent will begin to stretch, with an elongated stem and widely spaced leaves. This condition is known as etoliation.

The solution is to provide better light and prune the plant back to its original shape. Many kinds of succulents will thrive outdoors in the summer.
Temperature
Succulents are much more cold-tolerant than many people assume. As in the desert, where there is often a marked contrast between night and day, succulents thrive in colder nights, down to even 40ºF.
Ideally, succulents prefer daytime temperatures between 70 F and about 85 F and nighttime temperatures between 50 F and 55 F.
Watering
Succulents should be watered generously in the summer. The potting mix should be allowed to dry between waterings, but do not underwater. During the winter, when the plants go dormant, cut watering back to once every other month. Overwatering and ensuing plant rot is the single most common cause of plant failure. Be aware, though, that an overwatered succulent might at first plump up and look very healthy. However, the cause of death may have already set in underground, with rot spreading upward from the root system. A succulent should never be allowed to sit in water. The following are signs of under- or overwatering:
Overwatering. Overwatered plants are soft and discolored. The leaves may be yellow or white and lose their color. A plant in this condition may be beyond repair, but you can still remove it from its pot and inspect the roots. If they are brown and rotted, cut away dead roots and repot into drier potting media, or take a cutting and propagate the parent plant.
Under-watering: Succulents prefer generous water during the growing season (spring and summer). An under-watered plant will first stop growing, then begin to shed leaves. Alternatively, the plant may develop brown spots on the leaves.

Potting Soil
Succulents should be potted in a fast-draining mixture that's designed for cacti and succulents. If you don't have access to a specialized mix, consider modifying a normal potting mix with an inorganic agent like perlite to increase aeration and drainage. These plants have shallow roots that form a dense mat just under the soil surface.
Fertilizer
During the summer growing season, fertilizer as you would with other houseplants. Stop fertilizing entirely during the winter.
Technically, a succulent is any plant with thick, fleshy (succulent) water storage organs. Succulents store water in their leaves, their stems or their roots. These plants have adapted to survive arid conditions throughout the world, from Africa to the deserts of North America. Fortunately for us, this adaptive mechanism has resulted in an incredible variety of interesting leaf forms and plant shapes, including paddle leaves, tight rosettes, and bushy or trailing columns of teardrop leaves.

As a group, succulents include some of the most well-known plants, such as the aloe and agave, and many almost unknown plants. Cacti are a unique subset of the succulent group. Succulents make excellent display plants in dish gardens.
The Rules for Growing Succulent Houseplants
No matter what kind of succulent you're growing, the rules are pretty similar between the different species. Here are the general rules for growing top-quality succulents:
Southern Light
Succulents prefer bright light, such as found on a south-facing window. Watch the leaves for indications that the light level is correct. Some species will scorch if suddenly exposed to direct sunlight. The leaves will turn brown or white as the plant bleaches out and the soft tissues are destroyed. Alternatively, an underlit succulent will begin to stretch, with an elongated stem and widely spaced leaves. This condition is known as etoliation.

The solution is to provide better light and prune the plant back to its original shape. Many kinds of succulents will thrive outdoors in the summer.
Temperature
Succulents are much more cold-tolerant than many people assume. As in the desert, where there is often a marked contrast between night and day, succulents thrive in colder nights, down to even 40ºF.
Ideally, succulents prefer daytime temperatures between 70 F and about 85 F and nighttime temperatures between 50 F and 55 F.
Watering
Succulents should be watered generously in the summer. The potting mix should be allowed to dry between waterings, but do not underwater. During the winter, when the plants go dormant, cut watering back to once every other month. Overwatering and ensuing plant rot is the single most common cause of plant failure. Be aware, though, that an overwatered succulent might at first plump up and look very healthy. However, the cause of death may have already set in underground, with rot spreading upward from the root system. A succulent should never be allowed to sit in water. The following are signs of under- or overwatering:
Overwatering. Overwatered plants are soft and discolored. The leaves may be yellow or white and lose their color. A plant in this condition may be beyond repair, but you can still remove it from its pot and inspect the roots. If they are brown and rotted, cut away dead roots and repot into drier potting media, or take a cutting and propagate the parent plant.
Under-watering: Succulents prefer generous water during the growing season (spring and summer). An under-watered plant will first stop growing, then begin to shed leaves. Alternatively, the plant may develop brown spots on the leaves.

Potting Soil
Succulents should be potted in a fast-draining mixture that's designed for cacti and succulents. If you don't have access to a specialized mix, consider modifying a normal potting mix with an inorganic agent like perlite to increase aeration and drainage. These plants have shallow roots that form a dense mat just under the soil surface.
Fertilizer
During the summer growing season, fertilizer as you would with other houseplants. Stop fertilizing entirely during the winter.
0
0
khaki83
2017年07月17日

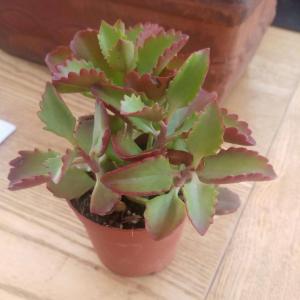
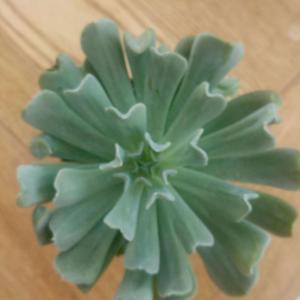
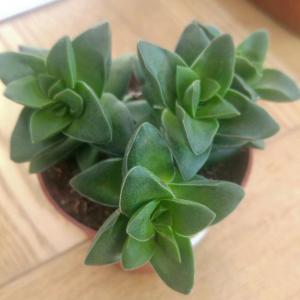
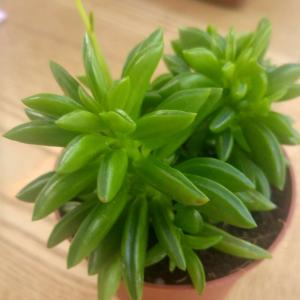
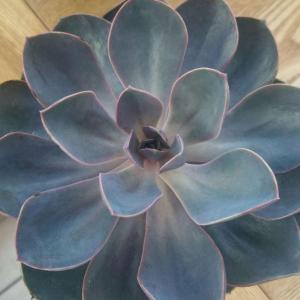
did a bit of shopping at the weekend. lots of Sedums and a beautiful Echeveria 'Duchess of Nuremberg'




0
0
文章
linpei
2017年07月04日

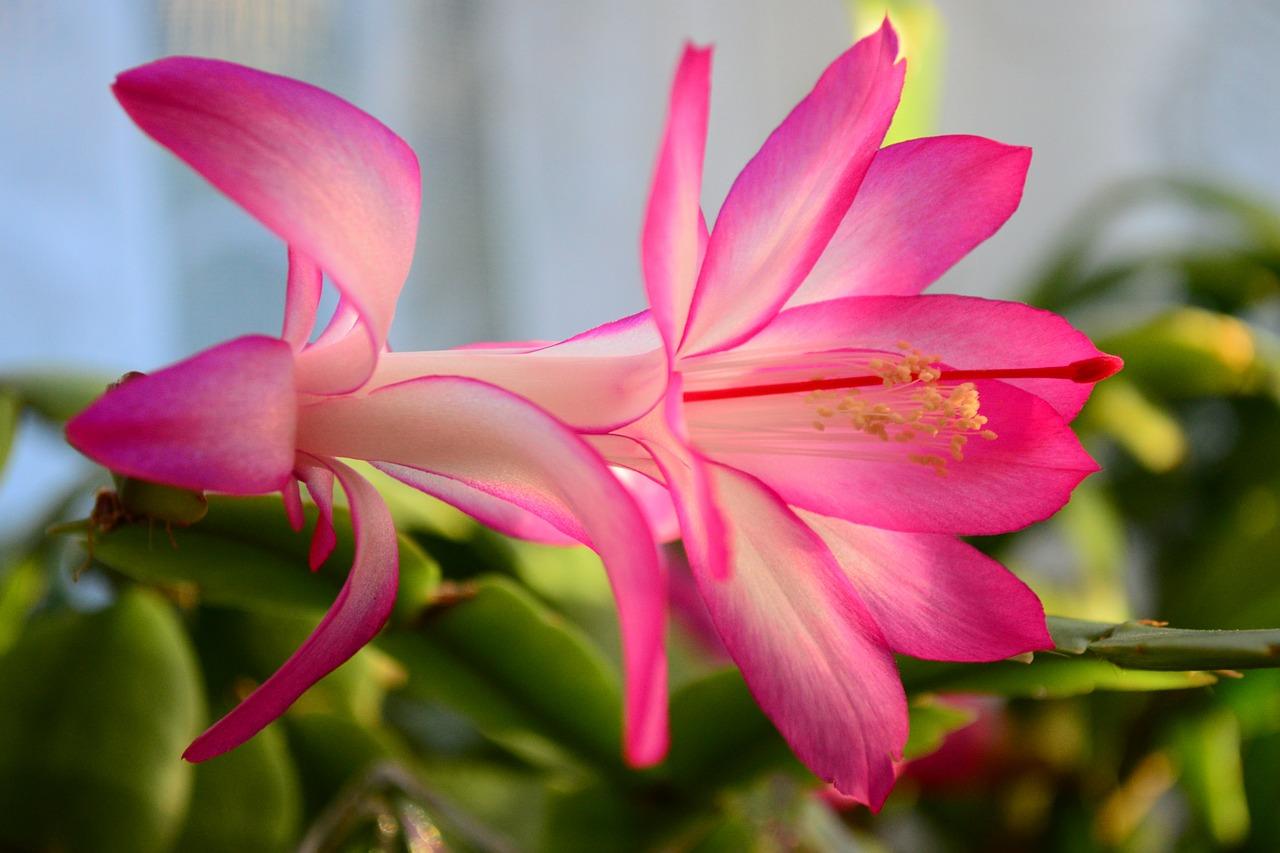
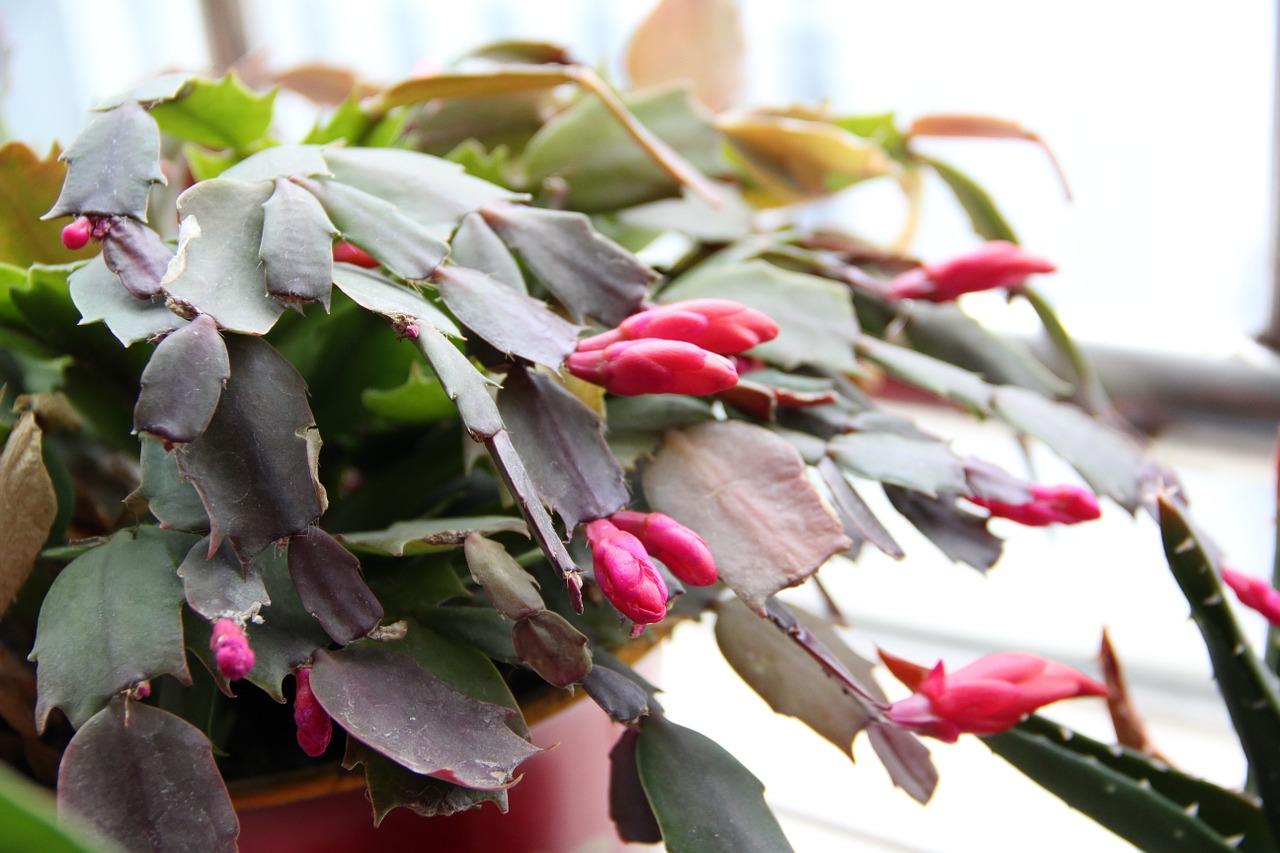
A beautiful holiday plant (botanically known as Schlumbergera or Zygocactus), the Christmas Cactus unsurprisingly blooms at Christmas and also sometimes around Easter time if cared for properly. A month prior to Christmas you will be able to watch the tips of the leaves beginning to grow. The tips grow darker as each day passes, until a bud forms. At Christmas time, as if by magic, the buds open to a beautiful flower that will add color and warmth to any holiday season.
Choosing Your Spot, Soil, and Set-Up
1.Give your Christmas Cactus bright but indirect light. Keep the plant in a well-lit location (like near a window) away from direct sunlight – too much heat and light can stunt growth and burn the leaves. It should also be away from drafts, heat vents, fireplaces or other sources of hot air.[1]
Move an indoors plant outdoors in summer to a shady location. It is best to keep in a normal house temperature range, about 65 to 75°F (18 to 20°C). That being said, cooler night temperatures can be used to initiate blooming. We'll discuss getting it to bloom in the final section.
If it's in a north or east-facing window, you won't have to worry about light. But if it's in a south or west-facing window, diffuse the light with semi-transparent curtains or some other light-diffusing device.
2.Provide the plant a source of humidity if you live in a dry environment. Put a tray of water next to the plant so that the water evaporates and provides humidity. Alternatively, you can make a humidity tray by placing the pot on a waterproof saucer that is filled with gravel and halfway filled with water.
50 to 60% humidity is the ultimate goal.[2] If your environment is close to that, you should be fine.
3.Use a well-draining container and well-draining soil. For the container, some of the cheap nursery planters will work well, and orchid planters (the plastic basket kind) work well also. Pair this planter with a planter that will hold water and allow the basket to fit down into it. Then, place a few medium sized rocks into the bottom so that the basket container will be held about an inch above the bottom. [3]
Use a combination of 3 parts potting soil to one part sand for the potting medium. An alternative is one part potting soil, two parts peat moss or compost, and one part sharp sand or perlite.[4] Whichever way you go, pour about two inches of room temperature water into the outer container and set the basket container inside. After about twelve hours, pour out any remaining water. Repeat this as often as the plant needs water; it will vary based on your home's condition. Monitor its need with a moisture prod and adjust accordingly.
4.Add fertilizer to assist plant growth. Plants that are actively growing should be given a blooming houseplant-type fertilizer. This is best done for a plant that is 2-3 weeks old. Follow the label directions for how much and how often to feed.
Fertilizing is important to keep the plant in good condition; the joints are fragile and can break apart if the plant descends into poor health. Generally, it should be fertilized 2-4 times a year with a 20-20-20 feed, but stop feeding about a month before the buds appear (this usually means stopping by the end of October).

Watering Your Christmas Cactus
1.Water a Christmas Cactus with care. Caring for this plant can be a bit tricky as you need to take care not to overwater or underwater it:
A Christmas cactus is a tropical cactus, not a desert cactus. Unlike most desert cacti, this variety cannot tolerate completely dry soil. If the soil gets too dry, the flowers buds will drop, and the plant will wilt. Feel the soil with your fingers; if it feels dry, it's time to water.
Too much watering will cause spots from white rot to appear on the leaves, and the leaves will likely fall off. The soil should be evenly moist for best growth. The rule of thumb is less water is better than too much water.
When watering, thoroughly water the plant. Before attempting to water the plant again, check to see that the top inch of soil has dried thoroughly first. Mist leaves as well as watering the soil.
2.Change your watering schedule seasonally. Water the cactus based on your environment and the time of year. A good method is to water a cactus as follows:[5]
Dry climate, outdoors: Water every two to three days when warm and sunny
Humid, cool or indoors: Water every week
During the fall and winter months, the plants should be watered less frequently in order to promote blooming.
3.Stop watering around October. When October hits, your watering duties are over. You can carefully resume a light watering in November. If it's dry where you live, feel free to place the pot over a tray of moist pebbles. This is all to set up the bloom happening around Christmas.
The only other time you should cease watering is after the plant blooms. At this time, cease watering for about 6 weeks to allow the plant to rest. New growth will still appear – and that is when watering should be resumed.
4.Watch out for bud drop. One of the most frustrating things that can happen to Christmas cactus is after the flower buds have developed they drop off the plant. Bud drop can be caused by several different conditions. Usually it's because of over-watering, but it can also be due to a lack of humidity or insufficient light.
If this starts happening, water the plant less and add some fertilizer to the pot. Move it to an area away from a hot radiator or vent and try a new spot where it can get a bit more sunlight.
Getting a Timely Bloom
1.Encourage the flower blooming for the holiday season by lowering the temperature. The key to getting Christmas cactus to flower during the holiday season is proper light exposure, correct temperatures and limited watering. If you manipulate these things yourself, you can time a bloom just how you'd like.
Because this plant is thermo-photoperiodic, it will set buds when day length is about equal to night length and when the temperature drops to 50 to 60 degrees F for several weeks. If the temperature drops further, the plant will not bloom.
From September and October, the Christmas Cactus should be kept in a cool room where temperatures will remain around 50-55°F (10-12°C), give or take a few degrees. Don't expose the plant to freezing temperatures. Plants should be blooming for the holidays if cool treatments are started by early November.
2.Keep the plant in a dark room during the night. During the fall months, the Christmas Cactus should be placed in a spot where it receives indirect, bright light during the daylight hours but total darkness at night – it requires long, uninterrupted dark periods of about 12 hours or more.[6]
Begin the dark treatments in about mid-October to have plants in full bloom by the holidays. Place the plants in a dark area from about 12 or more hours each night for 6-8 weeks or until you see buds forming. A closet or unused bathroom are ideal places.
Be especially careful with watering at this time. Reduce the watering slightly. Do not soak the soil after a dry period; only moisten the top few inches, since buds, flowers and even leaves can fall off if the roots are suddenly saturated.
3.When you see flower buds forming, increase light and humidity. The "dark ages" are over when your plant starts budding. At this point, you should increase, humidity, light, water (not too much, of course), and the temperature. In other words, continue as you were a few months ago.
If the buds form too early, you can lower the temperature to stunt them. When you're ready, up the temperature and they should resume their progress.[7]

Caring for Your Cactus Post-Bloom
1.Prune the Christmas cactus about a month after blooming. This will encourage the plant to branch out, especially after a period of "rest" has been granted. It will not look very pretty after the blossoms have faded. Some people wait until March or so, when new growth begins, to prune the cactus.
As mentioned before, cease watering for 30 days post-bloom. When you see new growth forming, you can begin watering again.
2.Propagate a Christmas Cactus by cutting off short, Y-shaped sections of the stem. Each section must consist of two or three joined segments. Allow each section to dry for a few hours before pushing them into a 3-inch pot that contains the same potting soil as the parent plant. Plant halfway down the first segment and water sparingly to prevent rot from developing.[8]
Treat the cuttings as mature plants. In about four to six weeks, the cuttings should have rooted and will begin to show some new growth. They grow quickly, and should take in about two or three weeks. You can fertilize after the cutting has grown one new segment.
3.Repot every 2-3 years. Your plant should be fine for a couple of years unless the root system gets diseased or harmed. Apart from this, a new pot is needed when the roots have filled it or when the soil has been officially depleted of nutrients. Most people do this in the spring.
When replanting or repotting, use new, fresh soil. It's worth the few extra dollars since it will probably be sitting in that soil for a long time. Your plant is a living thing like you, so it deserves the best.
The best time for repotting is between February and April, about once every three years.[9] Just be sure not to give it a pot that's too big; the Christmas Cactus flowers best when it's pot-bound.
Choosing Your Spot, Soil, and Set-Up
1.Give your Christmas Cactus bright but indirect light. Keep the plant in a well-lit location (like near a window) away from direct sunlight – too much heat and light can stunt growth and burn the leaves. It should also be away from drafts, heat vents, fireplaces or other sources of hot air.[1]
Move an indoors plant outdoors in summer to a shady location. It is best to keep in a normal house temperature range, about 65 to 75°F (18 to 20°C). That being said, cooler night temperatures can be used to initiate blooming. We'll discuss getting it to bloom in the final section.
If it's in a north or east-facing window, you won't have to worry about light. But if it's in a south or west-facing window, diffuse the light with semi-transparent curtains or some other light-diffusing device.
2.Provide the plant a source of humidity if you live in a dry environment. Put a tray of water next to the plant so that the water evaporates and provides humidity. Alternatively, you can make a humidity tray by placing the pot on a waterproof saucer that is filled with gravel and halfway filled with water.
50 to 60% humidity is the ultimate goal.[2] If your environment is close to that, you should be fine.
3.Use a well-draining container and well-draining soil. For the container, some of the cheap nursery planters will work well, and orchid planters (the plastic basket kind) work well also. Pair this planter with a planter that will hold water and allow the basket to fit down into it. Then, place a few medium sized rocks into the bottom so that the basket container will be held about an inch above the bottom. [3]
Use a combination of 3 parts potting soil to one part sand for the potting medium. An alternative is one part potting soil, two parts peat moss or compost, and one part sharp sand or perlite.[4] Whichever way you go, pour about two inches of room temperature water into the outer container and set the basket container inside. After about twelve hours, pour out any remaining water. Repeat this as often as the plant needs water; it will vary based on your home's condition. Monitor its need with a moisture prod and adjust accordingly.
4.Add fertilizer to assist plant growth. Plants that are actively growing should be given a blooming houseplant-type fertilizer. This is best done for a plant that is 2-3 weeks old. Follow the label directions for how much and how often to feed.
Fertilizing is important to keep the plant in good condition; the joints are fragile and can break apart if the plant descends into poor health. Generally, it should be fertilized 2-4 times a year with a 20-20-20 feed, but stop feeding about a month before the buds appear (this usually means stopping by the end of October).

Watering Your Christmas Cactus
1.Water a Christmas Cactus with care. Caring for this plant can be a bit tricky as you need to take care not to overwater or underwater it:
A Christmas cactus is a tropical cactus, not a desert cactus. Unlike most desert cacti, this variety cannot tolerate completely dry soil. If the soil gets too dry, the flowers buds will drop, and the plant will wilt. Feel the soil with your fingers; if it feels dry, it's time to water.
Too much watering will cause spots from white rot to appear on the leaves, and the leaves will likely fall off. The soil should be evenly moist for best growth. The rule of thumb is less water is better than too much water.
When watering, thoroughly water the plant. Before attempting to water the plant again, check to see that the top inch of soil has dried thoroughly first. Mist leaves as well as watering the soil.
2.Change your watering schedule seasonally. Water the cactus based on your environment and the time of year. A good method is to water a cactus as follows:[5]
Dry climate, outdoors: Water every two to three days when warm and sunny
Humid, cool or indoors: Water every week
During the fall and winter months, the plants should be watered less frequently in order to promote blooming.
3.Stop watering around October. When October hits, your watering duties are over. You can carefully resume a light watering in November. If it's dry where you live, feel free to place the pot over a tray of moist pebbles. This is all to set up the bloom happening around Christmas.
The only other time you should cease watering is after the plant blooms. At this time, cease watering for about 6 weeks to allow the plant to rest. New growth will still appear – and that is when watering should be resumed.
4.Watch out for bud drop. One of the most frustrating things that can happen to Christmas cactus is after the flower buds have developed they drop off the plant. Bud drop can be caused by several different conditions. Usually it's because of over-watering, but it can also be due to a lack of humidity or insufficient light.
If this starts happening, water the plant less and add some fertilizer to the pot. Move it to an area away from a hot radiator or vent and try a new spot where it can get a bit more sunlight.

Getting a Timely Bloom
1.Encourage the flower blooming for the holiday season by lowering the temperature. The key to getting Christmas cactus to flower during the holiday season is proper light exposure, correct temperatures and limited watering. If you manipulate these things yourself, you can time a bloom just how you'd like.
Because this plant is thermo-photoperiodic, it will set buds when day length is about equal to night length and when the temperature drops to 50 to 60 degrees F for several weeks. If the temperature drops further, the plant will not bloom.
From September and October, the Christmas Cactus should be kept in a cool room where temperatures will remain around 50-55°F (10-12°C), give or take a few degrees. Don't expose the plant to freezing temperatures. Plants should be blooming for the holidays if cool treatments are started by early November.
2.Keep the plant in a dark room during the night. During the fall months, the Christmas Cactus should be placed in a spot where it receives indirect, bright light during the daylight hours but total darkness at night – it requires long, uninterrupted dark periods of about 12 hours or more.[6]
Begin the dark treatments in about mid-October to have plants in full bloom by the holidays. Place the plants in a dark area from about 12 or more hours each night for 6-8 weeks or until you see buds forming. A closet or unused bathroom are ideal places.
Be especially careful with watering at this time. Reduce the watering slightly. Do not soak the soil after a dry period; only moisten the top few inches, since buds, flowers and even leaves can fall off if the roots are suddenly saturated.
3.When you see flower buds forming, increase light and humidity. The "dark ages" are over when your plant starts budding. At this point, you should increase, humidity, light, water (not too much, of course), and the temperature. In other words, continue as you were a few months ago.
If the buds form too early, you can lower the temperature to stunt them. When you're ready, up the temperature and they should resume their progress.[7]

Caring for Your Cactus Post-Bloom
1.Prune the Christmas cactus about a month after blooming. This will encourage the plant to branch out, especially after a period of "rest" has been granted. It will not look very pretty after the blossoms have faded. Some people wait until March or so, when new growth begins, to prune the cactus.
As mentioned before, cease watering for 30 days post-bloom. When you see new growth forming, you can begin watering again.
2.Propagate a Christmas Cactus by cutting off short, Y-shaped sections of the stem. Each section must consist of two or three joined segments. Allow each section to dry for a few hours before pushing them into a 3-inch pot that contains the same potting soil as the parent plant. Plant halfway down the first segment and water sparingly to prevent rot from developing.[8]
Treat the cuttings as mature plants. In about four to six weeks, the cuttings should have rooted and will begin to show some new growth. They grow quickly, and should take in about two or three weeks. You can fertilize after the cutting has grown one new segment.
3.Repot every 2-3 years. Your plant should be fine for a couple of years unless the root system gets diseased or harmed. Apart from this, a new pot is needed when the roots have filled it or when the soil has been officially depleted of nutrients. Most people do this in the spring.
When replanting or repotting, use new, fresh soil. It's worth the few extra dollars since it will probably be sitting in that soil for a long time. Your plant is a living thing like you, so it deserves the best.
The best time for repotting is between February and April, about once every three years.[9] Just be sure not to give it a pot that's too big; the Christmas Cactus flowers best when it's pot-bound.

10
7
Miss Chen:溜溜溜
文章
linpei
2017年07月04日

Lotus flowers are beautiful aquatic plants that represent beauty and purity, and they are available in a range of sizes and colors. The most common colors are red, pink, yellow, and white. The plants can be grown from seeds or tubers, but seeds will not produce a flower the first year while they develop into tubers.
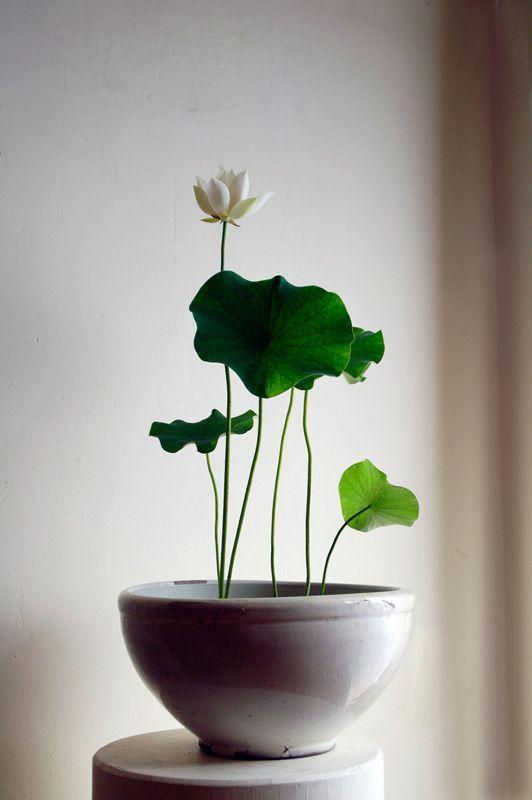
1.Growing from Seed
Scar the seeds. File the pointed tip of the seed down to one layer using a standard metal file. If you do not scar the seed, it will not grow and may rot.
2.Place the seeds into a glass of warm water. The water should not be chlorinated and must be changed every day until the lotus seeds sprout. After the first day of soaking, the seeds should swell to nearly twice their original size.
Seeds that float are almost always infertile. File any floating seeds down until you see a hint of the white meat on the inside of the seed. If these seeds do not swell like the others, discard them to avoid letting them cloud up the water.
3.Continue changing the water daily even after the seeds sprout. You must be more delicate than before to avoid disturbing the growth, however. Growth should start after four or five days of soaking, but you will need to wait a few more days until the seedling is at least 6 in. (15.24 cm) long before transferring.
4.Pick the right pot. A 3 to 5 gallon (11 to 19 liter) container should provide a young lotus plant with enough room to grow. A black plastic bucket works best because of its ability to retain heat and warm the seedlings. You also need to choose a bucket that does not have any drainage holes. The plant can actually gravitate toward the drainage holes and begin growing outside of them, causing the plant to under-perform.
5.Anchor the seeds. Lotus seeds without an anchor may find their way out of the soil and end up floating on the surface of the water. Gently wrap a small amount of modeling clay around each seed, but do not cover the sprout.
6.Fill your pot with dense soil. The ideal soil is about two parts clay and one part river sand. Fill the pot with about 6 in. (15.24 cm) of this potting medium.
7.Gently press the seeds into the top of the soil. The seeds should rest near the top of the soil, but you should brush a light layer of soil over the seeds after you press them in.
8.Lower the pot into shallow water. The water should be a maximum of 18 in. (45.72 cm) deep and at a temperature of 70 degrees Fahrenheit (21.1 degrees Celsius).
6
7
文章
Dummer. ゛☀
2017年06月30日

Stellerachamaejasme
Chamaejasme, sound is not feeling fierce, in fact it is a small flower plant, the more beautiful. But its toxicity is very large, or to pay special attention to farming.
Stellerachamaejasme introduction
Stellerachamaejasme nickname
Also called poison, Sichuan Stellera chamaejasme, continued white cat eye, chamaejasme grass, duanchangcao, swallow, to pull out the radish flowers, Steamed Buns flowers, it is perennial herbaceous flowers.
The breeding method of euphorbiae
When the reproduction of its breeding chamaejasme, is generally the root breeding, the underground rhizomes removed, cut into several sections of the plant can be disinfected, attention, avoid pests and diseases.
The role of Stellerachamaejasme
The role of Stellera chamaejasme or more, mainly is its medicinal value, secondly because it is plant is highly toxic, can be used to kill pests. The root of Stellera chamaejasme can be used to extract the alcohol industry.
Morphological character
Herbs perennial, 20-50 cm tall; rhizomes woody, stout, cylindrical, unbranched or branched, surface brown, face pale yellow; stems erect, unbranched, tufted, slender, green, sometimes purplish, glabrous, herbaceous, basally woody, sometimes with brown scales.
Ye Sansheng, born on dilute or subverticillate, papery, lanceolate or oblong lanceolate, thin oblong, 12-28 mm long, 3-10 mm wide, apex acuminate to obtuse, thin, base rounded to obtuse or cuneate, above green, the pale green to gray green, margin entire, not backscroll or slightly reflexed, midrib on flat, the uplift, lateral veins 4-6 pairs, second pairs of straight to leaf 2/3, both sides were obvious; petiole short, ca. 1.1 mm, base with flat or slightly above the joint, with a shallow trench.
Flowers white, yellow or purplish, fragrant flowered capitulum, apical, round shape; with green leafy bracts; sessile; calyx tube slender, 9-11 mm long, with obvious longitudinal veins, base slightly dilated, glabrous, lobes 5, ovate oblong, 2-4 mm long, wide about 2 mm, apex rounded, thin truncate, often with purple veined pattern; stamens 10, 2 round, round a central flower calyx tube, round from calyx tube throat, anther micro stretched filaments very short, anthers yellow, linear oblong, ca. 1.5 mm; one side disk developed, linear, ca. 1.8 mm, ca. 0.2 mm wide, apex slightly 2 lobed; ovary oval, subsessile, ca. 2 mm, 1.2 mm in diameter, the upper part is flaxen filiform fluff, style is short, stigma capitate, apex micro yellowish pilose. Fruit conic, ca. 5 mm in diam., ca. 2 mm in diam., upper or top gray villous, surrounded by persistent calyx tubes. Testa membranous, mauve. Florescence is 4-6 months, fruit 7-9 months.


0
0
求助
elvenking42
2017年06月09日

I picked up this beautiful Echeveria today with two flowerstalks ready to bloom.
my first question is if anyone can tell me what type of Echeveria it is? it's very small, maybe 3 inches across. the flowers appear to maybe be pink or yellow but the buds have not booked yet.
My second question if anyone knows is if I can let this bloom and it will still live? I know many types of succulents will die or at least go dormant after blooming, I would really love to see the blooms but I'm not willing to sacrifice my entire plant just to see them
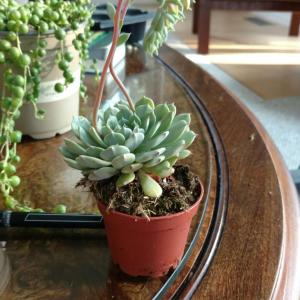
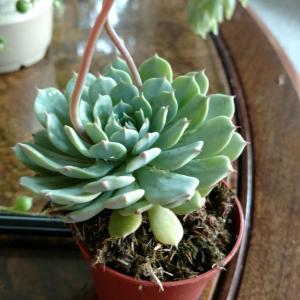
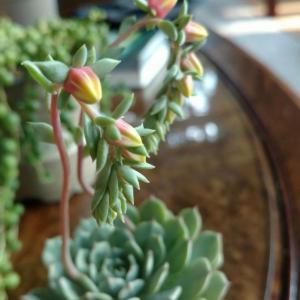


4
1
AloeYouVeraMuch:It will live! Also you have a lovely echeveria elegans! It tends to get pretty big so repotting may be in order soon.
meriunkat:I've had succulents that have flowerstalks the plant itself does not die, the flowers do tend to dry after blooming though
Frajille:Just do not over water it. I killed one before. They like to be dry mostly.
T.C.:It will live after blooming. Don't worry.
文章
Colorful
2017年05月23日
The houseplants in this list are exceptional; they are bold and pretty. Some of the most unique, beautiful indoor plants you should grow!Grow some of these plants indoors, and you’ll see a big change in your interior. These beautiful houseplants have the ability to change the appearance of any dull-boring room!1. Nerve Plant
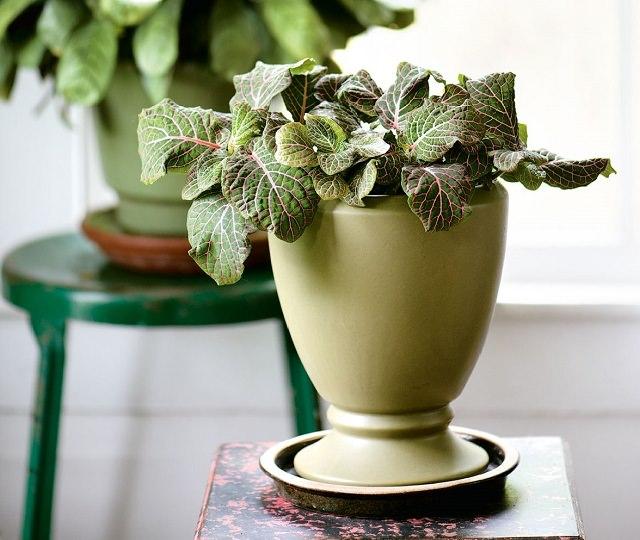
This demanding houseplant looks gorgeous due to its striking leaves. Picky about watering and dry indoor air and cold drafts. You must need to keep balance in watering.
2. Croton
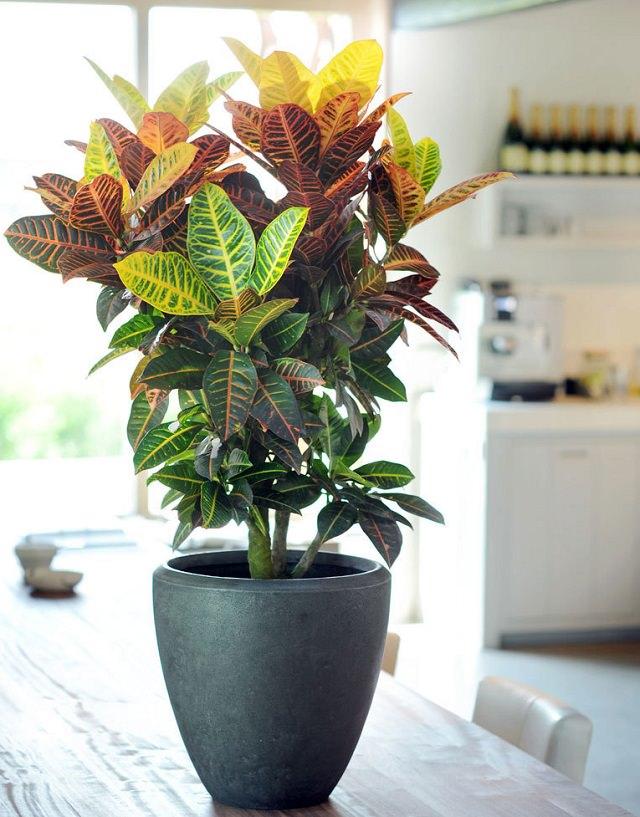
The bold and bodacious houseplant that is low maintenance too. The mix of yellow, amber, and orange color linear markings on thick dark green foliage, croton looks stunning. To grow, keep it in a spot that receives bright indirect light most of the time and water sporadically.
3. Calathea
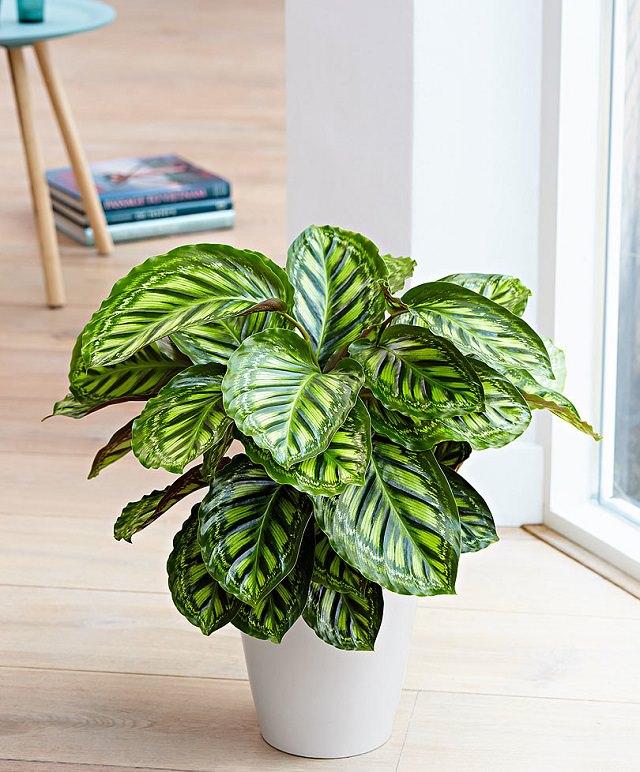
Lovely plant, great to look at! Many varieties are available in astonishing color combinations and patterns. This tropical houseplant doesn’t mind low light conditions. Keep it in warm, normal room temperature, saving from cold drafts. It likes humid surroundings and moderate watering.
4. Pencil Cactus
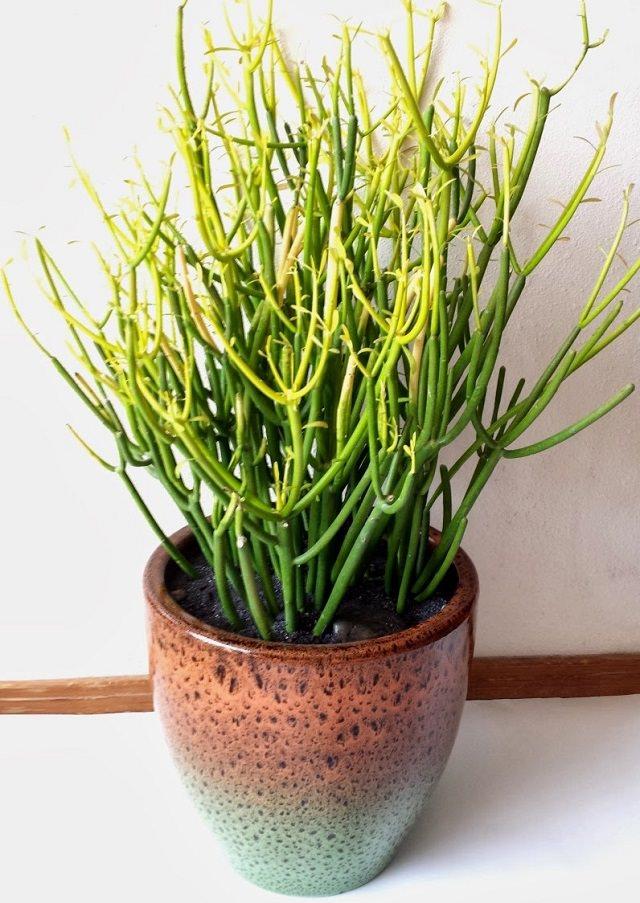
This unusual looking astonishing plant is notorious for its toxic milky sap (take care when handling this plant); still, it’s getting popular as a houseplant. Pencil cactus has medium to high light requirements and low watering needs; it also doesn’t mind dry air. Watering 2-3 times in a month is sufficient. To grow, keep the plant in a spot with ample light, a shaft of sunlight for a few hours or even more and it would do fine.
5. Silver Vase Plant
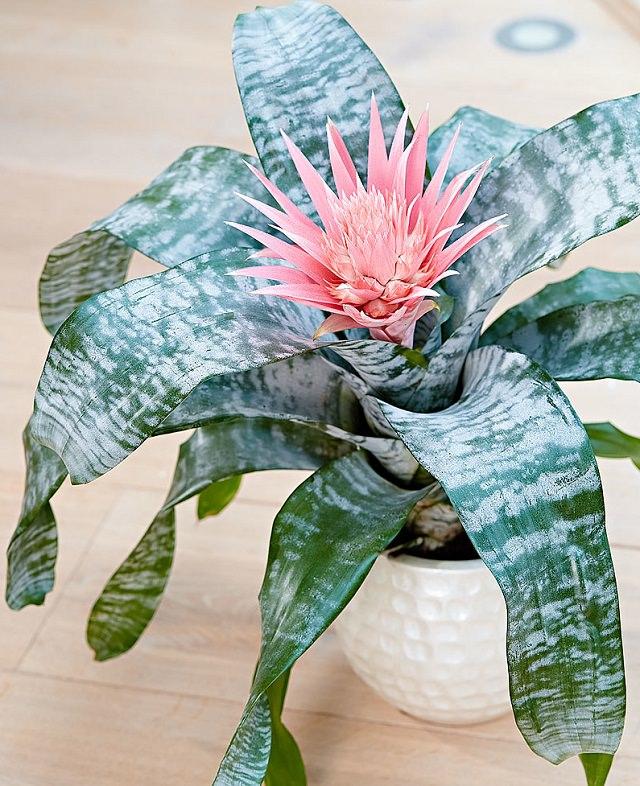
Unusual but a beautiful indoor plant, the silver vase or “urn plant” belongs to bromeliad family. Overall, growing this houseplant is similar to others– Be careful with watering, provide bright indirect light.
6. Fiddle Leaf Fig
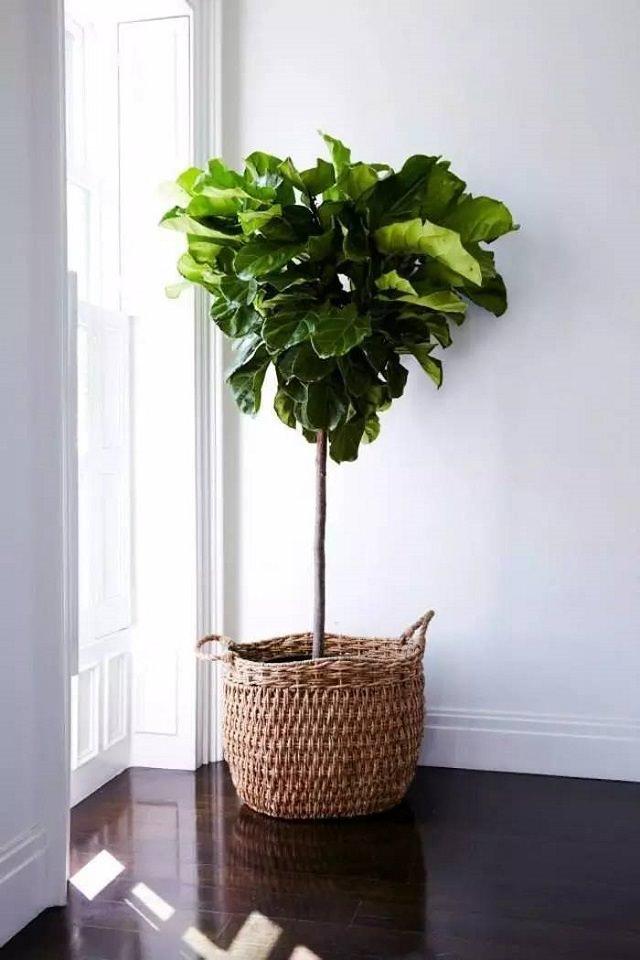
We couldn’t complete this list without adding fiddle leaf fig. Fiddle leaf is a tall, appealing houseplant with glossy, leathery foliage. This large houseplant can change the look of any room.
7. Aluminium Plant
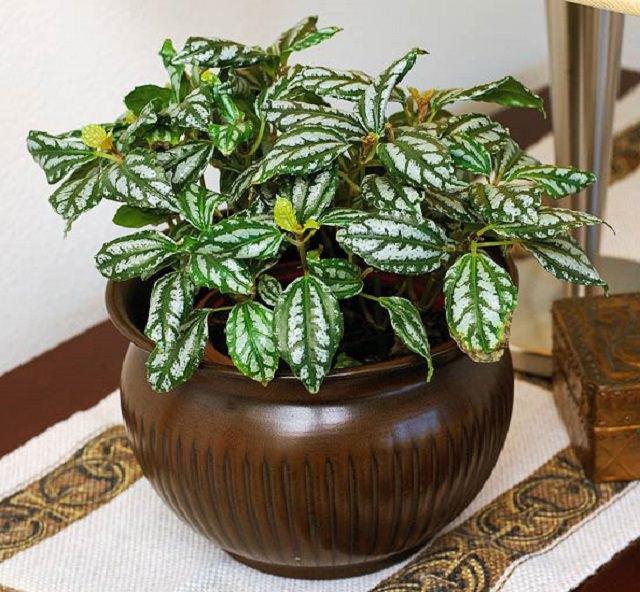
This plant is known for the beautiful silver strips that look like a color of aluminum; these strips appear over the glossy green color of each leaf. One of the beautiful indoor plants it is low maintenance. Keep it in a cool shady spot that receives a few hours of bright indirect light, water only when soil is dry.
8. Red Aglaonema
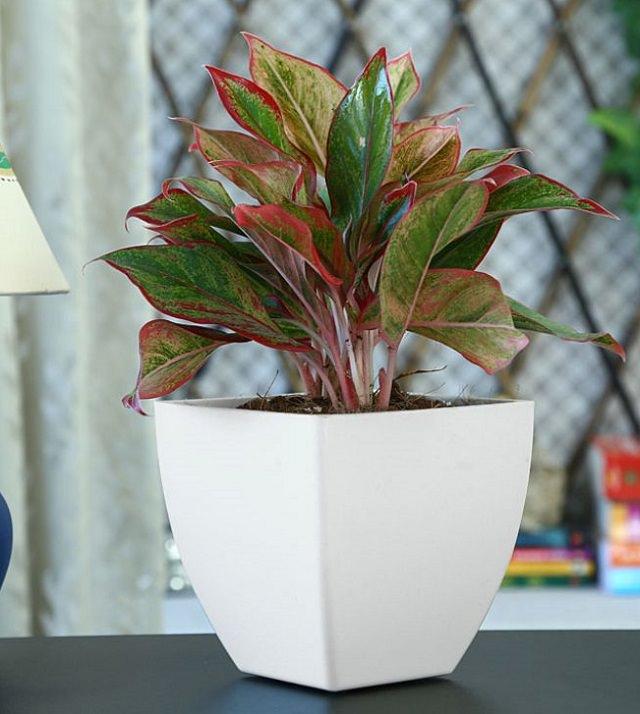
This beautiful houseplant’s dark green leaves with streaks of red and pink make it look really adorable indoors. It is absolutely easy to grow like Chinese evergreen and tolerates low light conditions and drought.
9. Anthurium
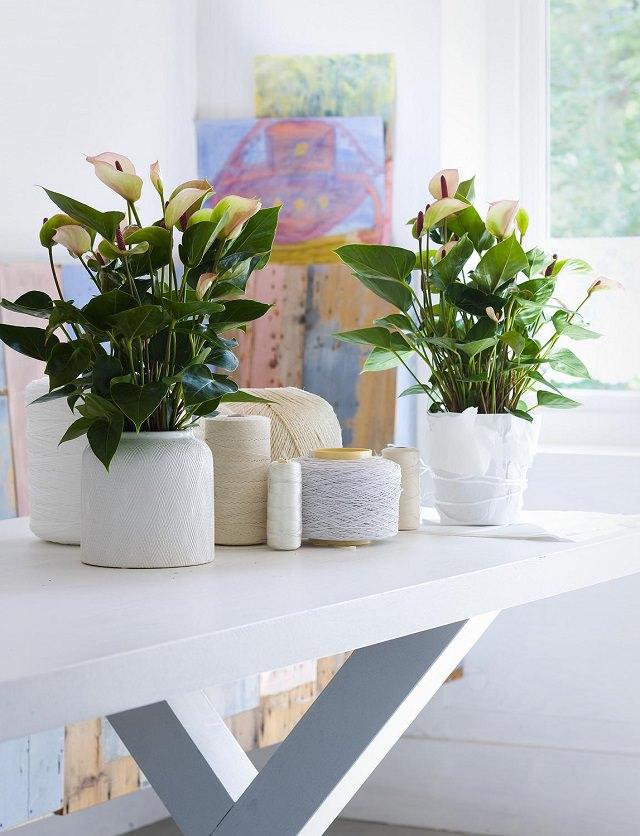
Anthuriums are beautiful houseplants that bloom in alluring shades of white, pink red or lavender. With a rich color palette, long lifespan and low care requirements, they are good for those with a busy lifestyle. Anthurium produces more foliage when grown in low-light conditions, so it’s you keep this plant in a spot that receives indirect sunlight all day.
10. African Mask Plant
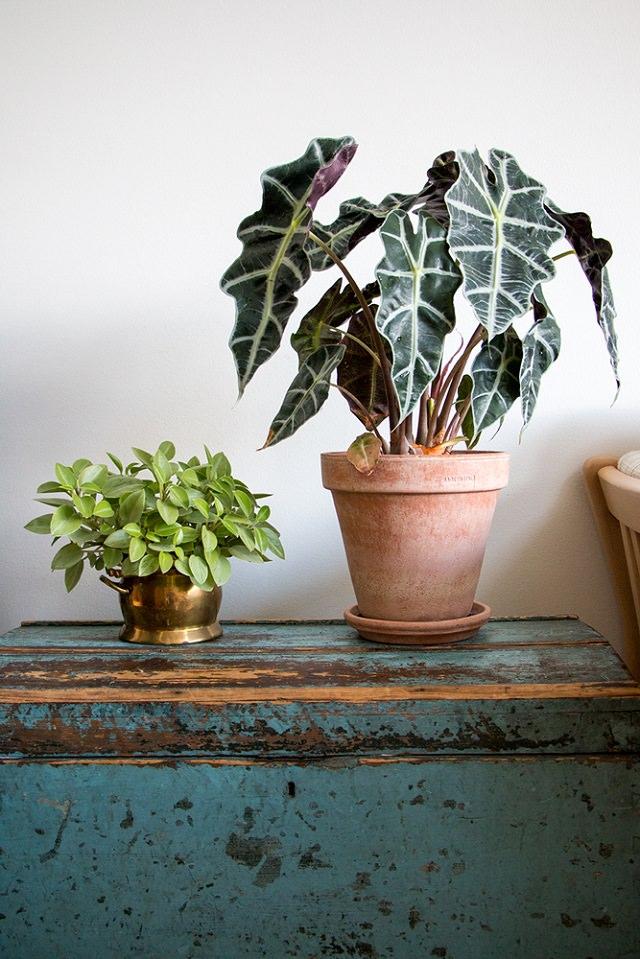
African Mask Plant with its dark green leaves and silvery-white veins can be easily mistaken for an artificial plant. This plant needs moderate watering and a bright position away from direct sunlight. Clean the leaves every few days to keep the plant looking attractive and healthy.
11. Prayer Plant
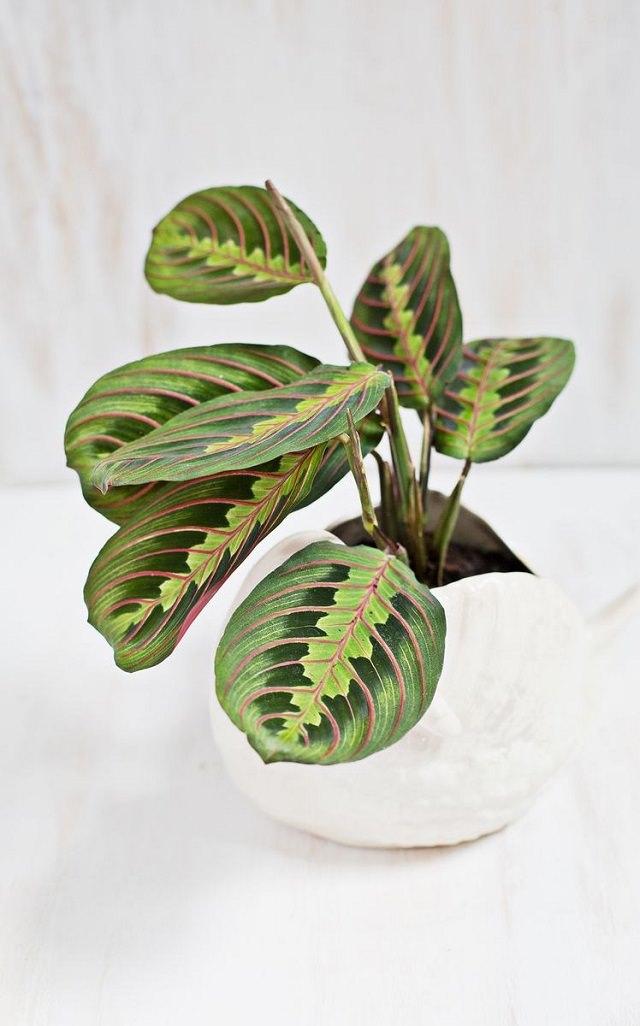
With its beautifully patterned oblong foliage and low care requirements, this exotic houseplant is a lovely addition to any home. It requires bright light, moderate watering, and warm room temperature when it’s grown indoors. One interesting fact about this houseplant is that it folds up its leaves in the night or in the dark place.
12. Bird’s Nest Fern
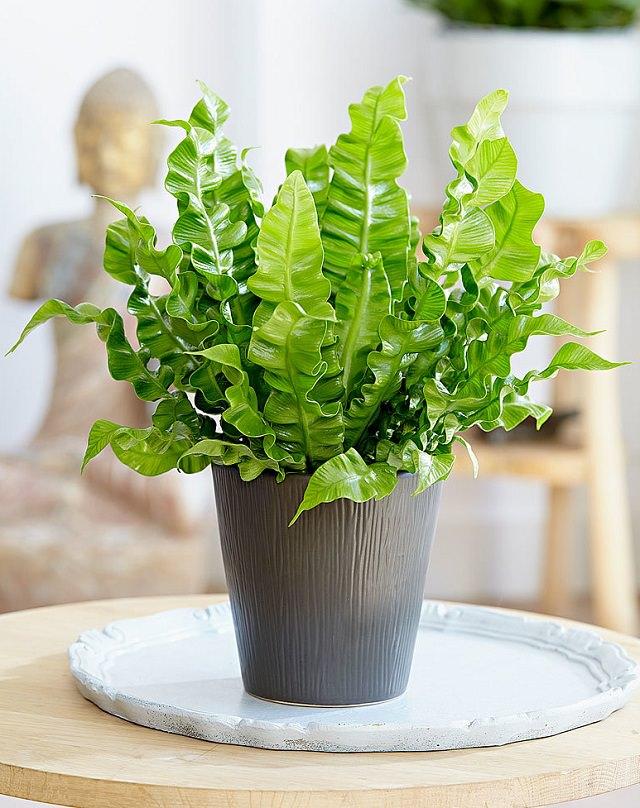
Native to Southeast Asia, bird’s nest fern (Asplenium nidus) is easy to grow if the proper conditions are given—mainly warmth and humidity. Bright indirect light and temperature around 70 F are optimum for growing bird’s nest fern indoors. Visit HGTV to learn more growing this!
13. Adenium
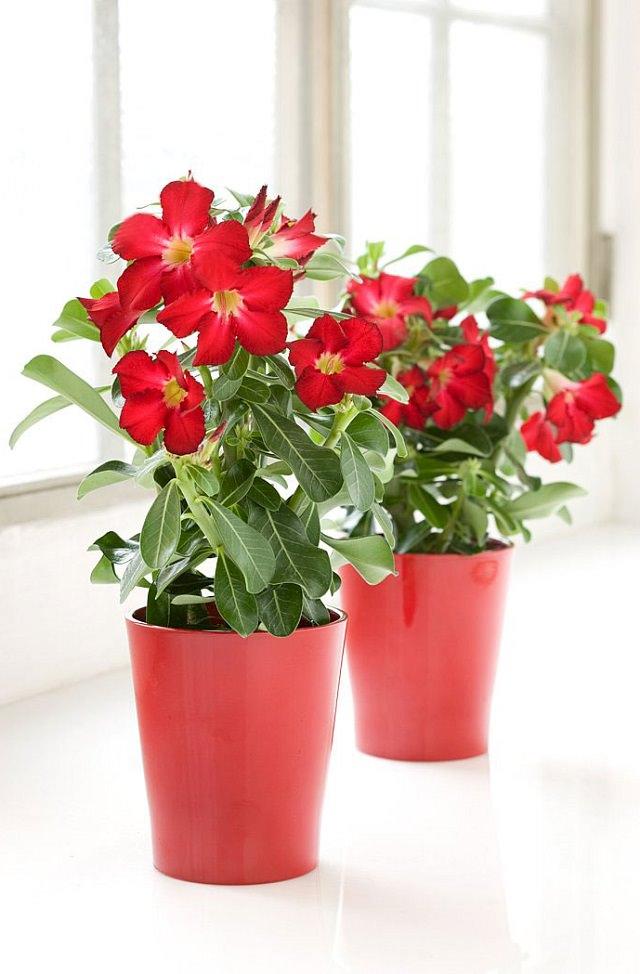
If you live in a warm climate and have a South or West facing window in your room, this is the plant you need to grow. Except for its sunlight requirements, Adenium is a low maintenance houseplant and flowers heartily throughout the year in frost-free climates.
14. Fiber-Optic Grass
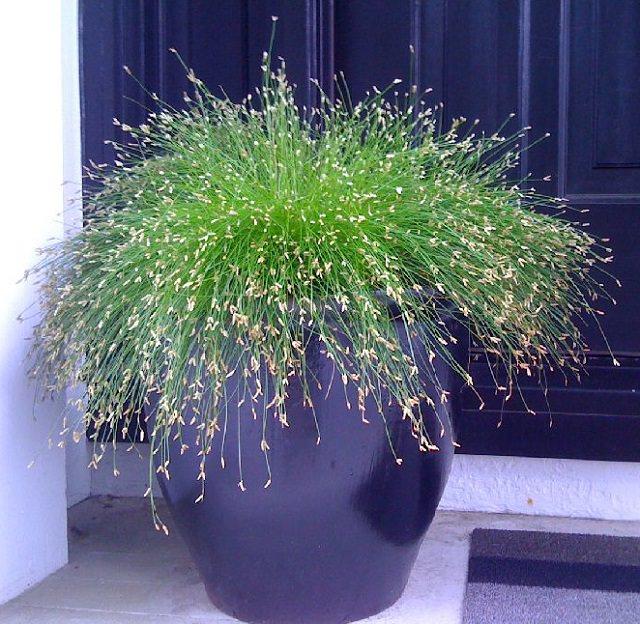
Fiber optic grass is a tropical grass that grows best in subtropical and tropical outdoor areas under USDA Zones (9-11), but it can be grown indoors in cooler regions too (We also added it to our list of BEST ORNAMENTAL GRASSES). Choose an ALLURING pot that will accentuate the beauty of this exotic grass, place it in a warm spot that receives bright light, and keep the soil slightly moist.
15. Ti Plant
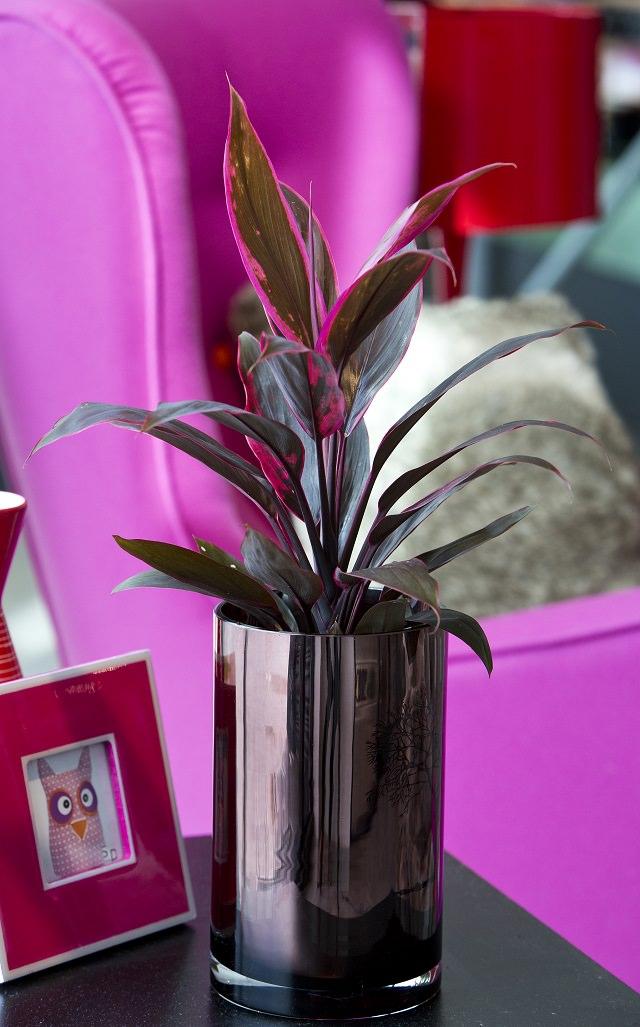
Purple foliage with streaks of blazing pink, the Ti plant looks hot and gorgeous. You can grow this plant for year around foliage attraction. This plant is drought tolerant but has a high light requirement, indoors, it must be kept somewhere where it can absorb direct and indirect light both.
16. Oxalis
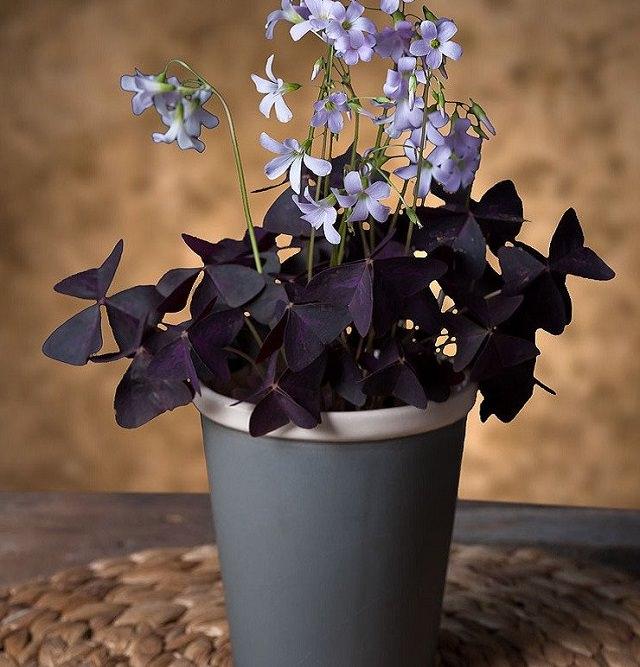
Oxalis belongs to a genus of edible, perennial plants characterized by striking mauve leaves and pink or white blooms. It prefers medium-to-bright light and performs better when grown in evenly moist soil.
17. Ponytail Palm
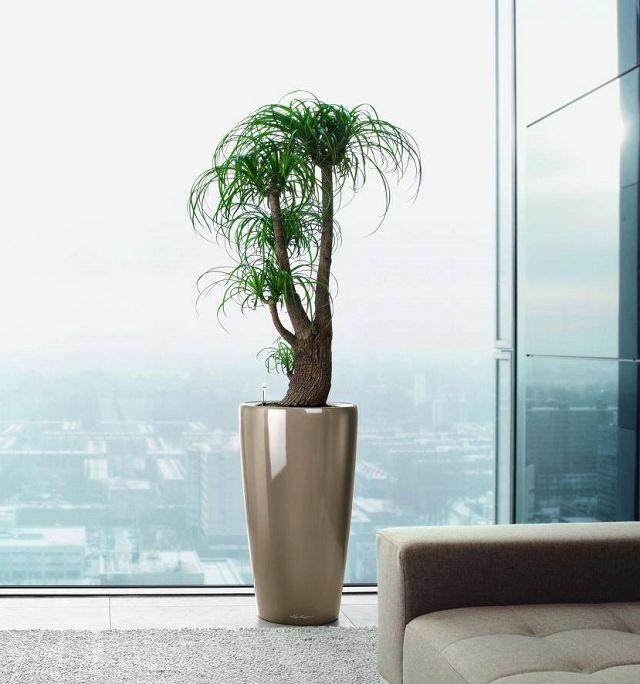
Ponytail Palm is an exotic succulent plant. It looks so interesting, one of the low maintenance plants as it has low watering needs and grows slowly, which means you don’t need to repot it frequently.
18. Poinsettia
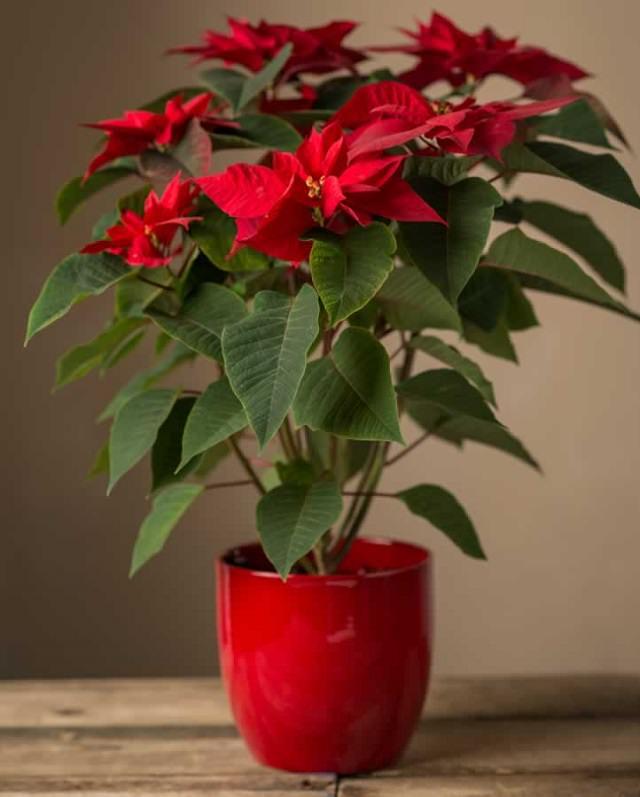
Poinsettias and holiday decorations go hand in hand. This plant looks stunning with or without blooms due to its colorful bracts and foliage. To remain healthy, cheery, and colorful, it needs a bright spot, a couple of hours of morning sunlight and indirect light all day long is sufficient. A draft-free place is best, watering when the soil is dry is required.
19. Rex Begonia
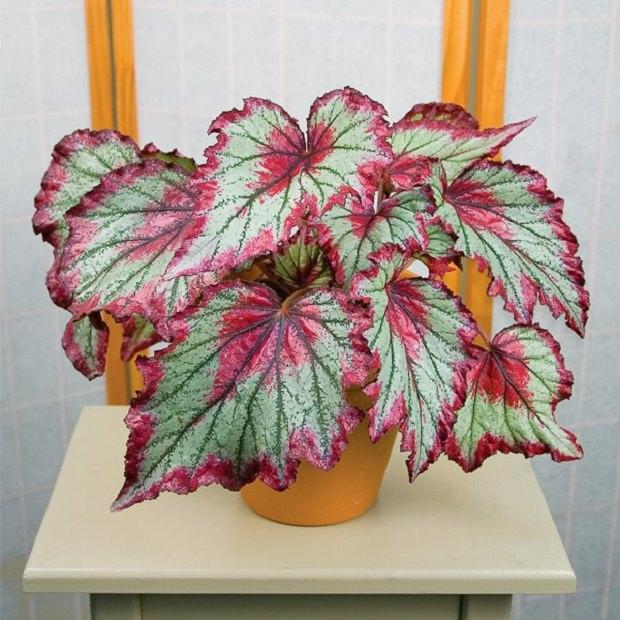
Rex begonias are best-looking begonias out there. Too showy, if you want to add a sparkle to your interior, grow them. Keeping in a bright shady spot in a well-drained medium, it’s important that you don’t overwater them.
20. Monstera Deliciosa
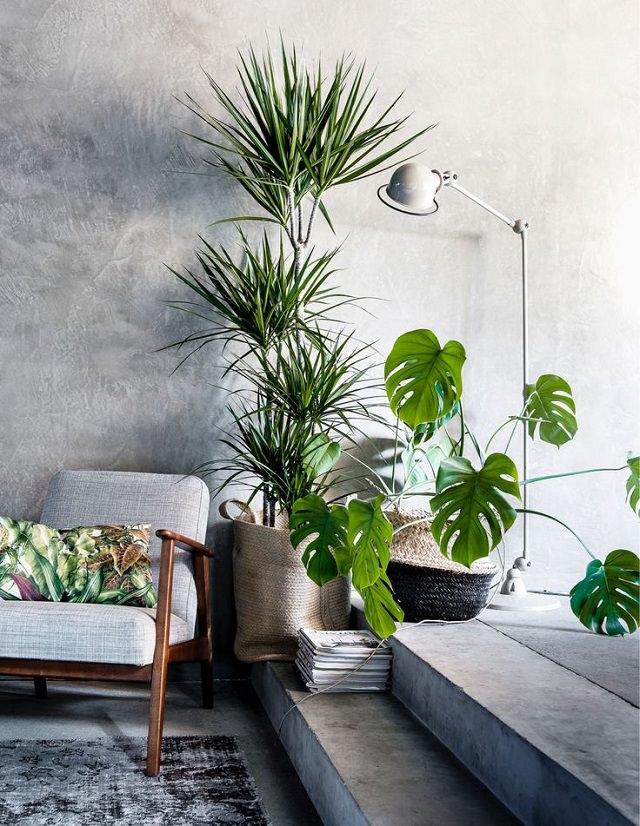
Monstera plant in a good looking pot standing beside a brightly painted wall in its supreme health displaying lush, oversized foliage of dark green color. You can imagine, it’ll look magnificent. Known as split leaf philodendron, you can also keep it in low light, for best result place it near a window where it’ll receive indirect sunlight all day long.
21. Schefflera (Umbrella Tree)
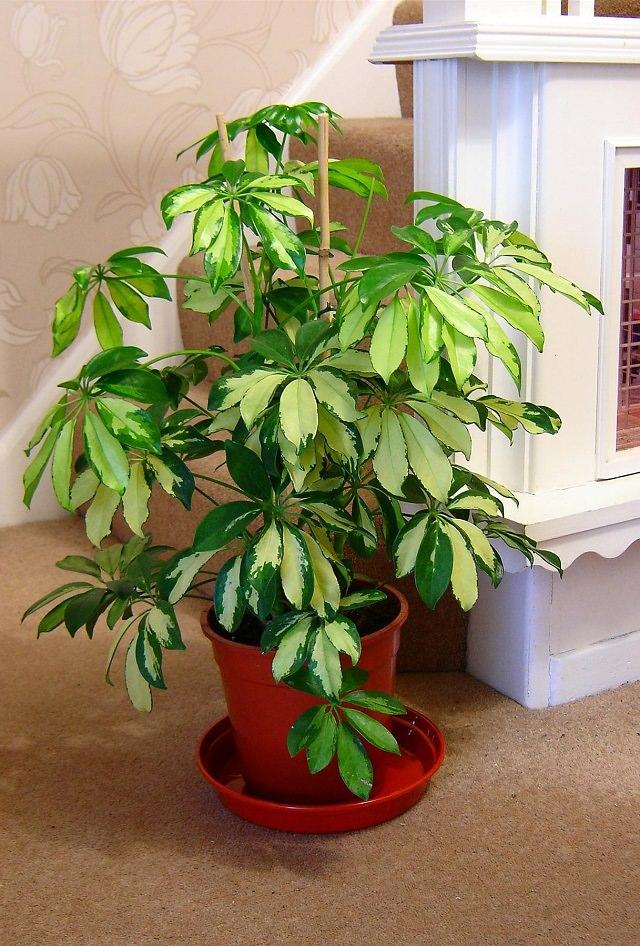
If you’re searching for a tall houseplant to improve the look of your interior, Schefflera is a good choice. Schefflera is finicky about its light requirements and doesn’t like direct sun but this doesn’t mean you can keep it in dim light, a spot near a window that receive indirect sunlight most of the time and have proper air circulation is what it demands. Watering should be done moderately.
22. Streptocarpus
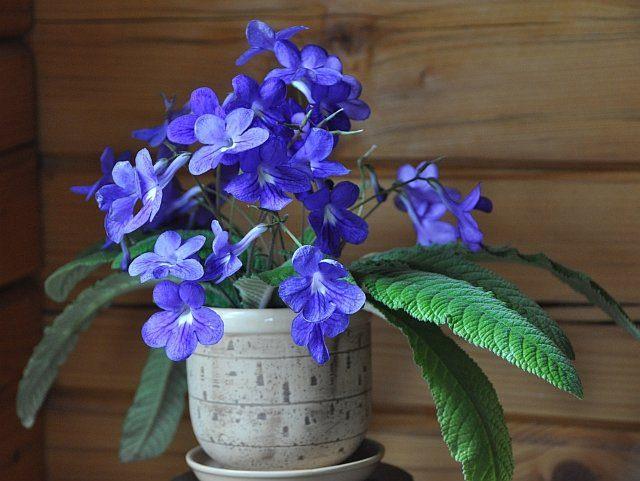
Streptocarpus, better known as the cape primrose is related to the African Violets; it prefers the same growing conditions of indirect light or filtered sunlight and moderately watered soil. Its velvety, deep green leaves and eye-catchy floral clusters hovering above the underlying foliage create a stunning appeal, which makes it perfect for adorning a secluded corner of a drawing room or adding a dash of color to an otherwise, dull space.
23. String of Pearls

The string of pearls is an easy-care succulent plant. It looks stunning in hanging baskets, trailing down. It is drought tolerant so you don’t need to water frequently, once in every other week would be enough.
24. Pleomele (Song of India)
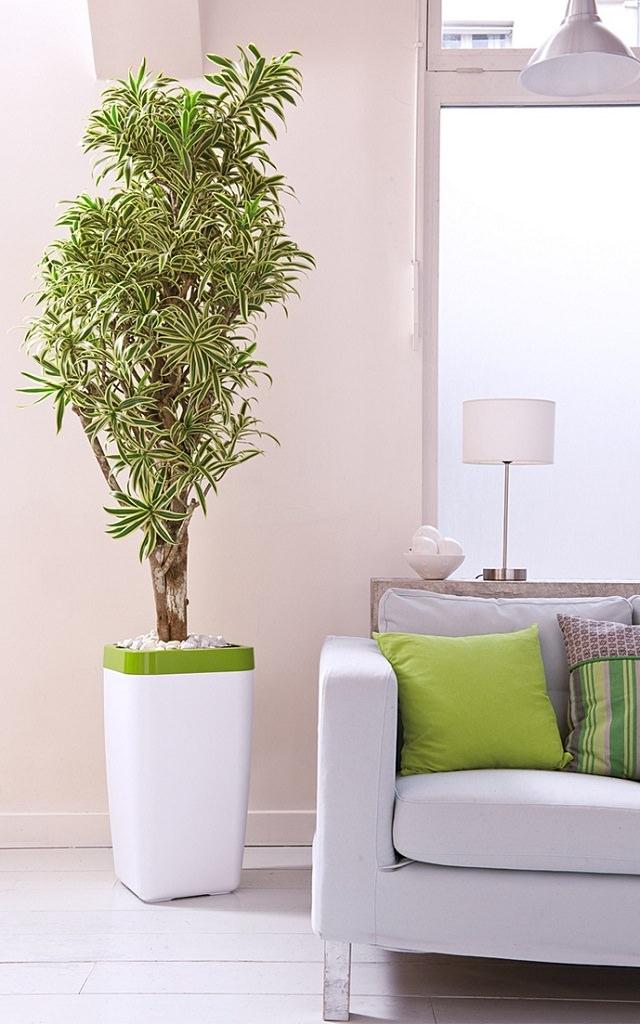
Dracaena reflexa like other plants of this genus is an easy-care houseplant. It’s one of the most ornamental dracaenas; the leaves have solid green color in the middle and a line of lime-yellow color on sides. Good for tabletops and plant stands as pleomele is a slow growing plant.
25. Brazilian Fireworks
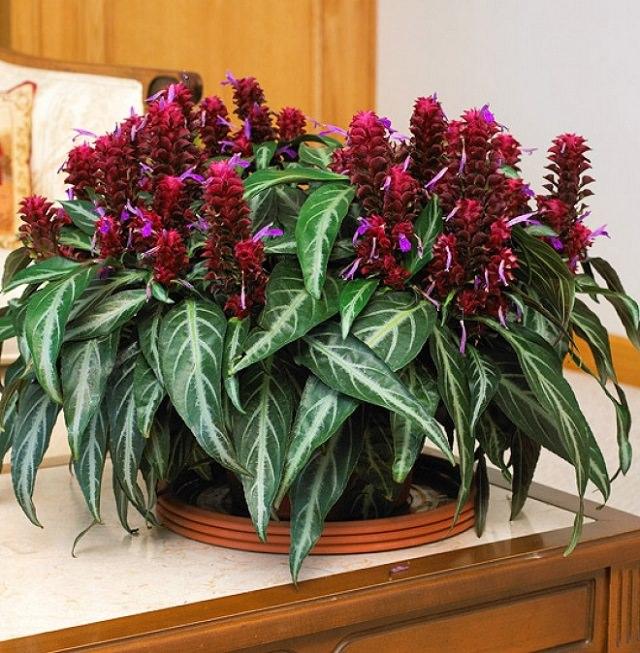
Whether you use this gorgeous tropical plant indoors, or in warm, shade gardens (if living in USDA zones 9-11), the Brazilian fireworks is a year-round delight with or without its flowers. This shade-loving plant is DEMANDING but thrives best when subjected to bright, indirect sunlight and occasional watering.
26. Peace lily
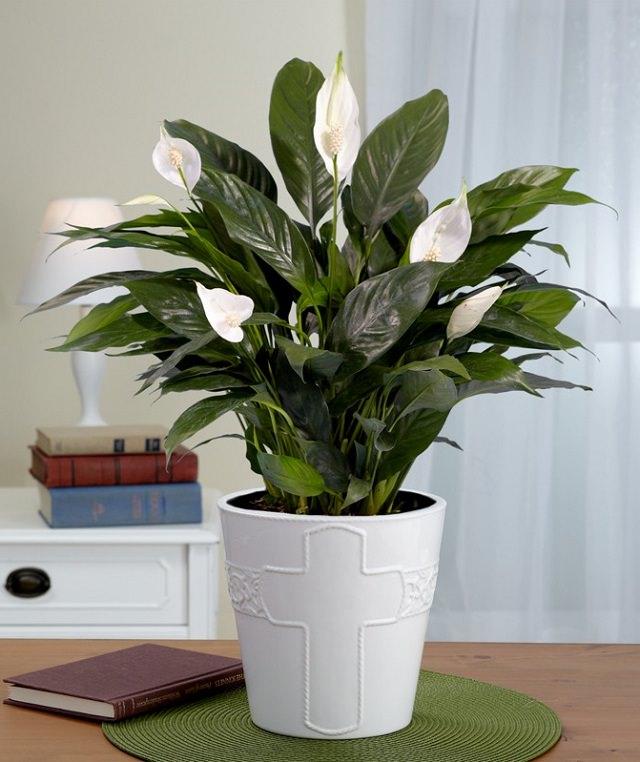
The peace lily is an attractive, low maintenance, air cleaning houseplant. This plant bears showy, spoon-shaped white spathe amidst a spike of white flower. Peace Lily survives best in a shady environment and easily tackle the absence of light.
27. Crown of Thorns
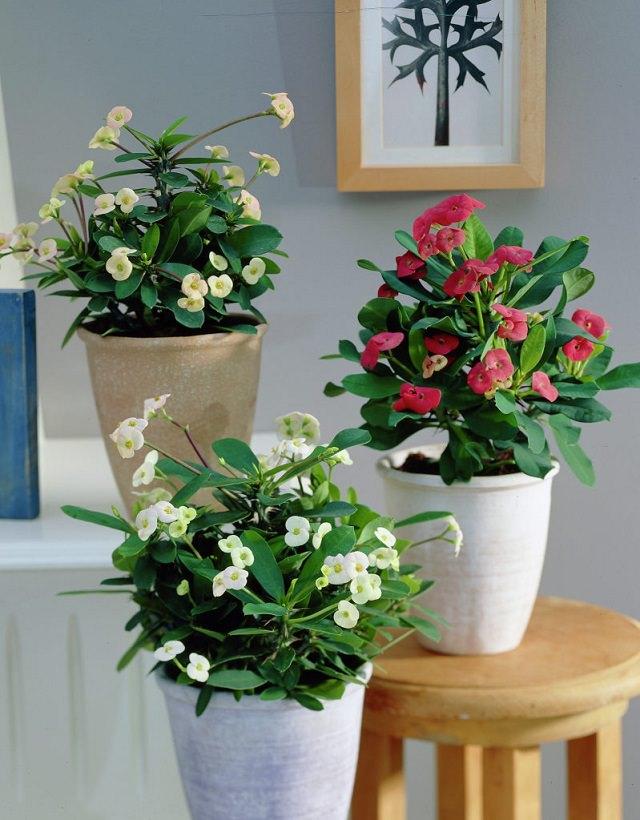
This lovely poinsettia relative is quite tolerant of neglect and thrives well as long as you place it in a bright spot and keep it in drier side. Appreciated for its showy flowers and thick, grayish-green leaves, it is a popular choice for indoor gardening.
28. Money Tree (Pachira Aquatica)

Tall, fat trunk, glossy-large foliage, the money tree is indeed a substitute for the fiddle leaf fig. Only a few indoor trees can become that tall. Also, it’s a low-maintenance houseplant. If you want to learn how to grow Pachira Aquatica indoors, click here!
29. African Violet

African violets are among the most easy-to-care flowering houseplants. They produce delicate, mauve flowers with little effort from your side. You can choose from several varieties, right from the white-edged blooms to the variegated foliage forms.

This demanding houseplant looks gorgeous due to its striking leaves. Picky about watering and dry indoor air and cold drafts. You must need to keep balance in watering.
2. Croton

The bold and bodacious houseplant that is low maintenance too. The mix of yellow, amber, and orange color linear markings on thick dark green foliage, croton looks stunning. To grow, keep it in a spot that receives bright indirect light most of the time and water sporadically.
3. Calathea

Lovely plant, great to look at! Many varieties are available in astonishing color combinations and patterns. This tropical houseplant doesn’t mind low light conditions. Keep it in warm, normal room temperature, saving from cold drafts. It likes humid surroundings and moderate watering.
4. Pencil Cactus

This unusual looking astonishing plant is notorious for its toxic milky sap (take care when handling this plant); still, it’s getting popular as a houseplant. Pencil cactus has medium to high light requirements and low watering needs; it also doesn’t mind dry air. Watering 2-3 times in a month is sufficient. To grow, keep the plant in a spot with ample light, a shaft of sunlight for a few hours or even more and it would do fine.
5. Silver Vase Plant

Unusual but a beautiful indoor plant, the silver vase or “urn plant” belongs to bromeliad family. Overall, growing this houseplant is similar to others– Be careful with watering, provide bright indirect light.
6. Fiddle Leaf Fig

We couldn’t complete this list without adding fiddle leaf fig. Fiddle leaf is a tall, appealing houseplant with glossy, leathery foliage. This large houseplant can change the look of any room.
7. Aluminium Plant

This plant is known for the beautiful silver strips that look like a color of aluminum; these strips appear over the glossy green color of each leaf. One of the beautiful indoor plants it is low maintenance. Keep it in a cool shady spot that receives a few hours of bright indirect light, water only when soil is dry.
8. Red Aglaonema

This beautiful houseplant’s dark green leaves with streaks of red and pink make it look really adorable indoors. It is absolutely easy to grow like Chinese evergreen and tolerates low light conditions and drought.
9. Anthurium

Anthuriums are beautiful houseplants that bloom in alluring shades of white, pink red or lavender. With a rich color palette, long lifespan and low care requirements, they are good for those with a busy lifestyle. Anthurium produces more foliage when grown in low-light conditions, so it’s you keep this plant in a spot that receives indirect sunlight all day.
10. African Mask Plant

African Mask Plant with its dark green leaves and silvery-white veins can be easily mistaken for an artificial plant. This plant needs moderate watering and a bright position away from direct sunlight. Clean the leaves every few days to keep the plant looking attractive and healthy.
11. Prayer Plant

With its beautifully patterned oblong foliage and low care requirements, this exotic houseplant is a lovely addition to any home. It requires bright light, moderate watering, and warm room temperature when it’s grown indoors. One interesting fact about this houseplant is that it folds up its leaves in the night or in the dark place.
12. Bird’s Nest Fern

Native to Southeast Asia, bird’s nest fern (Asplenium nidus) is easy to grow if the proper conditions are given—mainly warmth and humidity. Bright indirect light and temperature around 70 F are optimum for growing bird’s nest fern indoors. Visit HGTV to learn more growing this!
13. Adenium

If you live in a warm climate and have a South or West facing window in your room, this is the plant you need to grow. Except for its sunlight requirements, Adenium is a low maintenance houseplant and flowers heartily throughout the year in frost-free climates.
14. Fiber-Optic Grass

Fiber optic grass is a tropical grass that grows best in subtropical and tropical outdoor areas under USDA Zones (9-11), but it can be grown indoors in cooler regions too (We also added it to our list of BEST ORNAMENTAL GRASSES). Choose an ALLURING pot that will accentuate the beauty of this exotic grass, place it in a warm spot that receives bright light, and keep the soil slightly moist.
15. Ti Plant

Purple foliage with streaks of blazing pink, the Ti plant looks hot and gorgeous. You can grow this plant for year around foliage attraction. This plant is drought tolerant but has a high light requirement, indoors, it must be kept somewhere where it can absorb direct and indirect light both.
16. Oxalis

Oxalis belongs to a genus of edible, perennial plants characterized by striking mauve leaves and pink or white blooms. It prefers medium-to-bright light and performs better when grown in evenly moist soil.
17. Ponytail Palm

Ponytail Palm is an exotic succulent plant. It looks so interesting, one of the low maintenance plants as it has low watering needs and grows slowly, which means you don’t need to repot it frequently.
18. Poinsettia

Poinsettias and holiday decorations go hand in hand. This plant looks stunning with or without blooms due to its colorful bracts and foliage. To remain healthy, cheery, and colorful, it needs a bright spot, a couple of hours of morning sunlight and indirect light all day long is sufficient. A draft-free place is best, watering when the soil is dry is required.
19. Rex Begonia

Rex begonias are best-looking begonias out there. Too showy, if you want to add a sparkle to your interior, grow them. Keeping in a bright shady spot in a well-drained medium, it’s important that you don’t overwater them.
20. Monstera Deliciosa

Monstera plant in a good looking pot standing beside a brightly painted wall in its supreme health displaying lush, oversized foliage of dark green color. You can imagine, it’ll look magnificent. Known as split leaf philodendron, you can also keep it in low light, for best result place it near a window where it’ll receive indirect sunlight all day long.
21. Schefflera (Umbrella Tree)

If you’re searching for a tall houseplant to improve the look of your interior, Schefflera is a good choice. Schefflera is finicky about its light requirements and doesn’t like direct sun but this doesn’t mean you can keep it in dim light, a spot near a window that receive indirect sunlight most of the time and have proper air circulation is what it demands. Watering should be done moderately.
22. Streptocarpus

Streptocarpus, better known as the cape primrose is related to the African Violets; it prefers the same growing conditions of indirect light or filtered sunlight and moderately watered soil. Its velvety, deep green leaves and eye-catchy floral clusters hovering above the underlying foliage create a stunning appeal, which makes it perfect for adorning a secluded corner of a drawing room or adding a dash of color to an otherwise, dull space.
23. String of Pearls

The string of pearls is an easy-care succulent plant. It looks stunning in hanging baskets, trailing down. It is drought tolerant so you don’t need to water frequently, once in every other week would be enough.
24. Pleomele (Song of India)

Dracaena reflexa like other plants of this genus is an easy-care houseplant. It’s one of the most ornamental dracaenas; the leaves have solid green color in the middle and a line of lime-yellow color on sides. Good for tabletops and plant stands as pleomele is a slow growing plant.
25. Brazilian Fireworks

Whether you use this gorgeous tropical plant indoors, or in warm, shade gardens (if living in USDA zones 9-11), the Brazilian fireworks is a year-round delight with or without its flowers. This shade-loving plant is DEMANDING but thrives best when subjected to bright, indirect sunlight and occasional watering.
26. Peace lily

The peace lily is an attractive, low maintenance, air cleaning houseplant. This plant bears showy, spoon-shaped white spathe amidst a spike of white flower. Peace Lily survives best in a shady environment and easily tackle the absence of light.
27. Crown of Thorns

This lovely poinsettia relative is quite tolerant of neglect and thrives well as long as you place it in a bright spot and keep it in drier side. Appreciated for its showy flowers and thick, grayish-green leaves, it is a popular choice for indoor gardening.
28. Money Tree (Pachira Aquatica)

Tall, fat trunk, glossy-large foliage, the money tree is indeed a substitute for the fiddle leaf fig. Only a few indoor trees can become that tall. Also, it’s a low-maintenance houseplant. If you want to learn how to grow Pachira Aquatica indoors, click here!
29. African Violet

African violets are among the most easy-to-care flowering houseplants. They produce delicate, mauve flowers with little effort from your side. You can choose from several varieties, right from the white-edged blooms to the variegated foliage forms.
2
0
文章
Carol
2017年05月23日

If having a beautiful garden is your biggest dream then avoid doing these 9 landscaping mistakes when designing a garden.Mistake 1: Arranging everything in a single view

Why should you avoid this?
When the view is blocked and you can’t see everything in one go it creates an illusion of more space and interest.
What you should do!
If your garden is open and you have not divided it into different sections, it is going to look less interesting and small. Draw your plan in advance and divide the space of your garden within it in different sections. You do not need to create solid divisions in your garden like a wall or fence, you can do this with large trees, shrubs that can block a certain part, grasses or potted plants densely arranged.
Mistake 2: Not making a plan
Why should you avoid this?
If you’re going to start designing a garden without a plan, you’ll not be going to get what you’ve thought or imagined in your mind.
What you should do!
Plan every aspect of your garden on the paper, take help of landscaping software and make a list of plants you would like to grow. Do proper research and make a budget. If necessary, take help of professionals.
Mistake 3: Forgetting the furniture
Why should you avoid this?
Many gardeners tend to forget about furniture. They choose furniture of different styles that are too colorful and fancy this makes the garden look busy and without the symphony.
What you should do!
Not only the plants but also the furniture and materials you choose automatically give an atmosphere to your garden. Take great care to the type of plants and materials you will use. Buy all your furniture together of the same style to create harmony. Do not mix!
Mistake 4: Avoiding the Foliage

Why should you avoid this?
Most of us buy plants for flowers and fruits, avoiding the foliage plants. But to get a year round interest buy more foliage plants.
What you should do!
Buy plants for their foliage–texture, color, shape– their leaves are what you are going to see most of the year.
Mistake 5: Excessive ornamentation and so many garden accessories
Why should you avoid this?
This is one of the most common garden design mistakes. Using too many decorative items in the garden creates a distraction and makes your garden look cluttered and busy.
What you should do!
Do not overdo anything. Add a whim to your garden but avoid adding so many decorative items. Before adding anything see how it fits with the style of your garden and outdoor space.
Mistake 6: Forgetting the view from inside
Why should you avoid this?
Getting a good view of the garden from the windows is important. When designing a garden don’t forget its view you’ll get from the inside.
What you should do!
Before planting or placing your containers at the exact spot, go inside and look from every window to see how it’ll look to get a good view.
Mistake 7: So many colors

Why should you avoid this?
So many colors that are not in harmony can cause a distraction.
What you should do!
Decide a color palette for every section of your garden and add plants according to it. So many colors together can create a chaos.
Mistake 8: Ignoring the seasons
Why should you avoid this?
Every garden looks beautiful in spring and summer (in winter in tropics) but you should not forget about fall and winter.
What you should do!
Plan to grow plants with regard to the seasons for a year round interest. When you go to a nursery don’t just buy plants for the following season.
Mistake 9: Growing wrong plants in wrong positions
Why should you avoid this?
This one of the most common gardening mistakes that must be avoided. Not growing right plants in a right position will make all of your plants to die eventually.
What you should do!
Grow plants that are most suitable for your climate and weather and conditions you have in your garden is important. For example, plants that require full should be grown in a sunny position, plants that require dry soil must not be grown in moist soggy soil and so on. Also, at the time of planting, give them recommended space. Don’t forget that they’ll become tall and spread once you plant them.

Why should you avoid this?
When the view is blocked and you can’t see everything in one go it creates an illusion of more space and interest.
What you should do!
If your garden is open and you have not divided it into different sections, it is going to look less interesting and small. Draw your plan in advance and divide the space of your garden within it in different sections. You do not need to create solid divisions in your garden like a wall or fence, you can do this with large trees, shrubs that can block a certain part, grasses or potted plants densely arranged.
Mistake 2: Not making a plan
Why should you avoid this?
If you’re going to start designing a garden without a plan, you’ll not be going to get what you’ve thought or imagined in your mind.
What you should do!
Plan every aspect of your garden on the paper, take help of landscaping software and make a list of plants you would like to grow. Do proper research and make a budget. If necessary, take help of professionals.
Mistake 3: Forgetting the furniture
Why should you avoid this?
Many gardeners tend to forget about furniture. They choose furniture of different styles that are too colorful and fancy this makes the garden look busy and without the symphony.
What you should do!
Not only the plants but also the furniture and materials you choose automatically give an atmosphere to your garden. Take great care to the type of plants and materials you will use. Buy all your furniture together of the same style to create harmony. Do not mix!
Mistake 4: Avoiding the Foliage

Why should you avoid this?
Most of us buy plants for flowers and fruits, avoiding the foliage plants. But to get a year round interest buy more foliage plants.
What you should do!
Buy plants for their foliage–texture, color, shape– their leaves are what you are going to see most of the year.
Mistake 5: Excessive ornamentation and so many garden accessories
Why should you avoid this?
This is one of the most common garden design mistakes. Using too many decorative items in the garden creates a distraction and makes your garden look cluttered and busy.
What you should do!
Do not overdo anything. Add a whim to your garden but avoid adding so many decorative items. Before adding anything see how it fits with the style of your garden and outdoor space.
Mistake 6: Forgetting the view from inside
Why should you avoid this?
Getting a good view of the garden from the windows is important. When designing a garden don’t forget its view you’ll get from the inside.
What you should do!
Before planting or placing your containers at the exact spot, go inside and look from every window to see how it’ll look to get a good view.
Mistake 7: So many colors

Why should you avoid this?
So many colors that are not in harmony can cause a distraction.
What you should do!
Decide a color palette for every section of your garden and add plants according to it. So many colors together can create a chaos.
Mistake 8: Ignoring the seasons
Why should you avoid this?
Every garden looks beautiful in spring and summer (in winter in tropics) but you should not forget about fall and winter.
What you should do!
Plan to grow plants with regard to the seasons for a year round interest. When you go to a nursery don’t just buy plants for the following season.
Mistake 9: Growing wrong plants in wrong positions
Why should you avoid this?
This one of the most common gardening mistakes that must be avoided. Not growing right plants in a right position will make all of your plants to die eventually.
What you should do!
Grow plants that are most suitable for your climate and weather and conditions you have in your garden is important. For example, plants that require full should be grown in a sunny position, plants that require dry soil must not be grown in moist soggy soil and so on. Also, at the time of planting, give them recommended space. Don’t forget that they’ll become tall and spread once you plant them.
0
1
文章
lenny
2017年05月23日
Whether you have a rooftop garden already or you are planning to have one, these 11 rooftop garden design ideas and tips will help you in having the most beautiful roof terrace garden.
In densely populated urban areas of the cities even having a small rooftop or patio is such a boon. You can create a garden there. You can sit there and enjoy.
Surely you may have many plans about your rooftop garden design and style but considering these tips will be helpful too.
Rooftop Garden Design Ideas and Tips
We have some great terrace garden design ideas and essential tips that you can use for inspiration on your rooftop.
1. Keep it open

A small rooftop if kept open looks big. Consider, for example, transparent glass instead of a parapet wall; fences, railing or even you can create a hedge around the border. However, if you are concerned about the privacy and would like to block the constantly prying eyes of the neighbors, avoid this tip.
2. Grow tall plants and trees

If you have a large rooftop or have a bad view from there or if you want to get a real garden like feel do little high vegetation around the walls to maximize greenery and confine yourself from the rest of the city. Growing bamboos and grasses is a good combination if you want to make it low maintenance, otherwise, your options are unlimited, grow shrubs and trees.
3. Create raised beds
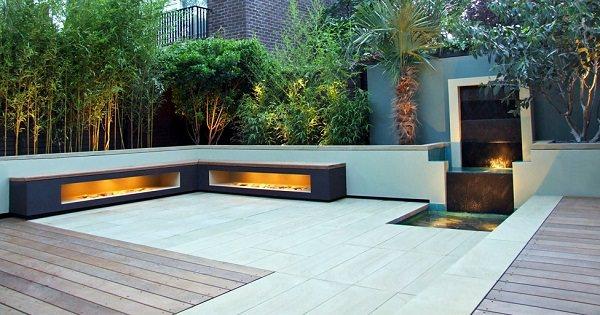
If your roof supports, creating raised beds adjacent to the walls is a good idea. You can add wooden raised beds or the ones that are made from metal. If you like, you can also construct the concrete raised beds– 2 feet deep and wide would be a great size, in them you can even grow tall shrubs and small trees and with the regular maintenance, pruning, and root trimming in every few years you can control the plants.
For these raised beds ensure you use waterproofing membrane and lay a thick root barrier that can block roots and prevent damage to the roof. One more idea is to make slightly elevated raised beds from the surface that way the raised beds do not touch the surface and roots of the plants may not be able to penetrate.
4. Plant carefully
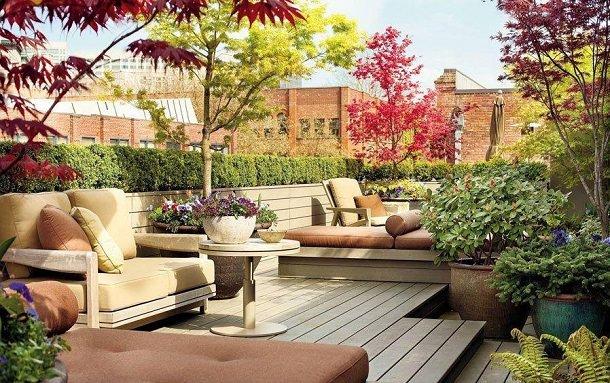
When it comes to rooftop garden design, ensure you maintain the diversity in the size of the plants. A few large plants, shrubs and small trees, ground covers, annuals must be there. Also, buy containers of different sizes this will give a great look to your rooftop garden.
5. Furniture


Decide in advance what kind of furniture you would like to purchase. Would you like to lounge on the roof terrace or want to have a dinner there? You must make a choice in the initial stage. Furniture that fit the style and theme of your garden would be appropriate.
6. Add a focal point

A focal point attracts the eyes toward it. Anything can be a focal point that draws attention. A water feature, tall tree, beautiful arrangement of container plants, a statue etc.
7. Do lighting

During the evening, it is important that your rooftop garden is well-lit. Especially near the stairwell or door, it’s nice to make more bright spots. Moreover, lighting a roof will make it look larger during dusk.
8. Use no more than three colors
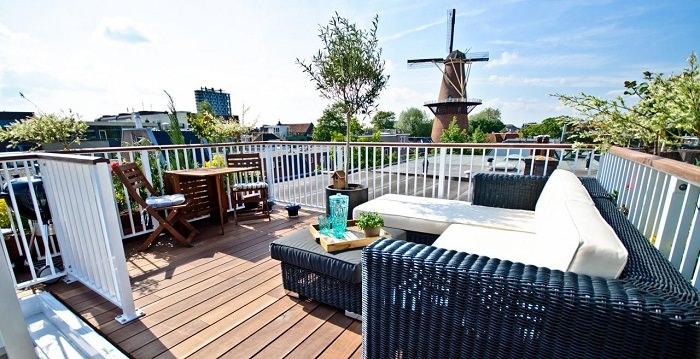
Always choose one color as an accent color and one or two more colors that’ll follow it. Using several different colors for walls, floor, railings, furniture or containers will make your rooftop look too busy and cluttered. A color combined with a neutral color works best. Neutral colors like white, gray, beige, indigo also accentuate the beauty of plants.
9. Utilize vertical space

Utilize vertical space to add more space to your rooftop garden, hang planters on the walls, use railing planters and grow a lot of climbers.
10. Nice floor is important

Don’t avoid the flooring. Choose flooring type that fits your budget, suits the climate you live in and accommodate the theme of the rooftop garden.
11. Play with colors and plant types

Use cool colors and warm colors in balance to get a beautiful look. On a well planned urban rooftop garden, everything is possible. Grow trees, shrubs, foliage plant and annuals for a burst of color.
In densely populated urban areas of the cities even having a small rooftop or patio is such a boon. You can create a garden there. You can sit there and enjoy.
Surely you may have many plans about your rooftop garden design and style but considering these tips will be helpful too.
Rooftop Garden Design Ideas and Tips
We have some great terrace garden design ideas and essential tips that you can use for inspiration on your rooftop.
1. Keep it open

A small rooftop if kept open looks big. Consider, for example, transparent glass instead of a parapet wall; fences, railing or even you can create a hedge around the border. However, if you are concerned about the privacy and would like to block the constantly prying eyes of the neighbors, avoid this tip.
2. Grow tall plants and trees

If you have a large rooftop or have a bad view from there or if you want to get a real garden like feel do little high vegetation around the walls to maximize greenery and confine yourself from the rest of the city. Growing bamboos and grasses is a good combination if you want to make it low maintenance, otherwise, your options are unlimited, grow shrubs and trees.
3. Create raised beds

If your roof supports, creating raised beds adjacent to the walls is a good idea. You can add wooden raised beds or the ones that are made from metal. If you like, you can also construct the concrete raised beds– 2 feet deep and wide would be a great size, in them you can even grow tall shrubs and small trees and with the regular maintenance, pruning, and root trimming in every few years you can control the plants.
For these raised beds ensure you use waterproofing membrane and lay a thick root barrier that can block roots and prevent damage to the roof. One more idea is to make slightly elevated raised beds from the surface that way the raised beds do not touch the surface and roots of the plants may not be able to penetrate.
4. Plant carefully

When it comes to rooftop garden design, ensure you maintain the diversity in the size of the plants. A few large plants, shrubs and small trees, ground covers, annuals must be there. Also, buy containers of different sizes this will give a great look to your rooftop garden.
5. Furniture


Decide in advance what kind of furniture you would like to purchase. Would you like to lounge on the roof terrace or want to have a dinner there? You must make a choice in the initial stage. Furniture that fit the style and theme of your garden would be appropriate.
6. Add a focal point

A focal point attracts the eyes toward it. Anything can be a focal point that draws attention. A water feature, tall tree, beautiful arrangement of container plants, a statue etc.
7. Do lighting

During the evening, it is important that your rooftop garden is well-lit. Especially near the stairwell or door, it’s nice to make more bright spots. Moreover, lighting a roof will make it look larger during dusk.
8. Use no more than three colors

Always choose one color as an accent color and one or two more colors that’ll follow it. Using several different colors for walls, floor, railings, furniture or containers will make your rooftop look too busy and cluttered. A color combined with a neutral color works best. Neutral colors like white, gray, beige, indigo also accentuate the beauty of plants.
9. Utilize vertical space

Utilize vertical space to add more space to your rooftop garden, hang planters on the walls, use railing planters and grow a lot of climbers.
10. Nice floor is important

Don’t avoid the flooring. Choose flooring type that fits your budget, suits the climate you live in and accommodate the theme of the rooftop garden.
11. Play with colors and plant types

Use cool colors and warm colors in balance to get a beautiful look. On a well planned urban rooftop garden, everything is possible. Grow trees, shrubs, foliage plant and annuals for a burst of color.
0
1
文章
lenny
2017年05月23日

If you have a limited space and you want to create a small rose garden there then growing roses in containers is the best option for you.

Blooming roses are among the most beautiful ornamental plants that can be grown in the garden. It is hardly surprising that many rose lovers that have limited space also desire to grow them. Fortunately, growing roses in containers on a balcony, patio or terrace is possible, this way you can create a small rose garden. Except large variety of roses, you can grow all type of roses in containers.
Choose Roses Wisely
Roses are one of the most diverse plants on our planet. There are 14, 000 varieties of roses of which some can withstand the – 40 F extreme cold temperature then there are some rose varieties suitable for tropics that bear up to 110 F and still blooms. Choose roses wisely, according to your climate.
You should also consider the space you have, decide whether you want to grow a small rose garden or just a few roses.
Type of Roses to Consider
Miniature Roses
Miniature Roses are comparatively easy to grow than all other rose types, they are simply the mini version of large roses and are ideal balcony roses, and good for roofs and patios. You can also grow them in hanging baskets and railing planters. On a balcony, you can also grow miniature climbing roses such as red cascade, to use up your vertical space. Miniature Roses produces small flowers of about 1”-2” inch size in red, yellow, pink, white, peach, orange and many other colors. Generally, the bushes grow to no more than 18 inches in height.
Hybrid Teas
If you like large roses, grow hybrid tea roses. They flower less but phenomenal. One flower on a long, straight and upright stem. Hybrid Tea Roses can be as tall as 6 feet. Each bloom can be up to 5″ in diameter. Hybrid Tea Roses are one of the world’s most popular types of roses due to their color and large blooms.
Floribunda
Floribunda roses produce a cluster of flowers on top of each stem, their blooms are smaller in compare to tea roses. These roses can grow up to 3 feet tall.
Patio Roses
Patio roses are undemanding small bushes, which grows between 18 to 24 inches tall. They have a compact growing habit and thrive well in containers.
To learn more about rose varieties for containers read this post.

Roses Must have Suitable Containers
The size of the container should be medium to large to grow rose bushes. Larger varieties require extensive, deep pot with a minimum diameter of 40 cm, with large drainage holes in the bottom. On the other hand, low growing, medium to small sized roses can be grown in containers with a diameter of 25 – 30 cm.
Don’t overlook the look of containers, potted rose plants look more beautiful if you choose a handsome container for them.
While choosing container look at their bottom for drainage holes, good drainage is essential for roses. If there is insufficient drainage, make some holes.
When and How to Plant Roses to Make a Small Rose Garden
Best time for planting roses is spring to early summer. After purchasing roses transplant them as soon as possible to new, larger pots as they usually are sold in very small containers.
For the USDA zones 9 – 11 and other subtropical and tropical parts, rose can be planted from any time between fall (autumn) to winter.
If you have bought bare root roses you should keep their roots submerged for an hour or two in the water, making them absorb the moisture, this will make them easier to adopt in a new place.
Then put on damp root ball of your rose plant into the pot. While planting, ensure that rose placed in soil just deep as it used to grow in the previous pot.
Water well the freshly planted roses and for a few days place them in a sheltered place that receives only a few hours of morning sun, later on, move the containers to the position that is sufficiently bright and receives the sun at least for 7 hours as no roses, in the long run, can tolerate shade.
Throughout the season, roses in containers should be watered deeply and moderately because they do not tolerate desiccation.
After about 2 to 3 weeks of planting, roses are ready to be fertilized. One thing you should know that roses are heavy feeders. Fertilize roses using the special rose mix fertilizer, which you can buy from a garden center, you can also fertilize them with any all-purpose fertilizer. Application of manure and compost also helps the rose plants.
Overwintering Roses
The main advantage of growing plants on a balcony is that it remains comparatively warmer than regular gardens. Still you should do some things to warm the pots and plants, do heavy mulching with organic matter and protect them from the cool air.
In very low temperatures in winters, keep your potted roses indoors.
For tropics it is opposite, you’ll need to care roses in summer. Cool weather varieties will die itself, so grow rose varieties that are suitable for tropics and save them from scorching the sun when it is overheadTips

Except North facing, you can grow roses on every type of balcony.
If you want to grow roses on South facing balcony, protect them from afternoon sun (especially in warm climates)
Every spring or in the beginning of growing season replace the potting soil or at least replace the top layer with compost or manure.
Always cut the faded flowers, this stimulates the growth of new buds.
Read more on rose care tips

Blooming roses are among the most beautiful ornamental plants that can be grown in the garden. It is hardly surprising that many rose lovers that have limited space also desire to grow them. Fortunately, growing roses in containers on a balcony, patio or terrace is possible, this way you can create a small rose garden. Except large variety of roses, you can grow all type of roses in containers.
Choose Roses Wisely
Roses are one of the most diverse plants on our planet. There are 14, 000 varieties of roses of which some can withstand the – 40 F extreme cold temperature then there are some rose varieties suitable for tropics that bear up to 110 F and still blooms. Choose roses wisely, according to your climate.
You should also consider the space you have, decide whether you want to grow a small rose garden or just a few roses.
Type of Roses to Consider

Miniature Roses
Miniature Roses are comparatively easy to grow than all other rose types, they are simply the mini version of large roses and are ideal balcony roses, and good for roofs and patios. You can also grow them in hanging baskets and railing planters. On a balcony, you can also grow miniature climbing roses such as red cascade, to use up your vertical space. Miniature Roses produces small flowers of about 1”-2” inch size in red, yellow, pink, white, peach, orange and many other colors. Generally, the bushes grow to no more than 18 inches in height.
Hybrid Teas
If you like large roses, grow hybrid tea roses. They flower less but phenomenal. One flower on a long, straight and upright stem. Hybrid Tea Roses can be as tall as 6 feet. Each bloom can be up to 5″ in diameter. Hybrid Tea Roses are one of the world’s most popular types of roses due to their color and large blooms.
Floribunda
Floribunda roses produce a cluster of flowers on top of each stem, their blooms are smaller in compare to tea roses. These roses can grow up to 3 feet tall.
Patio Roses
Patio roses are undemanding small bushes, which grows between 18 to 24 inches tall. They have a compact growing habit and thrive well in containers.
To learn more about rose varieties for containers read this post.

Roses Must have Suitable Containers
The size of the container should be medium to large to grow rose bushes. Larger varieties require extensive, deep pot with a minimum diameter of 40 cm, with large drainage holes in the bottom. On the other hand, low growing, medium to small sized roses can be grown in containers with a diameter of 25 – 30 cm.
Don’t overlook the look of containers, potted rose plants look more beautiful if you choose a handsome container for them.
While choosing container look at their bottom for drainage holes, good drainage is essential for roses. If there is insufficient drainage, make some holes.
When and How to Plant Roses to Make a Small Rose Garden
Best time for planting roses is spring to early summer. After purchasing roses transplant them as soon as possible to new, larger pots as they usually are sold in very small containers.
For the USDA zones 9 – 11 and other subtropical and tropical parts, rose can be planted from any time between fall (autumn) to winter.
If you have bought bare root roses you should keep their roots submerged for an hour or two in the water, making them absorb the moisture, this will make them easier to adopt in a new place.
Then put on damp root ball of your rose plant into the pot. While planting, ensure that rose placed in soil just deep as it used to grow in the previous pot.
Water well the freshly planted roses and for a few days place them in a sheltered place that receives only a few hours of morning sun, later on, move the containers to the position that is sufficiently bright and receives the sun at least for 7 hours as no roses, in the long run, can tolerate shade.
Throughout the season, roses in containers should be watered deeply and moderately because they do not tolerate desiccation.
After about 2 to 3 weeks of planting, roses are ready to be fertilized. One thing you should know that roses are heavy feeders. Fertilize roses using the special rose mix fertilizer, which you can buy from a garden center, you can also fertilize them with any all-purpose fertilizer. Application of manure and compost also helps the rose plants.
Overwintering Roses
The main advantage of growing plants on a balcony is that it remains comparatively warmer than regular gardens. Still you should do some things to warm the pots and plants, do heavy mulching with organic matter and protect them from the cool air.
In very low temperatures in winters, keep your potted roses indoors.
For tropics it is opposite, you’ll need to care roses in summer. Cool weather varieties will die itself, so grow rose varieties that are suitable for tropics and save them from scorching the sun when it is overheadTips

Except North facing, you can grow roses on every type of balcony.
If you want to grow roses on South facing balcony, protect them from afternoon sun (especially in warm climates)
Every spring or in the beginning of growing season replace the potting soil or at least replace the top layer with compost or manure.
Always cut the faded flowers, this stimulates the growth of new buds.
Read more on rose care tips
3
0
文章
Selina
2017年05月23日

When designing a container garden there are a few container garden design tips that must be followed to have a beautiful container garden in a limited space.
If you have a container garden, the chances are that it may be a collection of plants than a garden. But if you arrange and organize your container garden rightly, you can create an interesting garden like look and relaxing space in your home.
Container Garden Design Tips1.

When designing a container garden, plant a beautiful shrub or tree in a large unusual or artistic container and place it in a prominent spot in the container garden as a focal point. Plant a low growing plant on its base to create a more alluring effect or leave it alone for dramatic appeal.
2.

Group plants according to their height to create a garden like surrounding effect. To do this, place tall plants and trees in the back and short and low growing plants in front.
3.

Vary plant height with plant stands, or put pots and empty buckets upside down to use as makeshift bases. Create more interest by increasing the number of pots. Place large and heavy pots directly on the ground.
4.

Use pedestal pots or pedestal stands to draw attention to the interesting foliage plants or delicate flowers that might otherwise be overlooked.
5.

Disguise ugly pots and plant stands by placing containers in front of them. This will also create the illusion that the plants are larger than they actually are.
6.

Keep healthy and disease free plants towards the front to create an effect of lush green and colorful container garden.
7.

Plant several plant in a large container instead of planting in many small containers. This will make your container garden more organized and uncluttered. However, don’t buy all the pots of the same size.
8.

Plant hedging and tall plants like bamboo and conifers or grasses in the sides of the container garden to hide view from neighbors. This way you’ll be able to create a more private space and your container garden will look bigger too.
9.

Mix up sculptural plants with plants that have different shapes of leaves to draw attention.
10.

Enhance and beautify the look of pots by matching them with contrasting flowers and foliage plants.
11.

Use spiller, filler, and thriller technique to make beautiful combinations.
If you have a container garden, the chances are that it may be a collection of plants than a garden. But if you arrange and organize your container garden rightly, you can create an interesting garden like look and relaxing space in your home.
Container Garden Design Tips1.

When designing a container garden, plant a beautiful shrub or tree in a large unusual or artistic container and place it in a prominent spot in the container garden as a focal point. Plant a low growing plant on its base to create a more alluring effect or leave it alone for dramatic appeal.
2.

Group plants according to their height to create a garden like surrounding effect. To do this, place tall plants and trees in the back and short and low growing plants in front.
3.

Vary plant height with plant stands, or put pots and empty buckets upside down to use as makeshift bases. Create more interest by increasing the number of pots. Place large and heavy pots directly on the ground.
4.

Use pedestal pots or pedestal stands to draw attention to the interesting foliage plants or delicate flowers that might otherwise be overlooked.
5.

Disguise ugly pots and plant stands by placing containers in front of them. This will also create the illusion that the plants are larger than they actually are.
6.

Keep healthy and disease free plants towards the front to create an effect of lush green and colorful container garden.
7.

Plant several plant in a large container instead of planting in many small containers. This will make your container garden more organized and uncluttered. However, don’t buy all the pots of the same size.
8.

Plant hedging and tall plants like bamboo and conifers or grasses in the sides of the container garden to hide view from neighbors. This way you’ll be able to create a more private space and your container garden will look bigger too.
9.

Mix up sculptural plants with plants that have different shapes of leaves to draw attention.
10.

Enhance and beautify the look of pots by matching them with contrasting flowers and foliage plants.
11.

Use spiller, filler, and thriller technique to make beautiful combinations.
1
0


