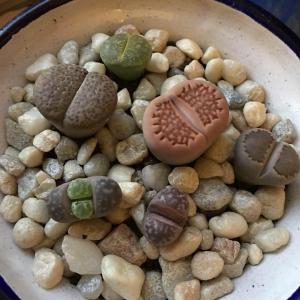
文章
Miss Chen
2017年11月04日

Both blueberries and black currants are small, dark-colored berries that grow in dense clusters on the branches of their bushes. The similarities end there, however -- the two types of plants are quite different in both their growth preferences and the flavor of their berries.

Blueberry Types and Growth Habits
Blueberries (Vaccinium spp.) are deciduous shrubs that produce clusters of small purple-blue berries in the summer. The sweet berries are highly desirable as a fresh fruit, and are a favorite food of wildlife.
The size of the bushes varies depending on the species. Full-sized bushes, called highbush blueberries, may grow as high as 5 feet with a similar spread, and some varieties of heat-loving rabbiteye blueberries may grow to twice that height. Low-growing species, called lowbush blueberries, tend to hug the ground and may get no taller than a foot or two. Hybrids of lowbush and highbush types, called half-high bushes, grow to somewhere in between and have been developed largely for their cold tolerance.
Black Currant Types and Growth Habits
The European black currant (Ribes nigrum) is a deciduous shrub that reaches a height of about 6 feet. American black currant (Ribes americanum), also sometimes called wild black currant, is a low-growing shrub that generally grows to between 3 and 6 feet in height; it is native to North America and is considered an invasive weed in some areas.
Both species produce small, purple-black berries in the summer. The flavor of the berries is significantly more tart than that of blueberries, and black currants are more often used in jams and jellies than they are eaten fresh.
Soil Preferences
Blueberries' need for acidic soil is one of the plant's defining characteristics; blueberries simply will not flourish or produce well unless they're grown in soil with a pH level between 4 and 5. Black currants, by contrast, don't like acidic soil and do best when the soil pH is near neutral, with a level between 6.7 and 7. However, both plants like well-drained soil that's rich in organic matter. Blueberries are especially intolerant of excessive moisture, and their shallow root systems are easily damaged by standing water.

Winter Hardiness
European black currants are winter hardy in U.S. Department of Agriculture plant hardiness zones 4 to 8; wild black currants are hardy in USDA zones 3 to 6. The bushes can withstand winter cold in these zones, but their flowers may be damaged by freezing temperatures in the spring. Highbush blueberries (Vaccinium corymbosum) are somewhat more sensitive to cold and more tolerant of heat; they are hardy in USDA zones 5 to 9. Lowbush blueberries (Vaccinium angustifolium) are, in general, more cold hardy; some varieties are hardy in USDA zones 2 to 8. Rabbiteye blueberries (Vaccinium ashei) are the least cold tolerant of the blueberry species -- they can handle winters only in USDA zones 8 to 10.

Blueberry Types and Growth Habits
Blueberries (Vaccinium spp.) are deciduous shrubs that produce clusters of small purple-blue berries in the summer. The sweet berries are highly desirable as a fresh fruit, and are a favorite food of wildlife.
The size of the bushes varies depending on the species. Full-sized bushes, called highbush blueberries, may grow as high as 5 feet with a similar spread, and some varieties of heat-loving rabbiteye blueberries may grow to twice that height. Low-growing species, called lowbush blueberries, tend to hug the ground and may get no taller than a foot or two. Hybrids of lowbush and highbush types, called half-high bushes, grow to somewhere in between and have been developed largely for their cold tolerance.
Black Currant Types and Growth Habits
The European black currant (Ribes nigrum) is a deciduous shrub that reaches a height of about 6 feet. American black currant (Ribes americanum), also sometimes called wild black currant, is a low-growing shrub that generally grows to between 3 and 6 feet in height; it is native to North America and is considered an invasive weed in some areas.
Both species produce small, purple-black berries in the summer. The flavor of the berries is significantly more tart than that of blueberries, and black currants are more often used in jams and jellies than they are eaten fresh.
Soil Preferences
Blueberries' need for acidic soil is one of the plant's defining characteristics; blueberries simply will not flourish or produce well unless they're grown in soil with a pH level between 4 and 5. Black currants, by contrast, don't like acidic soil and do best when the soil pH is near neutral, with a level between 6.7 and 7. However, both plants like well-drained soil that's rich in organic matter. Blueberries are especially intolerant of excessive moisture, and their shallow root systems are easily damaged by standing water.

Winter Hardiness
European black currants are winter hardy in U.S. Department of Agriculture plant hardiness zones 4 to 8; wild black currants are hardy in USDA zones 3 to 6. The bushes can withstand winter cold in these zones, but their flowers may be damaged by freezing temperatures in the spring. Highbush blueberries (Vaccinium corymbosum) are somewhat more sensitive to cold and more tolerant of heat; they are hardy in USDA zones 5 to 9. Lowbush blueberries (Vaccinium angustifolium) are, in general, more cold hardy; some varieties are hardy in USDA zones 2 to 8. Rabbiteye blueberries (Vaccinium ashei) are the least cold tolerant of the blueberry species -- they can handle winters only in USDA zones 8 to 10.
0
0
文章
Miss Chen
2017年11月02日

Strawberries require moist, warm soils for optimum growth, factors controlled most easily in a container. However, container-grown strawberries can tangle and overgrow themselves, causing rot and an unevenly ripe crop. You can solve this problem without purchasing trellises or fancy planting systems. All you need is some PVC pipe to build an original strawberry planter.

Step 1
Clean your PVC pipe with mild soap and clean water. Rinse it thoroughly. This eliminates dirt and grime that might harm your strawberries if absorbed. The length of the pipe may be from 2 to 8 feet; this depends on your space restrictions. Hardware stores will cut the pipe for you at no extra cost.
Step 2
Place the pipe on a flat surface. Drill 4-inch holes in the pipe with your boring bit, spacing them about 6 inches apart. In a 12-inch pipe, you'll only get two holes. In an 8-foot pipe, you may have up to 16 holes.
Step 3
Drill one 2-inch hole between each of the 4-inch holes. These holes will allow you to water your plants and give excess water a place to evaporate.
Step 4
Run a bead of silicone caulk around one end of the pipe. Press a pipe cap into place. Let the caulk dry overnight. Do not cap the other end yet.

Step 5
Pour potting soil into your pipe until it's half full when lying on its side, with the holes facing up. Fit the cap on the other end; don't seal it, so you can empty the planter if necessary.
Step 6
Gently place one strawberry seedling in each hole. Cover the roots with soil through its planting hole.
Step 7
Screw two lantern-style L-brackets into a porch wall with steel screws. These brackets have a slight curve in the top arm, perfect for holding your pipe planter. Set the planter on the brackets.

Step 1
Clean your PVC pipe with mild soap and clean water. Rinse it thoroughly. This eliminates dirt and grime that might harm your strawberries if absorbed. The length of the pipe may be from 2 to 8 feet; this depends on your space restrictions. Hardware stores will cut the pipe for you at no extra cost.
Step 2
Place the pipe on a flat surface. Drill 4-inch holes in the pipe with your boring bit, spacing them about 6 inches apart. In a 12-inch pipe, you'll only get two holes. In an 8-foot pipe, you may have up to 16 holes.
Step 3
Drill one 2-inch hole between each of the 4-inch holes. These holes will allow you to water your plants and give excess water a place to evaporate.
Step 4
Run a bead of silicone caulk around one end of the pipe. Press a pipe cap into place. Let the caulk dry overnight. Do not cap the other end yet.

Step 5
Pour potting soil into your pipe until it's half full when lying on its side, with the holes facing up. Fit the cap on the other end; don't seal it, so you can empty the planter if necessary.
Step 6
Gently place one strawberry seedling in each hole. Cover the roots with soil through its planting hole.
Step 7
Screw two lantern-style L-brackets into a porch wall with steel screws. These brackets have a slight curve in the top arm, perfect for holding your pipe planter. Set the planter on the brackets.
0
0
成长记
astronbot
2017年11月02日

I got perlite at home depot and repotted this lil guy!! (ive just been using regular cactus soil and it doesn't drain well) I'm watering him from the bottom this time, I heard it encourages deep root growth?


2
1
astronbot:@meriunkat thank you!!! he's one of my faves
meriunkat:So cute!
文章
Miss Chen
2017年10月30日

Pruning is a crucial aspect of grapevine cultivation, affecting overall vine balance. Extensive pruning takes place mid to late winter after grapevines enter winter dormancy to encourage productivity and direct vine canopy and bud growth during the growing season. Bare, exposed canes signal the dormancy of the vine. Removing old wood to make room for new fruiting wood is the primary purpose for heavily pruning grape vines.

Timing and Temperature
Because only shoots growing from 1-year-old canes produce fruit, healthy new canes must be produced every year to maintain annual production of fruit. A pruning practice that facilitates the production of fruiting wood involves removing all of the previous year's fruiting canes or spurs (now 2 years old) and any excess 1-year-old canes. From January through early March, grape growers should remove about 90 percent of wood growth from the previous growing season — with the exception of new 1-year-old fruiting canes and renewal spurs (new trunks), according to Oregon State University's Department of Horticulture. Pruning in the fall may increase vine susceptibility to freeze injury during winter. Optimal timing for pruning occurs when winter's coldest temperatures have likely passed and when temperatures consistently maintain levels above freezing.
Age Considerations
Cut back to two or three buds, a first-year vine should grow several shoots, promoting abundant leaf growth on the vine to permit the formation of a strong root system. The second year, remove flower clusters from the young vine as they form throughout the growing season. Implement typical pruning practices during the vine's third winter and allow fruit to develop during the following growing season. Old, neglected vines should undergo severe pruning in stages to minimize shock to the plant, removing dead and diseased wood first, continuing at intervals to remove old wood while leaving the new, 1-year-old wood growth.

Spring Pruning
In regions where risk of injury to the vine from severe winter weather exists, postpone heavy pruning until early spring. According to Cornell University, delay pruning through the winter months as long as feasible to reduce the danger of cold injury. If extremely cold temperatures do not occur in December, January and February, the danger of vine injury from cold is reduced. March may still produce damaging temperatures, but avoiding injury is more likely. Cornell University recommends examining the buds and proceeding on the basis of actual injury when the possibility of cold and freeze damage to grape vines exist, allowing you to compensate for actual injury losses.
Fruit Thinning
Fruit thinning is a type of pruning that is often necessary during the growing season to control excessive fruit production by permitting no more than one fruit cluster for each rapidly growing shoot. Fruit thinning ensures maximum quality and ripening, and its effectiveness depends on targeting new growth as early as possible throughout the growing season. During summer bloom, remove small or imperfect flower clusters at their first appearance to promote growth of large clusters of large grapes.

Timing and Temperature
Because only shoots growing from 1-year-old canes produce fruit, healthy new canes must be produced every year to maintain annual production of fruit. A pruning practice that facilitates the production of fruiting wood involves removing all of the previous year's fruiting canes or spurs (now 2 years old) and any excess 1-year-old canes. From January through early March, grape growers should remove about 90 percent of wood growth from the previous growing season — with the exception of new 1-year-old fruiting canes and renewal spurs (new trunks), according to Oregon State University's Department of Horticulture. Pruning in the fall may increase vine susceptibility to freeze injury during winter. Optimal timing for pruning occurs when winter's coldest temperatures have likely passed and when temperatures consistently maintain levels above freezing.
Age Considerations
Cut back to two or three buds, a first-year vine should grow several shoots, promoting abundant leaf growth on the vine to permit the formation of a strong root system. The second year, remove flower clusters from the young vine as they form throughout the growing season. Implement typical pruning practices during the vine's third winter and allow fruit to develop during the following growing season. Old, neglected vines should undergo severe pruning in stages to minimize shock to the plant, removing dead and diseased wood first, continuing at intervals to remove old wood while leaving the new, 1-year-old wood growth.

Spring Pruning
In regions where risk of injury to the vine from severe winter weather exists, postpone heavy pruning until early spring. According to Cornell University, delay pruning through the winter months as long as feasible to reduce the danger of cold injury. If extremely cold temperatures do not occur in December, January and February, the danger of vine injury from cold is reduced. March may still produce damaging temperatures, but avoiding injury is more likely. Cornell University recommends examining the buds and proceeding on the basis of actual injury when the possibility of cold and freeze damage to grape vines exist, allowing you to compensate for actual injury losses.
Fruit Thinning
Fruit thinning is a type of pruning that is often necessary during the growing season to control excessive fruit production by permitting no more than one fruit cluster for each rapidly growing shoot. Fruit thinning ensures maximum quality and ripening, and its effectiveness depends on targeting new growth as early as possible throughout the growing season. During summer bloom, remove small or imperfect flower clusters at their first appearance to promote growth of large clusters of large grapes.
0
0
文章
Miss Chen
2017年10月28日

Strawberry plants grow low to the ground and produce runners. They self-propagate through "daughter" plants. Self-propagation assures several years of continued growth, with three to five years of continued fruit production. Like all perennials, though, strawberry plants need specific fall and winter 
Preparation
Successful strawberry patches begin with the right planting area and soil for long-term success -- and also makes protecting the plants during the winter an easier task. Plant strawberries to receive full sunshine and quick drainage all year to keep them healthy in both summer and winter. Use a generous amount of organic compost at planting to maintain soil quality, and keep the soil from flooding or freezing in fall and winter.
Renovation
According to Purdue University, strawberry patches require yearly renovation in the fall to continue efficient growth and fruit production. Renovate your strawberry patch in late summer or fall, depending on the strawberry cultivar. Always start immediately after the last fruit harvest. This renovation eliminates old, finished plants and encourages new growth.
Process
Give the strawberries 12-12-12 fertilizer at a rate of 4 to 6 lbs. per 100 feet of row. Mix the fertilizer into the top 2 inches of soil to encourage new runner development. Mow all foliage down to within 1 inch of the soil, and pull up excess growth to narrow the rows to 6 to 8 inches. Cover the rows with 1/2 inch of soil and water as usual, to allow for new growth.

Winter Protection
Mulching and winter protection must follow renovation, to protect strawberries through the cold season. When new plants emerge from your renovated soil, water and weed them as usual until two to three weeks before the first frost of the season. At that time, give the new plants 12-12-12 fertilizer per manufacturer directions, then spread 4 to 5 inches of organic mulch, straw or shredded paper over the path. Maintain this layer through winter and turn it into the soil in spring.

Preparation
Successful strawberry patches begin with the right planting area and soil for long-term success -- and also makes protecting the plants during the winter an easier task. Plant strawberries to receive full sunshine and quick drainage all year to keep them healthy in both summer and winter. Use a generous amount of organic compost at planting to maintain soil quality, and keep the soil from flooding or freezing in fall and winter.
Renovation
According to Purdue University, strawberry patches require yearly renovation in the fall to continue efficient growth and fruit production. Renovate your strawberry patch in late summer or fall, depending on the strawberry cultivar. Always start immediately after the last fruit harvest. This renovation eliminates old, finished plants and encourages new growth.
Process
Give the strawberries 12-12-12 fertilizer at a rate of 4 to 6 lbs. per 100 feet of row. Mix the fertilizer into the top 2 inches of soil to encourage new runner development. Mow all foliage down to within 1 inch of the soil, and pull up excess growth to narrow the rows to 6 to 8 inches. Cover the rows with 1/2 inch of soil and water as usual, to allow for new growth.

Winter Protection
Mulching and winter protection must follow renovation, to protect strawberries through the cold season. When new plants emerge from your renovated soil, water and weed them as usual until two to three weeks before the first frost of the season. At that time, give the new plants 12-12-12 fertilizer per manufacturer directions, then spread 4 to 5 inches of organic mulch, straw or shredded paper over the path. Maintain this layer through winter and turn it into the soil in spring.
0
0
文章
Miss Chen
2017年10月27日

While you eagerly wait for the first bite out of one of your homegrown tomatoes (Lycopersicon esculentum), you might be dismayed to notice unsightly fungal growth on your plants. Before blasting the foliage with potentially harmful chemicals, try using a simple baking soda spray. The organic spray is easy to mix and could be just what you need to protect your tomato crop from nasty fungi.

Why It Works
Baking soda contains sodium bicarbonate, a substance that can help naturally control various tomato fungal diseases, including anthracnose, leaf spots, early tomato blight and powdery mildew. Baking soda doesn't actually kill the fungi, however. Instead, the sodium bicarbonate alters the pH balance of the foliage so the fungal spores can't germinate and grow. Because of this, baking soda works well as a preventative fungicide, but it doesn't spread easily or adhere well to foliage. Adding horticultural oil or dish soap to the spray gives it some sticking and spreading action. Oils can also help eradicate fungal spores already infecting your tomato plants.
Spray Recipes
Baking soda sprays are easy to make, and you can mix them up right inside of your garden sprayer. The Master Gardeners of Santa Clara County recommend combining 5 tablespoons of horticultural oil with 2 gallons of water. After mixing thoroughly, add 8 teaspoons of baking soda to the solution, and stir until the powder completely dissolves.
Another recipe recommended by Mike McGrath, host of "You Bet Your Garden" on WHYY, calls for adding liquid dish soap to the mixture, but use a natural soap with no bleach, fragrance or other additives. Simply mix 2 tablespoons of baking soda, 2 tablespoons of horticultural oil and about 4 drops of dish soap into 2 gallons of water. Shake well and start spraying your tomato plants.

Spraying Tomatoes
To prevent fungal diseases, apply baking soda sprays to tomato plants every seven to 14 days until the humidity levels no longer promote infections. Plants already infected need to be sprayed as often as every five to seven days until the disease symptoms clear up. Before spraying already infected tomatoes, remove infected foliage and any mulch surrounding the plants. Then give your tomatoes a strong blast of water from a garden hose to help loosen up the fungal spores. Apply the baking soda solution to the buds, fruit and plant foliage, making sure you evenly coat the tops and undersides of leaves until the solution drips from the foliage.
You can use baking soda sprays up until the day before harvest, but allow the spray to dry for one to four hours before re-entering the treatment area. Avoid spraying plants in direct sunlight or when temperatures reach higher than 80 degrees Fahrenheit, or you risk burning the foliage. Spray in the early morning or evening hours when it's cooler. Reapply baking soda sprays after heavy rainfall.
Words of Caution
Although nontoxic, baking soda sprays can still burn plant foliage. Test the solution on a small section of leaves, and wait at least 24 hours before inspecting for damage. If no burning occurs, spray your entire plant. Baking soda can accumulate in the soil, which often strips the soil of magnesium and calcium while making plants less able to absorb iron. This can cause your tomato plants to experience yellowing leaves or slow growth. Avoid using baking soda sprays more often then once every 14 days when trying to prevent plant fungal infections. When working with the fungicidal spray, protect your skin and eyes by putting on safety glasses, a face mask, long sleeves and pants.
Recognizing Fungal Diseases
Most common tomato fungal diseases thrive when humidity levels are high and temperatures fall between 60 and 80 degrees Fahrenheit. Powdery mildew causes white to light gray spots to form on leaves. Those spots quickly spread and cover tops and undersides of leaves with a white, talcum powderlike substance. Anthracnose fruit rot causes round, water-soaked circles about 1/4 inch in diameter to form on ripening fruit. Early tomato blight can infect fruit, leaves and stems. On leaves, it initially shows up as brown to black spots that grow into a target pattern. Infected leaves can turn yellow and fall from the plant. Fruit infections form a target pattern on immature tomatoes, while stem infections appear as gray sores with dark borders. Septoria leaf spot affects stems and leaves, appearing as small spots with light centers and deep brown margins. The foliage surrounding the spots eventually yellows, and the entire affected leaf dies.

Why It Works
Baking soda contains sodium bicarbonate, a substance that can help naturally control various tomato fungal diseases, including anthracnose, leaf spots, early tomato blight and powdery mildew. Baking soda doesn't actually kill the fungi, however. Instead, the sodium bicarbonate alters the pH balance of the foliage so the fungal spores can't germinate and grow. Because of this, baking soda works well as a preventative fungicide, but it doesn't spread easily or adhere well to foliage. Adding horticultural oil or dish soap to the spray gives it some sticking and spreading action. Oils can also help eradicate fungal spores already infecting your tomato plants.
Spray Recipes
Baking soda sprays are easy to make, and you can mix them up right inside of your garden sprayer. The Master Gardeners of Santa Clara County recommend combining 5 tablespoons of horticultural oil with 2 gallons of water. After mixing thoroughly, add 8 teaspoons of baking soda to the solution, and stir until the powder completely dissolves.
Another recipe recommended by Mike McGrath, host of "You Bet Your Garden" on WHYY, calls for adding liquid dish soap to the mixture, but use a natural soap with no bleach, fragrance or other additives. Simply mix 2 tablespoons of baking soda, 2 tablespoons of horticultural oil and about 4 drops of dish soap into 2 gallons of water. Shake well and start spraying your tomato plants.

Spraying Tomatoes
To prevent fungal diseases, apply baking soda sprays to tomato plants every seven to 14 days until the humidity levels no longer promote infections. Plants already infected need to be sprayed as often as every five to seven days until the disease symptoms clear up. Before spraying already infected tomatoes, remove infected foliage and any mulch surrounding the plants. Then give your tomatoes a strong blast of water from a garden hose to help loosen up the fungal spores. Apply the baking soda solution to the buds, fruit and plant foliage, making sure you evenly coat the tops and undersides of leaves until the solution drips from the foliage.
You can use baking soda sprays up until the day before harvest, but allow the spray to dry for one to four hours before re-entering the treatment area. Avoid spraying plants in direct sunlight or when temperatures reach higher than 80 degrees Fahrenheit, or you risk burning the foliage. Spray in the early morning or evening hours when it's cooler. Reapply baking soda sprays after heavy rainfall.
Words of Caution
Although nontoxic, baking soda sprays can still burn plant foliage. Test the solution on a small section of leaves, and wait at least 24 hours before inspecting for damage. If no burning occurs, spray your entire plant. Baking soda can accumulate in the soil, which often strips the soil of magnesium and calcium while making plants less able to absorb iron. This can cause your tomato plants to experience yellowing leaves or slow growth. Avoid using baking soda sprays more often then once every 14 days when trying to prevent plant fungal infections. When working with the fungicidal spray, protect your skin and eyes by putting on safety glasses, a face mask, long sleeves and pants.
Recognizing Fungal Diseases
Most common tomato fungal diseases thrive when humidity levels are high and temperatures fall between 60 and 80 degrees Fahrenheit. Powdery mildew causes white to light gray spots to form on leaves. Those spots quickly spread and cover tops and undersides of leaves with a white, talcum powderlike substance. Anthracnose fruit rot causes round, water-soaked circles about 1/4 inch in diameter to form on ripening fruit. Early tomato blight can infect fruit, leaves and stems. On leaves, it initially shows up as brown to black spots that grow into a target pattern. Infected leaves can turn yellow and fall from the plant. Fruit infections form a target pattern on immature tomatoes, while stem infections appear as gray sores with dark borders. Septoria leaf spot affects stems and leaves, appearing as small spots with light centers and deep brown margins. The foliage surrounding the spots eventually yellows, and the entire affected leaf dies.
0
0
成长记
Estefania Pereira
2017年10月10日

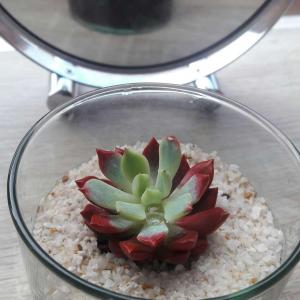
i think this is the fkower that shows the most growth, but im also seeing the red go away which goes really well with the book actually

3
1
成长记
Estefania Pereira
2017年10月10日

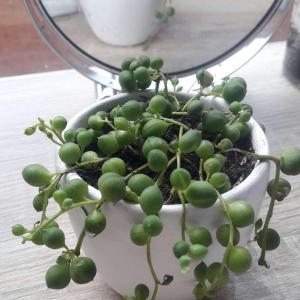
i cut every dead part of cien años and have also been watering them more, cut a piece for my mom, but im not good in noticing a growth in this one

0
0
文章
Dummer. ゛☀
2017年10月08日

There is enough diversity in the bellflower or Campanula clan to ring just about any gardener's chimes. With bell-shaped, tubular or star-shaped flowers in shades of blue, white, pink and red, they have growth habits that range from low and creeping to tall and upright. Most of the garden-worthy choices are perennials, although there are some annuals and a biennial in the genus. And all are beautiful, even the few that are such vigorous spreaders and seeders that you may need to think twice about including them in your garden.

About bellflowers
Bellflowers are hardy plants, with most types growing in Zones 4 to 8, even to zone 3 with reliable snow cover to provide insulation, but they'll sulk in the heat of the Deep South or Southwest. Peak bloom is in early to midsummer for most, but with deadheading you may get sporadic bloom throughout the summer and a second flush of flowers in fall. Bellflowers look lovely in many garden settings; their showy flowers and informal habit are the perfect fit in a cottage garden.
Special features of bellflowers
Bellflowers fall into two categories, tall, upright growers that are good choices for a border or for cutting, and low growers that work well for edging or in rock gardens.
One of the most popular uprights is Peach Leaved Bellflower (Campanula persicifolia). Tall, 15 to 30 inch spikes of 1-1.5 inch, broadly bell-shaped flowers in shades of blue, pink, white and purple rise in early summer from basal clumps of leaves. Clustered bellflower (C. glomerata) produces upwards facing heads of blossoms in purple or white in early summer on sturdy 18 inch stems. Milky bellflower (C. lactiflora), 3 to 5 feet tall, and great bellflower (C. latifolia), 4 to 5 feet tall, also both have upward-facing flowers.
Other upright growers are distinguished by their large, nodding blossoms. Spotted bellflower (C. punctata) gets about 2 feet tall and bears pink, speckled, dangling flowers from midsummer to fall. 'Cherry Bells' is a popular cultivar. The hybrid 'Sarastro' has large, deep-purple, nodding bells on a 2.5 to 3 foot tall plant.
The low spreading bellflowers look nice trailing over the tops and between the stones of a dry rock wall. In early summer, Serbian Bellflower (C. poscharskyana) spreads a wave of blue, 1-1", star-shaped flowers. Adriatic bellflower (C. garganica) and Dalmatian bellflower (C. portenschlagiana) are similar. For edging along a path, the low growing Carpathian harebell (C. carpatica) is perfect. The cultivar 'Blue Clips' bears bright blue bells on 8-12" high plants over most of the summer. Even more floriferous is the sterile hybrid 'Samantha', which is covered in violet-blue, bowl-shaped blossoms above a 6" high clump of leaves.
The biennial Canterbury bells (C. medium) is an old fashioned favorite, growing 12 to 30 inches tall and sporting boxy, bell-shaped flowers in shades of lilac, blue, pink and white. Start these plants from seed in midsummer for bloom the following year.

Choosing a site to grow bellflowers
Most bellflowers do best if planted in full sun, but will also thrive in light shade. Plant in moist, well-drained soil that is high in organic matter. Some are spreaders, especially clustered bellflower and Serbian bellflower, so plant these where they'll have some room to roam. But steer clear of the aggressive Korean bellflower (C. rapunculoides) which spreads so readily, it can become invasive.
Planting Instructions
Container plants can be set out any time during the growing season. Space most plants about a foot apart; the tall milky bellflower should have 24 inch spacing. Prepare the garden bed by using a garden fork or tiller to loosen the soil to a depth of 12 to 15 inches, then mix in a 2- to 4-inch layer of compost. Dig a hole twice the diameter of the pot the plant is in. Carefully remove the plant from its container and place it in the hole so the top of the root ball is level with the soil surface. Carefully fill in around the root ball and firm the soil gently. Water thoroughly.

Ongoing Care
Apply a complete organic fertilizer and a thin layer of compost each spring, followed by a 2-inch layer of mulch to retain moisture and control weeds. Water plants during the summer if rainfall is less than 1 inch per week. Deadhead flowers to neaten plants and prevent self-sowing. On taller types, remove faded flowers individually, then cut back the flowering stalks to the base when all bloom is finished. With low growers, wait until the first flush of bloom is past, then shear back plants by half. Peachleaf bellflower can self-sow to the point of weediness if not deadheaded. Most bellflowers benefit from division every 3 to 5 years to keep them growing vigorously.

About bellflowers
Bellflowers are hardy plants, with most types growing in Zones 4 to 8, even to zone 3 with reliable snow cover to provide insulation, but they'll sulk in the heat of the Deep South or Southwest. Peak bloom is in early to midsummer for most, but with deadheading you may get sporadic bloom throughout the summer and a second flush of flowers in fall. Bellflowers look lovely in many garden settings; their showy flowers and informal habit are the perfect fit in a cottage garden.
Special features of bellflowers
Bellflowers fall into two categories, tall, upright growers that are good choices for a border or for cutting, and low growers that work well for edging or in rock gardens.
One of the most popular uprights is Peach Leaved Bellflower (Campanula persicifolia). Tall, 15 to 30 inch spikes of 1-1.5 inch, broadly bell-shaped flowers in shades of blue, pink, white and purple rise in early summer from basal clumps of leaves. Clustered bellflower (C. glomerata) produces upwards facing heads of blossoms in purple or white in early summer on sturdy 18 inch stems. Milky bellflower (C. lactiflora), 3 to 5 feet tall, and great bellflower (C. latifolia), 4 to 5 feet tall, also both have upward-facing flowers.
Other upright growers are distinguished by their large, nodding blossoms. Spotted bellflower (C. punctata) gets about 2 feet tall and bears pink, speckled, dangling flowers from midsummer to fall. 'Cherry Bells' is a popular cultivar. The hybrid 'Sarastro' has large, deep-purple, nodding bells on a 2.5 to 3 foot tall plant.
The low spreading bellflowers look nice trailing over the tops and between the stones of a dry rock wall. In early summer, Serbian Bellflower (C. poscharskyana) spreads a wave of blue, 1-1", star-shaped flowers. Adriatic bellflower (C. garganica) and Dalmatian bellflower (C. portenschlagiana) are similar. For edging along a path, the low growing Carpathian harebell (C. carpatica) is perfect. The cultivar 'Blue Clips' bears bright blue bells on 8-12" high plants over most of the summer. Even more floriferous is the sterile hybrid 'Samantha', which is covered in violet-blue, bowl-shaped blossoms above a 6" high clump of leaves.
The biennial Canterbury bells (C. medium) is an old fashioned favorite, growing 12 to 30 inches tall and sporting boxy, bell-shaped flowers in shades of lilac, blue, pink and white. Start these plants from seed in midsummer for bloom the following year.

Choosing a site to grow bellflowers
Most bellflowers do best if planted in full sun, but will also thrive in light shade. Plant in moist, well-drained soil that is high in organic matter. Some are spreaders, especially clustered bellflower and Serbian bellflower, so plant these where they'll have some room to roam. But steer clear of the aggressive Korean bellflower (C. rapunculoides) which spreads so readily, it can become invasive.
Planting Instructions
Container plants can be set out any time during the growing season. Space most plants about a foot apart; the tall milky bellflower should have 24 inch spacing. Prepare the garden bed by using a garden fork or tiller to loosen the soil to a depth of 12 to 15 inches, then mix in a 2- to 4-inch layer of compost. Dig a hole twice the diameter of the pot the plant is in. Carefully remove the plant from its container and place it in the hole so the top of the root ball is level with the soil surface. Carefully fill in around the root ball and firm the soil gently. Water thoroughly.

Ongoing Care
Apply a complete organic fertilizer and a thin layer of compost each spring, followed by a 2-inch layer of mulch to retain moisture and control weeds. Water plants during the summer if rainfall is less than 1 inch per week. Deadhead flowers to neaten plants and prevent self-sowing. On taller types, remove faded flowers individually, then cut back the flowering stalks to the base when all bloom is finished. With low growers, wait until the first flush of bloom is past, then shear back plants by half. Peachleaf bellflower can self-sow to the point of weediness if not deadheaded. Most bellflowers benefit from division every 3 to 5 years to keep them growing vigorously.
1
0


