成长记
meriunkat
2017年10月06日

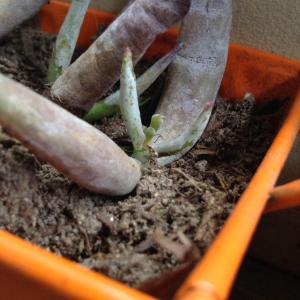
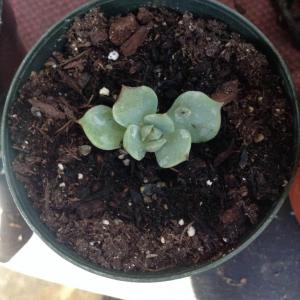
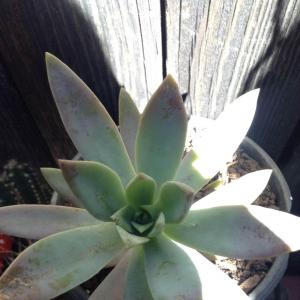
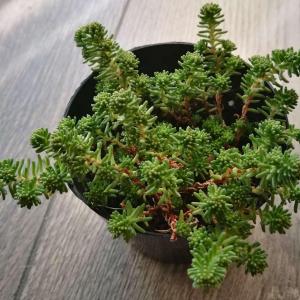
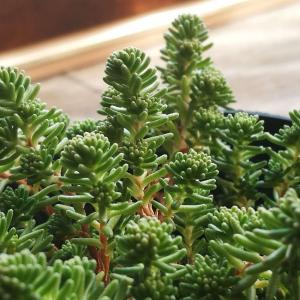
Switching it up, root hormone and lots of water to encourage faster root growth.


2
0
成长记
cclecombe
2017年10月01日

My propagating ivy is doing really well! It's pushed out some new growth and the roots are beginning to develop!


0
0
文章
Dummer. ゛☀
2017年09月28日

Plants in the Mint family (Lamiaceae) are very hardy perennials with vigorous growth habits. All types (including Sweet Mint, Spearmint, Peppermint, and Chocolate Mint) are fast-growing, spreading plants, so you must give them a place to spread without getting in the way, or plant them in a pot. Mint sends out runners that spread above and just below the ground, quickly forming large, lush green patches. In the right place it makes a pretty seasonal ground cover. You can also contain Mints in tight places such as between pavers of a walkway where your feet will brush against the leaves to release its fragrance.
The spikes of white or pinkish flowers are attractive, but brief. However, they do attract bees, butterflies and even birds. Most Mints are hybrids and will not grow true from seed.
Fresh leaves are a nice complement to lamb, fish, poultry, and vegetables such as peas, new potatoes, and carrots. Mint also blends well with green or fruit salads and beverages such as punch, lemonade, and tea. Two very well-known drinks, mint julep and Cuban Mojito, both depend on spearmint for their cool zest. Freeze Mint in cubes for iced tea. You can also preserve it in vinegar or dry it for potpourri or sachets.
Growing Conditions
Light: Mints will grow in full sun to partial shade.
Temperature: Depends on variety. Peppermint is very cold hardy, down to Zone 3. Spearmint handles the heat best, up to Zone 11.
Soil: Mint prefers a rich, moist soil with a slightly acidic pH between 6.5 and 7.0.
Growing Tips
Mint is one of the few culinary herbs that grows well in shady areas, although it can handle full sun if kept watered.
Cuttings of Mint will root easily in soil or water and mature plants can be divided and transplanted. However you can start new plants from seed. Sow outdoors in late spring or start seed indoors about 8 to 10 weeks before the last frost. Keep soil moist until seed germinates.
Mint prefers a rich, moist soil with a slightly acidic pH between 6.5 and 7.0. If the soil is somewhat lean, top dress yearly with organic matter and apply an organic fertilizer mid-season, after shearing.
To contain the roots and limit spreading, you can grow Mint in containers, above or sunk into the ground. Be careful to keep container Mints from flopping over and touching the ground. Stems will root quickly, if given the chance.
Harvesting
Snip sprigs and leaves as needed. If you don’t harvest your Mint regularly, it will benefit greatly from a shearing mid-season. At some point, you will probably notice the stems getting longer and the leaves getting shorter. That’s the time to cut the plants back by 1/3 to 1/2 and get them sending out fresh new foliage again. You can do small patches at a time, if you have a lot of Mint, and prolong the harvest season. All cuttings can be used, dried or frozen for later use. You can use, dry or freeze the cuttings.
Pests and Diseases
Sometimes gets rust, which appears like small orange spots on the undersides of leaves. Use an organic fungicide and try to allow plants to dry between waterings. Stressed plants may also be bothered by whitefly, spider mites, aphids, mealybugs.

The spikes of white or pinkish flowers are attractive, but brief. However, they do attract bees, butterflies and even birds. Most Mints are hybrids and will not grow true from seed.
Fresh leaves are a nice complement to lamb, fish, poultry, and vegetables such as peas, new potatoes, and carrots. Mint also blends well with green or fruit salads and beverages such as punch, lemonade, and tea. Two very well-known drinks, mint julep and Cuban Mojito, both depend on spearmint for their cool zest. Freeze Mint in cubes for iced tea. You can also preserve it in vinegar or dry it for potpourri or sachets.

Growing Conditions
Light: Mints will grow in full sun to partial shade.
Temperature: Depends on variety. Peppermint is very cold hardy, down to Zone 3. Spearmint handles the heat best, up to Zone 11.
Soil: Mint prefers a rich, moist soil with a slightly acidic pH between 6.5 and 7.0.
Growing Tips
Mint is one of the few culinary herbs that grows well in shady areas, although it can handle full sun if kept watered.

Cuttings of Mint will root easily in soil or water and mature plants can be divided and transplanted. However you can start new plants from seed. Sow outdoors in late spring or start seed indoors about 8 to 10 weeks before the last frost. Keep soil moist until seed germinates.
Mint prefers a rich, moist soil with a slightly acidic pH between 6.5 and 7.0. If the soil is somewhat lean, top dress yearly with organic matter and apply an organic fertilizer mid-season, after shearing.

To contain the roots and limit spreading, you can grow Mint in containers, above or sunk into the ground. Be careful to keep container Mints from flopping over and touching the ground. Stems will root quickly, if given the chance.
Harvesting
Snip sprigs and leaves as needed. If you don’t harvest your Mint regularly, it will benefit greatly from a shearing mid-season. At some point, you will probably notice the stems getting longer and the leaves getting shorter. That’s the time to cut the plants back by 1/3 to 1/2 and get them sending out fresh new foliage again. You can do small patches at a time, if you have a lot of Mint, and prolong the harvest season. All cuttings can be used, dried or frozen for later use. You can use, dry or freeze the cuttings.

Pests and Diseases
Sometimes gets rust, which appears like small orange spots on the undersides of leaves. Use an organic fungicide and try to allow plants to dry between waterings. Stressed plants may also be bothered by whitefly, spider mites, aphids, mealybugs.
0
0
成长记
cclecombe
2017年09月27日

Some new growth! She seems happy in this spot


6
0
damian saul:what?? this is a Adiantum chilense
文章
Dummer. ゛☀
2017年09月27日

Vitis vinifera, also known as Grapevine is a wonderfully giving plant. Not only will it grow on a trellis or pergola to give summer shade, it bears edible fruit and its early spring leaf growth is used for culinary purposes. There is also the added beauty of the change in leaf color as they begin to drop, allowing winter sun to penetrate. Greek and Italian cooks and gardeners are used to training Grapevines, specifically for their leaves to make stuffed vine leaves or dolmades.
Getting Started
In this day and age Grapevines are propagated from cuttings rather than seeds, as they get off to a much faster start that way. Grapevines can be purchased from nurseries, either potted in spring and summer or bare-rooted in winter. You can always grow your own vine from a cutting, as they are easy to strike and grow on their own roots, rather than being grafted. In winter, at pruning time, make a cutting of a leafless stem, around 4 to 6 inches (10 to 15 cm) long, with 2 or 3 nodes. Insert each cutting into a pot filled with coarse sand or propagating mix, and these will callous up and form roots and new growth by early spring, so you can plant them out where you want them to grow.
Growing Conditions
Choose a sunny, well-drained position, and at planting time, dig in plenty of organic matter, including a good shovelful of compost. Dig the hole large enough for the roots to spread, and backfill with soil and compost, pressing around the area to get rid of air holes. Water in well and make sure, with a grafted vine, that the graft union is not below the soil – it should be at least 4 inches (10 cm) above the surface.
Grapevines need a sunny spot to grow and tolerate most soils, but are particularly suited to those with a high pH. They do not mind chalky, limey soils as long as they are well drained.
In early spring, fertilize with a complete fertilizer to establish the new vine, and repeat each year in spring and summer. Grapevines are well adapted to growing in dry conditions and a drip-irrigation system will deliver water efficiently and adequately. It is a better method than watering overhead, as this can lead to fungal problems, such as mildew on the leaves and rotting fruit.
General Care
Prune the vine hard in winter, right back to the main framework of branches, as the grapevines bear fruit on the current year’s wood. In the first year of growth you could be picking a handful or two of fruit, but by the third or fourth year it will be in full swing.
The method of pruning depends on the grape cultivar. For most Grapevine types, pruning is done by cutting everything hard back to spurs or permanent buds on the main plant framework, so new growth occurs and produces fruit.
The main problem with Grapevines is fungus attack, in particular powdery mildew, which can harm the leaves and fruit. The answer is to spray with a Bordeaux spray while the vine is dormant and just before the buds burst. Spray again later in the season if the weather becomes humid, as humidity affects the fruit production.So remember, vine leaves should always be carefully rinsed before being used in cooking. The Grapevine is a vigorous grower and will need to be trained up and over a pergola or on a wire strand, creating a wonderful outdoor setting.
Protecting
It is important to protect the fruit on the vine as it ripens. There is a bit of controversy about using nets, as native bats and birds can become entangled in them. It is also awkward to cover these vigorous growers with nets. Horticultural waxed-paper fruit bags are available with a built-in twist-tie. The waxed bags shed water away from the fruit, making them great for humid climates. There is a small gap at the bottom of the bag for drainage which does not allow fruit fly to enter or in any way affect the bag’s usefulness.

Getting Started
In this day and age Grapevines are propagated from cuttings rather than seeds, as they get off to a much faster start that way. Grapevines can be purchased from nurseries, either potted in spring and summer or bare-rooted in winter. You can always grow your own vine from a cutting, as they are easy to strike and grow on their own roots, rather than being grafted. In winter, at pruning time, make a cutting of a leafless stem, around 4 to 6 inches (10 to 15 cm) long, with 2 or 3 nodes. Insert each cutting into a pot filled with coarse sand or propagating mix, and these will callous up and form roots and new growth by early spring, so you can plant them out where you want them to grow.

Growing Conditions
Choose a sunny, well-drained position, and at planting time, dig in plenty of organic matter, including a good shovelful of compost. Dig the hole large enough for the roots to spread, and backfill with soil and compost, pressing around the area to get rid of air holes. Water in well and make sure, with a grafted vine, that the graft union is not below the soil – it should be at least 4 inches (10 cm) above the surface.
Grapevines need a sunny spot to grow and tolerate most soils, but are particularly suited to those with a high pH. They do not mind chalky, limey soils as long as they are well drained.

In early spring, fertilize with a complete fertilizer to establish the new vine, and repeat each year in spring and summer. Grapevines are well adapted to growing in dry conditions and a drip-irrigation system will deliver water efficiently and adequately. It is a better method than watering overhead, as this can lead to fungal problems, such as mildew on the leaves and rotting fruit.
General Care
Prune the vine hard in winter, right back to the main framework of branches, as the grapevines bear fruit on the current year’s wood. In the first year of growth you could be picking a handful or two of fruit, but by the third or fourth year it will be in full swing.

The method of pruning depends on the grape cultivar. For most Grapevine types, pruning is done by cutting everything hard back to spurs or permanent buds on the main plant framework, so new growth occurs and produces fruit.
The main problem with Grapevines is fungus attack, in particular powdery mildew, which can harm the leaves and fruit. The answer is to spray with a Bordeaux spray while the vine is dormant and just before the buds burst. Spray again later in the season if the weather becomes humid, as humidity affects the fruit production.So remember, vine leaves should always be carefully rinsed before being used in cooking. The Grapevine is a vigorous grower and will need to be trained up and over a pergola or on a wire strand, creating a wonderful outdoor setting.

Protecting
It is important to protect the fruit on the vine as it ripens. There is a bit of controversy about using nets, as native bats and birds can become entangled in them. It is also awkward to cover these vigorous growers with nets. Horticultural waxed-paper fruit bags are available with a built-in twist-tie. The waxed bags shed water away from the fruit, making them great for humid climates. There is a small gap at the bottom of the bag for drainage which does not allow fruit fly to enter or in any way affect the bag’s usefulness.
0
0
文章
Dummer. ゛☀
2017年09月27日

Pieris japonica is a species of fantastic evergreen spring shrub which put on a spectacular display of white or pink, bell-shaped flowers and colorful new growth which ranges from pale pink to dark burgundy. It is a member of the Heath family and is originally from the forested mountain regions of China, Japan and Taiwan, and often called Lily of the Valley Bush, Japanese Pieris or Japanese Andromeda. It is a shrubs or small tree which in the wild can reach up to 33 feet (10 m), but the cultivated varieties available from garden centers are more likely to be small and compact or just reaching a height of up to 13 feet (4 m). They are fairly slow growing so even if you buy one of the larger varieties they will probably take up to 20 years to reach their maximum height. They are toxic to people and animals so make sure they are planted in a position where farm stock cannot reach them. They go well with other ericaceous woodland plants such as Rhododendrons, azaleas and Camellias, as they all enjoy the same conditions.
Position
As they are originally from a forested habitat they do best in dappled shade. Strong sun in early spring can burn the tender new growth. They will not do too well in full shade as they won’t produce as many flowers and the color of the new growth won’t be as intense. They need well-drained but moisture retentive humus-rich acid soil. If you have an alkaline soil you will have to grow it in a pot. You can add ericaceous compost and feed and mulch with pine needles but it will only be temporary and an alkaline soil will always be an alkaline soil. They are a hardy shrub but it may need some protection from late frosts which will burn the new growth and flowers. The frost probably won’t kill the plant but it will mar the spring display which is usually the main reason it is grown.
Planting
Plant them to the same depth as they are in the pot and water well. Keep an eye on the watering in the first season, particularly if there is a long dry spell.
Aftercare
It requires little or no pruning as it grows very slowly, just take out any dead branches. If you have to prune do it immediately after flowering. Take off the spent flowers to encourage the plant to put its energy into producing colorful new growth. Mulching with pine needles or ericaceous compost in spring will conserve moisture and retain the acidity of the soil. Feed with an ericaceous fertiliser, which also feeds Rhododendrons, azaleas and Camellias, in spring. Yellowing of the foliage is an indicator that it is lacking nutrients.
Containers
Choose a container in proportion to the plant and by re-potting every couple of years eventually move up to a pot suitable for the plants requirements. Put a good layer of crocks in the bottom, about 2 inches (5 cm), to aid with drainage. Pot up in ericaceous compost and raise the pot off the ground on pot feet, a couple of bricks or stones. This ensures that the water runs clear away from the pot and doesn’t block the drainage hole with silt. It will be more susceptible to drying out so keep an eye on the watering. A lack of nutrients can also be a problem so make sure you feed in spring.
Pests and Diseases
Leaf spot is a fungus which can be a problem in a wet spring. Spray with a fungicide to control the spread. There is no non-chemical solution.
Phytophthara ramorum is a particularly vicious fungus which attacks the roots and is responsible for Sudden Oak Death. The first sign is a wilting plant which is not dry or sat in saturated soil. There is no control. Dig the plant up and either burn it or put it in the grey refuse bin. Don’t compost it or put it in the green waste bin as this will only spread the disease.
Pieris Lacebug is a winged insect which causes the leaves to be pale and mottled on the upper surface, eventually leading to a bleached appearance later on in summer. The insects can be seen on the underside of the leaf. There is no non-chemical control. Spray with insecticide in early summer. Be careful about spraying other flowering plants as you will also kill bees, pollinators and any other beneficial insects.

Position
As they are originally from a forested habitat they do best in dappled shade. Strong sun in early spring can burn the tender new growth. They will not do too well in full shade as they won’t produce as many flowers and the color of the new growth won’t be as intense. They need well-drained but moisture retentive humus-rich acid soil. If you have an alkaline soil you will have to grow it in a pot. You can add ericaceous compost and feed and mulch with pine needles but it will only be temporary and an alkaline soil will always be an alkaline soil. They are a hardy shrub but it may need some protection from late frosts which will burn the new growth and flowers. The frost probably won’t kill the plant but it will mar the spring display which is usually the main reason it is grown.

Planting
Plant them to the same depth as they are in the pot and water well. Keep an eye on the watering in the first season, particularly if there is a long dry spell.
Aftercare
It requires little or no pruning as it grows very slowly, just take out any dead branches. If you have to prune do it immediately after flowering. Take off the spent flowers to encourage the plant to put its energy into producing colorful new growth. Mulching with pine needles or ericaceous compost in spring will conserve moisture and retain the acidity of the soil. Feed with an ericaceous fertiliser, which also feeds Rhododendrons, azaleas and Camellias, in spring. Yellowing of the foliage is an indicator that it is lacking nutrients.

Containers
Choose a container in proportion to the plant and by re-potting every couple of years eventually move up to a pot suitable for the plants requirements. Put a good layer of crocks in the bottom, about 2 inches (5 cm), to aid with drainage. Pot up in ericaceous compost and raise the pot off the ground on pot feet, a couple of bricks or stones. This ensures that the water runs clear away from the pot and doesn’t block the drainage hole with silt. It will be more susceptible to drying out so keep an eye on the watering. A lack of nutrients can also be a problem so make sure you feed in spring.

Pests and Diseases
Leaf spot is a fungus which can be a problem in a wet spring. Spray with a fungicide to control the spread. There is no non-chemical solution.
Phytophthara ramorum is a particularly vicious fungus which attacks the roots and is responsible for Sudden Oak Death. The first sign is a wilting plant which is not dry or sat in saturated soil. There is no control. Dig the plant up and either burn it or put it in the grey refuse bin. Don’t compost it or put it in the green waste bin as this will only spread the disease.

Pieris Lacebug is a winged insect which causes the leaves to be pale and mottled on the upper surface, eventually leading to a bleached appearance later on in summer. The insects can be seen on the underside of the leaf. There is no non-chemical control. Spray with insecticide in early summer. Be careful about spraying other flowering plants as you will also kill bees, pollinators and any other beneficial insects.
1
0


