文章
Dummer. ゛☀
2017年08月31日

Although lacebark elm (Ulmus parvifolia) is native to Asia, it was introduced to the United States in 1794. Since that time, it has become a popular landscape tree, suitable for growing in USDA hardiness zones 5 through 9. Read on for more helpful lacebark elm information.
Lacebark Elm Information
Also known as Chinese elm, lacebark elm is a medium size tree that typically reaches heights of 40 to 50 feet. It is valued for its shiny, dark green foliage and rounded shape. The multiple colors and rich textures of lacebark elm bark (the focus of its name) are an added bonus. Lacebark elm provides shelter, food and nesting sites for a variety of birds, and the leaves attract a number of butterfly larvae.
Lacebark Elm Pros and Cons
If you’re thinking about planting lacebark elm, growing this versatile tree is easy in well-drained soil, although it tolerates nearly any type of soil, including clay. It is a good shade tree and withstands a certain amount of drought. It is happy in prairies, meadows or home gardens. Unlike Siberian elm, lacebark is not considered to be a trash tree. Unfortunately, the two are frequently confused in nurseries.
One strong selling point is that lacebark elm has proven to be more resistant to Dutch elm disease, a deadly disease that often befalls other types of elm trees. It is also resistant to elm leaf beetle and Japanese beetle, both common elm tree pests. Any disease problems, including cankers, rots, leaf spots and wilt, tend to be relatively minor. There aren’t a lot of negatives when it comes to lacebark elm tree growing. However, the branches sometimes break when exposed to strong winds or laden with heavy snow or ice. Additionally, lacebark is considered to be invasive in some areas of the eastern and southwestern United States. It’s always a good idea to check with your local cooperative extension office before growing lacebark elm trees.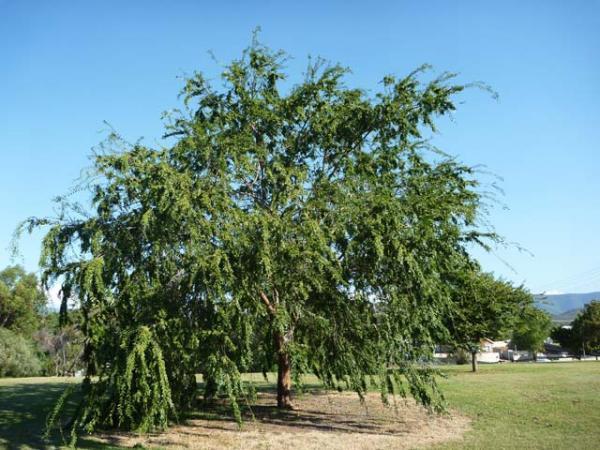
Care of Chinese Lacebark Elms
Once established, care of Chinese lacebark elms is uninvolved. However, careful training and staking when the tree is young will get your lacebark elm off to a good start. Otherwise, water regularly during spring, summer and early autumn. Although lacebark elm is relatively drought tolerant, regular irrigation means a healthier, more attractive tree. Lacebark elms don’t require a lot of fertilizer, but a once or twice yearly application of a high-nitrogen fertilizer ensures the tree has proper nutrition if soil is poor or growth appears slow. Fertilize lacebark elm in early spring and again in late autumn, well before the soil freezes.
It’s critical to select a fertilizer that releases nitrogen into the soil slowly, as a quick release of nitrogen can cause weak growth and severe structural damage that invites pests and disease.
0
0
文章
Dummer. ゛☀
2017年08月31日
Elms (Ulmus spp.) are stately and majestic trees that are an asset to any landscape. Growing elm trees provides a homeowner with cooling shade and unrivaled beauty for many years to come. Elm-lined streets were common in North America until Dutch elm disease struck in the 1930s, wiping out most of the trees. With new, disease-resistant varieties, however, elm trees are making a comeback. Let’s learn more about planting an elm tree.
About Elm Trees
Elms are native to Europe, Asia and North America. They are used as specimen trees in residential landscapes and as street and park trees. They have a shallow root system that makes it difficult to grow anything under them, but their natural beauty and the quality of their shade makes it worth forgoing a garden under the tree.
Chinese laceback elm (U. parvifolia) is one of the best elms for residential properties. It has an attractive, spreading canopy that provides far-reaching shade. Its shedding bark leaves an ornamental, puzzle-like pattern on the trunk. Here are some other types of elm trees to consider:
American elm (U. americana) grows up to 120 feet tall with a rounded or vase-shaped crown. Smooth-leaved elm (U. carpinifolia) grows 100 feet tall. It has a conical shape with drooping branches. Scottish elm (U. glabra) has a dome-shaped crown and grows to 120 feet tall. Dutch Elm (U. platii) grows up to 120 feet with a wide-spreading canopy and drooping branches.
Dutch elm disease is one of the most important problems with elms. This devastating disease has killed millions of trees in the United States and Europe. Caused by a fungus spread by elm bark beetles, the disease is usually fatal. When considering planting an elm tree, always buy resistant cultivars.
Elm Tree Care
Elms prefer full sun or partial shade and moist, well-drained fertile soil. They adapt to wet or dry soil as well. They make good street trees because they tolerate urban conditions, but keep in mind than planting an elm tree near sidewalks can lead to cracks and raised areas. You can plant container-grown trees any time of year. Bare root, balled and burlapped elms are best planted in spring or late fall. Don’t amend the soil in the hole at planting time unless it is very poor. Add a little compost to the fill dirt for poor soils. Wait until next spring to fertilize an elm tree.
Mulch the tree immediately after planting. Mulch helps the soil hold moisture and reduces competition from weeds. Use a 2-inch layer of light mulch such as shredded leaves, hay or pine needles. Use 3 inches of bark mulch. Water young trees weekly in the absence of rain. A good way to water a young tree is to bury the end of a water hose a couple of inches in the soil and let the water run as slowly as possible for about an hour. After the first couple of years, the tree only needs watering during prolonged dry spells.
Fertilize young elms every spring with a complete and balanced fertilizer. Over-application of fertilizer can harm the tree, so follow the fertilizer manufacturer’s instructions exactly. Older trees that aren’t adding much new growth don’t need annual fertilization, but they will appreciate a light scattering of fertilizer now and then.
0
0
文章
Dummer. ゛☀
2017年08月30日
Growing a red twig dogwood is a great way to add spectacular color to the winter garden. The stems, which are green in spring and summer, turn bright red when the foliage drops off in autumn. The shrub produces creamy-white flowers in spring and berries that ripen from green to white by the end of summer. Both fruits and flowers look good against the dark background of the foliage, but pale in comparison to the brilliant winter display.
Growing a Red Twig Dogwood
Don’t confuse red twig dogwood trees with other dogwood trees. While both the tree and the shrub belong to the Cornus genus, red twig dogwoods never grow to become trees. There are two species of Cornus called red twig dogwoods: Tatarian dogwood (C. alba) and Redosier dogwood (C. sericea). The two species are very similar. Red twig dogwood is one of those plants where more is better. They look fantastic when planted in groups or as an informal hedge. When planting red twig dogwoods, give them plenty of room. They grow up to 8 feet tall with an 8 foot spread. Overcrowding encourages diseases and causes less attractive, thin stems.
Red Twig Dogwood Care
Red twig dogwood care is minimal except for pruning. Annual pruning is essential to keep the brilliant colors of the twigs. The primary goal of pruning red twig dogwoods is to remove the old stems that no longer show good winter color. Remove about a third of the stems at ground level every year. Cut out old, weak stems as well as well as those that are damaged, discolored, or growing poorly. This method of pruning keeps the color bright and the shrub vigorous. After thinning you can shorten the stems to control the height if you’d like. Cut back the entire shrub to 9 inches above the ground if it becomes overgrown or out of control. This is a good way to quickly renew the plant, but it leaves a bare spot in the landscape until it regrows.
Water weekly in the absence of rain for the first couple of months after planting red twig dogwoods, and cut back on the water once the shrub is established. Mature shrubs only need watering during dry spells. Feed the plant once a year with a layer of compost or a sprinkling of slow-released fertilizer over the root zone.
1
0
文章
Dummer. ゛☀
2017年08月30日
Autumn foliage aside, yellow leaves on a tree generally doesn’t signal health and vitality. The flowering dogwood tree (Cornus florida) is no exception. If you see your dogwood tree leaves turning yellow during the growing season, the tree is likely suffering from a pest, disease or deficiency. Read on to find out why your dogwood has yellow leaves.
Avoiding Sick Dogwood Trees
When delicate blossoms open on your dogwood tree boughs, you know that spring is on the way. This native tree grows wild throughout the eastern states, and it is also a popular ornamental. The small size works well in home gardens and backyards, but improper culture can cause sick dogwood trees. The best defense against pests or diseases attacking your dogwood is to provide appropriate care for your tree. This is easier when you understand that dogwoods are understory trees in the wild, growing in shade on organically rich soil. You need to provide a similar environment.
Dogwood Tree with Yellow Leaves – Borer Attacks
If your tree canopy dies back or the leaves turn fall colors prematurely, it may indicate a dogwood borer attack. This insect is the most common pest of the cultivated dogwood. Adult borers are day-flying moths that lay their eggs wounds or fissures in the tree bark. As the insect larva emerge, they bore into the tree, leaving holes and sawdust-like frass as evidence of their presence. Yellow leaves on dogwood trees can be an early sign of an infection. To prevent a borer attack, plant your dogwood in shade, not direct sun, and provide adequate irrigation to avoid water stress. Don’t weed whack close to the base of the tree or otherwise wound its bark, since wounds provide an entryway for the borers.
Yellow Leaves on Dogwood Trees – Chlorosis
Another possible cause of yellow leaves on dogwood trees is chlorosis. Dogwood trees are susceptible to iron chlorosis, which means that the trees are not uptaking sufficient iron to manufacture chlorophyll, the green pigment in leaves. You should suspect chlorosis if the yellow first shows up in the area between the leaf veins, leaving the veins green. In more severe cases, the entire leaves turn pale yellow.
To prevent chlorosis in your dogwood tree, check the soil acidity before planting. Dogwoods cannot absorb the iron in the soil if it is too alkaline, that is, if the pH is above 7.5. While you are doing soil testing, check for magnesium, manganese and boron levels as well, since deficiencies in these minerals can also cause chlorosis. When you see your dogwood tree leaves turning yellow because of chlorosis, make sure you are watering appropriately. Overwatering the tree (or poor drainage) can also cause chlorosis. Likewise, root damage, girdling roots and trunk wounds all make it more difficult for the tree to transport nutrients.
Dogwood Has Yellow Leaves – Other Issues
If your dogwood has yellow leaves, the tree might also suffer from some other disease. For example, leaves with powdery mildew can turn yellow. Identify the disease by the white powder on foliage. Similarly, scale infection can also cause yellow leaves on dogwood trees. Scales are legless insects that look like small brown bumps on foliage or stems. Kill adults and eggs by spraying horticultural oil in spring.
0
0
文章
Dummer. ゛☀
2017年08月30日
At maturity, it looks a bit like an elongated, bright red cherry and, in fact, its name references cherries, but it isn’t related to them at all. No, this isn’t a riddle. I’m talking about growing cornelian cherries. You may not be familiar with cornelian cherry cultivation and wonder what the heck is a cornelian cherry plant? Keep reading to find out how to grow cornelian cherry trees, uses for cornelian cherries and other interesting facts about the plant.
What is a Cornelian Cherry Plant?
Cornelian cherries (Cornus mas) are actually members of the dogwood family and native to areas of Eastern Europe and Western Asia (they even survive in Siberia!). They are shrub-like trees that can grow up to 15-25 feet in height if left unpruned. The plant can live and be fruitful for up to 100 years. They bloom early in the season, even prior to forsythia, and bloom for an extended period of time, carpeting the tree in a yellow haze of tiny blossoms. The bark of the tree is flaky, gray-brown to brown. Bright green glossy leaves turn purplish-red in the fall.
Are Cornelian Cherries Edible?
Yes, cornelian cherries are very edible. Although the plant is known primarily as an ornamental in the United States, ancient Greeks have been growing cornelian cherries for 7,000 years! The ensuing fruit is initially very tart and looks much like olives. In fact, the ancient Greeks pickled the fruit much like olives. There are actually a myriad of other uses for cornelian cherries such as for syrups, jellies, jams, pies and other baked goods. Russians even make it into a cornelian cherry wine or add it to vodka.
How to Grow Cornelian Cherry Trees
While historically significant, cornelian cherries have not been mass produced due to the elongated pit inside the fruit that is difficult to remove, as it is firmly entrenched in the pulp. More often, the trees are seen as ornamental specimens, popular and planted around the 1920’s. Cornelian cherry cultivation is suited to USDA zones 4-8. The trees do best in full sun to part shade and while they do well in a variety of soils, they prefer fertile, well-draining soil with a pH of 5.5-7.5. This adaptable plant is winter hardy to -25 to -30 degrees F. (-31 to -34 C.). The tree can be pruned and trained into a single stemmed tree if desired and is primarily insect and disease resistant with the exception of dogwood anthracnose.
Cultivars include:
‘Aero elegantissima,’ with its variegated creamy-white leaves
‘Flava,’ with sweet, large, yellow fruit
‘Golden Glory,’ which bears large flowers and large fruit on its upright branching habit
0
0
文章
Dummer. ゛☀
2017年08月30日
Cypress trees are fast-growing North American natives that deserve a prominent place in the landscape. Many gardeners don’t consider planting cypress because they believe it only grows in wet, boggy soil. While it’s true that their native environment is constantly wet, once they’re established, cypress trees grow well on dry land and can even withstand occasional drought. The two types of cypress trees found in the U.S. are bald cypress (Taxodium distichum) and pond cypress (T. distichum).
Cypress Tree Info
Cypress trees have a straight trunk that tapers at the base, giving it a soaring perspective. In cultivated landscapes, they grow 50 to 80 feet tall with a spread of 20 to 30 feet. These deciduous conifers have short needles with a feathery appearance. Most varieties have needles that turn brown in winter, but a few have lovely yellow or gold fall color. Bald cypress has a tendency to form “knees,” which are pieces of root that grow above the ground in odd and sometimes mysterious shapes. Knees are more common for trees grown in water, and the deeper the water, the taller the knees. Some knees reach a height of 6 feet. Although no one is sure about the function of knees, they may help the tree get oxygen when they are underwater. These projections are sometimes unwelcome in the home landscape because they make mowing difficult and they can trip passers-by.
Where Cypress Trees Grow
Both types of cypress trees grow well in areas with lots of water. Bald cypress grows naturally near springs, on lake banks, in swamps or in bodies of water that flow at a slow to moderate rate. In cultivated landscapes, you can grow them in almost any soil. Pond cypress prefers still water and doesn’t grow well on land. This variety is rarely used in home landscapes because it needs boggy soil that is low in both nutrients and oxygen. It grows naturally in Southeastern wetlands, including the Everglades.
How to Care for Cypress Trees
Growing cypress trees successfully depends on planting the in the right location. Choose a site with full sun or partial shade and rich, acid soil. Cypress trees are hardy is USDA zones 5 through 10. Drench the soil around the tree after planting and cover the root zone with 3 to 4 inches of organic mulch. Give the tree a good soaking every week for the first few months. Cypress trees need water most in spring when they enter a growth spurt and in fall just before they go dormant. They can withstand occasional drought once established, but it’s best to water them if you haven’t had a drenching rain for more than a month.
Wait a year after planting before fertilizing a cypress tree for the first time. Cypress trees growing in a regularly fertilized lawn don’t generally need additional fertilizer once established. Otherwise, fertilize the tree every year or two with a balanced fertilizer or a thin layer of compost in fall. Spread a pound of balanced fertilizer for each inch of trunk diameter over an area approximately equal to the spread of the canopy.
0
0
文章
Dummer. ゛☀
2017年08月30日
Growing crabapple trees in the landscape is commonplace for many homeowners, but if you haven’t yet tried it, you may be asking, “How do you grow crabapple trees?” Continue reading to find out how to plant a crabapple tree as well as how to care for a crabapple tree in the landscape.
Flowering Crabapple Trees
Often called “the jewels of the landscape” flowering crabapple trees create four seasons of outstanding visual impact. In spring, the tree leafs out while the flower buds swell until they burst open to reveal fragrant blossoms in shades that range from white or pale pink to red.
As the flowers fade, they are replaced by small fruit that are relished by birds and squirrels. Most crabapple trees have vibrant fall colors, and once the leaves fall, the fruit stands out against the bare or snow-covered branches. The fruit often lasts well into the winter months. The difference between an apple and a crabapple is the size of the fruit. Fruit less than 2 inches in diameter are considered crabapples, while larger fruit are called apples.
How to Plant a Crabapple Tree
Choose a location in full sun with well-drained soil. Trees that are shaded develop an open canopy instead of a more attractive, dense growth habit. Shaded trees produce fewer flowers and fruit, and they are more susceptible to disease. Dig the hole for the tree as deep as the root ball and two to three times as wide. When you set the tree in the hole, the soil line on the tree should be even with the surrounding soil. Fill the hole half full with soil and water well to remove the air pockets. When the soil settles and the water drains through, finish filling the hole and water thoroughly.
How to Care for a Crabapple Tree
Growing crabapple trees in the home landscape is much easier if you choose disease- and insect-resistant varieties. This allows you to focus your attention on care essentials like fertilizing, watering and pruning. Newly Planted Trees – Newly planted crabapple trees don’t need fertilization until the following spring, but they do need regular watering during their first year. Keep the soil over the tree’s root zone evenly moist. A 2- to 4-inch layer of mulch over the roots prevents the soil from drying out too quickly. Established Flowering Crabapple Trees – Crabapple trees are drought-resistant once established, but they grow best if you water them when there is less than an inch of rain in a week during summer. A 2-inch layer of mulch applied every spring provides sufficient nutrients for a crabapple tree. If you prefer, you can apply a light feeding of slow-release fertilizer instead.
Crabapple trees need very little pruning. Remove dead, diseased and damaged twigs and branches in spring and remove suckers as they appear. Pruning crabapple trees after the end of June significantly reduces the number of flowers and fruit in the following year.
0
0
文章
Dummer. ゛☀
2017年08月30日
Clove trees (Syzygium aromaticum) produce the cloves you use to spice up your cooking. Can you grow a clove tree? According to clove tree information, it’s not hard to grow these trees if you can provide ideal growing conditions. If you are wondering what it takes to grow this tree or about clove tree uses, read on.
Clove Tree Information
The clove tree is native to Indonesia, but clove tree information suggests that it has naturalized in many warm countries. These include Mexico, Kenya and Sri Lanka. The plant has been cultivated since 200 B.C. to produce the cloves.
The most important of clove tree uses is, of course, the plant’s aromatic dried buds, or cloves. The name cloves comes from Latin “clavus,” meaning nail, as cloves often look like small nails. Clove trees are evergreens that grow to some 40 feet tall. Their bark is smooth and gray, and their long, 5-inch leaves look like bay leaves. Blossoms are tiny – about ½ inch long – and gather in clusters at branch tips. The entire plant is fragrant and aromatic.
Clove Tree Growing Conditions
Can you grow a clove tree? You can, but it’s hard for most gardeners to replicate ideal clove tree growing conditions. Clove tree information tells you that the tree is native to wet, tropical areas of the world. Therefore, the trees grow best in a hot and wet region. Ideal growing conditions include at least 50 to 70 inches of rainfall annually. The minimum temperature for clove trees is 59 degrees Fahrenheit (15 C.). Most commercial clove producers locate their plantations within 10 degrees of the equator.
Clove Tree Care
If you happen to live in such an area, and near the ocean, you probably won’t have much trouble growing clove trees. Plant the seeds in well-drained, fertile loam, then follow good practices for their care. One part of clove tree care is to install shade plants to protect the young seedlings for the first few years. Banana plants work well to provide this temporary shade. Clove trees are not a short-term project. The trees regularly live a century and sometimes live for over 300 years. More pertinent to the average gardener, you’ll have to wait at least 20 years for the tree to produce a full crop.
Clove Tree Uses
Many Americans use cloves for cooking. They are popular spices for baked hams and pumpkin pie. But clove tree uses are much broader than this globally. In Indonesia, cloves are used to make popular clove aromatized cigarettes. Other clove tree uses are medicinal. Extracted clove oil is also used as an essential oil that is used medicinally. Some people also make tea from cloves that is considered to help with stomach upsets, chills and impotence.
0
0
文章
Dummer. ゛☀
2017年08月30日
Chinese perfume tree (Aglaia odorata) is a small evergreen tree in the mahogany family. It is an ornamental plant in American gardens, typically growing to 10 feet or under and producing intensely fragrant sprays of unusual yellow flowers. If you want to start growing Chinese perfume trees, read on for information on these lovely plants and for tips on Chinese perfume tree care.
Chinese Perfume Tree Facts
Chinese perfume trees, also called Aglaia odorata plants, are native to low regions of China. They also grow in Taiwan, Indonesia, Cambodia, Laos, Thailand and Vietnam. The plant’s genus name comes from Greek mythology. Aglaia was the name of one of the three Graces.
In the wild, Aglaia ordorata plants can grow to 20 feet high. They grow in thickets or sparse forests. In the United States, they grow only in cultivation and are often planted for their fragrant blossoms.
You’ll find some interesting Chinese perfume tree facts when you read about those blossoms. The tiny yellow flowers—each about the size and shape of a grain of rice—grow in panicles about 2 to 4 inches long. They are shaped like tiny balls but do not open when the flowers bloom. The scent exuded by Chinese perfume tree flowers is sweet and lemony. It is stronger during the day than at night.
Growing Chinese Perfume Trees
If you are growing Chinese perfume trees, you need to know that an individual tree will bear either male or female flowers. Both types of flowers are fragrant, but only a pollinated female flower produces the fruit, a small berry with one seed inside. Chinese perfume tree care begins with planting the tree in an appropriate location. The trees are only hardy in U.S. Department of Agriculture plant hardiness zones 10 through 11. In cooler regions, you can grow Aglaia odorata plants in containers and move them indoors when temperatures drop. The trees will need well-draining soil and a location with full or partial sun. Plant them in a location with some shade if your region is hot in the summer.
Container plants brought inside should be located next to sunny windows. They’ll need moderate but regular irrigation. The soil must dry out between watering times.
0
0
文章
Dummer. ゛☀
2017年08月30日
Deodar cedar trees (Cedrus deodara) are not native to this country but they offer many of the advantages of native trees. Drought tolerant, fast-growing and relatively pest free, these conifers are graceful and attractive specimens for the lawn or backyard. If you are thinking of growing deodar cedar trees, you will find these evergreens perfect for specimens or soft hedges. Read on for more details about deodar cedar care.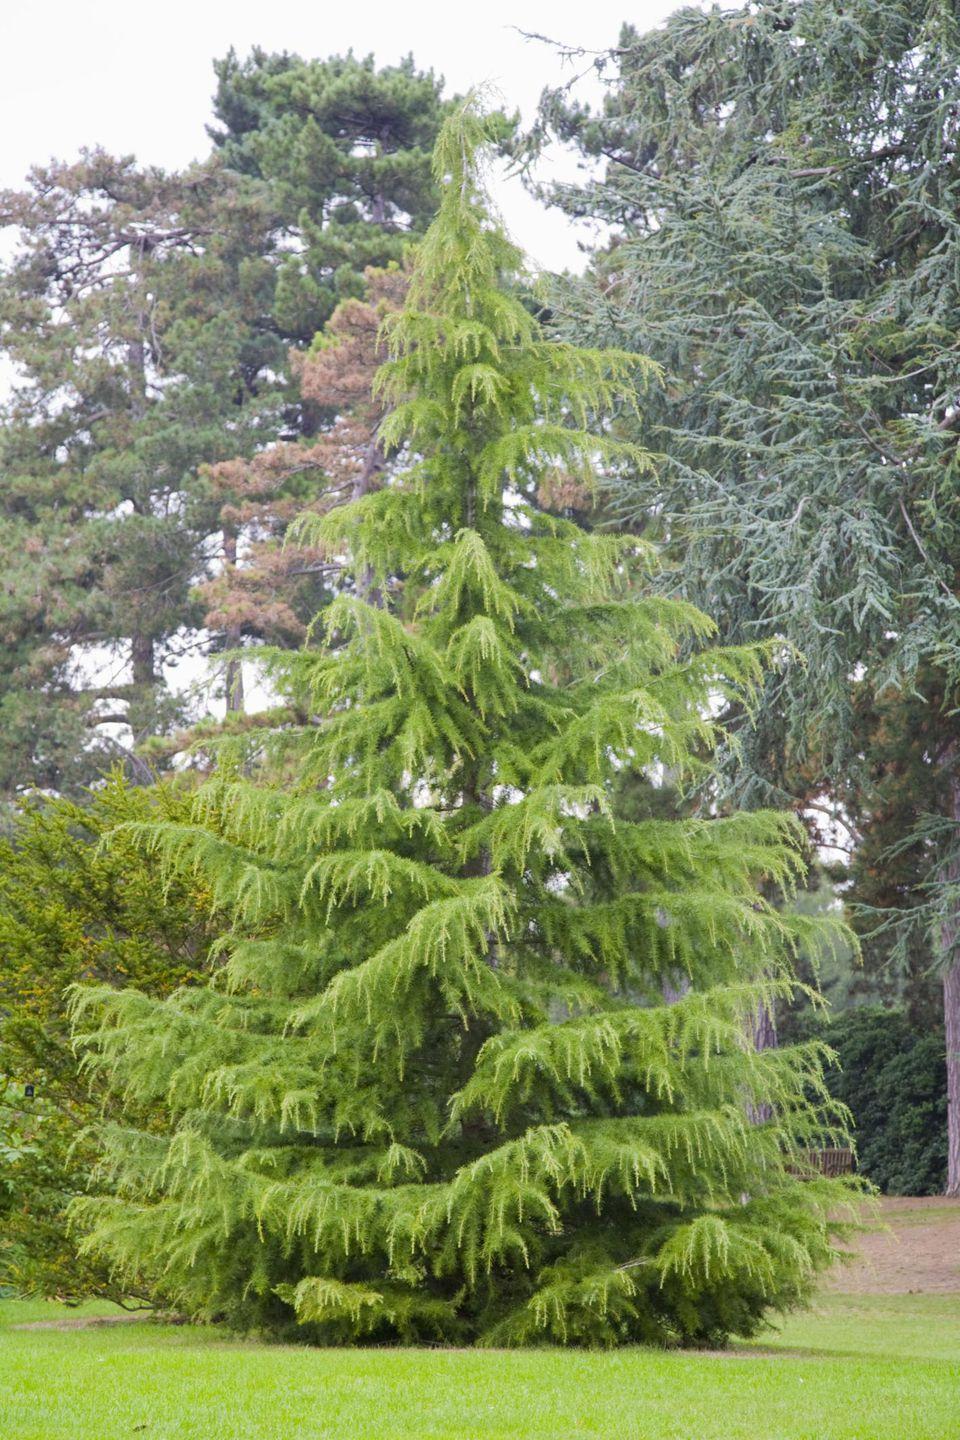
Deodar Cedar Info
This airy evergreen cedar tree rises to 50 feet or more when cultivated, and much taller in the wild. It is native to Afghanistan, Pakistan and India, and thrives in the coastal regions of the United States.
Deodar cedar trees grow into a loose pyramid shape, with 2-inch long whorled needles that give the tree a soft allure. The branches extend almost horizontally, angling slightly down, and the tips rise slightly. Needles of the deodar cedar are a slivery-green, making it a very attractive and popular ornamental. The trees are either male or female. Males grow the pollen-filled catkins, while females produce the egg-shaped cones.
Growing Deodar Cedar
If you are growing deodar cedar, you’ll want to find out how to care for a deodar cedar tree. First, you need to live in U.S. Department of Agriculture plant hardiness zones 7 through 9 and have plenty of space. These trees are most beautiful when they keep their lower branches, so it is best to plant them somewhere they will not be disturbed. Deodar cedar info will help you plant these trees in an appropriate site for their growing requirements. Find a sunny site with slightly acidic, well-drained soil. The tree also grows in partial shade and accepts sandy, loamy or clay soils. It even tolerates alkaline soil.
How to Care for a Deodar Cedar Tree
Deodar cedar care for a properly planted tree will not take much of your time and energy. Deodar cedar trees are very drought resistant, so if your area gets occasional rainfall, you may not need to irrigate. Otherwise, provide moderate amounts of water in dry weather. These trees live for a long time with few, if any, pest issues. They require no pruning, other than removing broken or dead branches, and provide maintenance free shade and beauty in your garden.
0
0
文章
Dummer. ゛☀
2017年08月30日
True cedars are forest giants, growing up to 200 feet tall. You might think that a tree of that size could tolerate any type of pruning, but nothing could be farther from the truth. Some experts recommend against ever pruning cedar trees. However, if cutting back cedar trees is in the cards, proceed very carefully. If you prune too deeply into the branches of the cedars, you’re likely to kill them. Read on for information about how and when to trim cedar trees.
The Problem with Cutting Back Cedar Trees
The problem with trimming a cedar tree is that every cedar has a dead zone in the center of the canopy. The new green growth is dense. It blocks the sunlight from the older growth beneath and without light, it dies. The outer green growth does not extend very deep into the tree. If you are pruning cedar trees and you cut branches back into the dead zone, they will not regrow.
When to Trim Cedar Trees
The general rule is that you shouldn’t prune true cedars very often. While some trees need pruning to establish a strong, balanced or graceful shape, the three types of true cedars that thrive in the United States – Lebanon, Deodar and Atlas cedar – do not. All three grow naturally into loose pyramid shapes. However, there are a few circumstances when it is a good idea trim cedar trees. One such circumstance is when a cedar develops two leaders. Cedars are stronger and more beautiful if they have only one central leader.
If your young cedar tree grows competing leaders, you’ll want to remove the weaker one. When trimming a cedar tree in this fashion, do so in early spring. Remove the weak leader at the point where it connects to the main stem. Sterilize the cutting tool before using it to prevent the spread of pathogens. Another time to start cutting back cedar trees is when you see damaged or dead branches. Prune out dead wood with sterilized clippers. If the cut should fall in the dead zone at the center of the cedar, cut it at the trunk instead.
How to Prune an Overgrown Cedar Tree
It happens. You thought your cedar would have enough room but it has filled up all the available space. That’s when you want to know how to prune an overgrown cedar tree. If your backyard cedars are pushing their allotted bounds, pruning cedar trees to contain their size must be done with caution. Here’s how to prune an overgrown cedar tree. Proceed branch by branch. Snip off the green branch tips on the first branch, making each cut above a lateral bud. Then proceed to the next branch and do the same.
The key is not to go pruning cedar trees into the dead zone. Check before each snip to be sure that there will be green branches on the tip of the branch.
0
0
文章
Dummer. ゛☀
2017年08月30日
No one can visit a tropical locale without noticing the multi-trunked trees with golden flowers cascading from the branches. Growing cassia trees (Cassia fistula) line the boulevards of many tropical cities; and when you see one in full flower for the first time, you have to ask, “How hardy is a cassia tree and can I take one home?”
Cassia Tree Info
If you live anywhere north of growing zone 10b and don’t have a climate controlled greenhouse, the answer is probably no. If you do meet one of those requirements, you’re in luck. Cassia tree info tells us that, depending on the species, these trees come in evergreen, semi-evergreen and deciduous types with brilliant pink, orange, red, white or yellow flowers. Yellow is the most common flower type and gives the tree one of its many common names, the gold medallion tree. Each flower is only about two to three inches wide but appear in clusters along densely packed racemes that on a mature growing cassia tree can reach two feet long. The light green leaves of the cassia tree are pinnate with six to twelve pairs of long oval leaflets and grow to two feet or more. Once flowering is over, the flowers are replaced with seed pods.
Growing Cassia Trees
If you live in an area that meets the requirements of how hardy is a cassia tree, planting a cassia tree can be a striking addition to your landscape. Most cassia tree info recommends growing cassia trees from seed. There’s a trick to this, however. The seeds are rock hard and water tight, so you can either soak them in sulfuric acid (No kidding! And it needs to be concentrated, too. In nature, this process occurs in the digestive tracts of animals.), or you can scarify or slit the seed coat. Soak the seed in water for at least 24 hours and nick the seed with a sharp knife. Keep the seed moist in a pot of commercial growing medium. You can, of course, purchase a tree from your local nursery or order it from a catalog. The following directions for planting a cassia tree will be the same.
Tips for Planting a Cassia Tree and Its Care
Cassia tree care requires very little, but that little is important. Once your seed has germinated and has about six leaves, it’s time to decide where your tree will be growing. Cassia trees need full sun to flower and produce the most colorful blossoms. They are tolerant of most soil types with a neutral pH, and while they like water, they do best in well drained soils. Dig your whole twice the size of the root ball and add peat moss and compost to the fill dirt, adding a handful of slow release fertilizer. Planting a cassia tree this way will give it the healthiest start. Leave a trough around your tree to collect water and see that it is watered regularly until the roots are well established.
Young trees need to be staked and will look a little scrawny for the first five years or so and then it will begin to fill out. These trees have a tendency to ‘weep’ so if you want a fuller look, pruning will be a part of your early cassia tree care. Still asking how hardy is a cassia tree? They rarely survive temperatures below 30 F. (-1 C.) and since they reach heights of 20 to 30 feet, that greenhouse better be a big one. Sometimes it’s better to dream. But for those of you who live in or on the edge of the tropics, think about planting a cassia tree as a lush tropical canopy for your yard.
One final word of warning. While all parts of the cassia tree were once used for ancient medical remedies, it is not safe to ingest any part of the tree. The seeds can be particularly toxic, so keep this in mind around children or pets.
0
0
文章
Dummer. ゛☀
2017年08月30日
If you’re looking for an interesting tree that can tolerate a wide range of growing conditions in the landscape, consider growing yourself a pea tree. What is a pea tree, you ask? Keep reading for more information about pea trees.
About Pea Trees
A member of the pea family (Fabaceae), the Siberian pea tree, Caragana arborescens, is a deciduous shrub or small tree native to Siberia and Manchuria. Introduced into the United States, the Siberian pea tree, otherwise known as Caragana pea tree, attains heights of between 10 to 15 feet tall, some up to 20 feet tall. It is composed of alternate 3- to 5-inch long leaves made up of eight to 12 oval leaflets with yellow snapdragon shaped blooms appearing in early spring and forming pods in late June or early July. Seeds are spread as the ripening pods burst with a resounding pop. The Siberian pea tree has been used medicinally while some ethnic groups eat the young pods, use the bark for fiber, and render an azure colored dye from its leaves. During WWII, Siberian peasants supposedly over wintered their poultry flocks by feeding them the seeds of Caragana pea trees, which wildlife enjoy as well. The erect to almost weeping habit of the pea tree lends itself well to planting Caragana as windbreaks, in borders, screen plantings and as flowering hedges.
How to Grow a Pea Tree
Interested in how to grow a pea tree? Planting Caragana trees may occur in almost any region of the United States, as it is fairly tolerant of most conditions. Siberian pea trees can be planted anywhere in anything from full sun to partial shade and in moist to dry soil. Planting Caragana pea trees may occur in clay, loam or sandy soil media with either a high acidity or high alkalinity in USDA plant hardiness zones 2-8.
You should plan on planting your pea tree after the chance of any frost in the area. Dig a hole that is twice as wide as the root ball and 2 inches as deep. Add a couple of handfuls of compost and four handfuls of sand (if you have dense soil) to the dirt. If you are planning on creating a hedge, space each plant 5 to 10 feet apart. Place 2 inches of this amended soil back into the hole and put the new Siberian pea plant atop and fill with the rest of the soil. Water thoroughly and tamp down the soil around the plant. Continue to water every other day for the first two weeks to establish strong root then thereafter reduce watering to twice a week for the next two weeks.
Pea Tree Care
Since Siberian pea plant is so adaptable, there is minimal pea tree care to consider once established. Feed the plant a slow release fertilizer tablet or granules once the plant has started to grow and water in. You will only need to fertilize once a year in the spring. Water every week unless the weather is overly hot and dry, and prune as needed – ideally in late winter to early spring, especially if creating a hedge of Caragana pea trees.
Caragana pea trees will even flourish seaside as well as more arid climates and is resistant to most pests and diseases. This hardy flowering specimen can live from 40 to 150 years growing an additional 3 feet per season, so if planting Caragana in your landscape, you should enjoy the tree for many years to come.
0
0
文章
Dummer. ゛☀
2017年08月30日
Perfect for the summer container garden, brugmansia is a fast-growing, easy-care shrub. This beautiful, flowering plant is not only easy to grow but propagating brugmansia is easy too. There are three methods of brugmansia propagation — by seeds, cuttings, and air layering — so you’re sure to find the method that works best for you.
Growing Brugmansia from Seeds
Brugmansia seeds are enclosed in a cork-like covering. The seeds themselves resemble small beans. When growing brugmansia from seeds, you can choose to leave this covering in place or remove it. Keep in mind, however, that taking the seed covering off will allow for faster germination and sprouting. Plant brugmansia seeds about half an inch deep in a mixture of sand and peat. Water well. The seeds should germinate within two to four weeks. Once seedlings have obtained their second leaves, they can be gently lifted and repotted individually in well-draining potting soil. Place in an area with indirect light.
Rooting Brugmansia Cuttings
Rooting brugmansia cuttings is the easiest way to propagate plants. They can be rooted in soil or water using both hardwood and softwood cuttings. Select cuttings from older wood and make them at least 6 inches long. When rooting brugmansia in water, remove all the bottom leaves. Change the water daily and once roots appear, move cuttings to a soil environment. If rooting in soil, place cutting about two inches deep in well-draining potting soil. Use your finger or a stick to make this easier. Likewise, you can make a small “trench” with your finger and place the cutting inside, firming the soil around the bottom part of the brugmansia cutting. Water the cutting and place it in a semi-shaded location until well rooted, at which time you can provide additional light.
Brugmansia Propagation Using Air Layering
Air layering allows you to root brugmansia cuttings while remaining on the mother plant. Choose a branch and cut an angled notch in the bottom side. Apply rooting hormone and then place some moistened peat mix (or soil) around the wound. Lightly wrap clear plastic over this. Once significant rooting has taken place, cut the branch from the mother plant and remove the plastic. Plant this in a pot of well-draining soil and keep it watered. Move to a shady location until well established before adding more light.
Brugmansia propagation is an easy and effective way to add more of these lovely plants to your garden. And with three different methods to choose from, propagating brugmansia is sure to be a success.
0
0
文章
Dummer. ゛☀
2017年08月30日
While most types of brugmansia, or angel trumpets, can thrive year round outdoors in warmer climates, they need to be protected from freezing temperatures, especially when growing brugmansia in cold climates. Therefore, wintering brugmansia indoors is oftentimes recommended. Follow these tips for over-wintering brugmansia in your home.
Growing Brugmansia in Cold Climates
Over-wintering brugmansia indoors is an important part of brugmansia maintenance in cold climates. To make this endeavor easier, it’s better to grow brugmansia plants in containers. Container grown plants can be easily moved indoors for brugmansia winter care.
Brugmansia Winter Care Preparation
Prior to bringing brugmansia indoors for winter dormancy, it’s a good idea to cut the plant back. Likewise, outdoor brugmansia plants in warmer climates should also be cut back to the ground and mulched generously. To ensure continuous plants, in the event something goes wrong, you may also want to consider rooting the cuttings taken during pruning. Once temperatures drop below 50 F. (10 C.). outside, it is time to take steps for wintering brugmansia. Place the plant in a dark, poorly lit location, such as the basement or even a closet, for winter storage. Less light and cooler temperatures (40-50 F./5-10 C.) are important for dormancy. Continue to water brugmansia sparingly about once a month to prevent the plant from drying out completely. However, do not fertilize it. Allow brugmansia to enter dormancy as normal. Complete leaf drop during this time is normal for brugmansia over winter.
Wintering Brugmansia as Houseplants
Some people prefer to grow brugmansia over winter as houseplants rather than allowing them to go dormant. This is fine. While some species of brugmansia may continue to develop buds throughout winter, in order to encourage blooming, the brugmansia will require significant light. Place brugmansia in a south-facing window where it will receive plenty of sunlight and treat it as a houseplant throughout winter, watering about once a week. Likewise, they can be placed in a greenhouse. While the plant may begin dropping leaves once it’s brought indoors, this is a normal response and nothing to be concerned about.
Growing brugmansia in cold climates requires a little extra effort, but it is well worth it in order to have these lovely plants in your garden year after year.
0
0

