文章
Dummer. ゛☀
2017年08月27日

Fine, delicate foliage and an attractive, mounding habit are just a couple of reasons gardeners like growing the silver mound plant (Artemisia schmidtiana ‘Silver Mound’). As you learn about growing and caring for silver mound plant, you will likely find other reasons to grow a few more in the garden.

Uses for Silver Mound Artemisia
This attractive plant is useful as a spreading border for the flower bed, when used as edging in the perennial garden and growing along paths and walkways. The delicate foliage retains its shape and color during the hottest months of summer.
Of the Asteraceae family, the silver mound Artemisia is the only member with a prostrate, spreading habit. Unlike others of the species, the silver mound plant is not invasive. Often called silver mound wormwood, this cultivar is a relatively dwarf plant. Scattered among tall, flowering summer blooms, the silver mound plant serves as a long lasting ground cover, shading out growing weeds and further reducing silver mound care.

Information on Caring for Silver Mound
full to partial sun location in average soil. Planting this specimen in less than fertile soil decreases some aspects of silver mound care. Soils that are too rich or too poor create the condition of splitting, dying out or separating in the middle of the mound. This is best corrected by division of the plant. Regular division of the silver mound Artemisia is a part of caring for silver mound, but is required less often if planted in the proper soil. The silver mound Artemisia is a small, resilient plant, resistant to deer, rabbits and many pests, making it an excellent addition for outlying rock gardens or beds near wooded or natural areas. Silver mound Artemisia care, other than division every two to three years, consists of infrequent watering during periods of no rain and a mid-summer trim, usually around the time the insignificant flowers appear in late June. Trimming keeps the plant tidy and helps it maintain its mounding shape and avoid splitting. Plant the silver mound Artemisia in your garden or flower bed for attractive, silver foliage and low maintenance. Drought and pest resistant, you may discover it is a desirable addition to your garden.
Uses for Silver Mound Artemisia
This attractive plant is useful as a spreading border for the flower bed, when used as edging in the perennial garden and growing along paths and walkways. The delicate foliage retains its shape and color during the hottest months of summer.
Of the Asteraceae family, the silver mound Artemisia is the only member with a prostrate, spreading habit. Unlike others of the species, the silver mound plant is not invasive. Often called silver mound wormwood, this cultivar is a relatively dwarf plant. Scattered among tall, flowering summer blooms, the silver mound plant serves as a long lasting ground cover, shading out growing weeds and further reducing silver mound care.
Information on Caring for Silver Mound
full to partial sun location in average soil. Planting this specimen in less than fertile soil decreases some aspects of silver mound care. Soils that are too rich or too poor create the condition of splitting, dying out or separating in the middle of the mound. This is best corrected by division of the plant. Regular division of the silver mound Artemisia is a part of caring for silver mound, but is required less often if planted in the proper soil. The silver mound Artemisia is a small, resilient plant, resistant to deer, rabbits and many pests, making it an excellent addition for outlying rock gardens or beds near wooded or natural areas. Silver mound Artemisia care, other than division every two to three years, consists of infrequent watering during periods of no rain and a mid-summer trim, usually around the time the insignificant flowers appear in late June. Trimming keeps the plant tidy and helps it maintain its mounding shape and avoid splitting. Plant the silver mound Artemisia in your garden or flower bed for attractive, silver foliage and low maintenance. Drought and pest resistant, you may discover it is a desirable addition to your garden.
1
1
文章
Dummer. ゛☀
2017年08月27日
Ajuga (Ajuga spp.), also known as carpet bugle or bugleweed, is an adaptable, low growing plant that forms a thick carpet of foliage, often with a grayish-green, bronze or reddish tint. The plant is covered with springtime blooms of blue, purple, violet, white or pink, depending on the variety. Although most varieties are relatively well-behaved, Ajuga reptans is a rambunctious cultivar that spreads by long runners. It tends to escape its boundaries and invades flower beds and lawns if it isn’t carefully contained. Ajuga weed control is tricky, and tackling ajuga plants in lawns is especially challenging. Read on for more information about getting rid of bugleweed.
How to Control Ajuga
Below are the most effective methods for treating bugleweeds that have become invasive. Hand pulling – It’s always best to manage unwanted plants without use of chemicals whenever possible. If you want to remove ajuga in an environmentally friendly manner, the best solution is pulling – and a lot of it. Watering the area the day before will make ajuga easier to pull, as will loosening the soil around the plants with a spade or garden fork. Use a weeding fork to dig deep under the roots for more thorough ajuga weed control. Take your time and remove as many roots as possible because even small pieces that remain in the soil can take root and spread. Keep a careful watch on the area and pull new plants as soon as they appear. It will take time, but if you are persistent, you will eventually gain the upper hand.
Dispose of the plants properly and don’t toss them on your compost pile; they’ll take root and you’ll be back at square one – or worse. Homemade herbicide – Another option for getting rid of bugleweed is to create a homemade, environmentally friendly herbicide by mixing equal parts very hot water and vinegar. Stir in a small amount of salt and a few drops of liquid dish soap. Apply the solution with a spray bottle or a garden sprayer. Black plastic – If the ajuga isn’t in your lawn, you may be able to smother large patches with black plastic. Secure the plastic with bricks or rocks and leave it alone for two weeks so the sun can “bake” the ajuga. If the plants are still alive, leave the plastic in place for an additional two weeks. Chemical herbicides – If all else fails, ajuga weed control may require an herbicide such as Round-up. If the ajuga is in your lawn, read the label carefully and be sure to use a non-selective herbicide that will kill the ajuga without harming your lawn.
0
0
文章
Dummer. ゛☀
2017年08月27日
Ajuga is one of those perennials that is as adaptive as it is entrancing. The low-growing rosettes boast beautiful foliage and spikes of eye-catching flowers in spring. Most varieties are runners which spread by stolons. It makes an excellent groundcover, but can you plant ajuga in pots? The attractive leaves and spreading nature of the plant perform as bright colored fillers in containers and may even be evergreen in many zones. Growing ajuga in containers provides long lasting texture and a foil for many other blooming or foliage plants.
Can You Plant Ajuga in Pots?
One of my go-to plants for containers or garden beds is ajuga. It is hardy, unfussy, brilliantly colored and gives more and more plants each season. Container grown ajuga is just as useful and perks up a pot when other plants have yet to bloom or have died back. The lively color and jaunty little flowers can grow in either shade or sun, providing many options for containers in any situation.
Gardeners with a love for ajuga in the garden will be delighted to know the plants do well in confined containers as well. Even the runner types will thrive in a well-drained medium with plenty of organic material. The pop of color and low growth habit are perfect for green leafy specimens and blooming perennials that haven’t flowered yet. Once your container is in full flower, ajuga doesn’t compete with other plants’ brilliance. Instead, it enhances the tones and textures that are coming into their own as spring progresses into summer. Spring is the best time for ajuga planting in pots but in temperate regions you can also create a container garden with the plant in fall.
Planting Ideas for Ajuga in Containers
Ajuga plants come with foliage of purple or green tinged with maroon, bronze, variegated pink, green, white and even silver-green. Most have blue flowers but a few have pink blooms. The rainbow nature of the plant ensures there is a variety for every container need. The most common are the purple-maroon leafed cultivars with bright blue spring flower spikes. Try growing ajuga in containers with summer perennials like:
Yarrow
Campanula
Coreopsis
Geraniums
Primroses
A complete foliage container is a spectacle of texture and hues if you combine ajuga with any of the following:
Heuchera
Ferns
Hosta
Pulmonaria
Ajuga is fairly resistant to dry conditions once established and can also be used with more arid loving plants like:
Hens and chicks
Sedum
Creeping thyme
Thrift
Because container grown ajuga can tolerate shade conditions, a container comprised of hosta, houittuynia, and brunnera will provide low light containers that capture any stray sunbeam and transform into a kaleidoscope of color and infectious foliage texture.
How to Care for Potted Ajuga Plants
There are few special rules for ajuga planting in pots. You do need to know how to care for potted ajuga plants during winter and what is expected regarding water and fertilizer. In combined container settings, try to plant specimens that match ajuga’s cultural preferences. The plant needs consistent moisture until established. It can tolerate either full sun or total shade. Feed the plants twice per year, beginning in early spring and again two months later. Remove runners if you wish and plant them in other containers or in the ground.
Flower spikes may be cut off when they are spent or leave them, as the dried spires have some architectural interest. In the winter, mulch around the root zone of ajuga to protect it from cold snaps, which are more severely felt in unsheltered containers. Pull away the mulch in late winter to early spring so new foliage and rosettes can easily grow. Ajuga is an uncomplicated plant with many uses and years of resilient beauty.
1
1
文章
Dummer. ゛☀
2017年08月27日
Ajuga – also known as bugleweed – is a tough, low-growing ground cover. It offers bright, semi-evergreen foliage and showy flower spikes in amazing shades of blue. The vigorous plant grows in a carpet of shiny foliage and massed flowers, swiftly forming dense mats that require little maintenance. Ajuga plant propagation is so easy that the plants easily become invasive, rambling across the lawn and into places in the garden reserved for other plants. Read on for information about propagating ajuga plants.
Propagation of Ajuga Plants
Growing ajuga is easier than getting rid of it, so take its rapid growth into account before you decide on ajuga plant propagation. You’ll first want to prepare a garden space to plant your new ajuga. You’ll succeed best at ajuga plant propagation if you select a sunny area or one that is in light shade for the plant’s new home. Ajuga won’t flower well in full shade. Ajuga plants do best in moist, fertile soil. It’s a good idea to work in humus or other organic material to the soil before planting time.
How to Propagate Bugleweed
You can start propagating ajuga plants from plant seeds or by division.
Seeds
One way to start propagating ajuga plants is by planting seeds. If you decide to do this, sow ajuga plant seeds in containers in fall or spring. Just cover the seeds with a thin layer of compost and keep the soil moist. The seeds germinate in a month or less. Prick out the individual plants and place in larger containers. In summer, move the young plants to your garden beds.
Division
Ajuga spread by underground runners called stolons. These runners root the plant in nearby soil and form clumps. The ajuga clumps will eventually get crowded and begin to lose vigor. This is the time to lift and divide them in order to obtain additional ajuga plants.Propagation of ajuga by division is an operation for early spring or fall. It’s a simple process. All you have to do is dig out the clumps and pull or cut them apart into smaller sections, then replant them in another location. You can also simply cut out big sections of plant mats – like lawn sod – and move them to a new location.
1
1
文章
Dummer. ゛☀
2017年08月27日
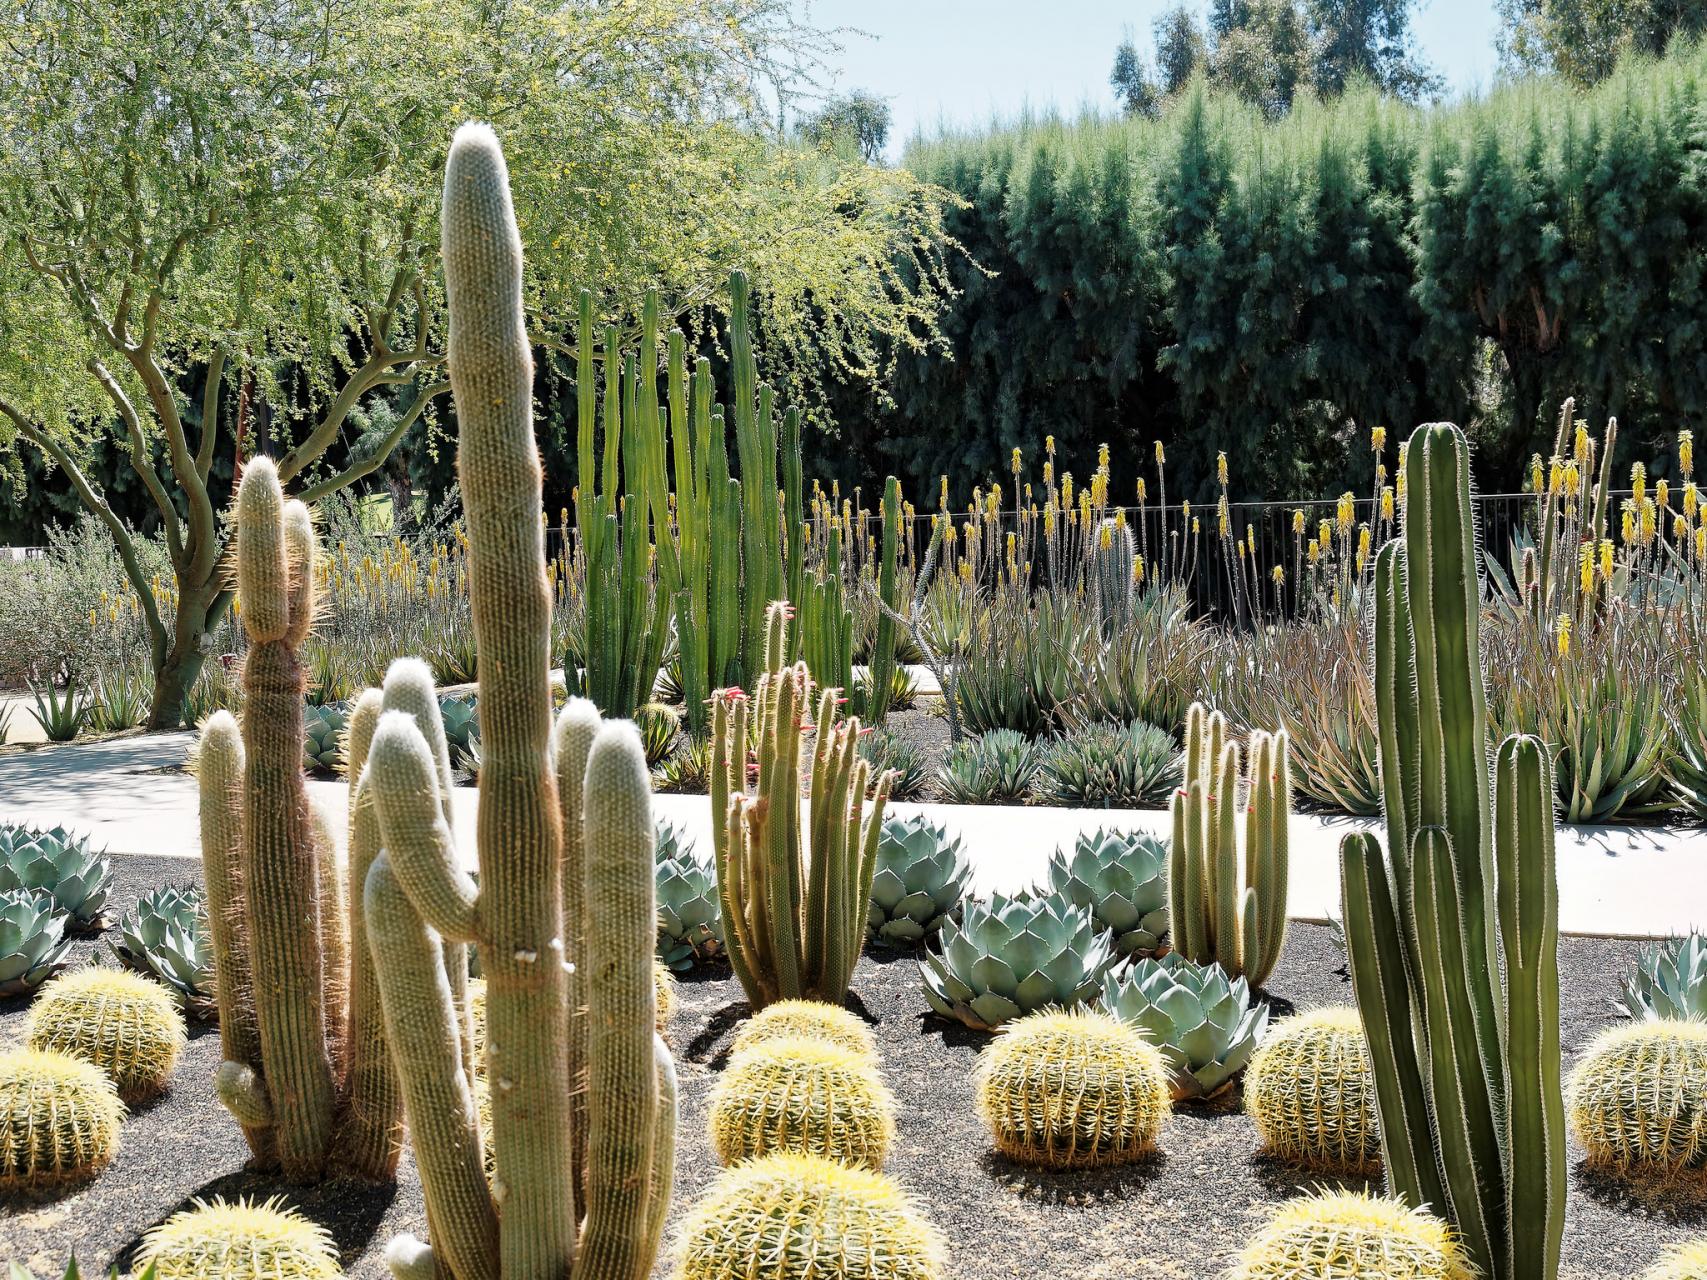
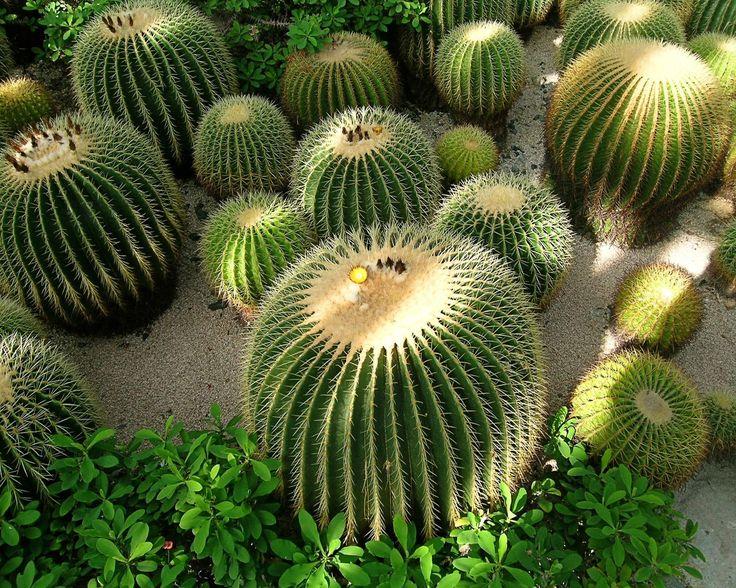
Saguaro cactus (Carnegiea gigantea) blossoms are the state flower of Arizona. The cactus is a very slow growing plant, which may add only 1 to 1 ½ inches in the first eight years of life. The Saguaro grows arms or lateral stems but it may take up to 75 years to produce the first one. Saguaro are very long lived and many found in the desert are 175 years old. It is likely that rather than growing Saguaro cactus in the home garden, you may find yourself the becoming owner of a well established Saguaro cactus when you buy a new home or build a home on land where Saguaro cactus already grow.
Saguaro Cactus Characteristics
Saguaro have barrel-shaped bodies with peripheral stems called arms. The exterior of the trunk is pleated due to the way it grows. The pleats expand, allowing the cactus to gather extra water in the rainy season and storing it in its tissues. An adult cactus may weigh 6 tons or more when filled with water and requires a strong internal support skeleton of connected ribs. A young growing Saguaro cactus may only be a few inches tall as ten year old plants and take decades to resemble the adults.
Where Do Saguaro Cactus Grow?
These cacti are native to and only grow in the Sonoran Desert. Saguaro are not found in the entire desert but only in areas that don’t freeze and at certain elevations. The freezing point is one of the most important considerations of where do Saguaro cactus grow. The cactus plants are found from sea level up to 4,000 feet. If they are growing above 4,000 feet, the plants survive only on south slopes where there are fewer freezes of shorter duration. Saguaro cactus plants are important parts of the desert ecology, both as habitat and as food.
Saguaro Cactus Care
It is not legal to procure a Saguaro cactus for home cultivation by digging it out of the desert. Beyond that, mature Saguaro cactus plants almost always die when transplanted. Saguaro cactus babies grow under the protection of nurse trees. The cactus will continue to grow and often its nurse tree will expire. It is thought the cactus may cause the nurse tree to die by competing for resources. The nurse trees provide Saguaro cactus babies with shelter from the harsh rays of the sun and dispersing moisture from evaporation. Saguaro cactus needs to grow in well-drained grit and receive low levels of water, with the soil drying out completely between irrigation. Annually fertilizing with cactus food in spring will help the plant complete its growth cycle. There are common cactus pests, such as scale and mealybugs, that will require manual or chemical controls.
Saguaro Cactus Blossoms
Saguaro cactus are slow to develop and may be 35 years of age or more before they produce the first flower. The flowers bloom in May until June and are a creamy white color and about 3 inches across. The Saguaro cactus blossoms only open at night and close in the day, which means they are pollinated by moths, bats and other nocturnal creatures.. The flowers are generally located at the end of the arms but may occasionally decorate the sides of the cactus.
0
0
文章
Dummer. ゛☀
2017年08月27日
Drought tolerant plants are important parts of the home landscape. Prickly pear plant is an excellent arid garden specimen that is appropriate for USDA plant hardiness zones 9 to 11. Growing prickly pear in colder climates can be done in containers where they are moved indoors when cold temperatures threaten. The question, “How to grow prickly pear?” is best answered with a little background on the plant.
Prickly Pear Plant Characteristics
Prickly pears are vigorously growing cactus with detachable spines which means they may not be suitable for every garden. The plants are perfect for the hot as a griddle areas of your garden. The plant is comprised of wide, flat, thick pads that are covered in spines and segmented stems. There are 181 species of prickly pear plant that range from low growing plants just over a foot high to 18 foot high giants.
Types of Prickly Pear
The wide range of cactus available for the home garden, provide a plant for every warm season situation. The diminutive Beavertail prickly pear (Opuntia basilaris) has bluish gray pads that are slightly triangular in shape and carried on a 20 inch tall frame that can spread 20 to 30 inches wide. The Indian fig prickly pear (Opuntia ficus-indica) is a monster of a cactus that grows in a treelike habit. It bears an edible fruit and large orange or yellow flowers. The types of prickly pear have numerous descriptive names, among them bunny ears (Opuntia microdasys) and cow’s tongue (Opuntia engelmannii).
Planting Prickly Pear
The first thing to remember when planting prickly pear is to wear thick gloves and full length sleeves. It will be helpful to have a second pair of hands to keep the cactus stable when lowering it into the hole. Plant the prickly pear at the same level it was growing in the nursery pot. Some exterior support may be necessary for larger specimens while it establishes. Planting prickly pear cactus requires careful handling to avoid damaging the plant and you.
How to Grow a Prickly Pear
Prickly pears are easy to grow. They need well-drained soil and can survive on rainwater after established. During rooting, the plant should be irrigated every two or three weeks. When you choose a cactus, consider the size it will eventually become and plant it away from pathways and areas where people will brush against it. Growing prickly pear successfully relies on a warm, dry climate. You can easily grow your own prickly pear. Propagation from pads is quick and quite simple. The pads are actually specialized flattened stems. Six month old pads are removed from the plant and set out in a dry area to form a callus on the cut end for several weeks. A half and half mix of soil and sand is good for planting prickly pear pads. The pad will form roots in a few months. During this time, it needs support and should not be watered. The pad can be watered after it will stand on its own.
0
0
文章
Dummer. ゛☀
2017年08月27日
Mistletoe cactus (Rhipsalis baccifera) is a tropical succulent native to rainforests in warm regions. The grownup name for this cactus is Rhipsalis mistletoe cactus. This cactus is found in Florida, Mexico and Brazil. Surprisingly, growing Rhipsalis requires shade to partial shade. While most cacti are found in hot, sunny, arid zones, mistletoe cactus is unique in its requirements for moisture and dim light. Take some tips on how to grow mistletoe cactus and enjoy this unique and entertaining looking plant.
About Rhipsalis Plants
Rhipsalis mistletoe cactus is also called chain cactus and grows epiphytically in its tropical forest home. The cactus has pencil thin succulent stems that may reach 6 feet in length. The thick skin of the stems does not produce thorns, but it does have almost imperceptible bumps on the surface of the plant. These plants are found clinging to tree crotches, in branch nooks and nestled in rock crevasses. The Rhipsalis mistletoe cactus is easy to grow and has very minimal needs. It is perfect for the home interior in a northern or western window.
Requirements for Growing Rhipsalis
Mistletoe cactus is only hardy in USDA plant hardiness zones 9 to 10. The plant is most often found indoors and may simply be mounted on a piece of bark like an orchid or potted in a good cactus mix. If you are not prone to overwatering, you can plant the cactus in regular potting soil mixed with sand or other gritty material. The plant is used to living in the understory of the forest, where temperatures are at least 60 F. (15 C.) and light is filtered through the high limbs. Growing Rhipsalis is practically foolproof as long as you mimic its native conditions.
How to Grow Mistletoe Cactus
Mistletoe cacti are easy to grow from cuttings. Seeds take way too long and they require very even environmental conditions. Take cuttings and let the severed end callus for a few days. Plant the callused end in a cactus mix or sand that has been lightly moistened. Cuttings root in two to six weeks. Seeds can be started indoors in flats filled with sand and peat. Moisten the medium and plant the seeds 1/4-inch deep. Keep the medium barely moist until the plants germinate. Grow young plants in semi-shade and water when the surface of the soil is dry.
Mistletoe Cactus Care
Ensure that your mistletoe cactus is planted in well-drained soil. Potted plants benefit from a saucer filled with rocks and water to increase the ambient humidity in the home interior. The plant rarely needs fertilizing and has few other needs except moderate light and even moisture. Fertilize with a half dilution of cactus food from April to September, once per month. Water frequently in spring and summer, but suspend water in winter. If any of the stems are damaged, you can trim them off with a sharp, sterile knife. Use these as cuttings to start new Rhipsalis mistletoe cactus.
1
0
文章
Dummer. ゛☀
2017年08月27日
Opuntia ficus-indica is more commonly known as a Barbary fig. This desert plant has been used for centuries as food, fending, and even dye. Growing Barbary fig plants, as long as you live in the right climate, is both rewarding and useful.
What is a Barbary Fig?
Barbary fig, a variety of prickly pear cactus, is thought to be native to Mexico where it has long been used for a variety of purposes. The fruits and pads can be eaten by humans and livestock, and the size, sprawling growth, and thorns make this cactus a good natural fence and barrier.
The insects that are used to make red dye feed on prickly pear, which has made it an economically useful plant. Today, the plant has spread far from Mexico. It is common in the southwest U.S. and is considered invasive in Africa. While Opuntia/Barbary fig info is practical for so many purposes, this plant is also great as simply an attractive addition to the garden. The plant grows green “pads,” which are covered in spines. At the tips of the pads, yellow to orange flowers bloom, followed by red fruits. The fruits are also known as tunas. Both these and the pads can be prepared and eaten.
How to Grow a Barbary Fig
As a cactus, this plant requires a desert climate to thrive: dry, hot conditions. It is hardy through zone 8, but is best in hotter regions. For the right location, Barbary fig care is easy. Give it a spot that gets full sun and little water. If you live in the desert, you can essentially put your cactus in a suitable area of the garden and leave it alone. It will grow and thrive. If you want to grow it indoors, it will do well in a container that is big enough. With the right sunny spot and dry soil, your Barbary fig may grow as tall as ten feet (3 meters), so give it plenty of space, or plan spacing accordingly if you want to use it as a fence.
0
1
文章
Dummer. ゛☀
2017年08月27日
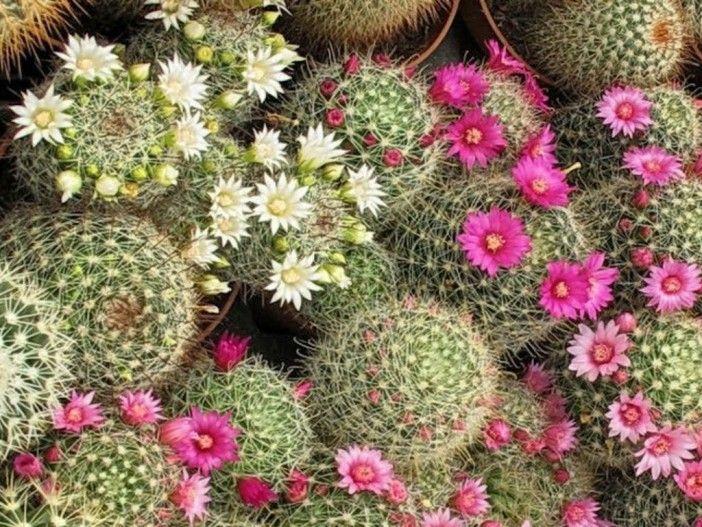
Growing pincushion cactus is an easy gardening project for the novice gardener. The plants are drought tolerant and native to the arid upper Sonoran desert. They are small cacti that make excellent additions to succulent displays. Pincushion cactus plant is a perennial that is most often found in heavily grazed pastureland and woody scrub.
Pincushion Cactus Plant Varieties
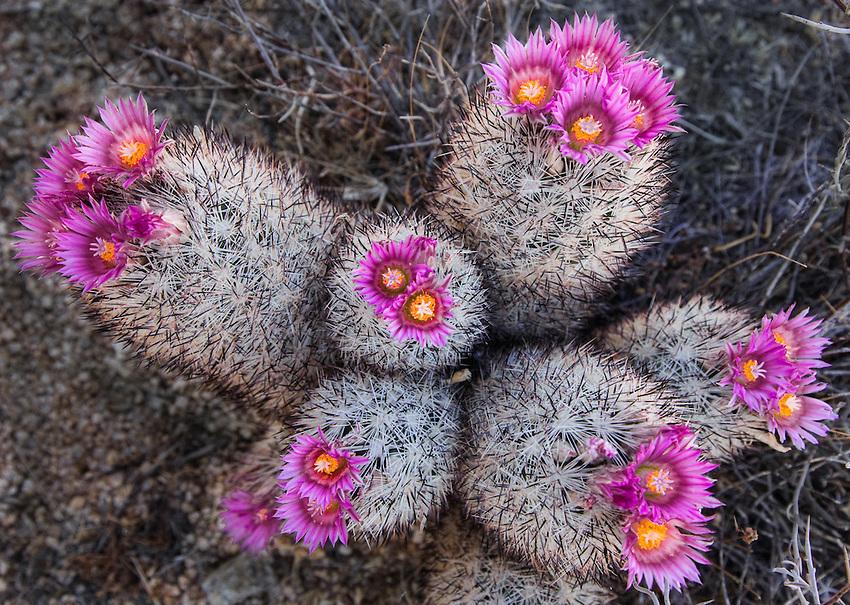
Pincushion cactus is a member of a family called Mammillaria, which includes 250 species of cactus. Some of the species of pincushion have colorful names. The Giant Snake or Crawling Log cactus (Mammillaria matudae) produce long stems. Snowball cushion cactus (Mammillaria candida) is a ball-shaped plant with white felt or fuzz on the skin of the plant. Old Lady cactus (Mammillaria hahniana) is a solitary cactus with white fuzzy hair-like spines and purplish red flowers. There are also Powder puff (Mammillaria bocasa-na) and Rose (Mammillaria zeilmanniana) among many others. Cactus and succulent stores can provide you with more pincushion cactus information.
Pincushion Cactus Information
Pincushion cacti are small, squat plants that usually don’t grow more than 6 inches in height. They can be ball or barrel shaped, and are native to the warmer regions of the United States. The pincushion cactus plant is most commonly grown indoors but it can tolerate some chilling temperatures if grown outside. Pincushion cactus is so called because it is covered in white spines over the entire surface of the plant. It is a very prickly little specimen that is best handled with thick gloves.
Growing Pincushion Cactus
Pincushion cactus care is very simple and suitable for the beginning gardener. Cactus plants are used to dry conditions and limited fertility. The soil for a pincushion needs to be well drained and gritty. The soil needs to dry out between watering, which is best accomplished with a sandy topsoil. The cactus goes dormant in winter and needs no additional irrigation until spring. Potted plants do well in unglazed clay pots, which allow any extra moisture to evaporate. Temperatures should be between 50 and 75 F. (10-24 C.). Small gravel spread around the base of the plant out to the root zone will act as a mulch to deter stem rot. The cactus produces offsets when it is mature. These can be divided from the mother plant and potted in a sandy soil mixture. You can also start the plants from seed in spring. Plant seed in a flat filled with cactus mix. Surface sow and then sprinkle sand lightly over the top and moisten the soil evenly. Place the flat in a warm location of at least 70 F. (21 C.). Keep seeds wet when growing pincushion cactus. Seedlings are transplanted when they can easily be moved.
Flowering Pincushion Cactus
If optimum heat and watering conditions are met, the pincushion cactus may reward you with flowers in spring. Enhance the chance of blooming by holding off watering until several weeks into spring. You can also apply a cactus food in early spring to give the plant the nutrients it needs to produce blooms.
Pincushion Cactus Plant Varieties
Pincushion cactus is a member of a family called Mammillaria, which includes 250 species of cactus. Some of the species of pincushion have colorful names. The Giant Snake or Crawling Log cactus (Mammillaria matudae) produce long stems. Snowball cushion cactus (Mammillaria candida) is a ball-shaped plant with white felt or fuzz on the skin of the plant. Old Lady cactus (Mammillaria hahniana) is a solitary cactus with white fuzzy hair-like spines and purplish red flowers. There are also Powder puff (Mammillaria bocasa-na) and Rose (Mammillaria zeilmanniana) among many others. Cactus and succulent stores can provide you with more pincushion cactus information.
Pincushion Cactus Information
Pincushion cacti are small, squat plants that usually don’t grow more than 6 inches in height. They can be ball or barrel shaped, and are native to the warmer regions of the United States. The pincushion cactus plant is most commonly grown indoors but it can tolerate some chilling temperatures if grown outside. Pincushion cactus is so called because it is covered in white spines over the entire surface of the plant. It is a very prickly little specimen that is best handled with thick gloves.
Growing Pincushion Cactus
Pincushion cactus care is very simple and suitable for the beginning gardener. Cactus plants are used to dry conditions and limited fertility. The soil for a pincushion needs to be well drained and gritty. The soil needs to dry out between watering, which is best accomplished with a sandy topsoil. The cactus goes dormant in winter and needs no additional irrigation until spring. Potted plants do well in unglazed clay pots, which allow any extra moisture to evaporate. Temperatures should be between 50 and 75 F. (10-24 C.). Small gravel spread around the base of the plant out to the root zone will act as a mulch to deter stem rot. The cactus produces offsets when it is mature. These can be divided from the mother plant and potted in a sandy soil mixture. You can also start the plants from seed in spring. Plant seed in a flat filled with cactus mix. Surface sow and then sprinkle sand lightly over the top and moisten the soil evenly. Place the flat in a warm location of at least 70 F. (21 C.). Keep seeds wet when growing pincushion cactus. Seedlings are transplanted when they can easily be moved.
Flowering Pincushion Cactus
If optimum heat and watering conditions are met, the pincushion cactus may reward you with flowers in spring. Enhance the chance of blooming by holding off watering until several weeks into spring. You can also apply a cactus food in early spring to give the plant the nutrients it needs to produce blooms.
1
1
文章
Dummer. ゛☀
2017年08月27日
If you are looking for a houseplant with a lot of character and personality, consider growing old man cactus (Cephalocereus senilis). While it isn’t wrinkly or on social security, the plant does have fluffy white tufts of hair over the surface of the cactus body. The appearance is reminiscent of senior citizen pates, lightly cushioned by sparse, long billowy hair. Indoor cactus growing is most suitable in the majority of the United States growing zones. Learn how to grow an old man cactus and bring the cute little plant with the fuzzy white hairdo into your home.

Old Man Cactus Houseplants
This cactus can go outside in USDA zones 9 and 10. Native to Mexico, they need hot, dry climates and bright sunlight. The long hair is used by the plant to keep itself cool in its natural habitat. As an outdoor plant, they can get 45 feet tall but are generally slow growing as potted plants. Old man cacti are mostly grown as houseplants and stay small and easily kept in a container for their entire lives. Indoor cactus growing requires a southern- or western-facing window and temperatures of at least 65 F. (18 C.). For best growth, give it a winter hibernation period in an area where temperatures are below 65 F. (18 C.).

How to Grow an Old Man Cactus
Use a cactus mix or blend of sand, perlite and topsoil for indoor cactus growing. Also, use an unglazed pot for growing old man cactus. This will allow the pot to evaporate any excess moisture. Old man cactus houseplants like their soil on the dry side and overwatering is a common cause of rot and disease. Old man cactus needs a sunny, warm location but has few other needs. You should watch it carefully for pests, however, which can hide in the hair. These include mealybugs, scale, and flying pests.

Old Man Cactus Care
Old man cactus is easy to propagate from cuttings or seed. Seeds take a long time to grow into something recognizable as a cactus, but it is a cheap and fun project for children. Cuttings need to lie out on the counter in a dry location for a couple of days to callus. Then insert the cut end with the dry, white callus into a soilless medium, such as sand or perlite. Keep the cutting in moderate, but not scalding, light where temperatures are at least 70 F. (21 C.) for best rooting. Don’t water until the little cutting has rooted. Then treat your new old man cactus houseplants as you would a mature specimen.
Old Man Cactus Houseplants
This cactus can go outside in USDA zones 9 and 10. Native to Mexico, they need hot, dry climates and bright sunlight. The long hair is used by the plant to keep itself cool in its natural habitat. As an outdoor plant, they can get 45 feet tall but are generally slow growing as potted plants. Old man cacti are mostly grown as houseplants and stay small and easily kept in a container for their entire lives. Indoor cactus growing requires a southern- or western-facing window and temperatures of at least 65 F. (18 C.). For best growth, give it a winter hibernation period in an area where temperatures are below 65 F. (18 C.).
How to Grow an Old Man Cactus
Use a cactus mix or blend of sand, perlite and topsoil for indoor cactus growing. Also, use an unglazed pot for growing old man cactus. This will allow the pot to evaporate any excess moisture. Old man cactus houseplants like their soil on the dry side and overwatering is a common cause of rot and disease. Old man cactus needs a sunny, warm location but has few other needs. You should watch it carefully for pests, however, which can hide in the hair. These include mealybugs, scale, and flying pests.
Old Man Cactus Care
Old man cactus is easy to propagate from cuttings or seed. Seeds take a long time to grow into something recognizable as a cactus, but it is a cheap and fun project for children. Cuttings need to lie out on the counter in a dry location for a couple of days to callus. Then insert the cut end with the dry, white callus into a soilless medium, such as sand or perlite. Keep the cutting in moderate, but not scalding, light where temperatures are at least 70 F. (21 C.) for best rooting. Don’t water until the little cutting has rooted. Then treat your new old man cactus houseplants as you would a mature specimen.
0
1
求助
Sean Mack
2017年08月26日

What is this plant? Its growing like a weed. the small berry/seedpods are turning red as they mature. im in yhe north east of the US if that helps identify

1
0
Sean Mack:@meriunkat thank you!! And great tip on the staining. It seems to have some nice year on it tho. Been making a bread starter next to it and it looks so happy!
meriunkat:I found it on Whiteflowerfarm.com it's called common pokeweed (Phytolacca Americana L.)
meriunkat:It also blooms little white flowers
meriunkat:oh I had this plant growing in my backyard once, it's annoying because those seed pods fall a lot when they are red and make a mess, they also stain so be careful 😁
文章
Dummer. ゛☀
2017年08月26日
Also known as little floating heart, water snowflake (Nymphoides spp.) is a charming little floating plant with delicate snowflake-like flowers that bloom in summer. If you have an ornamental garden pond, there are a lot of very good reasons for growing snowflake lilies. Read on to learn more about snowflake water lily.
Water Snowflake Information
Despite its name and the obvious resemblance, snowflake water lily isn’t actually related to the water lily. Its growth habits are similar, however, and snowflake water lily, like the water lily, floats on the surface of the water with its roots connected to the soil below.
Snowflake water plants are hardy growers, sending out runners that quickly spread over the water’s surface. The plants can be extremely helpful if you fight recurring algae in your pond, as snowflake water lily provides shade that minimizes algae growth. Because snowflake water lily is a rambunctious grower, it is considered to be an invasive species in some states. Ensure the plant isn’t a problem in your area before planting snowflake water plants in your pond. Folks at your local Cooperative Extension office can provide specific information.
Water Snowflake Care
Growing snowflake lilies isn’t difficult in the mild temperatures of USDA plant hardiness zones 7 through 11. If you live in a cooler climate, you can float the plants in pots and bring them indoors. Plant snowflake water lily where the plant is exposed to full sunlight, as blooming will be limited in partial shade and the plant may not survive in full shade. The water depth should be at least 3 inches and no deeper than 18 to 20 inches.
Snowflake water plants generally require no fertilizer because they take ample nutrients from pond water. However, if you choose to grow snowflake water lily in a container, provide a fertilizer made specifically for water plants every month or so during the growing season. Thin snowflake water plants occasionally if they become overcrowded, and remove dead leaves as they appear. Feel free to share the plant, which roots easily.
0
0
文章
Dummer. ゛☀
2017年08月26日
The attractive, feathery fronds of parrot feather plants (Myriophyllum aquaticum) often encourage the water gardener to use it in a bed or border. The delicate appearance of growing parrot feather compliments other foliage in your water feature or bog garden.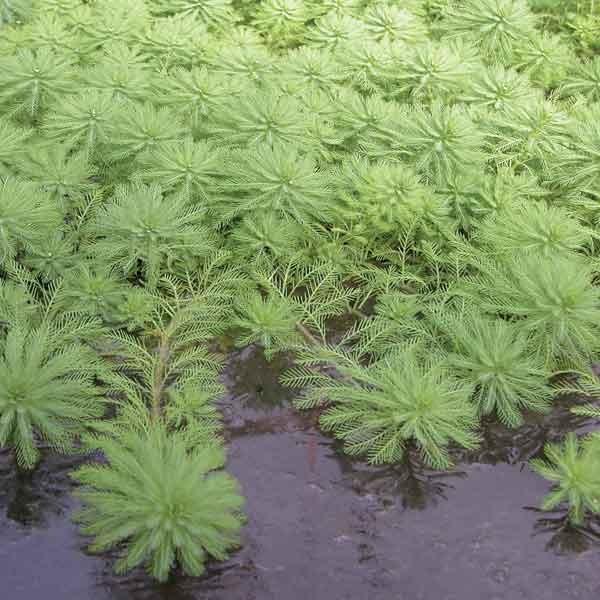
Parrot Feather Information
Stop: before you make the mistake of planting this seemingly innocent specimen in your landscape, you should know that parrot feather information indicates that these plants are highly invasive. Once planted, they have the potential to readily escape cultivation and overwhelm native plants. This has already happened in numerous areas in the United States. Only female specimens of the plant are known to grow in this country and multiply from root division and plant pieces in a process called fragmentation. Tiny bits of the plant have moved through waterways, on boats and located themselves aggressively in many areas. Several states have laws that prohibit growing parrot feather.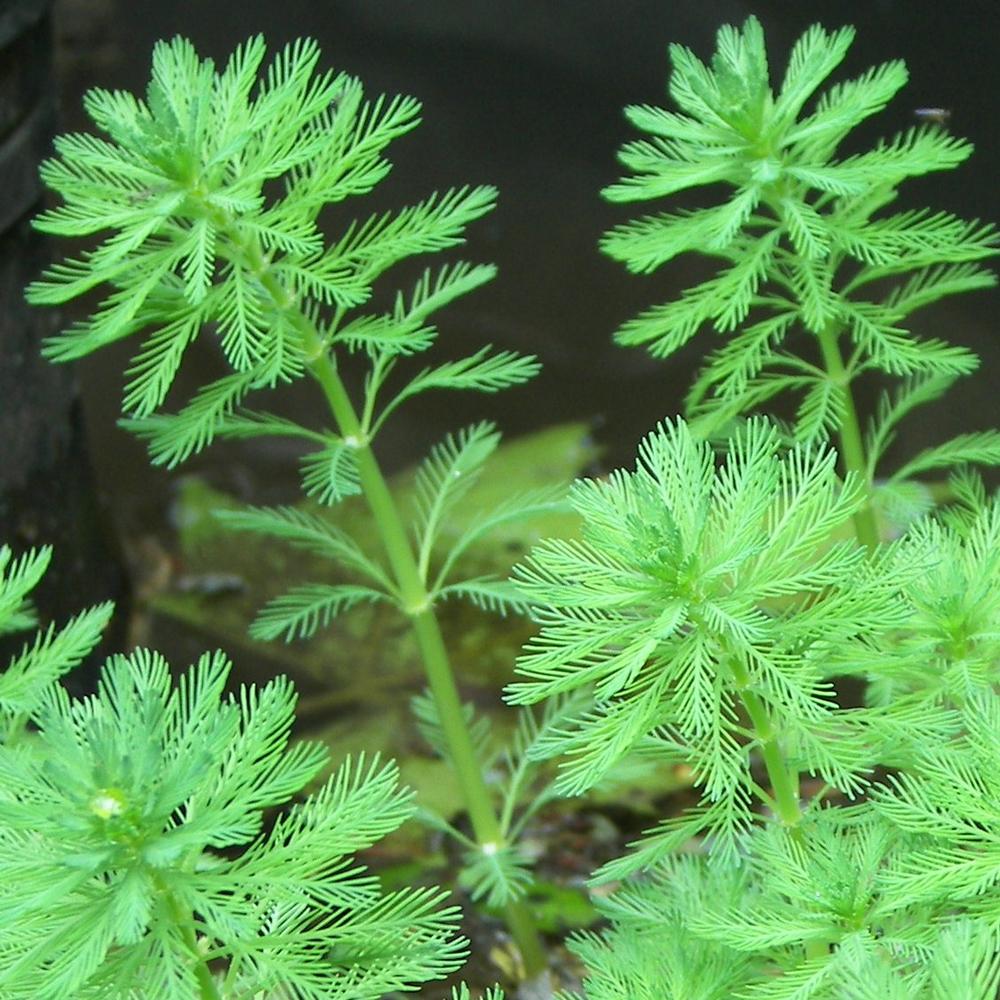
Growing Parrot Feather
Growing parrot feather began innocently enough in the United States. The South and Central American native came to the country in the 1800’s to decorate indoor and outdoor aquariums. The attractive, feathery plumes of parrot feather plants took hold and began to choke out native plants. If you choose to use parrot feather plants in your pond or water garden, keep in mind that parrot feather plant care will consist of keeping the plant under control. Keep growing parrot feather in bounds by only using in lined ponds and water features or in containers.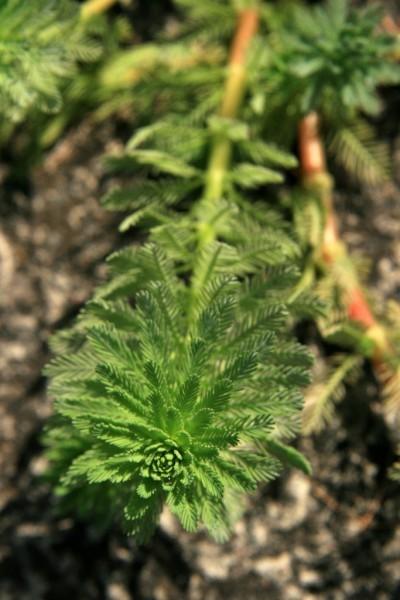
Parrot feather plants grow in fresh water areas from rhizomatous roots. Cutting the plant encourages it to grow, so control can be complicated if it grows to restrict your drainage pipe or begins to destroy beneficial algae. Aquatic herbicides are sometimes effective in parrot feather plant care and control. If you choose to grow parrot feather plants in or around your water feature or pond, make sure it is legal to grow it in your area. Plant only in a controlled situation, such as a container or indoor water feature.
1
1
文章
Dummer. ゛☀
2017年08月26日
The lotus (Nelumbo) is an aquatic plant with interesting leaves and stunning flowers. It’s most commonly grown in water gardens. It is very invasive, so care has to be taken when growing it, or it will quickly take over its environment. Keep reading to learn more lotus plant information, including lotus plant care and how to grow a lotus plant.
How to Grow a Lotus Plant
Growing lotus plants requires a certain amount of diligence. The plants will spread quickly and easily if grown in the soil, so it’s best to plant them in containers. Make sure your container has no drainage holes – lotus roots can easily escape through them, and since your container will be underwater, drainage is a non-issue.
If you’re growing lotus plants from rhizomes, fill a container with garden soil and lightly cover the rhizomes, leaving the pointed tips slightly exposed. Submerge the container in water so that the surface is about 2 inches above the soil line. You may have to put a layer of gravel on top of the soil to keep it from floating away. After a few days, the first leaf should emerge. Keep raising the level of the water to match the length of the stems. Once the weather outside is at least 60 F. (16 C.) and the stems extend several inches, you can move your container outdoors.
Sink the container in your outdoor water garden no more than 18 inches from the surface. You may have to raise it up on bricks or cinder blocks.
Lotus Plant Care
Caring for lotus plants is relatively easy. Place them in a spot that receives full sun and fertilize them moderately.
Lotus tubers can’t survive freezing. If your pond does not freeze solid, your lotus should be able to overwinter if placed deeper than the freeze line. If you’re worried about freezing, you can dig up your lotus tubers and overwinter them indoors in a cool place.
1
3
文章
Dummer. ゛☀
2017年08月26日
If you’re in need of a good, easy-care plant that enjoys plenty of moisture, then growing lizard’s tail swamp lily may be just what you desire. Keep reading for lizard’s tail information and care.
Lizard’s Tail Information
Lizard’s tail plants (Saururus cernuus), also known as lizard’s tail swamp lilies and Saururus lizard’s tail, are perennial plants that can grow up to 4 feet tall. They have a hairy stem with very few, if any, branches. Leaves are large and heart-shaped.
Found in marshes, along the banks of ponds and streams, it is not uncommon to see some of the plant growing under water. This provides habitats for small aquatic invertebrates, which draw fish and other species. In addition, after the plant dies, it is decomposed by fungi and bacteria which provide food for aquatic invertebrates. This interesting plant produces white aromatic flowers on top of the hairy stems opposite the top leaf. The flower structure is a spike with lots of small white flowers that form an arch. The seeds form a structure that looks similar to a wrinkled lizard’s tail. This water-loving species has an orange aroma and spreads by rhizomes to form colonies.
Growing Lizard’s Tail Swamp Lily
If you have a boggy area in your yard, a small pond, or even a shallow pool of water, that receives part shade, a lizard’s tail plant may be a great option. It is an herbaceous perennial that grows best in USDA plant hardiness zones 4 through 11. Considered a good plant for beginner gardeners, Saururus lizard’s tail is not difficult to plant or care for.
Lizard’s Tail Care
This plant requires extremely little attention once planted. It spreads by rhizomes and can be divided by root propagation. No special care is needed to over winter this plant, and it is not susceptible to bugs or disease. As long as it receives plenty of water and partial sun, it will thrive.
0
0

