文章
Miss Chen
2017年10月28日

Strawberries (Fragaria ananassa) are productive little plants that, given good growing conditions, will produce prolifically year after year. Although the length and severity of Michigan winters, particularly in the northern reaches of the state, can be a challenge to some fruit crops, strawberries aren't daunted by the cold. Cultivars are available that are hardy in U.S. Department of Agriculture plant hardiness zones 2 to 11, so they can handle the climate throughout Michigan.

Recommended Varieties
June-bearing strawberry varieties produce one large crop of berries, usually in mid-June in Michigan, and they typically produce more berries per season than other types of plants. Among suitable varieties of June-bearing cultivars for Michigan are "Allstar" (Fragaria ananassa "Allstar") and "Jewel" (Fragaria ananassa "Jewel"), both of which are hardy in USDA zones 4 to 8, and "Cavendish" (Fragaria ananassa "Cavendish") and "Annapolis" (Fragaria ananassa "Annapolis"), which are hardy in USDA zones 3 to 8.
Ever-bearing varieties produce two relatively small crops, the first in the spring and the second in the early fall; the timing of the crops is triggered by the length of daylight hours. Day-neutral varieties produce berries independently of day length and may produce through most of the season. Recommended cultivars for the state include "Tribute" (Fragaria ananassa "Tribute") and "Tristar" (Fragaria ananassa "Tristar"), which are hardy in USDA zones 4 to 8.
Site Selection
Strawberries prefer well-drained soils that contain plenty of organic matter. They also need at least 8 hours of sunlight per day to produce well, so they should be planted in full sun; although the plants can tolerate partial shade, they're unlikely to bear well if they don't get enough light.
Strawberries will also produce best if they're growing in slightly acidic soil with a pH level between 5.3 and 6.5.

Soil Preparation
Strawberries benefit from consistent soil moisture, so the soil in the planting bed needs to drain well yet retain enough moisture to keep the plants' roots from drying out. Incorporating 1 to 4 inches of organic compost or peat moss into the soil will help by contributing moisture-retentive material to sandy soils that otherwise might drain too quickly and by loosening dense clay soils that might retain too much water.
Setting Plants
Plant strawberries as early in the spring as possible so that they have plenty of time to get established at the beginning of the season.
Strawberries must be planted at the correct depth or they won't grow well. If they're planted so shallowly that the roots are exposed, the roots may dry out, but if they're planted so deeply that the crown where the leaves emerge is buried, the plant may rot. Place the plants so that the surface of the soil meets the midpoint of the crown. Firm the soil around the plants and water them well.
In laying out rows of plants, space plants 18 to 24 inches apart, with 3 or 4 feet between rows.
In a "matted row" planting system, plants are allowed to send out runners from which new plants grow and fill in the row; this system works well with June-bearing varieties. In a "hill" planting systems, runners are cut off and not allowed to produce new plants; this system is most often used with ever-bearing or day-neutral varieties.

Recommended Varieties
June-bearing strawberry varieties produce one large crop of berries, usually in mid-June in Michigan, and they typically produce more berries per season than other types of plants. Among suitable varieties of June-bearing cultivars for Michigan are "Allstar" (Fragaria ananassa "Allstar") and "Jewel" (Fragaria ananassa "Jewel"), both of which are hardy in USDA zones 4 to 8, and "Cavendish" (Fragaria ananassa "Cavendish") and "Annapolis" (Fragaria ananassa "Annapolis"), which are hardy in USDA zones 3 to 8.
Ever-bearing varieties produce two relatively small crops, the first in the spring and the second in the early fall; the timing of the crops is triggered by the length of daylight hours. Day-neutral varieties produce berries independently of day length and may produce through most of the season. Recommended cultivars for the state include "Tribute" (Fragaria ananassa "Tribute") and "Tristar" (Fragaria ananassa "Tristar"), which are hardy in USDA zones 4 to 8.
Site Selection
Strawberries prefer well-drained soils that contain plenty of organic matter. They also need at least 8 hours of sunlight per day to produce well, so they should be planted in full sun; although the plants can tolerate partial shade, they're unlikely to bear well if they don't get enough light.
Strawberries will also produce best if they're growing in slightly acidic soil with a pH level between 5.3 and 6.5.

Soil Preparation
Strawberries benefit from consistent soil moisture, so the soil in the planting bed needs to drain well yet retain enough moisture to keep the plants' roots from drying out. Incorporating 1 to 4 inches of organic compost or peat moss into the soil will help by contributing moisture-retentive material to sandy soils that otherwise might drain too quickly and by loosening dense clay soils that might retain too much water.
Setting Plants
Plant strawberries as early in the spring as possible so that they have plenty of time to get established at the beginning of the season.
Strawberries must be planted at the correct depth or they won't grow well. If they're planted so shallowly that the roots are exposed, the roots may dry out, but if they're planted so deeply that the crown where the leaves emerge is buried, the plant may rot. Place the plants so that the surface of the soil meets the midpoint of the crown. Firm the soil around the plants and water them well.
In laying out rows of plants, space plants 18 to 24 inches apart, with 3 or 4 feet between rows.
In a "matted row" planting system, plants are allowed to send out runners from which new plants grow and fill in the row; this system works well with June-bearing varieties. In a "hill" planting systems, runners are cut off and not allowed to produce new plants; this system is most often used with ever-bearing or day-neutral varieties.
0
0
文章
Miss Chen
2017年10月28日

Strawberry plants grow low to the ground and produce runners. They self-propagate through "daughter" plants. Self-propagation assures several years of continued growth, with three to five years of continued fruit production. Like all perennials, though, strawberry plants need specific fall and winter 
Preparation
Successful strawberry patches begin with the right planting area and soil for long-term success -- and also makes protecting the plants during the winter an easier task. Plant strawberries to receive full sunshine and quick drainage all year to keep them healthy in both summer and winter. Use a generous amount of organic compost at planting to maintain soil quality, and keep the soil from flooding or freezing in fall and winter.
Renovation
According to Purdue University, strawberry patches require yearly renovation in the fall to continue efficient growth and fruit production. Renovate your strawberry patch in late summer or fall, depending on the strawberry cultivar. Always start immediately after the last fruit harvest. This renovation eliminates old, finished plants and encourages new growth.
Process
Give the strawberries 12-12-12 fertilizer at a rate of 4 to 6 lbs. per 100 feet of row. Mix the fertilizer into the top 2 inches of soil to encourage new runner development. Mow all foliage down to within 1 inch of the soil, and pull up excess growth to narrow the rows to 6 to 8 inches. Cover the rows with 1/2 inch of soil and water as usual, to allow for new growth.

Winter Protection
Mulching and winter protection must follow renovation, to protect strawberries through the cold season. When new plants emerge from your renovated soil, water and weed them as usual until two to three weeks before the first frost of the season. At that time, give the new plants 12-12-12 fertilizer per manufacturer directions, then spread 4 to 5 inches of organic mulch, straw or shredded paper over the path. Maintain this layer through winter and turn it into the soil in spring.

Preparation
Successful strawberry patches begin with the right planting area and soil for long-term success -- and also makes protecting the plants during the winter an easier task. Plant strawberries to receive full sunshine and quick drainage all year to keep them healthy in both summer and winter. Use a generous amount of organic compost at planting to maintain soil quality, and keep the soil from flooding or freezing in fall and winter.
Renovation
According to Purdue University, strawberry patches require yearly renovation in the fall to continue efficient growth and fruit production. Renovate your strawberry patch in late summer or fall, depending on the strawberry cultivar. Always start immediately after the last fruit harvest. This renovation eliminates old, finished plants and encourages new growth.
Process
Give the strawberries 12-12-12 fertilizer at a rate of 4 to 6 lbs. per 100 feet of row. Mix the fertilizer into the top 2 inches of soil to encourage new runner development. Mow all foliage down to within 1 inch of the soil, and pull up excess growth to narrow the rows to 6 to 8 inches. Cover the rows with 1/2 inch of soil and water as usual, to allow for new growth.

Winter Protection
Mulching and winter protection must follow renovation, to protect strawberries through the cold season. When new plants emerge from your renovated soil, water and weed them as usual until two to three weeks before the first frost of the season. At that time, give the new plants 12-12-12 fertilizer per manufacturer directions, then spread 4 to 5 inches of organic mulch, straw or shredded paper over the path. Maintain this layer through winter and turn it into the soil in spring.
0
0
文章
Miss Chen
2017年10月27日

While you eagerly wait for the first bite out of one of your homegrown tomatoes (Lycopersicon esculentum), you might be dismayed to notice unsightly fungal growth on your plants. Before blasting the foliage with potentially harmful chemicals, try using a simple baking soda spray. The organic spray is easy to mix and could be just what you need to protect your tomato crop from nasty fungi.

Why It Works
Baking soda contains sodium bicarbonate, a substance that can help naturally control various tomato fungal diseases, including anthracnose, leaf spots, early tomato blight and powdery mildew. Baking soda doesn't actually kill the fungi, however. Instead, the sodium bicarbonate alters the pH balance of the foliage so the fungal spores can't germinate and grow. Because of this, baking soda works well as a preventative fungicide, but it doesn't spread easily or adhere well to foliage. Adding horticultural oil or dish soap to the spray gives it some sticking and spreading action. Oils can also help eradicate fungal spores already infecting your tomato plants.
Spray Recipes
Baking soda sprays are easy to make, and you can mix them up right inside of your garden sprayer. The Master Gardeners of Santa Clara County recommend combining 5 tablespoons of horticultural oil with 2 gallons of water. After mixing thoroughly, add 8 teaspoons of baking soda to the solution, and stir until the powder completely dissolves.
Another recipe recommended by Mike McGrath, host of "You Bet Your Garden" on WHYY, calls for adding liquid dish soap to the mixture, but use a natural soap with no bleach, fragrance or other additives. Simply mix 2 tablespoons of baking soda, 2 tablespoons of horticultural oil and about 4 drops of dish soap into 2 gallons of water. Shake well and start spraying your tomato plants.

Spraying Tomatoes
To prevent fungal diseases, apply baking soda sprays to tomato plants every seven to 14 days until the humidity levels no longer promote infections. Plants already infected need to be sprayed as often as every five to seven days until the disease symptoms clear up. Before spraying already infected tomatoes, remove infected foliage and any mulch surrounding the plants. Then give your tomatoes a strong blast of water from a garden hose to help loosen up the fungal spores. Apply the baking soda solution to the buds, fruit and plant foliage, making sure you evenly coat the tops and undersides of leaves until the solution drips from the foliage.
You can use baking soda sprays up until the day before harvest, but allow the spray to dry for one to four hours before re-entering the treatment area. Avoid spraying plants in direct sunlight or when temperatures reach higher than 80 degrees Fahrenheit, or you risk burning the foliage. Spray in the early morning or evening hours when it's cooler. Reapply baking soda sprays after heavy rainfall.
Words of Caution
Although nontoxic, baking soda sprays can still burn plant foliage. Test the solution on a small section of leaves, and wait at least 24 hours before inspecting for damage. If no burning occurs, spray your entire plant. Baking soda can accumulate in the soil, which often strips the soil of magnesium and calcium while making plants less able to absorb iron. This can cause your tomato plants to experience yellowing leaves or slow growth. Avoid using baking soda sprays more often then once every 14 days when trying to prevent plant fungal infections. When working with the fungicidal spray, protect your skin and eyes by putting on safety glasses, a face mask, long sleeves and pants.
Recognizing Fungal Diseases
Most common tomato fungal diseases thrive when humidity levels are high and temperatures fall between 60 and 80 degrees Fahrenheit. Powdery mildew causes white to light gray spots to form on leaves. Those spots quickly spread and cover tops and undersides of leaves with a white, talcum powderlike substance. Anthracnose fruit rot causes round, water-soaked circles about 1/4 inch in diameter to form on ripening fruit. Early tomato blight can infect fruit, leaves and stems. On leaves, it initially shows up as brown to black spots that grow into a target pattern. Infected leaves can turn yellow and fall from the plant. Fruit infections form a target pattern on immature tomatoes, while stem infections appear as gray sores with dark borders. Septoria leaf spot affects stems and leaves, appearing as small spots with light centers and deep brown margins. The foliage surrounding the spots eventually yellows, and the entire affected leaf dies.

Why It Works
Baking soda contains sodium bicarbonate, a substance that can help naturally control various tomato fungal diseases, including anthracnose, leaf spots, early tomato blight and powdery mildew. Baking soda doesn't actually kill the fungi, however. Instead, the sodium bicarbonate alters the pH balance of the foliage so the fungal spores can't germinate and grow. Because of this, baking soda works well as a preventative fungicide, but it doesn't spread easily or adhere well to foliage. Adding horticultural oil or dish soap to the spray gives it some sticking and spreading action. Oils can also help eradicate fungal spores already infecting your tomato plants.
Spray Recipes
Baking soda sprays are easy to make, and you can mix them up right inside of your garden sprayer. The Master Gardeners of Santa Clara County recommend combining 5 tablespoons of horticultural oil with 2 gallons of water. After mixing thoroughly, add 8 teaspoons of baking soda to the solution, and stir until the powder completely dissolves.
Another recipe recommended by Mike McGrath, host of "You Bet Your Garden" on WHYY, calls for adding liquid dish soap to the mixture, but use a natural soap with no bleach, fragrance or other additives. Simply mix 2 tablespoons of baking soda, 2 tablespoons of horticultural oil and about 4 drops of dish soap into 2 gallons of water. Shake well and start spraying your tomato plants.

Spraying Tomatoes
To prevent fungal diseases, apply baking soda sprays to tomato plants every seven to 14 days until the humidity levels no longer promote infections. Plants already infected need to be sprayed as often as every five to seven days until the disease symptoms clear up. Before spraying already infected tomatoes, remove infected foliage and any mulch surrounding the plants. Then give your tomatoes a strong blast of water from a garden hose to help loosen up the fungal spores. Apply the baking soda solution to the buds, fruit and plant foliage, making sure you evenly coat the tops and undersides of leaves until the solution drips from the foliage.
You can use baking soda sprays up until the day before harvest, but allow the spray to dry for one to four hours before re-entering the treatment area. Avoid spraying plants in direct sunlight or when temperatures reach higher than 80 degrees Fahrenheit, or you risk burning the foliage. Spray in the early morning or evening hours when it's cooler. Reapply baking soda sprays after heavy rainfall.
Words of Caution
Although nontoxic, baking soda sprays can still burn plant foliage. Test the solution on a small section of leaves, and wait at least 24 hours before inspecting for damage. If no burning occurs, spray your entire plant. Baking soda can accumulate in the soil, which often strips the soil of magnesium and calcium while making plants less able to absorb iron. This can cause your tomato plants to experience yellowing leaves or slow growth. Avoid using baking soda sprays more often then once every 14 days when trying to prevent plant fungal infections. When working with the fungicidal spray, protect your skin and eyes by putting on safety glasses, a face mask, long sleeves and pants.
Recognizing Fungal Diseases
Most common tomato fungal diseases thrive when humidity levels are high and temperatures fall between 60 and 80 degrees Fahrenheit. Powdery mildew causes white to light gray spots to form on leaves. Those spots quickly spread and cover tops and undersides of leaves with a white, talcum powderlike substance. Anthracnose fruit rot causes round, water-soaked circles about 1/4 inch in diameter to form on ripening fruit. Early tomato blight can infect fruit, leaves and stems. On leaves, it initially shows up as brown to black spots that grow into a target pattern. Infected leaves can turn yellow and fall from the plant. Fruit infections form a target pattern on immature tomatoes, while stem infections appear as gray sores with dark borders. Septoria leaf spot affects stems and leaves, appearing as small spots with light centers and deep brown margins. The foliage surrounding the spots eventually yellows, and the entire affected leaf dies.
0
0
softwpeach
2017年10月27日

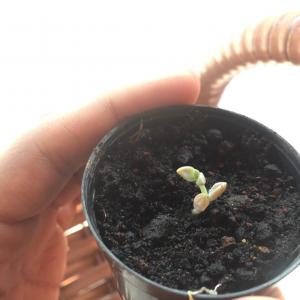
I was watering my plants and I saw this little plant on the ground, so I put it in a little pot but I wanna know what plant it is. #Identification #help

0
0
文章
Miss Chen
2017年10月26日

Grapes are planted in the late winter to early spring months. The plants start to grow in spring and continue to grow throughout the summer season. Grapes ripen in the late summer to early fall, depending on the variety grown. Grape varieties are available for USDA hardiness zones 5 through 9.

Location
Grapes require a location that receives high summer temperatures and full sunlight. Grape vines need protection from frost, so plant them on southern slopes, and avoid any low spots or places where cold air may collect. The length of the growing season varies among the different grape varieties, but grapes generally need 150 to 180 frost-free days between spring and fall freezes. Late spring freezes can kill newly opened shoots and compromise production.
Pruning
Pruning should be performed in late winter to early spring. When timing your pruning, aim to avoid the coldest parts of winter, but also to beat the period when buds begin to swell, suggests the University of Illinois Extension. New shoots appear on vines in the spring and mature into canes in the fall. When pruning, keep in mind that the previous season's wood supports the current season's growth, and fruit and flowers appear on the current season's growth.
Propagation
You can take cuttings from dormant vines in late fall or early spring to expand your plantings. This task is best performed in early spring so that you can plant your cuttings as soon as they leaf out and their roots develop, according to the University of Minnesota Extension. Cuttings may be taken from vines or pruned material.

Harvest
Grapes are mature and ready for harvest when their seeds turn from green to brown or their flavor reaches its peak. You should not use their skin color as a predictor of ripeness, as grapes may color before they mature. Grapes generally soften and develop a sweeter and less acidic flavor as they mature. If you pick based on color, you may harvest your grapes before they reach an ideal size and sweetness. The flavor of grapes will not improve after harvest.
Selection
Select grape varieties based upon your plans for the fruit, the flavor of the grapes and their disease resistance. When choosing grapes, look for varieties that possess the degree of cold hardiness needed to suit your growing region. Grapes range in hardiness from very cold tender, requiring low temperatures over 0 degrees Fahrenheit, to very hardy, tolerant of temperatures of minus 20 degrees Fahrenheit.

Location
Grapes require a location that receives high summer temperatures and full sunlight. Grape vines need protection from frost, so plant them on southern slopes, and avoid any low spots or places where cold air may collect. The length of the growing season varies among the different grape varieties, but grapes generally need 150 to 180 frost-free days between spring and fall freezes. Late spring freezes can kill newly opened shoots and compromise production.
Pruning
Pruning should be performed in late winter to early spring. When timing your pruning, aim to avoid the coldest parts of winter, but also to beat the period when buds begin to swell, suggests the University of Illinois Extension. New shoots appear on vines in the spring and mature into canes in the fall. When pruning, keep in mind that the previous season's wood supports the current season's growth, and fruit and flowers appear on the current season's growth.
Propagation
You can take cuttings from dormant vines in late fall or early spring to expand your plantings. This task is best performed in early spring so that you can plant your cuttings as soon as they leaf out and their roots develop, according to the University of Minnesota Extension. Cuttings may be taken from vines or pruned material.

Harvest
Grapes are mature and ready for harvest when their seeds turn from green to brown or their flavor reaches its peak. You should not use their skin color as a predictor of ripeness, as grapes may color before they mature. Grapes generally soften and develop a sweeter and less acidic flavor as they mature. If you pick based on color, you may harvest your grapes before they reach an ideal size and sweetness. The flavor of grapes will not improve after harvest.
Selection
Select grape varieties based upon your plans for the fruit, the flavor of the grapes and their disease resistance. When choosing grapes, look for varieties that possess the degree of cold hardiness needed to suit your growing region. Grapes range in hardiness from very cold tender, requiring low temperatures over 0 degrees Fahrenheit, to very hardy, tolerant of temperatures of minus 20 degrees Fahrenheit.
0
0
文章
Miss Chen
2017年10月25日

You can grow strawberries from seeds from a strawberry or from an existing plant. It's generally easier, however, to grow strawberries from plants, because you don't have to put effort into preparing the seeds and sowing them in hopes they germinate. As a result, you often have more success planting an existing plant.

Strawberry Selection
One challenge associated with growing strawberries from seeds is choosing the right strawberries. Although it might be tempting to select strawberries from a particularly great tasting batch, if they were purchased from a local farmer's market or grocery store, it's unlikely you will produce a plant with fruit of the same form and taste. Commercial growers often produce a self-pollinating variety of strawberry that was derived to ensure consistent quality fruit and reliable crop size. The downside to using this strawberry type is it might not replicate the traits of its parents in the new plant and thus the strawberries probably won't taste the same. If possible, select a strawberry from a home garden or wild strawberry patch.
Ripe vs. Unripe Strawberry
Don't plant seeds from unripe or nearly ripe strawberries, which are less likely to germinate and grow into healthy plants. Only use seeds from ripe strawberries and make certain that you plant viable seeds. Test seeds first. Viable seeds sink when placed in water; the others float.
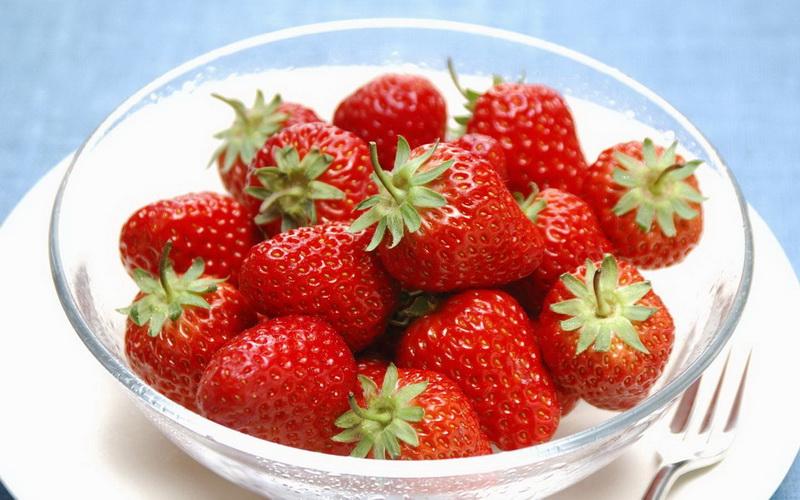
Obtaining Seeds
Before you can plant strawberry seeds, you must separate the seeds from the pulp. Place 1 cup of water and about a pint of strawberries in your blender. Turn it on for about three to five seconds. Let the mixture stand for about one minute or so to allow time for the viable seeds to sink; the other seeds will float along with the pulp. Slowly drain the water from the blender so that only the viable seeds are left inside. Spoon out the remaining seeds, rinse and place them on a paper towel to thoroughly dry. Once dry, the seeds are ready for planting, unless you chose a variety that requires a cold treatment, such as Alpine strawberries. If a cold treatment is necessary, place the seeds, wrapped in a paper towel and then sealed in a tight-fitting container, in the freezer for two to four weeks to simulate winter conditions. Remove the seeds and let them acclimate to room temperature before planting. The process helps speed up germination for certain varieties.
Tip
Use the same care in selecting an existing plant for propagating that you would use in choosing the strawberry variety you want to plant. Base your selection on fruit quality and taste, disease resistance and production. In addition, choose an Alpine or heirloom rather than a hybrid variety if possible. Hybrid varieties produced from strawberry seeds don't always develop fruit of comparable form.

Strawberry Selection
One challenge associated with growing strawberries from seeds is choosing the right strawberries. Although it might be tempting to select strawberries from a particularly great tasting batch, if they were purchased from a local farmer's market or grocery store, it's unlikely you will produce a plant with fruit of the same form and taste. Commercial growers often produce a self-pollinating variety of strawberry that was derived to ensure consistent quality fruit and reliable crop size. The downside to using this strawberry type is it might not replicate the traits of its parents in the new plant and thus the strawberries probably won't taste the same. If possible, select a strawberry from a home garden or wild strawberry patch.
Ripe vs. Unripe Strawberry
Don't plant seeds from unripe or nearly ripe strawberries, which are less likely to germinate and grow into healthy plants. Only use seeds from ripe strawberries and make certain that you plant viable seeds. Test seeds first. Viable seeds sink when placed in water; the others float.

Obtaining Seeds
Before you can plant strawberry seeds, you must separate the seeds from the pulp. Place 1 cup of water and about a pint of strawberries in your blender. Turn it on for about three to five seconds. Let the mixture stand for about one minute or so to allow time for the viable seeds to sink; the other seeds will float along with the pulp. Slowly drain the water from the blender so that only the viable seeds are left inside. Spoon out the remaining seeds, rinse and place them on a paper towel to thoroughly dry. Once dry, the seeds are ready for planting, unless you chose a variety that requires a cold treatment, such as Alpine strawberries. If a cold treatment is necessary, place the seeds, wrapped in a paper towel and then sealed in a tight-fitting container, in the freezer for two to four weeks to simulate winter conditions. Remove the seeds and let them acclimate to room temperature before planting. The process helps speed up germination for certain varieties.
Tip
Use the same care in selecting an existing plant for propagating that you would use in choosing the strawberry variety you want to plant. Base your selection on fruit quality and taste, disease resistance and production. In addition, choose an Alpine or heirloom rather than a hybrid variety if possible. Hybrid varieties produced from strawberry seeds don't always develop fruit of comparable form.
0
0
文章
Miss Chen
2017年10月25日

Climbing strawberry varieties are very similar to traditional strawberry plants, but the runners, or vines, can reach up to 40 inches in length. These strawberries grow well in the ground as well as in hanging baskets and containers. However, because of the longer vines, ground-planted climbing strawberries require a trellis to keep the fruit and foliage off of the ground.

Step 1
Wait until the early spring when freezing temperatures cease and the ground is no longer frozen. Look for a planting site that is well drained, receives six hours of sunlight per day, and has a dark soil composition. Areas that are slightly elevated are good sites for strawberries, because they aid in water drainage.
Step 2
Spread a general fertilizer, such as 10-10-10, over the planting side using 1 lb. for every 100 square feet of soil. Till the soil with a garden tiller to work the fertilizer six to eight inches into the soil

Step 3
Dig a hole in the soil that is the same depth as the roots of one for the climbing strawberry plants. Insert the roots into the hole, making sure that the area where the green stems emerge, called the crown, is above the soil. Fill in the hole but do not cover crown with soil.
Step 4
Plant additional climbing strawberry varieties in the same methods, spacing them 18 to 30 inches apart.
Step 5
Dig a 12-inch deep trench six inches behind the plants with a shovel. Insert a 4- to 5-foot tall trellis into the bottom of the trench and pack soil around the base to fill in the hole and to hold it upright. You can install a single long trellis or smaller ones for each plant.
Step 6
Water the soil to the same depth as the roots of the strawberry plants.
Step 7
Wait four to five weeks until the plant runners begin to grow. Lift the runners up to a vertical position and secure them gently to the trellis using gardener's tape. Loop the tape around the vine stems and tie in a knot behind the trellis.

Step 1
Wait until the early spring when freezing temperatures cease and the ground is no longer frozen. Look for a planting site that is well drained, receives six hours of sunlight per day, and has a dark soil composition. Areas that are slightly elevated are good sites for strawberries, because they aid in water drainage.
Step 2
Spread a general fertilizer, such as 10-10-10, over the planting side using 1 lb. for every 100 square feet of soil. Till the soil with a garden tiller to work the fertilizer six to eight inches into the soil

Step 3
Dig a hole in the soil that is the same depth as the roots of one for the climbing strawberry plants. Insert the roots into the hole, making sure that the area where the green stems emerge, called the crown, is above the soil. Fill in the hole but do not cover crown with soil.
Step 4
Plant additional climbing strawberry varieties in the same methods, spacing them 18 to 30 inches apart.
Step 5
Dig a 12-inch deep trench six inches behind the plants with a shovel. Insert a 4- to 5-foot tall trellis into the bottom of the trench and pack soil around the base to fill in the hole and to hold it upright. You can install a single long trellis or smaller ones for each plant.
Step 6
Water the soil to the same depth as the roots of the strawberry plants.
Step 7
Wait four to five weeks until the plant runners begin to grow. Lift the runners up to a vertical position and secure them gently to the trellis using gardener's tape. Loop the tape around the vine stems and tie in a knot behind the trellis.
0
0
求助
gudetama
2017年10月22日

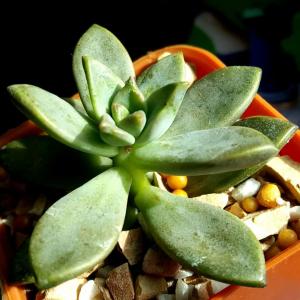
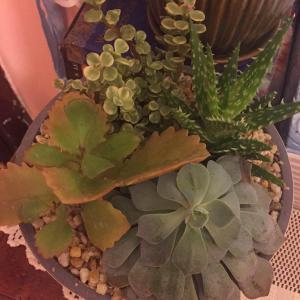
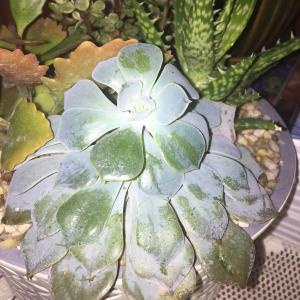
please help me identify these plants!


0
0
yayafaif:Sorry, I meant the top left (in the arrangement) 😊
yayafaif:The bottom left plant is a portulacaria afra variegata, or varigated elephants' food 🙂
成长记
cclecombe
2017年10月22日

We've had a shuffle round upstairs so a lot of our plants are in new positions, hopefully for the better. I'm hoping this aloe will do well by the window


0
0
cclecombe
2017年10月18日

Does anyone on here use instagram for plants (or anything else for that matter!)? If so I'd love to follow you! Comment your usernames below 🌿😊


3
0
Tlhoward120:@nofilternosoul 😊
Estefania Pereira:its more of a daily vlog kind of account, try to take pictures of my surroundings in the places i go, it would be @tefi_pr
meriunkat:@cclecombe aww thanks 😳😄
cclecombe:@meriunkat you're super talented! I love it!!
cclecombe:@meriunkat even better, I love having new artists to follow!
显示更多
cclecombe
2017年10月17日

I had my driving test this afternoon and unfortunately I didn't pass, so naturally I treated myself to some pick-me-up plants.


3
0
meriunkat:@cclecombe oh I see
cclecombe:@meriunkat we do have a dress form in our house so I did wonder whether she (her name is Venus) was in the back of the shot but then I checked and was like "oh no, just Amy"
meriunkat:@cclecombe oh haha😅 sorry, she really is
cclecombe:@meriunkat lmao no that's just my girlfriend, she's very pale 😂😂😂
meriunkat:@cclecombe and is there a maniqin back there?😅 from far away it looks like a doll
显示更多


