文章
莹723
2020年11月03日

How could we not love Squash? It grows in many different flavors and textures, and just keeps producing and producing.
Winter squash need tons of room to stretch because their vines sprawl 10 to 15 feet in every direction; train the plants up a trellis or fence to conserve space. Harvest winter squash when the rind can’t be pierced with your thumbnail, around the time when the vines wither or even right after the first light frost.

1.Acorn Squash
Shaped like its namesake, these popular winter squash are reliable performers. They’re best baked or stuffed.
Types of Acorn Squash: Honey Bear, Jester

2.Buttercup Squash
These easy-to-grow, turban-shaped squash store well into late winter and are buttery-sweet and satiny when baked and mashed. Bake, puree, and add olive oil and romano cheese for an out-of-this-world sauce to toss with pasta.
Types of Buttercup Squash: Burgess, Bonbon

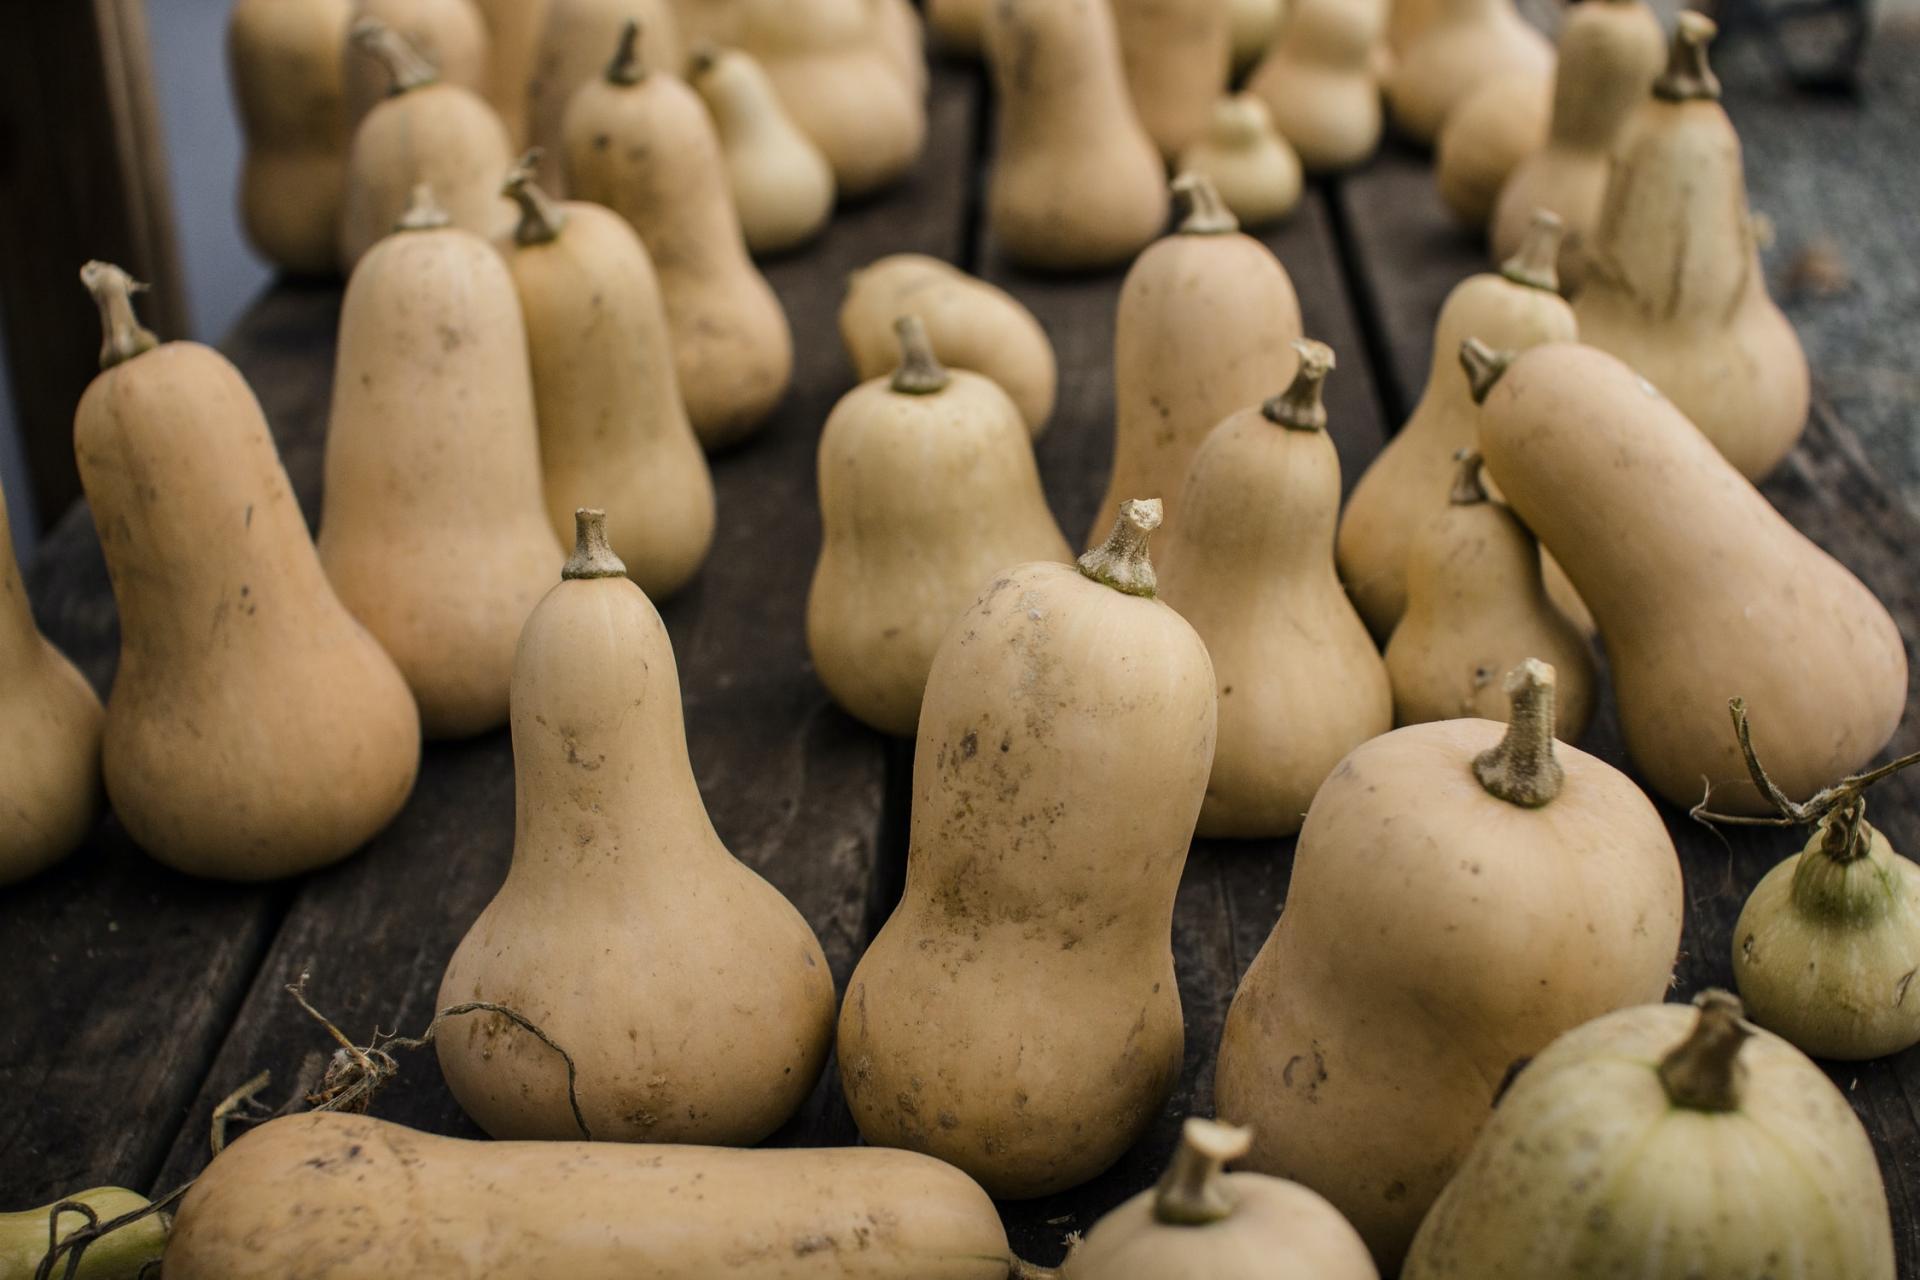
3.Butternut Squash
Butternuts are typically cylindrical with a bulb-shaped end and a classic, tan rind. You’ll need a few weeks of storage for the flavor to develop, but they last for months and months. They are prolific producers! Bake, sauté, or add to stews.
Types of Butternut Squash: Honeybaby, Waltham
4.Delicata Squash
This heirloom variety has cream and green-striped oblong fruits about three inches wide and six inches long. They’re extremely tender, with a flavor reminiscent of sweet potatoes. And unlike many winter squash, the rind is edible. Heads up: They don't store quite as long as some of the other winter squashes.
Types of Delicata Squash: Bush Delicata

5.Dumpling Squash
These multi-colored squashes with a squat little shape are both pretty and edible. They’re prolific producers, and they can be baked, grilled, steamed, or stuffed.
Types of Dumpling Squash: Sweet Dumpling, Carnival

6.Hubbard Squash
These squash, popular in New England, have a tough, bumpy rind and range in color from bright orange to a gorgeous aqua-blue color. Some varieties weigh in at 12 to 15 pounds each! Roast the medium-sweet flesh, or chunk it for stews.
Types of Hubbard Squash: Red Kuri, Blue Ballet

7.Kabocha Squash
These Japanese squash are similar in appearance to a buttercup, with a flavor that’s reminiscent of sweet potatoes. Bake, steam, or purée in soups.
Types of Kabocha Squash: Sunshine, Hokkori

8.Pumpkin Squash
Pumpkins actually are a type of winter squash. While some varieties are not particularly tasty, and are grown for carving, others are quite sweet! Bake, steam, put in stews, and roast the seeds, or of course make a pumpkin pie. They're easy to grow!
Types of Pumpkin Squash: Pepitas, Super Moon, Hijinks

9.Spaghetti Squash
These oblong-shaped squash have stringy flesh you can scrape out after cooking to create spaghetti-like strands. Use as a pasta substitute or in soups.
Types of Spaghetti Squash: Sugaretti, Tivoli

Winter squash need tons of room to stretch because their vines sprawl 10 to 15 feet in every direction; train the plants up a trellis or fence to conserve space. Harvest winter squash when the rind can’t be pierced with your thumbnail, around the time when the vines wither or even right after the first light frost.

1.Acorn Squash
Shaped like its namesake, these popular winter squash are reliable performers. They’re best baked or stuffed.
Types of Acorn Squash: Honey Bear, Jester

2.Buttercup Squash
These easy-to-grow, turban-shaped squash store well into late winter and are buttery-sweet and satiny when baked and mashed. Bake, puree, and add olive oil and romano cheese for an out-of-this-world sauce to toss with pasta.
Types of Buttercup Squash: Burgess, Bonbon

3.Butternut Squash
Butternuts are typically cylindrical with a bulb-shaped end and a classic, tan rind. You’ll need a few weeks of storage for the flavor to develop, but they last for months and months. They are prolific producers! Bake, sauté, or add to stews.
Types of Butternut Squash: Honeybaby, Waltham

4.Delicata Squash
This heirloom variety has cream and green-striped oblong fruits about three inches wide and six inches long. They’re extremely tender, with a flavor reminiscent of sweet potatoes. And unlike many winter squash, the rind is edible. Heads up: They don't store quite as long as some of the other winter squashes.
Types of Delicata Squash: Bush Delicata

5.Dumpling Squash
These multi-colored squashes with a squat little shape are both pretty and edible. They’re prolific producers, and they can be baked, grilled, steamed, or stuffed.
Types of Dumpling Squash: Sweet Dumpling, Carnival

6.Hubbard Squash
These squash, popular in New England, have a tough, bumpy rind and range in color from bright orange to a gorgeous aqua-blue color. Some varieties weigh in at 12 to 15 pounds each! Roast the medium-sweet flesh, or chunk it for stews.
Types of Hubbard Squash: Red Kuri, Blue Ballet

7.Kabocha Squash
These Japanese squash are similar in appearance to a buttercup, with a flavor that’s reminiscent of sweet potatoes. Bake, steam, or purée in soups.
Types of Kabocha Squash: Sunshine, Hokkori

8.Pumpkin Squash
Pumpkins actually are a type of winter squash. While some varieties are not particularly tasty, and are grown for carving, others are quite sweet! Bake, steam, put in stews, and roast the seeds, or of course make a pumpkin pie. They're easy to grow!
Types of Pumpkin Squash: Pepitas, Super Moon, Hijinks

9.Spaghetti Squash
These oblong-shaped squash have stringy flesh you can scrape out after cooking to create spaghetti-like strands. Use as a pasta substitute or in soups.
Types of Spaghetti Squash: Sugaretti, Tivoli

0
0
文章
莹723
2020年10月26日

Most gardens contain a mix of different plants, including perennials, annuals, shrubs and trees. Understanding the different types means you’ll understand how they grow, helping you to care for them correctly and ensure that it looks good all year round.
1.Annuals
Annuals complete their entire life cycle – growing from seed, flowering, making more seed, then dying – in one year (their name comes from the Latin ‘annus’, meaning ‘year’). They produce two types of bright, showy flowers in summer.
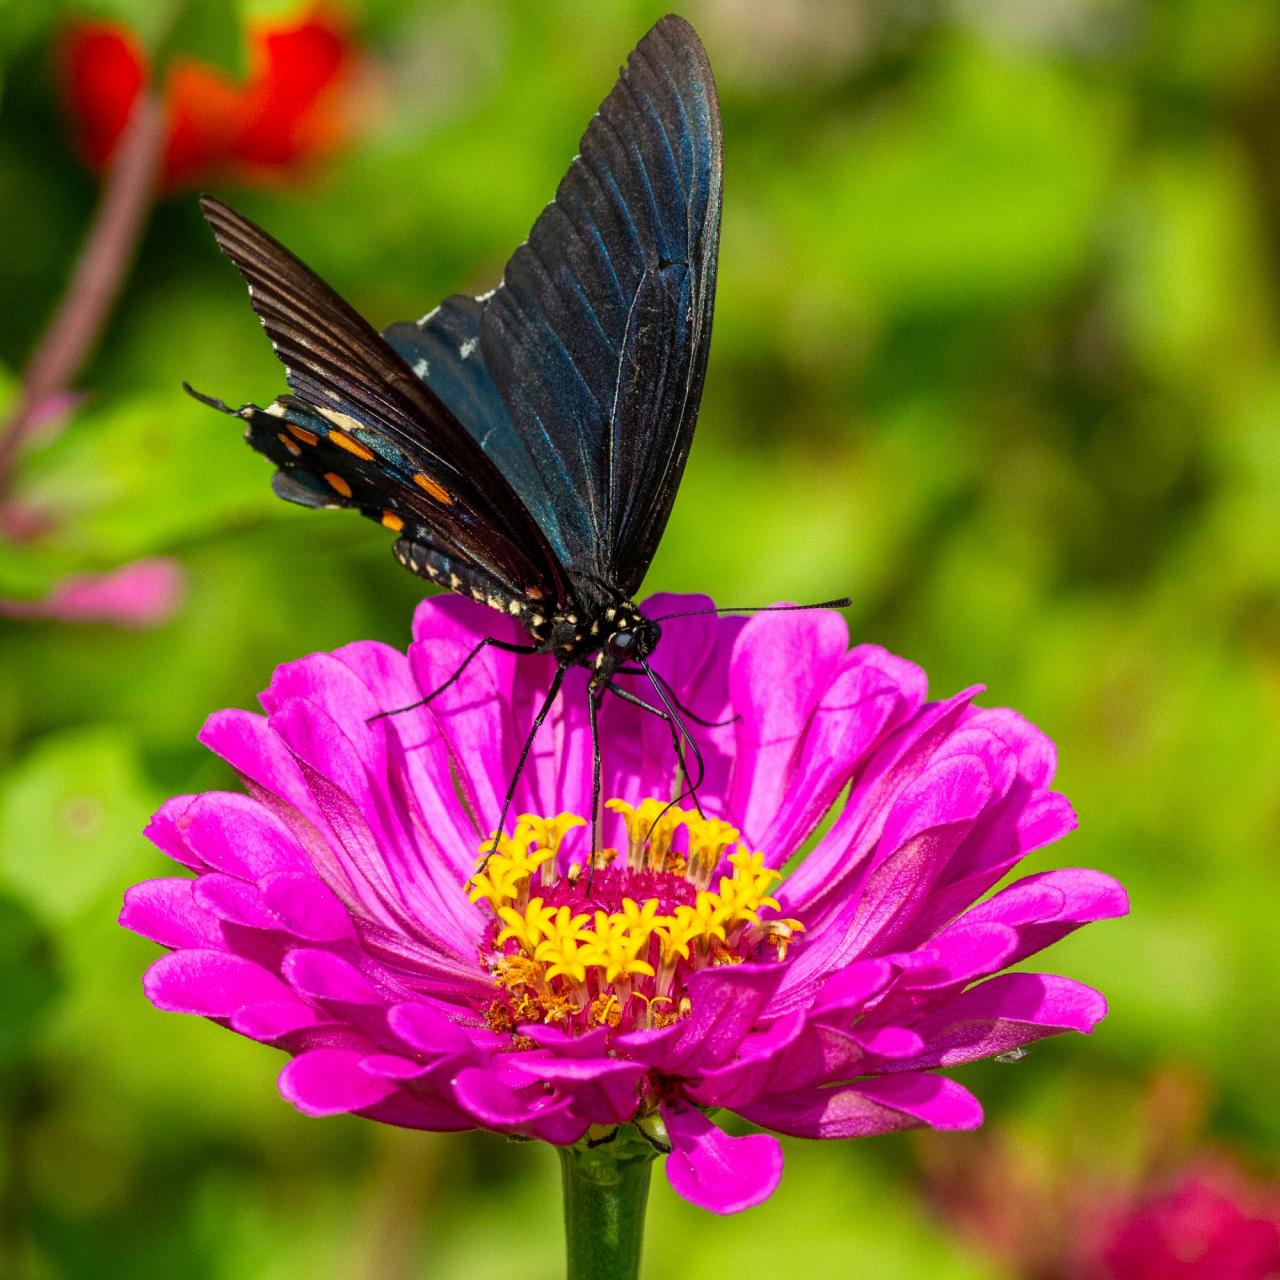
(Pink zinnias)
Hardy annuals can withstand the cold, so you can sow them outdoors in spring – March or April are the usual times but they can also be sown in September. They include cornflowers, love-in-a mist and nasturtiums.
Half-hardy annuals cannot survive the cold, so they are generally sown indoors in spring and planted out in May or June. They include cosmos and zinnias.
2.Biennials
Biennials take two years to complete their life cycle – they are sown in one year and flower and die in the next (their name comes from the Latin word, ‘biennis’, which means ‘two years’. They often flower in late spring, before annuals and perennials get going. The most common biennial in our gardens is the foxglove.
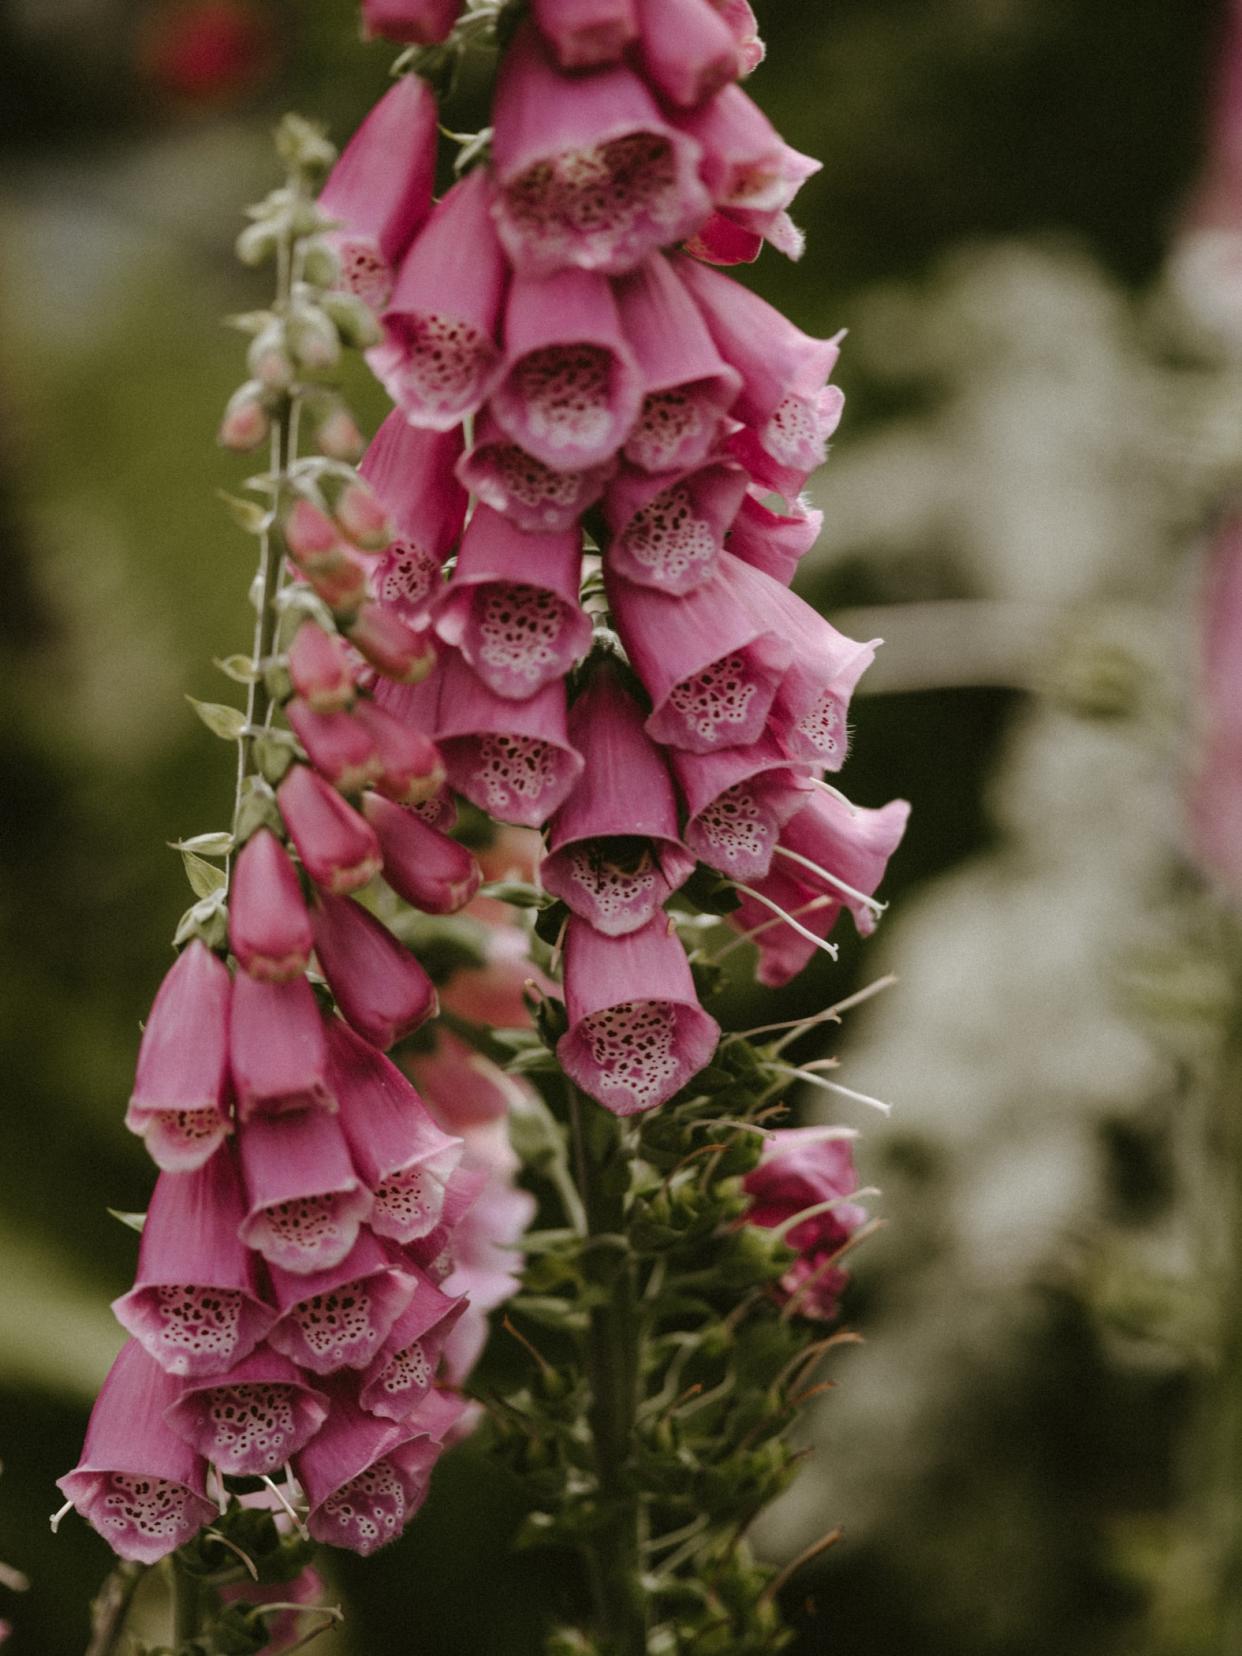
(Magenta and pink foxglove flowers)
3.Perennials
Perennials live for three years or more – their name comes the Latin, ‘perennis’, which means ‘many years’. They are sometimes referred to ‘herbaceous perennials’. They can flower for several months in summer. There are two types:

(Tall, pink-red lupins)
Hardy perennials can survive the winter and are left in the ground all year round. Don’t be alarmed when they seem to ‘disappear’ in winter – it’s a survival mechanism to get through the cold weather. Their foliage dies back but the rootstock remains dormant underground. New shoots then appear in spring. Popular perennials include lupins, delphiniums, cranesbills, hostas and peonies.
Half-hardy perennials cannot cope with the cold and so must be brought indoors in winter. It’s best to grow this type of plant in a pot, so that you can move it around easily. Alternatively, you could plant fresh plants every year. Half hardy perennials include many fuchsias and heliotrope.
4.Shrubs
Shrubs, such as roses and lavender, have a woody branches and no trunk. They lose their leaves in winter), evergreen (they keep their leaves year-round) or semi-evergreen (they keep their leaves in mild winters). Shrubs add structure and can last for many years, offering flowers, attractive foliage, colourful autumn leaves or berries. Evergreen types can be used as topiary, clipped into attractive shapes.

(Pale-apricot rose ‘Grace’)
5.Trees
Trees have a trunk and are larger than shrubs. They can be deciduous or evergreen. However small your garden, you can squeeze in a tree – it will change beautifully throughout the year and also acts as a high-rise home for wildlife.

(silver birch tree)
6.Climbers
Climbers grow upwards, and need support in the form of a trellis, arch, fence or wall. Popular climbers include clematis, honeysuckle, wisteria and jasmine. They take up very little room so are especially useful in small gardens. Use them around seating areas – over a pergola, for example – and to cover walls and fences.

(Lilac wisteria flowers)
7.Bulbs
Bulbs are underground storage organs and there are several different kinds – true bulbs, corms, tubers and rhizomes. They are planted in autumn or spring for spring or summer flowers. They include a wide range of popular garden plants including daffodils (pictured), tulips, bluebells, crocus, irises and dahlias.

(Daffodils)
8.Bedding plants
Bedding plants are planted temporarily in flower beds or borders, pots or window boxes, giving a display of flowers for a few months. Bedding plants are often half-hardy annuals or tender perennials, but can also be bulbs or shrubs. Popular bedding plants include pelargoniums (geraniums), begonias, petunias and pansies.

(Purple and yellow pansies)
Like our articles? Let us know in the comments!
1.Annuals
Annuals complete their entire life cycle – growing from seed, flowering, making more seed, then dying – in one year (their name comes from the Latin ‘annus’, meaning ‘year’). They produce two types of bright, showy flowers in summer.

(Pink zinnias)
Hardy annuals can withstand the cold, so you can sow them outdoors in spring – March or April are the usual times but they can also be sown in September. They include cornflowers, love-in-a mist and nasturtiums.
Half-hardy annuals cannot survive the cold, so they are generally sown indoors in spring and planted out in May or June. They include cosmos and zinnias.
2.Biennials
Biennials take two years to complete their life cycle – they are sown in one year and flower and die in the next (their name comes from the Latin word, ‘biennis’, which means ‘two years’. They often flower in late spring, before annuals and perennials get going. The most common biennial in our gardens is the foxglove.

(Magenta and pink foxglove flowers)
3.Perennials
Perennials live for three years or more – their name comes the Latin, ‘perennis’, which means ‘many years’. They are sometimes referred to ‘herbaceous perennials’. They can flower for several months in summer. There are two types:

(Tall, pink-red lupins)
Hardy perennials can survive the winter and are left in the ground all year round. Don’t be alarmed when they seem to ‘disappear’ in winter – it’s a survival mechanism to get through the cold weather. Their foliage dies back but the rootstock remains dormant underground. New shoots then appear in spring. Popular perennials include lupins, delphiniums, cranesbills, hostas and peonies.
Half-hardy perennials cannot cope with the cold and so must be brought indoors in winter. It’s best to grow this type of plant in a pot, so that you can move it around easily. Alternatively, you could plant fresh plants every year. Half hardy perennials include many fuchsias and heliotrope.
4.Shrubs
Shrubs, such as roses and lavender, have a woody branches and no trunk. They lose their leaves in winter), evergreen (they keep their leaves year-round) or semi-evergreen (they keep their leaves in mild winters). Shrubs add structure and can last for many years, offering flowers, attractive foliage, colourful autumn leaves or berries. Evergreen types can be used as topiary, clipped into attractive shapes.

(Pale-apricot rose ‘Grace’)
5.Trees
Trees have a trunk and are larger than shrubs. They can be deciduous or evergreen. However small your garden, you can squeeze in a tree – it will change beautifully throughout the year and also acts as a high-rise home for wildlife.

(silver birch tree)
6.Climbers
Climbers grow upwards, and need support in the form of a trellis, arch, fence or wall. Popular climbers include clematis, honeysuckle, wisteria and jasmine. They take up very little room so are especially useful in small gardens. Use them around seating areas – over a pergola, for example – and to cover walls and fences.

(Lilac wisteria flowers)
7.Bulbs
Bulbs are underground storage organs and there are several different kinds – true bulbs, corms, tubers and rhizomes. They are planted in autumn or spring for spring or summer flowers. They include a wide range of popular garden plants including daffodils (pictured), tulips, bluebells, crocus, irises and dahlias.

(Daffodils)
8.Bedding plants
Bedding plants are planted temporarily in flower beds or borders, pots or window boxes, giving a display of flowers for a few months. Bedding plants are often half-hardy annuals or tender perennials, but can also be bulbs or shrubs. Popular bedding plants include pelargoniums (geraniums), begonias, petunias and pansies.

(Purple and yellow pansies)
Like our articles? Let us know in the comments!
0
0
文章
莹723
2020年10月16日

Sowing cyclamen from seed is very easy, but it’s not a quick job– it can take a year or more before you see beautiful blooms.
To produce indoor cyclamen plants you need to use seeds of tender large-flowered varieties with wonderful colours.
Learn how to sow cyclamen seeds, below.
You Will Need
•Cyclamen seed
•10cm pot
•Seed compost
•Vermiculite
•Sheet of glass
•Black polythene
Step 1
Before sowing, soak the cyclamen seeds in warm water for at least 12 hours, to soften the seed coat, then rinse. Sow seeds into pots of compost, spacing them evenly.

Step 2
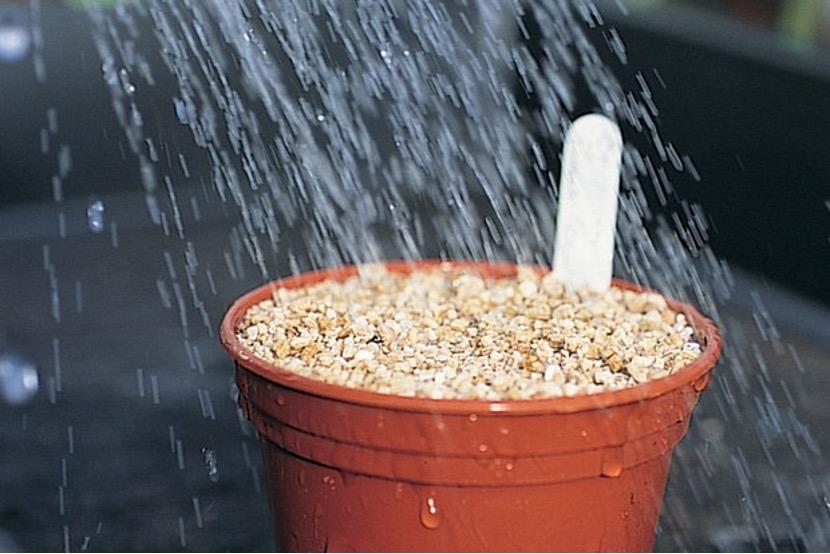
Sprinkle a layer of fine vermiculite or compost over the seeds until the surface is covered completely.

Step 3
Water, then cover with a sheet of glass and a layer of black polythene to shut out the light and encourage germination. Keep temperature lower than 16° – 21°.
Step 4
Check pot regularly. Germination can take 30 – 60 days, and once the seedlings appear, remove the covering and pop your pot into a bright position.

Step 5
Leaves develop from a tiny tuber, and once two or three leaves have formed the plants can be potted up separately.

Step 6
Plant individually into 7.5cm pots of multi-purpose compost, keeping the tiny tuber level with the surface of the compost.

Step 7
Pot on into larger containers as your plants grow, watering them regularly and feeding them once a week. Most varieties should begin flowering about nine months after sowing. Keep them in a cool spot.

Remove faded flowers or yellowing leaves by twisting stems and giving them a firm tug.
To produce indoor cyclamen plants you need to use seeds of tender large-flowered varieties with wonderful colours.
Learn how to sow cyclamen seeds, below.
You Will Need
•Cyclamen seed
•10cm pot
•Seed compost
•Vermiculite
•Sheet of glass
•Black polythene
Step 1
Before sowing, soak the cyclamen seeds in warm water for at least 12 hours, to soften the seed coat, then rinse. Sow seeds into pots of compost, spacing them evenly.

Step 2
Sprinkle a layer of fine vermiculite or compost over the seeds until the surface is covered completely.

Step 3
Water, then cover with a sheet of glass and a layer of black polythene to shut out the light and encourage germination. Keep temperature lower than 16° – 21°.

Step 4
Check pot regularly. Germination can take 30 – 60 days, and once the seedlings appear, remove the covering and pop your pot into a bright position.

Step 5
Leaves develop from a tiny tuber, and once two or three leaves have formed the plants can be potted up separately.

Step 6
Plant individually into 7.5cm pots of multi-purpose compost, keeping the tiny tuber level with the surface of the compost.

Step 7
Pot on into larger containers as your plants grow, watering them regularly and feeding them once a week. Most varieties should begin flowering about nine months after sowing. Keep them in a cool spot.

Remove faded flowers or yellowing leaves by twisting stems and giving them a firm tug.

0
0
文章
莹723
2020年09月28日

Have you ever thought about using rusty milk cans, chicken feeders, or galvanized mop buckets to grow plants?
Blogger Carlene Blair has created quite the oasis for herself right outside her door. This gorgeous garden is anything but "junky."She insisted in repurposing old junk into planters! It's a great hobby combining love of flower gardening with junking.

Let’s find out how she's going to top this!
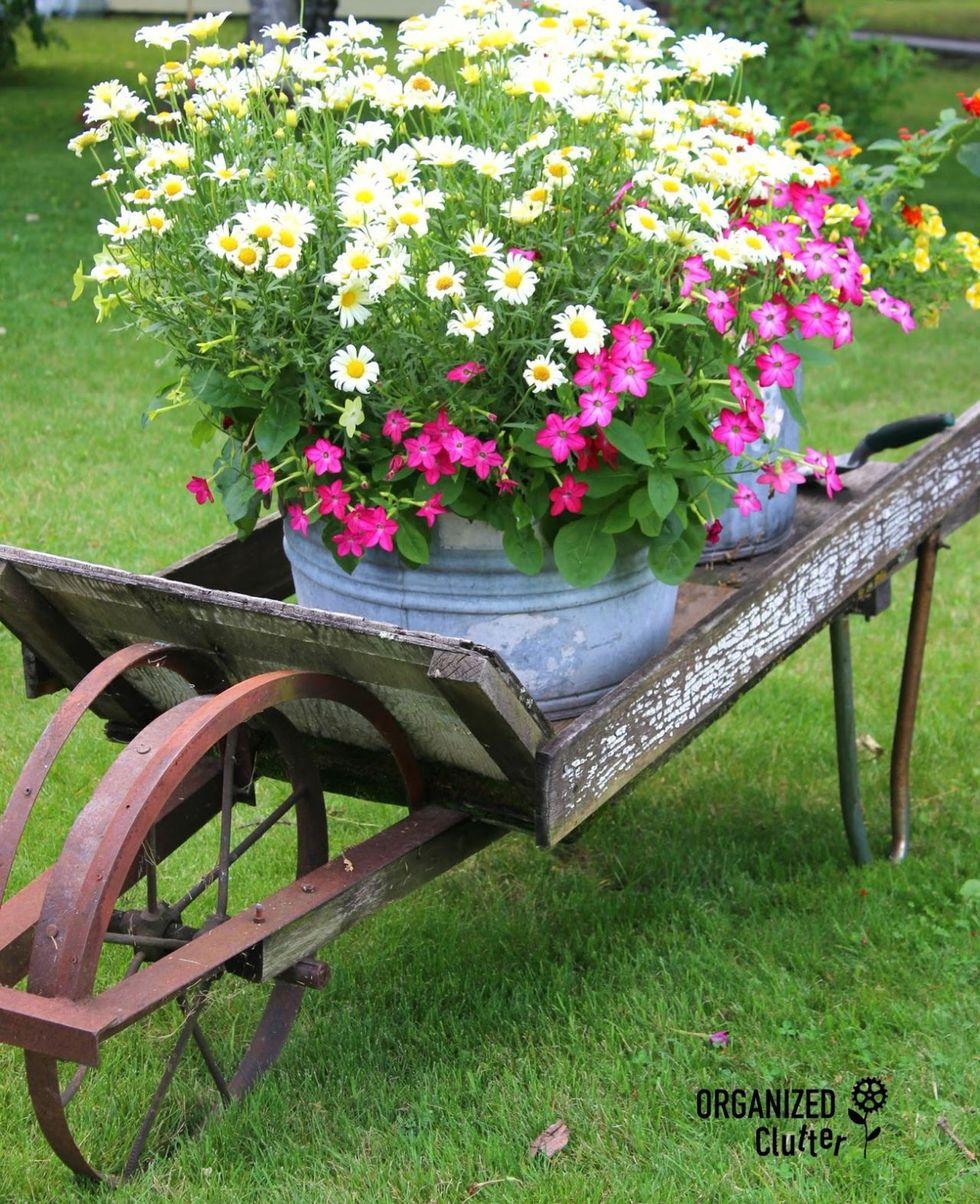
Blair's very first junk garden piece is this old wheelbarrow bursting with Marguerite daisies and nicotiana.
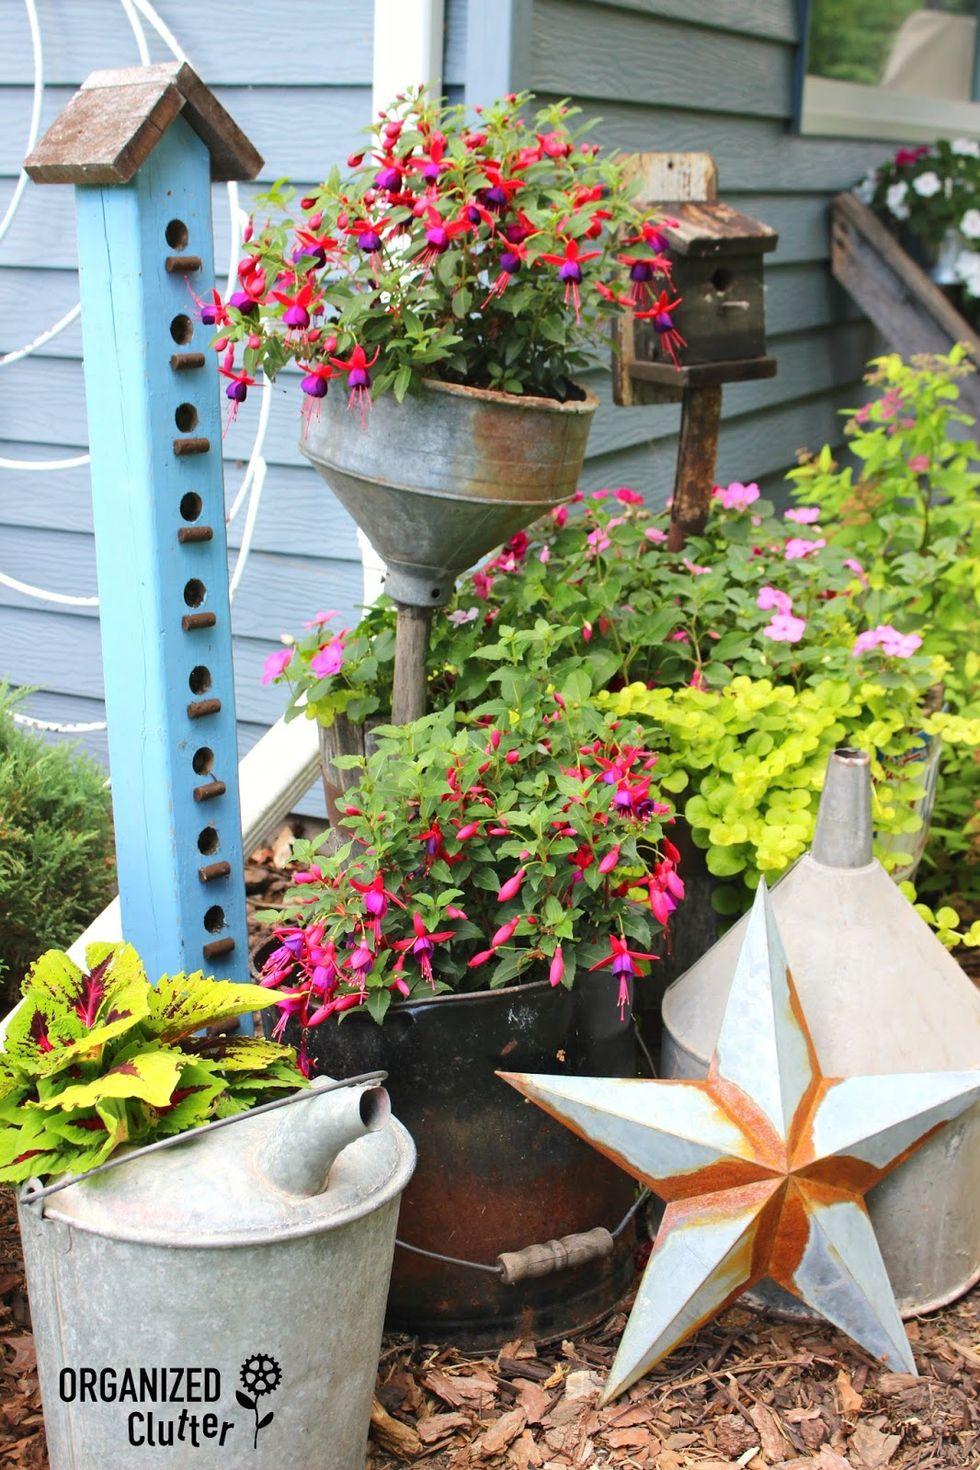
Have you ever seen such an assortment of trash-to-treasure planters?

The wild, abandoned look of this old typewriter in the bed of succulents is amazing.
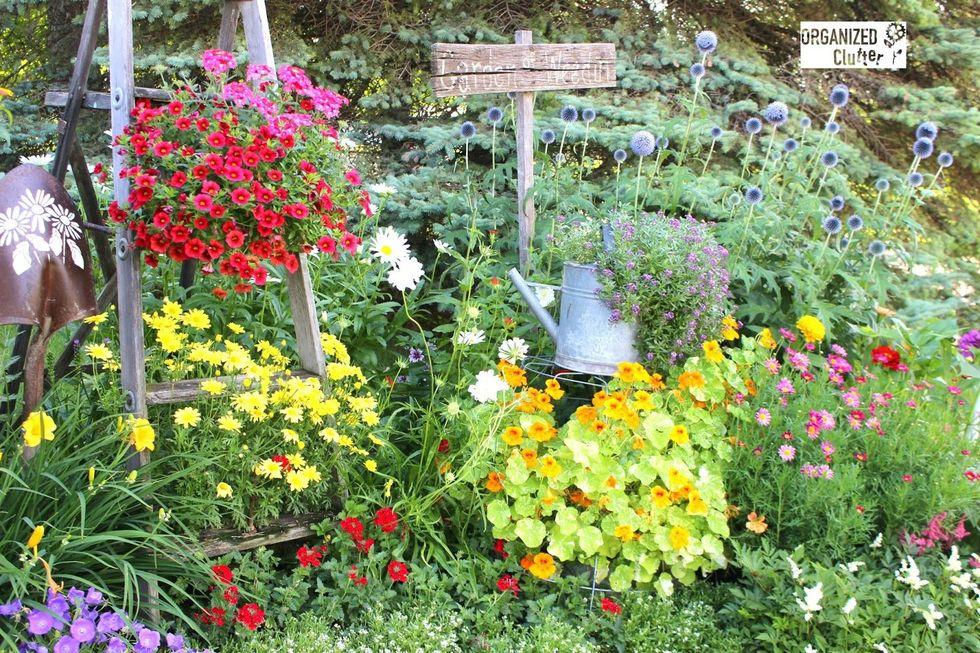
In her front yard, perennials and annuals spill out of watering cans and funnels and off the steps of a ladder.
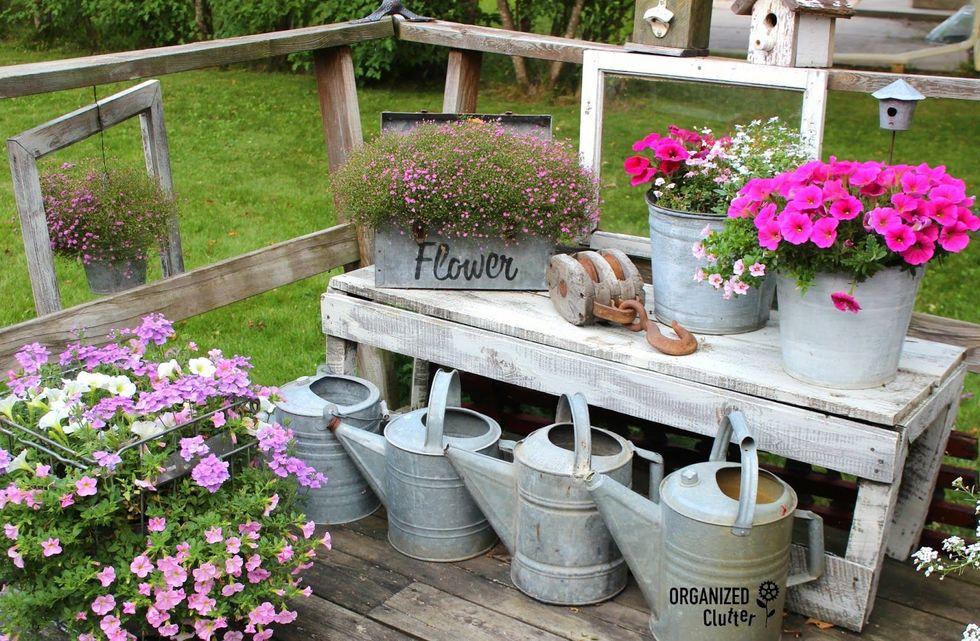
A whitewashed bench holds galvanized buckets and a toolbox, which are adorably stenciled.

What was once a gun rack is now attached to an old barn door and used to hold vintage garden tools.

Even a bike can be a beautiful planter.

This "Flower Market" sign is made of two spindle legs and a weathered piece of barn siding.
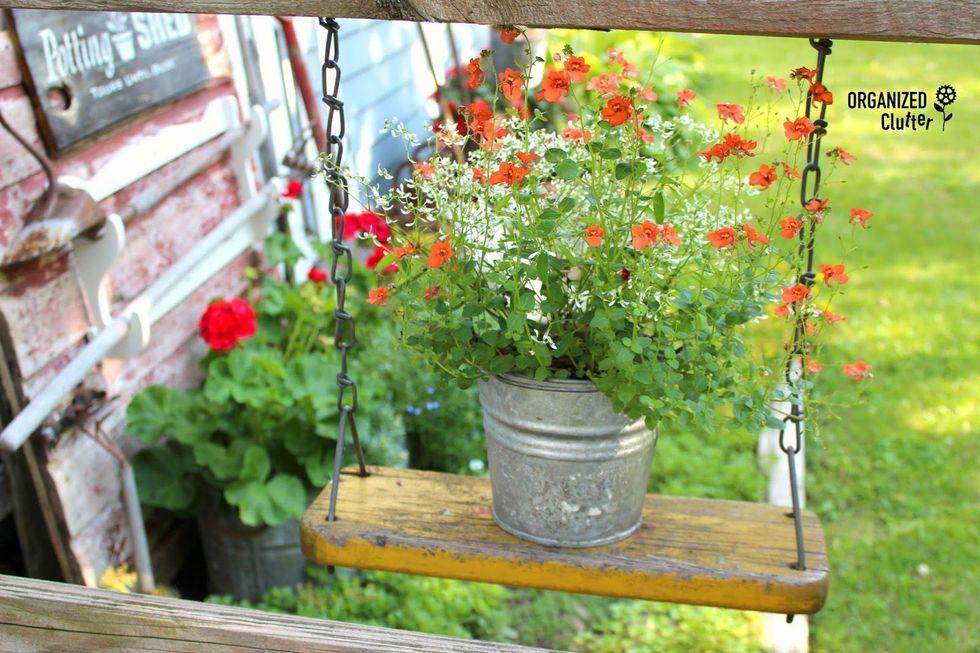
Last year, Blair tackled this project: repurposing a children's swing into a flower pot holder.

Rusty milk cans, chicken feeders, and galvanized mop buckets were given new life as planters.
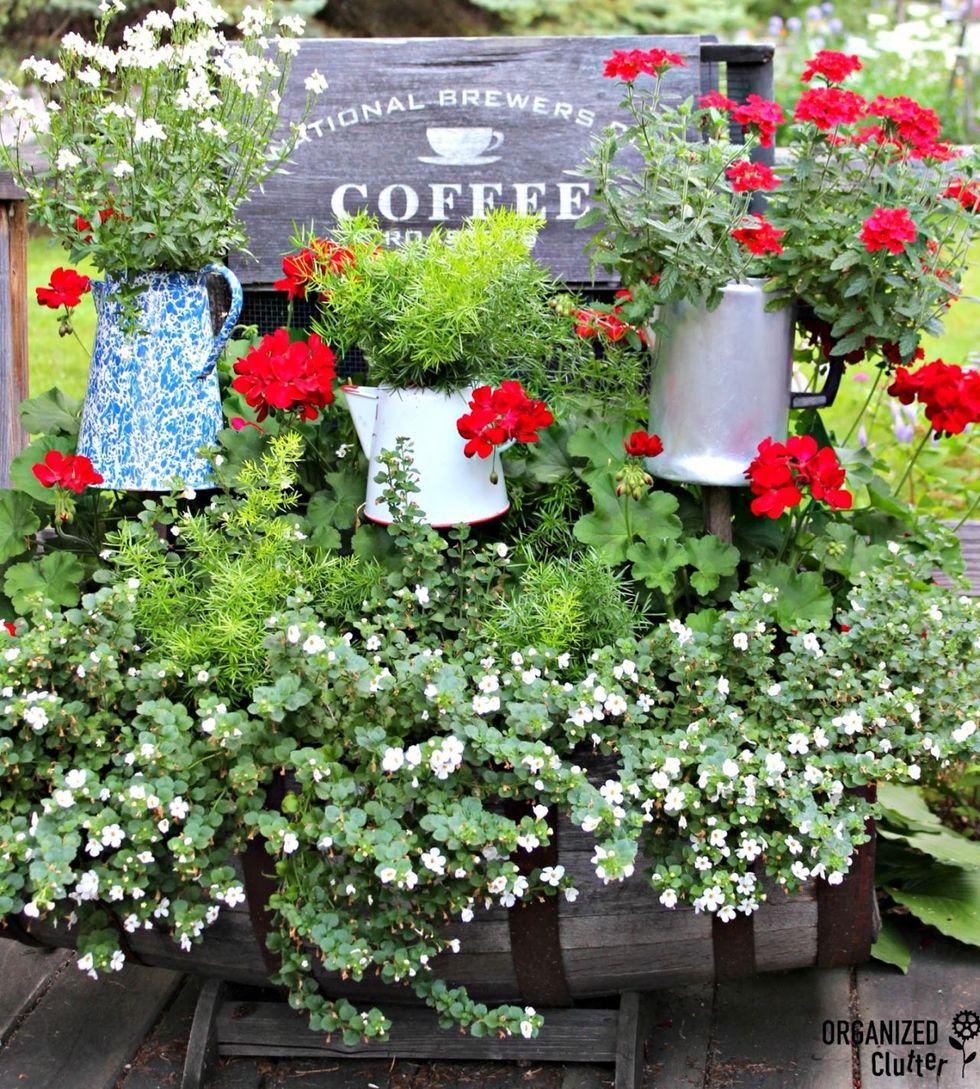
As were these scavenged coffee pots, which are mounted on stakes.
Blogger Carlene Blair has created quite the oasis for herself right outside her door. This gorgeous garden is anything but "junky."She insisted in repurposing old junk into planters! It's a great hobby combining love of flower gardening with junking.

Let’s find out how she's going to top this!

Blair's very first junk garden piece is this old wheelbarrow bursting with Marguerite daisies and nicotiana.

Have you ever seen such an assortment of trash-to-treasure planters?

The wild, abandoned look of this old typewriter in the bed of succulents is amazing.

In her front yard, perennials and annuals spill out of watering cans and funnels and off the steps of a ladder.

A whitewashed bench holds galvanized buckets and a toolbox, which are adorably stenciled.

What was once a gun rack is now attached to an old barn door and used to hold vintage garden tools.

Even a bike can be a beautiful planter.

This "Flower Market" sign is made of two spindle legs and a weathered piece of barn siding.

Last year, Blair tackled this project: repurposing a children's swing into a flower pot holder.

Rusty milk cans, chicken feeders, and galvanized mop buckets were given new life as planters.

As were these scavenged coffee pots, which are mounted on stakes.
0
0
文章
莹723
2020年09月27日

Slugs are a particular problem in spring, when plenty of young plants are growing.Tell-tale signs of slug damage include irregularly-shaped holes in leaves, stems, flowers, tubers and bulbs and potatoes, and silvery slime trails.
There are many options for controlling slugs, including going out at night with a torch and bucket to pick slugs off by hand. However, you should keep them under control in spring, combine a few methods.Protect all seedlings, new growth on most herbaceous plants, and all parts of susceptible plants, such as delphiniums and hostas.
Here are six ways to stop slugs for you.
1.Use organic slug pellets
Pellets made from ferric phosphate are approved for use by organic growers and are just as effective as non-organic ones but less harmful to birds and other wildlife. Scatter the pellets on the soil as soon as you can before tender growth appears.

2.Water in biological control
Microscopic nematodes can infect slugs with bacteria and then kill them, it’s an effective biological control by watered into the soil. Apply in the evenings when the soil is warm and moist, from spring onwards.
3.Use copper barriers
Copper barriers are effective slug deterrents – if a slug tries to cross one it receives an ‘electric shock’, forcing it back. Put copper rings around vulnerable plants, or stick copper tape around the rim of pots.

4.Use beer traps
They’re attracted to the smell, so make a slug trap with cheap beer. Do this by sinking a beer trap or container into the ground, with the rim just above soil level. Half fill with beer and the cover with a loose lid to stop other creatures falling in. Check and empty regularly.
5.Let them eat bran
Slugs love bran and will gorge on it. They then become bloated and dehydrated, and can’t hide, making them easy pickings for birds. Make sure the bran doesn’t get wet, though.

6.Slug-resistant plants to grow
Hellebores
Astilbes
Hardy geraniums
Eryngiums
Agastaches
Penstemons
Sidalcea
Astrantia
Ferns
Ornamental grasses
Verbena bonariensis

There are many options for controlling slugs, including going out at night with a torch and bucket to pick slugs off by hand. However, you should keep them under control in spring, combine a few methods.Protect all seedlings, new growth on most herbaceous plants, and all parts of susceptible plants, such as delphiniums and hostas.
Here are six ways to stop slugs for you.
1.Use organic slug pellets
Pellets made from ferric phosphate are approved for use by organic growers and are just as effective as non-organic ones but less harmful to birds and other wildlife. Scatter the pellets on the soil as soon as you can before tender growth appears.

2.Water in biological control
Microscopic nematodes can infect slugs with bacteria and then kill them, it’s an effective biological control by watered into the soil. Apply in the evenings when the soil is warm and moist, from spring onwards.

3.Use copper barriers
Copper barriers are effective slug deterrents – if a slug tries to cross one it receives an ‘electric shock’, forcing it back. Put copper rings around vulnerable plants, or stick copper tape around the rim of pots.

4.Use beer traps
They’re attracted to the smell, so make a slug trap with cheap beer. Do this by sinking a beer trap or container into the ground, with the rim just above soil level. Half fill with beer and the cover with a loose lid to stop other creatures falling in. Check and empty regularly.
5.Let them eat bran
Slugs love bran and will gorge on it. They then become bloated and dehydrated, and can’t hide, making them easy pickings for birds. Make sure the bran doesn’t get wet, though.

6.Slug-resistant plants to grow
Hellebores
Astilbes
Hardy geraniums
Eryngiums
Agastaches
Penstemons
Sidalcea
Astrantia
Ferns
Ornamental grasses
Verbena bonariensis

0
0
文章
莹723
2020年09月25日

Cactus plants, or cacti, make excellent indoor plants. Like succulents, they’re used to the hot, sunny, dry conditions of desert. Their leafless stems are designed to store water, so they can cope with drought. As such they need very little watering and can even rot if given too much. Cacti can be grown in pots or terrariums for years. They have different shapes and sizes and if you’re lucky, they bear delightful, colored flowers in summer.
1.How to plant cacti
Always plant cacti with care. The spines can prick and hurt your skin. It’s a good idea to use common kitchen items such as a thick tea towel, spoon and fork to help you.
Mulch with a layer of horticultural grit or pebbles to complete the look of the pot display. This also prevents water splashing back on the cactus.

2.How to propagate cacti
Cactus can be grown from seed although it can take several years for plants to reach a decent size. You can buy mixed cactus seed cheaply, and it’s fun to see which cactus varieties you end up with.
To grow cactus from seed, fill a pot with a moist, gritty, free-draining compost, firm down and level. Scatter cactus seeds over the surface, taking care not to sow them too thickly. Then, gently sprinkle a thin layer of vermiculite or fine grit over the seeds. Cover the pot with a clear plastic bag to preserve soil moisture, and leave the in a greenhouse or on a warm windowsill. You may need to find an alternative spot for them in winter if the windowsill becomes too cold.
Some cacti can be propagated from cuttings. Others bear offsets, which can simply be snipped off the plant and potted on.

3.Caring for cactus plants
In summer, water cacti no more than once a week. A good watering less often is better than a little-and-often approach. You shouldn’t need to water cacti at all in the coldest months.
Repot cacti every couple of years, to give them fresh compost – you won’t necessarily need to pot them into a larger pot.

4.Growing cactus plants: problem solving
Cactus plants are usually trouble free. If overwatered or not given enough light they can rot at the base. This is usually fatal for the plants.
Cactus plants can develop spindly growth but it’s easy to rectify.
5.Cactus varieties to grow
Echinocactus grusonii – golden barrel cactus is globe-shaped but eventually grows tall. Native to Mexico, it bears bright green stems with spiked ribs. Bright yellow flowers appear in summer.
Gymnocalycium paraguayense – a variable cactus with flattened spines. It produces creamy white flowers in spring and summer.
Mammillaria spinosissima – a globe-shaped cactus with bright pink, funnel-shaped flowers. Its central spines are a reddish-brown or yellow.
Rebutia krainziana – a clump-forming barrel cactus, forming dark green stems up to 7cm in diameter, with contrasting small, white areoles and spines. In late spring large, yellow or red flowers develop around the main stem, forming a tight clump.
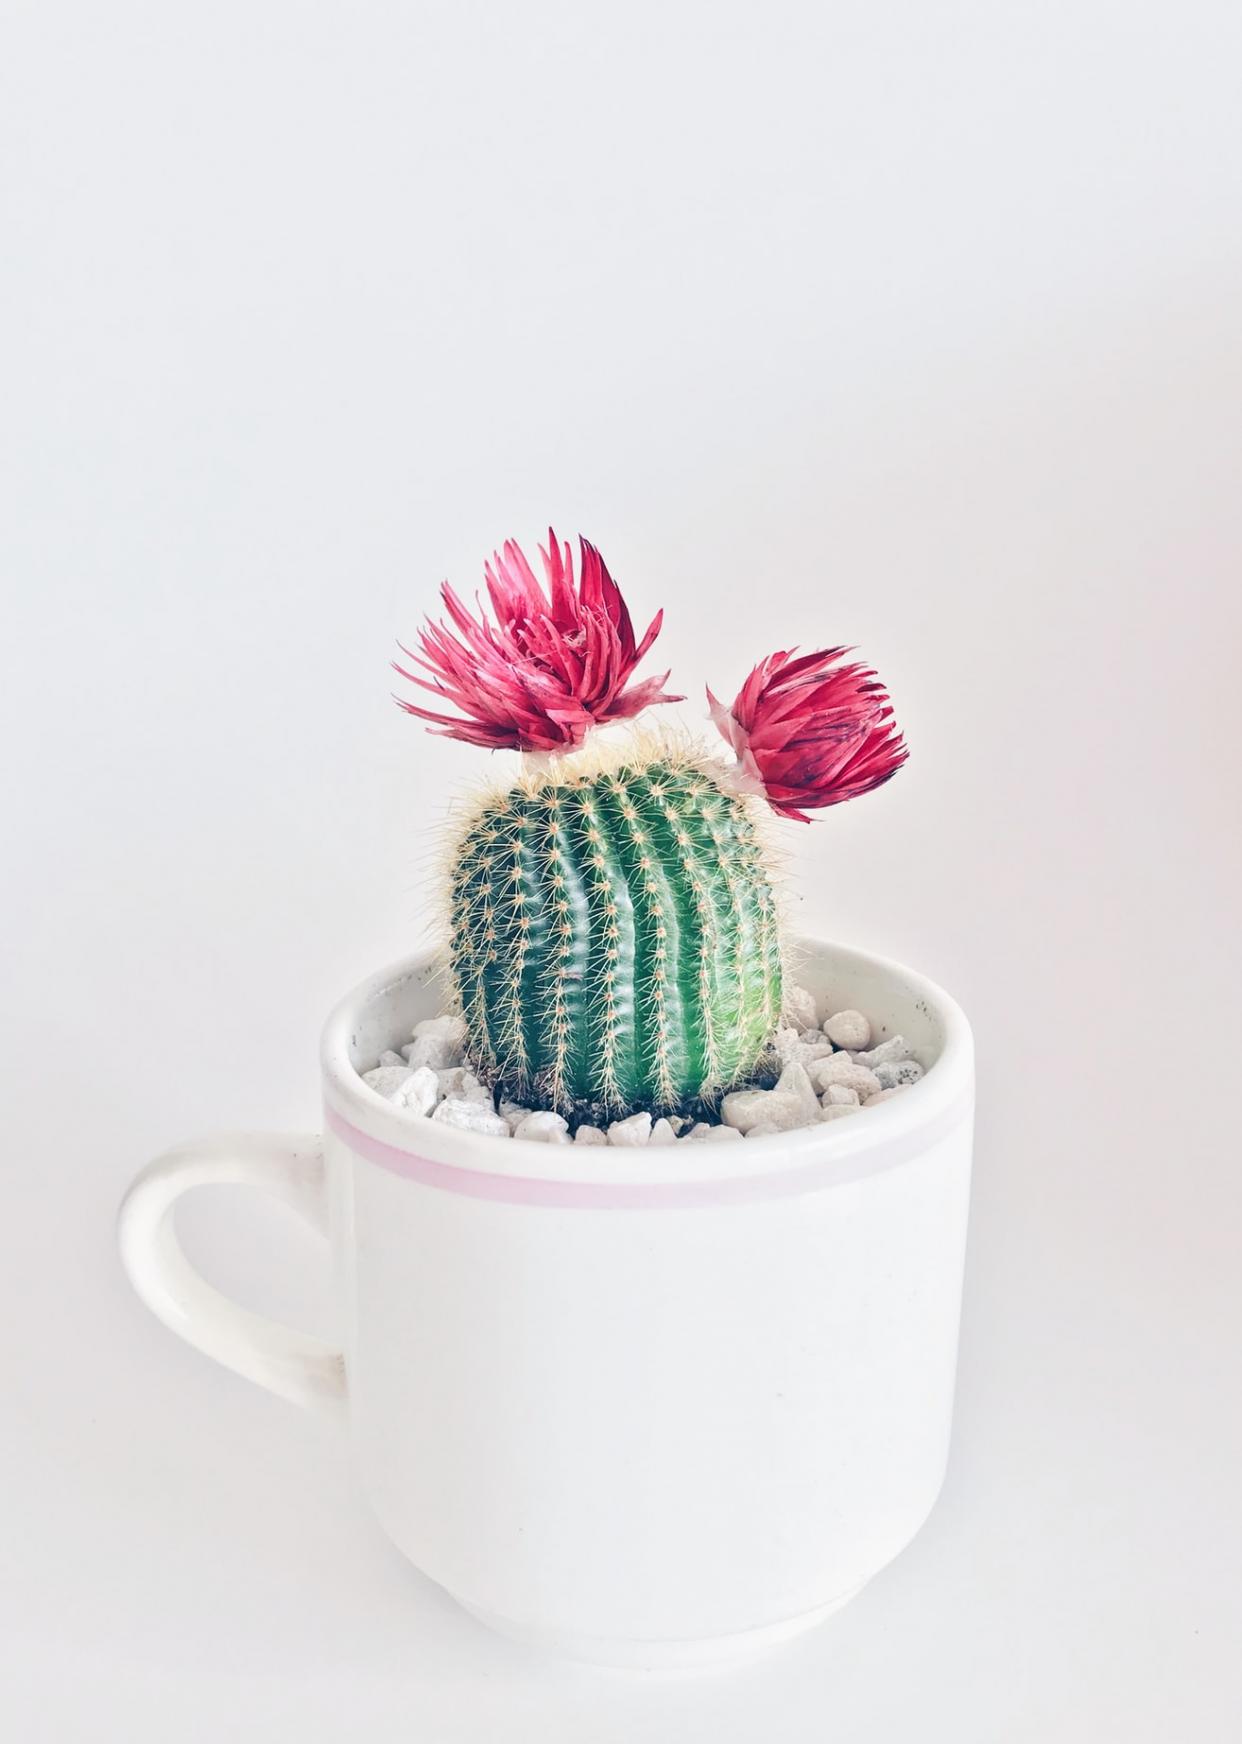
1.How to plant cacti
Always plant cacti with care. The spines can prick and hurt your skin. It’s a good idea to use common kitchen items such as a thick tea towel, spoon and fork to help you.
Mulch with a layer of horticultural grit or pebbles to complete the look of the pot display. This also prevents water splashing back on the cactus.

2.How to propagate cacti
Cactus can be grown from seed although it can take several years for plants to reach a decent size. You can buy mixed cactus seed cheaply, and it’s fun to see which cactus varieties you end up with.
To grow cactus from seed, fill a pot with a moist, gritty, free-draining compost, firm down and level. Scatter cactus seeds over the surface, taking care not to sow them too thickly. Then, gently sprinkle a thin layer of vermiculite or fine grit over the seeds. Cover the pot with a clear plastic bag to preserve soil moisture, and leave the in a greenhouse or on a warm windowsill. You may need to find an alternative spot for them in winter if the windowsill becomes too cold.
Some cacti can be propagated from cuttings. Others bear offsets, which can simply be snipped off the plant and potted on.

3.Caring for cactus plants
In summer, water cacti no more than once a week. A good watering less often is better than a little-and-often approach. You shouldn’t need to water cacti at all in the coldest months.
Repot cacti every couple of years, to give them fresh compost – you won’t necessarily need to pot them into a larger pot.

4.Growing cactus plants: problem solving
Cactus plants are usually trouble free. If overwatered or not given enough light they can rot at the base. This is usually fatal for the plants.
Cactus plants can develop spindly growth but it’s easy to rectify.
5.Cactus varieties to grow
Echinocactus grusonii – golden barrel cactus is globe-shaped but eventually grows tall. Native to Mexico, it bears bright green stems with spiked ribs. Bright yellow flowers appear in summer.
Gymnocalycium paraguayense – a variable cactus with flattened spines. It produces creamy white flowers in spring and summer.
Mammillaria spinosissima – a globe-shaped cactus with bright pink, funnel-shaped flowers. Its central spines are a reddish-brown or yellow.
Rebutia krainziana – a clump-forming barrel cactus, forming dark green stems up to 7cm in diameter, with contrasting small, white areoles and spines. In late spring large, yellow or red flowers develop around the main stem, forming a tight clump.

0
0
文章
莹723
2020年09月22日

Strawberries are easy and fun to grow. Plant strawberry runners or young plants in spring or autumn, and you’ll be rewarded with masses of delicious strawberries from late spring. Grow strawberries in a well prepared strawberry bed or planter, in full sun. And add some garden compost.

—How to grow strawberries from runners
Plant bare-rooted strawberry runners in spring or late summer/autumn.
Prepare the soil by digging in well-rotted garden compost and apply a dressing of sulphate of potash fertiliser.Bury their roots, about 30-45cm apart, then firm the soil around. Water well for the first few weeks.
Strawberries are also suited to growing in pots and hanging baskets. Use deep pots at least 15cm wide and plant one strawberry per pot. They thrive in moist but well-drained conditions, so use a soil-based compost with a deep layer of gravel or broken crocks in the base.

—Look after strawberry plants
To encourage flowering and fruit set, feed your strawberry plants with tomato fertiliser (follow the pack instructions) and water regularly. Avoid wetting any of ripening fruits to prevent grey mould.
Tuck some straw around the plants just before the fruit starts to develop. This helps to keep the berries clean and deters slugs and snails.
For next year’s crop, after fruiting finishes, cut off foliage about 5cm above ground level and give plants a good feed with a general-purpose fertiliser.
After three to four years, fruit size and quality declines so you need to replace your plants with new stock.

—Harvest
Once strawberries have been picked, the ripening process stops. So, wait until the berries are fully red before harvesting. Simply pinch through the stalks,avoid bruising the fruit.

—Store
As strawberries are perishable, it’s best to eat them straight from the plant, avoid the sun. You can store unwashed fruit for a few days in the fridge. If you’re lucky enough to have a glut, whizz them into delicious smoothies or use to make jam,or freeze them.

-Solve problem
Protect strawberry plants against slugs and snail attacks.
Grey mould can be a problem in wet weather, causing the berries to rot. Water plants in the morning rather than in the evening to give them time to dry out.

——Great types to grow
Summer-cropping strawberries:
• ‘Elsanta’ – heavy cropper with large, tasty, red fruits
• ‘Elvira’ – heavy crops and good disease resistance
• ‘Hapil’ – large glossy fruits, even in dry conditions
• ‘Honeoye’ – prolific fruiter with large, firm berries
• ‘Pegasus’ – sweet, juicy, top-quality berries
• ‘Symphony’ – good yields and fairly pest resistant
Everbearing strawberries:
• ‘Aromel’ – abundant dark red, juicy berries
• ‘Christine’ – sweet fruits that ripen in late May
• ‘Mara des Bois’ – large, deliciously aromatic fruits


—How to grow strawberries from runners
Plant bare-rooted strawberry runners in spring or late summer/autumn.
Prepare the soil by digging in well-rotted garden compost and apply a dressing of sulphate of potash fertiliser.Bury their roots, about 30-45cm apart, then firm the soil around. Water well for the first few weeks.
Strawberries are also suited to growing in pots and hanging baskets. Use deep pots at least 15cm wide and plant one strawberry per pot. They thrive in moist but well-drained conditions, so use a soil-based compost with a deep layer of gravel or broken crocks in the base.

—Look after strawberry plants
To encourage flowering and fruit set, feed your strawberry plants with tomato fertiliser (follow the pack instructions) and water regularly. Avoid wetting any of ripening fruits to prevent grey mould.
Tuck some straw around the plants just before the fruit starts to develop. This helps to keep the berries clean and deters slugs and snails.
For next year’s crop, after fruiting finishes, cut off foliage about 5cm above ground level and give plants a good feed with a general-purpose fertiliser.
After three to four years, fruit size and quality declines so you need to replace your plants with new stock.

—Harvest
Once strawberries have been picked, the ripening process stops. So, wait until the berries are fully red before harvesting. Simply pinch through the stalks,avoid bruising the fruit.

—Store
As strawberries are perishable, it’s best to eat them straight from the plant, avoid the sun. You can store unwashed fruit for a few days in the fridge. If you’re lucky enough to have a glut, whizz them into delicious smoothies or use to make jam,or freeze them.

-Solve problem
Protect strawberry plants against slugs and snail attacks.
Grey mould can be a problem in wet weather, causing the berries to rot. Water plants in the morning rather than in the evening to give them time to dry out.

——Great types to grow
Summer-cropping strawberries:
• ‘Elsanta’ – heavy cropper with large, tasty, red fruits
• ‘Elvira’ – heavy crops and good disease resistance
• ‘Hapil’ – large glossy fruits, even in dry conditions
• ‘Honeoye’ – prolific fruiter with large, firm berries
• ‘Pegasus’ – sweet, juicy, top-quality berries
• ‘Symphony’ – good yields and fairly pest resistant
Everbearing strawberries:
• ‘Aromel’ – abundant dark red, juicy berries
• ‘Christine’ – sweet fruits that ripen in late May
• ‘Mara des Bois’ – large, deliciously aromatic fruits

0
0
文章
莹723
2020年09月18日

Summer may go away, but your flowerbeds won’t! Flex your green thumb this autumn with beautiful flowers and plants to bring vibrant colors everyday. You’ll love fall decorations like wreaths, garlands, pumpkins, gourds and fresh flowers.Don’t retire your gardening tools now, because these fall blooms need to make an appearance outside your home and you'll reap the rewards of your planting in cold months.
1-Aster
These daisy-like flowers love lots of sunlight and water. They'll be blooming until almost winter.
Zones: 3-8
2-Chrysanthemum
Chrysanthemums bloom in tons of different shapes, sizes, and colors. They're perfect for container gardening—so fear not if you don't have room for a big garden.
Zones: 5-9

3-Parsley
Grow this popular herb and use it as a garnish for any dish.
Zones: 4-9

4-Winter Pansies
As evidenced by the name, winter pansies can hold their own once temps start to drop—but time your planting accordingly. These florals need to be in the soil with time to spare before the weather hits 45 degrees F or below.
Zones: 6 and above

5-Rosemary
Take this amazing herb off your fall holiday grocery list! You can plant the freshest rosemary it in your own backyard.
Zones: 9-11 as perennials, 1-8 as annuals

6-Cyclamen Hederifolium
A popular hardy perennial, cyclamen hederifolium blooms in the fall.
Zones: 5-9

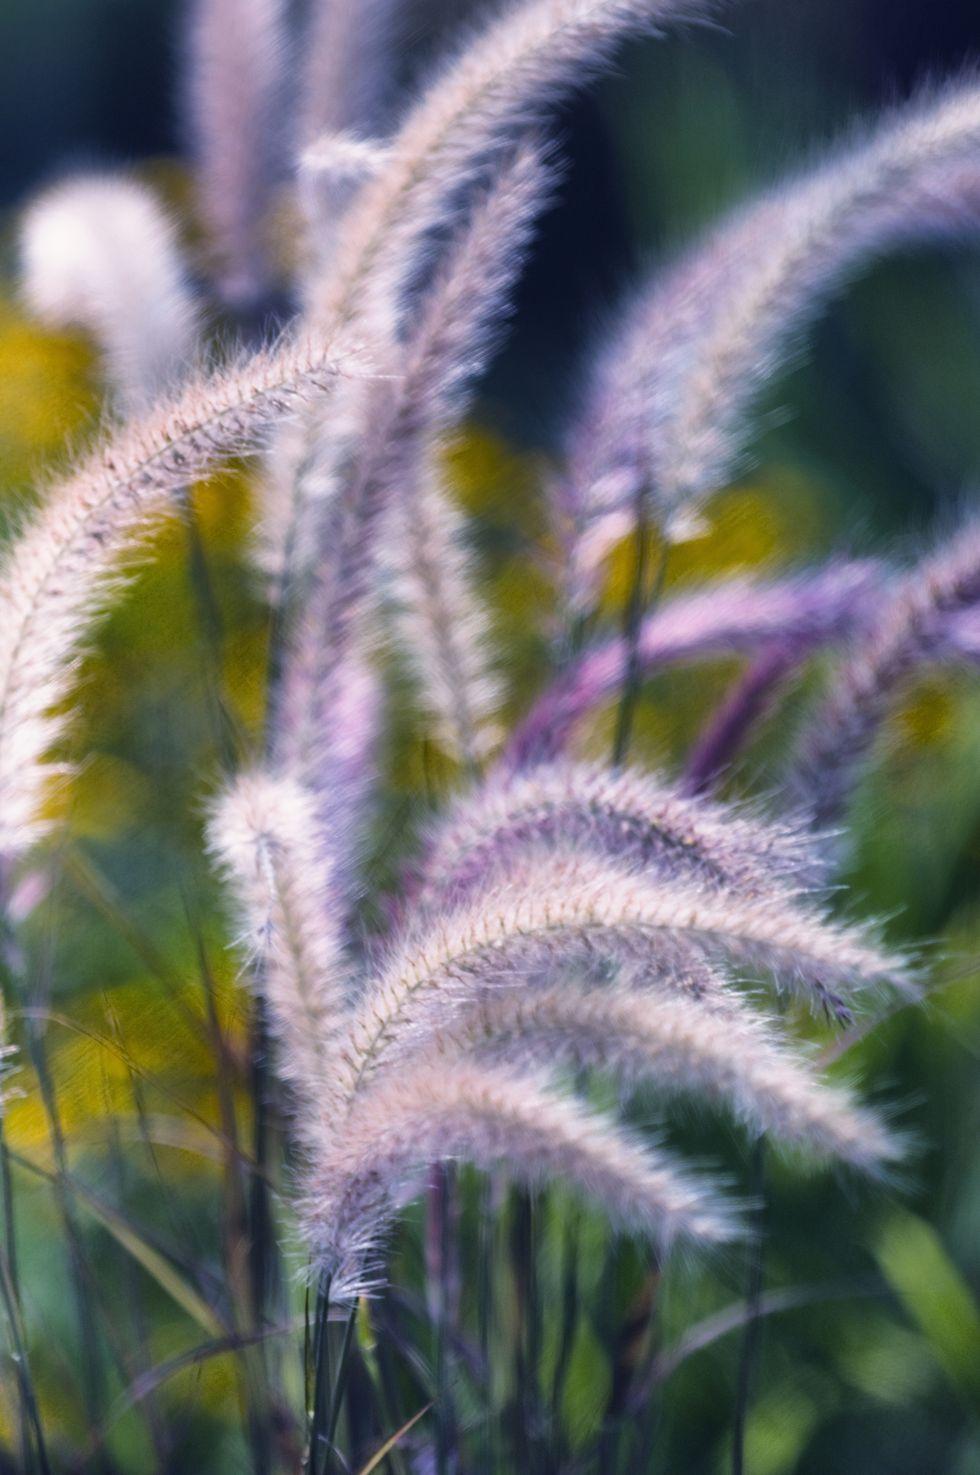
7-Purple Fountain Grass
This grass is a perfect pairing for other fall flowers like pansies, rudbeckia and flowering kale. Put it in the back of the garden to show off shorter stems.
Zones: 1-8
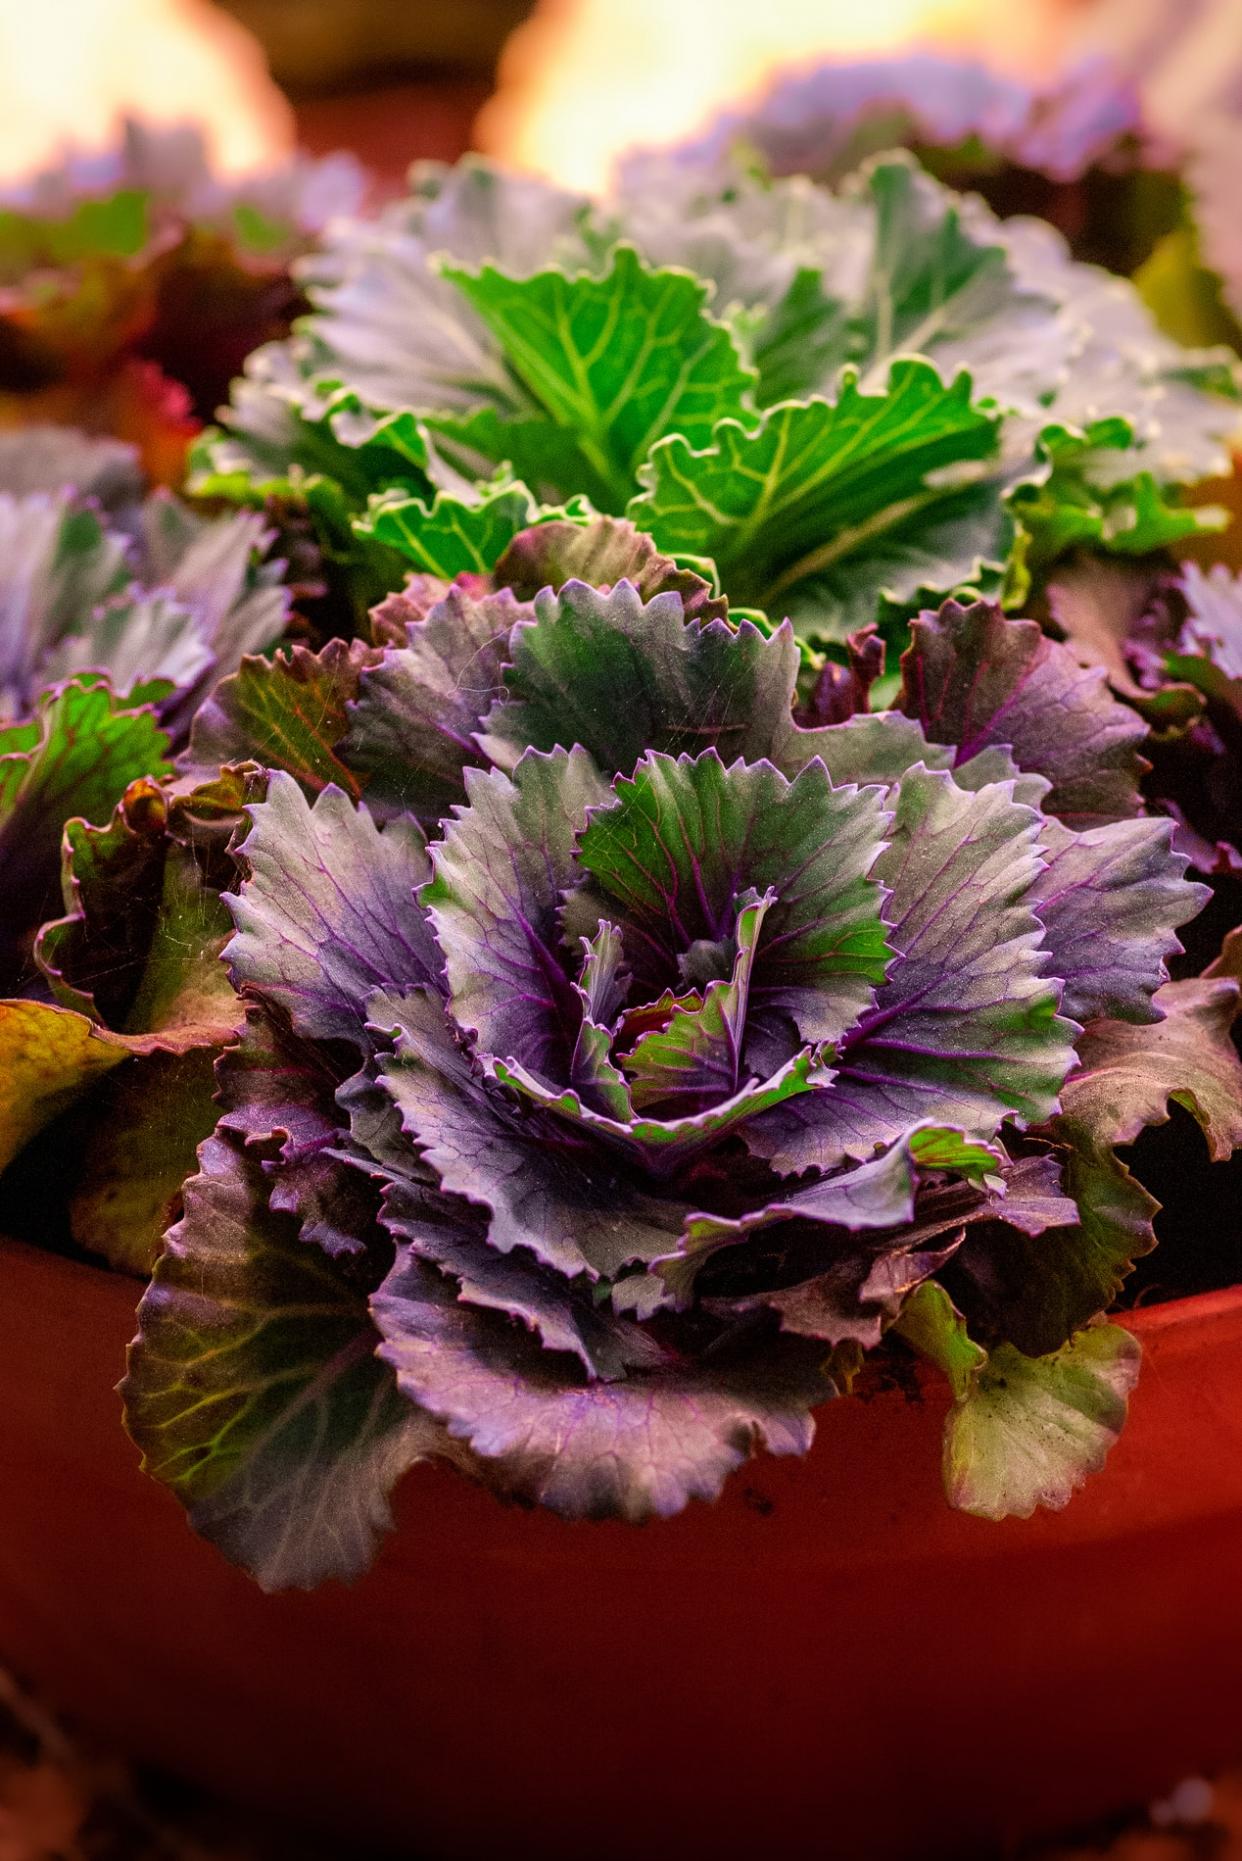
8-Ornamental Kale
Keep this kale well-watered if you want to see vibrant purple and green hues this fall.
Zones: 6-11
9-Witch Hazel
Growing this shrub is practically maintenance-free, and its bark extract is a well-known healing remedy for skin.
Zones: 5-8

10-Ornamental Peppers
These plants embody all the colors of fall in one punch. Not for human consumption, these fiery little peppers add a bit of flare to your fall garden.
Zones: 9-11

1-Aster
These daisy-like flowers love lots of sunlight and water. They'll be blooming until almost winter.
Zones: 3-8
2-Chrysanthemum
Chrysanthemums bloom in tons of different shapes, sizes, and colors. They're perfect for container gardening—so fear not if you don't have room for a big garden.
Zones: 5-9

3-Parsley
Grow this popular herb and use it as a garnish for any dish.
Zones: 4-9

4-Winter Pansies
As evidenced by the name, winter pansies can hold their own once temps start to drop—but time your planting accordingly. These florals need to be in the soil with time to spare before the weather hits 45 degrees F or below.
Zones: 6 and above

5-Rosemary
Take this amazing herb off your fall holiday grocery list! You can plant the freshest rosemary it in your own backyard.
Zones: 9-11 as perennials, 1-8 as annuals

6-Cyclamen Hederifolium
A popular hardy perennial, cyclamen hederifolium blooms in the fall.
Zones: 5-9

7-Purple Fountain Grass
This grass is a perfect pairing for other fall flowers like pansies, rudbeckia and flowering kale. Put it in the back of the garden to show off shorter stems.
Zones: 1-8

8-Ornamental Kale
Keep this kale well-watered if you want to see vibrant purple and green hues this fall.
Zones: 6-11

9-Witch Hazel
Growing this shrub is practically maintenance-free, and its bark extract is a well-known healing remedy for skin.
Zones: 5-8

10-Ornamental Peppers
These plants embody all the colors of fall in one punch. Not for human consumption, these fiery little peppers add a bit of flare to your fall garden.
Zones: 9-11

1
0
文章
ritau
2020年09月04日

Kale, or leaf cabbage, belongs to a group of cabbage (Brassica oleracea) cultivars grown for their edible leaves, although some are used as ornamentals. Kale plants have green or purple leaves, and the central leaves do not form a head (as with headed cabbage). Kales are considered to be closer to wild cabbage than most of the many domesticated forms of Brassica oleracea.
Kale originated in the eastern Mediterranean and Asia Minor, where it was cultivated for food beginning by 2000 BCE at the latest. Curly-leaved varieties of cabbage already existed along with flat-leaved varieties in Greece in the 4th century BC. These forms, which were referred to by the Romans as Sabellian kale, are considered to be the ancestors of modern kales.
The earliest record of cabbages in western Europe is of hard-heading cabbage in the 13th century. Records in 14th-century England distinguish between hard-heading cabbage and loose-leaf kale.
Russian kale was introduced into Canada, and then into the United States, by Russian traders in the 19th century. USDA botanist David Fairchild is credited with introducing kale (and many other crops) to Americans, having brought it back from Croatia, although Fairchild himself disliked cabbages, including kale.At the time, kale was widely grown in Croatia mostly because it was easy to grow and inexpensive, and could desalinate soil. For most of the twentieth century, kale was primarily used in the United States for decorative purposes; it became more popular as an edible vegetable in the 1990s due to its nutritional value.
During World War II, the cultivation of kale (and other vegetables) in the U.K. was encouraged by the Dig for Victory campaign. The vegetable was easy to grow and provided important nutrients missing from a diet because of rationing.

Many varieties of kale and cabbage are grown mainly for ornamental leaves that are brilliant white, red, pink, lavender, blue or violet in the interior of the rosette. The different types of ornamental kale are peacock kale, coral prince, kamone coral queen, color up kale and chidori kale. Ornamental kale is as edible as any other variety, but potentially not as palatable. Kale leaves are increasingly used as an ingredient for vegetable bouquets and wedding bouquets.
Raw kale is composed of 84% water, 9% carbohydrates, 4% protein, and 1% fat (table). In a 100 g (3 1⁄2 oz) serving, raw kale provides 207 kilojoules (49 kilocalories) of food energy and a large amount of vitamin K at 3.7 times the Daily Value (DV) (table). It is a rich source (20% or more of the DV) of vitamin A, vitamin C, vitamin B6, folate, and manganese. Kale is a good source (10–19% DV) of thiamin, riboflavin, pantothenic acid, vitamin E and several dietary minerals, including iron, calcium, potassium, and phosphorus. Boiling raw kale diminishes most of these nutrients, while values for vitamins A, C, and K, and manganese remain substantial.
Kale is a source of the carotenoids, lutein and zeaxanthin. As with broccoli and other cruciferous vegetables, kale contains glucosinolate compounds, such as glucoraphanin, which contributes to the formation of sulforaphane, a compound under preliminary research for its potential to affect human health.
Boiling kale decreases the level of glucosinate compounds, whereas steaming, microwaving or stir frying does not cause significant loss. Kale is high in oxalic acid, the levels of which can be reduced by cooking.
Kale contains high levels of polyphenols, such as ferulic acid, with levels varying due to environmental and genetic factors.
Kale originated in the eastern Mediterranean and Asia Minor, where it was cultivated for food beginning by 2000 BCE at the latest. Curly-leaved varieties of cabbage already existed along with flat-leaved varieties in Greece in the 4th century BC. These forms, which were referred to by the Romans as Sabellian kale, are considered to be the ancestors of modern kales.
The earliest record of cabbages in western Europe is of hard-heading cabbage in the 13th century. Records in 14th-century England distinguish between hard-heading cabbage and loose-leaf kale.
Russian kale was introduced into Canada, and then into the United States, by Russian traders in the 19th century. USDA botanist David Fairchild is credited with introducing kale (and many other crops) to Americans, having brought it back from Croatia, although Fairchild himself disliked cabbages, including kale.At the time, kale was widely grown in Croatia mostly because it was easy to grow and inexpensive, and could desalinate soil. For most of the twentieth century, kale was primarily used in the United States for decorative purposes; it became more popular as an edible vegetable in the 1990s due to its nutritional value.
During World War II, the cultivation of kale (and other vegetables) in the U.K. was encouraged by the Dig for Victory campaign. The vegetable was easy to grow and provided important nutrients missing from a diet because of rationing.

Many varieties of kale and cabbage are grown mainly for ornamental leaves that are brilliant white, red, pink, lavender, blue or violet in the interior of the rosette. The different types of ornamental kale are peacock kale, coral prince, kamone coral queen, color up kale and chidori kale. Ornamental kale is as edible as any other variety, but potentially not as palatable. Kale leaves are increasingly used as an ingredient for vegetable bouquets and wedding bouquets.
Raw kale is composed of 84% water, 9% carbohydrates, 4% protein, and 1% fat (table). In a 100 g (3 1⁄2 oz) serving, raw kale provides 207 kilojoules (49 kilocalories) of food energy and a large amount of vitamin K at 3.7 times the Daily Value (DV) (table). It is a rich source (20% or more of the DV) of vitamin A, vitamin C, vitamin B6, folate, and manganese. Kale is a good source (10–19% DV) of thiamin, riboflavin, pantothenic acid, vitamin E and several dietary minerals, including iron, calcium, potassium, and phosphorus. Boiling raw kale diminishes most of these nutrients, while values for vitamins A, C, and K, and manganese remain substantial.
Kale is a source of the carotenoids, lutein and zeaxanthin. As with broccoli and other cruciferous vegetables, kale contains glucosinolate compounds, such as glucoraphanin, which contributes to the formation of sulforaphane, a compound under preliminary research for its potential to affect human health.
Boiling kale decreases the level of glucosinate compounds, whereas steaming, microwaving or stir frying does not cause significant loss. Kale is high in oxalic acid, the levels of which can be reduced by cooking.
Kale contains high levels of polyphenols, such as ferulic acid, with levels varying due to environmental and genetic factors.
0
0
文章
ritau
2020年08月27日

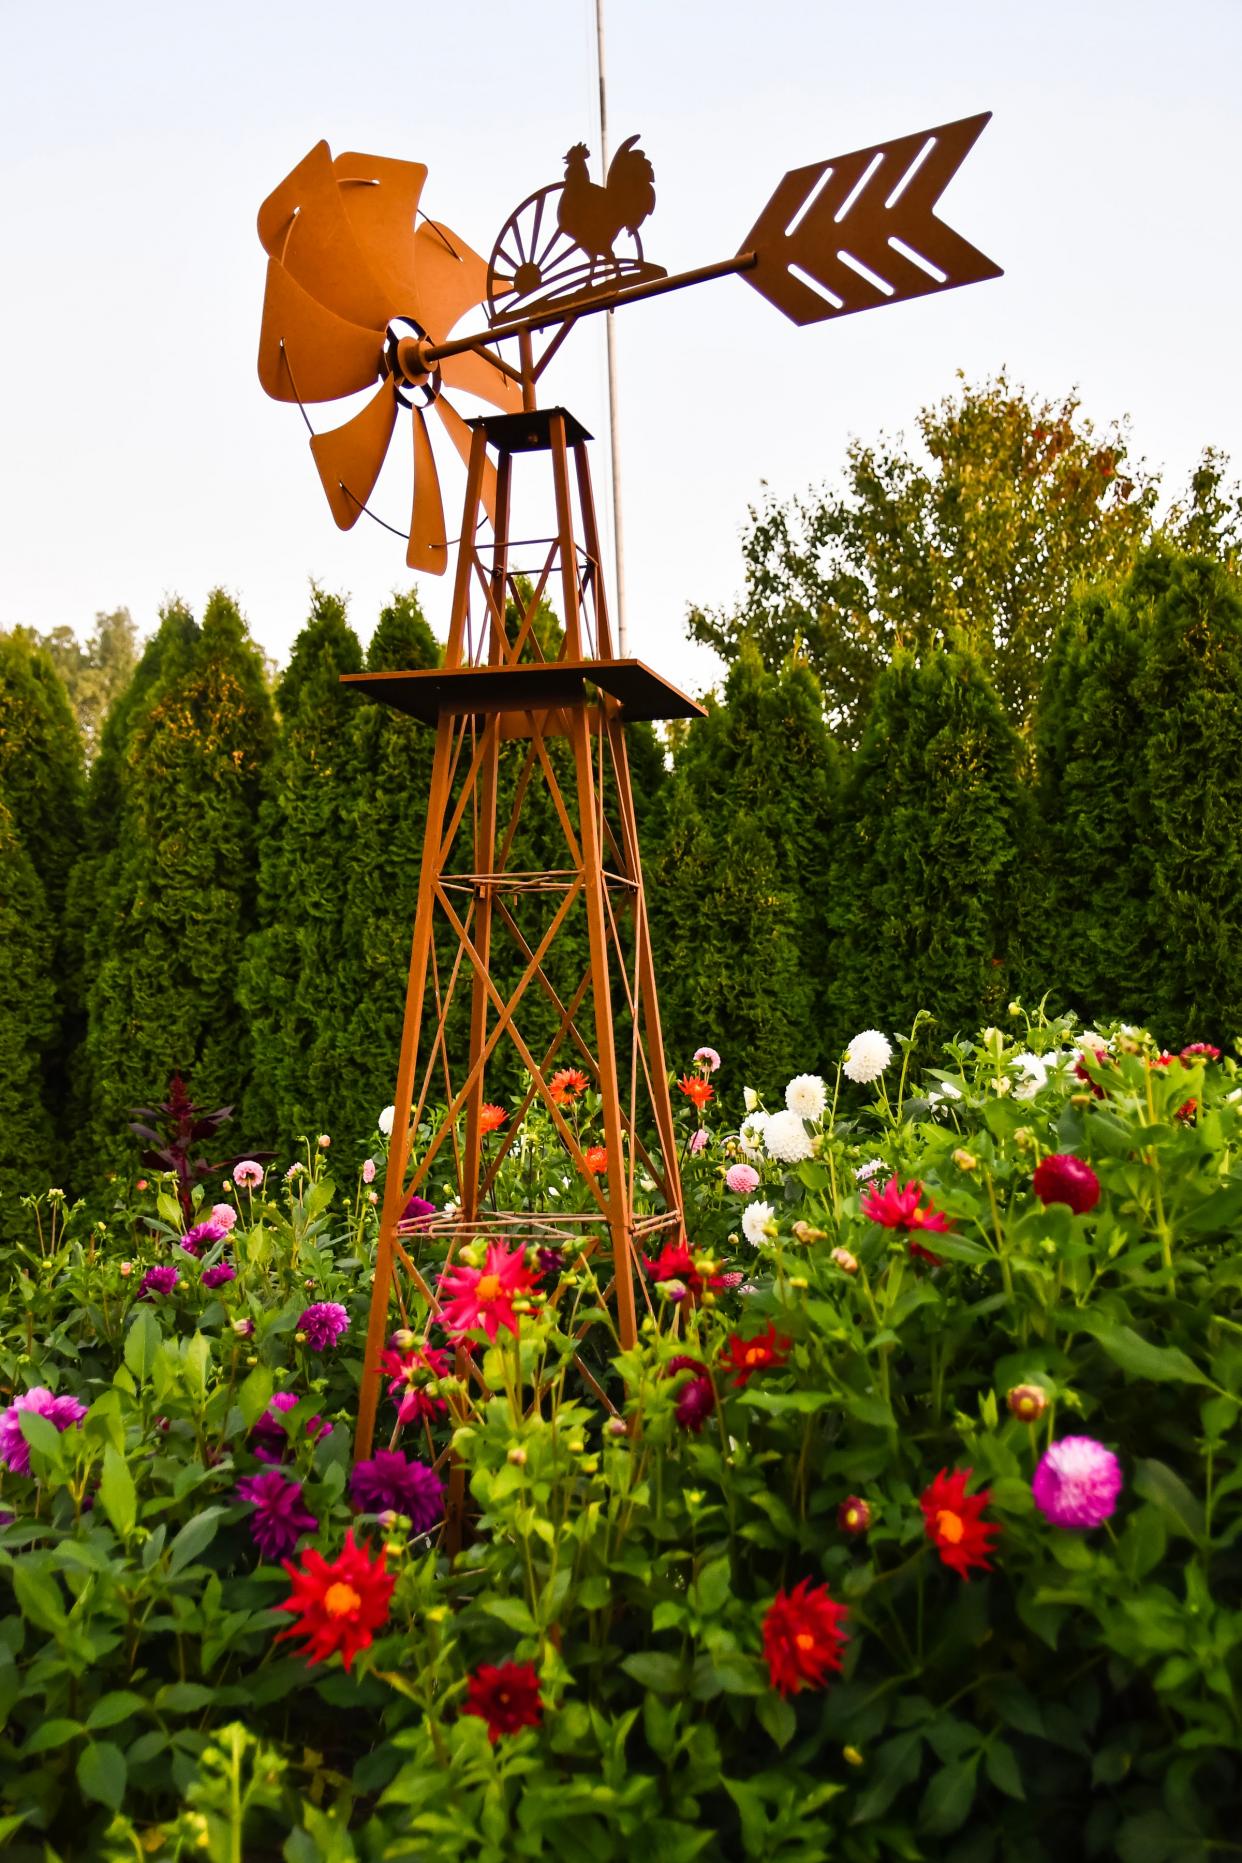
Dahlia is a genus of bushy, tuberous, herbaceous perennial plants native to Mexico and Central America. A member of the Asteraceae (formerly Compositae) family of dicotyledonous plants, its garden relatives thus include the sunflower, daisy, chrysanthemum, and zinnia. There are 42 species of dahlia, with hybrids commonly grown as garden plants. Flower forms are variable, with one head per stem; these can be as small as 5 cm (2 in) diameter or up to 30 cm (1 ft) ("dinner plate"). This great variety results from dahlias being octoploids—that is, they have eight sets of homologous chromosomes, whereas most plants have only two. In addition, dahlias also contain many transposons—genetic pieces that move from place to place upon an allele—which contributes to their manifesting such great diversity.
The stems are leafy, ranging in height from as low as 30 cm (12 in) to more than 1.8–2.4 m (6–8 ft). The majority of species do not produce scented flowers. Like most plants that do not attract pollinating insects through scent, they are brightly colored, displaying most hues, with the exception of blue.
The dahlia was declared the national flower of Mexico in 1963.The tubers were grown as a food crop by the Aztecs, but this use largely died out after the Spanish Conquest. Attempts to introduce the tubers as a food crop in Europe were unsuccessful.
Dahlias are perennial plants with tuberous roots, though they are grown as annuals in some regions with cold winters. While some have herbaceous stems, others have stems which lignify in the absence of secondary tissue and resprout following winter dormancy, allowing further seasons of growth. As a member of the Asteraceae, the dahlia has a flower head that is actually a composite (hence the older name Compositae) with both central disc florets and surrounding ray florets. Each floret is a flower in its own right, but is often incorrectly described as a petal, particularly by horticulturists. The modern name Asteraceae refers to the appearance of a star with surrounding rays.
*History
Spaniards reported finding the plants growing in Mexico in 1525, but the earliest known description is by Francisco Hernández, physician to Philip II, who was ordered to visit Mexico in 1570 to study the "natural products of that country". They were used as a source of food by the indigenous peoples, and were both gathered in the wild and cultivated. The Aztecs used them to treat epilepsy,and employed the long hollow stem of the (Dahlia imperalis) for water pipes. The indigenous peoples variously identified the plants as "Chichipatl" (Toltecs) and "Acocotle" or "Cocoxochitl" (Aztecs). From Hernandez's perception of Aztec, to Spanish, through various other translations, the word is "water cane", "water pipe", "water pipe flower", "hollow stem flower" and "cane flower". All these refer to the hollowness of the plants' stem.
Hernandez described two varieties of dahlias (the pinwheel-like Dahlia pinnata and the huge Dahlia imperialis) as well as other medicinal plants of New Spain. Francisco Dominguez, a Hidalgo gentleman who accompanied Hernandez on part of his seven-year study, made a series of drawings to supplement the four volume report. Three of his drawings showed plants with flowers: two resembled the modern bedding dahlia, and one resembled the species Dahlia merki; all displayed a high degree of doubleness.In 1578 the manuscript, entitled Nova Plantarum, Animalium et Mineralium Mexicanorum Historia, was sent back to the Escorial in Madrid; they were not translated into Latin by Francisco Ximenes until 1615. In 1640, Francisco Cesi, President of the Academia Linei of Rome, bought the Ximenes translation, and after annotating it, published it in 1649-1651 in two volumes as Rerum Medicarum Novae Hispaniae Thesaurus Seu Nova Plantarium, Animalium et Mineraliuím Mexicanorum Historia. The original manuscripts were destroyed in a fire in the mid-1600s.
"Stars of the Devil"
In 1872 J.T. van der Berg of Utrecht in the Netherlands, received a shipment of seeds and plants from a friend in Mexico. The entire shipment was badly rotted and appeared to be ruined, but van der Berg examined it carefully and found a small piece of root that seemed alive. He planted and carefully tended it; it grew into a plant that he identified as a dahlia. He made cuttings from the plant during the winter of 1872-1873. This was an entirely different type of flower, with a rich, red color and a high degree of doubling. In 1874 van der Berg catalogued it for sale, calling it Dahlia juarezii to honor Mexican President Benito Pablo Juarez, who had died the year before, and described it as "...equal to the beautiful color of the red poppy. Its form is very outstanding and different in every respect of all known dahlia flowers.".

This plant has perhaps had a greater influence on the popularity of the modern dahlia than any other. Called "Les Etoiles du Diable" (Stars of the Devil) in France and "Cactus dahlia" elsewhere, the edges of its petals rolled backwards, rather than forward, and this new form revolutionized the dahlia world. It was thought to be a distinct mutation since no other plant that resembled it could be found in the wild. Today it is assumed that D. juarezii had, at one time, existed in Mexico and subsequently disappeared. Nurserymen in Europe crossbred this plant with dahlias discovered earlier; the results became the progenitors of all modern dahlia hybrids today.
The stems are leafy, ranging in height from as low as 30 cm (12 in) to more than 1.8–2.4 m (6–8 ft). The majority of species do not produce scented flowers. Like most plants that do not attract pollinating insects through scent, they are brightly colored, displaying most hues, with the exception of blue.
The dahlia was declared the national flower of Mexico in 1963.The tubers were grown as a food crop by the Aztecs, but this use largely died out after the Spanish Conquest. Attempts to introduce the tubers as a food crop in Europe were unsuccessful.
Dahlias are perennial plants with tuberous roots, though they are grown as annuals in some regions with cold winters. While some have herbaceous stems, others have stems which lignify in the absence of secondary tissue and resprout following winter dormancy, allowing further seasons of growth. As a member of the Asteraceae, the dahlia has a flower head that is actually a composite (hence the older name Compositae) with both central disc florets and surrounding ray florets. Each floret is a flower in its own right, but is often incorrectly described as a petal, particularly by horticulturists. The modern name Asteraceae refers to the appearance of a star with surrounding rays.

*History
Spaniards reported finding the plants growing in Mexico in 1525, but the earliest known description is by Francisco Hernández, physician to Philip II, who was ordered to visit Mexico in 1570 to study the "natural products of that country". They were used as a source of food by the indigenous peoples, and were both gathered in the wild and cultivated. The Aztecs used them to treat epilepsy,and employed the long hollow stem of the (Dahlia imperalis) for water pipes. The indigenous peoples variously identified the plants as "Chichipatl" (Toltecs) and "Acocotle" or "Cocoxochitl" (Aztecs). From Hernandez's perception of Aztec, to Spanish, through various other translations, the word is "water cane", "water pipe", "water pipe flower", "hollow stem flower" and "cane flower". All these refer to the hollowness of the plants' stem.
Hernandez described two varieties of dahlias (the pinwheel-like Dahlia pinnata and the huge Dahlia imperialis) as well as other medicinal plants of New Spain. Francisco Dominguez, a Hidalgo gentleman who accompanied Hernandez on part of his seven-year study, made a series of drawings to supplement the four volume report. Three of his drawings showed plants with flowers: two resembled the modern bedding dahlia, and one resembled the species Dahlia merki; all displayed a high degree of doubleness.In 1578 the manuscript, entitled Nova Plantarum, Animalium et Mineralium Mexicanorum Historia, was sent back to the Escorial in Madrid; they were not translated into Latin by Francisco Ximenes until 1615. In 1640, Francisco Cesi, President of the Academia Linei of Rome, bought the Ximenes translation, and after annotating it, published it in 1649-1651 in two volumes as Rerum Medicarum Novae Hispaniae Thesaurus Seu Nova Plantarium, Animalium et Mineraliuím Mexicanorum Historia. The original manuscripts were destroyed in a fire in the mid-1600s.
"Stars of the Devil"
In 1872 J.T. van der Berg of Utrecht in the Netherlands, received a shipment of seeds and plants from a friend in Mexico. The entire shipment was badly rotted and appeared to be ruined, but van der Berg examined it carefully and found a small piece of root that seemed alive. He planted and carefully tended it; it grew into a plant that he identified as a dahlia. He made cuttings from the plant during the winter of 1872-1873. This was an entirely different type of flower, with a rich, red color and a high degree of doubling. In 1874 van der Berg catalogued it for sale, calling it Dahlia juarezii to honor Mexican President Benito Pablo Juarez, who had died the year before, and described it as "...equal to the beautiful color of the red poppy. Its form is very outstanding and different in every respect of all known dahlia flowers.".

This plant has perhaps had a greater influence on the popularity of the modern dahlia than any other. Called "Les Etoiles du Diable" (Stars of the Devil) in France and "Cactus dahlia" elsewhere, the edges of its petals rolled backwards, rather than forward, and this new form revolutionized the dahlia world. It was thought to be a distinct mutation since no other plant that resembled it could be found in the wild. Today it is assumed that D. juarezii had, at one time, existed in Mexico and subsequently disappeared. Nurserymen in Europe crossbred this plant with dahlias discovered earlier; the results became the progenitors of all modern dahlia hybrids today.
0
0
文章
ritau
2020年08月25日

1. Spray the plants with a strong stream of water. Use a hose to spray the plants affected by aphids with cold water—this should knock the aphids right off. A hard rainstorm can also wash the aphids off of the plant.
- While you want there to be water pressure, make sure you don’t damage the plants by setting the pressure too high.
- Repeat as needed to remove aphids when they crop up.
2. Remove the aphids using your hands. If you see a cluster of aphids on a plant, you can swipe them off using your fingers. When you brush the aphids off, drop them into a soapy bucket of water to kill them.
- If the aphids have infested an entire leaf or stem, snip off the section using scissors or pruning shears and drop it in the soapy bucket of water.
- Wear gloves to protect your hands.
3. Dust the plants with flour to help deal with an aphid invasion. Take a cupful of flour from your pantry or kitchen and bring it out to your garden. Use your hands to evenly sprinkle the plants affected by aphids, giving them a fine layer of flour.
- You don't have to coat the entire plant in flour, just the spot where the aphids are gathering.
- Ingesting the flour will constipate the aphids.
4. Wipe the plants down with a mild soap and water. Mix together a few drops of a mild dish detergent with a cup of water. Dip a rag or paper towel into the mixture, using it to gently wipe down the stem and leaves of the plant affected by the aphids.
- Make sure you wipe both sides of the leaves.

5. Mix together essential oils to use on the plants. Combine peppermint, rosemary, thyme, and clove oils in a bowl or cup, using 4-5 drops of each one. Pour the mixture into a spray bottle with water in it before shaking it all together. Spray the water and oil mixture onto plants that aphids have been eating.
- Designate 1 spray bottle as your essential oil sprayer. The oils tend to perfume and permeate the plastic, making them less than ideal for other uses going forward.
6. Create a homemade garlic spray to use on the aphids. Do this by chopping up 3-4 cloves of garlic before mixing them with 2 teaspoons (9.9 ml) of mineral oil. Leave the mixture alone for 24 hours before straining out the garlic chunks. Pour the mixture into a spray bottle with 16 ounces (450 g) of regular water and 1 teaspoon (4.9 ml) of dish soap before spraying the garlic concoction onto the plants.
- You can also make a tomato leaf spray to use on the plants.
7. Spray neem oil onto plants affected by aphids. By mixing neem oil with a little bit of water, you’ll create an organic concoction that helps repel aphids. Pour the water and neem oil into a spray bottle and apply it to sections of the plant that are affected by aphids.
- Find neem oil at a home and garden store, some big box stores, or online. Note that neem oil will perfume any sprayers for a long time. It’s best to designate a particular bottle for this use.
- You can also use horticultural oil to spray onto the plants.

8. Enlist an insecticidal soap to help control aphids. These soaps can be bought from a gardening supplier or online. Read the instructions to find out how much of the soap to mix with water before spraying it on the plants to help fend off aphids.
- These soaps are designed to kill the aphids.
- Insecticidal soaps are less toxic to mammals (humans and pets) than chemical insecticides. That said, follow the manufacturer’s directions about any safety precautions or gear you should wear when using them.
- While you want there to be water pressure, make sure you don’t damage the plants by setting the pressure too high.
- Repeat as needed to remove aphids when they crop up.
2. Remove the aphids using your hands. If you see a cluster of aphids on a plant, you can swipe them off using your fingers. When you brush the aphids off, drop them into a soapy bucket of water to kill them.
- If the aphids have infested an entire leaf or stem, snip off the section using scissors or pruning shears and drop it in the soapy bucket of water.
- Wear gloves to protect your hands.
3. Dust the plants with flour to help deal with an aphid invasion. Take a cupful of flour from your pantry or kitchen and bring it out to your garden. Use your hands to evenly sprinkle the plants affected by aphids, giving them a fine layer of flour.
- You don't have to coat the entire plant in flour, just the spot where the aphids are gathering.
- Ingesting the flour will constipate the aphids.
4. Wipe the plants down with a mild soap and water. Mix together a few drops of a mild dish detergent with a cup of water. Dip a rag or paper towel into the mixture, using it to gently wipe down the stem and leaves of the plant affected by the aphids.
- Make sure you wipe both sides of the leaves.

5. Mix together essential oils to use on the plants. Combine peppermint, rosemary, thyme, and clove oils in a bowl or cup, using 4-5 drops of each one. Pour the mixture into a spray bottle with water in it before shaking it all together. Spray the water and oil mixture onto plants that aphids have been eating.
- Designate 1 spray bottle as your essential oil sprayer. The oils tend to perfume and permeate the plastic, making them less than ideal for other uses going forward.
6. Create a homemade garlic spray to use on the aphids. Do this by chopping up 3-4 cloves of garlic before mixing them with 2 teaspoons (9.9 ml) of mineral oil. Leave the mixture alone for 24 hours before straining out the garlic chunks. Pour the mixture into a spray bottle with 16 ounces (450 g) of regular water and 1 teaspoon (4.9 ml) of dish soap before spraying the garlic concoction onto the plants.
- You can also make a tomato leaf spray to use on the plants.
7. Spray neem oil onto plants affected by aphids. By mixing neem oil with a little bit of water, you’ll create an organic concoction that helps repel aphids. Pour the water and neem oil into a spray bottle and apply it to sections of the plant that are affected by aphids.
- Find neem oil at a home and garden store, some big box stores, or online. Note that neem oil will perfume any sprayers for a long time. It’s best to designate a particular bottle for this use.
- You can also use horticultural oil to spray onto the plants.

8. Enlist an insecticidal soap to help control aphids. These soaps can be bought from a gardening supplier or online. Read the instructions to find out how much of the soap to mix with water before spraying it on the plants to help fend off aphids.
- These soaps are designed to kill the aphids.
- Insecticidal soaps are less toxic to mammals (humans and pets) than chemical insecticides. That said, follow the manufacturer’s directions about any safety precautions or gear you should wear when using them.
0
0
文章
ritau
2020年08月20日

Succulents are cute, versatile plants that can thrive both indoors and out! They make perfect indoor houseplants for small spaces, provided that you have a sunny windowsill. Get your set-up ready first by choosing a type of succulent, a well-drained container, and a well-draining soil. Then carefully pot your succulent in its new home as soon as possible to help it thrive. Care for your succulent by providing it with plenty of sunlight and a bit of water whenever the soil feels dry.
1. Choose a Zebra Plant or Gollum Jade succulent if you’re a beginner. While succulents are relatively easy to grow indoors, some varieties are easier than others! Stick to the Haworthia, Jade, or Gasteria varieties if you are unsure about what types to start with. All of these types are relatively drought-resistant and tend to grow well in indoor environments.
-If you’re in doubt about what sort of succulent to choose, pick one with green leaves such as agave or aloe. Succulents with green leaves tend to be the most forgiving and grow best indoors, compared to the purple, grey, or orange-leaved varieties.
-Zebra Plants have glossy green leaves with silver veins, creating a zebra-like appearance. They also have bright yellow flowers when they bloom.
-Gollum Jade succulents have green, tube-shaped leaves with red tips. Small white flowers form in winter.
2. Choose a pot slightly larger than your succulent, and make sure it has draining holes. You’ll find a wide variety of different terra-cotta pots available at your local gardening center! Pick a container that is just a bit bigger than the succulent to start with. Terra-cotta pots are ideal because they’re breathable, dry well, and draw water away from the soil. You can also choose a ceramic, metal, or plastic pot if you prefer, provided that it has good drainage.
-Holes for water drainage are essential, as succulents need to dry out their roots in order to survive. The roots will begin to rot otherwise.
-Succulents tend to grow as big as the pot they’re in.
-Glass pots don’t tend to work well for succulents, as there usually aren’t drainage holes.
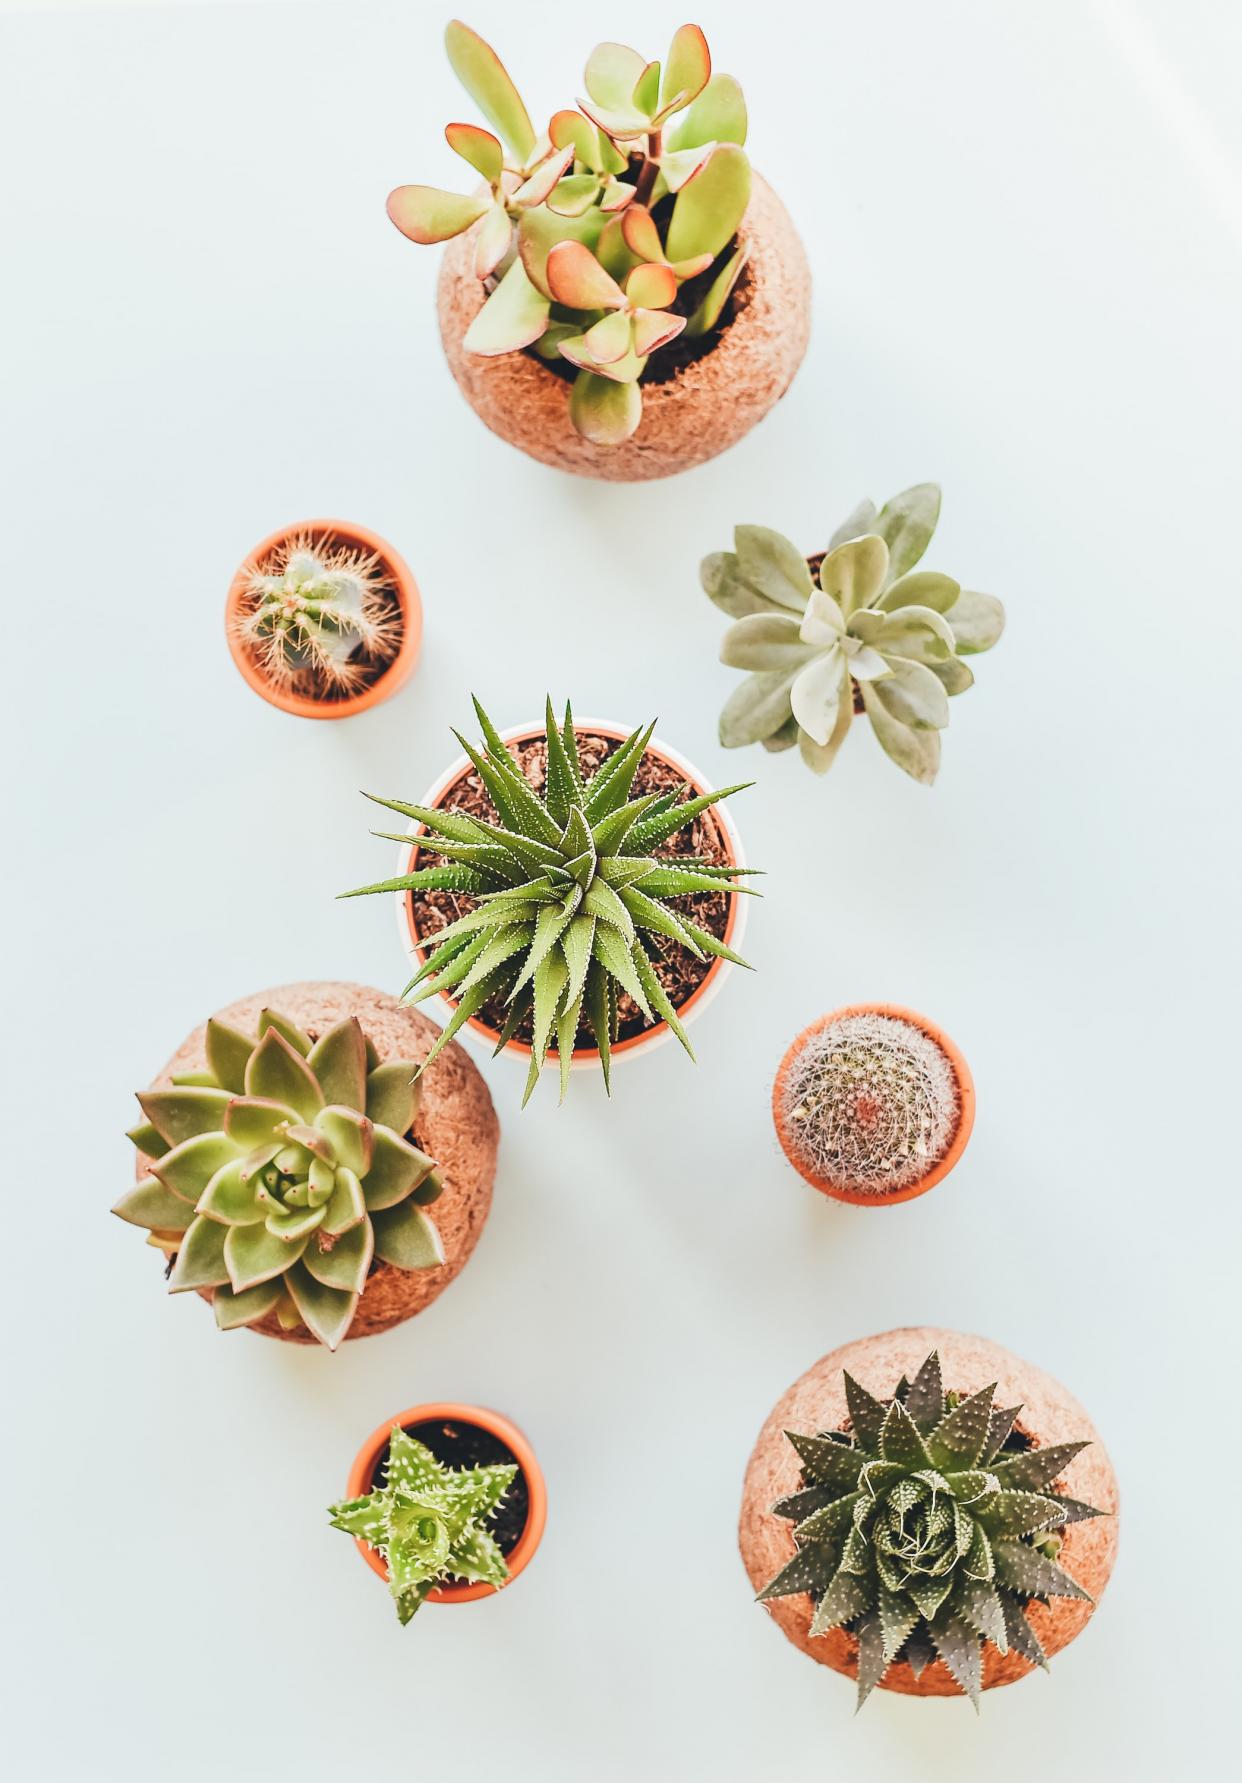
3. Pick a soil with 1⁄4 in (0.64 cm) particles to provide the best drainage. Succulents thrive in soils that drain well, so you need to pick a loosely compacted soil that will draw the water away. You can either choose a specialty succulent soil such as a cactus mix or make your own succulent-friendly soil. Simply mix 4 parts of regular gardening soil with 1 part of pumice, perlite, or turface to create a gritty, chunky mix.
-Crushed lava is also a good option.
4. Remove the succulent from the nursery pot within 24 hours of getting it. Succulents are often sold in small, plastic pots with very poorly drained soil. In order for your succulent to thrive, it needs to get out of that soil as soon as possible! Squeeze the plastic pot and gently pull the succulent upwards to remove it. If the succulent feels stuck, use scissors to cut the plastic pot away from the roots.
5. Suspend the succulent in the new pot as you fill it with soil. Succulent roots tend to be quite shallow and brittle, so do your best to protect these as you go about planting. Gently fill the sides of the pot with the soil, being careful not to damage the roots. Continue supporting the succulent until the pot is full and the succulent feels secure.
- If you're having trouble getting the soil around the roots, use your fingers to push and arrange the soil.
6. Space the succulents apart if you're planting more than 1 in a pot. Succulents don’t mind sharing a pot as long as each plant has breathing space. Leave a gap that's approximately 3–4 in (7.6–10.2 cm) between each succulent to ensure that the air can flow well and that each plant gets plenty of light.
-Outdoor succulents are fine being clumped close together because there is greater light and air flow in outdoor environments.
-Succulents naturally grow in warm, arid climates, which is why they require good air circulation to survive.
7. Keep the succulent in a bright spot with at least 6 hours of sun per day. Generally, indoor succulents love bright light and will thrive. Place the succulent on a sunny south or west-facing windowsill to ensure that it gets plenty of sun. It's okay if the succulent doesn't get full sun all day long, provided that it gets a minimum of 6 hours.
-If you notice the leaves are getting scorched, try using a sheer curtain to provide the succulent with a bit of protection.
8. Get a pitcher, watering can, or pipette to water the succulent. Succulents do best when the water is delivered directly to the soil rather than drenched over the whole plant. Find a tool that works for the size of your succulent. For example, pitchers or watering cans are good for larger succulents, while pipettes are best for very young or small plants.
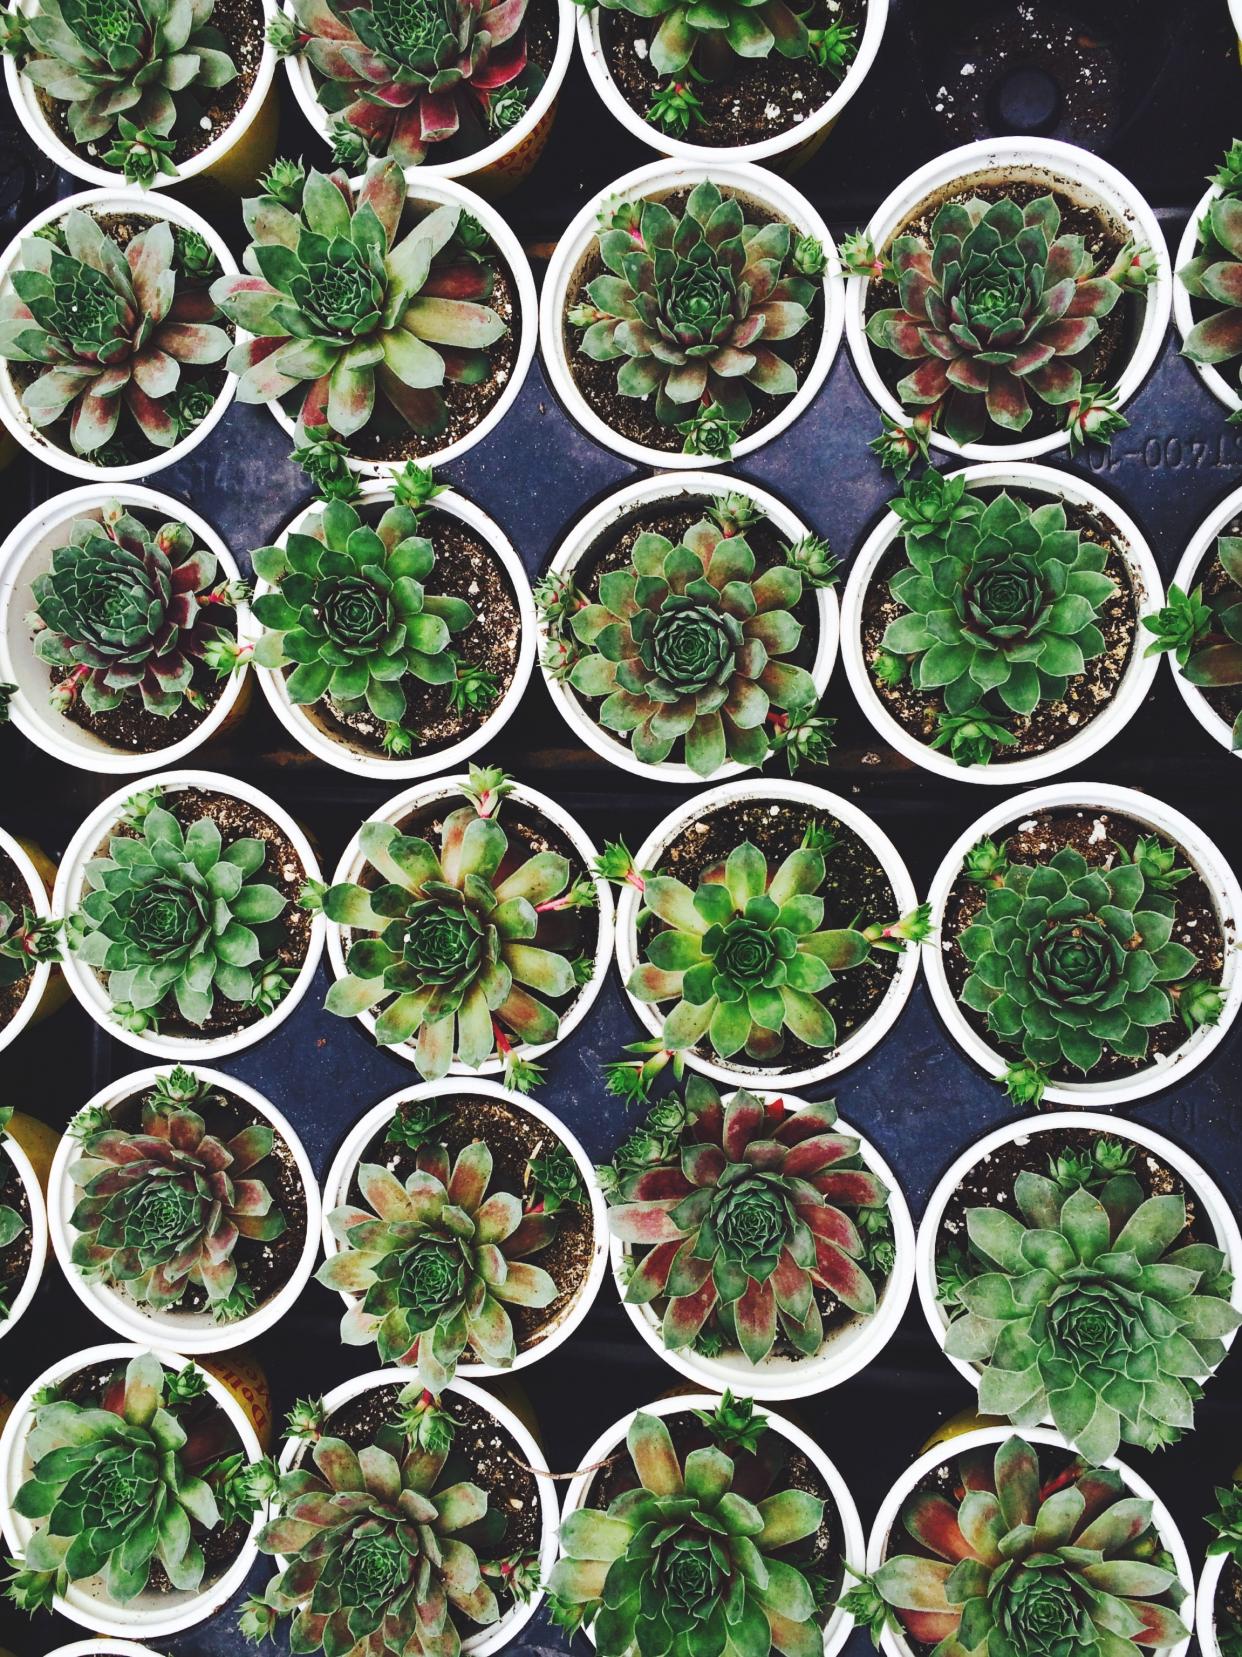
9. Give the succulent water every 1-3 weeks, whenever the soil feels dry. The easiest way to kill an indoor succulent is by overwatering! Feel the soil every 3-4 days to check the moisture level. Only water the succulent when the water feels completely dry and never when it’s damp or wet.
-How often you need to water your succulent depends on the variety, the climate, and the size of the plant. When you first get the plant, check the moisture level regularly until you work out what frequency is best.
10. Water the succulent until you see water exiting the drainage holes. Hold the pot over a sink while you water it and keep an eye on the water flow. Use the pitcher, watering can, or pipette to add water directly into the soil and stop the flow immediately when you see the water leaving the container.
1. Choose a Zebra Plant or Gollum Jade succulent if you’re a beginner. While succulents are relatively easy to grow indoors, some varieties are easier than others! Stick to the Haworthia, Jade, or Gasteria varieties if you are unsure about what types to start with. All of these types are relatively drought-resistant and tend to grow well in indoor environments.
-If you’re in doubt about what sort of succulent to choose, pick one with green leaves such as agave or aloe. Succulents with green leaves tend to be the most forgiving and grow best indoors, compared to the purple, grey, or orange-leaved varieties.
-Zebra Plants have glossy green leaves with silver veins, creating a zebra-like appearance. They also have bright yellow flowers when they bloom.
-Gollum Jade succulents have green, tube-shaped leaves with red tips. Small white flowers form in winter.
2. Choose a pot slightly larger than your succulent, and make sure it has draining holes. You’ll find a wide variety of different terra-cotta pots available at your local gardening center! Pick a container that is just a bit bigger than the succulent to start with. Terra-cotta pots are ideal because they’re breathable, dry well, and draw water away from the soil. You can also choose a ceramic, metal, or plastic pot if you prefer, provided that it has good drainage.
-Holes for water drainage are essential, as succulents need to dry out their roots in order to survive. The roots will begin to rot otherwise.
-Succulents tend to grow as big as the pot they’re in.
-Glass pots don’t tend to work well for succulents, as there usually aren’t drainage holes.

3. Pick a soil with 1⁄4 in (0.64 cm) particles to provide the best drainage. Succulents thrive in soils that drain well, so you need to pick a loosely compacted soil that will draw the water away. You can either choose a specialty succulent soil such as a cactus mix or make your own succulent-friendly soil. Simply mix 4 parts of regular gardening soil with 1 part of pumice, perlite, or turface to create a gritty, chunky mix.
-Crushed lava is also a good option.
4. Remove the succulent from the nursery pot within 24 hours of getting it. Succulents are often sold in small, plastic pots with very poorly drained soil. In order for your succulent to thrive, it needs to get out of that soil as soon as possible! Squeeze the plastic pot and gently pull the succulent upwards to remove it. If the succulent feels stuck, use scissors to cut the plastic pot away from the roots.
5. Suspend the succulent in the new pot as you fill it with soil. Succulent roots tend to be quite shallow and brittle, so do your best to protect these as you go about planting. Gently fill the sides of the pot with the soil, being careful not to damage the roots. Continue supporting the succulent until the pot is full and the succulent feels secure.
- If you're having trouble getting the soil around the roots, use your fingers to push and arrange the soil.
6. Space the succulents apart if you're planting more than 1 in a pot. Succulents don’t mind sharing a pot as long as each plant has breathing space. Leave a gap that's approximately 3–4 in (7.6–10.2 cm) between each succulent to ensure that the air can flow well and that each plant gets plenty of light.
-Outdoor succulents are fine being clumped close together because there is greater light and air flow in outdoor environments.
-Succulents naturally grow in warm, arid climates, which is why they require good air circulation to survive.
7. Keep the succulent in a bright spot with at least 6 hours of sun per day. Generally, indoor succulents love bright light and will thrive. Place the succulent on a sunny south or west-facing windowsill to ensure that it gets plenty of sun. It's okay if the succulent doesn't get full sun all day long, provided that it gets a minimum of 6 hours.
-If you notice the leaves are getting scorched, try using a sheer curtain to provide the succulent with a bit of protection.
8. Get a pitcher, watering can, or pipette to water the succulent. Succulents do best when the water is delivered directly to the soil rather than drenched over the whole plant. Find a tool that works for the size of your succulent. For example, pitchers or watering cans are good for larger succulents, while pipettes are best for very young or small plants.

9. Give the succulent water every 1-3 weeks, whenever the soil feels dry. The easiest way to kill an indoor succulent is by overwatering! Feel the soil every 3-4 days to check the moisture level. Only water the succulent when the water feels completely dry and never when it’s damp or wet.
-How often you need to water your succulent depends on the variety, the climate, and the size of the plant. When you first get the plant, check the moisture level regularly until you work out what frequency is best.
10. Water the succulent until you see water exiting the drainage holes. Hold the pot over a sink while you water it and keep an eye on the water flow. Use the pitcher, watering can, or pipette to add water directly into the soil and stop the flow immediately when you see the water leaving the container.
0
0
文章
ritau
2020年08月16日

1. Choose a lettuce variety that thrives indoors. Although most lettuce plants can stay healthy indoors, you'll have better success with some varieties over others. Buy any of these lettuce varieties, which are known for growing well inside, from a garden center or plant nursery:
-Garden Babies
-Merlot
-Baby Oakleaf
-Salad Bowl
-Lollo Rosa
-Black-Seeded Simpson
-Tom Thumb
-Red Deer Tongue
2. Fill a pot with a seed starting soil mix. Seed starting mixes are lightweight, they help your plants’ roots grow, and they're well-draining to prevent overwatering. If you cannot find a seed starting mix, you can also create a soil made from equal parts peat moss or coir, vermiculite, and sand.
-Each lettuce plant requires 4–6 in (10–15 cm) of space and a depth of about 8 inches (20 cm). Choose a pot that can accommodate these measurements.
-Purchase pots with drainage holes on the bottom. Place a saucer underneath the pot to catch draining water.
-You can buy seed starting soil mixes from most plant nurseries or garden centers.
3. Plant your seeds approximately 1 in (2.5 cm) apart. Dig a 4–6 in (10–15 cm) deep hole and place your seeds inside at about 1 in (2.5 cm) apart. Limit your seeds to 4 per pot to avoid overcrowding the lettuce as it grows. If you want to plant more than 4 seeds, prepare several pots ahead of time.
4. Sprinkle your seeds lightly with potting soil and water. Take a handful of potting soil and gently sprinkle it over the newly-planted seeds. Fill a spray bottle with water and gently mist the seeds to avoid washing them away.
5. Plant lettuce seedlings if you don't want to wait for seeds to sprout. If you don't want to wait for seeds to sprout, you can plant lettuce seedlings instead. Use the same technique as you would for lettuce seedlings, planting no more than 4 per pot.
-You can buy lettuce seedlings at many plant nurseries or garden centers

6. Mist your seeds daily until they sprout into seedlings. When they sprout, give your lettuce at least 1 in (2.5 cm) of water per week. Poke your finger in the soil once or twice a day and water your lettuce whenever the soil feels dry.
-The soil should be moist but not waterlogged.
-Another way to test the moisture level of soil is lifting up the pot. If it feels heavy, the soil is saturated with water.
7. Grow your lettuce in room temperature conditions. Lettuce grows best at temperatures around 65–70 °F (18–21 °C). Turn on the air conditioner or heater as needed to keep your plants at an even, sustainable temperature.
-If the weather is warm or cool enough outside, you can move your plants outdoors periodically to get fresh air.
8. Place your lettuce plant near a sunny window or a fluorescent grow light. Lettuce plants grow best with direct sunlight. If you're in a climate with very little sun, purchase a grow light from a plant nursery and position it about 12 inches (30 cm) overhead.
Lettuce plants need at least 12 hours of direct sunlight a day, with 14-16 hours the preferred amount.
Keep in mind that plants grown under a grow light generally need more time under the light than they would with natural sunlight. Aim closer to 14-16 hours instead of 12+ hours if you're using a grow light.
9. Water your lettuce whenever the leaves wilt. Lettuce plant leaves visibly wilt when they are thirsty. If your plant's leaves droop, water the lettuce until its soil is moist, but not soaking wet or waterlogged.
-The hotter the temperatures, the more often you will need to water your lettuce
10. Fertilize your lettuce 3 weeks after planting it. Lettuce needs nitrogen-rich soil to grow, so spray a liquid fertilizer on the plant 3 weeks after you planted it, or when the first leaves grow on the plant. Spray the fertilizer mainly near the soil, avoiding the lettuce leaves to prevent burning them.
-Use a liquid fertilizer. Granular fertilizers need to be mixed into the soil.
-Organic alfalfa meal or a nitrogen-rich, slow-release fertilizer both work well with lettuce.
-You can also use fish or seaweed emulsion fertilizers but they can emit a strong odor and are less recommended for indoor lettuce plants
11. Begin harvesting your lettuce 30-45 days after planting. On average, lettuce takes about 30-45 days after you plant the seeds to mature. Make a note on your calendar to begin harvesting after about 30 days has passed.
-Indoor lettuce plants grow and mature continually, so you can continue harvesting your plant after you've picked it for the first time.
-Mature indoor lettuce usually grows to about 4 inches (10 cm) tall.
-See How to Harvest Romaine Lettuce for specific instructions relating to this type of lettuce.
12. Harvest your lettuce in the morning. Morning is when your plant's most hydrated and at its strongest. If possible, harvest your plant before the late morning or afternoon to attain a healthier yield.
-If you can't harvest in the morning, avoid mid-to-late afternoon, which is when your plant's least hydrated.
13. Cut off the outer leaves. Do not harvest your indoor lettuce plant all at once. As long as you continue taking care of it, you can harvest it for several months. Cut 3-4 of the outer leaves at a time with garden shears or scissors, leaving the rest of the plant to heal and grow back later on.
-Avoid picking the lettuce's crown or center. Limit yourself to the outer leaves to boost its overall harvesting yield.

14. Refrigerate your lettuce for 5-8 days after harvesting. Depending on the variety, lettuce can last anywhere between 3-10 days in the refrigerator. Check how long your specific variety lasts for and, after placing the lettuce in the fridge, plan to use it by its expiration date.
-If you don't think you'll use your lettuce in 5-8 days, wait a few days before harvesting your plant.
15. Harvest your lettuce again in about 2 weeks. Your plant requires about 2 weeks to heal and grow more leaves before it is ready to harvest again. After your first time harvesting, wait 2 weeks in-between harvesting to keep your plant healthy and able to grow more leaves.
-Wait at least 2 weeks before harvesting young plants, which may take time to grow strong after being harvested.
-Sow additional seeds every 2 weeks to extend your harvest.
-Garden Babies
-Merlot
-Baby Oakleaf
-Salad Bowl
-Lollo Rosa
-Black-Seeded Simpson
-Tom Thumb
-Red Deer Tongue
2. Fill a pot with a seed starting soil mix. Seed starting mixes are lightweight, they help your plants’ roots grow, and they're well-draining to prevent overwatering. If you cannot find a seed starting mix, you can also create a soil made from equal parts peat moss or coir, vermiculite, and sand.
-Each lettuce plant requires 4–6 in (10–15 cm) of space and a depth of about 8 inches (20 cm). Choose a pot that can accommodate these measurements.
-Purchase pots with drainage holes on the bottom. Place a saucer underneath the pot to catch draining water.
-You can buy seed starting soil mixes from most plant nurseries or garden centers.
3. Plant your seeds approximately 1 in (2.5 cm) apart. Dig a 4–6 in (10–15 cm) deep hole and place your seeds inside at about 1 in (2.5 cm) apart. Limit your seeds to 4 per pot to avoid overcrowding the lettuce as it grows. If you want to plant more than 4 seeds, prepare several pots ahead of time.
4. Sprinkle your seeds lightly with potting soil and water. Take a handful of potting soil and gently sprinkle it over the newly-planted seeds. Fill a spray bottle with water and gently mist the seeds to avoid washing them away.
5. Plant lettuce seedlings if you don't want to wait for seeds to sprout. If you don't want to wait for seeds to sprout, you can plant lettuce seedlings instead. Use the same technique as you would for lettuce seedlings, planting no more than 4 per pot.
-You can buy lettuce seedlings at many plant nurseries or garden centers

6. Mist your seeds daily until they sprout into seedlings. When they sprout, give your lettuce at least 1 in (2.5 cm) of water per week. Poke your finger in the soil once or twice a day and water your lettuce whenever the soil feels dry.
-The soil should be moist but not waterlogged.
-Another way to test the moisture level of soil is lifting up the pot. If it feels heavy, the soil is saturated with water.
7. Grow your lettuce in room temperature conditions. Lettuce grows best at temperatures around 65–70 °F (18–21 °C). Turn on the air conditioner or heater as needed to keep your plants at an even, sustainable temperature.
-If the weather is warm or cool enough outside, you can move your plants outdoors periodically to get fresh air.
8. Place your lettuce plant near a sunny window or a fluorescent grow light. Lettuce plants grow best with direct sunlight. If you're in a climate with very little sun, purchase a grow light from a plant nursery and position it about 12 inches (30 cm) overhead.
Lettuce plants need at least 12 hours of direct sunlight a day, with 14-16 hours the preferred amount.
Keep in mind that plants grown under a grow light generally need more time under the light than they would with natural sunlight. Aim closer to 14-16 hours instead of 12+ hours if you're using a grow light.
9. Water your lettuce whenever the leaves wilt. Lettuce plant leaves visibly wilt when they are thirsty. If your plant's leaves droop, water the lettuce until its soil is moist, but not soaking wet or waterlogged.
-The hotter the temperatures, the more often you will need to water your lettuce
10. Fertilize your lettuce 3 weeks after planting it. Lettuce needs nitrogen-rich soil to grow, so spray a liquid fertilizer on the plant 3 weeks after you planted it, or when the first leaves grow on the plant. Spray the fertilizer mainly near the soil, avoiding the lettuce leaves to prevent burning them.
-Use a liquid fertilizer. Granular fertilizers need to be mixed into the soil.
-Organic alfalfa meal or a nitrogen-rich, slow-release fertilizer both work well with lettuce.
-You can also use fish or seaweed emulsion fertilizers but they can emit a strong odor and are less recommended for indoor lettuce plants
11. Begin harvesting your lettuce 30-45 days after planting. On average, lettuce takes about 30-45 days after you plant the seeds to mature. Make a note on your calendar to begin harvesting after about 30 days has passed.
-Indoor lettuce plants grow and mature continually, so you can continue harvesting your plant after you've picked it for the first time.
-Mature indoor lettuce usually grows to about 4 inches (10 cm) tall.
-See How to Harvest Romaine Lettuce for specific instructions relating to this type of lettuce.
12. Harvest your lettuce in the morning. Morning is when your plant's most hydrated and at its strongest. If possible, harvest your plant before the late morning or afternoon to attain a healthier yield.
-If you can't harvest in the morning, avoid mid-to-late afternoon, which is when your plant's least hydrated.
13. Cut off the outer leaves. Do not harvest your indoor lettuce plant all at once. As long as you continue taking care of it, you can harvest it for several months. Cut 3-4 of the outer leaves at a time with garden shears or scissors, leaving the rest of the plant to heal and grow back later on.
-Avoid picking the lettuce's crown or center. Limit yourself to the outer leaves to boost its overall harvesting yield.

14. Refrigerate your lettuce for 5-8 days after harvesting. Depending on the variety, lettuce can last anywhere between 3-10 days in the refrigerator. Check how long your specific variety lasts for and, after placing the lettuce in the fridge, plan to use it by its expiration date.
-If you don't think you'll use your lettuce in 5-8 days, wait a few days before harvesting your plant.
15. Harvest your lettuce again in about 2 weeks. Your plant requires about 2 weeks to heal and grow more leaves before it is ready to harvest again. After your first time harvesting, wait 2 weeks in-between harvesting to keep your plant healthy and able to grow more leaves.
-Wait at least 2 weeks before harvesting young plants, which may take time to grow strong after being harvested.
-Sow additional seeds every 2 weeks to extend your harvest.
0
0
文章
ritau
2020年08月02日

1. Purchase a mint seedling. Mint plants are notoriously difficult to begin from seed. Instead, visit your local nursery (or even sometimes your local grocery store) and purchase a mint seedling. Look for a seeding that is already at least 3–4 inches (7.6–10.2 cm) tall.
-Some varieties of mint include sweet mint, chocolate mint, spearmint, lemon mint, apple mint, and peppermint.
-Spearmint and peppermint are the most common. Spearmint is often used in baking and cooking. Peppermint is used more often for drinks, like mojitos and hot chocolate.
2. Propagate a new mint plant from a cutting. Trim a 4 in (10 cm) sprig from an existing mint plant, about 0.5 inches (1.3 cm) above a junction. Place the trimming in a glass of water, and wait about 1 week. Small white roots should begin appearing under water. Wait another 2-7 days to allow the roots to develop.
-Add water to the glass as necessary.
-Change the water every 4-5 days to keeping your trimming healthy.
3. Use a “runner” from an existing outdoor mint plant. If you have a friend with an existing outdoor mint plant, you may be able to use one of their runners. “Runners” are long stems that grow away from a mint plant. Runners set their own roots in the ground, which means they can be carefully removed and transplanted into a new pot. Look for a runner, and use a trowel to gently remove it from the ground.
4. Find a container with a wide surface. Mint plants needs a lot of width to grow effectively, but they don’t need a great deal of depth. For each mint plant, look for a container at least 8–12 inches (20–30 cm) wide.
-Ceramic planters are porous and lose moisture easily. Your mint might be happier in a plastic container.
-You can repurpose a plastic container by drilling a hole in the bottom for drainage.
5. Fill your container with potting soil. You can pick up some potting soil from a local nursery, home improvement store, or big box store. Mint plants enjoy soil that drains well, so don’t pack the soil too tight.
6. Test your soil for a pH of 6-7.5. Mint plants are not super finicky, so they will accept a relatively wide pH range. Use a test kit to make sure your soil falls within this optimal range.
-To lower the pH of your soil, add some compost, composted manure, or acidic mulch.
-To raise the pH of your soil, add pelletized lime or wood ash.

7. Place your mint seedling in the container. Using a small trowel and/or your fingers, make a small opening in the soil. Carefully place your mint seedling into this opening. Move the soil around your seedling so that the roots are no longer exposed, and your seedling can stand up.
-Indoor mint plants do not require fertilizer or mulch.
8. Water your seedling immediately after planting. Once you've gotten your mint plant in the soil, give your seedling a generous watering. For one mint plant, offer around 6–8 fluid ounces (180–240 ml) of water.
Caring for:
1. Place your mint plant so it receives indirect sunlight. Choose an area that receives morning sun and partial afternoon shade. You want the plant to get some light without drying it out completely. Rotate your plant every 3-4 days. Mint plants will grow in the direction of sunlight, and rotating the plant helps to keep it from growing unevenly.
Some good options include:
-A windowsill that faces north.
-A shelf across the room from a south-facing window.
2. Water your mint frequently. Water your mint at least every 2-3 days, or more if you live in a very dry climate or your mint is getting a lot of direct sunlight. Check the soil with a finger each day to ensure that the soil is moist.
-Add around 1–2 cups (240–470 ml) to your mint plant at each watering.
-Humidity can be important to the growing process, so consider misting your plant with water in between waterings.
3. Use water soluble fertilizer if desired. Mint plants do not often require fertilizer, but it can help improve your plant's growth if used occasionally. The best time to use fertilizer is in the spring when plants first start the new growing season.
-Choose a water soluble, time-release fertilizer.
-Too much fertilizer can alter the taste of your mint.

4. Harvest your mint leaves. Give your new mint plant anywhere from 2-6 weeks to get established. Then begin plucking off leaves as you need them. Avoid harvesting more than ⅓ of the plant at one time, as this can prevent proper regrowth.
-Hang mint stems upside down to dry them.
-Save mint leaves in an airtight container, like a jar or a small plastic bag.
5. Remove any flower buds before they open. Although the flowers that appear at the top of your mint plant are pretty, you’ll need to trim them off as soon as they appear. Use a pair of sharp scissors to clip the flowers off at the stem to prevent fewer, blander mint leaves.
This prevents the plant from “going to seed.” When a mint plant starts producing seeds, it puts less energy toward leaf production.
-Some varieties of mint include sweet mint, chocolate mint, spearmint, lemon mint, apple mint, and peppermint.
-Spearmint and peppermint are the most common. Spearmint is often used in baking and cooking. Peppermint is used more often for drinks, like mojitos and hot chocolate.
2. Propagate a new mint plant from a cutting. Trim a 4 in (10 cm) sprig from an existing mint plant, about 0.5 inches (1.3 cm) above a junction. Place the trimming in a glass of water, and wait about 1 week. Small white roots should begin appearing under water. Wait another 2-7 days to allow the roots to develop.
-Add water to the glass as necessary.
-Change the water every 4-5 days to keeping your trimming healthy.
3. Use a “runner” from an existing outdoor mint plant. If you have a friend with an existing outdoor mint plant, you may be able to use one of their runners. “Runners” are long stems that grow away from a mint plant. Runners set their own roots in the ground, which means they can be carefully removed and transplanted into a new pot. Look for a runner, and use a trowel to gently remove it from the ground.
4. Find a container with a wide surface. Mint plants needs a lot of width to grow effectively, but they don’t need a great deal of depth. For each mint plant, look for a container at least 8–12 inches (20–30 cm) wide.
-Ceramic planters are porous and lose moisture easily. Your mint might be happier in a plastic container.
-You can repurpose a plastic container by drilling a hole in the bottom for drainage.
5. Fill your container with potting soil. You can pick up some potting soil from a local nursery, home improvement store, or big box store. Mint plants enjoy soil that drains well, so don’t pack the soil too tight.
6. Test your soil for a pH of 6-7.5. Mint plants are not super finicky, so they will accept a relatively wide pH range. Use a test kit to make sure your soil falls within this optimal range.
-To lower the pH of your soil, add some compost, composted manure, or acidic mulch.
-To raise the pH of your soil, add pelletized lime or wood ash.

7. Place your mint seedling in the container. Using a small trowel and/or your fingers, make a small opening in the soil. Carefully place your mint seedling into this opening. Move the soil around your seedling so that the roots are no longer exposed, and your seedling can stand up.
-Indoor mint plants do not require fertilizer or mulch.
8. Water your seedling immediately after planting. Once you've gotten your mint plant in the soil, give your seedling a generous watering. For one mint plant, offer around 6–8 fluid ounces (180–240 ml) of water.
Caring for:
1. Place your mint plant so it receives indirect sunlight. Choose an area that receives morning sun and partial afternoon shade. You want the plant to get some light without drying it out completely. Rotate your plant every 3-4 days. Mint plants will grow in the direction of sunlight, and rotating the plant helps to keep it from growing unevenly.
Some good options include:
-A windowsill that faces north.
-A shelf across the room from a south-facing window.
2. Water your mint frequently. Water your mint at least every 2-3 days, or more if you live in a very dry climate or your mint is getting a lot of direct sunlight. Check the soil with a finger each day to ensure that the soil is moist.
-Add around 1–2 cups (240–470 ml) to your mint plant at each watering.
-Humidity can be important to the growing process, so consider misting your plant with water in between waterings.
3. Use water soluble fertilizer if desired. Mint plants do not often require fertilizer, but it can help improve your plant's growth if used occasionally. The best time to use fertilizer is in the spring when plants first start the new growing season.
-Choose a water soluble, time-release fertilizer.
-Too much fertilizer can alter the taste of your mint.

4. Harvest your mint leaves. Give your new mint plant anywhere from 2-6 weeks to get established. Then begin plucking off leaves as you need them. Avoid harvesting more than ⅓ of the plant at one time, as this can prevent proper regrowth.
-Hang mint stems upside down to dry them.
-Save mint leaves in an airtight container, like a jar or a small plastic bag.
5. Remove any flower buds before they open. Although the flowers that appear at the top of your mint plant are pretty, you’ll need to trim them off as soon as they appear. Use a pair of sharp scissors to clip the flowers off at the stem to prevent fewer, blander mint leaves.
This prevents the plant from “going to seed.” When a mint plant starts producing seeds, it puts less energy toward leaf production.
0
0
文章
ritau
2020年07月24日

The orange is the fruit of various citrus species in the family Rutaceae (see list of plants known as orange); it primarily refers to Citrus × sinensis, which is also called sweet orange, to distinguish it from the related Citrus × aurantium, referred to as bitter orange. The sweet orange reproduces asexually (apomixis through nucellar embryony); varieties of sweet orange arise through mutations.
The orange is a hybrid between pomelo (Citrus maxima) and mandarin (Citrus reticulata). The chloroplast genome, and therefore the maternal line, is that of pomelo. The sweet orange has had its full genome sequenced.
All citrus trees belong to the single genus Citrus and remain almost entirely interfertile. This includes grapefruits, lemons, limes, oranges, and various other types and hybrids. As the interfertility of oranges and other citrus has produced numerous hybrids and cultivars, and bud mutations have also been selected, citrus taxonomy is fairly controversial, confusing or inconsistent. The fruit of any citrus tree is considered a hesperidium, a kind of modified berry; it is covered by a rind originated by a rugged thickening of the ovary wall.

Different names have been given to the many varieties of the species. Orange applies primarily to the sweet orange – Citrus sinensis (L.) Osbeck. The orange tree is an evergreen, flowering tree, with an average height of 9 to 10 m (30 to 33 ft), although some very old specimens can reach 15 m (49 ft). Its oval leaves, alternately arranged, are 4 to 10 cm (1.6 to 3.9 in) long and have crenulate margins. Sweet oranges grow in a range of different sizes, and shapes varying from spherical to oblong. Inside and attached to the rind is a porous white tissue, the white, bitter mesocarp or albedo (pith).The orange contains a number of distinct carpels (segments) inside, typically about ten, each delimited by a membrane, and containing many juice-filled vesicles and usually a few seeds (pips). When unripe, the fruit is green. The grainy irregular rind of the ripe fruit can range from bright orange to yellow-orange, but frequently retains green patches or, under warm climate conditions, remains entirely green. Like all other citrus fruits, the sweet orange is non-climacteric. The Citrus sinensis group is subdivided into four classes with distinct characteristics: common oranges, blood or pigmented oranges, navel oranges, and acidless oranges.
As with other citrus fruits, orange pulp is an excellent source of vitamin C, providing 64% of the Daily Value in a 100 g serving (right table). Numerous other essential nutrients are present in low amounts (right table).
Oranges contain diverse phytochemicals, including carotenoids (beta-carotene, lutein and beta-cryptoxanthin), flavonoids (e.g. naringenin) and numerous volatile organic compounds producing orange aroma, including aldehydes, esters, terpenes, alcohols, and ketones.
Orange squeezer for making juice
Orange juice contains only about one-fifth the citric acid of lime or lemon juice (which contain about 47 g/l).

The orange is a hybrid between pomelo (Citrus maxima) and mandarin (Citrus reticulata). The chloroplast genome, and therefore the maternal line, is that of pomelo. The sweet orange has had its full genome sequenced.
All citrus trees belong to the single genus Citrus and remain almost entirely interfertile. This includes grapefruits, lemons, limes, oranges, and various other types and hybrids. As the interfertility of oranges and other citrus has produced numerous hybrids and cultivars, and bud mutations have also been selected, citrus taxonomy is fairly controversial, confusing or inconsistent. The fruit of any citrus tree is considered a hesperidium, a kind of modified berry; it is covered by a rind originated by a rugged thickening of the ovary wall.

Different names have been given to the many varieties of the species. Orange applies primarily to the sweet orange – Citrus sinensis (L.) Osbeck. The orange tree is an evergreen, flowering tree, with an average height of 9 to 10 m (30 to 33 ft), although some very old specimens can reach 15 m (49 ft). Its oval leaves, alternately arranged, are 4 to 10 cm (1.6 to 3.9 in) long and have crenulate margins. Sweet oranges grow in a range of different sizes, and shapes varying from spherical to oblong. Inside and attached to the rind is a porous white tissue, the white, bitter mesocarp or albedo (pith).The orange contains a number of distinct carpels (segments) inside, typically about ten, each delimited by a membrane, and containing many juice-filled vesicles and usually a few seeds (pips). When unripe, the fruit is green. The grainy irregular rind of the ripe fruit can range from bright orange to yellow-orange, but frequently retains green patches or, under warm climate conditions, remains entirely green. Like all other citrus fruits, the sweet orange is non-climacteric. The Citrus sinensis group is subdivided into four classes with distinct characteristics: common oranges, blood or pigmented oranges, navel oranges, and acidless oranges.
As with other citrus fruits, orange pulp is an excellent source of vitamin C, providing 64% of the Daily Value in a 100 g serving (right table). Numerous other essential nutrients are present in low amounts (right table).
Oranges contain diverse phytochemicals, including carotenoids (beta-carotene, lutein and beta-cryptoxanthin), flavonoids (e.g. naringenin) and numerous volatile organic compounds producing orange aroma, including aldehydes, esters, terpenes, alcohols, and ketones.
Orange squeezer for making juice
Orange juice contains only about one-fifth the citric acid of lime or lemon juice (which contain about 47 g/l).

0
0


