文章
Miss Chen
2018年01月07日

Gladiolus is an easy-to-grow flower noted for its tall flower spikes. The gladiolus or gladiola typically is grown in U.S. Department of Agriculture hardiness zones 7 through 10. Called the sword lily for its upright, flower-studded stalk, the gladiolus is a fair weather plant. The flower bulbs, also called corms, are not winter-hardy. The flowers bloom from mid-summer through the first frost.

Features
The gladiolus blooms on tall stems with narrow, blade-shaped leaves. Because glads mature in a season, you can plant corms in spring and enjoy flowers by mid-summer, when a series of trumpet-shaped florets opens along the stem. Plant the corms in well-drained, organic soil with moderate moisture. Encourage prolific blooms by planting gladioli away from shrubs or other tall flowers. The plants produce strong stems and healthier flowers with open exposure to sunlight. When the plants die back in late autumn, corms remain in the ground in temperate climates and put out new foliage and flowers in spring. Dig up corms in cold zones and store in a well-ventilated, protected area at 35 to 45 degrees Fahrenheit until spring.
Types
Glads range from miniatures, growing under 3 feet tall with 2-1/2-inch flowers, to giants, growing 4 to 6 feet tall with 5-inch blooms. Glads flower in almost every color shade from white through dark purple. Some cultivars yield bi-color flowers, such as white with brown centers. Other hybrids offer green flowers that blend with the tall leaves. Miniatures fit well as cut flowers in small bouquets. Glads make spectacular vase arrangements with or without other cut flowers.

Staking
Keep flowers upright by staking gladioli. In wind or rain, glads may topple, uprooting the bulbs. Flower weight makes some glad stems bend or break. Protect stems by staking each individually or staking a row of glads. Stake individual flowers by tapping a 1-inch square wood support into the ground and tying each stem to its stake. Support a row of glads by tapping in 2-inch square posts and weaving twine between the posts. Tie the glads to the twine network. Some gardeners plant rows of glads in front of lattice so that tipsy glads are easily anchored to the decorative lattice grid.
Considerations
Select cultivars that bloom at different times for an ever-changing summer display. By planting corms in succession every two weeks from spring through early summer, the glads bloom continuously into autumn. For variety, choose a different color or height for each planting.

Features
The gladiolus blooms on tall stems with narrow, blade-shaped leaves. Because glads mature in a season, you can plant corms in spring and enjoy flowers by mid-summer, when a series of trumpet-shaped florets opens along the stem. Plant the corms in well-drained, organic soil with moderate moisture. Encourage prolific blooms by planting gladioli away from shrubs or other tall flowers. The plants produce strong stems and healthier flowers with open exposure to sunlight. When the plants die back in late autumn, corms remain in the ground in temperate climates and put out new foliage and flowers in spring. Dig up corms in cold zones and store in a well-ventilated, protected area at 35 to 45 degrees Fahrenheit until spring.
Types
Glads range from miniatures, growing under 3 feet tall with 2-1/2-inch flowers, to giants, growing 4 to 6 feet tall with 5-inch blooms. Glads flower in almost every color shade from white through dark purple. Some cultivars yield bi-color flowers, such as white with brown centers. Other hybrids offer green flowers that blend with the tall leaves. Miniatures fit well as cut flowers in small bouquets. Glads make spectacular vase arrangements with or without other cut flowers.

Staking
Keep flowers upright by staking gladioli. In wind or rain, glads may topple, uprooting the bulbs. Flower weight makes some glad stems bend or break. Protect stems by staking each individually or staking a row of glads. Stake individual flowers by tapping a 1-inch square wood support into the ground and tying each stem to its stake. Support a row of glads by tapping in 2-inch square posts and weaving twine between the posts. Tie the glads to the twine network. Some gardeners plant rows of glads in front of lattice so that tipsy glads are easily anchored to the decorative lattice grid.
Considerations
Select cultivars that bloom at different times for an ever-changing summer display. By planting corms in succession every two weeks from spring through early summer, the glads bloom continuously into autumn. For variety, choose a different color or height for each planting.
0
0
文章
Miss Chen
2018年01月07日

Potted hyacinths are sold as seasonal flowering plants. You can make the flowers bloom earlier in the season than they do naturally, usually in late winter or early spring. The bulbs grow and bloom inside the home after they are forced. The potted hyacinths rarely bloom a second time in the pot, but you can replant them outdoors and they may bloom again the next year. Caring for the potted hyacinth properly during the flowering period helps prolong the life of the blossoms.

Step 1
Set the hyacinth pot in an area that receives bright sunlight until the bulbs begin to flower. Keep the pot in an area with a temperature near 60 degrees F for best growth.
Step 2
Water the bulbs when the top half inch of soil feels dry. Hyacinth are sometimes grown in pebbles and water instead of soil. Water these bulbs as needed so the water level remains just below the bottom of the bulb.
Step 3
Move the hyacinth pot to an area that receives bright but indirect sunlight once the flower blossoms begin to open. Direct sunlight during flowering may cause the blooms to wilt prematurely.
Step 4
Fertilize the bulbs with a soluble balanced fertilizer after the blooms begin to fade if you want to replant them outdoors. Only potted hyacinths in soil replant well - pebble-grown bulbs should be discarded. Apply the fertilizer every two weeks at half the recommended monthly dosage on the label.

Step 5
Cut off the flower stalks after the blossoms fade but leave the foliage in place. Move the plants back into direct sunlight and continue to water and fertilize them until the foliage dies back naturally.
Step 6
Cut the foliage off the bulbs to within 1 inch of the top of the bulb. Plant the bulbs outdoors in a sunny, well-drained bed, spacing them 2 to 3 inches apart in all directions. It may take up to two years before the hyacinths flower again.

Step 1
Set the hyacinth pot in an area that receives bright sunlight until the bulbs begin to flower. Keep the pot in an area with a temperature near 60 degrees F for best growth.
Step 2
Water the bulbs when the top half inch of soil feels dry. Hyacinth are sometimes grown in pebbles and water instead of soil. Water these bulbs as needed so the water level remains just below the bottom of the bulb.
Step 3
Move the hyacinth pot to an area that receives bright but indirect sunlight once the flower blossoms begin to open. Direct sunlight during flowering may cause the blooms to wilt prematurely.
Step 4
Fertilize the bulbs with a soluble balanced fertilizer after the blooms begin to fade if you want to replant them outdoors. Only potted hyacinths in soil replant well - pebble-grown bulbs should be discarded. Apply the fertilizer every two weeks at half the recommended monthly dosage on the label.

Step 5
Cut off the flower stalks after the blossoms fade but leave the foliage in place. Move the plants back into direct sunlight and continue to water and fertilize them until the foliage dies back naturally.
Step 6
Cut the foliage off the bulbs to within 1 inch of the top of the bulb. Plant the bulbs outdoors in a sunny, well-drained bed, spacing them 2 to 3 inches apart in all directions. It may take up to two years before the hyacinths flower again.
0
0
文章
Miss Chen
2018年01月07日

Amaryllis (Hippeastrum spp.) produce flamboyant blooms over outsize bulbs. The tropical plants grow outdoors only in U.S. Department of Agriculture plant hardiness zones 8 through 10, but they also make a splash as houseplants where they brighten winter holidays. How many times they'll bloom indoors or how long they'll last in the garden depends on how you treat them after they're finished blooming.

The Perennial Bulb
Like other bulbs, the amaryllis nurtures next year's plant and bloom as this year's flowers fade. It is also perennial, which means that it lives for three years or longer. How many years your amaryllis lives depends on its ability to gather nutrients, a process fueled by photosynthesis in its leaves.
Unlike many bulbs, amaryllis leaves follow flowers and persist for several months after the plant has bloomed in the spring. Whether outdoors or in a container, do not cut the amaryllis plant's long, straplike leaves until they whither. In this way, you've given the perennial bulb another year of life.
Indoor Bulbs
Gift amaryllis bulbs typically arrive eight to 10 weeks before the winter holidays with instructions to begin watering them immediately. Depending on the age of the bulb, it will produce one or more scapes typically topped by three trumpet-shaped flowers in shades of red, pink, white or bicolor combinations. Indoors, with bright light and moderate temperatures, each scape of flowers lasts up to a month. Plants kept in a cool room, around 65 degrees Fahrenheit, bloom longest.

In the Garden
Plant amaryllis bulbs in the garden in September or October in USDA zones 8 through 10. Use purchased bulbs or gift bulbs that have faded. Plant the bulbs in organic, well-draining soil with the wide side down so that the narrow neck sits above the soil.
Beginning when scapes begin growing in February or March, fertilize with a low-nitrogen garden fertilizer such as 5-10-10 or 6-12-12. Work 1 to 1.5 pounds into the soil for every 100-foot of row or for 100 square feet of bed. Fertilize when the bulbs break dormancy, when scapes reach 6 to 8 inches tall and again after the flowers fade in April. Remove faded flower scapes to stop energy-robbing seed formation.
Bulbs and Dormancy
Whether indoors or out, the secret to long-lived amaryllis lies in their ability to build new embryos while their leaves fade throughout the summer. Dormancy allows them to rest before entering the "home stretch" of bloom. After this period of rapid growth, bulbs need a period of 2 to 3 months of dormancy. Stop watering plants and put potted bulbs in a cool, dry basement or plant them with garden bulbs in fall.
Begin watering plants again as they emerge from dormancy in February or March and keep the soil evenly moist as bulbs bloom. Within two to three years, bulbs may produce offsets -- bulblets that, when removed during dormancy and planted in pots or garden, may produce flowers within three to four years, prolonging the bloom of your amaryllis collection.

The Perennial Bulb
Like other bulbs, the amaryllis nurtures next year's plant and bloom as this year's flowers fade. It is also perennial, which means that it lives for three years or longer. How many years your amaryllis lives depends on its ability to gather nutrients, a process fueled by photosynthesis in its leaves.
Unlike many bulbs, amaryllis leaves follow flowers and persist for several months after the plant has bloomed in the spring. Whether outdoors or in a container, do not cut the amaryllis plant's long, straplike leaves until they whither. In this way, you've given the perennial bulb another year of life.
Indoor Bulbs
Gift amaryllis bulbs typically arrive eight to 10 weeks before the winter holidays with instructions to begin watering them immediately. Depending on the age of the bulb, it will produce one or more scapes typically topped by three trumpet-shaped flowers in shades of red, pink, white or bicolor combinations. Indoors, with bright light and moderate temperatures, each scape of flowers lasts up to a month. Plants kept in a cool room, around 65 degrees Fahrenheit, bloom longest.

In the Garden
Plant amaryllis bulbs in the garden in September or October in USDA zones 8 through 10. Use purchased bulbs or gift bulbs that have faded. Plant the bulbs in organic, well-draining soil with the wide side down so that the narrow neck sits above the soil.
Beginning when scapes begin growing in February or March, fertilize with a low-nitrogen garden fertilizer such as 5-10-10 or 6-12-12. Work 1 to 1.5 pounds into the soil for every 100-foot of row or for 100 square feet of bed. Fertilize when the bulbs break dormancy, when scapes reach 6 to 8 inches tall and again after the flowers fade in April. Remove faded flower scapes to stop energy-robbing seed formation.
Bulbs and Dormancy
Whether indoors or out, the secret to long-lived amaryllis lies in their ability to build new embryos while their leaves fade throughout the summer. Dormancy allows them to rest before entering the "home stretch" of bloom. After this period of rapid growth, bulbs need a period of 2 to 3 months of dormancy. Stop watering plants and put potted bulbs in a cool, dry basement or plant them with garden bulbs in fall.
Begin watering plants again as they emerge from dormancy in February or March and keep the soil evenly moist as bulbs bloom. Within two to three years, bulbs may produce offsets -- bulblets that, when removed during dormancy and planted in pots or garden, may produce flowers within three to four years, prolonging the bloom of your amaryllis collection.
0
0
文章
Miss Chen
2018年01月02日

Tiger Lilies (Lilium columbianum Leichtlin), also known as Columbia lilies, are native to North America. The orange flowers, which may or may not have speckles, grow up to 4 feet tall. They add color and variety to the home garden. The flowers have six petals and blossom during the summer months. The best time to transplant tiger lilies depends on whether you are working with bulbs, bulbils, scales or seedlings.

Propagation
You can propagate lilies from bulbs, bulbils, scales or seed. During the growing season, the flower bulb will produce several smaller bulbs that remain attached to it. Even the tiniest bulb in the cluster is fertile if it has roots growing from it. If you want to plant seeds, then do not remove the spent flowers from the plants. This will encourage the plant to produce seedpods.
Transplanting Bulbs
As tiger lily bulbs never become dormant, according to North Dakota State University Extension, you need to choose the best time to transplant them. The best time is during autumn when the weather is chilly, and after the plants have died back. Dig up the bulbs, separate the cluster and then immediately replant them approximately 1 foot apart. This spacing gives the plants enough distance for healthy growth and flowering.
Transplanting Bulbils
Bulbils produce bulbs one to two years after you plant them. You will find bulbils on the mature leaves of the tiger lily in late summer or early autumn. They look like plump black beads. Carefully remove them from the leaves and immediately plant them in furrows, recommends the North American Lily Society.

Transplanting Scales
As soon as your tiger lilies finish flowering, usually in late summer, dig up the bulbs and remove from four to eight scales from each one. Do not touch the inner layers of scales, as they provide nutrition to the bulb. Additionally, you can remove the same number of scales from newly purchased tiger lily bulbs before planting them. The scales will grow bulblets and form roots. Find detailed directions for transplanting scales in Resources.
Transplanting Seedlings
Harvest only the brown seedpods, as they contain mature seeds. Depending on your weather, the seedlings should be ready to transplant from 6 to 8 weeks after sowing. Harden off the seedlings for approximately two weeks before transplanting into your garden Plant them in the spring when the soil is warm and all danger of frost is past.

Propagation
You can propagate lilies from bulbs, bulbils, scales or seed. During the growing season, the flower bulb will produce several smaller bulbs that remain attached to it. Even the tiniest bulb in the cluster is fertile if it has roots growing from it. If you want to plant seeds, then do not remove the spent flowers from the plants. This will encourage the plant to produce seedpods.
Transplanting Bulbs
As tiger lily bulbs never become dormant, according to North Dakota State University Extension, you need to choose the best time to transplant them. The best time is during autumn when the weather is chilly, and after the plants have died back. Dig up the bulbs, separate the cluster and then immediately replant them approximately 1 foot apart. This spacing gives the plants enough distance for healthy growth and flowering.
Transplanting Bulbils
Bulbils produce bulbs one to two years after you plant them. You will find bulbils on the mature leaves of the tiger lily in late summer or early autumn. They look like plump black beads. Carefully remove them from the leaves and immediately plant them in furrows, recommends the North American Lily Society.

Transplanting Scales
As soon as your tiger lilies finish flowering, usually in late summer, dig up the bulbs and remove from four to eight scales from each one. Do not touch the inner layers of scales, as they provide nutrition to the bulb. Additionally, you can remove the same number of scales from newly purchased tiger lily bulbs before planting them. The scales will grow bulblets and form roots. Find detailed directions for transplanting scales in Resources.
Transplanting Seedlings
Harvest only the brown seedpods, as they contain mature seeds. Depending on your weather, the seedlings should be ready to transplant from 6 to 8 weeks after sowing. Harden off the seedlings for approximately two weeks before transplanting into your garden Plant them in the spring when the soil is warm and all danger of frost is past.
0
0
文章
Miss Chen
2018年01月02日

Gladiolus plants send up flowers during the summer. Each flower stem contains several buds that bloom along the length of the stem. The flowers are prized as a colorful garden flower and as a cut flower for indoor display. The plants grow from a tender perennial corm that collects and stores the energy necessary for the following year's growth, making it necessary to properly care for the gladiolus after blooming if you want it to flower again the next year.

Step 1
Cut off the flower stem at its base after all the buds have flowered and completed blooming. Use clean, sharp shears to remove the stems.
Step 2
Water the plants weekly after blooming. Provide enough water at each irrigation to keep the top 6 inches of soil moist. Water more frequently if hot weather causes the soil to dry out or the plants to wilt.
Step 3
Weed between the gladiolus weekly or as necessary to keep weeds from establishing in the bed. Gladiolus plants can't tolerate weed competition, as the weeds rob the soil of the nutrients and water the corms need to store energy.
Step 4
Cut back the foliage to within ½ inch of the ground after the first fall frost causes the foliage to yellow and die back. Dig the corms up after cutting back the foliage.

Step 5
Spread the corms out in a dry, warm location indoors. Dry the corms for three weeks.
Step 6
Break the bottom off the corm along the seam and discard the bottom portion, saving only the new top corm. Store the corms in a paper bag in a dry location where temperatures are 35 to 45 degree Fahrenheit until spring planting.

Step 1
Cut off the flower stem at its base after all the buds have flowered and completed blooming. Use clean, sharp shears to remove the stems.
Step 2
Water the plants weekly after blooming. Provide enough water at each irrigation to keep the top 6 inches of soil moist. Water more frequently if hot weather causes the soil to dry out or the plants to wilt.
Step 3
Weed between the gladiolus weekly or as necessary to keep weeds from establishing in the bed. Gladiolus plants can't tolerate weed competition, as the weeds rob the soil of the nutrients and water the corms need to store energy.
Step 4
Cut back the foliage to within ½ inch of the ground after the first fall frost causes the foliage to yellow and die back. Dig the corms up after cutting back the foliage.

Step 5
Spread the corms out in a dry, warm location indoors. Dry the corms for three weeks.
Step 6
Break the bottom off the corm along the seam and discard the bottom portion, saving only the new top corm. Store the corms in a paper bag in a dry location where temperatures are 35 to 45 degree Fahrenheit until spring planting.
0
0
文章
Miss Chen
2018年01月02日

Known for their signature three falling petals, irises (Iris spp.) grow between 4 and 36 inches tall, depending on the variety. These perennials commonly blossom in the spring and summer with colors ranging from orange to purple. Once the flowers fade, you may be tempted to remove the foliage, but it is critical to leave the greenery intact for several weeks. Irises thrive in U.S. Department of Agriculture plant hardiness zones 4 through 9.

Average Time Span
In general, cut the greenery back six to eight weeks after your blossoms die back. Although the foliage appears unsightly, it is slowly gathering energy to be stored for next season's flowering. Rhizomes, or underground stems, store photosynthesized energy from the dying foliage. If the rhizomes do not store enough energy, your irises bloom with less vigor or fail to flower altogether next season. The only foliage alteration you can make is simply folding the leaves downward if they are waving wildly in all directions; do not tie them into a bundle, because this process hinders photosynthesis.
Visual Signal
Your greenery is ready to be cut back when it appears yellow and has a papery texture. However, each leaf does not yellow at the same rate as others -- only cut portions that are obviously depleted of green pigment, called chlorophyll. Your irises can be slowly pruned of their yellowed foliage to create a neater garden appearance. In the meantime, plant distracting ground cover or other blossoming flowers around your irises to disguise the location. Creeping foliage and spectacular flowers make it easier to ignore the dying iris leaves until you can completely trim the greenery back.
Dormancy Period
Most iris varieties enter dormancy in July through the warm, early fall. Autumn is a practical time to cut your greenery back, especially if you want to dig your rhizomes. After two to three years, iris rhizomes clump into a mass that impedes vigorous flowering. Dig your rhizomes in the fall, and divide them. Each rhizome piece needs to have some roots and a bud-growing point. Plant these pieces in your garden for widespread blossoming come spring and summer.

Considering Flower Removal
Unlike the foliage, flower stalks need immediate removal after they start fading. Because you need the leaves to remain healthy until they yellow, your decaying flowers become a liability: They hold molds that easily infiltrate the leaves if left to rot in place. You also want to direct energy into foliage energy production, not seed production. Fading flowers are usually creating seed pods; removing the flowers directs energy into the leaves and rhizomes for storage and vigorous blossoming potential next season.

Average Time Span
In general, cut the greenery back six to eight weeks after your blossoms die back. Although the foliage appears unsightly, it is slowly gathering energy to be stored for next season's flowering. Rhizomes, or underground stems, store photosynthesized energy from the dying foliage. If the rhizomes do not store enough energy, your irises bloom with less vigor or fail to flower altogether next season. The only foliage alteration you can make is simply folding the leaves downward if they are waving wildly in all directions; do not tie them into a bundle, because this process hinders photosynthesis.
Visual Signal
Your greenery is ready to be cut back when it appears yellow and has a papery texture. However, each leaf does not yellow at the same rate as others -- only cut portions that are obviously depleted of green pigment, called chlorophyll. Your irises can be slowly pruned of their yellowed foliage to create a neater garden appearance. In the meantime, plant distracting ground cover or other blossoming flowers around your irises to disguise the location. Creeping foliage and spectacular flowers make it easier to ignore the dying iris leaves until you can completely trim the greenery back.
Dormancy Period
Most iris varieties enter dormancy in July through the warm, early fall. Autumn is a practical time to cut your greenery back, especially if you want to dig your rhizomes. After two to three years, iris rhizomes clump into a mass that impedes vigorous flowering. Dig your rhizomes in the fall, and divide them. Each rhizome piece needs to have some roots and a bud-growing point. Plant these pieces in your garden for widespread blossoming come spring and summer.

Considering Flower Removal
Unlike the foliage, flower stalks need immediate removal after they start fading. Because you need the leaves to remain healthy until they yellow, your decaying flowers become a liability: They hold molds that easily infiltrate the leaves if left to rot in place. You also want to direct energy into foliage energy production, not seed production. Fading flowers are usually creating seed pods; removing the flowers directs energy into the leaves and rhizomes for storage and vigorous blossoming potential next season.
0
0
文章
Miss Chen
2017年12月10日

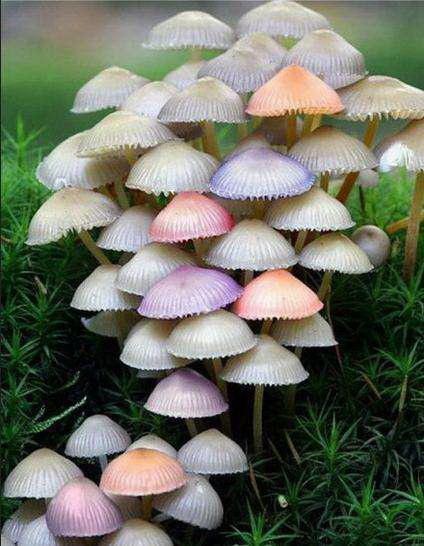
Truffles are small, lumpy, white mushrooms that grow on the roots of hazelnut, pine and oak trees. A tree with roots containing truffle spores may take up to a year to produce truffles; they are rare because of this. It is possible to grow truffles by planting seeds fallen from a tree with truffles on its roots, but a more reliable method is to buy a sapling inoculated with truffle spores. Although it takes time for the first truffle crop to form, after the first crop, a tree can produce truffles for many years.
Step 1
Place a terra-cotta pot on top of a drainage plate near a sunny window in a room that maintains a temperature of between 70 and 75 degrees, as truffles need a very temperate climate. Fill the pot about halfway with soil mixed with small gravel or sand. Truffles need soil with very good drainage; otherwise, they may rot.
Step 2
Gently unwrap the root ball of a sapling that has been inoculated with truffle spores, untangling the roots slightly with your fingers. Put the sapling in the center of the pot, and scoop soil over the roots until they are completely covered.
Step 3
Water the tree every other day. Empty the drainage plate when you notice water pooling and not being absorbed or evaporated.
Step 4
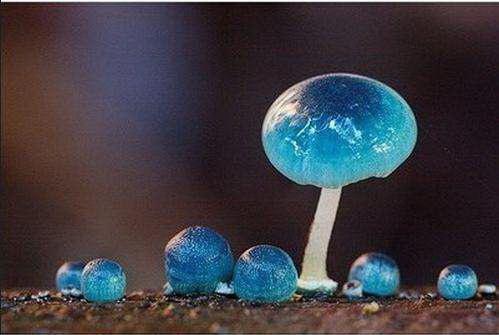
Wait about a year and check the soil. Look for small, rounded lumps around the roots. Gently probe the soil with your fingers to find any truffles.

Step 1
Place a terra-cotta pot on top of a drainage plate near a sunny window in a room that maintains a temperature of between 70 and 75 degrees, as truffles need a very temperate climate. Fill the pot about halfway with soil mixed with small gravel or sand. Truffles need soil with very good drainage; otherwise, they may rot.
Step 2
Gently unwrap the root ball of a sapling that has been inoculated with truffle spores, untangling the roots slightly with your fingers. Put the sapling in the center of the pot, and scoop soil over the roots until they are completely covered.
Step 3
Water the tree every other day. Empty the drainage plate when you notice water pooling and not being absorbed or evaporated.

Step 4
Wait about a year and check the soil. Look for small, rounded lumps around the roots. Gently probe the soil with your fingers to find any truffles.
1
3
文章
Miss Chen
2017年12月10日

The simplest method to harvest mushroom spores is to create a spore print. These prints are composed of thousands of microscopic fungal spores. They can last for years if properly stored, and can be used to grow the next generation of fruiting mushrooms.
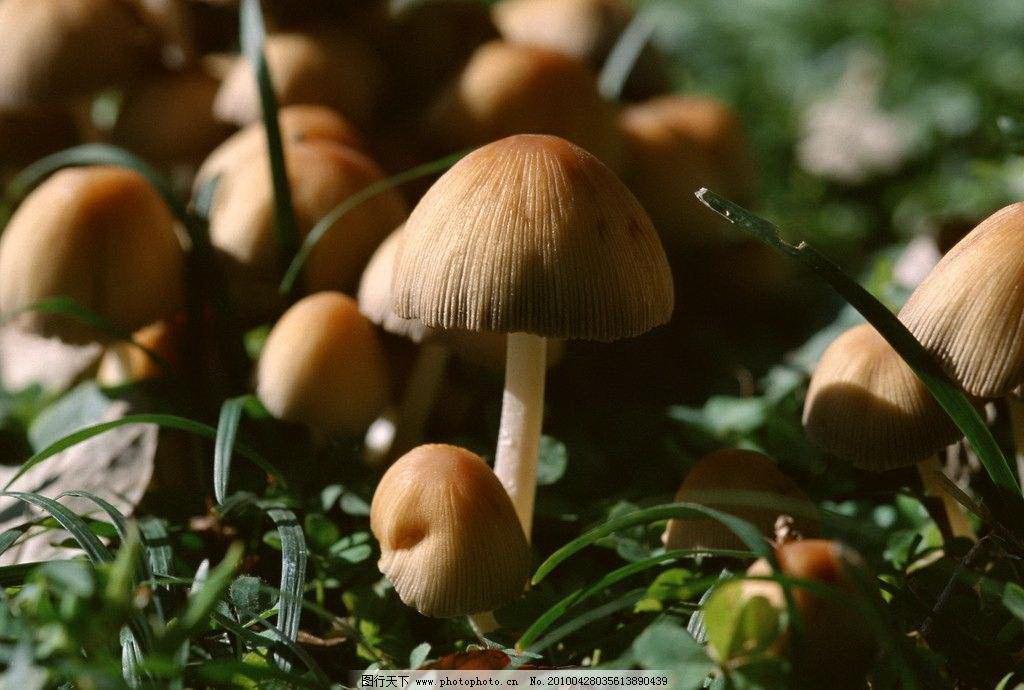
Begin the process of spore harvest only when the mushroom is ready. For most mushrooms, this is shortly after the edges of the cap have separated from the body of the stalk--a process called "veiling." Be sure your work station is completely clean before beginning.
Step 2
Place the laminated card in the center of your work area. You can laminate an index card yourself by smoothly covering one or both sides with packing tape. The goal is to create a smooth, non-porous surface on which the mushroom cap will lie.
Step 3
Put on the disposable gloves.
Step 4
Wipe down the laminated card with the alcohol using the cotton balls. Wait five minutes before proceeding for the alcohol to evaporate.
Step 5
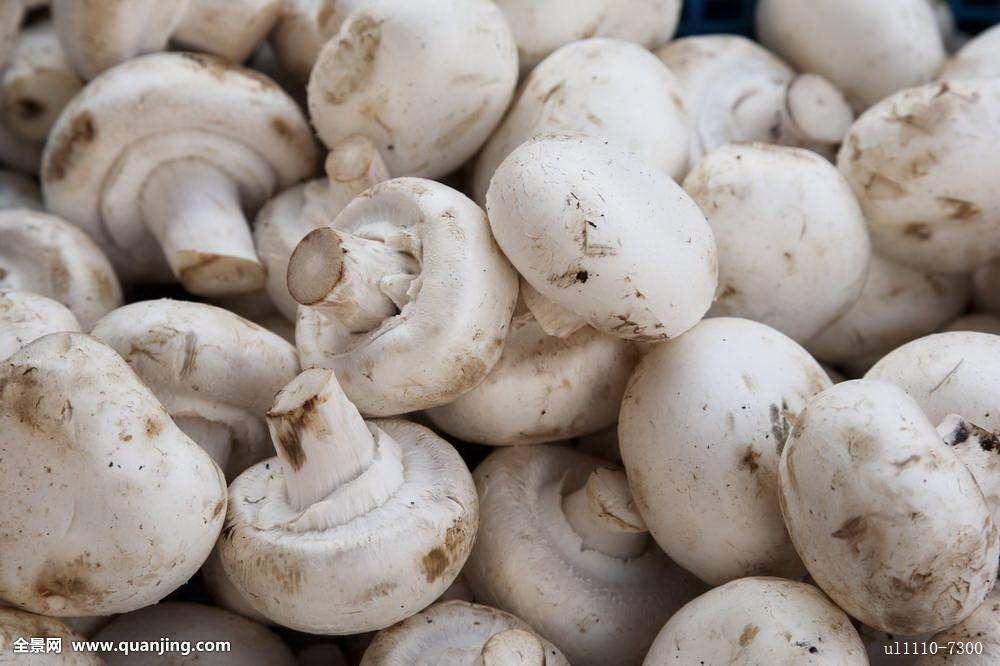
Remove the mushroom cap from the stalk. In most mushrooms you can gently twist the cap off. If necessary, you can use a sharp knife to cut the stalk close to where it meets the cap.
Step 6
Place the mushroom cap right-side up on the sterilized index card.
Step 7
Quickly cover the card and cap with a clean cup or glass placed upside-down. Make sure that the rim of the cup is flush with the work surface and that no air can enter.
Step 8
Leave the cup, mushroom cap and card for 12 hours. In this time, many thousands of spores will fall from the "gills" at the underside of the cap. Though each spore is too small to see, they will pile up to form visible mounds.
Step 9
Lift away the covering cup and the mushroom cap. Carefully slide the laminated card, now bearing the mushroom spores, into the plastic bag. Take care not to scrape the spore location against the sides of the bag as you store it.
Step 10
Seal the bag.

Begin the process of spore harvest only when the mushroom is ready. For most mushrooms, this is shortly after the edges of the cap have separated from the body of the stalk--a process called "veiling." Be sure your work station is completely clean before beginning.
Step 2
Place the laminated card in the center of your work area. You can laminate an index card yourself by smoothly covering one or both sides with packing tape. The goal is to create a smooth, non-porous surface on which the mushroom cap will lie.
Step 3
Put on the disposable gloves.
Step 4
Wipe down the laminated card with the alcohol using the cotton balls. Wait five minutes before proceeding for the alcohol to evaporate.

Step 5
Remove the mushroom cap from the stalk. In most mushrooms you can gently twist the cap off. If necessary, you can use a sharp knife to cut the stalk close to where it meets the cap.
Step 6
Place the mushroom cap right-side up on the sterilized index card.
Step 7
Quickly cover the card and cap with a clean cup or glass placed upside-down. Make sure that the rim of the cup is flush with the work surface and that no air can enter.
Step 8
Leave the cup, mushroom cap and card for 12 hours. In this time, many thousands of spores will fall from the "gills" at the underside of the cap. Though each spore is too small to see, they will pile up to form visible mounds.
Step 9
Lift away the covering cup and the mushroom cap. Carefully slide the laminated card, now bearing the mushroom spores, into the plastic bag. Take care not to scrape the spore location against the sides of the bag as you store it.
Step 10
Seal the bag.
0
0
文章
Miss Chen
2017年12月09日

A mushroom is a fleshy, spore-bearing fungus. The term is applied to stemmed varieties like the commonly cultivated white button mushroom found in grocery stores. Other types of mushrooms grow without stems or even in a wooden, leathery pattern on trees and logs. Since some mushrooms can make you violently ill when ingested, or prove fatal, those interested in using them in cooking are advised to be able to make proper field identification. When in doubt, throw it out! Learn to identify edible mushrooms.

Morels
One of the tastiest mushrooms in North America is the morel. The three main varieties grow for a few weeks a year, in the spring, just after the first flowers bloom. Morels are identified by pits or cavities that cover the entire cap at the top of the stem. There are also spring mushrooms that exhibit a brainy, spongy cap. These are called false morels and should never be eaten since they can cause illness and death.
Golden Chanterelles
Some say this distinctive bright-yellow mushroom smells like apricot and tastes like a flower. It is found in the wilds from Alaska to Florida. Look for this mushroom to bloom at the end of winter. The cap of the golden chanterelle will be orange to yellow in color, smooth, hairless, and wavy at the edges when mature. There are two types of similar mushrooms that might fool you (and make you sick), so find a pictorial field guide to make sure you have the right one before eating it.
Black Trumpets
This summer mushroom is easy to find and identify. Look beneath oak trees primarily, but it doesn't grow on wood. If you find one, chances are there will be many more nearby. The cap spreads outward from the stem and is hollow inside, so identifying it is like looking down into a trumpet. The coloring runs the gamut from salmon to gray to black. Black trumpets work well powdered and used as flavoring.
Porcini
Referred to simply as "the king" in the United States, this mushroom can grow up to ten inches across its red-tinged dome cap, the underneath of which is spongy with no obvious gill structure. The prime harvesting season is late summer through early fall. Expect to find one by itself or in groups. The stalk is thick and white or yellowish in color. French and Italian recipes make widespread use of dried porcini.

Hen-of-the-woods
Towards the end of the mushrooming season, lucky hunters might stumble across a 40- or 50-pound fruiting hen-of-the-woods beneath an oak tree. The hen is identified by leaf-like fronds growing in overlapping patterns in a bushy structure, sort of like the tail feathers of a chicken. The fronds may be darker at the edges and the sprouting surface can be several feet across. Harvest the mushroom, chop it into whatever size pieces you like to cook with, and freeze the rest in a freezer bag for later use.

Morels
One of the tastiest mushrooms in North America is the morel. The three main varieties grow for a few weeks a year, in the spring, just after the first flowers bloom. Morels are identified by pits or cavities that cover the entire cap at the top of the stem. There are also spring mushrooms that exhibit a brainy, spongy cap. These are called false morels and should never be eaten since they can cause illness and death.
Golden Chanterelles
Some say this distinctive bright-yellow mushroom smells like apricot and tastes like a flower. It is found in the wilds from Alaska to Florida. Look for this mushroom to bloom at the end of winter. The cap of the golden chanterelle will be orange to yellow in color, smooth, hairless, and wavy at the edges when mature. There are two types of similar mushrooms that might fool you (and make you sick), so find a pictorial field guide to make sure you have the right one before eating it.
Black Trumpets
This summer mushroom is easy to find and identify. Look beneath oak trees primarily, but it doesn't grow on wood. If you find one, chances are there will be many more nearby. The cap spreads outward from the stem and is hollow inside, so identifying it is like looking down into a trumpet. The coloring runs the gamut from salmon to gray to black. Black trumpets work well powdered and used as flavoring.
Porcini
Referred to simply as "the king" in the United States, this mushroom can grow up to ten inches across its red-tinged dome cap, the underneath of which is spongy with no obvious gill structure. The prime harvesting season is late summer through early fall. Expect to find one by itself or in groups. The stalk is thick and white or yellowish in color. French and Italian recipes make widespread use of dried porcini.

Hen-of-the-woods
Towards the end of the mushrooming season, lucky hunters might stumble across a 40- or 50-pound fruiting hen-of-the-woods beneath an oak tree. The hen is identified by leaf-like fronds growing in overlapping patterns in a bushy structure, sort of like the tail feathers of a chicken. The fronds may be darker at the edges and the sprouting surface can be several feet across. Harvest the mushroom, chop it into whatever size pieces you like to cook with, and freeze the rest in a freezer bag for later use.
0
0
文章
Miss Chen
2017年12月09日

Texas mushroom hunters discover hundreds of mold and fungi in the state's desert, forest and semi-arid areas. Wild mushrooms grow year round. Some are edible, others are deadly. There's no substitute for an expert guide, especially if you're thinking about eating Texas' wild mushrooms. (See Reference 1, Pg. 1, 2)

Earthballs
Resembling a small ball, the earthball is one of Texas' puffball mushrooms. They are stalk-free, meaning they hold themselves to the ground with their roots. You can find these brown mushrooms growing on wood as well as on the ground. Earthball mushrooms have irregular, darker-toned patches. Their interiors resemble dark dirt.
Brain Fungi
The body of brain fungi looks like a cup. You can't miss it because its outer texture resembles a brain. This mushroom produces spores within its folds. You will find them growing on wood as well as on the ground.
Stinkhorns
Stinkhorns look like tiny horns—or they are phallic-shaped. Insects enjoy their dark and slimy exterior layer. Stickhorns smell terrible. Chances are that you will smell one before you see it. Yet in some parts of the world, stinkhorn mushrooms are considered a delicacy.
Polypores
Like the puffball mushroom, polypores don't have a stalk. They grow on wood in a cluster of wavy-edged, round caps.

Devil's Cigar
As its name suggests, the devil's cigar looks like a dark-brown cigar. When the mushroom matures and opens, its shape resembles a star. Because it looks a lot like the star that appears on Texas' flag, the Texas Legislature recognizes the devil's cigar mushroom as its official state fungus.

Earthballs
Resembling a small ball, the earthball is one of Texas' puffball mushrooms. They are stalk-free, meaning they hold themselves to the ground with their roots. You can find these brown mushrooms growing on wood as well as on the ground. Earthball mushrooms have irregular, darker-toned patches. Their interiors resemble dark dirt.
Brain Fungi
The body of brain fungi looks like a cup. You can't miss it because its outer texture resembles a brain. This mushroom produces spores within its folds. You will find them growing on wood as well as on the ground.
Stinkhorns
Stinkhorns look like tiny horns—or they are phallic-shaped. Insects enjoy their dark and slimy exterior layer. Stickhorns smell terrible. Chances are that you will smell one before you see it. Yet in some parts of the world, stinkhorn mushrooms are considered a delicacy.
Polypores
Like the puffball mushroom, polypores don't have a stalk. They grow on wood in a cluster of wavy-edged, round caps.

Devil's Cigar
As its name suggests, the devil's cigar looks like a dark-brown cigar. When the mushroom matures and opens, its shape resembles a star. Because it looks a lot like the star that appears on Texas' flag, the Texas Legislature recognizes the devil's cigar mushroom as its official state fungus.
0
0
文章
Miss Chen
2017年12月09日

The thought of meaty, earthy morels gets even the most jaded mushroom hunter excited. Yet, morels can be as unpredictable as they are delicious. Conditions for morel growth need to be perfect, and they're picky about which trees they'll grow near. Different morel varieties, or morels in different regions, may prefer particular trees. Most morel trees are hardwood species, and they're frequently old, dead or dying--though this isn't always the case.

Elm Trees
Morels are closely associated with elm trees. Elms grow in a vase-shape with more foliage on the slender upper branches. Find an elm tree that's just started to die and it can be very productive for gray and yellow morels, according to the website Northern Country Morels. Large chunks of fallen bark around the trunk base are usually a sign of a sick or dead tree, ideal for morel growth.
Apple Trees
Apple trees often grow in a twisted, gnarly formation and rarely stretch higher than 20 feet. The distinct pinkish-white blossom appears in May, with ripe apples following in early fall. All types of morel mushrooms grow around the base of apple trees. Untended orchards filled with old apple trees make fertile morel spots, according to fungi expert David Fischer at the American Mushrooms website.
Ash
The ash tree is most associated with black morels, as well as occasional blooms of yellow morel, according to Northern Country Morels. Ash tree bark is gray with deeply marked diamond shapes. Morels will happily grow near large and healthy ash trees, unlike other tree types where the morel prefers decaying individuals.

Poplar
Poplars grow tall, often to over 100 feet. Poplars attract morel mushroom growth in most locations, but in some regions they're especially productive. For example, in the Piedmont plateau region in the eastern United States, morels frequently grow near tulip poplars, according to the University of North Carolina. Live and thriving tulip poplars will often harbor nearby morels. Poplar bark is gray to brown and often ridged and knobbly.
Burnt Trees
Morels often grow in abundance in forest areas burned at some stage in the last three years, according to the University of Alaska Fairbanks. Researchers from the botany department of the University of Wisconsin Madison also noted that morels were particularly fond of growing on the sides of scars in the ground where trees has burned into the earth.

Elm Trees
Morels are closely associated with elm trees. Elms grow in a vase-shape with more foliage on the slender upper branches. Find an elm tree that's just started to die and it can be very productive for gray and yellow morels, according to the website Northern Country Morels. Large chunks of fallen bark around the trunk base are usually a sign of a sick or dead tree, ideal for morel growth.
Apple Trees
Apple trees often grow in a twisted, gnarly formation and rarely stretch higher than 20 feet. The distinct pinkish-white blossom appears in May, with ripe apples following in early fall. All types of morel mushrooms grow around the base of apple trees. Untended orchards filled with old apple trees make fertile morel spots, according to fungi expert David Fischer at the American Mushrooms website.
Ash
The ash tree is most associated with black morels, as well as occasional blooms of yellow morel, according to Northern Country Morels. Ash tree bark is gray with deeply marked diamond shapes. Morels will happily grow near large and healthy ash trees, unlike other tree types where the morel prefers decaying individuals.

Poplar
Poplars grow tall, often to over 100 feet. Poplars attract morel mushroom growth in most locations, but in some regions they're especially productive. For example, in the Piedmont plateau region in the eastern United States, morels frequently grow near tulip poplars, according to the University of North Carolina. Live and thriving tulip poplars will often harbor nearby morels. Poplar bark is gray to brown and often ridged and knobbly.
Burnt Trees
Morels often grow in abundance in forest areas burned at some stage in the last three years, according to the University of Alaska Fairbanks. Researchers from the botany department of the University of Wisconsin Madison also noted that morels were particularly fond of growing on the sides of scars in the ground where trees has burned into the earth.
0
1
文章
Miss Chen
2017年12月09日

Growing your own morel mushrooms at home will prevent you from mistaking poisonous mushrooms for them when hunting for the mushrooms in the wild. Morel mushrooms appear in the spring, and typically grow near apple and elm trees. The mushrooms are considered a delicacy, and they only grow for a limited time during the spring. Growing these mushrooms will require a lot of effort and patience, but they will be well worth the hard work and wait.

Step 1
Locate an area that has well-drained soil. Remove all the weeds and grass from the area. Choose a location with shade that receives filtered sunlight.
Step 2
Combine an equal amount of peat, wood ash and gypsum to fill the top 4 to 6 inches of soil at your prepared site. You can burn wood and collect the ash as long as you use it within 48 hours.
Step 3
Inject the morel mushroom spores into the soil with a spawning kit. Follow the direction on the kit to ensure that you inject them properly. Spread the spawn over the soil according to the kit.
Step 4
Water the morel mushroom to keep the soil moist. Remove large debris away from the growing bed.

Step 5
Harvest the morels once they reach 4 inches in height. Cover the soil with a layer of composted manure and wood ash to keep the bed prepared for the next growing season. The bed will continue to grow morel mushrooms as long as you tend to the area properly.

Step 1
Locate an area that has well-drained soil. Remove all the weeds and grass from the area. Choose a location with shade that receives filtered sunlight.
Step 2
Combine an equal amount of peat, wood ash and gypsum to fill the top 4 to 6 inches of soil at your prepared site. You can burn wood and collect the ash as long as you use it within 48 hours.
Step 3
Inject the morel mushroom spores into the soil with a spawning kit. Follow the direction on the kit to ensure that you inject them properly. Spread the spawn over the soil according to the kit.
Step 4
Water the morel mushroom to keep the soil moist. Remove large debris away from the growing bed.

Step 5
Harvest the morels once they reach 4 inches in height. Cover the soil with a layer of composted manure and wood ash to keep the bed prepared for the next growing season. The bed will continue to grow morel mushrooms as long as you tend to the area properly.
0
0
成长记
hege
2017年12月09日

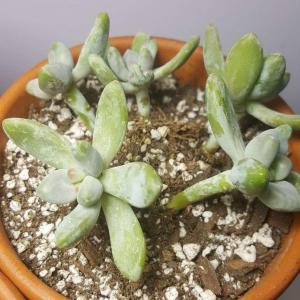
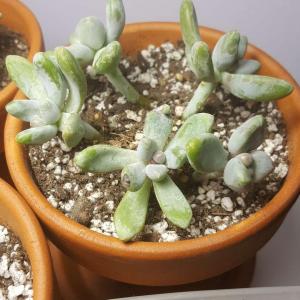
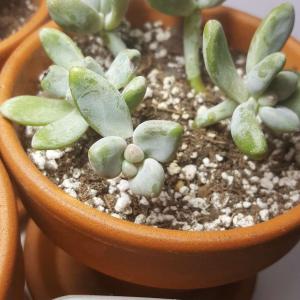
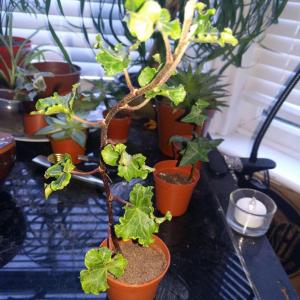
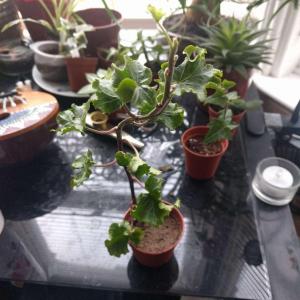
this cutting didn't grow roots for ages, then I forgot about it and it grew really good ones plus a new leaf!


0
0
Aki
2017年12月07日

Hope they can grow well in Lao Weather


2
0
meriunkat:those little guys in the back that look like flowers are so cute 😆


