文章
Miss Chen
2018年04月27日

Pumpkins (Cucurbita spp.) grow when there is no threat of frost for at least 90 days. An annual vine that dies after the pumpkin fruits form and ripen, gardeners in the United States plant seeds in late spring or midsummer for harvest in time for October festivities. Pumpkins need abundant sunlight and warmth to grow, flower and set fruits well. Shady garden locations are poor sites for raising pumpkin plants.
Growing Requirements

Pumpkin patches are always in an open, sunny spot.
Pumpkin vines need lots of space to sprawl their vines across the garden soil. Depending on the variety, 500 to 2,000 square feet is needed for bush-vine pie and jumbo jack o' lantern types, respectively. Plant seeds in a fertile, moist but well-drained soil that is slightly acidic to neutral in pH. Full sun is a must -- at least 8 hours of direct sunrays daily. Insufficient sunlight causes vines to grow long and spindly with few leaves and flowers.
Effects of Shade
Shady growing conditions retard the growth of pumpkins on many levels. The shade delays warming of soil and air, thereby slowing vine growth. Lack of sun prevents leaves from producing enough carbohydrates, leads to delay in flowering and slows the development of pumpkin fruits. Pumpkin vines also do not do well in moist, high humidity conditions. A shady garden slows evaporation of dew and rain droplets and can increase susceptibility for stem, root and fruit rot from fungi and molds.
When to Plant Pumpkins

In the northern United States where the summers aren't too hot and the frost-free growing seasons are shorter, sow pumpkin seeds in mid to late spring after the expected last spring frost date in May. Soil temperatures above 60 degrees Fahrenheit are best. Sow pumpkins the same time as cucumbers, sweet corn, watermelon, cantaloupe and squash. In the extreme southern U.S., sow pumpkins in early summer, anytime from mid June early July, so they grow and ripen just in time for harvest in September and October. Pumpkin vines die too early in summer in the South, which leads to pumpkin rot or deterioration in the warm temperatures if sown in April or May.
Flowering Insight

Ample sunlight encourages production of flowers in pumpkin vines. Blossoms are either male or female in gender, and both must be present for pollination by bees. The flowers open during the day and close at night or when it's not bright enough or rainy. Shady conditions can delay flowers opening and keep temperatures too cool for heavy visitation by bees. Only pollinated, female pumpkin flowers produce pumpkin fruits.
Growing Requirements

Pumpkin patches are always in an open, sunny spot.
Pumpkin vines need lots of space to sprawl their vines across the garden soil. Depending on the variety, 500 to 2,000 square feet is needed for bush-vine pie and jumbo jack o' lantern types, respectively. Plant seeds in a fertile, moist but well-drained soil that is slightly acidic to neutral in pH. Full sun is a must -- at least 8 hours of direct sunrays daily. Insufficient sunlight causes vines to grow long and spindly with few leaves and flowers.
Effects of Shade
Shady growing conditions retard the growth of pumpkins on many levels. The shade delays warming of soil and air, thereby slowing vine growth. Lack of sun prevents leaves from producing enough carbohydrates, leads to delay in flowering and slows the development of pumpkin fruits. Pumpkin vines also do not do well in moist, high humidity conditions. A shady garden slows evaporation of dew and rain droplets and can increase susceptibility for stem, root and fruit rot from fungi and molds.
When to Plant Pumpkins

In the northern United States where the summers aren't too hot and the frost-free growing seasons are shorter, sow pumpkin seeds in mid to late spring after the expected last spring frost date in May. Soil temperatures above 60 degrees Fahrenheit are best. Sow pumpkins the same time as cucumbers, sweet corn, watermelon, cantaloupe and squash. In the extreme southern U.S., sow pumpkins in early summer, anytime from mid June early July, so they grow and ripen just in time for harvest in September and October. Pumpkin vines die too early in summer in the South, which leads to pumpkin rot or deterioration in the warm temperatures if sown in April or May.
Flowering Insight

Ample sunlight encourages production of flowers in pumpkin vines. Blossoms are either male or female in gender, and both must be present for pollination by bees. The flowers open during the day and close at night or when it's not bright enough or rainy. Shady conditions can delay flowers opening and keep temperatures too cool for heavy visitation by bees. Only pollinated, female pumpkin flowers produce pumpkin fruits.
0
0
文章
Miss Chen
2018年04月27日

Plant a vegetable garden this spring and save money on your grocery bills. White acre peas and other southern peas grow quickly and produce high yields in warmer climates. Cow peas of all varieties produce peas in shells that you can cook immediately or dry for long-term storage. Found mainly in Florida, white acre peas have a soft texture and delicate creamy taste.

Step 1
Prepare the soil for your peas by tilling a 3-inch layer of compost into the soil. White acre peas need well-drained, loamy soil. They prefer a moderately acidic soil with a pH between 6.0 and 6.5. For best results have your soil tested and apply garden sulfur in amounts recommended by your soil test to correct the pH, if needed.
Step 2
Wait until all danger of frost has passed before planting white acre peas. Sow seeds every 3 to 6 inches in rows that are at least 20 inches apart. Sow multiple seeds per hole to ensure germination. Sow additional rows of seed two weeks apart so that the harvest continues throughout the summer.
Step 3
Water your rows every day for the first week, and reduce to twice weekly once germination is complete. While growing, white acre peas need an inch of water every seven to 10 days. When your peas are beginning to flower, water them gently near the base of the plant.
Step 4
Thin your seedlings when they begin to sprout new leaves. Reduce the population to only one plant every six inches. Either pull the seedlings from the earth by grasping them near the roots or clip them with a pair of garden shears.

Step 5
Fertilize your peas with bone meal and wood ash, 1/2 tbsp. each per plant. White acre peas need plenty of phosphorous and potassium but self-fertilize the soil with nitrogen. Adding nitrogen from conventional plant food causes low pea pod production but bigger bushes.
Step 6
Harvest your white acre peas 75 to 90 days after planting. If you plan to eat your peas fresh, pick your peas when the pods plump but have not yet begun to dry. For long-term storage, allow the pods to dry on the vine. Shell the peas and complete the drying process spread on screens.

Step 1
Prepare the soil for your peas by tilling a 3-inch layer of compost into the soil. White acre peas need well-drained, loamy soil. They prefer a moderately acidic soil with a pH between 6.0 and 6.5. For best results have your soil tested and apply garden sulfur in amounts recommended by your soil test to correct the pH, if needed.
Step 2
Wait until all danger of frost has passed before planting white acre peas. Sow seeds every 3 to 6 inches in rows that are at least 20 inches apart. Sow multiple seeds per hole to ensure germination. Sow additional rows of seed two weeks apart so that the harvest continues throughout the summer.
Step 3
Water your rows every day for the first week, and reduce to twice weekly once germination is complete. While growing, white acre peas need an inch of water every seven to 10 days. When your peas are beginning to flower, water them gently near the base of the plant.
Step 4
Thin your seedlings when they begin to sprout new leaves. Reduce the population to only one plant every six inches. Either pull the seedlings from the earth by grasping them near the roots or clip them with a pair of garden shears.

Step 5
Fertilize your peas with bone meal and wood ash, 1/2 tbsp. each per plant. White acre peas need plenty of phosphorous and potassium but self-fertilize the soil with nitrogen. Adding nitrogen from conventional plant food causes low pea pod production but bigger bushes.
Step 6
Harvest your white acre peas 75 to 90 days after planting. If you plan to eat your peas fresh, pick your peas when the pods plump but have not yet begun to dry. For long-term storage, allow the pods to dry on the vine. Shell the peas and complete the drying process spread on screens.
0
0
文章
Miss Chen
2018年04月26日

Broccoli is a cool-season brassica (related to cauliflower and other cole crops) that prefers temperatures between 65 and 75 degrees Fahrenheit. It matures quickly, allowing gardeners to grow it in both spring and fall. To get a head start on spring planting, however, broccoli seeds are sown indoors, then transplanted into the garden after the last annual frost date, following a brief hardening-off period.

Step 1
Select a sunny indoor location, such as a greenhouse or a south-facing window that receives several hours of sunlight. Alternately, purchase a grow-light. Most regular indoor lights are not sufficient to grow broccoli indoors.
Step 2
Purchase or mix your own seed starting soil, or seedling soil mix. This mix should be light, well-draining, and fertile. If making your own, include compost both for fertility and to ensure the mix has a light, well-draining texture.
Step 3
Fill a seedling tray with seed starter soil. If you will be growing the broccoli indoors for a long time, and are concerned about insufficient room for the roots as the broccoli ages, sow seeds in pots instead. The optimum depth is about a quarter inch, spacing about 3 inches apart.
Step 4
Moisten the soil with a water spray bottle to prevent moving the seeds around or flushing them. Keep soil evenly moist until germination, and keep soil temperatures closer to 75 degrees for fastest germination. After germination, temperatures are more favorable closer to 60 degrees.

Step 5
Transplant to the garden or to the final growing area when broccoli has four to five true leaves, roughly four to six weeks after planting seeds. The first two leaves that broccoli produces during germination are not true leaves.
Step 6
Grow broccoli to maturity indoors only if you have a growing area that receives at least six hours of direct sunlight every day, or with grow lights timed to provide at least six hours of light per day. Each broccoli plant will need approximately three feet of growing space for a large head, less for a smaller head that is harvested twice. Ensure that broccoli has at least 6 to 12 inches of soil depth for roots to grow in, or grow broccoli hydroponically according to your hydroponic system specifications.

Step 1
Select a sunny indoor location, such as a greenhouse or a south-facing window that receives several hours of sunlight. Alternately, purchase a grow-light. Most regular indoor lights are not sufficient to grow broccoli indoors.
Step 2
Purchase or mix your own seed starting soil, or seedling soil mix. This mix should be light, well-draining, and fertile. If making your own, include compost both for fertility and to ensure the mix has a light, well-draining texture.
Step 3
Fill a seedling tray with seed starter soil. If you will be growing the broccoli indoors for a long time, and are concerned about insufficient room for the roots as the broccoli ages, sow seeds in pots instead. The optimum depth is about a quarter inch, spacing about 3 inches apart.
Step 4
Moisten the soil with a water spray bottle to prevent moving the seeds around or flushing them. Keep soil evenly moist until germination, and keep soil temperatures closer to 75 degrees for fastest germination. After germination, temperatures are more favorable closer to 60 degrees.

Step 5
Transplant to the garden or to the final growing area when broccoli has four to five true leaves, roughly four to six weeks after planting seeds. The first two leaves that broccoli produces during germination are not true leaves.
Step 6
Grow broccoli to maturity indoors only if you have a growing area that receives at least six hours of direct sunlight every day, or with grow lights timed to provide at least six hours of light per day. Each broccoli plant will need approximately three feet of growing space for a large head, less for a smaller head that is harvested twice. Ensure that broccoli has at least 6 to 12 inches of soil depth for roots to grow in, or grow broccoli hydroponically according to your hydroponic system specifications.
0
0
成长记
Shami
2018年04月23日

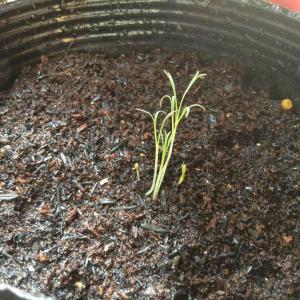
It said on the package that it was easy to grow. But I'm having a hard time on watering them. :( Date: April 23, 2018

0
0
成长记
Shami
2018年04月20日

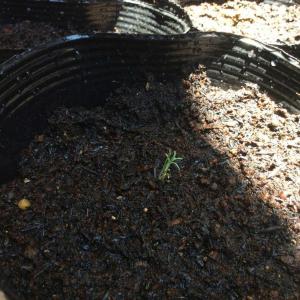
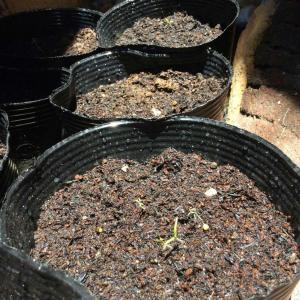
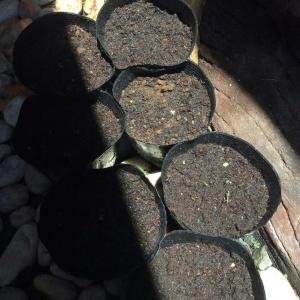
These poppies grow so well! So far, 5 out of 7 from the pots sprouted. Date: April 21, 2018


0
0
文章
Miss Chen
2018年04月20日

Zucchini and other summer squash can be grown in vegetable gardens throughout the United States, providing a good crop each year. Although the squash are considered easy to grow, the plants can suffer damage when not cared for properly. Yellow leaves are a sign of a potential problem in many plants, zucchini included. In some cases, overwatering may cause the problem. However, that is only one potential cause.

Water Needs
Zucchini need about 1 inch of water per week, the University of Illinois Extension reports. When rainfall does not meet these needs, the best technique for watering the squash is to provide one deep water per week. If you grow zucchini in a sandy soil, water more frequently but use less water with each irrigation, the University of Minnesota Extension recommends.
Too Much Water
Yellow leaves on a zucchini plant can be a sign of many problems, including too much water. Typically, leaves yellow as a result of wet soil following heavy rains when temperatures are cool or cold, the University of Minnesota Extension reports. Leaves also may appear dark green or brown, and many may wilt or die back, when temperatures drop.
Other Causes
Cold weather and too much moisture are among many potential causes for yellow leaves on a zucchini plant. Powdery mildew can also cause yellowing, typically on the plant's oldest leaves. Downy mildew can also cause yellowing, although typically in spots and splotches. Pests including the squash vine borer and squash bugs can make leaves yellow and wilt. Finally, plant viruses such as squash mosaic can lead to yellowing of leaves.

Treatment and Care
How to care for a zucchini plant with yellowing leaves depends on the cause. When the problem develops following a cold and rainy spell, the plant's health may improve without your aid as temperatures warm and the soil dries out. If the yellow leaves are pest related, you can remove visible pests and their eggs and larvae by hand when checking the plants; alternatively, try an insecticide applied at the base of the vines, suggests the Iowa State University Extension. Herbicides can help control mildew and other plant diseases.

Water Needs
Zucchini need about 1 inch of water per week, the University of Illinois Extension reports. When rainfall does not meet these needs, the best technique for watering the squash is to provide one deep water per week. If you grow zucchini in a sandy soil, water more frequently but use less water with each irrigation, the University of Minnesota Extension recommends.
Too Much Water
Yellow leaves on a zucchini plant can be a sign of many problems, including too much water. Typically, leaves yellow as a result of wet soil following heavy rains when temperatures are cool or cold, the University of Minnesota Extension reports. Leaves also may appear dark green or brown, and many may wilt or die back, when temperatures drop.
Other Causes
Cold weather and too much moisture are among many potential causes for yellow leaves on a zucchini plant. Powdery mildew can also cause yellowing, typically on the plant's oldest leaves. Downy mildew can also cause yellowing, although typically in spots and splotches. Pests including the squash vine borer and squash bugs can make leaves yellow and wilt. Finally, plant viruses such as squash mosaic can lead to yellowing of leaves.

Treatment and Care
How to care for a zucchini plant with yellowing leaves depends on the cause. When the problem develops following a cold and rainy spell, the plant's health may improve without your aid as temperatures warm and the soil dries out. If the yellow leaves are pest related, you can remove visible pests and their eggs and larvae by hand when checking the plants; alternatively, try an insecticide applied at the base of the vines, suggests the Iowa State University Extension. Herbicides can help control mildew and other plant diseases.
0
0
成长记
Shami
2018年04月19日

Some of the poppies appeared already! I hope they grow well. Date: April 20, 2018


0
0
文章
Miss Chen
2018年04月18日

Cucumbers are one of the less finicky producers in a summer garden. With the right conditions, they tend to grow rather quickly and will be ripe and ready to eat within six weeks. Obtaining the right conditions for a long cuke over a stunted, rounded or crumpled one isn't that difficult if you pay attention to the details.

Know the Type of Cucumber You're Getting
You can choose vining cucumbers, perfect for container gardening or small gardens, or bush cucumbers. A vining cucumber loves a trellis to hold onto as it searches for higher ground with tiny tendrils. These are easier to pick and can be more prolific in their production than the bush variety. There are three main types to choose from: pickling, burpless (a less bitter variety) and slicing. Choose one that works best with your temperature and sun exposure. Your local gardening group or collective will be able to tell you the exact best cucumber to grow in your area and may also hook you up with the proper fertilizer to get them growing long and green rather than stout, spotted and curled. Some cucumbers were bred to be different, round or bulbous, such as the lemon cucumber, which looks like a tennis ball with stripes. Know what to expect when you choose your cucumber so you don't panic if it leans more toward yellow, such as the tasty Chinese yellow cucumber.
Why Cucumbers Become Round
If you notice your cucumber becoming misshapen before it's ready to pick, there are a few ways to remedy the situation. Cucumbers need a lot of water, as well as good drainage, to keep them perky and perfectly formed over the weeks of growing. If you notice your cucumbers beginning to bend, check your fertilizer. A good rule for a fertilizer is a 10-7-7 mix of nitrogen, phosphorus and potassium. Ensure that they aren't struggling to find sun exposure. If they have to work to get at least six hours of full sun, they may get weak and have a hard time producing. If the temperatures get to boiling, it can kill pollen and keep your crop from getting proper pollination. You can take a small paint brush and spread the pollen from bloom to bloom to give your plant a boost.

How to Grow Great Cucumbers
You can start cucumbers by seed indoors three to four weeks before you plan to put them in the ground. Once the soil is above 70 degrees Fahrenheit, you can transplant your seedlings or put seeds straight in the ground. Don't crowd your cukes. Plant seeds 36 inches apart at least as they like to spread their umbrella-like leaves. Vines can be placed a foot apart if they have a trellis to lean on.
Cucumbers love it loose, so don't pack them into tight spots with hard soil. A nice, light sandy soil is preferred. A good mix of compost worked into the top two inches of the soil before planting will make the soil a happy home for cucumbers. If you have clay soil, you can add peat or compost to make it more hospitable. Add more compost to your soil after new shoots appear, about a month after initial planting.
Make sure the area you plant in has good drainage because cucumbers do not like to get their feet wet and are susceptible to root rot if left in standing water for too long.

Know the Type of Cucumber You're Getting
You can choose vining cucumbers, perfect for container gardening or small gardens, or bush cucumbers. A vining cucumber loves a trellis to hold onto as it searches for higher ground with tiny tendrils. These are easier to pick and can be more prolific in their production than the bush variety. There are three main types to choose from: pickling, burpless (a less bitter variety) and slicing. Choose one that works best with your temperature and sun exposure. Your local gardening group or collective will be able to tell you the exact best cucumber to grow in your area and may also hook you up with the proper fertilizer to get them growing long and green rather than stout, spotted and curled. Some cucumbers were bred to be different, round or bulbous, such as the lemon cucumber, which looks like a tennis ball with stripes. Know what to expect when you choose your cucumber so you don't panic if it leans more toward yellow, such as the tasty Chinese yellow cucumber.
Why Cucumbers Become Round
If you notice your cucumber becoming misshapen before it's ready to pick, there are a few ways to remedy the situation. Cucumbers need a lot of water, as well as good drainage, to keep them perky and perfectly formed over the weeks of growing. If you notice your cucumbers beginning to bend, check your fertilizer. A good rule for a fertilizer is a 10-7-7 mix of nitrogen, phosphorus and potassium. Ensure that they aren't struggling to find sun exposure. If they have to work to get at least six hours of full sun, they may get weak and have a hard time producing. If the temperatures get to boiling, it can kill pollen and keep your crop from getting proper pollination. You can take a small paint brush and spread the pollen from bloom to bloom to give your plant a boost.

How to Grow Great Cucumbers
You can start cucumbers by seed indoors three to four weeks before you plan to put them in the ground. Once the soil is above 70 degrees Fahrenheit, you can transplant your seedlings or put seeds straight in the ground. Don't crowd your cukes. Plant seeds 36 inches apart at least as they like to spread their umbrella-like leaves. Vines can be placed a foot apart if they have a trellis to lean on.
Cucumbers love it loose, so don't pack them into tight spots with hard soil. A nice, light sandy soil is preferred. A good mix of compost worked into the top two inches of the soil before planting will make the soil a happy home for cucumbers. If you have clay soil, you can add peat or compost to make it more hospitable. Add more compost to your soil after new shoots appear, about a month after initial planting.
Make sure the area you plant in has good drainage because cucumbers do not like to get their feet wet and are susceptible to root rot if left in standing water for too long.
1
1
文章
Miss Chen
2018年04月17日

Watermelon on the Fourth of July is about as American as apple pie, but the fruit actually originated in Africa, the University of Arkansas Extension reports. Today, the melons -- a warm-season crop -- grow commercially and in backyard gardens in many parts of the United States. The warm summers in zone 6 -- which includes much of Kentucky and Tennessee as well as portions of Kansas, Arkansas, Missouri, Illinois, Indiana, Ohio, Pennsylvania and West Virginia -- are suitable for growing watermelons.
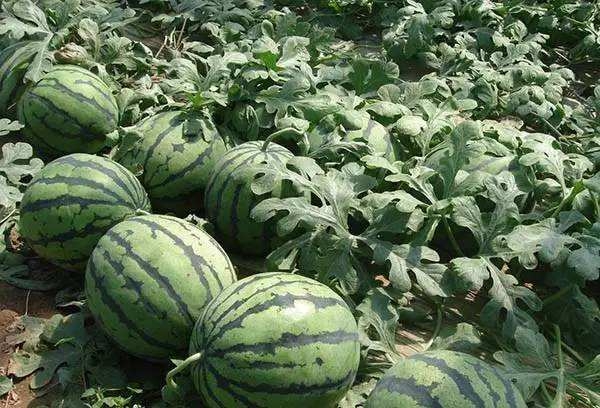
Step 1
Create soil hills in your garden space by piling soil in mounds. If you intend to plant several watermelons, set the hills 6 feet apart, the University of Arkansas Extension advises. Plant rows of watermelons 7 feet to 10 feet apart.
Step 2
Plant several watermelon seeds 1/2 inch deep in the hills, covering them carefully with soil. Watermelons should be planted when the threat of frost has passed and the soil has warmed. In zone 6, this generally occurs in the middle of May.
Step 3
Water the plants carefully at planting time so that they can begin to establish their roots. Continue watering as necessary during the growing season so the soil does not dry out. In general, watering is only required during extended dry periods because the plants have a deep root system that can meet their moisture needs.

Step 4
Remove the smallest young plants after they sprout through the soil, leaving only two to three seedlings in each hill. It's always best to keep the largest, most healthy-looking plants and thin out the small or weak plants.
Step 5
Weed the garden space regularly, either by hand or with a hoe. Weeding is especially important early in the season, when the plants are setting their roots.
Step 6
Monitor the plants for signs the melons are ripe starting about 80 days after you planted them. Gardeners often have difficulty determining when to harvest watermelons, but there are several signs to watch for. First, a ripe watermelon will have a dull green color. The tendrils will turn from green to brown and the spot where the melon sits on the ground will turn from green to yellow.

Step 1
Create soil hills in your garden space by piling soil in mounds. If you intend to plant several watermelons, set the hills 6 feet apart, the University of Arkansas Extension advises. Plant rows of watermelons 7 feet to 10 feet apart.
Step 2
Plant several watermelon seeds 1/2 inch deep in the hills, covering them carefully with soil. Watermelons should be planted when the threat of frost has passed and the soil has warmed. In zone 6, this generally occurs in the middle of May.
Step 3
Water the plants carefully at planting time so that they can begin to establish their roots. Continue watering as necessary during the growing season so the soil does not dry out. In general, watering is only required during extended dry periods because the plants have a deep root system that can meet their moisture needs.

Step 4
Remove the smallest young plants after they sprout through the soil, leaving only two to three seedlings in each hill. It's always best to keep the largest, most healthy-looking plants and thin out the small or weak plants.
Step 5
Weed the garden space regularly, either by hand or with a hoe. Weeding is especially important early in the season, when the plants are setting their roots.
Step 6
Monitor the plants for signs the melons are ripe starting about 80 days after you planted them. Gardeners often have difficulty determining when to harvest watermelons, but there are several signs to watch for. First, a ripe watermelon will have a dull green color. The tendrils will turn from green to brown and the spot where the melon sits on the ground will turn from green to yellow.
0
1
文章
Miss Chen
2018年04月16日

Eggplants are garden cousins of tomato and pepper plants. When you grow eggplants in a backyard garden, expect them to grow in similar fashion to tomato plants. Gardeners often stake eggplant plants to give them sufficient support as they grow taller and larger throughout the growing season. Prune eggplants carefully throughout the growing season to ensure that the plants grow properly and produce a bounty of delicious eggplants.

Step 1
Watch the eggplant plants as they grow taller and larger. The stems of eggplants grow similarly to tomato plants, with suckers appearing between the main stalk and the side branches. If you do not prune away these suckers, they will divert plant energy and you may have fewer and smaller eggplants.
Step 2
Position the pruning shears so the blades are flush with the main stem and clip off the suckers flush with the stem.
Step 3
Discard the suckers in the bucket as you remove them. Never leave discarded plant pieces littering the soil beneath a plant because this may introduce bacteria and infection to the plant.

Step 4
Clip off the oldest leaves from the bottom two or three branches to improve air circulation throughout the eggplant.
Step 5
Check the eggplants once each week to find suckers, removing the suckers you find. Trim the bottom leaves once each month.

Step 1
Watch the eggplant plants as they grow taller and larger. The stems of eggplants grow similarly to tomato plants, with suckers appearing between the main stalk and the side branches. If you do not prune away these suckers, they will divert plant energy and you may have fewer and smaller eggplants.
Step 2
Position the pruning shears so the blades are flush with the main stem and clip off the suckers flush with the stem.
Step 3
Discard the suckers in the bucket as you remove them. Never leave discarded plant pieces littering the soil beneath a plant because this may introduce bacteria and infection to the plant.

Step 4
Clip off the oldest leaves from the bottom two or three branches to improve air circulation throughout the eggplant.
Step 5
Check the eggplants once each week to find suckers, removing the suckers you find. Trim the bottom leaves once each month.
0
0
文章
Miss Chen
2018年04月16日

The humble potato, Solanum tuberosum, is native to North America but grown the world over as a nutritious staple food and delicious dinner vegetable fried, baked, mashed or roasted. Potatoes are easy to grow in the home garden and available in hundreds of different varieties. Once planted, potatoes emerge from the soil quickly, depending on temperature, planting conditions and the variety you are growing.

Soil Temperature
Seed potatoes planted in garden soil at the recommended depth of about 4 inches should emerge from the soil in two to four weeks, according to Cornell University. However, if soil temperature is too cold or the ground is too wet or too dry, seed potato pieces are likely to rot in the ground and not sprout, or take considerably longer to emerge from the soil. As long as the ground has warmed, sprouting potatoes that may be killed back by late-spring frosts will emerge again and grow successfully through the summer season. Hill up soil around emerging potato plants; this practice will compel them to grow longer root systems that will produce more potatoes.
Curing Seed Potatoes
Small seed potatoes can be planted whole, while ones larger than a small egg should be cut into pieces, with each piece containing one or more eyes from which the growth will sprout. Curing the cut seed potato pieces before planting them will help to ensure better germination rates and faster emergence, according to Cornell University, although this is a point of disagreement among experts, with the Ohio State University Extension recommending planting immediately after seed potatoes are cut. To follow Cornell's recommended curing process, put cut seed potato pieces in a brown paper bag and store at room temperature for four to six days, shaking occasionally to prevent pieces from sticking together, then plant in a prepared trench in garden soil.

Sprouted Potatoes
You can speed up the potato emergence process by pre-sprouting your potatoes, advises the University of Georgia College of Agricultural and Environmental Science. Start with small, whole seed potatoes, and lay them out in a single layer in a room that receives sun and keeps a temperature consistently over 60 degrees. The potatoes will develop small green sprouts that, in large quantities, may be toxic, so don't eat your greened potatoes. Plant the sprouted potatoes about 4 inches deep, with the sprouts pointed upwards, and the potato plants will emerge from the soil faster than unsprouted plantings. Don't plant sprouted potatoes too deeply or you will delay their emergence.
Straw Potatoes
Market gardeners looking for perfectly-shaped potato tubers, and gardeners looking to submit prize-winning large potatoes at county fair competitions, often use a method called straw potato growing. Plant by placing seed potatoes at the surface of loosened, cultivated soil, then covering with 6 inches of loose straw. The potato plants will emerge through the straw, usually in just 2 to 3 weeks, because they do not have several inches of soil to grow through. Add more straw around the plants as they grow and as the earlier straw layers compact. Harvest at the end of the season by pulling back the straw, which eliminates the risk of slicing tubers when digging them out with a shovel.

Soil Temperature
Seed potatoes planted in garden soil at the recommended depth of about 4 inches should emerge from the soil in two to four weeks, according to Cornell University. However, if soil temperature is too cold or the ground is too wet or too dry, seed potato pieces are likely to rot in the ground and not sprout, or take considerably longer to emerge from the soil. As long as the ground has warmed, sprouting potatoes that may be killed back by late-spring frosts will emerge again and grow successfully through the summer season. Hill up soil around emerging potato plants; this practice will compel them to grow longer root systems that will produce more potatoes.
Curing Seed Potatoes
Small seed potatoes can be planted whole, while ones larger than a small egg should be cut into pieces, with each piece containing one or more eyes from which the growth will sprout. Curing the cut seed potato pieces before planting them will help to ensure better germination rates and faster emergence, according to Cornell University, although this is a point of disagreement among experts, with the Ohio State University Extension recommending planting immediately after seed potatoes are cut. To follow Cornell's recommended curing process, put cut seed potato pieces in a brown paper bag and store at room temperature for four to six days, shaking occasionally to prevent pieces from sticking together, then plant in a prepared trench in garden soil.

Sprouted Potatoes
You can speed up the potato emergence process by pre-sprouting your potatoes, advises the University of Georgia College of Agricultural and Environmental Science. Start with small, whole seed potatoes, and lay them out in a single layer in a room that receives sun and keeps a temperature consistently over 60 degrees. The potatoes will develop small green sprouts that, in large quantities, may be toxic, so don't eat your greened potatoes. Plant the sprouted potatoes about 4 inches deep, with the sprouts pointed upwards, and the potato plants will emerge from the soil faster than unsprouted plantings. Don't plant sprouted potatoes too deeply or you will delay their emergence.
Straw Potatoes
Market gardeners looking for perfectly-shaped potato tubers, and gardeners looking to submit prize-winning large potatoes at county fair competitions, often use a method called straw potato growing. Plant by placing seed potatoes at the surface of loosened, cultivated soil, then covering with 6 inches of loose straw. The potato plants will emerge through the straw, usually in just 2 to 3 weeks, because they do not have several inches of soil to grow through. Add more straw around the plants as they grow and as the earlier straw layers compact. Harvest at the end of the season by pulling back the straw, which eliminates the risk of slicing tubers when digging them out with a shovel.
0
0
求助
Shami
2018年04月16日

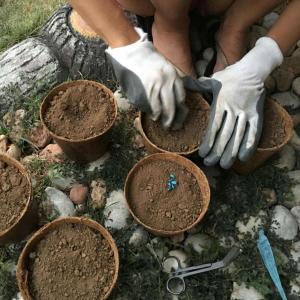
I burried these hybrid sunflower seeds a little too deep. I'm worried that they won't be able to grow. And how much water do they need? #sunflower #hybridsunflower #hybrid



0
0
文章
Miss Chen
2018年04月15日

Spaghetti squash, one of the common and popular winter squash varieties, grows into a large oval squash with a yellow or orange skin. Most spaghetti squash varieties mature in three to four months. If you lack garden space, grow a vine variety of spaghetti squash on a trellis to conserve soil area. Because the spaghetti squash become quite large as they mature, rig a support system for the growing squash.

Step 1
Prepare a sunny growing location after the final spring frost. Cultivate the soil with the garden spade down to a depth of 6 to 8 inches. Add 4 inches of compost to the top of the soil and work the compost and the soil completely to mix them. Rake the soil surface smooth.
Step 2
Insert the wood or metal trellis system into the soil. Pound the bottom of the trellis into the soil with a hammer to drive it at least 8 inches into the ground.
Step 3
Plant the spaghetti squash seeds along both sides of the trellis, positioning the seeds four to six inches from the trellis. Sow two seeds together about 1 inch deep, spacing the seeds about 12 inches apart. Cover the seeds lightly with soil.
Step 4
Water the seeds generously immediately after planting and keep the soil moist while the seeds germinate – about one to two weeks. Provide water for the growing spaghetti squash plants if less than 1 inch of rain falls in a one-week period.

Step 5
Thin the seedlings when they reach a height of 4 inches. Remove the weakest seedlings to leave one plant growing every 12 inches along the trellis.
Step 6
Apply the fertilizer to the seedlings by sprinkling 1/4 lb. of granular fertilizer for every 10 feet of seedlings. Apply the fertilizer approximately three weeks after you see the first blossoms and work the fertilizer into the soil well with a hand rake.
Step 7
Pull weeds as they appear, to keep the soil area free of competing plants.
Step 8
Tie the vines to the trellis with the stretchy plant ties to train the vines. Support the main vines by tying them loosely to the trellis.
Step 9
Cut a 2-foot length of cheesecloth for each spaghetti squash that begins to grow on the plants. Tie the cheesecloth so it acts as a sling for the squash and tie the ends of the cheesecloth to the trellis.
Step 10
Harvest spaghetti squash before the first autumn frost, when the skins turn yellow. The skin should feel firm to the touch. Use a sharp knife to cut the squash from the vines, leaving about 3 inches of vine protruding from the squashes.

Step 1
Prepare a sunny growing location after the final spring frost. Cultivate the soil with the garden spade down to a depth of 6 to 8 inches. Add 4 inches of compost to the top of the soil and work the compost and the soil completely to mix them. Rake the soil surface smooth.
Step 2
Insert the wood or metal trellis system into the soil. Pound the bottom of the trellis into the soil with a hammer to drive it at least 8 inches into the ground.
Step 3
Plant the spaghetti squash seeds along both sides of the trellis, positioning the seeds four to six inches from the trellis. Sow two seeds together about 1 inch deep, spacing the seeds about 12 inches apart. Cover the seeds lightly with soil.
Step 4
Water the seeds generously immediately after planting and keep the soil moist while the seeds germinate – about one to two weeks. Provide water for the growing spaghetti squash plants if less than 1 inch of rain falls in a one-week period.

Step 5
Thin the seedlings when they reach a height of 4 inches. Remove the weakest seedlings to leave one plant growing every 12 inches along the trellis.
Step 6
Apply the fertilizer to the seedlings by sprinkling 1/4 lb. of granular fertilizer for every 10 feet of seedlings. Apply the fertilizer approximately three weeks after you see the first blossoms and work the fertilizer into the soil well with a hand rake.
Step 7
Pull weeds as they appear, to keep the soil area free of competing plants.
Step 8
Tie the vines to the trellis with the stretchy plant ties to train the vines. Support the main vines by tying them loosely to the trellis.
Step 9
Cut a 2-foot length of cheesecloth for each spaghetti squash that begins to grow on the plants. Tie the cheesecloth so it acts as a sling for the squash and tie the ends of the cheesecloth to the trellis.
Step 10
Harvest spaghetti squash before the first autumn frost, when the skins turn yellow. The skin should feel firm to the touch. Use a sharp knife to cut the squash from the vines, leaving about 3 inches of vine protruding from the squashes.
0
0


