文章
Abigal
2017年03月29日


Concrete, or cinder block, is an inexpensive and organic building material for the garden. Easily picked up at your local home improvement store, with a little creativity you can use it to create garden hardscaping that will last. It combines well with other elements such as wood, and is easy for even the beginning DIY’er to work with. What are five ways to use it in the garden?
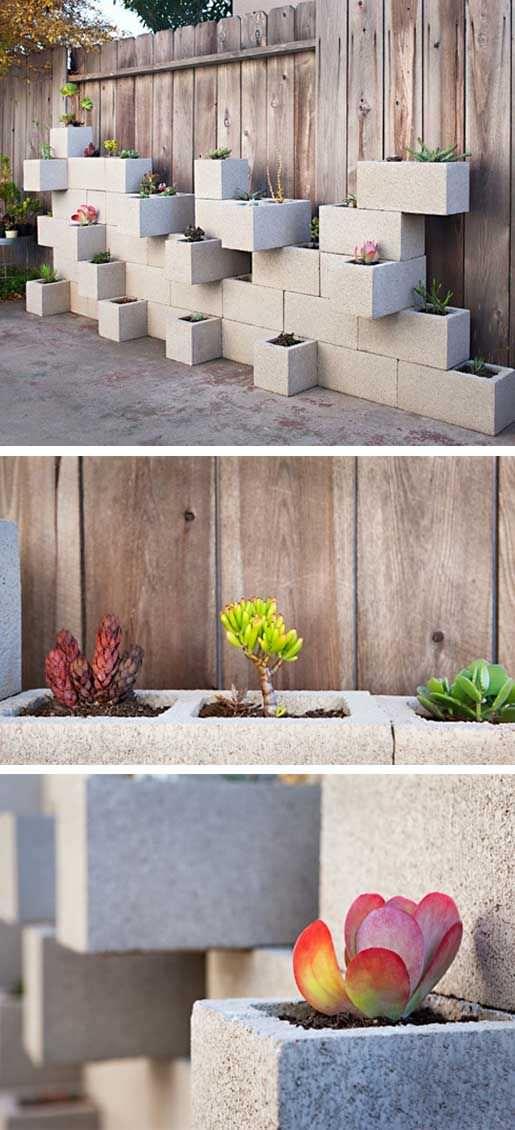
From ‘J Peterson Garden Design’, this cinder block succulent planter is a scaled down (read : easier) version of a planter that made it’s way across the internet last year. We understand the appeal, we created our own mini version of this with our DIY cinder block vertical planter. But we love the large scale this project is done on, and the steps are easy!

Here is another version of a cinder block succulent planter by ‘Zack Benson Photography’…
Steps
From ‘Step by Step’, these DIY concrete block stairs are so much better than using wood… they won’t rot away in a couple years! I like the idea of planting them with a stepable ground cover… Really complete tutorial with TONS of step by step pics…

Another example, this inspirational photo of concrete block steps is from ‘Sustainable Urban Living‘… Love how they just seamlessly merge into the side of the hill!
Fire Pit
What is nature, and therefore a garden, without fire? Fire is a necessary element in the world of nature and should be respected in the garden. Many trees cannot even release their seeds without the heat of a fire. This simple DIY fire pit by ‘Must Add Fabric Softener’ is another good example of the simplicity of using concrete block. And for all of you who have heard these fire pits are dangerous, read their take on this… which I happen to agree with.

This easy fire pit was done by ‘The Dirty Loft’, and he also addresses the “concrete block will explode” controversy… BTW… Lowe’s themselves list these blocks as fire resistant.

Furniture
This DIY cinder block bench was created by ‘Decoist’ during their front porch makeover, and has a complete tutorial. They also show several different variations of adding the planter sections.

From a Pinterest user, this bench follows the same principles…

Another Pinterest find, this bench incorporates stacked cinder block. You can use exterior landscaping adhesive to secure the blocks together if you wish.

This cinder block potting bench is a great idea, and is a much more stylish version college bookshelves!

Privacy wall
From ‘The Info Mine’, I love the Southwest look of this DIY cinder block planter wall… They used ‘Deck Restore’ to seal and add the color.

Here is the unpainted version.

This inspirational photo from ‘Houzz‘ shows you that even in an upscale design, like with this Eichler home, cinder block is a great building material!

3
0
文章
Abigal
2017年03月15日


I love wind chimes. They are a peaceful way to remind us of all the forces in nature that we can’t see. Wind and water are the two most calming elements in the garden. Make your own DIY wind chime crafts, and use them on your porch or patio, in a tree, or from a fence to add that little tinkle of happy sounds all through your garden space!
Our feature project, above, is from ‘Inner Child Giving’. This is a simple tutorial for their DIY key wind chime. I love the bright colors they use, and the simple and repurposed materials. You could choose a more subtle color scheme as well.
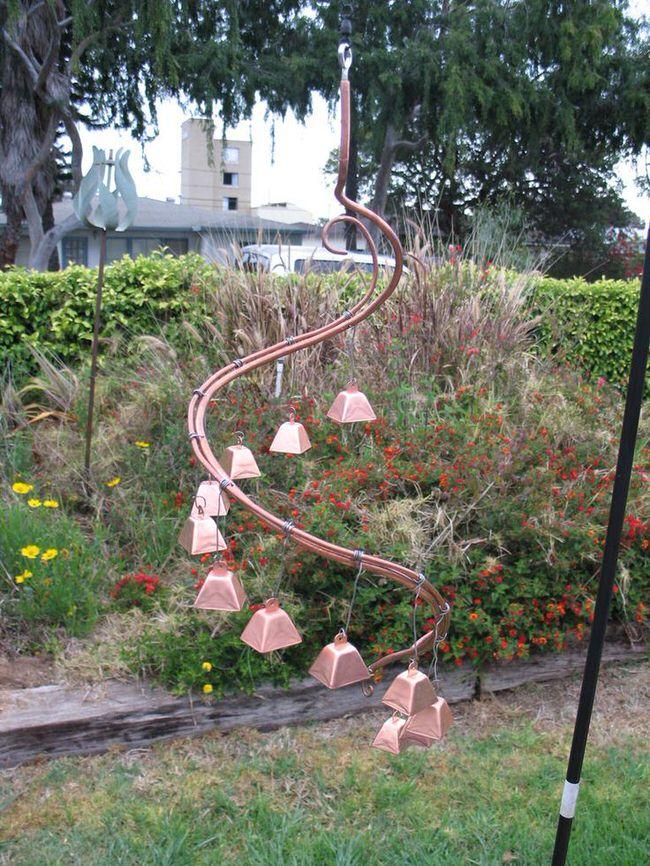
This hardware store hanging wind chime from ‘Instructables’ is an inexpensive project. Made from copper tubing, and the little copper bells meant for fishing, this is a pretty clever use of materials.
From Martha, this short, easy tutorial shows you how to make a simple seashell wind chime, perfect for an after vacation project with the kids!

A more extensive tutorial on making shell chimes, by ‘Kleas’. Step by step photos are easy to follow. They use embroidery floss instead of string, which I like because it ties easier. I think I would go for less color, but you can make it your own!

This flower pot garden chime by ‘Lowes’ is so cute, and super easy. Made with nothing but clothesline, flower pots, and a key! Paint it like they did, or leave it natural.

Create these colorful wind chimes with the tutorial by ‘My Home My Style’. A flower pot and pretty shells, I can just hear the delicate sound this chime would make!

From ‘Michelle Made Me’, this summer time chime is simply bamboo stakes and pretty painting. I love how bamboo sounds striking in the wind.

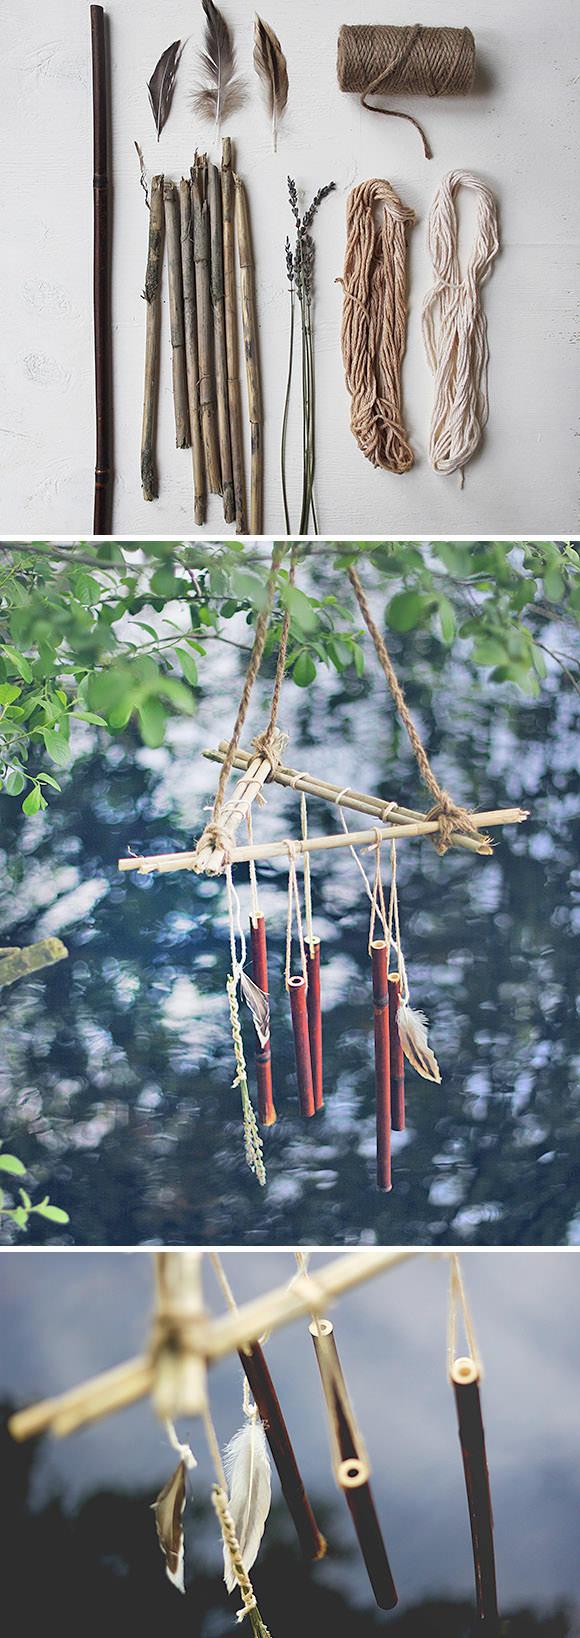
‘Free People’ has another take on bamboo wind chimes… they have directions on making a more natural version, and I love these ones using feathers as well. Lots of step by step photos.
This bottle cap wind chime is from Krafty Katreena’s Etsy shop, and totally worth the buy. You could try making this yourself using a sink strainer top with an eye bolt, and jewelry findings (called jump rings) to string the bottle caps together.

Another inspirational idea, this bottle cap wind chime is from, ‘From the Alley to the Gallery‘.

More inspiration, from ‘Home Sweet Homemade‘… this sea pebble wind chime has such beautiful colors, and I think just listening to it would remind me of the beach!

Another one from “Home Sweet Homemade‘, this driftwood wind chime is beautiful… so talented to make these creations!

Our last DIY project is from ‘Maker Mama’, and it’s easy enough to make with the kids. This recycled wind chime tutorial uses tin juice caps and wire hangar! Enjoy your wind chime crafts!

0
0
文章
粉团
2017年03月15日

Seriously, can you use this classic beverage in the garden? It looks like! We find out some Surprising Coca Cola Uses in the garden.

Either you hate or love it, the coca cola is one of the best-selling beverages in the world. However, it has adverse health effects, but it can be helpful in the gardening, many ways.
Coca Cola for Composting
You may find it unusual, but you can use Coke as an ingredient in your compost pile. The treehugger.com and Lifehacker posted about this– “Simply pour the soda over the pile. Coke’s mildly acidic nature will help break down organic matter, while its sweetness helps attract micro-organisms that aid in the composting process.” If you like the idea, you can try this at least once to see the after-effect.
Killing Slugs with Coca Cola
Try this trick, if you are tired of seeing slugs and snails crawling in your garden and desperately trying to get rid of them. It’s not much different than one using the beer to attract slugs. Just mark 2-3 spots in your garden where you find the slugs most and pick a low bowl. Pour some Coca Cola into the bowl overnight, and the snails and slugs will be attracted to it. The acid in the soda will kill these pests.
Make a Wasp Trap
If there are too many wasps and hornets visiting your garden, and you want to get rid of them, use coca cola to lure and kill them. Try this DIY wasp trap idea! For this, you’ll have to place a bowl filled with coke at an open spot somewhere in your garden. These predator insects will attract towards the sweet nectar. Similarly, you can also kill the flies!
Spraying Coca Cola on Plants
It has been observed and proved in experiments that spraying coca cola on plants is totally uncalled for. It has little to no benefits, albeit it can cause problems. This sugary drink contains 3.25-gram sugar per ounce, and too much sugar absorbs water much like salt and can prevent plant roots from absorbing the water, causing the dehydration. Visit eHow to read more of it!
2
2
文章
扭扭
2017年03月14日

These ‘Vertical Balcony Garden Ideas’ will inspire you to generate space and how to make balcony vertical garden.
You have a small balcony or a terrace and you want to grow a garden there? Well, if you arrange everything neatly and use every inch of your space then you will be able to do this really. One thing you need to remember is balcony gardening is not about putting some pots and grow plants. It is about how aptly you manage space. Using vertical space is part of it.
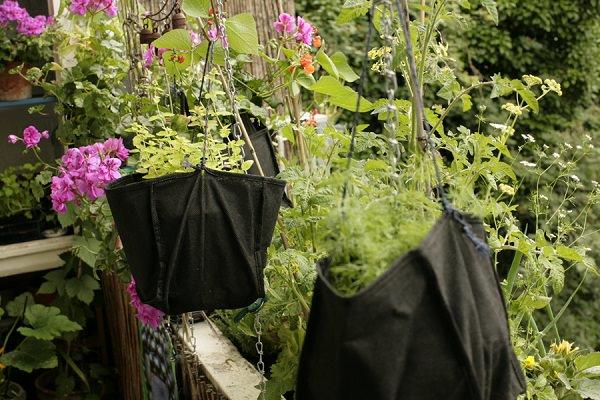
1.These two grow bags are strong enough to bear the weight of herbs growing in the containers kept inside them, this is a good idea if you don’t have hanging baskets.
2.These clay pots are arranged one above each other using threaded steel and fasteners.

3.Use racks to keep pots, this way you can use lot of vertical space of your balcony.
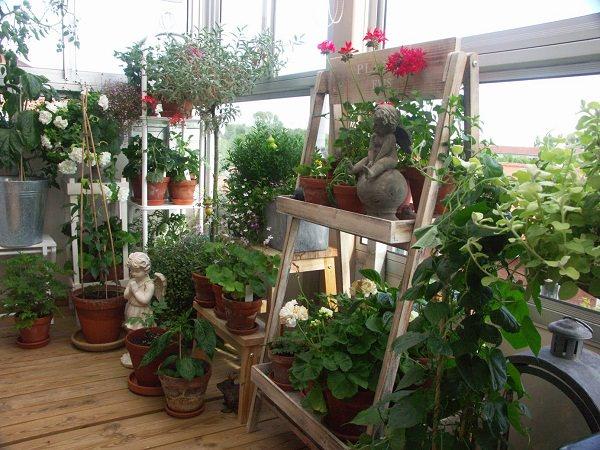
4.Fuchsia growing on a hanging basket is looking beautiful and a wooden planter is tied on railing is a smart way to use outside space.
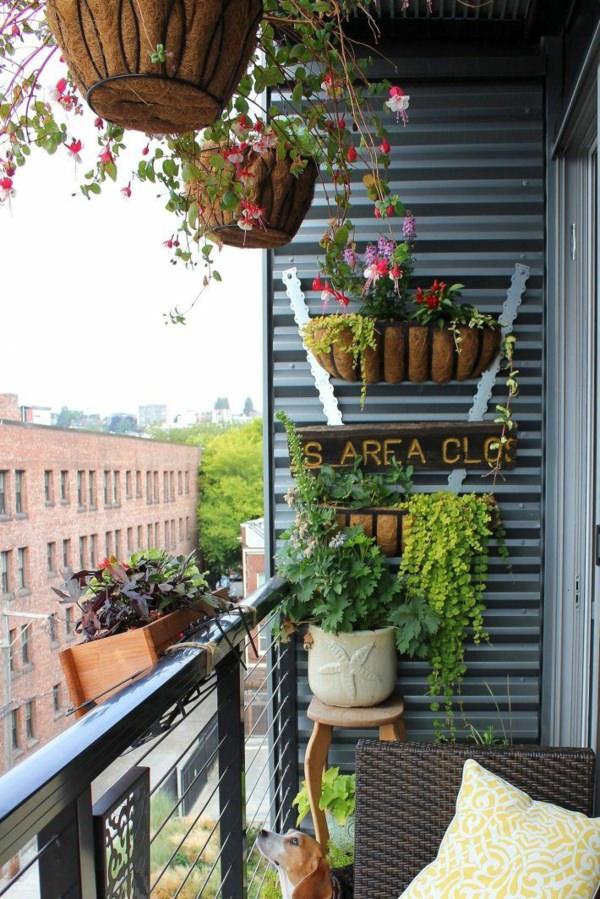
5. Table garden is used to grow plants, two main benefit of table garden is that if you have a back problem then you don’t need to get down and up. Besides this, it saves space on the floor.
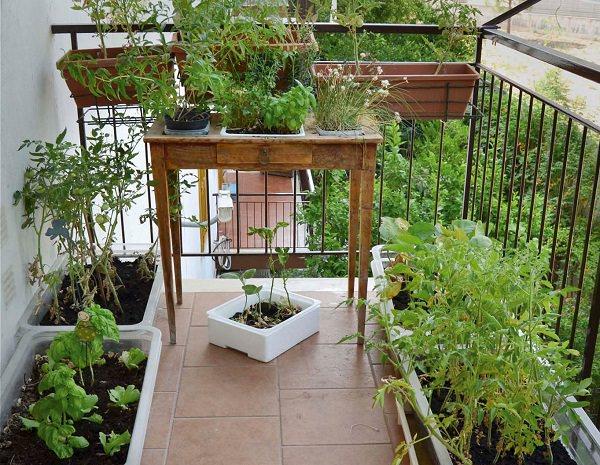
6.Hang lot of planters on the railings of your balcony garden, this is an apt way to generate lot of space.
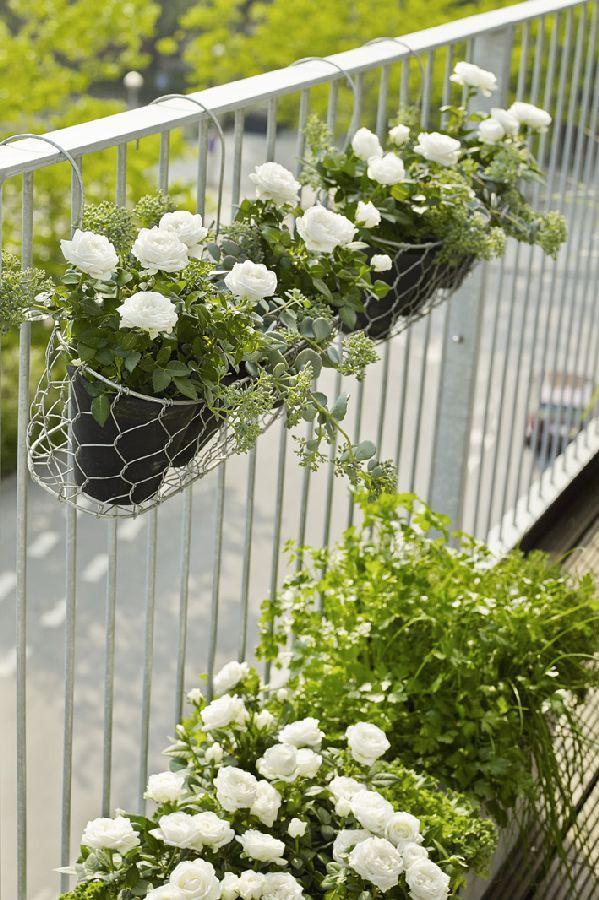
7.Wooden pallets can be used to do multiple things. You can hang pots on them and grow plants in its narrow space. Read more on DIY pallets ideas. You can also arrange pots one above each other as you see in the picture. Use PVC pipes to grow plants, this is called gutter gardening. Here’s one tutorial on how to grow strawberries in gutters.
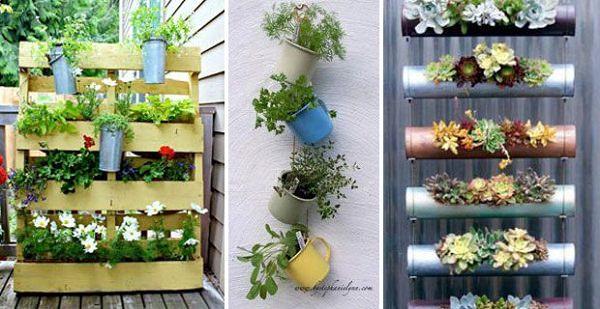
8.And here comes a burning one. If you have ammo cans use your creativity to make them vertical planter. Before trying this, make sure to clean up the canes properly.

9.OK! It’s a bit cheeky idea, herbs growing inside the gloves. If you have some odd ideas, try them.

10.Use plant walls if you want to optimize space of your balcony or terrace. You’ll be stunned after you install one, these plant walls are useful innovation for small gardens.
11.This is one cheap solution you should look at. Planters are hanged on this wooden bracket mounted on the wall.

12.Grow herbs and green leafy vegetables on these gutters, this is a modern way to create lot of space.
You have a small balcony or a terrace and you want to grow a garden there? Well, if you arrange everything neatly and use every inch of your space then you will be able to do this really. One thing you need to remember is balcony gardening is not about putting some pots and grow plants. It is about how aptly you manage space. Using vertical space is part of it.
1.These two grow bags are strong enough to bear the weight of herbs growing in the containers kept inside them, this is a good idea if you don’t have hanging baskets.

2.These clay pots are arranged one above each other using threaded steel and fasteners.

3.Use racks to keep pots, this way you can use lot of vertical space of your balcony.

4.Fuchsia growing on a hanging basket is looking beautiful and a wooden planter is tied on railing is a smart way to use outside space.

5. Table garden is used to grow plants, two main benefit of table garden is that if you have a back problem then you don’t need to get down and up. Besides this, it saves space on the floor.

6.Hang lot of planters on the railings of your balcony garden, this is an apt way to generate lot of space.

7.Wooden pallets can be used to do multiple things. You can hang pots on them and grow plants in its narrow space. Read more on DIY pallets ideas. You can also arrange pots one above each other as you see in the picture. Use PVC pipes to grow plants, this is called gutter gardening. Here’s one tutorial on how to grow strawberries in gutters.

8.And here comes a burning one. If you have ammo cans use your creativity to make them vertical planter. Before trying this, make sure to clean up the canes properly.

9.OK! It’s a bit cheeky idea, herbs growing inside the gloves. If you have some odd ideas, try them.

10.Use plant walls if you want to optimize space of your balcony or terrace. You’ll be stunned after you install one, these plant walls are useful innovation for small gardens.
11.This is one cheap solution you should look at. Planters are hanged on this wooden bracket mounted on the wall.

12.Grow herbs and green leafy vegetables on these gutters, this is a modern way to create lot of space.

1
0
文章
Andy
2017年03月13日

Learn how to make a windowsill herb garden, if you’re short of space. Pleasure of harvesting your own herbs is immense– you can make fresh tea, use them in salads and garnish them on food.You don’t need a big yard for this, just a small and simple windowsill that receives a few hours of sunlight.
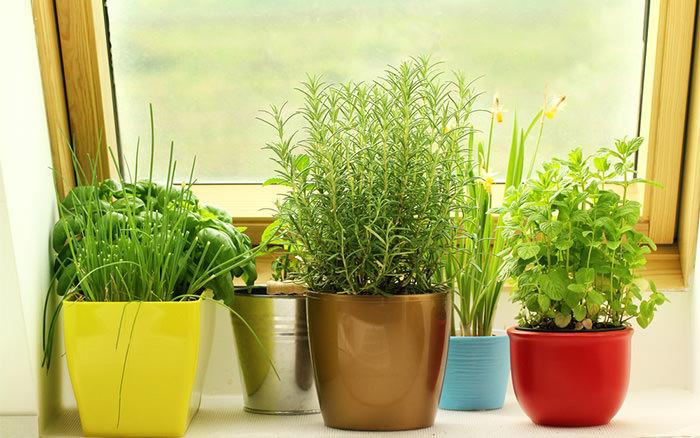
It’s easy and anyone who have lack of space can create a mini herb garden that grows on a window sill. Here are 6 basic steps to follow to make it possible.How to
Make a Windowsill Herb Garden
1. Choose Suitable Container to Make a Windowsill Herb Garden
Either use lot of pots to grow specific herb in each one or choose a planter as wide as that it’ll cover the space of your windowsill easily, make sure the pot you use should be at least 6 to 12 inches deep. Herbs are shallow root plants so they don’t mind growing in less deep planters. But most of the herbs like mint and thyme have tendency to spread, so it’s good to select a large and wide pot for them.
One more benefit of choosing a large pot is that you can pour lot of soil in it and this will save you from frequent watering.
2. Ensure sufficient drainage
Once you select a container or containers, second step is to ensure good drainage. Check out the bottom of planter for drainage holes, if they are not sufficient, make some.
You don’t need to put gravels or clay balls to make a drainage layer. This is a myth and doesn’t do any good for drainage.
3. Provide quality Potting soil
Soil or growing medium for growing herbs should be of best quality. It have to be light, penetrable, fertile and airy.
Buy soil less potting mix or make your own by adding perlite, compost and garden soil, it is the best growing medium for containers and essential for the success of your windowsill herb garden.
An aerated and rich soil with good retention power of the water improves the quality of plants you grow.
4. Planting a Windowsill Herb Garden
Be realistic and don’t try to grow all the aromatic and tastiest herbs you’ve heard about.
Make a list of herbs you would like to plant, and find out those which matches your growing conditions.
Forget about the species and varieties that are difficult to grow and spread more.
Choose basil, rosemary, thyme, oregano, cilantro and sage if your window is exposed to at least 6 hours of direct sun. If exposure of sun is less than this, prefer parsley, lemon balm, fennel, chives, chervil and mint.
These are the all time favorite herbs and easiest to grow, if you want to grow something out of the box, do some research.
5. Windowsill Herb Garden Care
Water your plants frequently in summer, in fall and winter limit the watering needs.
You can also add hydrogel crystals in soil and do heavy mulching to preserve water if you live in tropical climate.
To improve the quality and quantity of your crop, it is essential to use fertilizer regularly. Prefer organic fertilizers that provide all the necessary nutrients while being more environmentally friendly.
You’ll need nitrogen rich fertilizers to promote more foliage growth in herbs.
6. Harvesting
The best way to encourage the production of foliage and dense growth is to harvest herbs regularly, this frequent pinching and picking up of leaves promotes lush and healthy growth of plants.
You’ll also need to deadhead flowers to stop the herbs from seeding to prolong their growing time.
In addition, to add some colors on your windowsill herb garden, you can plant annual flowers that require similar growing conditions to grow.
1
2
文章
lenny
2017年02月24日
#Growing corn in containers is possible, however the yield is less than the corn grown in a #garden . Corn requires more #space than most small or medium sized containers provide. If you’re planting corn in containers, use large pots and reproduce optimum external conditions as close as possible.Choosing Containers to Grow Corn in Pots

Choose a large container that is at least 12 inches deep and wide. You can grow about four corn plants in this size of pot. Make sure your pot have enough drainage holes in the bottom.
Varieties for Growing Corn in Containers
As you grow corn in pots, choose a dwarf variety that does not exceed 4 or 5 feet (1.2 to 1.5 m) height. Some good choices are short stemmed ‘Trinity’ and ‘Sweet Painted Mountain’.
Planting
Sow four to six seeds per pot about 1 inch (2.5 cm) deep and rake a bit of soil above them. Don’t worry if the corn is planted together closely in a pot. In fact, sowing seeds closely helps in pollination and allow the corn to fruit abundantly.
Requirements
Sweet corn needs full sun, plenty of water and fertile soil to thrive. It depends on the wind for pollination, which is best achieved when the corn is planted in a block of several short rows.
Mulch around the corn to hold in moisture. Use wood chips, newspapers or grass to help prevent moisture loss. Mulching also keeps weeds to a minimum.
Soil
Corn plants require soil that retains moisture without drying out quickly but drains well enough so it doesn’t become soggy or waterlogged. A peat based potting soil works best for them.
Water
Water the plant every other day, keeping the soil constantly moist. Water is important ingredient to get sweet and soft corns, especially at the time of fruiting you’ll need to water your potted corns more.
Fertilizer
Add fertilizer after 10 weeks from sowing. Dig a hole about 2 cm in depth and diameter around each plant. Pour 1/2 tablespoons of 5-10-10 or 10-20-20 fertilizer per plant, and incorporate the soil.
Harvesting
If you know how to grow corn in pots, you can grow your own corns without the need of lot of space, usually corns are ready to harvest between 60 to 100 days after planting, depending on the variety and weather conditions.

0
0
文章
Abigal
2017年02月23日

The garden gate is the quintessential “first impression” of any #garden , and making it special sets the tone for your outdoor #space . Why not use up-cycled materials to create a garden gate with charm, cleverness, creativity…and is a good thing for nature. (Recycling!)

We scoured Pinterest and the web for bloggers that have some great ideas for up-cycled garden gates, and anyone who is handy (or can lean on a handy loved one!) can accomplish these garden projects.
This old window makes a marvelous garden gate… Simply place posts a distance apart equal to the width of the window, add hinges and latches…

This garden gate was created from old tools. So creative! Montana Wildlife Gardener used all recycled tools for his project.
Dishfunctional Designs recently featured a great garden gate made from an old screen door… Check out your local Habitat for Humanity ReStore!

Finally, we found a bunch of great gates done out of old metal headboards… I think these might be my favorite!
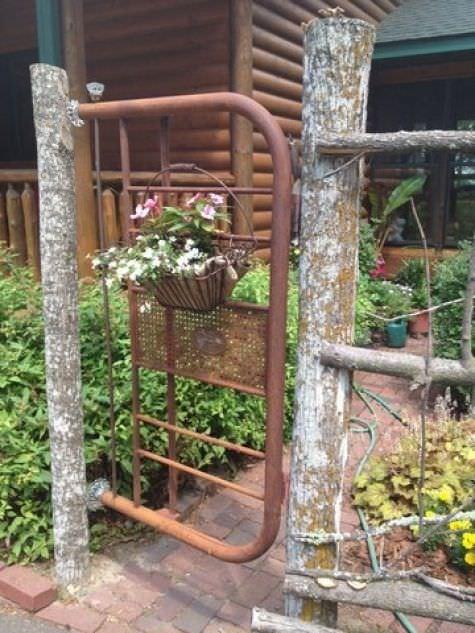

What ideas have you run across for creative up-cycled garden gates? Share!

We scoured Pinterest and the web for bloggers that have some great ideas for up-cycled garden gates, and anyone who is handy (or can lean on a handy loved one!) can accomplish these garden projects.
This old window makes a marvelous garden gate… Simply place posts a distance apart equal to the width of the window, add hinges and latches…

This garden gate was created from old tools. So creative! Montana Wildlife Gardener used all recycled tools for his project.
Dishfunctional Designs recently featured a great garden gate made from an old screen door… Check out your local Habitat for Humanity ReStore!

Finally, we found a bunch of great gates done out of old metal headboards… I think these might be my favorite!


What ideas have you run across for creative up-cycled garden gates? Share!
0
0
文章
Abigal
2017年02月23日

Terra-cotta pots are inexpensive, easy to find and most of us have one or two lying around the garden shed… so let’s use them! Whether you prefer a natural, more contemporary look for your garden, or love color, cute and fun, we have the garden pot projects for you to add some personality to your yard and garden space. Check out these inspirational photos and tutorials for #garden pot projects…

Garden Muse has a great tutorial on making a bell tower wind chime from mini pots. We might prefer to leave the pots natural, but the idea is so original!

This tiered planter from HGTV would look great on a front entry landing, and we love that it is filled with foliage plants… but you could use flowering plants as well within any color scheme. Learn how here.

This rain chain made from pots from Natalie Witt is very cool… again, we prefer the natural, but I am liking the blue as well! Tutorial here.

This clay pot wreath is easy and inexpensive, and just says, “A gardener lives here.” This would make a great gift for a gardener as well! Learn how to make this wreath.

Last, but not least, we LOVE these terra cotta pot people! You can find out how to make them here.

Or this!

Or this one!

They all use the same basic technique, what a creative and cute garden project!

Garden Muse has a great tutorial on making a bell tower wind chime from mini pots. We might prefer to leave the pots natural, but the idea is so original!

This tiered planter from HGTV would look great on a front entry landing, and we love that it is filled with foliage plants… but you could use flowering plants as well within any color scheme. Learn how here.

This rain chain made from pots from Natalie Witt is very cool… again, we prefer the natural, but I am liking the blue as well! Tutorial here.

This clay pot wreath is easy and inexpensive, and just says, “A gardener lives here.” This would make a great gift for a gardener as well! Learn how to make this wreath.

Last, but not least, we LOVE these terra cotta pot people! You can find out how to make them here.

Or this!

Or this one!

They all use the same basic technique, what a creative and cute garden project!
1
0
文章
Abigal
2017年02月21日

Many areas of the country use metal fence posts in building back yard fences to provide a strong, long lasting barrier that stands up to wind and sun rot. The only problem with that solution is that they are just, plain, ugly. Here at TGG, we have a great yard and garden, but I couldn’t stand to look out of the window each day at those ugly metal fence posts! So if you have this problem, here is the #DIY cure, step by step! (Did I forget to mention? It’s easy!)

Supplies
Wood fence boards, tall enough to cover to the top of your fence posts, and at least as wide. We used 5 ½ foot tall, six inch wide cedar fence boards.
Screw Eyes, we used #212
Flexible wire, we used 18 gauge
Tape measure or yard stick
Pencil

Step One:We are going to be creating a wire loop on the back of the wooden board, to hang over the top of the metal fence post, which will in turn cover the metal post with the wood. I suggest you read through the whole post, and check out the photos, and it will all become clear on how simple it is!
Here is an example of what the wire loop will look like when finished, to help you wrap your head around what we’re up to.

Hold your wood board in front of your metal post, and determine how close to the ground you would like it to hang. Make sure it covers the top of the ugly metal fence post. The loop will hang off of the top bracket or fence line. Measure 2 ½ inches below the spot where the wire will hang off of. Might help to have an extra hand to hold the board in place as you mark the measurements.

Step Two:Now lay out all you boards, and assembly line style, mark all your boards at that same measurement, and one inch in on both sides of the board. This is where you will insert the screw eyes. Make sure you don’t screw them so far that you poke thru the front (exposed) side of the fence board.

Step Three:Cut a 15 inch long piece of wire for each board. We used the wire cutter that came on the package of our wire, but you should be able to use scissors with this gauge pretty easily. Slip through one screw hook, bend off about 1 ½ inches and wrap it tight.

Step Four:Hold the board in place, and wrap the wire around the top of the metal post and through the other screw eye. Bend to mark, then remove the board from the post. (This is to make it easier to wind the wire). Insert the free end of the wire back through the screw eye to the bend point you marked, then twist the wire closed. You now have your wire loop.


Step Five:Hang the wire loop over the top of the fence post. You can unwind the wire from one screw eye and tighten it or loosen it if you need to adjust.

Repeat for all fence posts! If your wood boards jut too far above the top of the fence and it bothers you, feel free to trim the boards down. Just be sure to trim them all down to the same height. This likely won’t be a problem for most of us, as fence boards are pretty standard in most parts of the country.
Look at the difference!


If you live in a windy or stormy area, you can repeat the process on the lower end of the board as well and secure the bottom in the same way.
Great cure for those ugly metal fence posts, and it’s and easy and inexpensive DIY garden project. Our total?
10 cedar fence boards 17.00
3 packs of screw eyes 3.50
1 package 18 gauge wire 3.50
Grand total for our entire fence line, $24.00!
What kind of camouflage projects are you facing in your yard or garden? Comment and let us know, maybe it will be in our upcoming posts!

Supplies
Wood fence boards, tall enough to cover to the top of your fence posts, and at least as wide. We used 5 ½ foot tall, six inch wide cedar fence boards.
Screw Eyes, we used #212
Flexible wire, we used 18 gauge
Tape measure or yard stick
Pencil

Step One:We are going to be creating a wire loop on the back of the wooden board, to hang over the top of the metal fence post, which will in turn cover the metal post with the wood. I suggest you read through the whole post, and check out the photos, and it will all become clear on how simple it is!
Here is an example of what the wire loop will look like when finished, to help you wrap your head around what we’re up to.

Hold your wood board in front of your metal post, and determine how close to the ground you would like it to hang. Make sure it covers the top of the ugly metal fence post. The loop will hang off of the top bracket or fence line. Measure 2 ½ inches below the spot where the wire will hang off of. Might help to have an extra hand to hold the board in place as you mark the measurements.

Step Two:Now lay out all you boards, and assembly line style, mark all your boards at that same measurement, and one inch in on both sides of the board. This is where you will insert the screw eyes. Make sure you don’t screw them so far that you poke thru the front (exposed) side of the fence board.

Step Three:Cut a 15 inch long piece of wire for each board. We used the wire cutter that came on the package of our wire, but you should be able to use scissors with this gauge pretty easily. Slip through one screw hook, bend off about 1 ½ inches and wrap it tight.

Step Four:Hold the board in place, and wrap the wire around the top of the metal post and through the other screw eye. Bend to mark, then remove the board from the post. (This is to make it easier to wind the wire). Insert the free end of the wire back through the screw eye to the bend point you marked, then twist the wire closed. You now have your wire loop.


Step Five:Hang the wire loop over the top of the fence post. You can unwind the wire from one screw eye and tighten it or loosen it if you need to adjust.

Repeat for all fence posts! If your wood boards jut too far above the top of the fence and it bothers you, feel free to trim the boards down. Just be sure to trim them all down to the same height. This likely won’t be a problem for most of us, as fence boards are pretty standard in most parts of the country.
Look at the difference!


If you live in a windy or stormy area, you can repeat the process on the lower end of the board as well and secure the bottom in the same way.
Great cure for those ugly metal fence posts, and it’s and easy and inexpensive DIY garden project. Our total?
10 cedar fence boards 17.00
3 packs of screw eyes 3.50
1 package 18 gauge wire 3.50
Grand total for our entire fence line, $24.00!
What kind of camouflage projects are you facing in your yard or garden? Comment and let us know, maybe it will be in our upcoming posts!
0
0
文章
Andrea
2017年02月17日

If you want a great #vegetable #garden you need to use raised garden beds. Raised beds are great for growing healthy, productive vegetables and flowers and they’re easy to make.
Making a raised bed is a simple bit of carpentry that anyone should be able to do. The easiest way to buy some 2×12 lumber and screw them together in the shape of a rectangle. You can make them as long as you like but you should limit the width to 3 or 4 feet so you can easily reach in the bed to plant seeds, pull weeds or to harvest crops.
The next question you’re probably asking is what kind of wood do I use to build raised beds. The whole pressure treated vs. non issue is a complicated one. Does pressure treated wood leach chemicals into the soil? Well the answers are yes and maybe.

The old pressure treated lumber (CCA) is preserved with a process that uses arsenic. Obviously you don’t want arsenic anywhere near something you’re going to eat even in the small amounts that might be present in a raised bed vegetable garden. CCA wood isn’t too readily available anymore so you probably don’t have to worry about coming across it. The new improved pressure treated wood (ACQ) replace CCA pressure treated wood a few years ago. The lumber industry says it safer to handle and use but guess what? It eats through normal galvanized screws and fasteners. You have to use stainless steel screws with ACQ wood. I’m not an expert with lumber or chemicals but that sounds like something that shouldn’t be near my vegetables.
I think I’ll avoid all pressure treated wood until some long term studies are done.
Naturally rot resistant woods like cedar and redwood are great for building raised beds. But cedar and redwood are expensive. You could also use regular non-pressure treated lumber but just be aware that the wood will probably rot in a few years. It’s inexpensive enough that it shouldn’t be an issue.
If you plan on growing vegetables or flowers in your yard this year, why not try growing them in raised garden beds.
Making a raised bed is a simple bit of carpentry that anyone should be able to do. The easiest way to buy some 2×12 lumber and screw them together in the shape of a rectangle. You can make them as long as you like but you should limit the width to 3 or 4 feet so you can easily reach in the bed to plant seeds, pull weeds or to harvest crops.
The next question you’re probably asking is what kind of wood do I use to build raised beds. The whole pressure treated vs. non issue is a complicated one. Does pressure treated wood leach chemicals into the soil? Well the answers are yes and maybe.

The old pressure treated lumber (CCA) is preserved with a process that uses arsenic. Obviously you don’t want arsenic anywhere near something you’re going to eat even in the small amounts that might be present in a raised bed vegetable garden. CCA wood isn’t too readily available anymore so you probably don’t have to worry about coming across it. The new improved pressure treated wood (ACQ) replace CCA pressure treated wood a few years ago. The lumber industry says it safer to handle and use but guess what? It eats through normal galvanized screws and fasteners. You have to use stainless steel screws with ACQ wood. I’m not an expert with lumber or chemicals but that sounds like something that shouldn’t be near my vegetables.
I think I’ll avoid all pressure treated wood until some long term studies are done.
Naturally rot resistant woods like cedar and redwood are great for building raised beds. But cedar and redwood are expensive. You could also use regular non-pressure treated lumber but just be aware that the wood will probably rot in a few years. It’s inexpensive enough that it shouldn’t be an issue.
If you plan on growing vegetables or flowers in your yard this year, why not try growing them in raised garden beds.
0
0
文章
lenny
2017年02月16日


Herbs are for more than just making your food extra wonderful or supporting your health and vitality through tea blend infusions. Planted in strategic places in your vegetable garden, herbs repel certain kinds of insects without the use of harmful chemicals.
Try planting these herbs and flowers in your garden as preventative measures. If you get a really bad infestation, go to chemicals, but these plants can help prevent problems.
Here are a few bugs, and expert recommendations on herbs to plant for prevention.
Ants: Pennyroyal, spearmint, southernwood, tansy
Aphids: Garlic, chives and other onions, coriander, anise, nasturtium and petunia around fruit trees
Borer: garlic, onion, tansy
Cabbage moth: mint, hyssop, rosemary, southernwood, thyme, sage, celery, catnip, nasturtium
Colorado potato beetle: green beans, horseradish, dead nettle, flax, catnip, coriander, tansy, nasturtium
Cucumber beetle: tansy, radish
Cutworm: tansy
Flea beetle: wormwood, mint, catnip, interplant crops with tomato
Japanese beetle: garlic, larkspur, tansy, rue, white geranium
Leafhopper: petunia, geranium
Mexican bean beetle: marigold, potato, rosemary, savory, petunia
Mites: garlic, onion, chives
Nematodes: marigold, salvia, dahlia, calendula, asparagus
Rose chafer: geranium, petunia, onion
Slug: rosemary, wormwood
Squash bug: tansy, nasturtium, catnip
Tomato hornworm: borage, marigold, opal basil
Whitefly: nasturtium, marigold

Petunias, marigolds and geraniums can be planted in a border around the garden or trees. If you want the benefit of catnip without digging it out of your garden for years to come, put in a large clay pot and place nearby. For other pest prevention plants, thoughtful inter-planting of vegetables can help with the process.
Using herbs and flowers in this way can keep your garden “green” and prevent tears when you find your prized tomato plant cut off at the root by some nasty slug!
This article was brought to you by the friendly Tea, Herb and Spice folks at the 10000Seeds website. Show your appreciation for this newfound knowledge by browsing the unique collections of dried herbs and spices available to enhance and expand your cooking adventures. We especially recommend the Sweet Herb and Spice Adventure for an enticing change of pace!
0
0
文章
Andy
2017年02月14日

Learn how to build a herb spiral in this article. A spiral herb garden is used for growing different herbs in a small space. With it, you can make a perfect use of your vertical space in an arranged manner.The principle of spiral herb garden is simple but functional
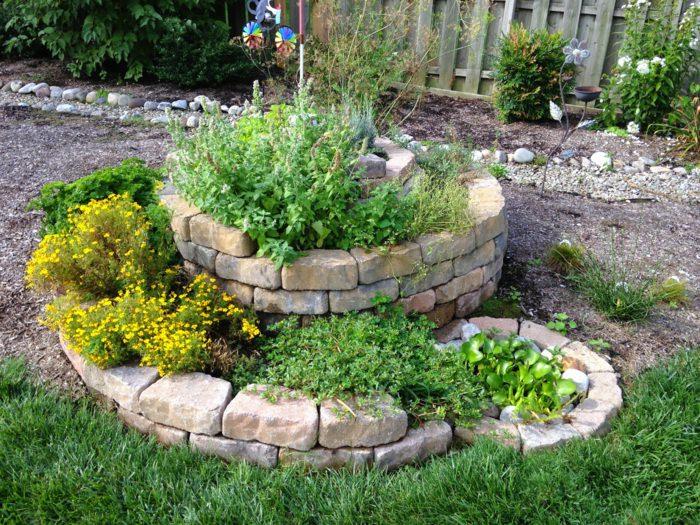
A herb spiral is basically a small herb garden. It is three-dimensional and have beds in a confined, sloppy space of spiral shape, which can be used to grow various herbs. The top area of the spiral receives the full sun and has superior drainage, therefore, herbs that like exposure to the sun and good drainage are planted there. The bottom area of the spiral is suitable to grow herbs that require moist soil and less sun.
Herb spiral has spirally upward walls that are made of natural stones or bricks. The spiral shape is enlarged in contrast to the raised bed, the bed area has sufficient space to grow herbs and there are several zones with different soil characteristics and exposure to the sun.
The walls of herb spiral store solar heat and pass it at night back to the plant. Gabion walls look very attractive and are suitable for spiral herb gardens, too. At the foot of the herb spiral you can even make a mini pond, which will retain the moisture in the lower area, or if you want, you can create a wetland where you can grow plants that love saturated soil.
Making a herb spiral is relatively cheap or almost free. It utilizes vertical space, which means you can grow more plants in small space. It also provides microclimates to different plants that mean you can grow more variety of plants. You can also make it on a concrete floor in your urban space.
How to Build a Herb Spiral
Build a herb spiral in a spot that receives at least 5 hours of sunlight daily. A sunny spot is good, but if you live in tropics choose an area that receives shade in the afternoon. You can also make herb spiral on a rooftop garden or on a large balcony or terrace.
Materials Required for a Spiral herb Garden
• Limestone and limestone rubble
• Soil
• Compost or aged manure
• Geotextile, pond liner or large container
• Gravel, crushed stones or wood chips for the driveway around the spiral
• Plants
• Working Tools: Spade, shovel, wheelbarrow, a stick, a rope and a measurement tape.
An 80-100 cm (0.8-1 m) high herb spiral should have a minimum diameter of 1.5-2 m.How to Make a Herb Spiral

1. Decide where on the ground you’ll make a herb spiral. Plant a pole exactly at the center of that area and with the help of the measurement tape and rope, make a circle with a stick and then mark it with limestone.
2. Now erode the topsoil with the help of a shovel or spade to level the spot, also remove weeds and other debris.
3. If you want to create a pond or wetland at the foot of the spiral dig the soil more deeply at that point.
4. Before you lay the stones to make the wall, cover the excavation for the future pond with pond liner and around the spiral and its path with geotextile to prevent the weeds. If you don’t want to use geotextile, lay the cardboards. You can skip this step if you want.
5. Use the larger stones for the very bottom file of the spiral wall and smaller stones for the top. Keep the top layer of stones slightly inclined towards the interior.
6. Raise the row of layered stones and spiral up to a height of about 0.80 to 1 m. Always fill in the gaps with gravel or rubble. Also, at the center of the spiral, which is deepest, you can fill half of its depth with rubble or gravel.
7. Space for the plants to grow between the spirals should be, according to the amplitude of the spiral, ideally 30 to 50 cm.
8. Add a thin layer of crushed stone, gravel, wood chips or other materials in the base of your spiral bed where you’ll grow plants to cover the gap and improve drainage. At last, fill the spiral with soil and aged manure or compost. Once done, your spiral herb garden is ready for planting.

9. In the case of very large spirals, it could be difficult to collect herbs from the center without stepping on the bed so it is a good idea to lay the stones as footholds. For stability, it is important that the stones are placed with the smooth side down, and they are arranged staggered to avoid creating continuous joints.
Herb Spiral Plans for PlantingPlan 1
Here we have provided you a plan for a small Mediterranean spiral herb garden: For this, you will need a warm and sunny place. You can easily adjust your choice of herbs according to your climate and amount of sun your herb spiral may receive.

In a herb spiral, grow all the herbs you need for everyday cooking. The top of the herb spiral is a dry spot, which is ideal for the Mediterranean herbs such as lavender, sage, rosemary, or thyme. The middle circle of the spiral inhabits herbs that like slight moisture and requires the sun to thrive– cilantro, dill, lemon balm, lemon grass or chives. In the lower side, plant herbs that tolerate evenly moist soils and some shade such as mint, basil or parsley.
Plan 2
According to the plan 2, at the time of filling the soil in your spiral herb garden, bear in mind that this should be ideally divided into the four zones, each of which fades into the next without the continuity to give a different environment to your plants.

The area which is marked as A is on top of the spiral – Here you can grow Mediterranean or tropical herbs– Fill it with a light and loamy soil with the slight amount of sand.
In the second turn of the spiral, which is marked as B – Fill it with the soil that has some clay, also add a lot of compost to lighten it.
The lowest curve of the spiral, which is C– Fill it with rich potting soil and plenty of aged manure.
If you have not made a small water pond, then last is the swampy area D– Here add nutrient-rich soil so that you can grow here the plants that love wet soils.
Herb Spiral PlantsA
Rosemary (1), lavender (2), hyssop (3), Roman chamomile (4), sage (5), Oregano (6), savory (7), thyme (8), rui or (fake curry plant) helichrysum italicum (9).
B
Rocket (10), nasturtium (11), tarragon (or tarragon) (12), cilantro (13) Bishop’s weed (14), calendula (15), Marjoram (16 ), ginger (17).
C
Lemon balm (18), parsley (can not be close to chives), Bee balm (19) dill (20), garlic (21), chervil (22), chive (23), marshmallow (24), mint (25).
D

A herb spiral is basically a small herb garden. It is three-dimensional and have beds in a confined, sloppy space of spiral shape, which can be used to grow various herbs. The top area of the spiral receives the full sun and has superior drainage, therefore, herbs that like exposure to the sun and good drainage are planted there. The bottom area of the spiral is suitable to grow herbs that require moist soil and less sun.
Herb spiral has spirally upward walls that are made of natural stones or bricks. The spiral shape is enlarged in contrast to the raised bed, the bed area has sufficient space to grow herbs and there are several zones with different soil characteristics and exposure to the sun.
The walls of herb spiral store solar heat and pass it at night back to the plant. Gabion walls look very attractive and are suitable for spiral herb gardens, too. At the foot of the herb spiral you can even make a mini pond, which will retain the moisture in the lower area, or if you want, you can create a wetland where you can grow plants that love saturated soil.
Making a herb spiral is relatively cheap or almost free. It utilizes vertical space, which means you can grow more plants in small space. It also provides microclimates to different plants that mean you can grow more variety of plants. You can also make it on a concrete floor in your urban space.
How to Build a Herb Spiral

Build a herb spiral in a spot that receives at least 5 hours of sunlight daily. A sunny spot is good, but if you live in tropics choose an area that receives shade in the afternoon. You can also make herb spiral on a rooftop garden or on a large balcony or terrace.
Materials Required for a Spiral herb Garden
• Limestone and limestone rubble
• Soil
• Compost or aged manure
• Geotextile, pond liner or large container
• Gravel, crushed stones or wood chips for the driveway around the spiral
• Plants
• Working Tools: Spade, shovel, wheelbarrow, a stick, a rope and a measurement tape.
An 80-100 cm (0.8-1 m) high herb spiral should have a minimum diameter of 1.5-2 m.How to Make a Herb Spiral

1. Decide where on the ground you’ll make a herb spiral. Plant a pole exactly at the center of that area and with the help of the measurement tape and rope, make a circle with a stick and then mark it with limestone.
2. Now erode the topsoil with the help of a shovel or spade to level the spot, also remove weeds and other debris.
3. If you want to create a pond or wetland at the foot of the spiral dig the soil more deeply at that point.
4. Before you lay the stones to make the wall, cover the excavation for the future pond with pond liner and around the spiral and its path with geotextile to prevent the weeds. If you don’t want to use geotextile, lay the cardboards. You can skip this step if you want.
5. Use the larger stones for the very bottom file of the spiral wall and smaller stones for the top. Keep the top layer of stones slightly inclined towards the interior.
6. Raise the row of layered stones and spiral up to a height of about 0.80 to 1 m. Always fill in the gaps with gravel or rubble. Also, at the center of the spiral, which is deepest, you can fill half of its depth with rubble or gravel.
7. Space for the plants to grow between the spirals should be, according to the amplitude of the spiral, ideally 30 to 50 cm.
8. Add a thin layer of crushed stone, gravel, wood chips or other materials in the base of your spiral bed where you’ll grow plants to cover the gap and improve drainage. At last, fill the spiral with soil and aged manure or compost. Once done, your spiral herb garden is ready for planting.

9. In the case of very large spirals, it could be difficult to collect herbs from the center without stepping on the bed so it is a good idea to lay the stones as footholds. For stability, it is important that the stones are placed with the smooth side down, and they are arranged staggered to avoid creating continuous joints.
Herb Spiral Plans for PlantingPlan 1
Here we have provided you a plan for a small Mediterranean spiral herb garden: For this, you will need a warm and sunny place. You can easily adjust your choice of herbs according to your climate and amount of sun your herb spiral may receive.

In a herb spiral, grow all the herbs you need for everyday cooking. The top of the herb spiral is a dry spot, which is ideal for the Mediterranean herbs such as lavender, sage, rosemary, or thyme. The middle circle of the spiral inhabits herbs that like slight moisture and requires the sun to thrive– cilantro, dill, lemon balm, lemon grass or chives. In the lower side, plant herbs that tolerate evenly moist soils and some shade such as mint, basil or parsley.
Plan 2
According to the plan 2, at the time of filling the soil in your spiral herb garden, bear in mind that this should be ideally divided into the four zones, each of which fades into the next without the continuity to give a different environment to your plants.

The area which is marked as A is on top of the spiral – Here you can grow Mediterranean or tropical herbs– Fill it with a light and loamy soil with the slight amount of sand.
In the second turn of the spiral, which is marked as B – Fill it with the soil that has some clay, also add a lot of compost to lighten it.
The lowest curve of the spiral, which is C– Fill it with rich potting soil and plenty of aged manure.
If you have not made a small water pond, then last is the swampy area D– Here add nutrient-rich soil so that you can grow here the plants that love wet soils.
Herb Spiral PlantsA
Rosemary (1), lavender (2), hyssop (3), Roman chamomile (4), sage (5), Oregano (6), savory (7), thyme (8), rui or (fake curry plant) helichrysum italicum (9).
B
Rocket (10), nasturtium (11), tarragon (or tarragon) (12), cilantro (13) Bishop’s weed (14), calendula (15), Marjoram (16 ), ginger (17).
C
Lemon balm (18), parsley (can not be close to chives), Bee balm (19) dill (20), garlic (21), chervil (22), chive (23), marshmallow (24), mint (25).
D
3
1


