文章
小马奥
2017年05月23日

Instead of having a dull and deserted balcony, use it to create a Balcony Kitchen Garden where you can grow fresh organic food. Read on!
Instead of having a dull and deserted balcony where you usually keep your trash or old, unused items; chairs with faded color, brooms or vacuum cleaner you can use it to create a tiny balcony KITCHEN garden. Which, when the time come will reward you with the HARVEST of aromatic herbs, fresh and organic vegetables, and juicy plump fruits with great flavor that you can never get from store bought edibles!

Time, effort and planning are required
You’ll need to dedicate some time from your busy urban life to look after the plants you’ve chosen to grow. Since you’re not growing a real garden– 15 minutes a day would be enough for the most basic tasks like watering, pinching, pruning, and deadheading the fading flowers.
Minimal effort and the maximum result– for this you’ll need to be consistent! The right amount of watering, avoiding both the overwatering and underwatering, fertilizing plants on time, pruning, transplanting must be done as per scheduled.
Planning is the most crucial part here. You have limited space and that’s the real challenge– How to utilize every inch of space and improve the productivity of crops. Also, choosing the right kind of plants and varieties according to your climate is required.
Take help of vertical gardening to create space

Opt for vertical gardening ideas and you’ll be able to double up the planting space. Not only the simple pots, on your balcony– install railing planters, wall planters, add some stack planters and hang a few hanging baskets to create space. Grow more climbers, vines, and plants that grow vertically. You can also place plant stand like one in the picture above or else DIY a ladder shelf or planter which will provide you more area to arrange your pots.
A few basic requirements and tips before you start
These are really basic needs and you might already know about them. For example, use a soilless potting medium as this is light, doesn’t thwart the drainage, and permeable. Take a look at the direction and amount of sunlight you receive in your balcony. For a kitchen garden, it should receive at least 6-7 hours of direct sunlight. However, if you live in tropics most of the plants will thrive in fewer hours of sunlight too. Always apply organic fertilizers and use large pots instead of smaller ones for the plants like tomatoes, peppers, and lemon tree.
Also Read: Plants for North and South Facing Balcony
Start with herbs

If you’re new to edible gardening, start with herbs! They are the easiest plants to grow and you can grow them anywhere (unless they are not receiving a few hours of sunlight). See balcony herb garden ideas for inspiration. Choose your favorite herbs according to the growing conditions and climate. Sow the seeds or bought a few plants from your nearby nursery. Chive, mint, thyme, basil, oregano, parsley, cilantro, whichever you like. Don’t forget to check out our list on easy to grow herbs!
Also Read: How to Start a Balcony Herb Garden
Growing fruits is possible too

Not only the herbs and vegetables, growing fruit trees in containers is possible, even in a limited space like a balcony! Lemon tree, strawberries, apple, pomegranate or watermelon if you like. The list of the fruiting plants and trees is big. You can read more about this in detail in our article.
Vegetables you can grow
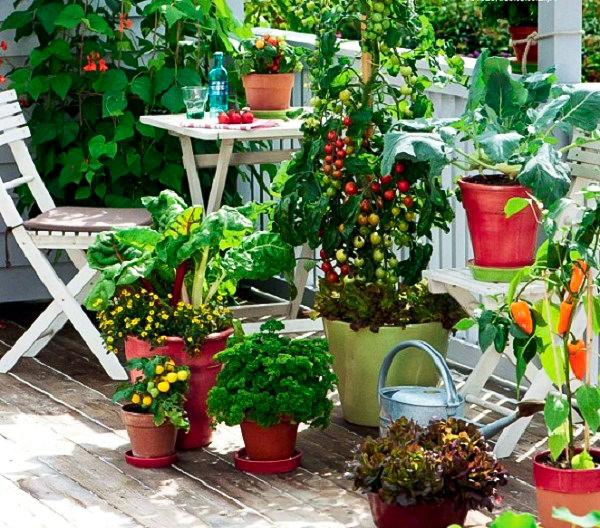
You can grow almost any vegetable plant on your balcony kitchen garden (if growing conditions are appropriate). For bigger plants like zucchini, tomatoes, eggplants, cucumbers or other fruit vegetables like peppers, okras, and beans– choose pots that are large and at least 30-40 cm deep. Herbs, leafy vegetables, salad greens, radishes, and carrots can be planted in wide shallow pots that are
15 to 20 cm deep. Cherry tomatoes, green onions, spinach, beans, and lettuces can be very productive there as they don’t need a lot of space.
Also Read: Growing Tomatoes in Hanging Baskets
Vegetable and herbs according to sunlight requirementsLow sun (minimum 4-6 hours)CeleryParsleyMintCilantroLettuceSalad greensSpinachGreen onions, onionsAsian greensGingerPeasRadishes and Carrots
Also Read: How to Start a Salad Garden
Sunny (More than 6 hours)BasilSageThymeDillChivesTomatoesPeppers and ChiliesEggplantOkraCucumberMelon and GourdsBeside these you can also grow plants like lavender, marigold, nasturtiums in your Balcony kitchen garden!
Instead of having a dull and deserted balcony where you usually keep your trash or old, unused items; chairs with faded color, brooms or vacuum cleaner you can use it to create a tiny balcony KITCHEN garden. Which, when the time come will reward you with the HARVEST of aromatic herbs, fresh and organic vegetables, and juicy plump fruits with great flavor that you can never get from store bought edibles!

Time, effort and planning are required
You’ll need to dedicate some time from your busy urban life to look after the plants you’ve chosen to grow. Since you’re not growing a real garden– 15 minutes a day would be enough for the most basic tasks like watering, pinching, pruning, and deadheading the fading flowers.
Minimal effort and the maximum result– for this you’ll need to be consistent! The right amount of watering, avoiding both the overwatering and underwatering, fertilizing plants on time, pruning, transplanting must be done as per scheduled.
Planning is the most crucial part here. You have limited space and that’s the real challenge– How to utilize every inch of space and improve the productivity of crops. Also, choosing the right kind of plants and varieties according to your climate is required.
Take help of vertical gardening to create space

Opt for vertical gardening ideas and you’ll be able to double up the planting space. Not only the simple pots, on your balcony– install railing planters, wall planters, add some stack planters and hang a few hanging baskets to create space. Grow more climbers, vines, and plants that grow vertically. You can also place plant stand like one in the picture above or else DIY a ladder shelf or planter which will provide you more area to arrange your pots.
A few basic requirements and tips before you start
These are really basic needs and you might already know about them. For example, use a soilless potting medium as this is light, doesn’t thwart the drainage, and permeable. Take a look at the direction and amount of sunlight you receive in your balcony. For a kitchen garden, it should receive at least 6-7 hours of direct sunlight. However, if you live in tropics most of the plants will thrive in fewer hours of sunlight too. Always apply organic fertilizers and use large pots instead of smaller ones for the plants like tomatoes, peppers, and lemon tree.
Also Read: Plants for North and South Facing Balcony
Start with herbs

If you’re new to edible gardening, start with herbs! They are the easiest plants to grow and you can grow them anywhere (unless they are not receiving a few hours of sunlight). See balcony herb garden ideas for inspiration. Choose your favorite herbs according to the growing conditions and climate. Sow the seeds or bought a few plants from your nearby nursery. Chive, mint, thyme, basil, oregano, parsley, cilantro, whichever you like. Don’t forget to check out our list on easy to grow herbs!
Also Read: How to Start a Balcony Herb Garden
Growing fruits is possible too

Not only the herbs and vegetables, growing fruit trees in containers is possible, even in a limited space like a balcony! Lemon tree, strawberries, apple, pomegranate or watermelon if you like. The list of the fruiting plants and trees is big. You can read more about this in detail in our article.
Vegetables you can grow

You can grow almost any vegetable plant on your balcony kitchen garden (if growing conditions are appropriate). For bigger plants like zucchini, tomatoes, eggplants, cucumbers or other fruit vegetables like peppers, okras, and beans– choose pots that are large and at least 30-40 cm deep. Herbs, leafy vegetables, salad greens, radishes, and carrots can be planted in wide shallow pots that are
15 to 20 cm deep. Cherry tomatoes, green onions, spinach, beans, and lettuces can be very productive there as they don’t need a lot of space.
Also Read: Growing Tomatoes in Hanging Baskets
Vegetable and herbs according to sunlight requirementsLow sun (minimum 4-6 hours)CeleryParsleyMintCilantroLettuceSalad greensSpinachGreen onions, onionsAsian greensGingerPeasRadishes and Carrots
Also Read: How to Start a Salad Garden
Sunny (More than 6 hours)BasilSageThymeDillChivesTomatoesPeppers and ChiliesEggplantOkraCucumberMelon and GourdsBeside these you can also grow plants like lavender, marigold, nasturtiums in your Balcony kitchen garden!
0
0
文章
粉团
2017年05月23日

If you’re looking for an easy and most amazing way to transform your garden then use garden Pebbles!

Are you looking for a quick option to transform your garden and make it beautiful and attractive for visitors? If yes, then garden pebbles are the best options that you can opt for. One of the most important things about these is that regardless of what you do, your garden will always look remarkably beautiful and pleasant.
In the market, you can find varied, affordable and colorful garden pebbles. And there are many eye-catching and creative ways out there to use them. The best part is that these are very easy to maintain. For taking it to a whole new level and to increase the appeal of your garden and landscaping, you can opt for river rocks.
Why You Should Use Garden Pebbles
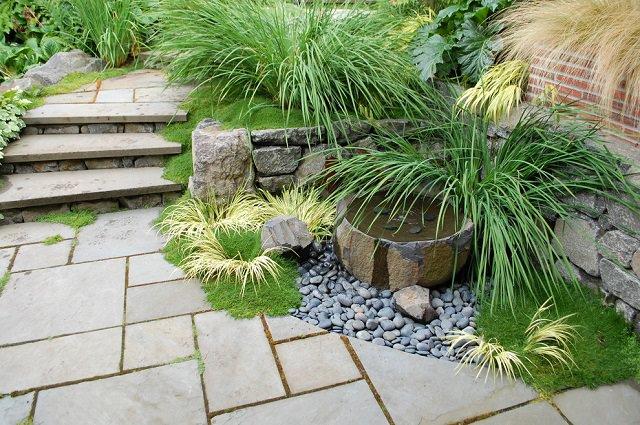
These are pleasant to look at and add a wide range of natural colors to the garden, thus, making your garden look more natural. It helps to maintain the original look and enhances the beauty of your garden. Some of the more notable benefits are:
These pebbles or stones are durable and can withstand almost any level of natural temperature. They are also effective for areas around the stove or fireplace as these are natural stones and resistant to most natural elements.You can also use them for mulching and if you have a container garden pebbles can make your container plants look better.The surfaces of the garden pebbles are flush and these are very safe to walk on. These stones offer more traction and as a result, slipping is out of the question with these stones in place.These stones can be used on dry surfaces such as on a plain landscape and also wet surfaces like a garden floor, swimming pool and portions of your deck.Useful Advice on Grouting Pebbles
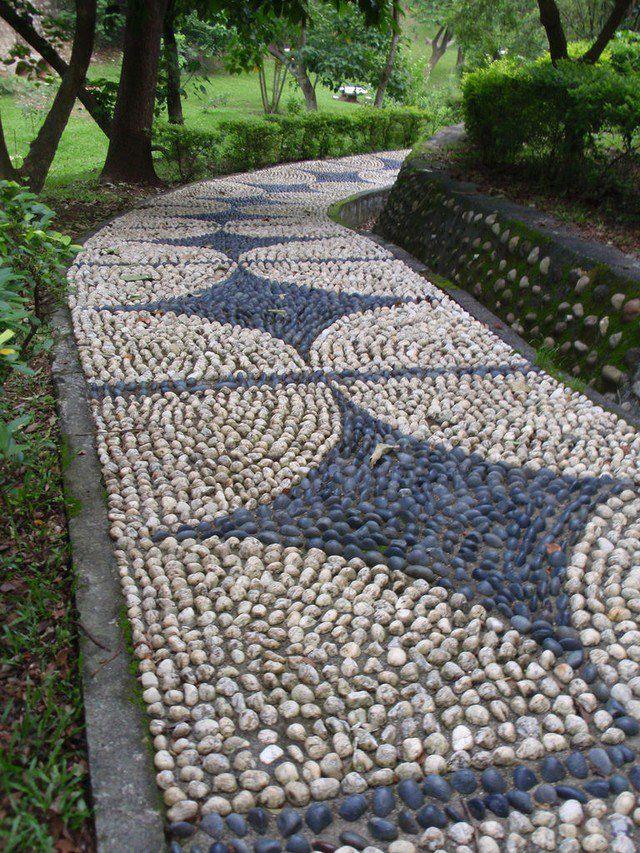
When you prepare the grout for placing the garden pebbles make sure that you avoid putting too much of water because adding a lot of water can result in a weak grout that can flake in later stages.In order to appreciate the beauty of these naturally attractive stones, you need to remove the excess grout with the help of a wet sponge. This is important because in order to make the setting beautiful you want to show as much stone as possible.In order to maintain the beauty of these natural stones, you need to make sure to apply sealant every 2-3 years so that the beauty can be prolonged.
Installing or using garden pebbles in your property all by yourself is a fun and creative activity. However, you need to make sure that you follow a proper procedure that will help to get everything done in the right way. If you are not good with working on grout and don’t have many creative ideas then it is best to call the professionals to help you in this regard.
Get Affordable Rates

There are a lot of things that you can buy to get your garden pebbles installed and there are many sellers available in the market. However, you need to make sure that you only buy from affordable sellers and get the best deals in this regard. Since there are multitudes of sellers in the market there is a lot of competition; and as a result, you can get attractive garden pebbles at the most affordable rates.
So, make sure that you compare all your options and then decide on the one that is most suitable for your needs. Get the help of the internet to understand the various possibilities that you have with these stones.

Are you looking for a quick option to transform your garden and make it beautiful and attractive for visitors? If yes, then garden pebbles are the best options that you can opt for. One of the most important things about these is that regardless of what you do, your garden will always look remarkably beautiful and pleasant.
In the market, you can find varied, affordable and colorful garden pebbles. And there are many eye-catching and creative ways out there to use them. The best part is that these are very easy to maintain. For taking it to a whole new level and to increase the appeal of your garden and landscaping, you can opt for river rocks.
Why You Should Use Garden Pebbles

These are pleasant to look at and add a wide range of natural colors to the garden, thus, making your garden look more natural. It helps to maintain the original look and enhances the beauty of your garden. Some of the more notable benefits are:
These pebbles or stones are durable and can withstand almost any level of natural temperature. They are also effective for areas around the stove or fireplace as these are natural stones and resistant to most natural elements.You can also use them for mulching and if you have a container garden pebbles can make your container plants look better.The surfaces of the garden pebbles are flush and these are very safe to walk on. These stones offer more traction and as a result, slipping is out of the question with these stones in place.These stones can be used on dry surfaces such as on a plain landscape and also wet surfaces like a garden floor, swimming pool and portions of your deck.Useful Advice on Grouting Pebbles

When you prepare the grout for placing the garden pebbles make sure that you avoid putting too much of water because adding a lot of water can result in a weak grout that can flake in later stages.In order to appreciate the beauty of these naturally attractive stones, you need to remove the excess grout with the help of a wet sponge. This is important because in order to make the setting beautiful you want to show as much stone as possible.In order to maintain the beauty of these natural stones, you need to make sure to apply sealant every 2-3 years so that the beauty can be prolonged.
Installing or using garden pebbles in your property all by yourself is a fun and creative activity. However, you need to make sure that you follow a proper procedure that will help to get everything done in the right way. If you are not good with working on grout and don’t have many creative ideas then it is best to call the professionals to help you in this regard.
Get Affordable Rates

There are a lot of things that you can buy to get your garden pebbles installed and there are many sellers available in the market. However, you need to make sure that you only buy from affordable sellers and get the best deals in this regard. Since there are multitudes of sellers in the market there is a lot of competition; and as a result, you can get attractive garden pebbles at the most affordable rates.
So, make sure that you compare all your options and then decide on the one that is most suitable for your needs. Get the help of the internet to understand the various possibilities that you have with these stones.
3
2
文章
Gina
2017年05月23日

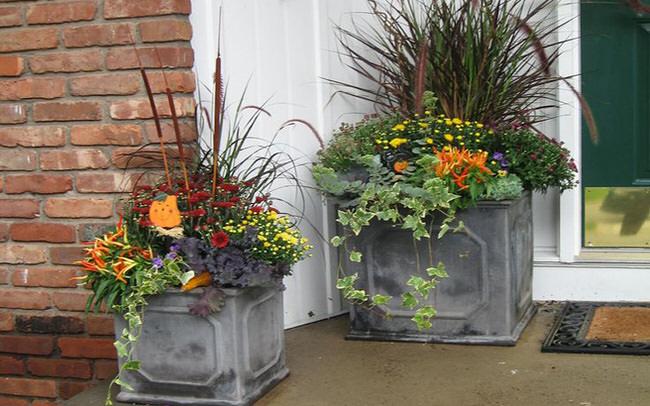
The growing session isn’t over just because summer is winding down… one of the best ways to keep your garden space vibrant is to use fall containers. And most of you who have been reading TGG awhile know that I like to do things just a little different from the crowd, so our choices here are not the average pot o’ mums! So with inspiring combinations and plant suggestions, let’s let the photos (ok, and a few suggestions from us!) do the talking! Fabulous fall containers!
First, some tips…
1. Use grasses. Height, texture, movement… and they look great all winter. (Before you ask, this one is ‘Pennisetum’ “Fireworks”.)

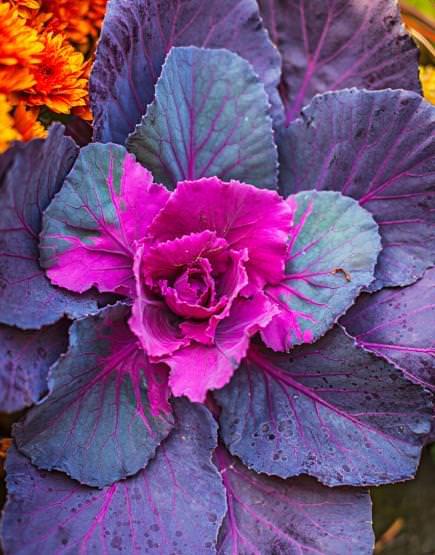
2. Use Kale. Pretty! And, it lasts right through frost, and even snow! Look for larger, colorful varieties at your nursery. Don’t buy the 4 inch pots from the grocery store nursery section. Big difference.
3. Use something other than plants to take it out of the “snooze” zone. An unusual container, adding pumpkins or squash to the container, using branches or other natural items as “accessories”… This also allows you to buy far fewer plants by filling space with other things of interest.
4. Don’t stop watering/ fertilizing…
5. Pack ’em in tight, because they won’t have a long, warm season of fast growth to fill in.Now, on with the inspiration!
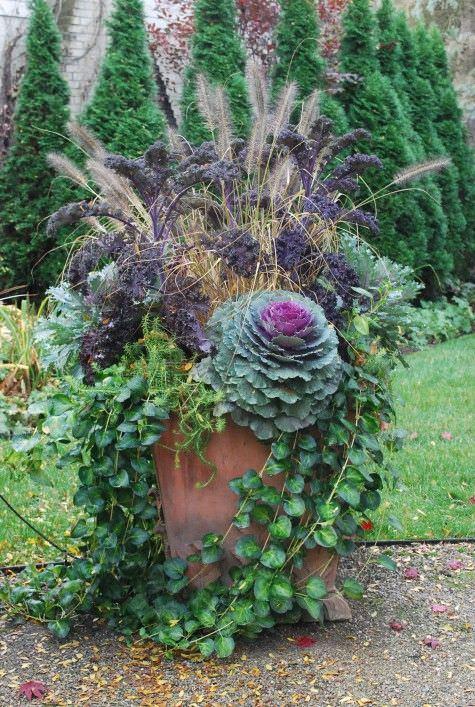
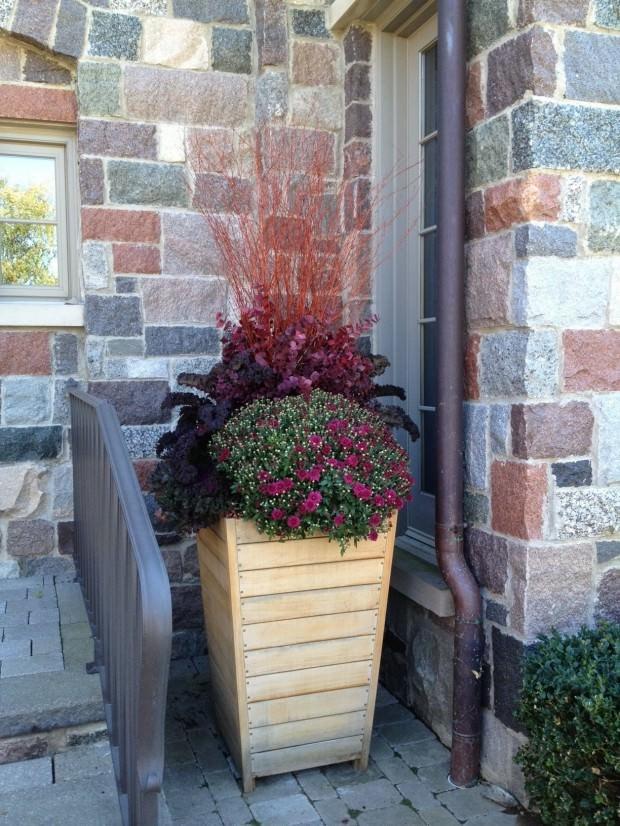
From landscape designer Deborah Silver, and her blog ‘Dirt Simple‘, these two fall containers epitomize the use of grasses, kale and unusual containers… Check out her blog, they do amazing work! A bunch of inspiring photos!

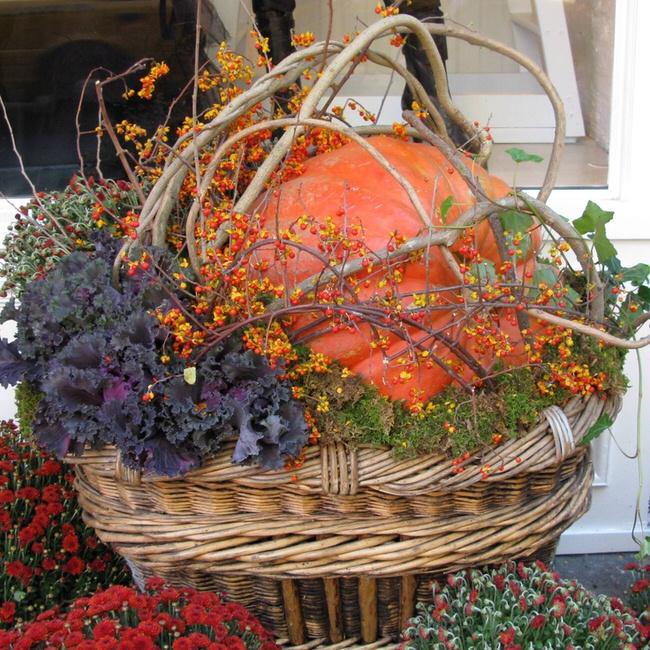
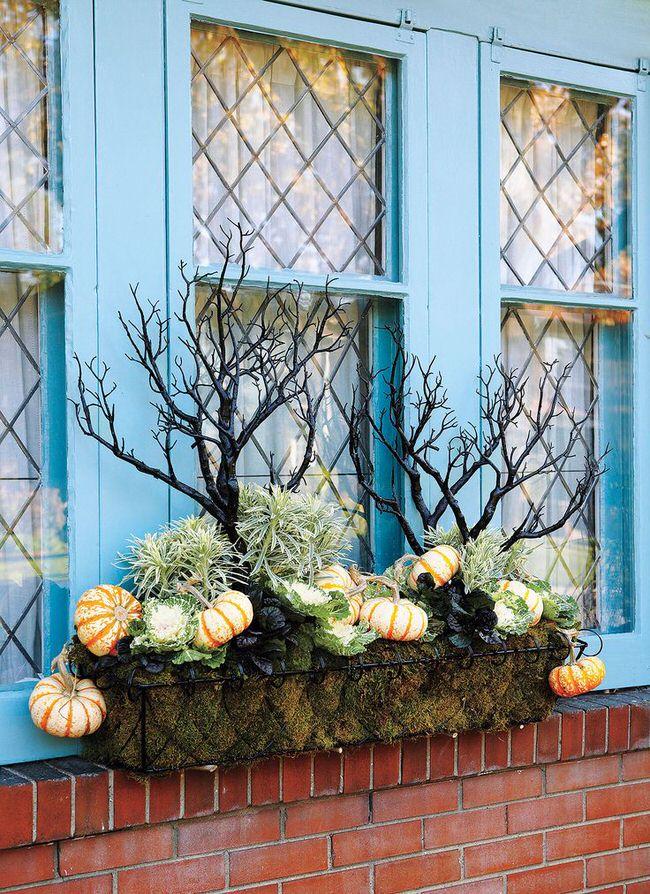
From ‘VSF, New York‘, this florist created basket container is the coolest thing around. Branches, moss and a pumpkin keep company with Kale and Mums… anything but ordinary!
From ‘BHG’, three plants, simple container, easy to duplicate!
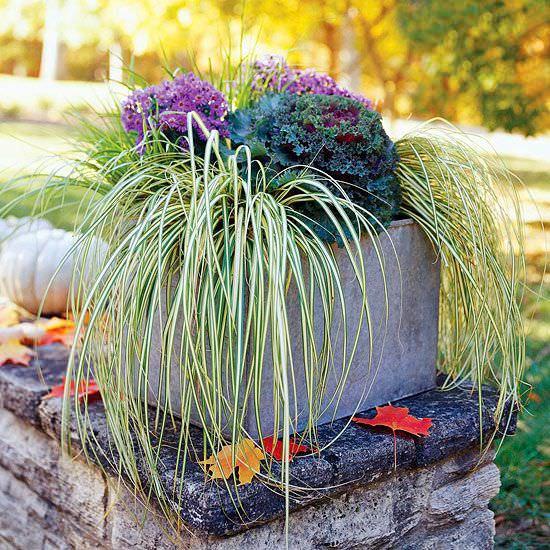
Lucy at ‘Craftberry Bush‘ did an amazing job on her fall front porch! Check out her use of grasses, containers, Kale and pumpkins… Really professional job!
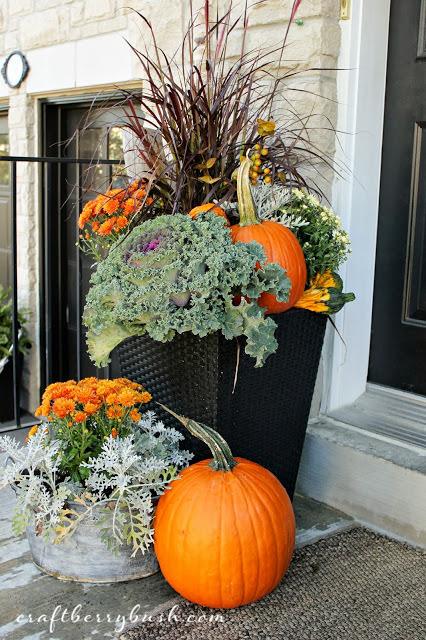
Another simple design, by ‘Midwest Living’…
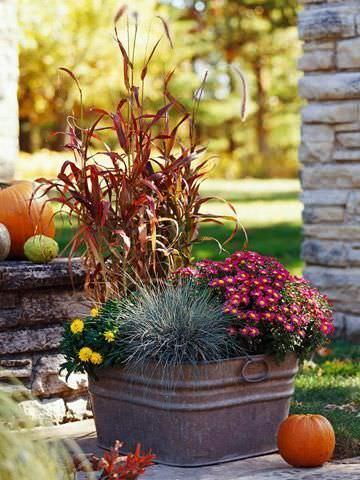
From ‘Canadian Gardening‘, this unusual fall window box has my vote for one of a kind! Love the eerie branches!
Use a “Flower Tower” planter, (or DIY one from this video by Home Depot) to grow Kale! Creative!
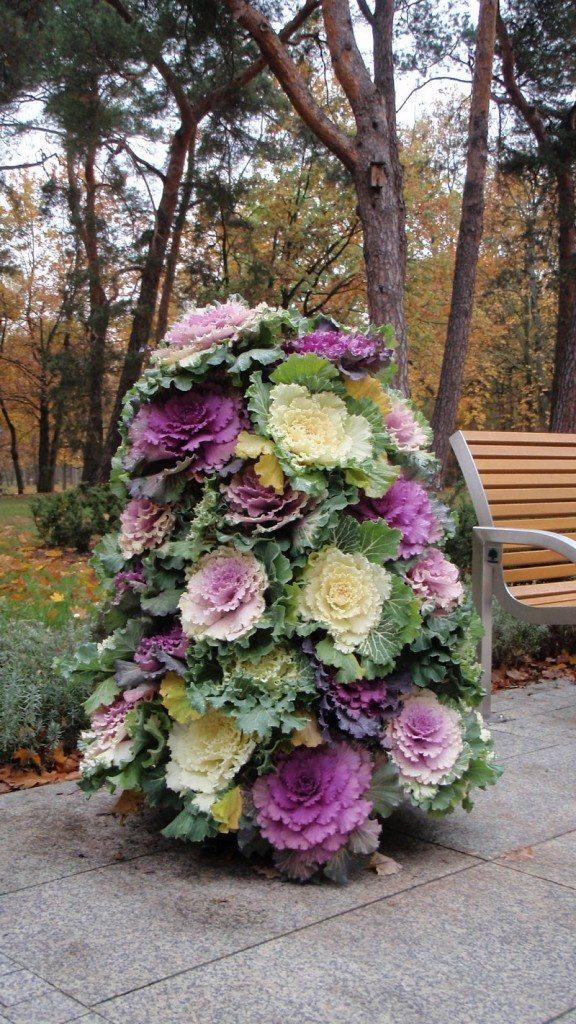
This homeowner used a tall branch to add height and substance, one licorice plant, and a pumpkin… Love the simpleness, yet so interesting!
Finally, from ‘Pocket Full of Posies Design‘, this planting uses unusual containers to make this mum and grasses front door container really wow.
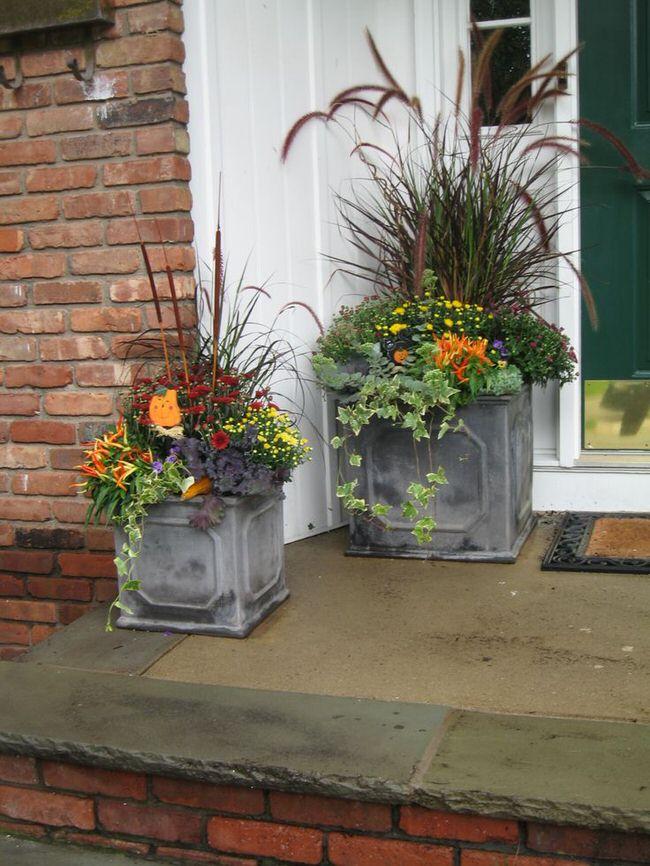
1
0
文章
Hande Salcan
2017年05月23日


I never like to use the word “chores” (ick!) when it comes to gardening, but let’s face it…there are a few things we need to do each season to keep our garden healthy and productive. Frankly, the fall prep can be a little tough for me…after all, it can be hard to see how it will affect your garden months down the road. (Even when you know better ’cause you read all my good advice. :) But spring prep, now that’s a diff story. You get to see the results of your efforts quickly, and besides, the first stirrings of spring is enough to prod you along to get these (not chores) done. And I don’t know about you, but after this winter, I’d do anything to get outside, even prep! (Again, not chores.) So here is your spring garden prep checklist that you can start working on as the snow melts (and it will!) and the temperatures warm!
1. Pull out the toolbox, cause it’s time to repair! Before you are kept busy pulling weeds, planting and designing, and harvesting veggies, make sure anything that has been put aside for repairs gets fixed. Stepping stones heaved from the ground? Time to lay them back in flush with the ground. Solar path lights not working? Repair or replace!
2. Time to cut it all back. Perennials and some shrubs need to have all the old dead growth cut back in early spring, to allow them to regrow with plenty of light and air circulation. (Also, it’s prettier!) If you haven’t cut back your ornamental grasses and rose bushes, the sooner the better.
3. Clean it up! Scrub out containers to get them ready for new designs this spring and summer, any tools that missed your fall prep need to be cleaned and possibly oiled, birdhouses, ponds and fountains all need a good cleaning out and checking over. If your spring bulbs are covered with a mash of fall leaves, clean them up so they won’t rot underneath.
4. Plant bare root roses and trees and shrubs. This is a great time to get good deals on bare root plants… get them in the ground before the weather warms too much. Tip: Make sure you already know where the plant is going to go when you bring it home… Bare root plants are great until they break dormancy, then you better hope they are in the ground already! It’s really easy to set a new rose bush or two aside until you decide where to put them, only to find them dried out and stunted because they broke dormancy without the benefit of soil and water.

5. If you have some perennials that were crowded last season, or you just want to create more plants, now is the time to divide those perennials.
6. Check for watering needs. If you have had a dry winter, make sure you give all your plants a good long drink to help them wake up to spring. In mid-late spring you can begin your fertilizing schedule.
7. Now the fun part…plant something! Early spring veggies, pansies and primroses, and new perennials are prime for planting in spring. Make sure after all the (not chores) you reward yourself by doing the one thing you’ve been waiting to do all winter…get your hands in the soil, and nurture a living plant (or five)!
Was that so hard? And besides, it got you out in the garden! I know, I say that a lot. :)
2
3
文章
Micky
2017年05月23日


The holidays are finally here, and what better way to greet your holiday guests than with a creative holiday front porch display? Even if you don’t have much time to decorate for the holidays indoors, you can use these quick and inexpensive ideas to add a personal touch to the front porch in a flash!
Door Candy
I love to hang a holiday wreath each year, but since its the first point visitors see of my home, I try to make it special. Easy ways to add a creative touch to your holiday doorway, without breaking the budget?
Hang an old picture frame painted in your holiday color scheme instead of a wreath. Inside the frame hang a cool element that reflects your personality. Ideas? Ice skates, colorful shatterproof ornaments, mittens, wooden letters representing your last name, toy car or train, a bunch of holly tied with ribbon…the possibilities are endless. See how they did this one – from A vegas Girl At Heart.

Create a nature wreath with a wreath base, a glue gun, and mosses, pine cones and a little bit of sparkle. Make it simple and modern, or ornate and traditional. Top it off by tying a large Christmas ribbon off center at the top. Tip: A wreath base can be anything from a store bought wreath, to a piece of old plywood, all the way down to sturdy cardboard. Make sure your wreath has some protection for t he weather.

Check out the tutorial for this super easy wreath from The Creek Line House.

Instead of a wreath this year, how about creating cute holiday signs to hang on the front door? All is takes is a blank wooden template from the craft store, or even a scrap piece of wood. The more age, the better. Use stencils or stamps, and welcome Santa (and everyone else!) with style! Some catchy phrases for your sign? Keep it simple and use “Believe”, “Joy”, or “Let It Snow”. Be cute with “Santa, Define Good…” or “Baby It’s Cold Outside”, or choose something more spiritual to reflect your family.

Here’s the tutorial for this sign from our friends at Love Of Family And Home.

Pot up Some Holiday
Create an easy holiday planter or flower pot for your front porch decorating. Think in layers, like a cake. Make a base inside your container with stones or rock to secure your arrangement. Now using evergreen branches, “plant” them in the pot. Leave a clear spot in the center of the container to pile shatterproof ball ornaments. (This is the “cake” filling). I use a glue gun to secure them to each other to make them more stable. Now add some long bare branches into the arrangement for height and texture. Tie on a ribbon if you like. Easy, fast, stylish and best of all, you can collect most of the items for the planter in your yard or neighborhood! Kim at ‘Kim Power Style‘ made this charming little Christmas bucket using battery operated lights & large pine cones. Love those birch logs!
Wrap up some empty cardboard boxes like gifts, and pile them by the front door, on a bench, or in an entry. Pick up the gift wrap and the ribbon at the dollar shop, and it’s a frugal way to make fun and festive holiday impact! Or go all out and create these amazing DIY outdoor lighted gift boxes! DIY Vintage Chic tells you how to do it.

Use craft foam and scissors to cut out stars or another holiday shape, and attach like wall paper to your front door or entry. Poster putty is a great temporary adhesive that doesn’t not leave any damage or marks on your door or siding.
Watch Your Step!
Finally don’t forget your front door mat. After all, this time of year, it gets a lot of use, and a lot of attention. Use craft paints and inexpensive mats from the home improvement store to make a custom door entry perfect for your family. You can stencil directly on them with a stiff brush, or use a pre-made stamp. Snowflakes, anyone? We love this one from the Lisa Leonard Blog. Here’s the tutorial.

Use these creative ways to decorate your front porch for the holidays, and share your love of this season with your neighbors, friends and family!
0
0
文章
扭扭
2017年05月23日

Learn growing tomatoes in hanging basket if you have a balcony garden, this way they’ll not take much space.

Tomatoes require lot of space to grow and if you have a small garden, growing them in hanging basket is an apt way to use vertical space, plus they adapt easily unlike other vegetables.
Juicy, plump, small, big, round and colorful tomatoes are one of the most favorite crops, whether you have a garden or not you can grow them in hanging baskets.
Growing Tomatoes in Hanging Baskets
Your success in growing tomatoes depends on three factors— yours choosing right variety, basket and providing it appropriate conditions, if you satisfy all of the three, you’ll get rich home grown tomatoes in harvesting season.
Choosing Right Tomato Variety
You can’t grow regular tomato plants. Varieties of cherry tomatoes do well in hanging baskets— ‘hundreds and thousands’ (UK variety) is highly productive and its mini tomatoes taste great, plant grows bush like and spread well. Other varieties like Tumbling Tom (both red and yellow) provides classic tomato taste and most recommended, whereas deep red Maskotka gives juicy flavor and fruit heavily.
Choosing a Basket
Take a *deep basket of diameter 12” as these varieties don’t need bigger pots. Line your basket with plastic or coconut fiber liners. However, it’s better to line it with plastic. For this, make some drainage holes in plastic and place it inside the basket, make sure to spread it properly. As hanging baskets dry out quickly, lining them helps to keep the moisture in soil.
Check out this self watering hanging basket on amazon. Its unique wick system draws the moisture up into the soil, allowing the plant to feed at its’ own rate. The best thing is, it is of only $14.7.
1
0
文章
lenny
2017年05月23日
If you want to create a garden on terrace or you already own one, inspire yourself with these 21 ‘Beautiful Terrace Garden Images’.
To make a beautiful terrace garden, arrange everything neatly, do not use more than 3-5 colors on your terrace. Plan everything on paper, determine a theme and the ambiance you would like to create there and work accordingly.
1.
Create an alluring container garden on terrace, grow flowers to embellish it. Most of the terraces are sunny and flowers are easy to grow. Make a lovely flower garden with combination of both perennials and annuals equally.
2.
If you want to create a serene and calm garden on terrace, use colors like blue, green, indigo, pink and white instead of bright colors.
3.
Grow lot of vines and dwarf trees near the walls. These will use your vertical space efficiently.
4.
Create a low maintenance garden on terrace, if you are unable to do lot of care. Read these low maintenance garden tips.
5.
If you want to make a lush green garden, grow lot of dwarf conifers and ferns on your terrace. These will give an elegant look with wooden deck and furniture.
6.
This garden on terrace is simple yet good looking, not so many colors and accessories are used.
7.
Excellent use of old tires you can see here, these planters are made after doing some DIY hacks. See these DIY tire ideas for more.
8.
Both lavender and allium (ornamental onion) love sunny spot and well drained soil, growing them on terrace is easy too.
9.
Floor plays an essential role in creating a beautiful terrace garden. You can also use pebbles to add an extra element.
10.
Making a lawn on terrace is possible too. You’ll have your best seating place above your urban dwelling, if you’ll create a terrace lawn.
11.
Create a cottage garden like setup, wild and overgrown terrace garden that will give you peace of mind. In the garden you can white nicotianas are grown for scent and lavender in other corner with lot of perennials capturing the eyes. You can see more about this on Gardenista.
12.
What’s not you can do on your terrace? Make a water garden, if you love to grow aquatic plants.
13.
If you have a north or east facing terrace, you do not receive full sun. In that case grow plants that grows well in partial sun. Ferns, Ivies, violets and pansies are good choice for such terrace gardens.
14.
Make raised beds on your terrace to grow trees, this is a good idea if you want to grow large shrubs or trees that have deep roots.
15.
Classy and elegant, deck tiles are looking beautiful on this terrace in the evening. If you don’t want to grow lot of plants on your terrace, simply put some potted plants in the corner.
16.
Make your beautiful terrace garden more zippy at night so you can savor your dinner there, do some lightning and you will all set to enjoy.
17.
Growing a lawn needs lots of maintenance and care and if you are worried about this, use synthetic grass, it is a good option for both terrace and balcony gardens.
18.
Using light colored furniture is a great idea to follow on terraces, because light colored furniture don’t heat up early.
19.
Grow dwarf trees and bamboos for terrace garden privacy.
20.
You can grow annuals under potted trees, this is a good idea for limited space like terrace.
21.
To make a beautiful terrace garden, arrange everything neatly, do not use more than 3-5 colors on your terrace. Plan everything on paper, determine a theme and the ambiance you would like to create there and work accordingly.
1.

Create an alluring container garden on terrace, grow flowers to embellish it. Most of the terraces are sunny and flowers are easy to grow. Make a lovely flower garden with combination of both perennials and annuals equally.
2.

If you want to create a serene and calm garden on terrace, use colors like blue, green, indigo, pink and white instead of bright colors.
3.

Grow lot of vines and dwarf trees near the walls. These will use your vertical space efficiently.
4.

Create a low maintenance garden on terrace, if you are unable to do lot of care. Read these low maintenance garden tips.
5.

If you want to make a lush green garden, grow lot of dwarf conifers and ferns on your terrace. These will give an elegant look with wooden deck and furniture.
6.

This garden on terrace is simple yet good looking, not so many colors and accessories are used.
7.

Excellent use of old tires you can see here, these planters are made after doing some DIY hacks. See these DIY tire ideas for more.
8.

Both lavender and allium (ornamental onion) love sunny spot and well drained soil, growing them on terrace is easy too.
9.

Floor plays an essential role in creating a beautiful terrace garden. You can also use pebbles to add an extra element.
10.

Making a lawn on terrace is possible too. You’ll have your best seating place above your urban dwelling, if you’ll create a terrace lawn.
11.

Create a cottage garden like setup, wild and overgrown terrace garden that will give you peace of mind. In the garden you can white nicotianas are grown for scent and lavender in other corner with lot of perennials capturing the eyes. You can see more about this on Gardenista.
12.

What’s not you can do on your terrace? Make a water garden, if you love to grow aquatic plants.
13.

If you have a north or east facing terrace, you do not receive full sun. In that case grow plants that grows well in partial sun. Ferns, Ivies, violets and pansies are good choice for such terrace gardens.
14.

Make raised beds on your terrace to grow trees, this is a good idea if you want to grow large shrubs or trees that have deep roots.
15.

Classy and elegant, deck tiles are looking beautiful on this terrace in the evening. If you don’t want to grow lot of plants on your terrace, simply put some potted plants in the corner.
16.

Make your beautiful terrace garden more zippy at night so you can savor your dinner there, do some lightning and you will all set to enjoy.
17.

Growing a lawn needs lots of maintenance and care and if you are worried about this, use synthetic grass, it is a good option for both terrace and balcony gardens.
18.

Using light colored furniture is a great idea to follow on terraces, because light colored furniture don’t heat up early.
19.

Grow dwarf trees and bamboos for terrace garden privacy.
20.

You can grow annuals under potted trees, this is a good idea for limited space like terrace.
21.

1
1
文章
Hande Salcan
2017年05月23日


It can be easy and inexpensive to start garden seeds indoors for spring planting. Here at The Garden Glove, we use several methods.
Method #1 – Purchase an inexpensive dome style seed starter from your local garden center or discount store. These usually sell for less than $10, and contain everything except the seeds to get you growing, including a humidity dome to keep in heat, and soil or soil less cubes. The only downside to these is that the growing blocks are usually pretty small, so if you are going to plant fast growing annuals such as sunflowers, morning glories or squash, you might want to wait to just two weeks before last frost. Otherwise, you will have to transplant your seedlings into larger containers as they outgrow the seed dome.
This method works very well for growing perennials, since they are slower growing than annuals as a rule.
Make sure the growing medium is moist, place the seeds at the depth recommended by the packet, and place the dome on. You will see moisture condense inside the dome. This is great for starting out, as the heat and moisture is trapped in. However, once seedlings start to appear, you MUST remove the dome to prevent “damping off” a fungal disease that will kill the seedlings. Add water as necessary to keep the soil moist, but not wet.

Method #2 – The second method is the most economical one. This is where we plant seed into reusable or recycled containers. These containers must have drainage, and be able to be moved easily. Tupperware, egg cartons or pots made from recycled newspaper are several popular ideas. Placed on a tray, such as an old cookie sheet- they make great planting flats, if not too terribly attractive. It helps when using this method to enclose the entire tray in a clear plastic bag until seedlings appear. This does the same job as the $10 dome, by keeping in heat and moisture.
Hee is a tutorial from Hobby Room Diaries on making newspaper pots!

Method #3 – This is my preferred method, and one I just started using two years ago. I picked up a portable greenhouse. It has several metal shelves for seedling flats covered by a poly “tent” to keep in heat and moisture. This makes it very easy for me to move the entire set up outdoors for daylight, and the tent keeps the heat in, even when it hovers near freezing outside. I can grow several hundred seedlings in this setup. I caution you against leaving it outdoors during windy conditions, however. Also keep in mind during sunny days it can heat up inside the greenhouse quite quickly, so make sure you tie up one side and occasionally monitor the temps in your greenhouse. When the weather is warm enough, remove the poly tenting entirely.

Once the seedlings are up, they must have very bright, though not direct light. Using a windowsill during bad weather is acceptable, but to grow healthy and strong, seedlings should be placed in either artificial light, or on a protected porch for much of the day. Make sure you bring them in at night, and don’t leave them out on frosty weather.
You can create an artificial light system easily with a cheap shop light from the home improvement store, and a both a warm and cool 40 watt fluorescent tube. It does not have to be one of the more expensive plant growing tubes. Hang the lights from chains off a scrap 2×4 stand. Keep the lights very close to the seedlings, and leave on for at least 12 hours a day.
Starting garden seeds indoors will save you money and allow you to grow plant varieties in your garden that are special and unusual. It’s easy, so try starting your seeds indoors today!
2
0
文章
Andrea
2017年05月22日


I used to grow vegetables in a larger separate garden here at TGG, but have since moved into a home with less space and open ground. I find that I do miss fresh herbs and veggies on my table, and so I have come up with some simple ways anyone can use to grow fresh vegetables even if their space is small, their soil is poor, or their motivation for lots of hard work is low! Did I mention? Growing your own vegetables is more nutritious for your family, and fattens up the checkbook too. Now is the perfect time of year to get started.
Grow Vegetables in Containers
You may be thinking, who has containers that big? Seriously, in today’s gardening world, you can find almost any veggie in a smaller container friendly version. Even summer squash and bush beans can easily be grown in as little as 12 inch pots.
Make sure you fertilize with every water with half strength liquid fertilizer, and make sure they don’t dry out in the container.
Don’t want your patio to look like a community container garden? No problem! Just add a couple decorative plants along the edge of each container, and let the vege be the foliage and texture.
Tuck Them Into Bed
Garden beds, that is! Again, compact varieties can be tucked right into those empty spots in the garden where the petunias were last year. Many types of herbs and vegetables can be quite ornamental as well. Try purple basil, Swiss chard, artichokes, red peppers, leaf lettuces and purple bush beans. Till up the spot in the garden bed you wish to plant with a spade, plant some seeds, cover with a little soil, water and fertilize. Many times your automatic watering system will make the job even easier. Make sure you keep your eye out for mildew disease and spray accordingly- vegetables planted in close quarters are more susceptible. You might find them so pretty you want to keep planting them every year, just for good looks!
Community Gardens
In many communities there are gardens set up exclusively for growing your own food, when you cannot grow at home. Some of these gardens are free, others charge a small fee. Depending on the size plot you are allotted, consider growing an extra row of food for food banks. It doesn’t take any longer to care for one more row of food, but can make a big difference in your community to a family who is struggling. One packet of seed costs $1.50. So check out community gardens, and make it a family project to care for your vegetables each evening! Find out more about community gardens at http://communitygarden.org/
Growing vegetables can be simple, and can include a separate vegetable garden to feed your whole family, or just one pot of lovingly tended tomatoes on the back porch. It’s can be as simple as you want to make it, but there is nothing like fresh vegetables and herbs on a summer table, so give at least one a try this season.
Are you growing vegetables this season? Comment and let us know what your garden includes!
0
0
文章
Andy
2017年05月22日

See these 19 tea herbs to make a tea herb garden. It is a wonderful accent that can go along with the rest of your garden and brings you the joy of fresh herbs, you can use these herbs to prepare aromatic, healthy and tasty herbal teas of different flavors.
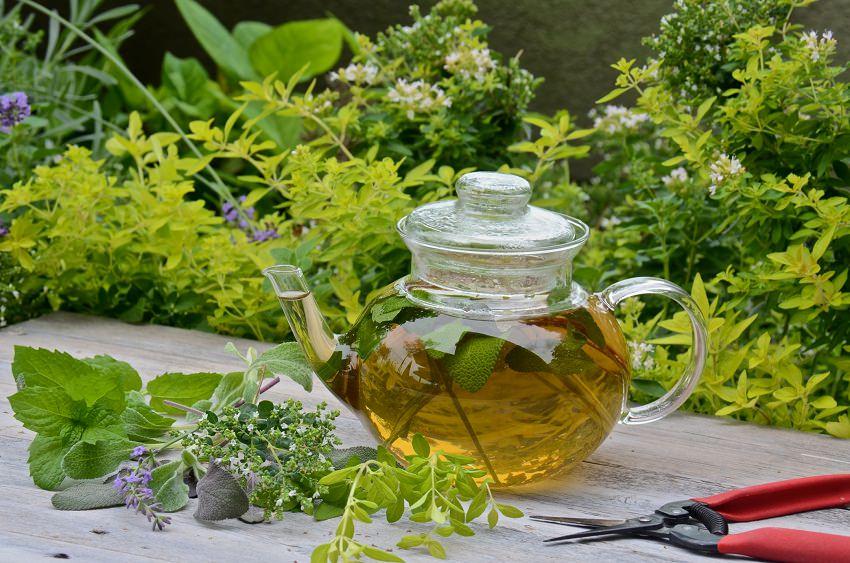
1. Lavender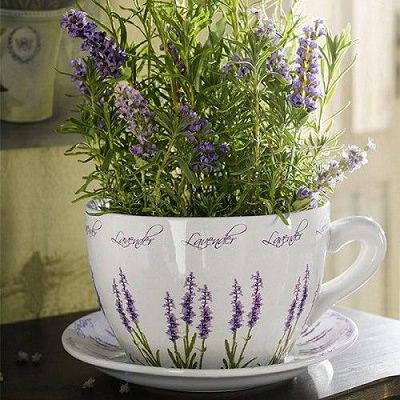
Maybe you’ve never thought to make lavender tea but its floral taste is amazing. A delicious cup of herbal tea you can make from lavender flowers that is sweet and fragrant in taste and is perfect for calming your mind, particularly recommended to reduce tension and alleviate headache.
Lavender grows well in full sun, in well drained soil.
Also read : How to Grow Lavender Plants
2. Lemon Verbena
Lemon verbena leaves are used to make tea. Consumption of its tea improves digestion, joint pain and helps in asthma.
Refreshing and sour, this lemon flavored plant is easy to grow. It needs full sun to thrive and doesn’t tolerate severe winters. Below 14 F (-10 C) the plant dies. It’s more suitable for subtropical and tropical climate, although you can grow lemon verbena in cold climate, but in containers.
3. Mint
Mint is a most favorite tea herb and popular among herbal tea lovers, it’s also one of the easiest plants to grow. Mint tea fights with digestive disorders, abdominal pain and stomach cramps. Besides this, it stimulates the appetite, reduces flatulence and is very refreshing in flavor.
Mint is very robust plant and can even get out of hand in the garden if you don’t care to stop it. It grows in moist soil in full to partial sun.
Also read: How to Control Invasive Plants
4. Lemon Balm
Lemon balm plant is closely related to mint, but has a distinct lemon flavor. It gives flavor to herbal teas and ice creams and appears to be a useful fragrant herb in the kitchens.
Lemon balm grows well in dry soil and partial shade. If grown outside it dies in winter but regrow again in spring. Lemon balm spreads vigorously if grown in garden beds so it’s better to grow it in a confined space or in a container.
5. Ginger
Ginger tea is popular, especially in South and East Asia. Its roots and leaves can be used to make tea. Use of ginger tea is praised in ancient Chinese medicines and Ayurveda, it’s an antioxidant and contains antibacterial properties. It cures diseases like cold, flu, nausea and improves digestion and appetite.
Ginger is such an easy to grow and forget it plant that you’ll definitely like to grow. It is hardy in USDA zones 9 – 12 and grows best in filtered sunlight and moist soil in a spot that is less windy.
6. Thyme
Thyme is an effective herbal tea ingredient that calms stomach problems and sore throat. Use its leaves to prepare tea, if there are flowers, add them too.
Thyme grows well in full sun but also tolerate partial sun and is an ideal herb that is very low maintenance.
7. Chamomile
Beautiful daisy like flowers that smells mildly fruity like an apple, chamomile is a useful medicinal tea herb. It’s traditionally used to induce calm and sleep. You can prepare its tea with small white and yellow flowers rather than the leaves. There are two kinds of chamomile (German and Roman), Roman chamomile offers strong flavored tea.
Chamomile likes sandy soil and lots of sun and it needs a lot of water during the summer. It’s hardy under USDA Zones 4 – 9.
8. Jasmine
Jasmine flowers are suitable to make tea, for this you need to pick some fresh flowers. Dry and mix them with green tea, you can also steep them alone to make jasmine tea.
Jasmine vine thrives in full sun and needs a trellis or a support to climb. It’s not suitable for harsh winter climates, so if you want to grow it, grow it in container that can be moved inside.
9. Stevia
Stevia leaves are sweet and can be steeped to make tea. It’s a safe and natural sweetener, used in place of sugar in an infusion and good for diabetics.
Stevia grows in USDA Zones 9 to 11, it doesn’t tolerate cold. Still, you can grow it in more colder zones in a pot so that it can be brought inside when winter comes.
10. Marjoram
This culinary herb has a fruity and sour flavor with a hint of mint. Marjoram tea cures various digestion and stomach problems including poor appetite, liver disease, gallstones, intestinal gas, and stomach cramps.
It grows well in full sun but can tolerate light shade, it needs loose and well drained soil.
11. Cilantro
Commonly used for cooking, cilantro is also suitable for tea. Its tea resembles aroma similar to Lady Gray tea. Mix honey in it to soothe the acidity and constipation. It also clears toxins from the body and prevents indigestion.
It grows in both the sun and partial shade and is an ideal herb for pots. Cilantro grows diversely as annual herb in almost any climate, it can be grown under USDA Zones 3 – 11.
12. Rosemary
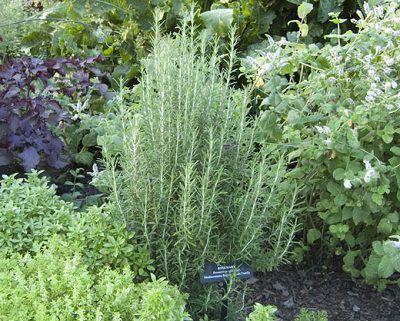
Rosemary tea improves digestion, promotes cognitive function and acts as an antioxidant, protecting the body from heart disease and cancer.
Rosemary plant prefers full sun, light and well drained soil.
13. Fennel
Fennel seeds are used to prepare its tea. Fennel tea is very beneficial for digestive disorders like irritable bowel syndrome, bloating and flatulence.
Fennel grows in USDA zones 4 to 10 in moist and fertile soil in full to partial sun.
14. St. John’s wort
It is a very effective remedy against nervous disorders: insomnia, depression, anxiety etc. However, it also has some side effects.
It grows very easily without special care. It can be grown on the ground or in pots.
To learn how to grow St John’s wort read this.
15. Sage
The antiseptic tonic of sage enables to provide an effective remedy for ailments as varied as: mouth ulcer and sore throat. Sage tea also helps in depression and Alzheimer. Take 1 tablespoon fresh sage leaves and 1 tablespoon dried sage leaves and steep it for 3 – 5 minutes in boiling water. Strain it and mix honey in it for taste. Your sage tea is ready.
It can be grown either in the ground or in pots. If grown in pots it’s important to water sage regularly.
16. Viola tricolor
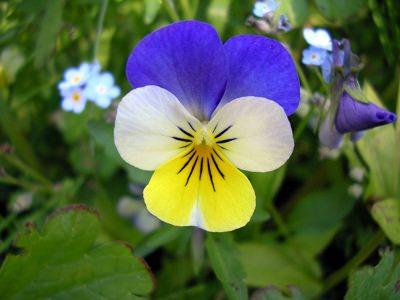
Often referred as wild pansy, it’s a common European flower that grows wild as a short lived perennial. Viola tricolor is known for its medicinal properties. It contains flavonoids, saponins, anthocyanins, carotenoids that helps in fighting myriads of human diseases like cancer, various skin diseases, allergies and sore throat. You can use whole plant to make tea.
Also called as heartsease, viola tricolor grows in partial shade in slightly acidic to neutral soil. It’s hardy in USDA zones 3 to 9
17. Basil
Basil especially holy basil or ‘tulsi’ is best to make basil tea, you can also add honey and ginger in it. Other varieties of basil are also used. Basil is stress reliever and if used with honey and ginger it helps in asthma and cough, cold and influenza. Consumption of basil tea lowers the blood sugar level and helps in heart diseases. Basil tea is also a good cure of mouth problems and bad breath.
Holy Basil loves warm exhibition, it’s a tropical plant, hardy in USDA Zones 10, 11 and grows best when temperature stays around 70 – 86 F (20 – 30 C).
18. Catnip
Mildly sedative and calming, catnip tea is excellent treat after an exhausting day. It helps in digestive disorder like diarrhea, relieves headache and insomnia and if you’re going through nicotine withdrawal, it alleviates the stress. Both the leaves and flowers are used to prepare tea.
If you know how to save your catnip plant from cats for your use growing it is easy. It’s hardy in USDA Zones 3 – 8 and prefers well drained soil that is sandy, although catnip grows in variety of soil types. Keep your plant in full to partial sun.
19. Lemon Grass
Lemon grass (Cymbopogon citratus) is used to make herbal tea, in soups and other dishes. This lemony scented tea herb also repels pests like white flies away from garden.
Grow lemongrass in warm and sunny spot and do regular watering. Lemongrass is hardy in USDA Zones 9 – 11, however if you like to grow it in colder climate you can grow it in a pot and bring that indoors or in a greenhouse in winter.

1. Lavender

Maybe you’ve never thought to make lavender tea but its floral taste is amazing. A delicious cup of herbal tea you can make from lavender flowers that is sweet and fragrant in taste and is perfect for calming your mind, particularly recommended to reduce tension and alleviate headache.
Lavender grows well in full sun, in well drained soil.
Also read : How to Grow Lavender Plants
2. Lemon Verbena
Lemon verbena leaves are used to make tea. Consumption of its tea improves digestion, joint pain and helps in asthma.
Refreshing and sour, this lemon flavored plant is easy to grow. It needs full sun to thrive and doesn’t tolerate severe winters. Below 14 F (-10 C) the plant dies. It’s more suitable for subtropical and tropical climate, although you can grow lemon verbena in cold climate, but in containers.
3. Mint
Mint is a most favorite tea herb and popular among herbal tea lovers, it’s also one of the easiest plants to grow. Mint tea fights with digestive disorders, abdominal pain and stomach cramps. Besides this, it stimulates the appetite, reduces flatulence and is very refreshing in flavor.
Mint is very robust plant and can even get out of hand in the garden if you don’t care to stop it. It grows in moist soil in full to partial sun.
Also read: How to Control Invasive Plants
4. Lemon Balm
Lemon balm plant is closely related to mint, but has a distinct lemon flavor. It gives flavor to herbal teas and ice creams and appears to be a useful fragrant herb in the kitchens.
Lemon balm grows well in dry soil and partial shade. If grown outside it dies in winter but regrow again in spring. Lemon balm spreads vigorously if grown in garden beds so it’s better to grow it in a confined space or in a container.
5. Ginger
Ginger tea is popular, especially in South and East Asia. Its roots and leaves can be used to make tea. Use of ginger tea is praised in ancient Chinese medicines and Ayurveda, it’s an antioxidant and contains antibacterial properties. It cures diseases like cold, flu, nausea and improves digestion and appetite.
Ginger is such an easy to grow and forget it plant that you’ll definitely like to grow. It is hardy in USDA zones 9 – 12 and grows best in filtered sunlight and moist soil in a spot that is less windy.
6. Thyme
Thyme is an effective herbal tea ingredient that calms stomach problems and sore throat. Use its leaves to prepare tea, if there are flowers, add them too.
Thyme grows well in full sun but also tolerate partial sun and is an ideal herb that is very low maintenance.
7. Chamomile
Beautiful daisy like flowers that smells mildly fruity like an apple, chamomile is a useful medicinal tea herb. It’s traditionally used to induce calm and sleep. You can prepare its tea with small white and yellow flowers rather than the leaves. There are two kinds of chamomile (German and Roman), Roman chamomile offers strong flavored tea.
Chamomile likes sandy soil and lots of sun and it needs a lot of water during the summer. It’s hardy under USDA Zones 4 – 9.
8. Jasmine
Jasmine flowers are suitable to make tea, for this you need to pick some fresh flowers. Dry and mix them with green tea, you can also steep them alone to make jasmine tea.
Jasmine vine thrives in full sun and needs a trellis or a support to climb. It’s not suitable for harsh winter climates, so if you want to grow it, grow it in container that can be moved inside.
9. Stevia
Stevia leaves are sweet and can be steeped to make tea. It’s a safe and natural sweetener, used in place of sugar in an infusion and good for diabetics.
Stevia grows in USDA Zones 9 to 11, it doesn’t tolerate cold. Still, you can grow it in more colder zones in a pot so that it can be brought inside when winter comes.
10. Marjoram
This culinary herb has a fruity and sour flavor with a hint of mint. Marjoram tea cures various digestion and stomach problems including poor appetite, liver disease, gallstones, intestinal gas, and stomach cramps.
It grows well in full sun but can tolerate light shade, it needs loose and well drained soil.
11. Cilantro
Commonly used for cooking, cilantro is also suitable for tea. Its tea resembles aroma similar to Lady Gray tea. Mix honey in it to soothe the acidity and constipation. It also clears toxins from the body and prevents indigestion.
It grows in both the sun and partial shade and is an ideal herb for pots. Cilantro grows diversely as annual herb in almost any climate, it can be grown under USDA Zones 3 – 11.
12. Rosemary

Rosemary tea improves digestion, promotes cognitive function and acts as an antioxidant, protecting the body from heart disease and cancer.
Rosemary plant prefers full sun, light and well drained soil.
13. Fennel
Fennel seeds are used to prepare its tea. Fennel tea is very beneficial for digestive disorders like irritable bowel syndrome, bloating and flatulence.
Fennel grows in USDA zones 4 to 10 in moist and fertile soil in full to partial sun.
14. St. John’s wort
It is a very effective remedy against nervous disorders: insomnia, depression, anxiety etc. However, it also has some side effects.
It grows very easily without special care. It can be grown on the ground or in pots.
To learn how to grow St John’s wort read this.
15. Sage
The antiseptic tonic of sage enables to provide an effective remedy for ailments as varied as: mouth ulcer and sore throat. Sage tea also helps in depression and Alzheimer. Take 1 tablespoon fresh sage leaves and 1 tablespoon dried sage leaves and steep it for 3 – 5 minutes in boiling water. Strain it and mix honey in it for taste. Your sage tea is ready.
It can be grown either in the ground or in pots. If grown in pots it’s important to water sage regularly.
16. Viola tricolor

Often referred as wild pansy, it’s a common European flower that grows wild as a short lived perennial. Viola tricolor is known for its medicinal properties. It contains flavonoids, saponins, anthocyanins, carotenoids that helps in fighting myriads of human diseases like cancer, various skin diseases, allergies and sore throat. You can use whole plant to make tea.
Also called as heartsease, viola tricolor grows in partial shade in slightly acidic to neutral soil. It’s hardy in USDA zones 3 to 9
17. Basil
Basil especially holy basil or ‘tulsi’ is best to make basil tea, you can also add honey and ginger in it. Other varieties of basil are also used. Basil is stress reliever and if used with honey and ginger it helps in asthma and cough, cold and influenza. Consumption of basil tea lowers the blood sugar level and helps in heart diseases. Basil tea is also a good cure of mouth problems and bad breath.
Holy Basil loves warm exhibition, it’s a tropical plant, hardy in USDA Zones 10, 11 and grows best when temperature stays around 70 – 86 F (20 – 30 C).
18. Catnip
Mildly sedative and calming, catnip tea is excellent treat after an exhausting day. It helps in digestive disorder like diarrhea, relieves headache and insomnia and if you’re going through nicotine withdrawal, it alleviates the stress. Both the leaves and flowers are used to prepare tea.
If you know how to save your catnip plant from cats for your use growing it is easy. It’s hardy in USDA Zones 3 – 8 and prefers well drained soil that is sandy, although catnip grows in variety of soil types. Keep your plant in full to partial sun.
19. Lemon Grass
Lemon grass (Cymbopogon citratus) is used to make herbal tea, in soups and other dishes. This lemony scented tea herb also repels pests like white flies away from garden.
Grow lemongrass in warm and sunny spot and do regular watering. Lemongrass is hardy in USDA Zones 9 – 11, however if you like to grow it in colder climate you can grow it in a pot and bring that indoors or in a greenhouse in winter.
2
2
文章
Andy
2017年05月22日

Learn how to grow dill in tropics. In warm, tropical climate you require a different approach to grow this herb. Growing dill in containers is also possible, which is given in this educative guide.
Dill is an aromatic annual herb grown for its use in various cuisines. It is a wild plant that attracts butterflies and bees and other beneficial insects.
Difficulty — Easy
Soil pH — slightly acidic to neutral
Scientific Name-– Anethum graveolens
Growing Habit
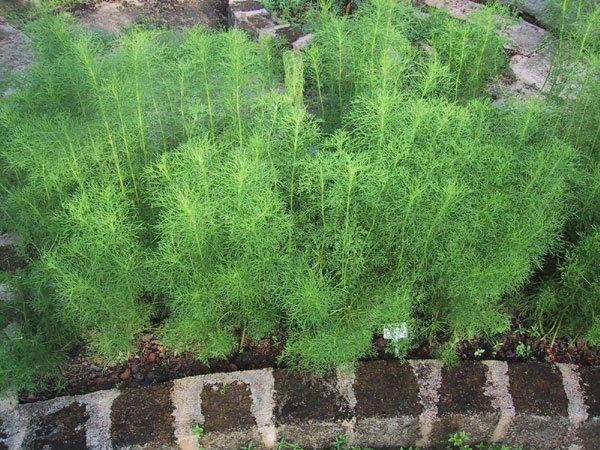
Dill is an upright plant that can grow up to 75 cm tall, it has slightly bluish and green colored scented finely cut leaves and mustard colored umbel flowers. Dill grows well in garden beds and vegetable patches. Growing dill in pots and indoors is also possible.
You can grow dill at anytime when the temperature is around 50 – 80 F (10 – 27 C). In cooler climates, it is grown in spring, summer and up to fall in warm temperate zones. But if you live in tropics, grow dill in fall and winter.
Planting dill
Sow seeds 1/4 inches deep on a bright spot that receive morning sun. One thing you should note that dill hates to be transplanted later, so make sure you’ll sow seeds at exact place or in container where you would like to plant them later. Seeds will germinate in between 7 – 21 days. When seedlings are 2 – 3 inches high, thin them to 10 inches apart.
Growing dill in Containers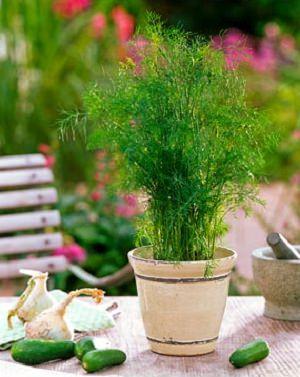
Dill can grow up to 3 feet high, unlike other herbs it has long tap root so it requires deep pot. Choose at least 12 inches deep container that has sufficient drainage. In a single container you can grow 2 -3 plants together.
Location
Dill, in order to grow healthy and lush, needs a Mediterranean climate. It prefers full sun. You also need to protect the plant from extreme tropical conditions, only then can you grow it successfully. Whether in pots on the balcony, patio or terrace or in the garden, ensure the plant remains on a less windy position, that is sunny. Keep the plant in afternoon shade if temperature rises up.
Watering
Dill tolerates drought and its flavor increases if it is allowed to be slightly “thirsty”. But in tropics you’ll need to keep the soil relatively moist. Avoid overwatering in any case.
Also Read: How to Make Balcony Herb Garden
Soil
It can tolerate poor soil, but in fertile soil rich tasting dill is produced. Amend the soil by mixing plenty of aged manure or compost and sand, if needed.
Fertilizer
Generally, dill does not require frequent fertilizer but to give boost to plant you can feed 5-10-5 fertilizer lightly. If you’re growing dill in containers fertilize the plant every month with half strength liquid fertilizer.
Mulching
Cover the plant with a 2-inch layer of organic mulch once the plants are 4 inches high. Mulch gives plant stability, suppresses weeds and keeps the soil moist.
Pinching and Deadheading
Pinch the plant when it grows above 6 inches tall for bushier growth. Nip off the tips regularly. Do not allow the plant to flower and seed, if you want a longer growing period.
Harvest
Harvest the leaves when the plant is 6 inches high. Once dill brings to flower, it will stop growing leaves, so if you want to keep harvesting the leaves, pinch flower buds when they are small. If you want seeds, stop deadheading. To harvest the seeds, cut the seed heads once they have turned brown.
Dill is an aromatic annual herb grown for its use in various cuisines. It is a wild plant that attracts butterflies and bees and other beneficial insects.
Difficulty — Easy
Soil pH — slightly acidic to neutral
Scientific Name-– Anethum graveolens
Growing Habit

Dill is an upright plant that can grow up to 75 cm tall, it has slightly bluish and green colored scented finely cut leaves and mustard colored umbel flowers. Dill grows well in garden beds and vegetable patches. Growing dill in pots and indoors is also possible.
You can grow dill at anytime when the temperature is around 50 – 80 F (10 – 27 C). In cooler climates, it is grown in spring, summer and up to fall in warm temperate zones. But if you live in tropics, grow dill in fall and winter.
Planting dill
Sow seeds 1/4 inches deep on a bright spot that receive morning sun. One thing you should note that dill hates to be transplanted later, so make sure you’ll sow seeds at exact place or in container where you would like to plant them later. Seeds will germinate in between 7 – 21 days. When seedlings are 2 – 3 inches high, thin them to 10 inches apart.
Growing dill in Containers

Dill can grow up to 3 feet high, unlike other herbs it has long tap root so it requires deep pot. Choose at least 12 inches deep container that has sufficient drainage. In a single container you can grow 2 -3 plants together.
Location
Dill, in order to grow healthy and lush, needs a Mediterranean climate. It prefers full sun. You also need to protect the plant from extreme tropical conditions, only then can you grow it successfully. Whether in pots on the balcony, patio or terrace or in the garden, ensure the plant remains on a less windy position, that is sunny. Keep the plant in afternoon shade if temperature rises up.
Watering
Dill tolerates drought and its flavor increases if it is allowed to be slightly “thirsty”. But in tropics you’ll need to keep the soil relatively moist. Avoid overwatering in any case.
Also Read: How to Make Balcony Herb Garden
Soil
It can tolerate poor soil, but in fertile soil rich tasting dill is produced. Amend the soil by mixing plenty of aged manure or compost and sand, if needed.
Fertilizer
Generally, dill does not require frequent fertilizer but to give boost to plant you can feed 5-10-5 fertilizer lightly. If you’re growing dill in containers fertilize the plant every month with half strength liquid fertilizer.
Mulching
Cover the plant with a 2-inch layer of organic mulch once the plants are 4 inches high. Mulch gives plant stability, suppresses weeds and keeps the soil moist.
Pinching and Deadheading
Pinch the plant when it grows above 6 inches tall for bushier growth. Nip off the tips regularly. Do not allow the plant to flower and seed, if you want a longer growing period.
Harvest
Harvest the leaves when the plant is 6 inches high. Once dill brings to flower, it will stop growing leaves, so if you want to keep harvesting the leaves, pinch flower buds when they are small. If you want seeds, stop deadheading. To harvest the seeds, cut the seed heads once they have turned brown.
0
0
文章
Abigal
2017年05月22日

Want more flowers in your garden? Here’re 7 tips you should know to keep your plants blooming.1. Use rich soil
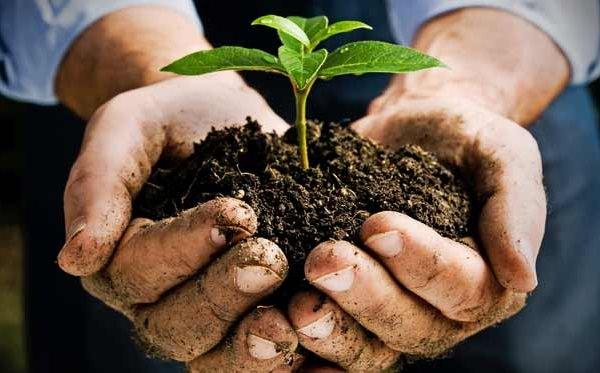
Soil that is light and rich in compost or manure provides plenty of nutrients constantly to the plants. A soil that is rich in organic matter also encourages bacterial activity that promotes soil fertility. Add some compost or manure to the soil when planting your plants and go adding them time to time.
2. Deadhead often

Most plants grow better and have more flowers if their wilted and faded blooms are plucked often. When you see the wilted flowers, remove them, so the plant can direct its energy on other flowers and they will be receiving more nutrients. Wilted flowers waste energy and sap. They also attract insect and pests. Also, by cutting off the spent flowers you prevent plants from seeding.
3. Fertilize the plants

To have more flowers, feed the plants regularly during the growing season with half strength liquid fertilizer, a flowering fertilizer should be used that has more phosphorus than nitrogen, as phosphorus is the element that promotes more flower buds. Also, you can mix time-based fertilizer in the soil at the beginning of the growing season.
4. Provide more sun

Light is essential for the plant’s growth, direct sunlight for several hours a day can be a prerequisite for many plants that come to flower, however, shade loving plants tend to reduce the number of flowers when exposed to more sun.
5. Nurse the roots
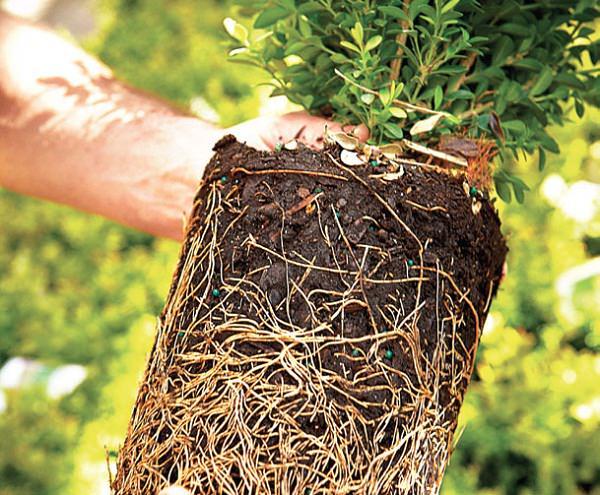
To have healthy plants and abundant blooms– nurse the roots, and remember that it is through them the plants absorb nutrients and water from the soil. When you perform the transplant or when you dig soil around the plant be careful not to cut or damage the roots as if being damaged plant would take a while to recover or it may die.
6. Apply mulch

Plants growing in a mulched soil are usually more vigorous, less prone to pests and diseases.
7. Do moderate watering
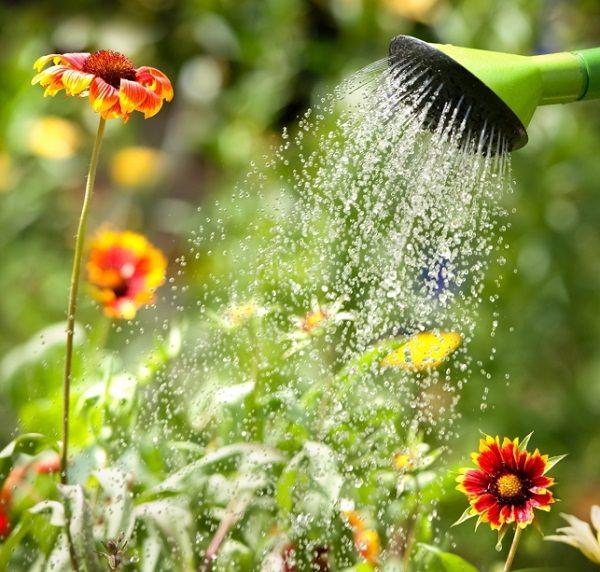
Excess watering tends to favor the development of foliage but can also produce the absence of flowering. Similarly, the lack of water can cause the plant to drop the flower buds. The best way is to do moderate watering (avoiding both overwatering and underwatering) during the flowering season.

Soil that is light and rich in compost or manure provides plenty of nutrients constantly to the plants. A soil that is rich in organic matter also encourages bacterial activity that promotes soil fertility. Add some compost or manure to the soil when planting your plants and go adding them time to time.
2. Deadhead often

Most plants grow better and have more flowers if their wilted and faded blooms are plucked often. When you see the wilted flowers, remove them, so the plant can direct its energy on other flowers and they will be receiving more nutrients. Wilted flowers waste energy and sap. They also attract insect and pests. Also, by cutting off the spent flowers you prevent plants from seeding.
3. Fertilize the plants

To have more flowers, feed the plants regularly during the growing season with half strength liquid fertilizer, a flowering fertilizer should be used that has more phosphorus than nitrogen, as phosphorus is the element that promotes more flower buds. Also, you can mix time-based fertilizer in the soil at the beginning of the growing season.
4. Provide more sun

Light is essential for the plant’s growth, direct sunlight for several hours a day can be a prerequisite for many plants that come to flower, however, shade loving plants tend to reduce the number of flowers when exposed to more sun.
5. Nurse the roots

To have healthy plants and abundant blooms– nurse the roots, and remember that it is through them the plants absorb nutrients and water from the soil. When you perform the transplant or when you dig soil around the plant be careful not to cut or damage the roots as if being damaged plant would take a while to recover or it may die.
6. Apply mulch

Plants growing in a mulched soil are usually more vigorous, less prone to pests and diseases.
7. Do moderate watering

Excess watering tends to favor the development of foliage but can also produce the absence of flowering. Similarly, the lack of water can cause the plant to drop the flower buds. The best way is to do moderate watering (avoiding both overwatering and underwatering) during the flowering season.
1
1
文章
Abigal
2017年05月22日


Our backyards are used for BBQ’s and family gatherings, playgrounds and football games. Don’t forget to use your yard for some good ‘ol wind down time! These 13 projects for backyard relaxation will help turn your garden space into a zen place. Catchy, right? :) Our feature project above, is a hanging bed from ‘The Devoted Wife‘.
From ‘Pottery Barn‘, we love this backyard bed space too! Want to make one of your own? Then jump on over to our post on DIY garden hanging beds and find a bunch of great tutorials!

If you love those hanging beds, then try something a little different with this deck makeover by Sarah Dorsey for ‘Home Depot’. In this one post, there is a tutorial for her DIY hanging bench, cable railing, privacy curtains and deck makeover. What a cool space to have a glass of wine or tea in!

Need a more comfy spot, perhaps under a tree? For a whole afternoon? We feel ya. Try this DIY hammock from ‘Martha’ made from a simple drop cloth.

Or learn how to make a rope hammock from ‘Kinfolk’. This is just inexpensive nylon rope and overhand knots! Or for more ideas, check out our post on DIY hammocks.

Amy of ‘Her Tool Belt’ did this DIY chaise tutorial from 2×4’s for ‘Bob Vila’. Just in case you were getting tired of laying down… ;)

These DIY chaise lounges look perfect for a warm afternoon! Made by ‘Being Brooke’ at ‘Ana White’, she did these for $35!

Ok, now you have a place to relax your body, now it’s time to relax the soul! Start with water… this DIY fountain from ‘Oregon Live’ ought to do it!

‘Diane and Dean’ have another take for you…. They did this garden fountain on the edge of an existing pool to add to the ambience, and it looks kinda “tropical wonderland” to us!

If water hasn’t gotten you there, how about wind? Make your own wind chimes with this tutorial by ‘HGTV’. This is a simple project using a craft round, pipe and twine.

Or make these DIY wind chimes in an hour with things from the shop, including simple washers! From ‘Bob Vila’.

Ok, so now you’ve had a relaxing afternoon, but the evening is creeping in… No need to start the stress parade again.! Just fire up your DIY propane fire pit! This one from ‘WC Welding’ was done in just 5 steps from a garden patio table.
Finally, if you want to get a bit serious, jump on over to one of our fav sites, ‘Homemade Modern’ and learn how to make their concrete fire pit.

Ok, are we officially in kick back mode yet?
0
1
文章
Abigal
2017年05月22日


Love IKEA? Yes, us too. But did you know they have tons of products that you can use to make clever garden planters? Make these IKEA planter hacks for less money, and with more character! Just a reminder, as we all know, IKEA changes it’s inventory pretty often, so if you can’t find a product listed in one of these tutorials, chance are they have a similar one that will work.
Our feature photo above, is from ‘IKEAHackers’ themselves. They made this designer hanging planter with the “Asker” container from Ikea and some old leather belts. Really simple and fast project!
From ‘House Pet‘, this IKEA planter hack uses the Tradig wire bowl as a base, and then just tucked a pot inside. This looks like a very expensive piece I saw recently in a modern furnishings store.

Crystal from ‘A Pumpkin and a Princess’ made this succulent planter box IKEA hack from the Dragon bamboo bath accessories… I love the simple but natural feel of this.

From ‘Design Sponge’, this Grundtal kitchen storage was repurposed as a hanging IKEA planter hack in the kitchen.

Learn how to plant a succulent garden in an IKEA cart from ‘Succulents and Sunshine’. BTW, this site has great info on growing succulents, so spend a little time here. I love the color of this cart! Plus, she has a warning for assembly that you should know.

So this IKEA hack from ‘Brady Bunch Remodel‘ isn’t exactly a hack, because they start out using an Ikea planter from the Kardemumma series… The difference is, they took two of the pots and turned one of them upside down and made them into a Mid Century Modern planter knock off!

This DIY totem planter IKEA hack from ‘We Are Scout’ is really clever and inexpensive. She used the Ikea 365+ white bowls and acrylic paint to make the magic, and these look just like ceramic! Great tutorial with lots of instruction and photos.

‘The Geek Ticket’ used an IKEA Antonius shelving system to create this balcony planter IKEA hack. And the best part? The basket costs less than $3!

Ok, one more! A floating shelf planter? Done. ‘Hot for Houses‘ used an Ikea Ribba picture shelf to do a knock off of an expensive floating shelf made just for air plants.

0
0
文章
Abigal
2017年05月21日


Repurposing is a craze that is not going away any time soon, and it shouldn’t! We all need to think about things in a new way to prevent waste, and it helps that it is a lot of fun to use your creativity to make old things into new. I especially love to use old things in the garden… Ok, it sounds dumb, but I feel like Mother Nature appreciates it just a little more when it’s used to enhance the great outdoors. Corny, yes. But hey, it makes me feel good. These thrift store DIY garden projects are just the thing for a rainy Saturday (or a sunny Monday!) to help you decorate your outdoor space. Our feature photo above, is from ‘Ruff by Margo‘. She gathers great ideas for old windows, and her reader Jennifer sent this one in, with a window box attached. So charming!
From ‘Gumption Decor’ I love this DIY file cabinet planter! I’ve seen these projects before, but wondered if they could hold up to all that weight of the soil. They fixed this problem by having a wood liner made from scrap wood. A little spray paint and wheels, and a very cool, contemporary planter! (BTW, you need to make sure you have a solid bottom on the file cabinet, these run about $10 at my local Goodwill!)

Pam at ‘House of Hawthornes’ made this DIY mosaic bowling ball yard art from… well, yes, a bowling ball. This is an easy project with some caulk, grout and some craft store gems. I would love one that was all aqua blue! Easy to follow tutorial with photos.

Ingenious much? ‘Gadget Sponge‘ created these repurposed up cycled bird feeder for ‘Birds and Blooms Magazine’! Pretty…Cool… And a good tutorial too!

Another repurposed bird feeder that requires almost no work? An old outdoor lantern with the glass removed… Perfect! If you find those cheap brass kinds, use a spray paint with an antique or hammered metal finish on the outside. From ‘Real Simple’.

Ok, this one is a cuuuttteeee. Vanessa at ‘Tried and True’ has a full tutorial for you to learn to make her DIY acorn bird feeder. A wooden bowl from the thrift store and some wire mesh make this adorable! Let’s just hope the squirrels don’t catch sight!

From ‘Ann’s Garden Path’, these hanging chandeliers from wire baskets are really clever, and easy and inexpensive to make. The wire baskets are from thrift stores, and they are lit with a $1.50 Target solar light. Hang them on Shepard hooks, or I love the idea of hanging them in a tree with a little table and two chairs just underneath. Quaint, huh?

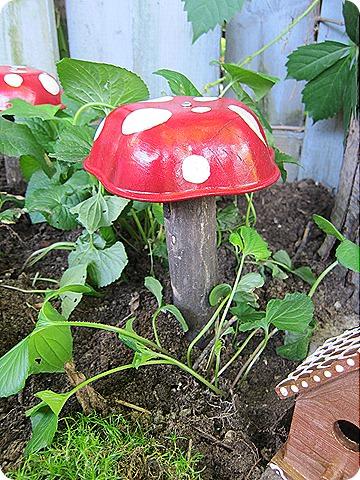
‘Let’s Go Fly a Kite’ turned ordinary thrift store salad bowls into the most adorable garden toadstools I ever saw. If you have kids and want to teach them the magic of a garden, this is the project for you. (Or, even if you don’t!) Step by step photos. Love this!
From ‘Morena’s Corner’, this DIY tea pot bird bath is really a piece of vintage art. I love how she reminds us not to paint the top, inside portion of the bird bath. It can’t be good for them! And I really like the soothing green she chose… just enough of a color pop that the piece stands out in the garden, but not so much as to clash with it’s surroundings.

Use a thrift store spring form pan to make these DIY stepping stones from ‘Home Hardware’. Very simple tutorial. Project with the kids this weekend?
Make a terrarium from a repurposed light fixture with this idea from ‘HGTV Gardens’. Easy! Oh, and they have full instructions on caring for a terrarium too!

This dresser turned plant container from Kay Basset is via ‘Flea Market Gardening‘. Great site with a lot of thrifting ideas!

Ok, this last one from ‘Lily Pad Cottage’ I’m throwing in there for two reasons… 1. Even thought she made this amazingly smart DIY fire pit table top from scratch, this could be made using the top of a thrift store dining table as well. 2. It’s smart!

0
1


