文章
Miss Chen
2021年09月21日

Balloon flowers (Platycodon grandiflorus) are clump-forming perennials and members of the easy-to-grow bellflower family of plants although the blooms do not resemble bells. Instead, puffy, balloon-like buds swell up to produce the 2- to 3-inch star-shaped flowers. This easy-grower blooms all summer long with intense blue-violet flowers, but there are also cultivars with white and pink blooms. Balloon flowers are generally planted in the spring after the danger of frost has passed, growing quickly to bloom in the first year.
Common Name Balloon flower, Chinese bellflower, Japanese bellflower
Botanical Name Platycodon grandiflorus
Family Campanulaceae (bellflower)
Plant Type Herbaceous perennial
Mature Size 1– 2 1/2 ft. tall, 1–1 1/2 ft. wide
Sun Exposure Full sun to part shade
Soil Type Rich, loamy, medium moisture, well-draining
Soil pH 5.5–7.5 (acidic to slightly alkaline)
Bloom Time Summer
Flower Color Blue-violet, white, pink
Hardiness Zones 3–8 (USDA)
Native Area China, Korea, Japan, Russia
Balloon Flower Care
Balloon flowers make excellent plants for border gardens or rock gardens and the blooms attract pollinators such as bees and butterflies thanks to their wide-open petals. These perennials will self-sow their seed, though they aren't aggressive spreaders. Overall, balloon flowers are fairly low-maintenance plants and are quite pest- and disease-resistant outside of root rot in areas with large amounts of rainfall.1
The taller varieties of balloon flowers can become a bit floppy. You can stake them or plant them in clumps to let them support one another. Start with nursery plants or grow your balloon flowers from seed.
Light
You will get the most flowers if you plant balloon flowers in full sun (at least six hours of sunlight on most days). However, they will be fine in part shade and might actually prefer some shade from where the afternoon sun is especially hot.
Soil
Balloon flowers prefer organically rich, loamy soil that has good drainage. They don’t grow well in dense soil, such as clay. They like a soil pH in the 5.5 to 7.5 range.
Water
Keep the soil of young plants consistently moist but not soggy. Once established, balloon flowers like a moderate amount of moisture in the soil, but they can tolerate short periods of drought. They won’t need a lot of supplemental watering unless you have a long period without rainfall that causes the soil to dry out.
Temperature and Humidity
Balloon flowers are hardy and do well in USDA growing zones 3 to 8. Their ideal temperature range is between 60 and 80 degrees Fahrenheit, but they can withstand higher temperatures if they have some shade in the afternoon. Frost can kill young plants and will cause established plants to die back into the ground in the fall. Balloon flowers tolerate both humid and dry air conditions, provided they have the right amount of soil moisture.
Fertilizer
Balloon flowers typically don't need supplemental feeding if you have rich soil. But a layer of compost in the fall can help them replenish the energy they expend blooming during the growing season. If you have poor soil, use an all-purpose, slow-release fertilizer in early spring.
Types of Balloon Flowers
There are several popular varieties of balloon flowers, including:
Platycodon grandiflorus Astra series: This type grows double flowers with 10 petals in blue, pink, or white. They're an ideal choice to start from seeds.
P. grandiflorus Fuji series: This is the most commonly sold variety, as well as the tallest, with 30-inch stems and flowers in blue, pink, or white.
P. grandiflorus 'Komachi': The purple-blue flowers in this variety stay in their puffy pillow stage even after blooming.
P. 'Sentimental Blue': This dwarf variety grows about 6 inches tall with lots of 1- to 2-inch purple flowers.
Pruning
Pruning generally isn't necessary with balloon flowers, though you can do so for appearance. To achieve stockier plants, you can cut back tall stems by about half in the late spring. This can help to prevent the plants from flopping over. Also, deadheading your plants (removing spent blooms) will keep them looking good and repeatedly blooming. Don't remove the whole stem, just the faded flowers. The remaining buds on the stem will continue to open.
Propagating Balloon Flowers
Propagating by division is generally not recommended for balloon flowers because the deep taproots do not like being disturbed. Instead, you can propagate by taking stem cuttings.
Use sterile, sharp pruners to trim a 4-inch length of stem, and remove the lower foliage to expose the bare stem.
Use a rooting hormone on the bare stem if you wish, and then pot it in moist soil.
Keep the soil moist (but not soggy) as you wait for roots to take hold.
Once you see leaf growth and feel resistance when you give the cutting a gentle tug, you’ll know roots have grown. Then, the plant is ready to be transplanted into the garden.
How to Grow Balloon Flowers From Seed
Start seeds indoors in the early spring about six to eight weeks before your area's projected last frost date, using seed starter mix or ordinary potting soil. Barely cover the seeds with 1/16 inch of soil. Place the container in a warm location until the seeds germinate. After the weather has warmed, you can transplant the seedlings outdoors. If you plant seeds directly in your garden, do so after your last frost date, but know they likely won't flower in their first year.
Common Pests and Plant Diseases
Balloon flowers generally attract slugs and snails, as do many other outdoor bloomers, which can be coaxed off the plants with bait. However, the plant may become afflicted with crown rot, root rot, botrytis gray mold, powdery mildew, or fungal leaf spot. Crown and root rot may cause plants to die over the winter. Leaves presenting powdery spots, mottling, or blotching can usually be treated with a fungicide. Quickly discard plants with gray mold so it doesn't spread, then use a preventative fungicide on remaining plants.
0
0
文章
Miss Chen
2021年09月19日

The Parodia magnifica genus includes a multitude of showy and easy-to-grow small ball cacti. Native to central South America, they are easy to care for, making them excellent beginner cacti. Their round appearance is to credit for their shapely name, and they can grow in clusters up to over a foot wide. While they prefer a warm and dry climate, they are more adaptable than some of their cacti cousins, able to withstand temperatures that hover around freezing as long as they're kept dry.
Ball cacti are moderate growers, adding about 4 inches to their height each year. Older plants will frequently produce flowers in beautiful shades of yellow, red, orange, or pink, and all varietals feature ridges of spikes that start out white and grow to a yellow-brown with age.

Botanical Name Parodia magnifica
Common Name Ball cactus, balloon cactus, silver ball cactus, blue ball cactus
Plant Type Cactus
Mature Size 3–12 in. tall, 3–18 in. wide
Sun Exposure Full sun, partial shade
Soil Type Sandy, well-drained
Soil pH Acidic
Bloom Time Summer
Flower Color Yellow, pink, red, orange
Hardiness Zones 9–12 (USDA)
Native Area South America
Ball Cactus Care
If you can grow cacti and succulents successfully, you can likely grow the popular ball cactus without too much trouble. It's important to remember that the ball cactus doesn't like direct sunlight and is accustomed to more water than many other cacti species. Additionally, it's imperative that the cactus is not exposed to prolonged dampness or sitting water. Never let your cactus sit in a dish of water, and take care to ensure its soil is very well-draining.
To encourage better flowering, allow the plants to enjoy a cooling period in the winter and dramatically cut back on watering cadence. Lastly, make sure to fertilize during the growing season for the best results.
Light
Ball cacti like lots of light—just not too much of it. Don't let that confuse you, though—it's actually simpler than it seems. Essentially they can take direct sunlight in the softer hours of the mornings and afternoons but should be kept in partial shade throughout the hottest hours of the day. If your yard or garden can't account for both, consider planting your cactus in a pot that you can move into a shadier spot during high noon. If you're planting your cactus indoors and are sitting it at a window sill for sunlight, be sure to rotate it periodically to ensure even (not skewed or crooked) growth.
Soil
Like many cacti, the ball cactus prefers an airy, dry soil mixture. Drainage is especially important as well, so if you're opting for a store-bought blend (cacti or succulent-specific mix is your best bet), consider adding coarse sand, perlite, or pumice to the mixture to help aerate the soil. Overall, the pH level of the soil isn't terribly important to the ball cactus, but it does thrive best in a slightly acidic mixture with a pH between 6.1 and 6.5.
Water
Ball cacti are drought tolerant but do like water during their growing season. Provide regular water during the spring and summer months, but only when the soil is dry to the touch, thoroughly soaking the soil through when you do water. In the winter the cactus will go dormant and need very little water, so you can cease complete cut back watering and let the soil almost dry between waterings, but do not let it completely dry out. If planted in a container, make sure there are several holes in the bottom of the pot to aid in drainage.
Temperature and Humidity
True to their nature, ball cacti prefer warm, desert-like conditions. That being said, they can survive in below-freezing temperatures as low as 20 degrees Fahrenheit, though it's not recommended that they're kept that cold for very long at all.
Dry heat is the key to keeping any cactus, and ball cacti will not do well if exposed to too much moisture—either from watering or in the form of humidity. Therefore, it is unnecessary to spritz them or increase the humidity in their environment.
Fertilizer
Though not necessary, the ball cactus will respond well to fertilizer. During the growing season, fertilize with a cacti fertilizer mix, and suspend feeding during the dormant winter period.
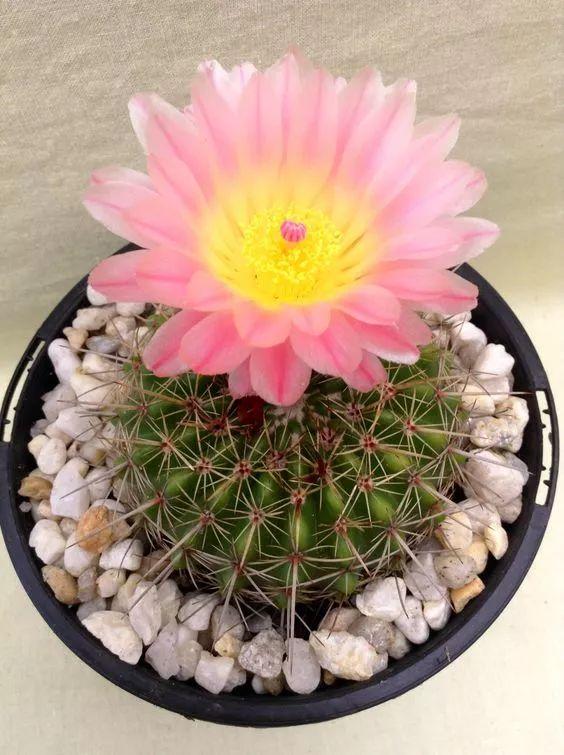
Propagating Ball Cactus
Ball cacti can be propagated easily from offsets, which readily form in clusters around the base of the mother plant. To propagate, carefully remove an offset and allow the cut section to dry on a paper towel for a few days–depending on the size of the cut area, a callous will form over the cut surface. Once the callous has formed, place the new plant in a pot with a cactus or succulent soil mixture and keep it in a warm place until new roots emerge. Once the cactus is established, repot it into a regular-sized container.
Potting and Repotting Ball Cactus
Repot your ball cactus as needed, preferably during the warm season. Make sure the soil is dry before repotting, then gently remove the cactus and surrounding soil from the pot. Knock away the old soil from the roots, making sure to remove any rotted or dead roots in the process. Treat any cuts with a fungicide. Place the plant in its new pot and backfill with potting soil, spreading the roots out as you repot. Leave the plant dry for a week or so, then begin to water lightly to reduce the risk of root rot.
Ball cacti are moderate growers, adding about 4 inches to their height each year. Older plants will frequently produce flowers in beautiful shades of yellow, red, orange, or pink, and all varietals feature ridges of spikes that start out white and grow to a yellow-brown with age.

Botanical Name Parodia magnifica
Common Name Ball cactus, balloon cactus, silver ball cactus, blue ball cactus
Plant Type Cactus
Mature Size 3–12 in. tall, 3–18 in. wide
Sun Exposure Full sun, partial shade
Soil Type Sandy, well-drained
Soil pH Acidic
Bloom Time Summer
Flower Color Yellow, pink, red, orange
Hardiness Zones 9–12 (USDA)
Native Area South America
Ball Cactus Care
If you can grow cacti and succulents successfully, you can likely grow the popular ball cactus without too much trouble. It's important to remember that the ball cactus doesn't like direct sunlight and is accustomed to more water than many other cacti species. Additionally, it's imperative that the cactus is not exposed to prolonged dampness or sitting water. Never let your cactus sit in a dish of water, and take care to ensure its soil is very well-draining.
To encourage better flowering, allow the plants to enjoy a cooling period in the winter and dramatically cut back on watering cadence. Lastly, make sure to fertilize during the growing season for the best results.
Light
Ball cacti like lots of light—just not too much of it. Don't let that confuse you, though—it's actually simpler than it seems. Essentially they can take direct sunlight in the softer hours of the mornings and afternoons but should be kept in partial shade throughout the hottest hours of the day. If your yard or garden can't account for both, consider planting your cactus in a pot that you can move into a shadier spot during high noon. If you're planting your cactus indoors and are sitting it at a window sill for sunlight, be sure to rotate it periodically to ensure even (not skewed or crooked) growth.
Soil
Like many cacti, the ball cactus prefers an airy, dry soil mixture. Drainage is especially important as well, so if you're opting for a store-bought blend (cacti or succulent-specific mix is your best bet), consider adding coarse sand, perlite, or pumice to the mixture to help aerate the soil. Overall, the pH level of the soil isn't terribly important to the ball cactus, but it does thrive best in a slightly acidic mixture with a pH between 6.1 and 6.5.
Water
Ball cacti are drought tolerant but do like water during their growing season. Provide regular water during the spring and summer months, but only when the soil is dry to the touch, thoroughly soaking the soil through when you do water. In the winter the cactus will go dormant and need very little water, so you can cease complete cut back watering and let the soil almost dry between waterings, but do not let it completely dry out. If planted in a container, make sure there are several holes in the bottom of the pot to aid in drainage.
Temperature and Humidity
True to their nature, ball cacti prefer warm, desert-like conditions. That being said, they can survive in below-freezing temperatures as low as 20 degrees Fahrenheit, though it's not recommended that they're kept that cold for very long at all.
Dry heat is the key to keeping any cactus, and ball cacti will not do well if exposed to too much moisture—either from watering or in the form of humidity. Therefore, it is unnecessary to spritz them or increase the humidity in their environment.
Fertilizer
Though not necessary, the ball cactus will respond well to fertilizer. During the growing season, fertilize with a cacti fertilizer mix, and suspend feeding during the dormant winter period.

Propagating Ball Cactus
Ball cacti can be propagated easily from offsets, which readily form in clusters around the base of the mother plant. To propagate, carefully remove an offset and allow the cut section to dry on a paper towel for a few days–depending on the size of the cut area, a callous will form over the cut surface. Once the callous has formed, place the new plant in a pot with a cactus or succulent soil mixture and keep it in a warm place until new roots emerge. Once the cactus is established, repot it into a regular-sized container.
Potting and Repotting Ball Cactus
Repot your ball cactus as needed, preferably during the warm season. Make sure the soil is dry before repotting, then gently remove the cactus and surrounding soil from the pot. Knock away the old soil from the roots, making sure to remove any rotted or dead roots in the process. Treat any cuts with a fungicide. Place the plant in its new pot and backfill with potting soil, spreading the roots out as you repot. Leave the plant dry for a week or so, then begin to water lightly to reduce the risk of root rot.
0
0
文章
Miss Chen
2021年09月08日

Growing avocados outdoors as productive fruit trees can be tricky, but growing them as houseplants is fun and easy, resulting in a seedling that will eventually turn into an attractive little specimen with glossy, oval leaves 4 to 8 inches long. True, it's unlikely your tree will ever bear fruit (unless you give it about 10 years), and even if it does, the fruit from the offspring most likely won't resemble the original. But as an indoor plant, an avocado has plenty of merit as a decorative novelty. Keep in mind that all parts of the avocado plant are toxic to animals.1
Common Name Avocado
Botanical Name Persea americana
Family Lauraceae
Plant Type Broadleaf evergreen fruit tree
Mature Size 30 to 60 ft. in the landscape; potted plants can be pruned to remain small
Sun Exposure Full sun
Soil Type General-purpose potting soil
Soil pH 6.0 to 6.5, tolerates acidic or alkaline soil
Bloom Time Seasonal bloomer
Flower Color Greenish-yellow
Hardiness Zones 10-12 (USDA), any zone as a houseplant
Native Area Mexico
Toxicity Toxic to dogs, birds, and horses
Avocado Plant Care
When avocado is grown as a houseplant, it is often grown from seed (the fruit pits) that can be sprouted in water or directly in potting soil.
Established plants will do best in sunny windows. Fertilize them regularly in spring and summer with a balanced granular fertilizer.
Avocados grown indoors are mostly novelty plants. If you want it to bear fruit and turn into the tree it really is, you'll have to move your avocado outside, but this may only work if you live in a warmer climate.
Light
Like banana trees, avocado plants thrive in full sun. They will tolerate some shade, but potted indoor plants generally need the brightest spot you can find. If you're starting from a seed, the seed can be kept on a bright windowsill until roots form, and the first leaves emerge.
Water
Avocado plants should be kept continuously moist, but adequate drainage is essential. Watch for leaf yellowing, which is a sign of too much water.
Temperature
Avocado plants prefer warm growing seasons, but can take winter temperatures down to 50 degrees Fahrenheit, when growth will slow.
Soil
A rich, fast-draining potting soil mix is ideal.
Fertilizer
Fertilize abundantly during the growing season with a balanced fertilizer.
Types of Avocado Plants
Although there are about 1,000 varieties of avocado, the one most likely to find its way into your home is the Haas avocado, which is grown in tremendous quantities in California and throughout Latin America. These are small, pebbly avocados with high-fat content and delicious flesh. Larger, lighter green Florida avocados are also found in season. These have less fat and are sometimes marketed as health-conscious avocados. You'll find plenty of healthy pits inside any of these types of avocados that you can use to grow your plants.
Pruning
The first serious trimming should occur when the plant is only 12 inches tall. At that time, cut it back to 6 inches and allow for new leaves and stems to form.
As it gets taller, pinch off new growth throughout the summer to force new branches to form, because avocado fruit develops on new growth. Keeping the new growth pinched off will also keep the plant bushy while controlling its size.
Propagating Avocado Plants
Avocado can be propagated in a number of ways., but is usually done for avocado trees planted in the landscape. Professionals graft desirable avocado varieties onto disease-resistant root-stock to produce a disease-resistant tree with the desired kind of fruit or preferred size.
They can also be propagated by air-layering: Encouraging roots to grow by scarring a tree branch, wrapping the wounded area with a small amount of rooting medium, and allowing a bundle of roots to develop while the branch is still on the tree. Once a network of roots are developed, the branch is snipped off and planted in soil.
How to Grow Avocado Plants From Seed
For houseplants, propagate an avocado plant with the seed of the fruit. The seed of an avocado is the large brown pit. Here's how to grow your avocado houseplant:
To sprout an avocado seed, insert three toothpicks into the seed and suspend it with the broad end down over a glass of water.
Cover about an inch of the seed with water.
Keep it in a warm place, but not in direct sunlight.
The seed should sprout in two to six weeks. Let the young plant grow to six inches, then cut it back to three inches to encourage stronger root growth.
When the roots have grown thick and the stem has new leaves again, plant in soil in a pot about 10 inches in diameter, leaving half the seed still exposed above the soil. Make sure the pot has a drainage hole.
Potting and Repotting Avocado Plants
Repot your avocado every spring when the plant begins to grow again. For the first few years, trimming your avocado is necessary to encourage a bushy plant. You can place the avocado outside during summer, and bring it inside before first frost.
Overwintering
Bring your plants inside if it's going to be below 50 degrees Fahrenheit. Winter's lack of humidity may cause your plant to lose leaves, but they will come back when the weather is warm.
Common Pests & Plant Diseases
Look for symptoms like leaf yellowing, which can indicate too much water or sluggish drainage. They may develop root rot in overly wet potting soil. Also, keep an eye out for a white crust on the soil, this means an excess of salt build-up from the fertilizer. Flush the pot regularly.2
When grown outdoors, avocado trees are threatened by laurel wilt, caused by the Raffaelea lauricola fungus. It is transmitted by several different species of ambrosia beetle. Infected trees usually succumb within 4 to 8 weeks.
0
0
文章
Miss Chen
2021年08月15日

The arrowhead vine is a pretty trailing or climbing vine that tends to grow quickly under the right conditions. Native to a wide region of South America, it has become a popular houseplant, thanks to its easy-going nature and appealing hanging shape.
The arrowhead vine's leaf structure changes as it matures, going from a simple arrow shape to a deeply lobed or divided mature leaf. Its leaves can vary in hue depending on their age, ranging from dark green and white to lime green and bright pink. Arrowhead vine is only viable outdoors in USDA hardiness zones 10 through 12, so in most locations in the United States, it is grown year-round as a houseplant. The vine does best if left relatively alone, making it a great pick for novice gardeners or those who just forget to tend to their in-home garden frequently.
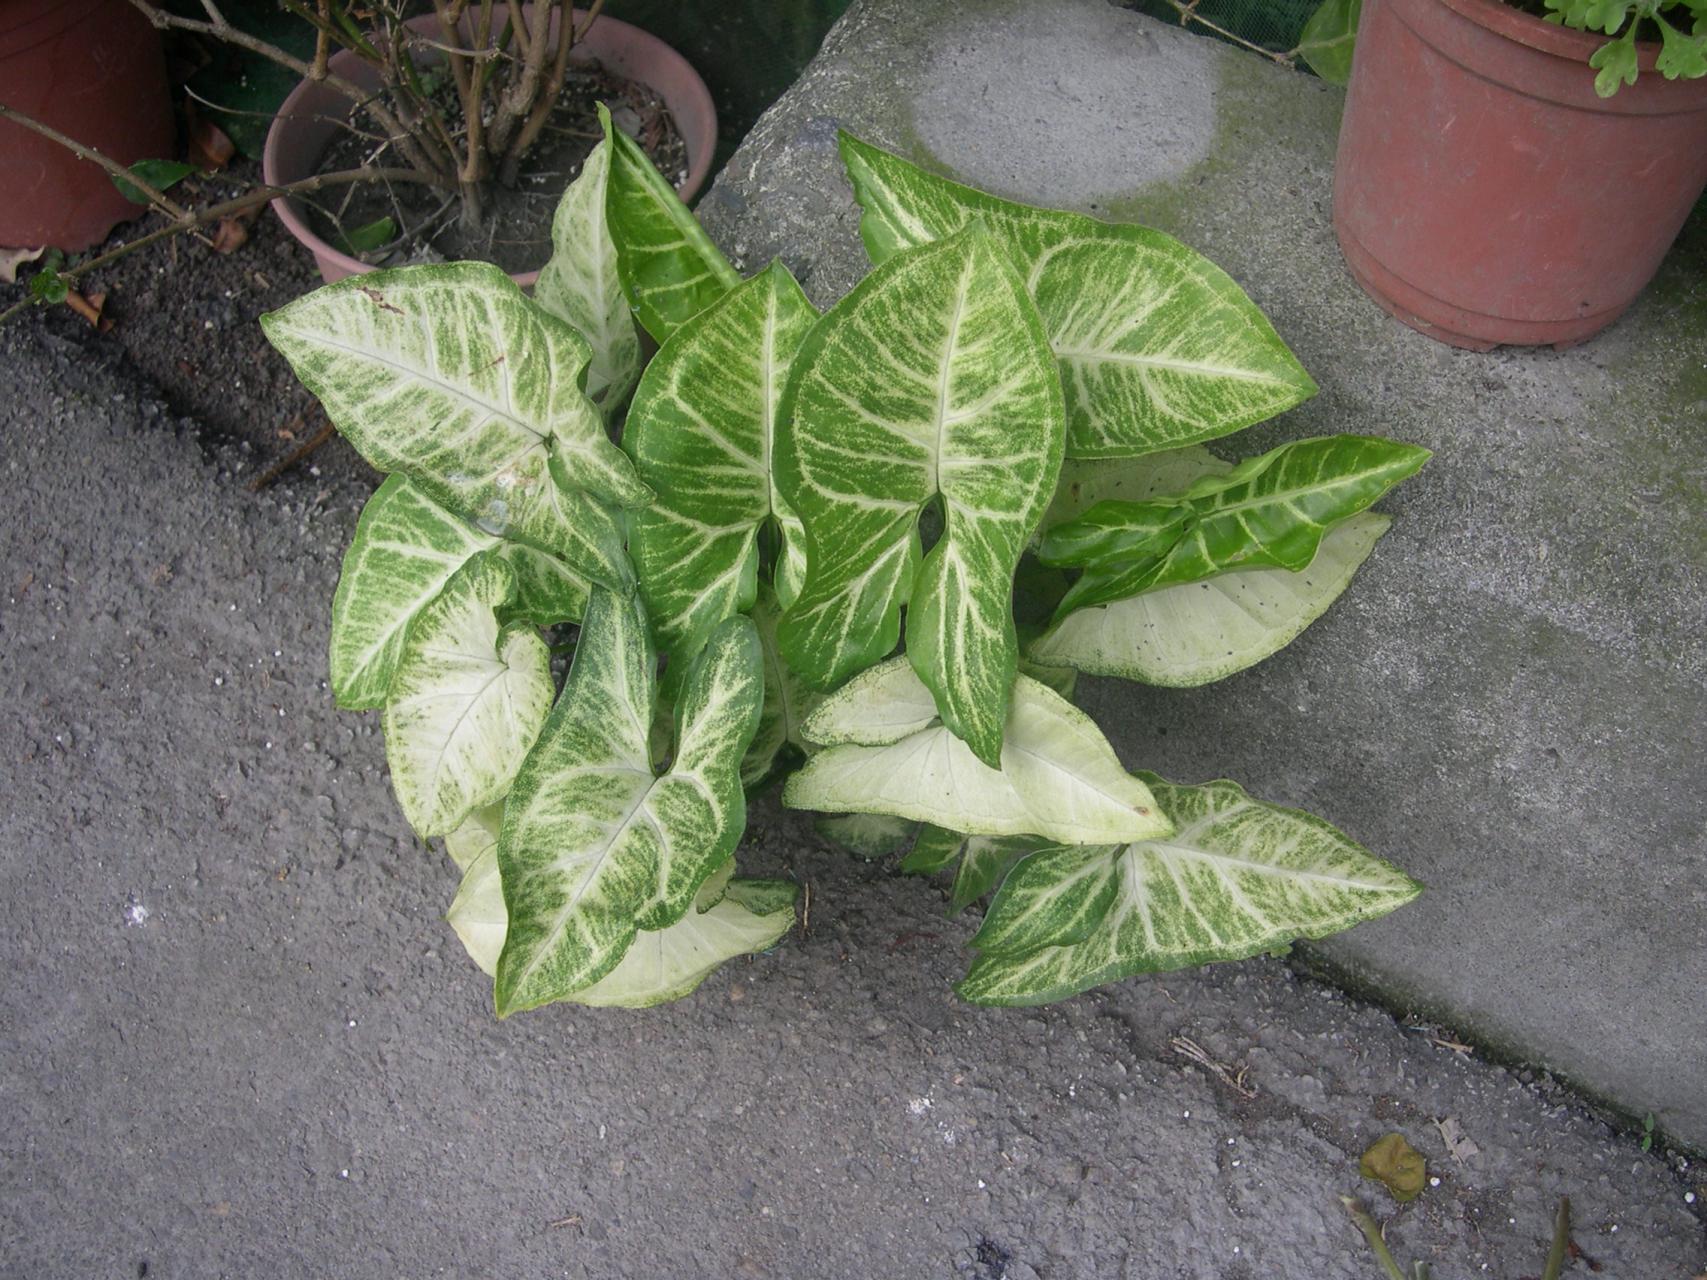
Botanical Name Syngonium podophyllum
Common Name Arrowhead vine
Plant Type Vine
Mature Size 3–6 ft. tall, 1–2 ft. wide
Sun Exposure Partial shade
Soil Type Moist but well-drained
Soil pH Neutral to acidic
Bloom Time Summer (rarely flowers)
Flower Color White
Hardiness Zones 10–12 (USDA)
Native Area South America, Mexico
Toxicity Toxic to dogs and cats
Arrowhead Vine Care
Arrowhead vine is a relatively easy houseplant to care for—it will thrive under the same conditions as its very popular relative, the philodendron. Arrowhead vines are climbers in the wild and will eventually grow from shade into full sun in the canopy of trees, with leaves maturing and gaining size as the plants gain altitude. As a houseplant, they're often used as trailing plants once mature and can be trained up a pole or moss stick for added visual interest. Alternately, you can pinch new growth to maintain the young plant's upright stems.
Tropical in nature, arrowhead vines are perfect for a sunroom or greenhouse conservatory where ample heat, light, and humidity will encourage their growth. Provide your arrowhead vine with the right growing conditions, and you will have a lush and healthy plant.
Light
Arrowhead vine likes bright light but no direct sun. Diffused light is best, as harsh rays can burn or bleach the delicate leaves and vines. Variegated colorways can handle a bit more direct sun, while deeper green varieties are better adapted to partial shade.
Soil
Plant your arrowhead vine in a traditional soil-based potting mix. Arrowhead vines are prone to root rot, so you'll want to make sure whichever potting soil you choose is well-draining. Additionally, consider planting your vine in a terracotta or clay vessel to wick away extra moisture from the soil.
Water
Water your arrowhead vine regularly during the spring and summer months, and reduce your watering cadence come winter. During the spring and summer, you want to allow your vine to dry out partially between waterings but never completely. Likewise, the plant should not be kept too wet, either.
Temperature and Humidity
True to its tropical nature, arrowhead vine prefers warm and humid conditions. If possible, maintain temperatures above 60 degrees Fahrenheit. While the plant can tolerate average humidity, it will thrive best with added moisture in the air. Consider keeping your plant somewhere in your home with naturally higher humidity (like a kitchen or bathroom), or utilize a method of increasing humidity, like a portable machine or placing a bed of wet river rocks beneath the pot.
Fertilizer
Feed your arrowhead vine once a month with liquid fertilizer throughout the spring, summer, and fall months. You can halt feeding throughout winter when the plant will naturally slow its growth.
Propagating Arrowhead Vine
Arrowhead vine plants root readily from stem cuttings and can easily be propagated in the spring or summer months. If your plant has aerial roots along the stem, take a section of the stem with attached roots to increase your odds of success.
To propagate arrowhead vine, place your cutting into a glass of water—within a few weeks, you'll notice new roots have begun to form. Wait at least a month until the roots have strengthened, topping off the water periodically. At that point, you can plant the cutting into the soil as you normally would.

Repotting Arrowhead Vine
These plants are aggressive, rapid-growing vines, so the frequency of repotting depends somewhat on how big you want the vine to get. Repot yearly for a larger vine. Otherwise, refresh potting media every spring and repot every other year to ensure the plant does not become root-bound.
Common Pests and Diseases
Arrowhead vine is relatively resistant to pests on its own. However, dwelling in the home amongst other plants can expose it to pests like spider mites, mealybugs, aphids, and scale. If you notice any of these afflictions, treat your plant immediately with neem oil or another natural solution.
The arrowhead vine's leaf structure changes as it matures, going from a simple arrow shape to a deeply lobed or divided mature leaf. Its leaves can vary in hue depending on their age, ranging from dark green and white to lime green and bright pink. Arrowhead vine is only viable outdoors in USDA hardiness zones 10 through 12, so in most locations in the United States, it is grown year-round as a houseplant. The vine does best if left relatively alone, making it a great pick for novice gardeners or those who just forget to tend to their in-home garden frequently.

Botanical Name Syngonium podophyllum
Common Name Arrowhead vine
Plant Type Vine
Mature Size 3–6 ft. tall, 1–2 ft. wide
Sun Exposure Partial shade
Soil Type Moist but well-drained
Soil pH Neutral to acidic
Bloom Time Summer (rarely flowers)
Flower Color White
Hardiness Zones 10–12 (USDA)
Native Area South America, Mexico
Toxicity Toxic to dogs and cats
Arrowhead Vine Care
Arrowhead vine is a relatively easy houseplant to care for—it will thrive under the same conditions as its very popular relative, the philodendron. Arrowhead vines are climbers in the wild and will eventually grow from shade into full sun in the canopy of trees, with leaves maturing and gaining size as the plants gain altitude. As a houseplant, they're often used as trailing plants once mature and can be trained up a pole or moss stick for added visual interest. Alternately, you can pinch new growth to maintain the young plant's upright stems.
Tropical in nature, arrowhead vines are perfect for a sunroom or greenhouse conservatory where ample heat, light, and humidity will encourage their growth. Provide your arrowhead vine with the right growing conditions, and you will have a lush and healthy plant.
Light
Arrowhead vine likes bright light but no direct sun. Diffused light is best, as harsh rays can burn or bleach the delicate leaves and vines. Variegated colorways can handle a bit more direct sun, while deeper green varieties are better adapted to partial shade.
Soil
Plant your arrowhead vine in a traditional soil-based potting mix. Arrowhead vines are prone to root rot, so you'll want to make sure whichever potting soil you choose is well-draining. Additionally, consider planting your vine in a terracotta or clay vessel to wick away extra moisture from the soil.
Water
Water your arrowhead vine regularly during the spring and summer months, and reduce your watering cadence come winter. During the spring and summer, you want to allow your vine to dry out partially between waterings but never completely. Likewise, the plant should not be kept too wet, either.
Temperature and Humidity
True to its tropical nature, arrowhead vine prefers warm and humid conditions. If possible, maintain temperatures above 60 degrees Fahrenheit. While the plant can tolerate average humidity, it will thrive best with added moisture in the air. Consider keeping your plant somewhere in your home with naturally higher humidity (like a kitchen or bathroom), or utilize a method of increasing humidity, like a portable machine or placing a bed of wet river rocks beneath the pot.
Fertilizer
Feed your arrowhead vine once a month with liquid fertilizer throughout the spring, summer, and fall months. You can halt feeding throughout winter when the plant will naturally slow its growth.
Propagating Arrowhead Vine
Arrowhead vine plants root readily from stem cuttings and can easily be propagated in the spring or summer months. If your plant has aerial roots along the stem, take a section of the stem with attached roots to increase your odds of success.
To propagate arrowhead vine, place your cutting into a glass of water—within a few weeks, you'll notice new roots have begun to form. Wait at least a month until the roots have strengthened, topping off the water periodically. At that point, you can plant the cutting into the soil as you normally would.

Repotting Arrowhead Vine
These plants are aggressive, rapid-growing vines, so the frequency of repotting depends somewhat on how big you want the vine to get. Repot yearly for a larger vine. Otherwise, refresh potting media every spring and repot every other year to ensure the plant does not become root-bound.
Common Pests and Diseases
Arrowhead vine is relatively resistant to pests on its own. However, dwelling in the home amongst other plants can expose it to pests like spider mites, mealybugs, aphids, and scale. If you notice any of these afflictions, treat your plant immediately with neem oil or another natural solution.
0
0
文章
Miss Chen
2021年04月20日

As a novice, I recommend some more popular and relatively easy-to-breed varieties. You can use small pots to raise single plants in a single room, or you can group pots to grow plants with similar habits. If you are a fighter in general cargo, you are strongly recommended to buy these two varieties. The price of real cabbage is a big surprise, and you will not die no matter how you raise it.
1. White Peony
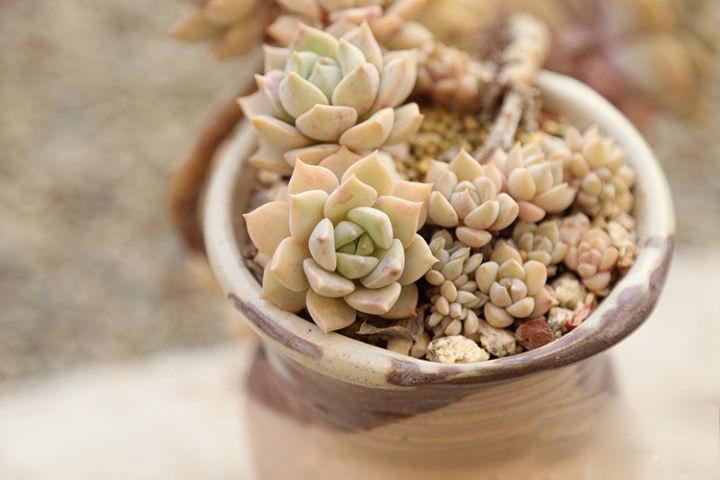
White peonies are tender and tender when they are raised. In the past two years, South Korea brought white peonies of superb quality to the country and sold them at high prices, posing as new varieties. However, because the variety is still relatively general, the temperature difference and light requirements are relatively high if you want to grow a particularly good color. The main surprise that white peony brings is that it is super easy to live.
2. Givalian
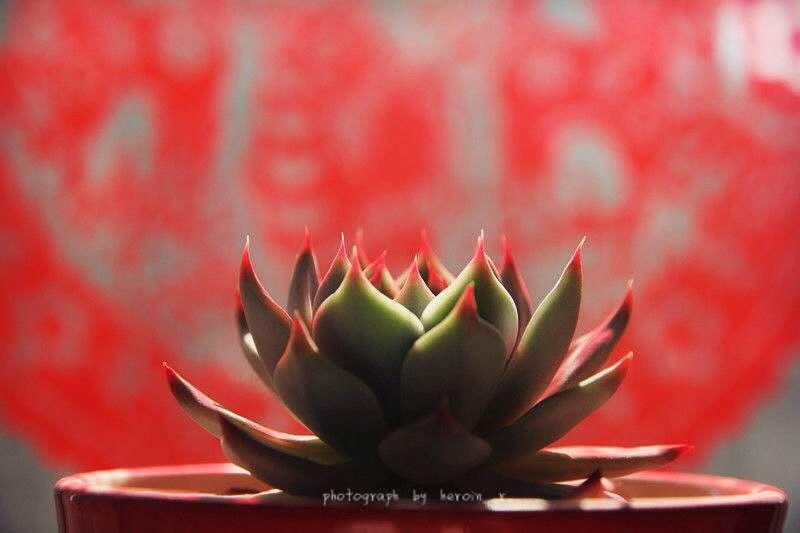
White peony is alive as soon as it is inserted, and Jivalian is basically red as soon as it is exposed to the sun, and it is shining with a little sunshine. In autumn and winter, almost half of the leaves are red tips, which is especially beautiful. And even though it is a common product, Jiwalian rarely grows excessively. In summer, the leaves will elongate and the plant shape is scattered. Most of the time, it is very compact. The magnificent and charming type in everyone's impression, Succulents are always chubby and chubby, but not all of them. Succulents also have romantic varieties like roses.
3. Mountain rose

The rose among the succulents is the mountain rose. The thin leaves are layered on top of each other, rolling out a beautiful heart like a rose, which is very beautiful. Mountain roses are talking about this type of plant, not the name of the variety. In this type of plant, there will be a variety of small roses with petals of different shapes. However, although the plant type is very beautiful, mountain roses are more difficult to produce color, and they are usually green.
4. Lina Lian
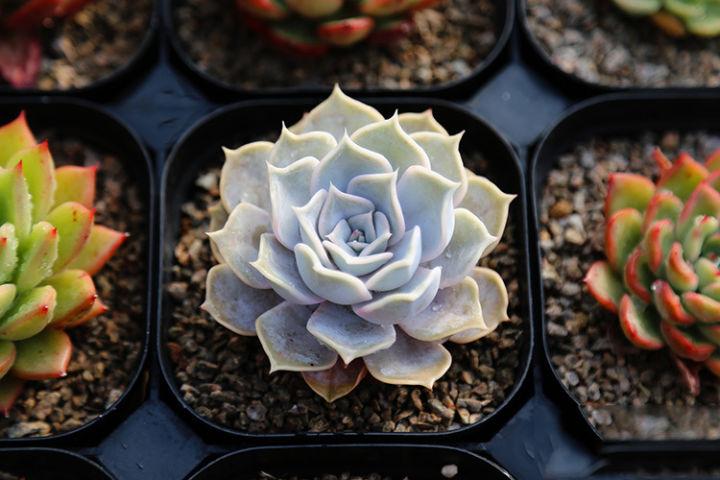
Lina is also a very common general product, because of its unique leaf shape, it has almost become a must-have for the group of pots. In many varieties with round leaves, it can play a good role in adjusting, and Lina is very easy to use. Color, in addition to the unavoidable turning green in summer, other seasons can easily become the kind of light pink that is very girly. However, Lina's words are a bit like white peony. It lives no matter what, but it is a variety that is easier to grow. For the color control, the delicate pink series must not be overlooked. Every year in autumn and winter, these pink varieties are simply going to be beautiful.
5. Debbie

The pink variety is a classic must-have. It grows fast, and is not so easy to grow. It is easier to control the plant type and color, and novices can also grow beautiful.
6, peach eggs
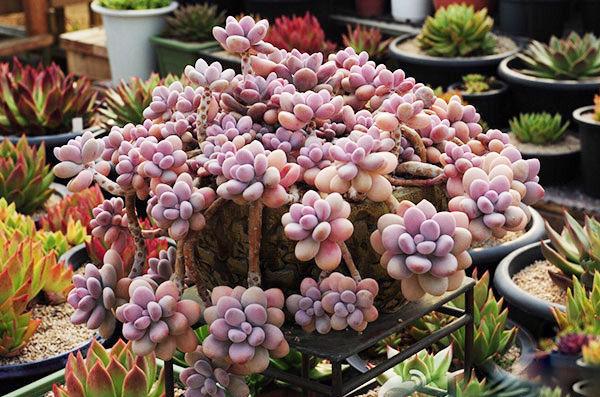
The characteristic of a good variety is that even if the conditions are not adequate, the appearance of the plant will still be good. In terms of price, peach eggs are no longer in the ranks of general merchandise, but the genes of good varieties make them tender and tender almost all year round, and they are not easy to grow. After a long time, the peach egg will become a very beautiful old pile, which is collected by almost every high-level player. Noble and glamorous type In nature, blue plants are relatively rare, whether they are flowers or leaves, so blue succulents are generally quite popular. The white whale almost loses every blue, and it really feels too beautiful.
1. White Peony

White peonies are tender and tender when they are raised. In the past two years, South Korea brought white peonies of superb quality to the country and sold them at high prices, posing as new varieties. However, because the variety is still relatively general, the temperature difference and light requirements are relatively high if you want to grow a particularly good color. The main surprise that white peony brings is that it is super easy to live.
2. Givalian

White peony is alive as soon as it is inserted, and Jivalian is basically red as soon as it is exposed to the sun, and it is shining with a little sunshine. In autumn and winter, almost half of the leaves are red tips, which is especially beautiful. And even though it is a common product, Jiwalian rarely grows excessively. In summer, the leaves will elongate and the plant shape is scattered. Most of the time, it is very compact. The magnificent and charming type in everyone's impression, Succulents are always chubby and chubby, but not all of them. Succulents also have romantic varieties like roses.
3. Mountain rose

The rose among the succulents is the mountain rose. The thin leaves are layered on top of each other, rolling out a beautiful heart like a rose, which is very beautiful. Mountain roses are talking about this type of plant, not the name of the variety. In this type of plant, there will be a variety of small roses with petals of different shapes. However, although the plant type is very beautiful, mountain roses are more difficult to produce color, and they are usually green.
4. Lina Lian

Lina is also a very common general product, because of its unique leaf shape, it has almost become a must-have for the group of pots. In many varieties with round leaves, it can play a good role in adjusting, and Lina is very easy to use. Color, in addition to the unavoidable turning green in summer, other seasons can easily become the kind of light pink that is very girly. However, Lina's words are a bit like white peony. It lives no matter what, but it is a variety that is easier to grow. For the color control, the delicate pink series must not be overlooked. Every year in autumn and winter, these pink varieties are simply going to be beautiful.
5. Debbie

The pink variety is a classic must-have. It grows fast, and is not so easy to grow. It is easier to control the plant type and color, and novices can also grow beautiful.
6, peach eggs

The characteristic of a good variety is that even if the conditions are not adequate, the appearance of the plant will still be good. In terms of price, peach eggs are no longer in the ranks of general merchandise, but the genes of good varieties make them tender and tender almost all year round, and they are not easy to grow. After a long time, the peach egg will become a very beautiful old pile, which is collected by almost every high-level player. Noble and glamorous type In nature, blue plants are relatively rare, whether they are flowers or leaves, so blue succulents are generally quite popular. The white whale almost loses every blue, and it really feels too beautiful.
0
0
文章
莹723
2021年02月17日

Sowing seeds is something that some gardeners avoid, but it’s easy when you know how. You just need to give seeds the right conditions, and they’ll germinate.
Germination is triggered by the correct combination of light levels, temperature and moisture – get these right, and the seed will start to grow.
We show you when and where to sow all kinds of seeds, indoors and outdoors, in this sowing guide.

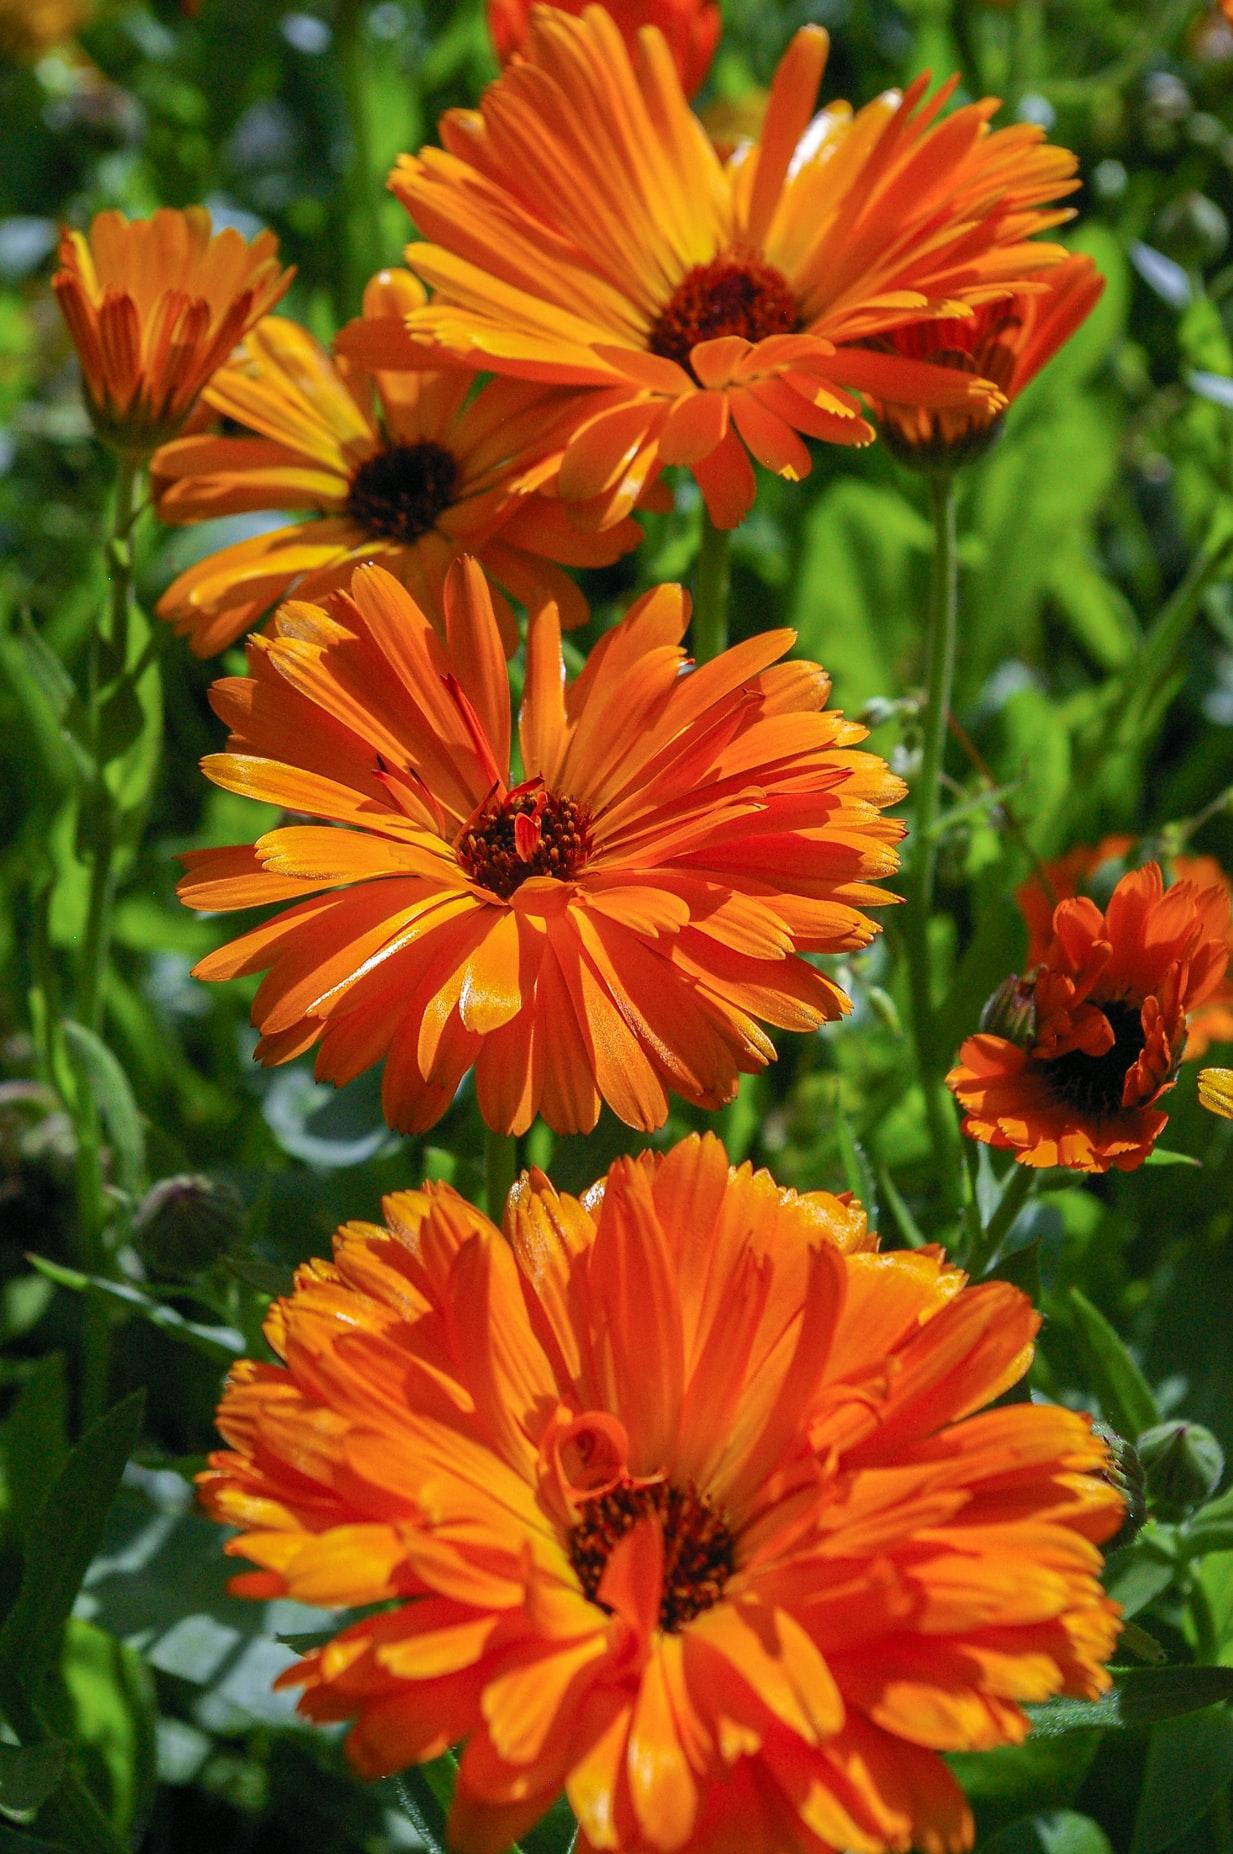
1.Hardy annuals
Including: calendula, cornflower, nasturtium, poppy, sunflower, sweet pea.
Sow under glass: Feb-Mar (soil temp 8-12°C).
Sow outdoors: Mar-April (soil temp 6-12°C).
2.Hardy salads and veg
Including: beetroot, broad bean, chard, lettuce, pea, spring onion, radish, rocket.
Sow under glass: Feb-April (soil temp 10-18°C).
Sow outdoors: March-Sep (soil temp 8-18°C).

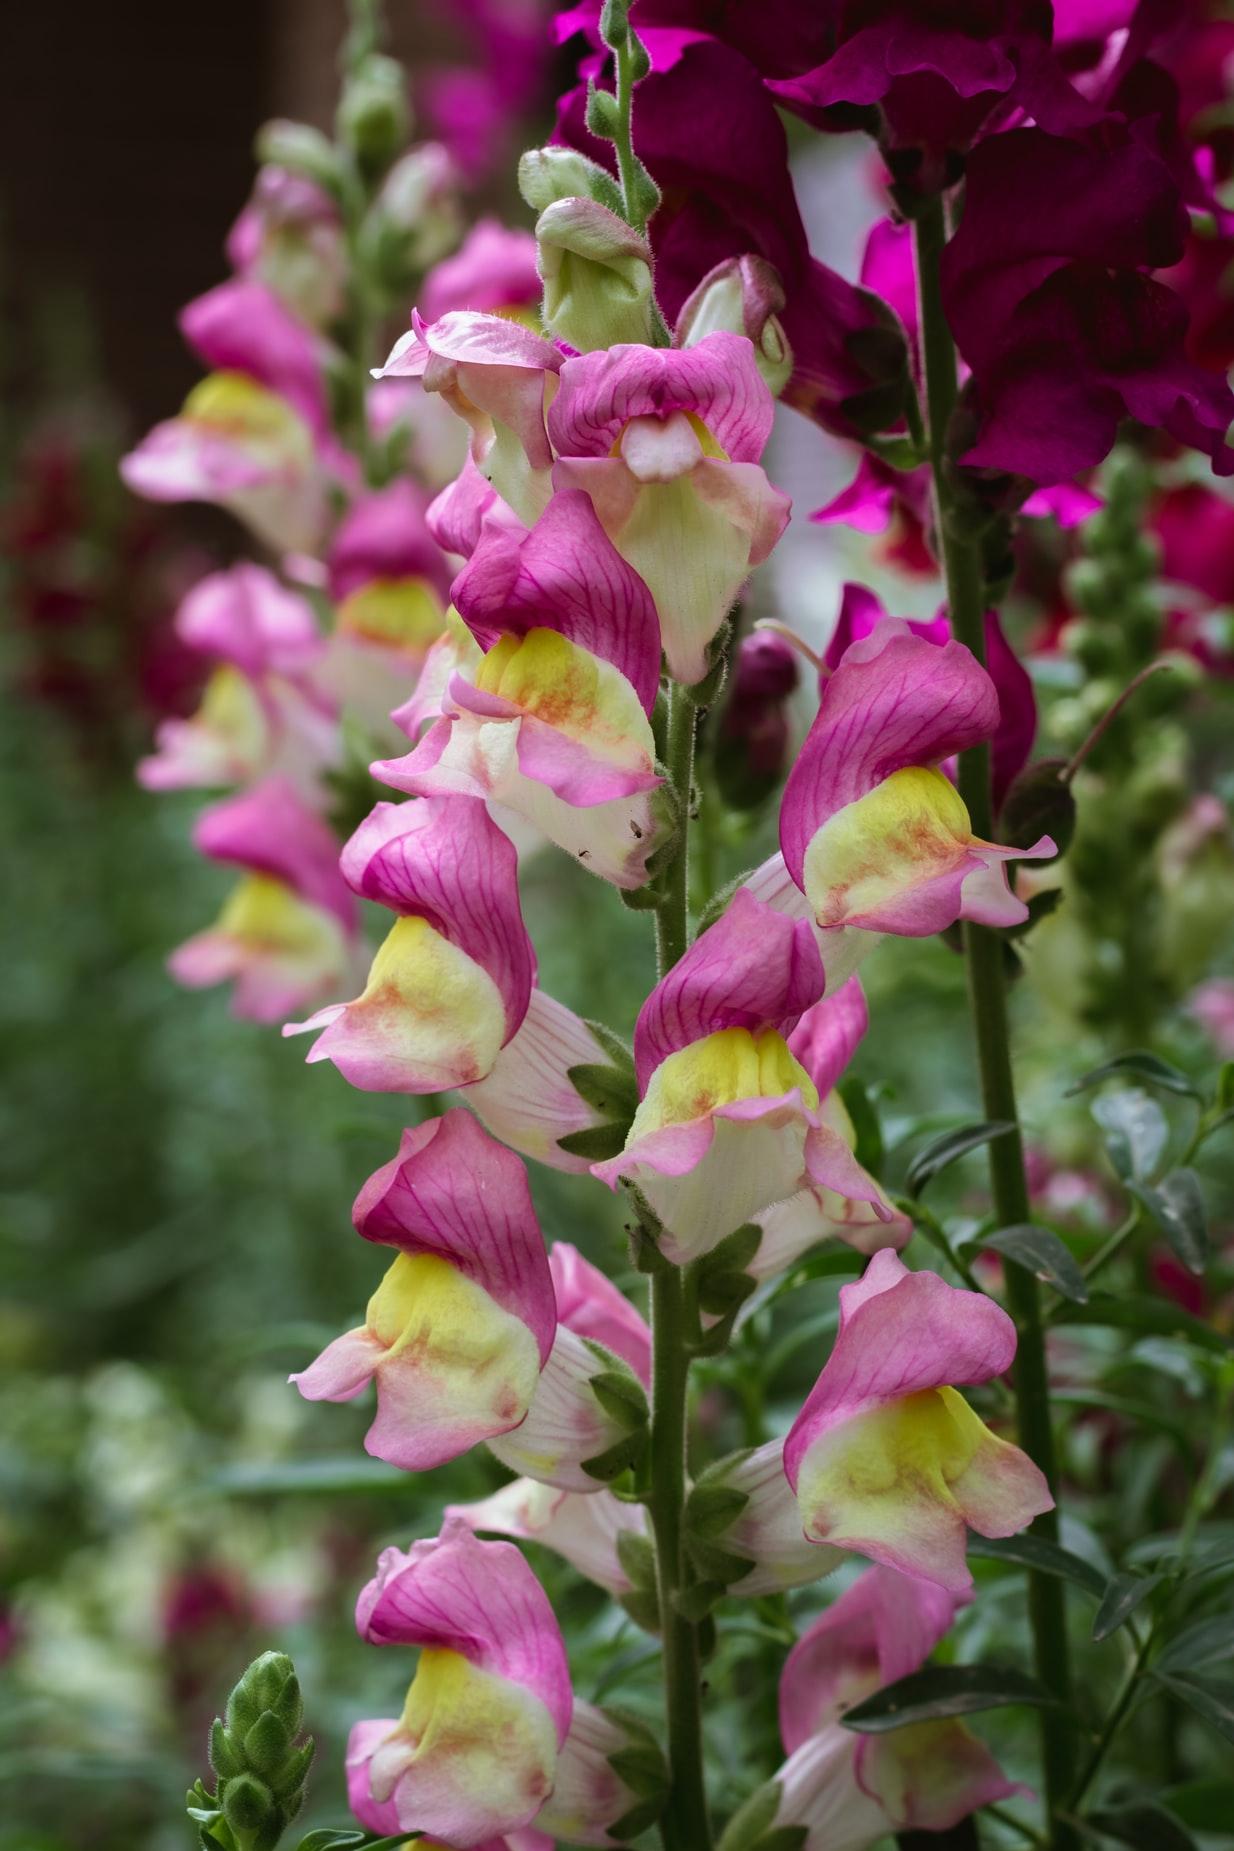
3.Half-hardy flowers
Including: cosmos, lobelia, morning glory, nicotiana, snapdragon.
Sow under glass: Mar (soil temp 16-24°C) – seeds must be sown indoors.
4.Tender perennials
Including: begonias, dahlia, fuchsia, heliotrope, pelargonium, salvia.
Sow under glass: Jan-Feb (soil temp 18-24°C) – must be sown under cover.

5.Frost-tender veg
Including: aubergine, chillies, courgette, French/runner bean, pepper, pumpkin, sweetcorn, tomato.
Sow under glass: April (soil temp 16-28°C).
Sow outdoors: May-June (soil temp at least 10°C).

6.Hardy perennials
Including: aquilegia, delphinium, echinacea, hellebore, lupin, rudbeckia, verbascum.
Sow under glass: Jan-Feb (soil temp 18-21°C).
Sow outdoors: April-June (soil temp at least 10°C).

7.Polyanthus
Including: campanula, forget-me-not, foxglove, polyanthus, sweet william, wallflower, winter pansy.
Sow under glass: June (soil temp 12-18°C).
Sow outdoors: April-June (soil temp 10-18°C).

8.Trees and shrubs
Including: abutilon, acer, bonsai, cotoneaster, cytisus (broom), hawthorn, sorbus.
Sow under glass: Sep-Mar (soil temp 4-10°C).
Sow outdoors: Sep-Mar (soil temp 0-12°C).

Germination is triggered by the correct combination of light levels, temperature and moisture – get these right, and the seed will start to grow.
We show you when and where to sow all kinds of seeds, indoors and outdoors, in this sowing guide.

1.Hardy annuals
Including: calendula, cornflower, nasturtium, poppy, sunflower, sweet pea.
Sow under glass: Feb-Mar (soil temp 8-12°C).
Sow outdoors: Mar-April (soil temp 6-12°C).

2.Hardy salads and veg
Including: beetroot, broad bean, chard, lettuce, pea, spring onion, radish, rocket.
Sow under glass: Feb-April (soil temp 10-18°C).
Sow outdoors: March-Sep (soil temp 8-18°C).

3.Half-hardy flowers
Including: cosmos, lobelia, morning glory, nicotiana, snapdragon.
Sow under glass: Mar (soil temp 16-24°C) – seeds must be sown indoors.

4.Tender perennials
Including: begonias, dahlia, fuchsia, heliotrope, pelargonium, salvia.
Sow under glass: Jan-Feb (soil temp 18-24°C) – must be sown under cover.

5.Frost-tender veg
Including: aubergine, chillies, courgette, French/runner bean, pepper, pumpkin, sweetcorn, tomato.
Sow under glass: April (soil temp 16-28°C).
Sow outdoors: May-June (soil temp at least 10°C).

6.Hardy perennials
Including: aquilegia, delphinium, echinacea, hellebore, lupin, rudbeckia, verbascum.
Sow under glass: Jan-Feb (soil temp 18-21°C).
Sow outdoors: April-June (soil temp at least 10°C).

7.Polyanthus
Including: campanula, forget-me-not, foxglove, polyanthus, sweet william, wallflower, winter pansy.
Sow under glass: June (soil temp 12-18°C).
Sow outdoors: April-June (soil temp 10-18°C).

8.Trees and shrubs
Including: abutilon, acer, bonsai, cotoneaster, cytisus (broom), hawthorn, sorbus.
Sow under glass: Sep-Mar (soil temp 4-10°C).
Sow outdoors: Sep-Mar (soil temp 0-12°C).

0
0
文章
莹723
2020年12月15日

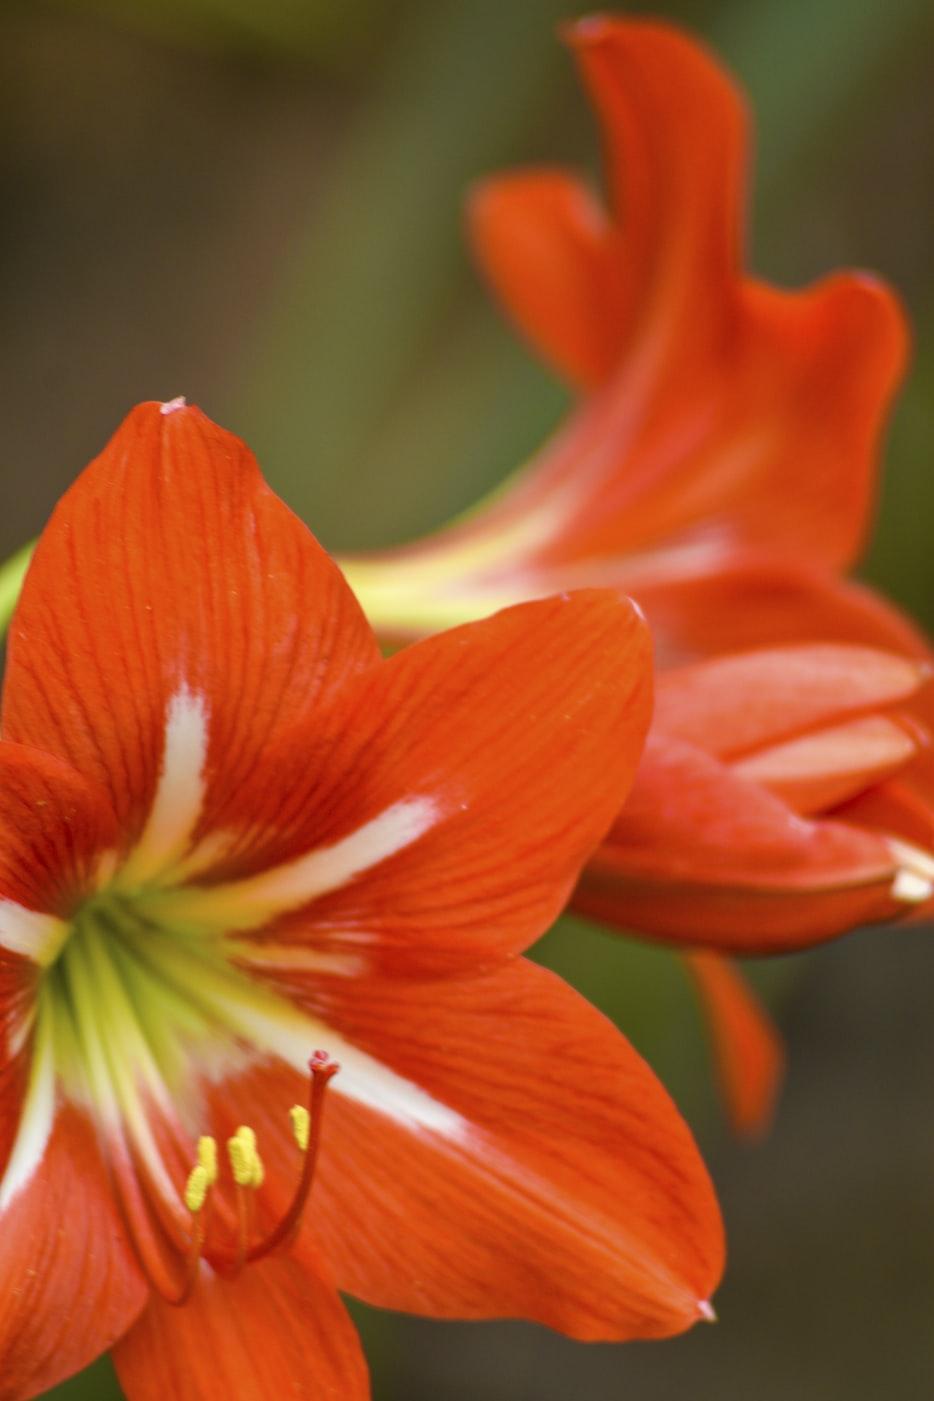
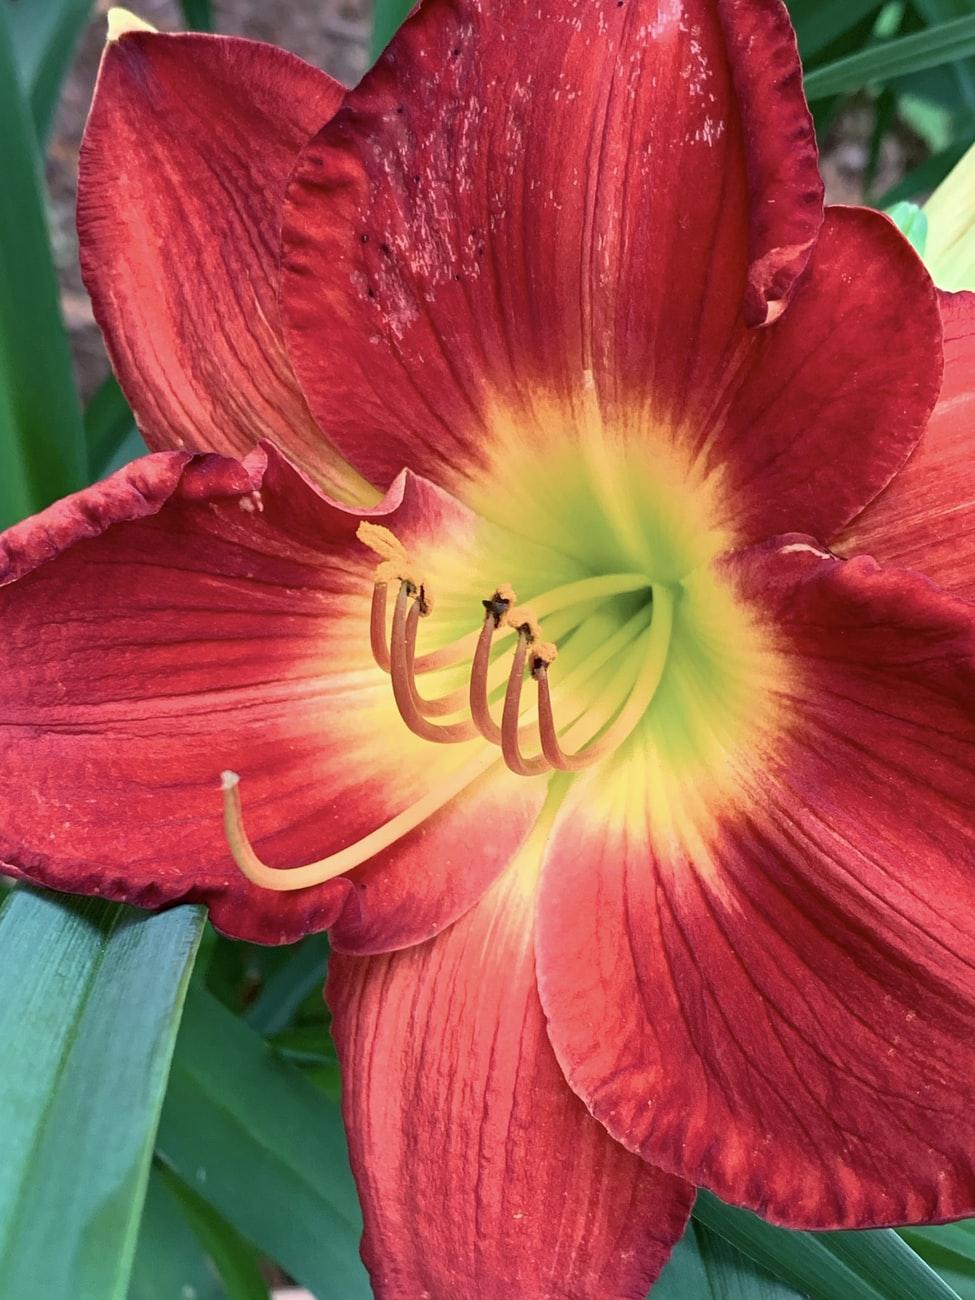
In the depths of winter and early spring, the flamboyant blooms of amaryllis (Hippeastrum) are welcome. They’re easy to grow, and take between six to eight weeks to flower. Planted in mid-late September, they should produce their large trumpet flowers for Christmas.
The rich red variety ‘Royal Velvet’ is great for decorating your home or to give as a gift:
Like many bulbs, including lilies, all parts of amaryllis are poisonous to cats and dogs, so please grow them in areas they can’t reach.
You Will Need
•Amaryllis bulb
•Multi-purpose, peat-free compost
•20cm diameter pot
•Pot, for soaking
Step 1
Soak the amaryllis bulbs for a few hours to help rehydrate the roots and speed up the growth process.
Step 2
Fill a pot with compost and sit the bulb on top. Don’t use a pot that’s too big: amaryllis do best when pot bound.

Step 3
Top up with compost and water in. Leave in a warm, dark place for a couple of weeks and don’t water further.
Step 4
When a shoot emerges, bring inside to a warm, light spot and water regularly. Expect flowers in six to eight weeks.

The rich red variety ‘Royal Velvet’ is great for decorating your home or to give as a gift:
Like many bulbs, including lilies, all parts of amaryllis are poisonous to cats and dogs, so please grow them in areas they can’t reach.

You Will Need
•Amaryllis bulb
•Multi-purpose, peat-free compost
•20cm diameter pot
•Pot, for soaking

Step 1
Soak the amaryllis bulbs for a few hours to help rehydrate the roots and speed up the growth process.
Step 2
Fill a pot with compost and sit the bulb on top. Don’t use a pot that’s too big: amaryllis do best when pot bound.

Step 3
Top up with compost and water in. Leave in a warm, dark place for a couple of weeks and don’t water further.
Step 4
When a shoot emerges, bring inside to a warm, light spot and water regularly. Expect flowers in six to eight weeks.

0
0
文章
莹723
2020年11月19日

The blooms of amaryllis (Hippeastrum) are a stunning sight in the depths of winter and early spring. They’re easy to grow, and take between six to eight weeks to flower. Planted during October into an attractive container, they should produce their large trumpet flowers during the coming festive season.
You will like the rich red variety ‘Royal Velvet’, which is great for decorating your home or to give as a gift!
Like many bulbs, including lilies, all parts of amaryllis are poisonous to cats and dogs, so make sure to grow them in areas they can’t reach.
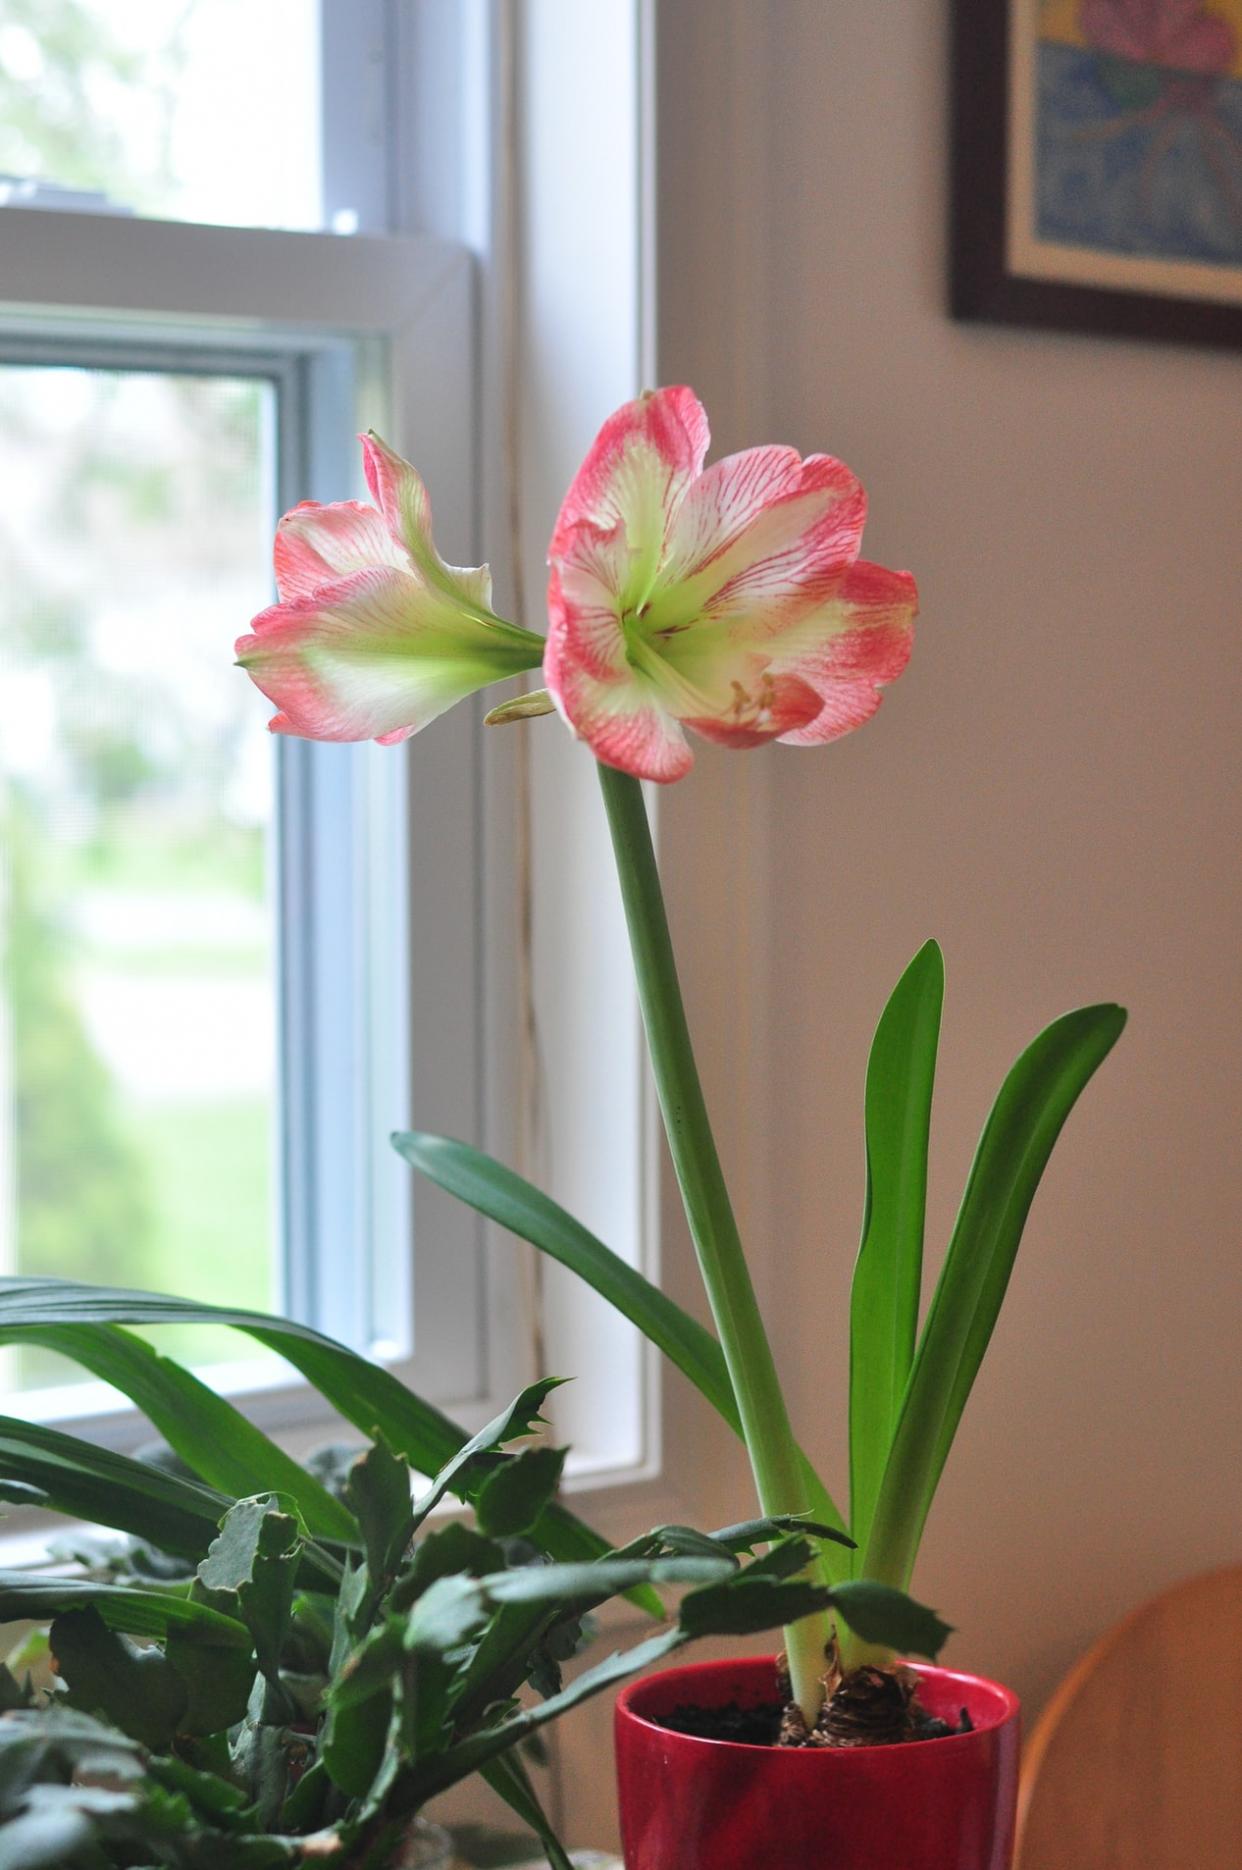
Let’s find out how to force amaryllis bulbs for a wonderful Christmas display.
You Will Need
•Amaryllis bulb
•Multi-purpose, peat-free compost
•20cm diameter pot
•Pot, for soaking
Total time:
30 minutes

Step 1
Soak the amaryllis bulbs for a few hours to help rehydrate the roots and speed up the growth process.

Step 2
Fill a pot with compost and sit the bulb on top. Don’t use a pot that’s too big: amaryllis do best when pot bound.

Step 3
Top up with compost and water in. Leave in a warm, dark place for a couple of weeks and don’t water further.

Step 4
When a shoot emerges, bring inside to a warm, light spot and water regularly. Expect flowers in six to eight weeks.

You will like the rich red variety ‘Royal Velvet’, which is great for decorating your home or to give as a gift!
Like many bulbs, including lilies, all parts of amaryllis are poisonous to cats and dogs, so make sure to grow them in areas they can’t reach.

Let’s find out how to force amaryllis bulbs for a wonderful Christmas display.
You Will Need
•Amaryllis bulb
•Multi-purpose, peat-free compost
•20cm diameter pot
•Pot, for soaking
Total time:
30 minutes

Step 1
Soak the amaryllis bulbs for a few hours to help rehydrate the roots and speed up the growth process.

Step 2
Fill a pot with compost and sit the bulb on top. Don’t use a pot that’s too big: amaryllis do best when pot bound.

Step 3
Top up with compost and water in. Leave in a warm, dark place for a couple of weeks and don’t water further.

Step 4
When a shoot emerges, bring inside to a warm, light spot and water regularly. Expect flowers in six to eight weeks.

0
0
文章
莹723
2020年11月13日

•Plant size
80cm height
80cm spread
•Average Yield
4.5kg-13.5kg per 3m row
•Spacing
1.6m apart
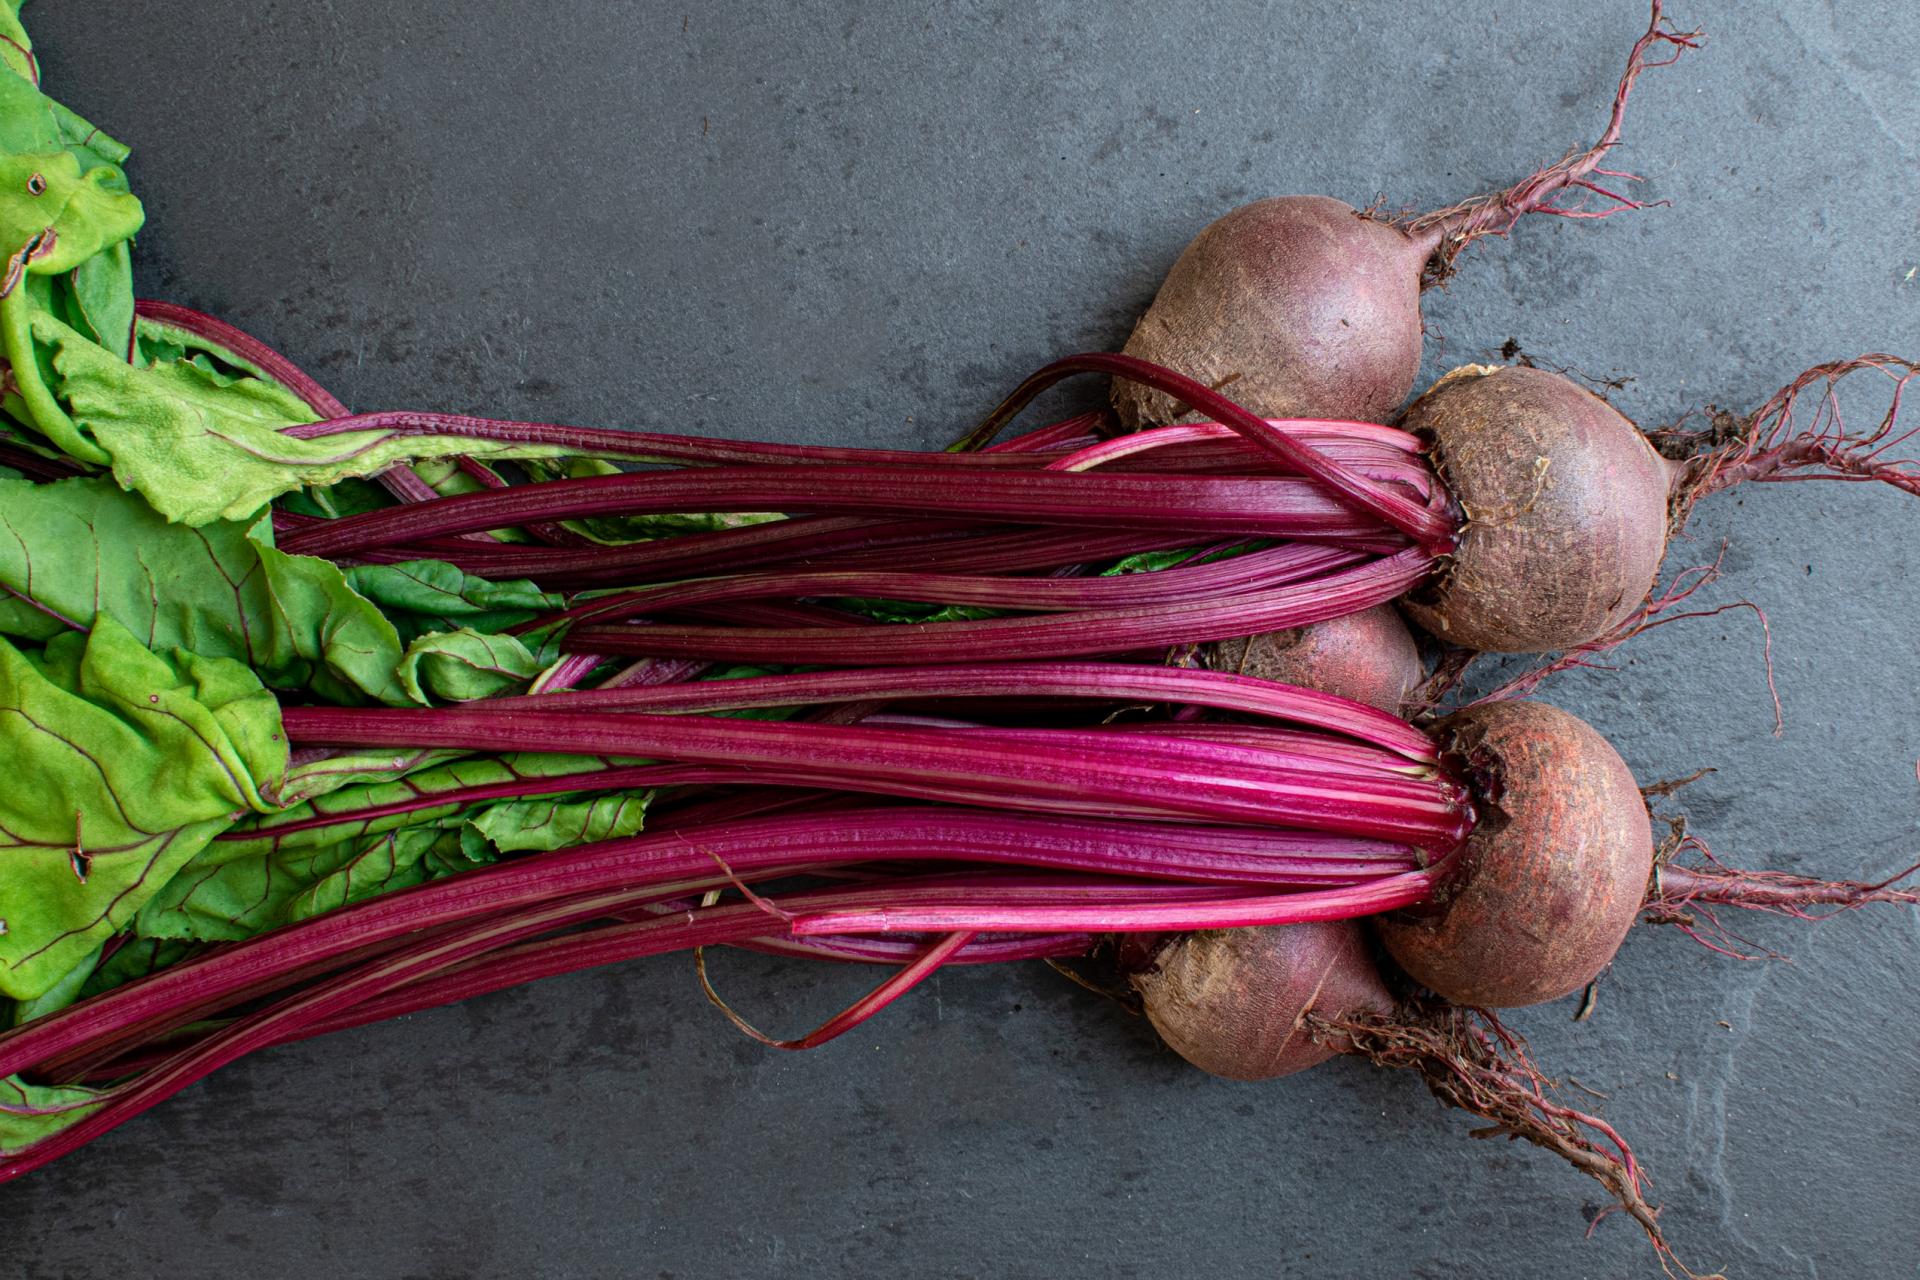
Rhubarb is easy to grow, producing masses of delicious stalks every year. Only the rhubarb stalks are edible. Never eat rhubarb leaves as these are extremely poisonous – compost these instead.
Plant rhubarb in fertile, free-draining soil with added organic matter, such as well-rotted horse manure. Allow plenty of space around the plant so it can spread out. Water during dry periods and mulch annually, in autumn. It’s a good idea to remove any flower stems when they appear to direct energy back into stem production. To harvest rhubarb, take the entire stem, gently twisting and then pulling it upwards from the base.
Find out more about growing rhubarb, below.

——How to grow rhubarb
The best way to plant rhubarb is to plant rhubarb crowns. Crowns are offsets cut from divisions of vigorous parent plants – usually they will be a piece of root with at least one dormant bud visible. Plant them in late autumn, 90cm or more apart, depending on the eventual spread of your chosen cultivar. Rhubarb will grow well in a sunny, open site, on a wide range of soils, as long as it has been well-prepared with plenty of manure or compost.
If you like the challenge of growing from seed, sow rhubarb outdoors in spring in a seedbed, thinning to 15cm apart and then once more to 30cm apart. The quality of seed-grown rhubarb can vary, so be ruthless in selecting the strongest plants to grow on. Plant out your chosen plants in a permanent site in autumn or spring.

——Caring for rhubarb
Rhubarb doesn’t need much attention and once established rhubarb plants will be productive for around 10 years. Maintaining soil fertility is the key to keeping plants healthy. Mulch around the base of plants with home-made compost, well-rotted manure and leaf mould, to suppress weeds and retain soil moisture. Giving plants a liquid feed in spring will also aid strong growth.
To get the sweetest and earliest crop of rhubarb you need to force rhubarb plants to produce stems before they would normally be ready. This simply means covering the crowns in early winter, to block out the light. You can use a bin or bucket, or a traditional terracotta rhubarb forcer – any cover that’s at least 45cm high. Your rhubarb plants will have developed tender stems after around five weeks.
If you have a greenhouse or garage, you can lift rhubarb plants to force indoors, for an even earlier crop. Dig up crowns in November and leave them on the soil surface to chill for two weeks. This will break dormancy. Then pot up each crown in compost, before moving into a cool indoor spot, and then cover.
It’s best to wait until your plants are well-established before forcing rhubarb, as it takes quite a lot of energy from the plant. Forced rhubarb plants will not usually produce much of a crop later on, but can be divided and replanted in summer.

——Harvesting rhubarb
Harvest rhubarb stems when they’re green or red. For strong and healthy growth, don’t harvest rhubarb in the first year, and take only a few stalks in the second. If you have established plants, three or more years old, rhubarb is ready to harvest from spring onwards, as soon as the stalks are long enough – between 30-60cm, depending on the variety. There’s no need to use a knife, simply pull and twist the stems off the plant, as this stimulates fresh new growth.
Forced rhubarb is usually ready in late winter to early spring. The stems will be shorter, but sweeter.

——Storing rhubar
Rhubarb is at its most delicious when cooked after being freshly picked. However, it can be frozen, raw and cut into chunks, or after cooking.
Traditionally rhubarb is stewed or baked and served with custard or in a pie or crumble.

——Growing rhubarb: problem solving
Rhubarb plants can be prone to honey fungus, crown rot and viruses. Any of these diseases will weaken the plant and it is best to dig up affected plants and start again on a new site. Crown rot is the most common. It’s a fungal infection at the base of the stalks, and causes the crowns to turn brown and soft. Unfortunately there’s no remedy.
——Rhubarb varieties to try
•Rheum x hybridum ‘Timperley Early’ – ideal for forcing, this will produce tender pink stems in February. But even unforced, it is one of the earliest varieties, ready to harvest from March
•Rheum x hybridum ‘Stockbridge Arrow’ – long, thick stems with a good colour and sweet flavour. Leaves are arrow-shaped and very ornamental, which makes it a great choice for mixed borders and smaller gardens. H: 60cm x S:1.2m
•Rheum x hybridum ‘Cawood Delight’ – a relatively new variety, producing dark pinky-red stems with a good shine and flavour. Although valued for its high quality stems, it produces smaller yields and is not suitable for forcing. H:1.4m x S:1.4m
•Rheum x hybridum ‘Victoria’ – an old and reliable variety, reputedly named after Queen Victoria. It produces high yields of long stems with a sweet flavour and good texture and can be harvested as baby stems, forced or simply left to mature. H:1.4m x S:1.4m
•Rheum x hybridum ‘Fulton’s Strawberry Surprise’ – a newer introduction with vivid red stems on strong, vigorous plants. H:1.4m x S:1.4m
•Rheum x hybridum ‘Livingstone’ – a new variety that crops in autumn and spring
80cm height
80cm spread
•Average Yield
4.5kg-13.5kg per 3m row
•Spacing
1.6m apart
Rhubarb is easy to grow, producing masses of delicious stalks every year. Only the rhubarb stalks are edible. Never eat rhubarb leaves as these are extremely poisonous – compost these instead.
Plant rhubarb in fertile, free-draining soil with added organic matter, such as well-rotted horse manure. Allow plenty of space around the plant so it can spread out. Water during dry periods and mulch annually, in autumn. It’s a good idea to remove any flower stems when they appear to direct energy back into stem production. To harvest rhubarb, take the entire stem, gently twisting and then pulling it upwards from the base.
Find out more about growing rhubarb, below.

——How to grow rhubarb
The best way to plant rhubarb is to plant rhubarb crowns. Crowns are offsets cut from divisions of vigorous parent plants – usually they will be a piece of root with at least one dormant bud visible. Plant them in late autumn, 90cm or more apart, depending on the eventual spread of your chosen cultivar. Rhubarb will grow well in a sunny, open site, on a wide range of soils, as long as it has been well-prepared with plenty of manure or compost.
If you like the challenge of growing from seed, sow rhubarb outdoors in spring in a seedbed, thinning to 15cm apart and then once more to 30cm apart. The quality of seed-grown rhubarb can vary, so be ruthless in selecting the strongest plants to grow on. Plant out your chosen plants in a permanent site in autumn or spring.

——Caring for rhubarb
Rhubarb doesn’t need much attention and once established rhubarb plants will be productive for around 10 years. Maintaining soil fertility is the key to keeping plants healthy. Mulch around the base of plants with home-made compost, well-rotted manure and leaf mould, to suppress weeds and retain soil moisture. Giving plants a liquid feed in spring will also aid strong growth.
To get the sweetest and earliest crop of rhubarb you need to force rhubarb plants to produce stems before they would normally be ready. This simply means covering the crowns in early winter, to block out the light. You can use a bin or bucket, or a traditional terracotta rhubarb forcer – any cover that’s at least 45cm high. Your rhubarb plants will have developed tender stems after around five weeks.
If you have a greenhouse or garage, you can lift rhubarb plants to force indoors, for an even earlier crop. Dig up crowns in November and leave them on the soil surface to chill for two weeks. This will break dormancy. Then pot up each crown in compost, before moving into a cool indoor spot, and then cover.
It’s best to wait until your plants are well-established before forcing rhubarb, as it takes quite a lot of energy from the plant. Forced rhubarb plants will not usually produce much of a crop later on, but can be divided and replanted in summer.

——Harvesting rhubarb
Harvest rhubarb stems when they’re green or red. For strong and healthy growth, don’t harvest rhubarb in the first year, and take only a few stalks in the second. If you have established plants, three or more years old, rhubarb is ready to harvest from spring onwards, as soon as the stalks are long enough – between 30-60cm, depending on the variety. There’s no need to use a knife, simply pull and twist the stems off the plant, as this stimulates fresh new growth.
Forced rhubarb is usually ready in late winter to early spring. The stems will be shorter, but sweeter.

——Storing rhubar
Rhubarb is at its most delicious when cooked after being freshly picked. However, it can be frozen, raw and cut into chunks, or after cooking.
Traditionally rhubarb is stewed or baked and served with custard or in a pie or crumble.

——Growing rhubarb: problem solving
Rhubarb plants can be prone to honey fungus, crown rot and viruses. Any of these diseases will weaken the plant and it is best to dig up affected plants and start again on a new site. Crown rot is the most common. It’s a fungal infection at the base of the stalks, and causes the crowns to turn brown and soft. Unfortunately there’s no remedy.

——Rhubarb varieties to try
•Rheum x hybridum ‘Timperley Early’ – ideal for forcing, this will produce tender pink stems in February. But even unforced, it is one of the earliest varieties, ready to harvest from March
•Rheum x hybridum ‘Stockbridge Arrow’ – long, thick stems with a good colour and sweet flavour. Leaves are arrow-shaped and very ornamental, which makes it a great choice for mixed borders and smaller gardens. H: 60cm x S:1.2m
•Rheum x hybridum ‘Cawood Delight’ – a relatively new variety, producing dark pinky-red stems with a good shine and flavour. Although valued for its high quality stems, it produces smaller yields and is not suitable for forcing. H:1.4m x S:1.4m
•Rheum x hybridum ‘Victoria’ – an old and reliable variety, reputedly named after Queen Victoria. It produces high yields of long stems with a sweet flavour and good texture and can be harvested as baby stems, forced or simply left to mature. H:1.4m x S:1.4m
•Rheum x hybridum ‘Fulton’s Strawberry Surprise’ – a newer introduction with vivid red stems on strong, vigorous plants. H:1.4m x S:1.4m
•Rheum x hybridum ‘Livingstone’ – a new variety that crops in autumn and spring
0
0
文章
莹723
2020年11月04日

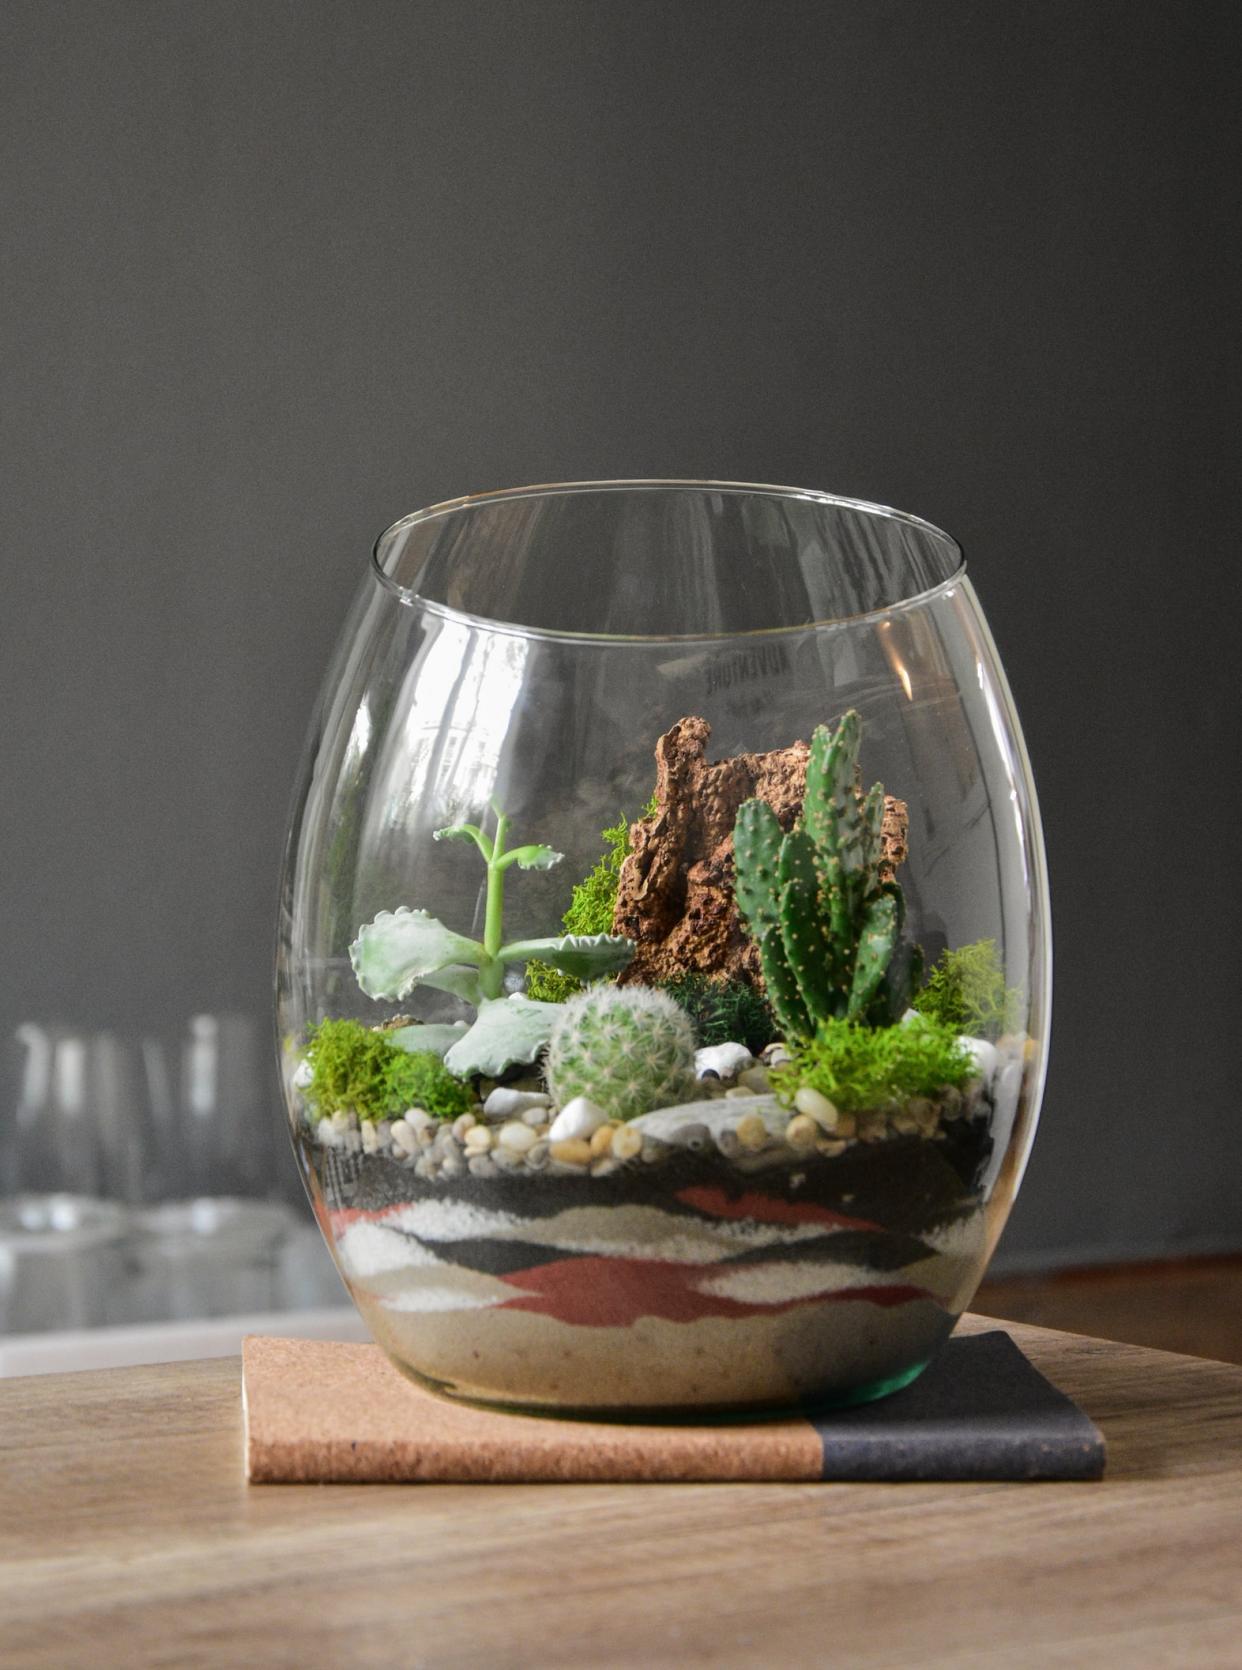
Bottle gardens, or terrariums, are enjoying a revival, and they’re easy to create.The key is to combine small plants that thrive in similar growing conditions – usually either damp shade or drought.
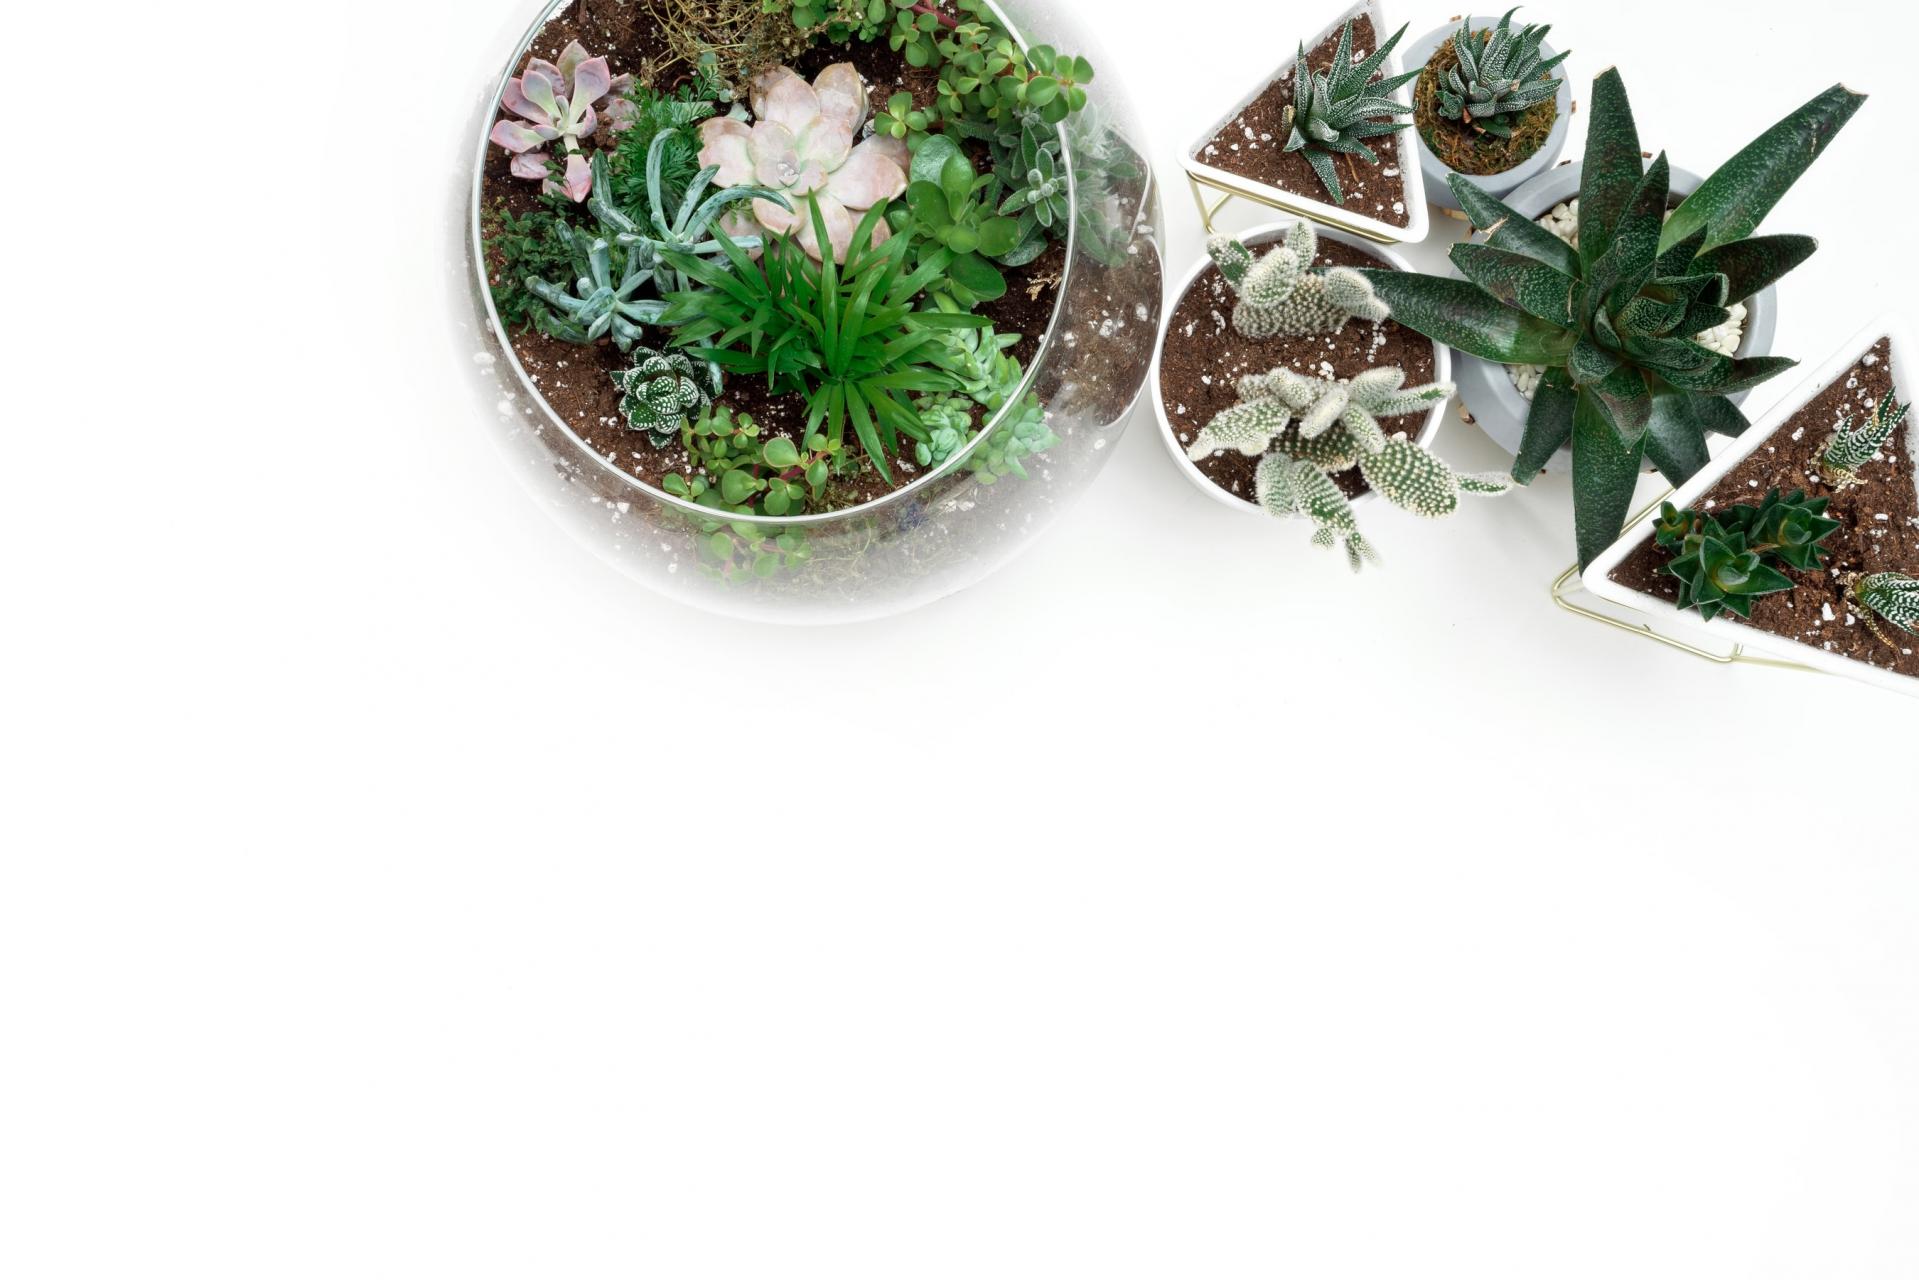
You can plant a bottle garden in virtually any glass vessel, though closed ones are best for moisture lovers and open ones best for plants used to drier conditions. Don’t worry if you can’t find what we used – look in charity shops, garden centres, your kitchen cupboard or on the internet for something that appeals.

You Will Need
•Vintage glass bottle
•Horticultural grit
•Peat free houseplant compost
•Moss, (from the lawn)
•Spathiphyllum 'Chopin'
•Fittonia verschaffeltii
•Syngonium 'White Butterfly'
•Chlorophytum comosum 'Ocean'
•Peperomia rotundifolia
Total time:
20 minutes
Step 1
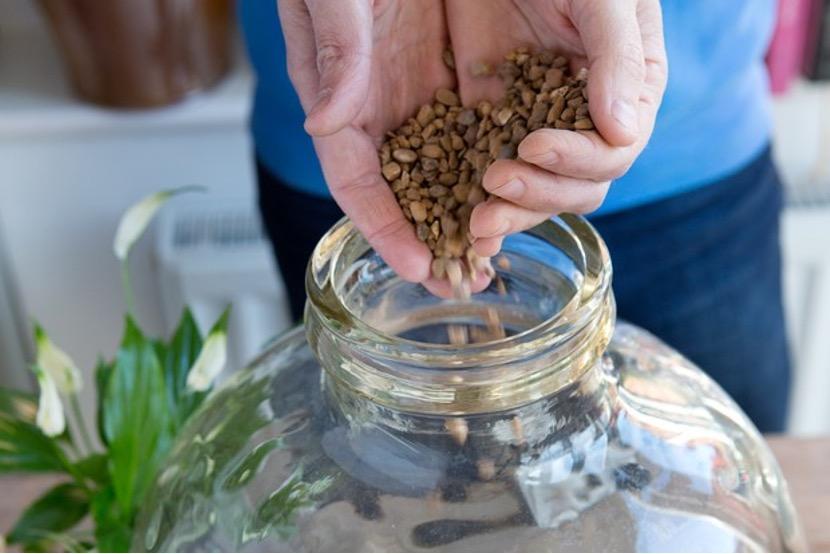
Put 5cm of horticultural grit in the bottom of the bottle for drainage. Add houseplant compost till the bottle is about a third full – breaking up any lumps with your hands. Choose lush foliage plants that thrive in low light and humidity.
Step 2
Position the plants one at a time, planting them as you would in a container – firm the compost around them. Fill gaps between plants with a layer of moss.

Step 3
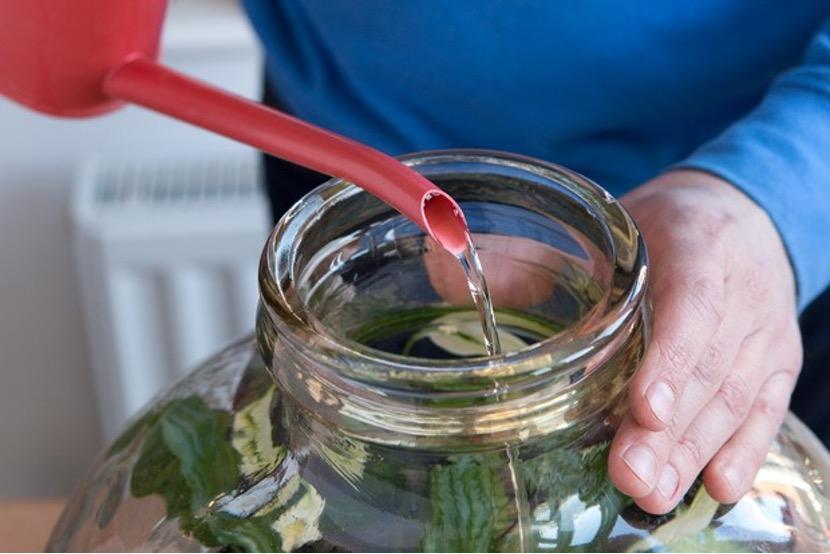
Water sparingly down the sides of the bottle as the curved sides will prevent a lot of evaporation. Ensure the compost doesn’t dry out or become saturated with water. Place in a bright spot out of direct sunlight.
Alternative plants for a bottle garden
• Maidenhair fern (Adiantum raddianum)
• Golden polypody (Phlebodium aureum)
• Hares foot fern (Humata tyermannii)
• Mind-your-own-business (Soleirolia soleirolii)
• Centella (Centella asiatica)
• Cacti and succulents
You can plant a bottle garden in virtually any glass vessel, though closed ones are best for moisture lovers and open ones best for plants used to drier conditions. Don’t worry if you can’t find what we used – look in charity shops, garden centres, your kitchen cupboard or on the internet for something that appeals.

You Will Need
•Vintage glass bottle
•Horticultural grit
•Peat free houseplant compost
•Moss, (from the lawn)
•Spathiphyllum 'Chopin'
•Fittonia verschaffeltii
•Syngonium 'White Butterfly'
•Chlorophytum comosum 'Ocean'
•Peperomia rotundifolia

Total time:
20 minutes
Step 1
Put 5cm of horticultural grit in the bottom of the bottle for drainage. Add houseplant compost till the bottle is about a third full – breaking up any lumps with your hands. Choose lush foliage plants that thrive in low light and humidity.

Step 2
Position the plants one at a time, planting them as you would in a container – firm the compost around them. Fill gaps between plants with a layer of moss.

Step 3
Water sparingly down the sides of the bottle as the curved sides will prevent a lot of evaporation. Ensure the compost doesn’t dry out or become saturated with water. Place in a bright spot out of direct sunlight.

Alternative plants for a bottle garden
• Maidenhair fern (Adiantum raddianum)
• Golden polypody (Phlebodium aureum)
• Hares foot fern (Humata tyermannii)
• Mind-your-own-business (Soleirolia soleirolii)
• Centella (Centella asiatica)
• Cacti and succulents

0
0
文章
莹723
2020年10月16日

Sowing cyclamen from seed is very easy, but it’s not a quick job– it can take a year or more before you see beautiful blooms.
To produce indoor cyclamen plants you need to use seeds of tender large-flowered varieties with wonderful colours.
Learn how to sow cyclamen seeds, below.
You Will Need
•Cyclamen seed
•10cm pot
•Seed compost
•Vermiculite
•Sheet of glass
•Black polythene
Step 1
Before sowing, soak the cyclamen seeds in warm water for at least 12 hours, to soften the seed coat, then rinse. Sow seeds into pots of compost, spacing them evenly.

Step 2
Sprinkle a layer of fine vermiculite or compost over the seeds until the surface is covered completely.

Step 3
Water, then cover with a sheet of glass and a layer of black polythene to shut out the light and encourage germination. Keep temperature lower than 16° – 21°.
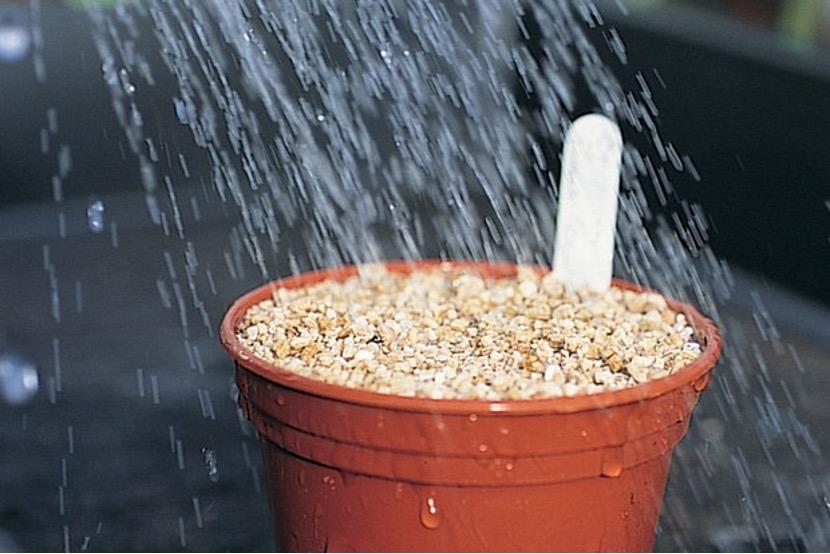
Step 4
Check pot regularly. Germination can take 30 – 60 days, and once the seedlings appear, remove the covering and pop your pot into a bright position.

Step 5
Leaves develop from a tiny tuber, and once two or three leaves have formed the plants can be potted up separately.

Step 6
Plant individually into 7.5cm pots of multi-purpose compost, keeping the tiny tuber level with the surface of the compost.

Step 7
Pot on into larger containers as your plants grow, watering them regularly and feeding them once a week. Most varieties should begin flowering about nine months after sowing. Keep them in a cool spot.

Remove faded flowers or yellowing leaves by twisting stems and giving them a firm tug.
To produce indoor cyclamen plants you need to use seeds of tender large-flowered varieties with wonderful colours.
Learn how to sow cyclamen seeds, below.
You Will Need
•Cyclamen seed
•10cm pot
•Seed compost
•Vermiculite
•Sheet of glass
•Black polythene
Step 1
Before sowing, soak the cyclamen seeds in warm water for at least 12 hours, to soften the seed coat, then rinse. Sow seeds into pots of compost, spacing them evenly.

Step 2
Sprinkle a layer of fine vermiculite or compost over the seeds until the surface is covered completely.

Step 3
Water, then cover with a sheet of glass and a layer of black polythene to shut out the light and encourage germination. Keep temperature lower than 16° – 21°.

Step 4
Check pot regularly. Germination can take 30 – 60 days, and once the seedlings appear, remove the covering and pop your pot into a bright position.

Step 5
Leaves develop from a tiny tuber, and once two or three leaves have formed the plants can be potted up separately.

Step 6
Plant individually into 7.5cm pots of multi-purpose compost, keeping the tiny tuber level with the surface of the compost.

Step 7
Pot on into larger containers as your plants grow, watering them regularly and feeding them once a week. Most varieties should begin flowering about nine months after sowing. Keep them in a cool spot.

Remove faded flowers or yellowing leaves by twisting stems and giving them a firm tug.

0
0
文章
莹723
2020年09月22日

Strawberries are easy and fun to grow. Plant strawberry runners or young plants in spring or autumn, and you’ll be rewarded with masses of delicious strawberries from late spring. Grow strawberries in a well prepared strawberry bed or planter, in full sun. And add some garden compost.

—How to grow strawberries from runners
Plant bare-rooted strawberry runners in spring or late summer/autumn.
Prepare the soil by digging in well-rotted garden compost and apply a dressing of sulphate of potash fertiliser.Bury their roots, about 30-45cm apart, then firm the soil around. Water well for the first few weeks.
Strawberries are also suited to growing in pots and hanging baskets. Use deep pots at least 15cm wide and plant one strawberry per pot. They thrive in moist but well-drained conditions, so use a soil-based compost with a deep layer of gravel or broken crocks in the base.

—Look after strawberry plants
To encourage flowering and fruit set, feed your strawberry plants with tomato fertiliser (follow the pack instructions) and water regularly. Avoid wetting any of ripening fruits to prevent grey mould.
Tuck some straw around the plants just before the fruit starts to develop. This helps to keep the berries clean and deters slugs and snails.
For next year’s crop, after fruiting finishes, cut off foliage about 5cm above ground level and give plants a good feed with a general-purpose fertiliser.
After three to four years, fruit size and quality declines so you need to replace your plants with new stock.

—Harvest
Once strawberries have been picked, the ripening process stops. So, wait until the berries are fully red before harvesting. Simply pinch through the stalks,avoid bruising the fruit.

—Store
As strawberries are perishable, it’s best to eat them straight from the plant, avoid the sun. You can store unwashed fruit for a few days in the fridge. If you’re lucky enough to have a glut, whizz them into delicious smoothies or use to make jam,or freeze them.

-Solve problem
Protect strawberry plants against slugs and snail attacks.
Grey mould can be a problem in wet weather, causing the berries to rot. Water plants in the morning rather than in the evening to give them time to dry out.

——Great types to grow
Summer-cropping strawberries:
• ‘Elsanta’ – heavy cropper with large, tasty, red fruits
• ‘Elvira’ – heavy crops and good disease resistance
• ‘Hapil’ – large glossy fruits, even in dry conditions
• ‘Honeoye’ – prolific fruiter with large, firm berries
• ‘Pegasus’ – sweet, juicy, top-quality berries
• ‘Symphony’ – good yields and fairly pest resistant
Everbearing strawberries:
• ‘Aromel’ – abundant dark red, juicy berries
• ‘Christine’ – sweet fruits that ripen in late May
• ‘Mara des Bois’ – large, deliciously aromatic fruits


—How to grow strawberries from runners
Plant bare-rooted strawberry runners in spring or late summer/autumn.
Prepare the soil by digging in well-rotted garden compost and apply a dressing of sulphate of potash fertiliser.Bury their roots, about 30-45cm apart, then firm the soil around. Water well for the first few weeks.
Strawberries are also suited to growing in pots and hanging baskets. Use deep pots at least 15cm wide and plant one strawberry per pot. They thrive in moist but well-drained conditions, so use a soil-based compost with a deep layer of gravel or broken crocks in the base.

—Look after strawberry plants
To encourage flowering and fruit set, feed your strawberry plants with tomato fertiliser (follow the pack instructions) and water regularly. Avoid wetting any of ripening fruits to prevent grey mould.
Tuck some straw around the plants just before the fruit starts to develop. This helps to keep the berries clean and deters slugs and snails.
For next year’s crop, after fruiting finishes, cut off foliage about 5cm above ground level and give plants a good feed with a general-purpose fertiliser.
After three to four years, fruit size and quality declines so you need to replace your plants with new stock.

—Harvest
Once strawberries have been picked, the ripening process stops. So, wait until the berries are fully red before harvesting. Simply pinch through the stalks,avoid bruising the fruit.

—Store
As strawberries are perishable, it’s best to eat them straight from the plant, avoid the sun. You can store unwashed fruit for a few days in the fridge. If you’re lucky enough to have a glut, whizz them into delicious smoothies or use to make jam,or freeze them.

-Solve problem
Protect strawberry plants against slugs and snail attacks.
Grey mould can be a problem in wet weather, causing the berries to rot. Water plants in the morning rather than in the evening to give them time to dry out.

——Great types to grow
Summer-cropping strawberries:
• ‘Elsanta’ – heavy cropper with large, tasty, red fruits
• ‘Elvira’ – heavy crops and good disease resistance
• ‘Hapil’ – large glossy fruits, even in dry conditions
• ‘Honeoye’ – prolific fruiter with large, firm berries
• ‘Pegasus’ – sweet, juicy, top-quality berries
• ‘Symphony’ – good yields and fairly pest resistant
Everbearing strawberries:
• ‘Aromel’ – abundant dark red, juicy berries
• ‘Christine’ – sweet fruits that ripen in late May
• ‘Mara des Bois’ – large, deliciously aromatic fruits

0
0
文章
ritau
2020年04月02日

Today, we are going to introduce 7 ways to make fertilizer that you can easy to handle with at home. Let's take a look!
1.Use water from a freshwater aquarium.
Freshwater aquariums contain nitrogen, which can provide your plants with a healthy boost. Fish naturally release nitrogen into the water, making their "waste" water an important source of nutrients for plants. Instead of dumping it down the toilet, use it to water your plants once a week. Fish waste, as well, contains trace elements important for plant growth.

2.Create a coffee compost.
Mix coffee grounds with leafy yard waste for "quick compost," especially for acid-loving plants. Mix your coffee grounds with an equal amount of dead leaves, pine straw, and other brown yard clippings and sprinkle over the soil once a month. Roses, azaleas, hydrangeas, and many other plants crave a low pH soil and will respond particularly well.
3.Use eggshells.
Spread old eggshells over your garden, or in the bottom of planting holes, for a calcium boost. Plants like tomatoes and peppers particularly love calcium, but your whole garden will enjoy eggshells. Calcium, which is over 90% of an eggshell's makeup, helps a plant develop strong cell walls. To use eggshells, lightly crush up the shells and spread over the garden. You can till them into the soil or leave them right on top -- they decompose very quickly.

4.Brew grass tea.
Make a "nutrient tea" with grass clippings from your yard. Use the bag on your lawnmower to keep the clippings the next time you cut the grass. Use them to fill up a 5-gallon bucket roughly 2/3s of the way to the top, then fill it near the top with water. Stir it quickly, then let it sit for three days, stirring once each morning. When done, strain out the grass clippings and use your "tea" to water your plants, providing essential nitrogen, by mixing it with an equal amount of water and spraying over the plants.
5.Save and spread your fireplace ashes. Wood ash is high in calcium and potassium, making it an excellent supplement to your soil. Simply spread it right over the garden, using your hands to lightly turn it into the top layer of the soil.
*Vegetables, in particular, tend to love ash, as it promotes healthy root growth.
*Warning: Do not use fireplace ashes on plants that love acidic soil like blueberries, roses, or azaleas.

6.Try banana peels. Cut up banana peels and add them to the hole when planting. Banana peels don't do much once the plant is already in the ground, but it can work wonders as you're planting. The peels contain a lot of potassium, which promotes a plant's root development. Cut up half a banana peel and toss it in the bottom of your hole before adding the plant.
7.Make your own compost. Composting at home is easy, so you can turn all of your old food scraps, leaves, and plant clippings into food for your garden. When organic matter decays, it releases nutrients that can enrich your soil. You can build your own compost in your yard, or you can try one of the commercially-available kitchen compost units.
via wikihow
1.Use water from a freshwater aquarium.
Freshwater aquariums contain nitrogen, which can provide your plants with a healthy boost. Fish naturally release nitrogen into the water, making their "waste" water an important source of nutrients for plants. Instead of dumping it down the toilet, use it to water your plants once a week. Fish waste, as well, contains trace elements important for plant growth.

2.Create a coffee compost.
Mix coffee grounds with leafy yard waste for "quick compost," especially for acid-loving plants. Mix your coffee grounds with an equal amount of dead leaves, pine straw, and other brown yard clippings and sprinkle over the soil once a month. Roses, azaleas, hydrangeas, and many other plants crave a low pH soil and will respond particularly well.
3.Use eggshells.
Spread old eggshells over your garden, or in the bottom of planting holes, for a calcium boost. Plants like tomatoes and peppers particularly love calcium, but your whole garden will enjoy eggshells. Calcium, which is over 90% of an eggshell's makeup, helps a plant develop strong cell walls. To use eggshells, lightly crush up the shells and spread over the garden. You can till them into the soil or leave them right on top -- they decompose very quickly.

4.Brew grass tea.
Make a "nutrient tea" with grass clippings from your yard. Use the bag on your lawnmower to keep the clippings the next time you cut the grass. Use them to fill up a 5-gallon bucket roughly 2/3s of the way to the top, then fill it near the top with water. Stir it quickly, then let it sit for three days, stirring once each morning. When done, strain out the grass clippings and use your "tea" to water your plants, providing essential nitrogen, by mixing it with an equal amount of water and spraying over the plants.
5.Save and spread your fireplace ashes. Wood ash is high in calcium and potassium, making it an excellent supplement to your soil. Simply spread it right over the garden, using your hands to lightly turn it into the top layer of the soil.
*Vegetables, in particular, tend to love ash, as it promotes healthy root growth.
*Warning: Do not use fireplace ashes on plants that love acidic soil like blueberries, roses, or azaleas.

6.Try banana peels. Cut up banana peels and add them to the hole when planting. Banana peels don't do much once the plant is already in the ground, but it can work wonders as you're planting. The peels contain a lot of potassium, which promotes a plant's root development. Cut up half a banana peel and toss it in the bottom of your hole before adding the plant.
7.Make your own compost. Composting at home is easy, so you can turn all of your old food scraps, leaves, and plant clippings into food for your garden. When organic matter decays, it releases nutrients that can enrich your soil. You can build your own compost in your yard, or you can try one of the commercially-available kitchen compost units.
via wikihow
0
0
文章
绿手指客服
2019年10月28日

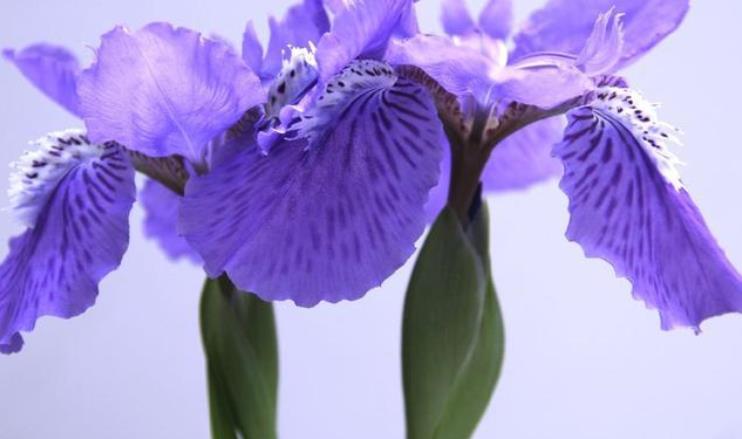
Just when you think winter is never going end, the cheery blue and yellow flowers of Iris reticulata ‘Harmony’ burst into bloom. This flowers from this easy-care bulb may be short, but they're big on bold color, especially when planted in large groupings in a rock or woodland garden. Like other bulbs, Iris reticulata ‘Harmony’ requires full sun (at least six hours a day) and well-drained soil.

Plant the spring-blooming bulbs in autumn, placing them 4 inches deep in the soil. Over time, Iris reticulata ‘Harmony’ will spread, slowly carpeting your garden with color. After the flowers fade, leave the foliage alone until it dries and disappears on its own.
How to grow
Cultivation Grow in well-drained, fertile, neutral to slightly acid loam in full sun
Propagation Propagate by division of rhizomes from midsummer to early autumn
Suggested planting locations and garden types Flower borders and beds Wall-side Borders City & Courtyard Gardens Coastal Cottage & Informal Garden
How to care
Pruning Remove any dying foliage in autumn, old flower stems can be cut down after flowering
Pests May be attacked by slugs, snails and thrips
Diseases May be subject to iris rhizome rot, a leaf spot and a virus

Plant the spring-blooming bulbs in autumn, placing them 4 inches deep in the soil. Over time, Iris reticulata ‘Harmony’ will spread, slowly carpeting your garden with color. After the flowers fade, leave the foliage alone until it dries and disappears on its own.

How to grow
Cultivation Grow in well-drained, fertile, neutral to slightly acid loam in full sun
Propagation Propagate by division of rhizomes from midsummer to early autumn
Suggested planting locations and garden types Flower borders and beds Wall-side Borders City & Courtyard Gardens Coastal Cottage & Informal Garden
How to care
Pruning Remove any dying foliage in autumn, old flower stems can be cut down after flowering
Pests May be attacked by slugs, snails and thrips
Diseases May be subject to iris rhizome rot, a leaf spot and a virus
0
0
成长记
kensong
2019年05月01日

The hybrid Ficus Lyrata Variegata is not an easy find and also not an easy plant to care for compared to the regular FLF but it's such a beauty.
It's leaves look painted with a cream white that frames a forest green leaf with unpredictable patches of olive green intertwined.
#ficus #ficuslyrata #ficuslyratavariegata #ficuslyratavariegated #lyrata #rubberplant #rubberplants #variegated #variegatedplants #houseplants #gardening #gardening_love #betterhomesandgardens #urbanplants

1
0


