文章
Miss Chen
2018年07月17日

Fresh-picked cucumbers from your garden are not only healthier for you, but they taste better too. Growing cucumbers is an easy project whether it's for slicing in your salad or for pickling. There are two types of cucumbers you can grow, bush or vine. The vine type is the cucumber that will grow on the trellis, and they grow straighter and are cleaner than cucumbers that grow on the ground. Growing your cucumbers from seed will take from a month to two months depending on the size cucumber or pickle you want.
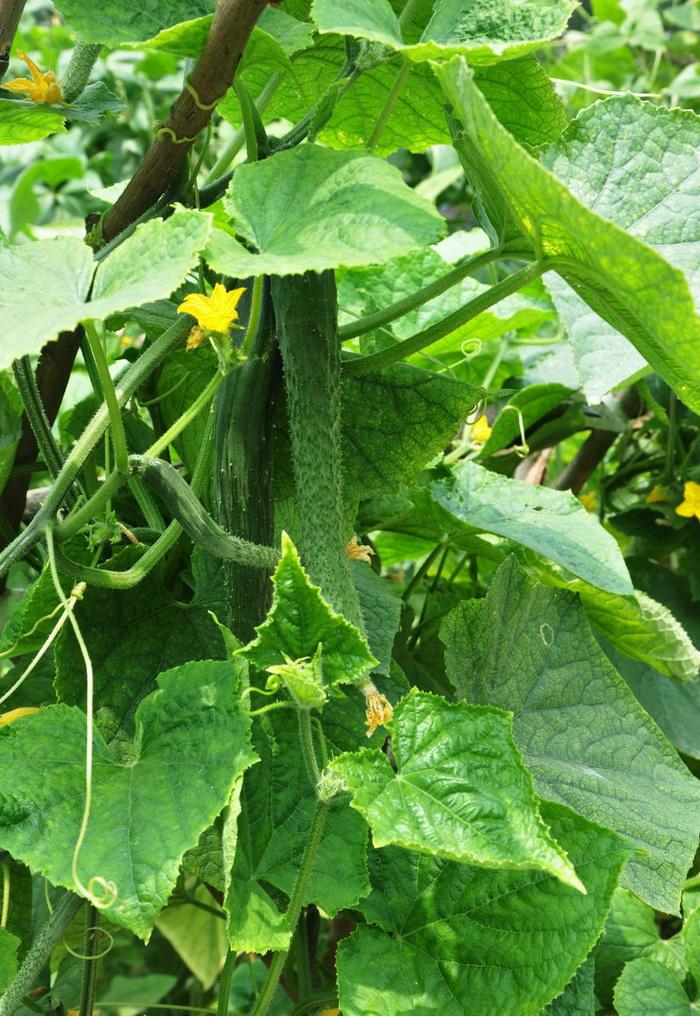
Step 1
Prepare the soil for the cucumber seeds. Place the cucumbers to the north end of the garden to avoid shading your other plants. Cultivate the soil to remove all weeds, and amend the soil for the seeds by adding compost to it and mixing it throughout. Mound the soil to two inches high and a foot apart for each plant. Do not plant the seeds until the soil temperature has reached 70 degrees.
Step 2
Set up the trellis to the north of the mounds. Use a side of your fence if your garden is fenced in. Other types of trellises can be used too, such as vegetable cages, A-frames or fashion your own out of bamboo poles and chicken wire. Make sure the poles are pushed well into the ground because the plants will pull on it and become heavy.
Step 3
Plant the seeds in the mounds. You can plant 3 or 4 seeds per mound, and weed out the weaker of the plants when they start to sprout, leaving only one plant per mound.
Step 4
Place the cucumber's tendrils on the trellis when they first start to show. Helping the cucumber onto the trellis is important as it will attach to anything including other plants. Once it is attached to the trellis it will continue to climb without any more help.
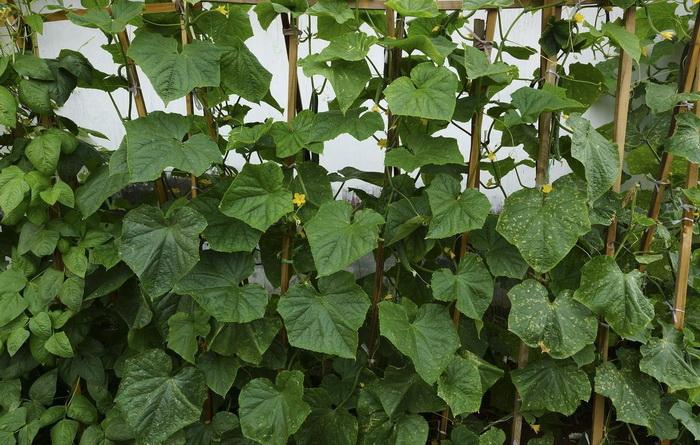
Step 5
Keep the soil moist as the cucumbers are growing. Try to water the ground, and keep the foliage as dry as possible to avoid moisture diseases. Fertilize with a liquid vegetable fertilizer attached to your garden hose every two weeks.
Step 6
Harvest the cucumbers when they are the size you desire. Do not let them get too large, or they will be bitter and very seedy. Cut the cucumbers from the vine; do not pull them or you will damage the vine.

Step 1
Prepare the soil for the cucumber seeds. Place the cucumbers to the north end of the garden to avoid shading your other plants. Cultivate the soil to remove all weeds, and amend the soil for the seeds by adding compost to it and mixing it throughout. Mound the soil to two inches high and a foot apart for each plant. Do not plant the seeds until the soil temperature has reached 70 degrees.
Step 2
Set up the trellis to the north of the mounds. Use a side of your fence if your garden is fenced in. Other types of trellises can be used too, such as vegetable cages, A-frames or fashion your own out of bamboo poles and chicken wire. Make sure the poles are pushed well into the ground because the plants will pull on it and become heavy.
Step 3
Plant the seeds in the mounds. You can plant 3 or 4 seeds per mound, and weed out the weaker of the plants when they start to sprout, leaving only one plant per mound.
Step 4
Place the cucumber's tendrils on the trellis when they first start to show. Helping the cucumber onto the trellis is important as it will attach to anything including other plants. Once it is attached to the trellis it will continue to climb without any more help.

Step 5
Keep the soil moist as the cucumbers are growing. Try to water the ground, and keep the foliage as dry as possible to avoid moisture diseases. Fertilize with a liquid vegetable fertilizer attached to your garden hose every two weeks.
Step 6
Harvest the cucumbers when they are the size you desire. Do not let them get too large, or they will be bitter and very seedy. Cut the cucumbers from the vine; do not pull them or you will damage the vine.
0
0
文章
Miss Chen
2018年07月16日

Potatoes are a staple of the American diet and are a common ingredient in many foods. While they are heavily cultivated commercially, potatoes are also fairly easy to grow at home. If you have grown potatoes in the past and are looking to get another crop started this year, you may have considered using seed potatoes. Proper storage and care of your seed potatoes can mean all the difference when it comes to a healthy, bountiful crop.
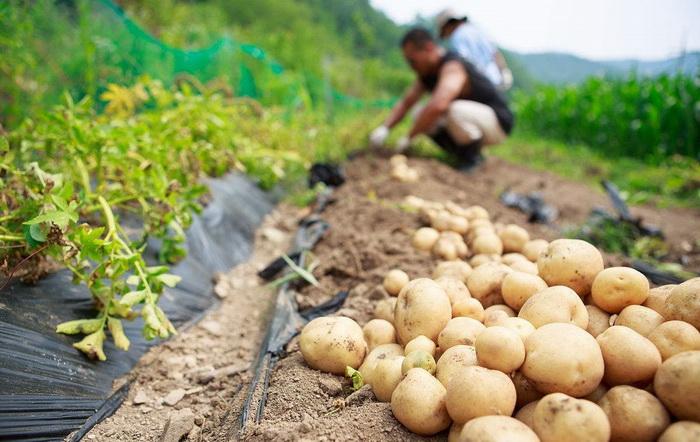
What Are Seed Potatoes?
You grow seed potatoes specifically for replanting to produce a potato crop. They are not a different kind of potato. Instead, it is their purpose that causes them to have a different classification.
Potatoes are tubers, which means that they grow as the food supply for the leafy green part of their plant. The tuber grows larger underground to store food for the plant. If provided proper nutrients, tubers like potatoes grow sprouts underground, which we call eyes. The eyes of a potato then develop into new plants.
You might think that you can start a potato crop using store-bought potatoes. However, most of the potatoes sold to grocery stores have chemical treatments so that they do not grow eyes while on the shelf. As a result, they are far less likely to be effective as seed potatoes. In addition, the chance of a diseased potato crop is much greater if you use store-bought potatoes as the basis for your planting.
How to Harvest Seed Potatoes
To harvest seed potatoes, dig up any potatoes you wish to store for next year's harvest. Brush the dirt off the potatoes, but do not wash them. You may also purchase certified disease-free potatoes from a garden supply or home improvement store. Many experts recommend starting fresh with certified seed potatoes each year to lessen the risk of an infected and ultimately damaged crop. Plants such as potatoes, tomatoes, eggplants and peppers (all members of the Solanaceae or Nightshade family) are particularly prone to plant-borne illnesses that can destroy entire crops.
If you choose to move forward with homegrown seed potatoes, be sure to practice crop rotation, planting your potatoes in a different place each year to prevent disease. Not only is this important for the yield of your harvest, it is essential for your seed potatoes. This is because diseases carried by these seed potatoes are likely to persist into another growing season.
Another way to maximize the return on your crop is to harvest seed potatoes of varying types, including heirloom varieties. If you do accidentally introduce a disease to your crop, you might have a higher yield if you have established a diverse population.

How to Store Seed Potatoes
Store your seed potatoes in a cool, dry place that hovers around 50 degrees Fahrenheit. While some humidity is essential for your seed potatoes, you should not expose them to too much moisture, or they may begin to rot.
In addition, it is critical that potatoes have time to rest, so you should not move or expose them to light or heat during the storage period. Locations like cool closets or cellars are excellent places for seed potatoes. If you are planning to store your potatoes in a basement location, take care to place them so that mice or other nuisance wildlife cannot get to them.
Keep the potatoes in a cardboard box or brown paper bag during their hibernation period. However, they require ventilation, so do not stack or pile the potatoes too high. Additionally, do not cover or close the container so that air cannot enter.
Three to four weeks before you wish to plant your crop, move your seed potatoes to a well-lit area with high humidity. A sunny window or under a grow light is an excellent choice. The purpose of this exercise is to encourage the sprouting of your potatoes. Covering seed potatoes with moist burlap bags can aid in the sprouting process.
How to Plant Seed Potatoes
If your seed potatoes are small, you do not need to cut them. However, if you have stored large potatoes, you should cut them into pieces with two to three eyes each. Each piece should weigh about two ounces. Following these guidelines will maximize your crop yield. You will need to either plant any cut potatoes immediately or let them dry for up to two days and then plant them.
Plant your seed potatoes in well-drained, rich and fertilized soil that is six inches deep. If you choose to hill your potatoes, mound the dirt covering them and add a layer of mulch on top. Keep hills about one foot apart. Water your seed potatoes regularly, providing each plant two inches of water per week.

What Are Seed Potatoes?
You grow seed potatoes specifically for replanting to produce a potato crop. They are not a different kind of potato. Instead, it is their purpose that causes them to have a different classification.
Potatoes are tubers, which means that they grow as the food supply for the leafy green part of their plant. The tuber grows larger underground to store food for the plant. If provided proper nutrients, tubers like potatoes grow sprouts underground, which we call eyes. The eyes of a potato then develop into new plants.
You might think that you can start a potato crop using store-bought potatoes. However, most of the potatoes sold to grocery stores have chemical treatments so that they do not grow eyes while on the shelf. As a result, they are far less likely to be effective as seed potatoes. In addition, the chance of a diseased potato crop is much greater if you use store-bought potatoes as the basis for your planting.
How to Harvest Seed Potatoes
To harvest seed potatoes, dig up any potatoes you wish to store for next year's harvest. Brush the dirt off the potatoes, but do not wash them. You may also purchase certified disease-free potatoes from a garden supply or home improvement store. Many experts recommend starting fresh with certified seed potatoes each year to lessen the risk of an infected and ultimately damaged crop. Plants such as potatoes, tomatoes, eggplants and peppers (all members of the Solanaceae or Nightshade family) are particularly prone to plant-borne illnesses that can destroy entire crops.
If you choose to move forward with homegrown seed potatoes, be sure to practice crop rotation, planting your potatoes in a different place each year to prevent disease. Not only is this important for the yield of your harvest, it is essential for your seed potatoes. This is because diseases carried by these seed potatoes are likely to persist into another growing season.
Another way to maximize the return on your crop is to harvest seed potatoes of varying types, including heirloom varieties. If you do accidentally introduce a disease to your crop, you might have a higher yield if you have established a diverse population.

How to Store Seed Potatoes
Store your seed potatoes in a cool, dry place that hovers around 50 degrees Fahrenheit. While some humidity is essential for your seed potatoes, you should not expose them to too much moisture, or they may begin to rot.
In addition, it is critical that potatoes have time to rest, so you should not move or expose them to light or heat during the storage period. Locations like cool closets or cellars are excellent places for seed potatoes. If you are planning to store your potatoes in a basement location, take care to place them so that mice or other nuisance wildlife cannot get to them.
Keep the potatoes in a cardboard box or brown paper bag during their hibernation period. However, they require ventilation, so do not stack or pile the potatoes too high. Additionally, do not cover or close the container so that air cannot enter.
Three to four weeks before you wish to plant your crop, move your seed potatoes to a well-lit area with high humidity. A sunny window or under a grow light is an excellent choice. The purpose of this exercise is to encourage the sprouting of your potatoes. Covering seed potatoes with moist burlap bags can aid in the sprouting process.
How to Plant Seed Potatoes
If your seed potatoes are small, you do not need to cut them. However, if you have stored large potatoes, you should cut them into pieces with two to three eyes each. Each piece should weigh about two ounces. Following these guidelines will maximize your crop yield. You will need to either plant any cut potatoes immediately or let them dry for up to two days and then plant them.
Plant your seed potatoes in well-drained, rich and fertilized soil that is six inches deep. If you choose to hill your potatoes, mound the dirt covering them and add a layer of mulch on top. Keep hills about one foot apart. Water your seed potatoes regularly, providing each plant two inches of water per week.
0
0
文章
Miss Chen
2018年07月14日

Peppers are a popular plant for the home vegetable garden. The three most common varieties of peppers are bell peppers, hot peppers and sweet peppers. Although peppers are relatively easy to grow, several factors can result in low fruit production. If you want to get your green pepper plants to produce more, be vigilant with their care.
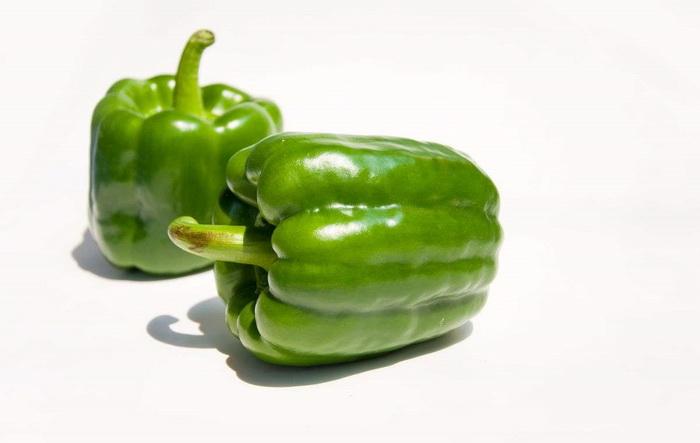
Step 1
Monitor temperatures. Peppers prefer warm whether, so avoid planting them until after the last frost of the season and cover them if frost is expected. Some varieties suffer during extended periods of extreme heat as well and require shading. Optimal temperatures for growing peppers range from roughly 70 to 85 degrees Fahrenheit.
Step 2
Provide proper nutrients. Fertilizer rich in nitrogen will result in a leafy, healthy plant but won't yield much fruit. Use a phosphorus and potassium-rich fertilizer as the plants begin to develop.
Step 3
Remove the first few flower buds. This allows the plant to develop more before it begins producing fruit and sometimes results in higher fruit production.
Step 4
Pick often. Picking fruits as they ripen encourages the plant to begin producing more fruit.

Step 5
Prune the plants. Moderate pruning in the late summer or early fall sometimes extends fruit production, but prune with care. Severe pruning damages the plant.

Step 1
Monitor temperatures. Peppers prefer warm whether, so avoid planting them until after the last frost of the season and cover them if frost is expected. Some varieties suffer during extended periods of extreme heat as well and require shading. Optimal temperatures for growing peppers range from roughly 70 to 85 degrees Fahrenheit.
Step 2
Provide proper nutrients. Fertilizer rich in nitrogen will result in a leafy, healthy plant but won't yield much fruit. Use a phosphorus and potassium-rich fertilizer as the plants begin to develop.
Step 3
Remove the first few flower buds. This allows the plant to develop more before it begins producing fruit and sometimes results in higher fruit production.
Step 4
Pick often. Picking fruits as they ripen encourages the plant to begin producing more fruit.

Step 5
Prune the plants. Moderate pruning in the late summer or early fall sometimes extends fruit production, but prune with care. Severe pruning damages the plant.
1
0
文章
Miss Chen
2018年07月13日

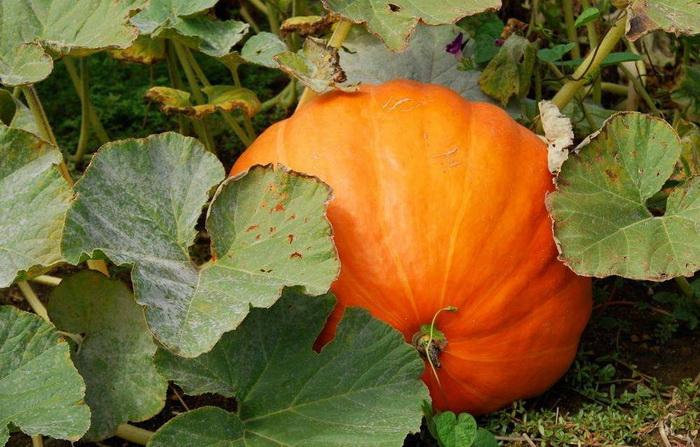
Pumpkins are a popular vegetable for a reason: they are delicious, fun and easy to grow. It doesn't take all that much to cultivate pumpkins in your yard: soil, space, water and sunlight. But if you want to grow big pumpkins, the kind you might see winning the blue ribbon at a county fair, it takes a little extra effort, and some good old fashioned tricks. Feeding sugar to your pumpkins, for instance, can make them grow much bigger than just sun and water alone will.
Step 1
Choose a spot in your yard or garden with at least six hours of full sun per day, an even pH balance and well-draining soil.
Step 2
Buy a bag of compost, and mix two or three trowel-fulls into each square foot of growing space.
Step 3
Place a group of two to three seedlings 2 or 3 inches apart from each other and cover their roots with soil. If you want to grow more than one pumpkin, place another patch of one or two seedlings at least 5 feet away.
Step 4
Water your pumpkin plants between four and seven times a week, so that they are always damp, and get about 2 inches of water per week.
Step 5
Wait until a pumpkin develops, and has grown to be about 6 inches across.
Step 6
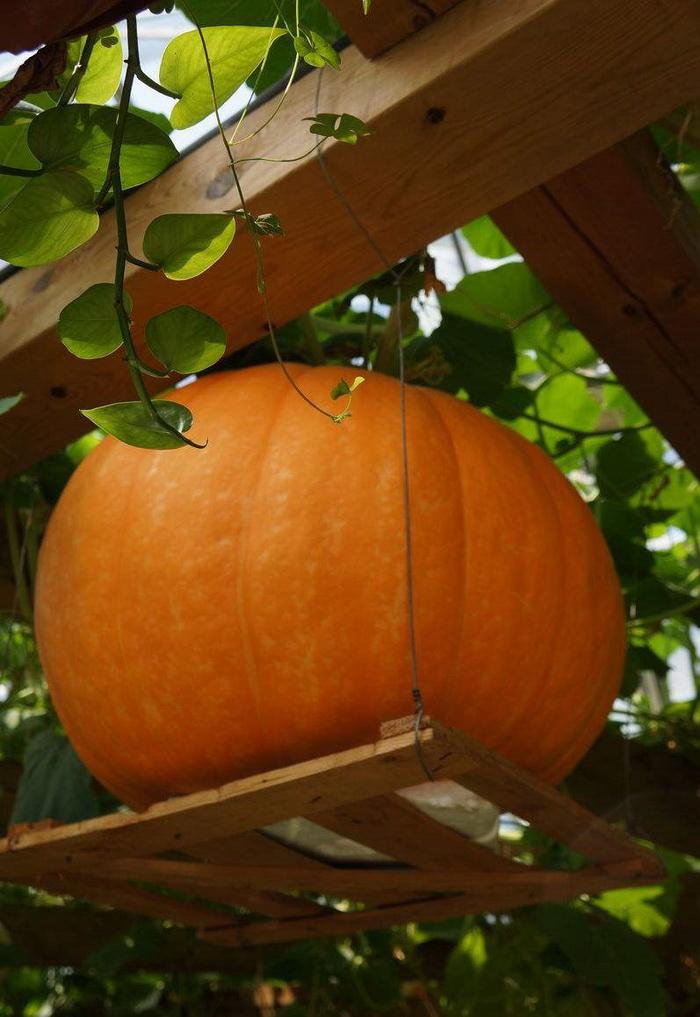
Fill a bowl with 50 percent water and 50 percent white granulated sugar. If you want to use milk instead of water, this will work well too. Dunk your cotton string into this mixture.
Step 7
Make a small slit with your knife in the base of the pumpkin's stem, about 4 inches above the pumpkin. Insert one end of your cotton string into the slit, and keep the other end in your sugar water mixture. The pumpkin will slowly suck up the sugar mixture, helping it grow bigger.
Step 8
Keep an eye on the sugar mixture, and replenish the bowl when it is empty. Keep this up for at least two weeks, or until you are ready to harvest your large pumpkin.

Step 1
Choose a spot in your yard or garden with at least six hours of full sun per day, an even pH balance and well-draining soil.
Step 2
Buy a bag of compost, and mix two or three trowel-fulls into each square foot of growing space.
Step 3
Place a group of two to three seedlings 2 or 3 inches apart from each other and cover their roots with soil. If you want to grow more than one pumpkin, place another patch of one or two seedlings at least 5 feet away.
Step 4
Water your pumpkin plants between four and seven times a week, so that they are always damp, and get about 2 inches of water per week.
Step 5
Wait until a pumpkin develops, and has grown to be about 6 inches across.

Step 6
Fill a bowl with 50 percent water and 50 percent white granulated sugar. If you want to use milk instead of water, this will work well too. Dunk your cotton string into this mixture.
Step 7
Make a small slit with your knife in the base of the pumpkin's stem, about 4 inches above the pumpkin. Insert one end of your cotton string into the slit, and keep the other end in your sugar water mixture. The pumpkin will slowly suck up the sugar mixture, helping it grow bigger.
Step 8
Keep an eye on the sugar mixture, and replenish the bowl when it is empty. Keep this up for at least two weeks, or until you are ready to harvest your large pumpkin.
0
0
文章
Miss Chen
2018年07月11日

Haworthia are delightful little succulents that form very attractive and singular small houseplants. Generally easy to grow, the same best practices that yield healthy aloe and echeveria plants will also produce beautiful Haworthia.

In terms of appeal, these small, low growing plants form rosettes of fleshy green leaves that are generously covered with white, pearly warts or bands, giving them a distinctive appearance. Just like other succulents, these plants appreciate bright light, adequate moisture in the summer, and relatively drier conditions in the winter. Avoid overwatering, but don’t let them dry out too much.
Growing Conditions
Light: Bright light, but not direct sunlight. These grow in similar conditions to other succulents. White or yellow leaves usually signify too much sun.
Water: Water evenly and generously in the summer, letting the soil media dry out between waterings. In the winter, reduce watering to every other month. Never allow water to collect in the rosette.
Temperature: Warmer summers but cool in the winter (down to 50 degrees F).
Soil: Use a cactus mix or very fast-draining potting soil mixed with sand.
Fertilizer:Fertilize during the summer growing season with a cactus fertilizer. Don't feed during the winter.
Propagation
Haworthia can be propagated at repotting time using offsets from the mother plant. When taking offsets, use a sharp knife or snippers and cut as close to the mother stem as possible to include as many roots as possible, then allow the offset to dry briefly before repotting it (similar to cuttings from other succulents). Pot the offsets in a small pot, using the same soil as the mother plant, put it in a warm, bright spot, and make sure to adequately water.
Repotting
Haworthia are small (usually remaining between 3" and 5" in height) and relatively slow-growing. They are often grown in small clusters in wide, shallow dishes. Over time, clusters will naturally enlarge as the mother plant sends off small plantlets.
When the cluster has outgrown its dish, repot in the spring or early summer into a new wide and shallow dish with fresh potting soil. This is also the time to take offsets for propagation.

Varieties
There are about 80 species of Haworthia, but their classification can be complex. The main difference between the common species is the size of the leaves and the orientation of the white markings on the leaves. H. margaritifera has warty white projections on the leaves, while H. fasciata features horizontal white stripes and is sometimes called the zebra plant.
Some of the species, such as H. bolusii have "tufted" edges to the leaves, while H. attenuata features long, pointed green leaves. In general, the best advice is to buy the most attractive variety based on leaf form and markings, as they all have similar cultural requirements.
Grower's Tips
Haworthia are not considered difficult houseplants to grow—if you can keep a pot of aloe alive on a windowsill, chances are you can do the same with a dish of Haworthia. As with all succulents, the most dangerous situation is too much water, since they should never be allowed to sit in water under any circumstances.
At the same time, these little decorative plants can be grown in interesting containers such as teacups and even miniature baby shoes. If you're given a Haworthia in such a container, make sure the container had adequate drainage. If it doesn't, it might be a good idea to pop the plant out of its container and add a layer of gravel to the bottom to reduce the wicking action of the soil above.
Finally, look out for sunburned spots on your plants.

In terms of appeal, these small, low growing plants form rosettes of fleshy green leaves that are generously covered with white, pearly warts or bands, giving them a distinctive appearance. Just like other succulents, these plants appreciate bright light, adequate moisture in the summer, and relatively drier conditions in the winter. Avoid overwatering, but don’t let them dry out too much.
Growing Conditions
Light: Bright light, but not direct sunlight. These grow in similar conditions to other succulents. White or yellow leaves usually signify too much sun.
Water: Water evenly and generously in the summer, letting the soil media dry out between waterings. In the winter, reduce watering to every other month. Never allow water to collect in the rosette.
Temperature: Warmer summers but cool in the winter (down to 50 degrees F).
Soil: Use a cactus mix or very fast-draining potting soil mixed with sand.
Fertilizer:Fertilize during the summer growing season with a cactus fertilizer. Don't feed during the winter.
Propagation
Haworthia can be propagated at repotting time using offsets from the mother plant. When taking offsets, use a sharp knife or snippers and cut as close to the mother stem as possible to include as many roots as possible, then allow the offset to dry briefly before repotting it (similar to cuttings from other succulents). Pot the offsets in a small pot, using the same soil as the mother plant, put it in a warm, bright spot, and make sure to adequately water.
Repotting
Haworthia are small (usually remaining between 3" and 5" in height) and relatively slow-growing. They are often grown in small clusters in wide, shallow dishes. Over time, clusters will naturally enlarge as the mother plant sends off small plantlets.
When the cluster has outgrown its dish, repot in the spring or early summer into a new wide and shallow dish with fresh potting soil. This is also the time to take offsets for propagation.

Varieties
There are about 80 species of Haworthia, but their classification can be complex. The main difference between the common species is the size of the leaves and the orientation of the white markings on the leaves. H. margaritifera has warty white projections on the leaves, while H. fasciata features horizontal white stripes and is sometimes called the zebra plant.
Some of the species, such as H. bolusii have "tufted" edges to the leaves, while H. attenuata features long, pointed green leaves. In general, the best advice is to buy the most attractive variety based on leaf form and markings, as they all have similar cultural requirements.
Grower's Tips
Haworthia are not considered difficult houseplants to grow—if you can keep a pot of aloe alive on a windowsill, chances are you can do the same with a dish of Haworthia. As with all succulents, the most dangerous situation is too much water, since they should never be allowed to sit in water under any circumstances.
At the same time, these little decorative plants can be grown in interesting containers such as teacups and even miniature baby shoes. If you're given a Haworthia in such a container, make sure the container had adequate drainage. If it doesn't, it might be a good idea to pop the plant out of its container and add a layer of gravel to the bottom to reduce the wicking action of the soil above.
Finally, look out for sunburned spots on your plants.
2
4
文章
Miss Chen
2018年07月11日

Peppers are a popular plant for the home vegetable garden. The three most common varieties of peppers are bell peppers, hot peppers and sweet peppers. Although peppers are relatively easy to grow, several factors can result in low fruit production. If you want to get your green pepper plants to produce more, be vigilant with their care.

Step 1
Monitor temperatures. Peppers prefer warm whether, so avoid planting them until after the last frost of the season and cover them if frost is expected. Some varieties suffer during extended periods of extreme heat as well and require shading. Optimal temperatures for growing peppers range from roughly 70 to 85 degrees Fahrenheit.
Step 2
Provide proper nutrients. Fertilizer rich in nitrogen will result in a leafy, healthy plant but won't yield much fruit. Use a phosphorus and potassium-rich fertilizer as the plants begin to develop.
Step 3
Remove the first few flower buds. This allows the plant to develop more before it begins producing fruit and sometimes results in higher fruit production.
Step 4
Pick often. Picking fruits as they ripen encourages the plant to begin producing more fruit.

Step 5
Prune the plants. Moderate pruning in the late summer or early fall sometimes extends fruit production, but prune with care. Severe pruning damages the plant.

Step 1
Monitor temperatures. Peppers prefer warm whether, so avoid planting them until after the last frost of the season and cover them if frost is expected. Some varieties suffer during extended periods of extreme heat as well and require shading. Optimal temperatures for growing peppers range from roughly 70 to 85 degrees Fahrenheit.
Step 2
Provide proper nutrients. Fertilizer rich in nitrogen will result in a leafy, healthy plant but won't yield much fruit. Use a phosphorus and potassium-rich fertilizer as the plants begin to develop.
Step 3
Remove the first few flower buds. This allows the plant to develop more before it begins producing fruit and sometimes results in higher fruit production.
Step 4
Pick often. Picking fruits as they ripen encourages the plant to begin producing more fruit.

Step 5
Prune the plants. Moderate pruning in the late summer or early fall sometimes extends fruit production, but prune with care. Severe pruning damages the plant.
1
0
文章
Miss Chen
2018年06月30日


01.Grow These Succulents Almost Anywhere
It seems like pretty much everyone has developed a thirst for succulents—those plants with exotic shapes and diverse forms that are easy to maintain and create a bold statement wherever they grow. Even beginning gardeners are tempted to buy one or two out of curiosity; with some getting hooked after seeing how beautiful and manageable they are.
Many of the uninitiated take a look at a bed of succulents and refer to them as Hens and Chicks (Sempervivums). But there are hundreds—thousands—of others that aficionados collect, trade, share and discuss in person and online. Some people love them because they are so easy to propagate—just take a snip, let callous over, and plant in the ground or in a container.
In regions that have been affected by drought or practice water-wise landscaping, succulents are a gorgeous and simple addition to the garden. They also thrive on patios, decks, and balconies, and make smart choices for pool area landscaping.
Planting the Right Succulents
Things you should know before you get started:
Succulents require more water in summer. If you live in a region with little rainfall, plan to water in-ground succulents once a week. Those in containers will require water about three times per week.
Reduce irrigation in fall and winter so that succulents can withstand lower temperatures. Soggy soil and soft, new growth make succulents more susceptible to damage from freezes.
What grows best in your region? If you aren't sure, buy from local suppliers: nurseries, succulent plant groups, botanical gardens, etc. This will ensure that they will survive.
While all-succulent gardens are attractive, start out by working them into your existing landscape. Discover some of the best companion plants for succulents.
Learn more about these easy-to-care-for beauties, including how to pronounce them (so you can impress everyone). And remember: cactus are succulents, but succulents are not cactus. Species are presented alphabetically.
02.Aeonium
Pronunciation: a-OH-nee-um
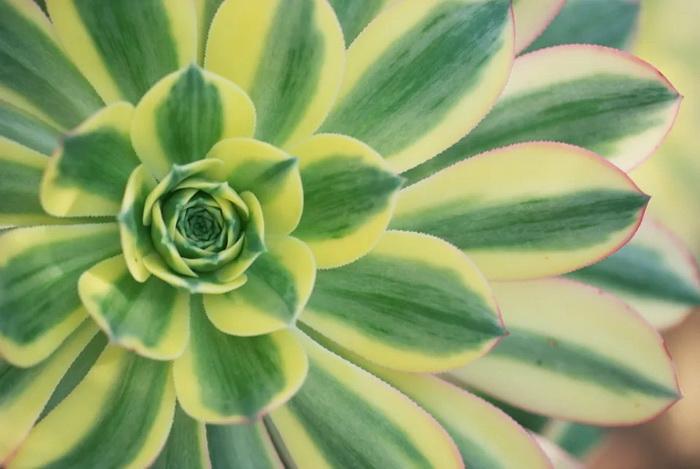
Traits: These natives of North Africa's Canary Islands prefer more moisture than most succulents. Darker ones, like the purple/black Aeonium 'Zwartkop', can tolerate sun more than the lighter varieties. Many aeoniums are in the forms of flowers and rosettes, making them especially pretty in container gardens or even cut bouquets or arrangements.
Try These:
Black Aeonium: Aeonium arboreum 'Zwartkop'
A. artropurpureum
Kiwi Aeonium: A.decorum "Kiwi'
Canary Island aeonium: A. canariense
Sunburst Aeonium: A. 'Sunburst'
03.Agave
Pronunciation: a-GAH-vee
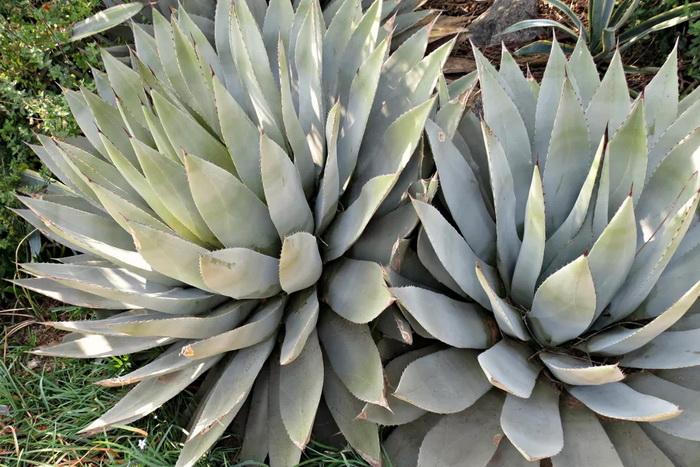
Traits: Native to the Americas, in-ground specimens grow more quickly and produce more blooms than their cousins confined to containers. Easily identifiable by their strong forms and large sizes—they make striking landscape plants. Leaves can be smooth, sword-shaped, toothed, or carried in rosettes. Blooms are infrequent but can be magnificent and huge--sometimes 14 feet or more. After flowering the larger agaves die, but offshoots or pups usually form before this occurs.
Try These:
Tuxedo Agave: Agave americana
Fox Tail Agave: A. attenuata; 'Kara's Stripes'
A. 'Blue Flame'
A. 'Cream Spike'
A. filifera
A. lopantha 'Quadricolor'
Parry's Agave or Artichoke Agave: A. parryi
Butterfly Agave: A. potatorum 'Kissho Kan' or 'Kichi-Jokan'
Queen Victoria Agave: A. victoriae-reginae

04.Aloe
Pronunciation: AL-oh
Traits: Native to Africa, the Mediterranean, Madagascar, aloes have fleshy, pointed leaves often arranged in rosettes that resemble agaves. Aloes, however, have showy flowers that bloom regularly, with the biggest display of flowers from February to September. Some blooms are tubular shaped and come in shades of orange, red, or yellow, while others are bicolor.
Aloes can be just a few inches high to as tall as trees, with leaves that are either smooth, bumpy, or prickly. It's those leaves that help funnel water down to the plant's crown, keeping it moist and succulent. Aloes prefer more water than agaves and other succulents. Their roots are fairly close to the surface, making them ideal next to houses or near pools.
Try These:
Aloe africana
A. arborescens
A. plicatilis
A. striata
A. vera

05.Crassula
Pronunciation: KRASS-oo-la
Traits: Native to South Africa, this large genus features small-to-medium succulents that have fleshy leaves arranged in a variety of patterns. Some crassula have branching stems, while others have are low-growing plants with dense foliage that are often good ground covers.
Try These:
Jade: Crassula ovata
Crassula argentea
C. falcata
C. cooperi
C. deltoidea

06.Dasylirion
Pronunciation: das-uh-LIH-ree-uhn
Traits: Although they more closely resemble a palm, this species surprises some people when they learn that they are actually succulents. Popular in xeriscape gardens, they have a southwestern look, and many have green, greyish, or blue-green strap-like leaves with small, sharp teeth that line the leaf edges. Small trunks can become woody, which makes them appear even less like succulents.
These striking succulents like some water, but will grow in desert and drought-tolerant gardens and make attractive container plants.
Try These:
Mexican Grass Tree: Dasylirion longissimum or D. quadrangulatum
Desert Spoon: D. wheelerii
Texas Sotol D. texanum
0
2
文章
Miss Chen
2018年06月29日

Sedum plants come in a wide variety of heights, colors, and forms. Showy Stonecrop, the taller plants in the genus Sedum, are popular garden plants that are extremely easy to grow. Although lovely, sedums are often taken for granted in the garden, partly because they don’t bloom until the fall, but also because they require so little care from the gardener. The thick leaves of these succulent plants are able to withstand both drought and rainy weather.
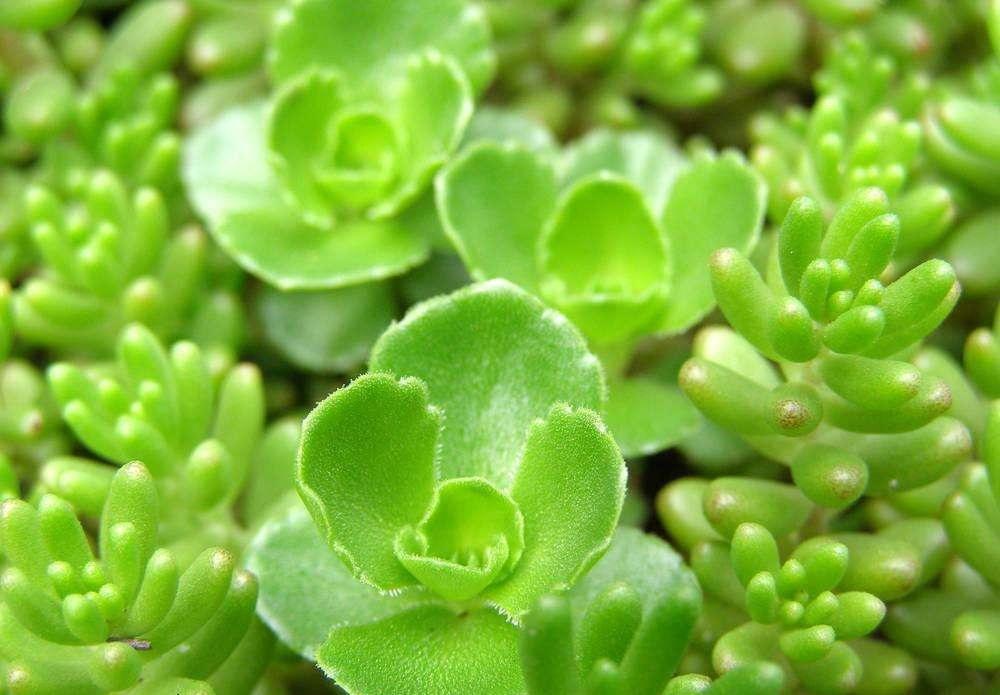
The flower buds form early and remain attractive well in winter. If the deer didn’t eat them, Sedum would be a perfect plant.
Growth Habit and Leaves: Border Stonecrops are a small section of the hundreds of species of Sedum. These taller growing Sedums have thick stems, fleshy leaves and tight flower heads that start out looking similar to heads of broccoli. Most are sturdy enough to stand upright on their own, with a few varieties that have a nice trailing quality, suitable for containers.
Flowers: Tall sedum flowers tend to come in shades of pink and mauve, that start out pale and deepen as they mature. The flower heads are attractive from bud through to their dried stage and are usually left standing tall throughout winter. The stems are even strong enough to hold a few inches of snow, capping the flower tops.
Botanical Name
Sedum
Common Names
Showy Stonecrop, Border Stonecrop
Hardiness Zones
Actual hardiness always has some variability, depending on the type of sedum you are growing and your growing conditions for the year.
However, sedum plants tend to be tough and adaptable. You can expect them to survive in USDA Hardiness Zones 3 - 10.
Mature Plant Size
Most tall sedum varieties stand upright and form a well-behaved mound, but there are a few, like "Matrona" that naturally flop over. In general, expect the mature size of your sedum plants to be 6 - 24 inches (H) x 12 - 24 inches (W).

Sun Exposure for Sedums
Sedums will grow best in full sun. They are very drought tolerant, but stonecrops can get sun scald in extremely hot, dry conditions. Sedums can be grown successfully in partial shade, but the plants might not be as sturdy and upright as they would be in full sun.
Bloom Time
Although sedum flowers don't open until late summer / early fall, the flower heads form early in the season. They start off a green color, like a broccoli bud, and slowly change color, usually from a pink to a mauve. The earlier, paler color is actually the flower in bloom. The mauve color is generally when the flower head is starting to dry. But sedum flowers tend to look good in all their stages, making them a great plant for a long season of interest.
Using Stonecrops in Your Garden Design
Sedum look especially good in a small mass planting that takes center stage in autumn. Because they look good all season, sedums are suitable for edging, as specimen plants and in containers. Smaller varieties are good choices for rock gardens and walls. Sedums make long-lasting cut flowers and are great for attracting butterflies and other pollinators.
The Best Sedum Varieties to Grow
Sedum "Autumn Joy" - Still a favorite because it is such a wonderful, beautiful performer.
Sedum spectabile "Brilliant" - A clearer pink than most Sedum flowers.
Sedum "Vera Jamison" - Burgandy leaves and mauve flowers with a trailing habit.
Sedum "Black Jack" - Deep burgundy, almost black foliage and strong upright habit.
Sedum "Cloud Nine" - Variegated Foliage
Sedum Growing Tips
Sedums are extremely easy to grow. They prefer a well-drained soil but can tolerate rainy weather as well. Extreme heat and lack of sun both cause Sedum to get a bit leggy. Pruning the plants back in early July will encourage them to get bushier and to grow sturdier, but it can result in smaller flowers.
Most of the sedum seed offered is for the low growing, ground cover varieties, not tall sedum. Taller sedums tend to be hybrids, and they won't grow true from seed. You will usually need to start off with plants or divisions.
Caring for Your Stonecrop Plants
Stonecrop flowers bloom only once; late in the season. Stonecrops do not need deadheading and often look good right through the winter. After several years, the center of Sedum plants will show signs of dying out, a sure sign they need dividing. Dividing them is a good idea at that point, to keep the plant vigorous.
Stem cuttings can be taken at any time, to propagate more Sedum.
More Drought Tolerant Succulent Plants to Grow
Sedums are not the only easy to grow succulent plants for your garden, although they do tend to be hardier than most other succulents. If you are interested in growing more of these fascinating drought-tolerant plants others you might try include Aeonium, Agave, Crassula, Echeveria, Euphorbia, Ice Plants (Lampranthus), Kalanchoe, and Senecio. Many of these also make great houseplants.

The flower buds form early and remain attractive well in winter. If the deer didn’t eat them, Sedum would be a perfect plant.
Growth Habit and Leaves: Border Stonecrops are a small section of the hundreds of species of Sedum. These taller growing Sedums have thick stems, fleshy leaves and tight flower heads that start out looking similar to heads of broccoli. Most are sturdy enough to stand upright on their own, with a few varieties that have a nice trailing quality, suitable for containers.
Flowers: Tall sedum flowers tend to come in shades of pink and mauve, that start out pale and deepen as they mature. The flower heads are attractive from bud through to their dried stage and are usually left standing tall throughout winter. The stems are even strong enough to hold a few inches of snow, capping the flower tops.
Botanical Name
Sedum
Common Names
Showy Stonecrop, Border Stonecrop
Hardiness Zones
Actual hardiness always has some variability, depending on the type of sedum you are growing and your growing conditions for the year.
However, sedum plants tend to be tough and adaptable. You can expect them to survive in USDA Hardiness Zones 3 - 10.
Mature Plant Size
Most tall sedum varieties stand upright and form a well-behaved mound, but there are a few, like "Matrona" that naturally flop over. In general, expect the mature size of your sedum plants to be 6 - 24 inches (H) x 12 - 24 inches (W).

Sun Exposure for Sedums
Sedums will grow best in full sun. They are very drought tolerant, but stonecrops can get sun scald in extremely hot, dry conditions. Sedums can be grown successfully in partial shade, but the plants might not be as sturdy and upright as they would be in full sun.
Bloom Time
Although sedum flowers don't open until late summer / early fall, the flower heads form early in the season. They start off a green color, like a broccoli bud, and slowly change color, usually from a pink to a mauve. The earlier, paler color is actually the flower in bloom. The mauve color is generally when the flower head is starting to dry. But sedum flowers tend to look good in all their stages, making them a great plant for a long season of interest.
Using Stonecrops in Your Garden Design
Sedum look especially good in a small mass planting that takes center stage in autumn. Because they look good all season, sedums are suitable for edging, as specimen plants and in containers. Smaller varieties are good choices for rock gardens and walls. Sedums make long-lasting cut flowers and are great for attracting butterflies and other pollinators.
The Best Sedum Varieties to Grow
Sedum "Autumn Joy" - Still a favorite because it is such a wonderful, beautiful performer.
Sedum spectabile "Brilliant" - A clearer pink than most Sedum flowers.
Sedum "Vera Jamison" - Burgandy leaves and mauve flowers with a trailing habit.
Sedum "Black Jack" - Deep burgundy, almost black foliage and strong upright habit.
Sedum "Cloud Nine" - Variegated Foliage
Sedum Growing Tips
Sedums are extremely easy to grow. They prefer a well-drained soil but can tolerate rainy weather as well. Extreme heat and lack of sun both cause Sedum to get a bit leggy. Pruning the plants back in early July will encourage them to get bushier and to grow sturdier, but it can result in smaller flowers.
Most of the sedum seed offered is for the low growing, ground cover varieties, not tall sedum. Taller sedums tend to be hybrids, and they won't grow true from seed. You will usually need to start off with plants or divisions.
Caring for Your Stonecrop Plants
Stonecrop flowers bloom only once; late in the season. Stonecrops do not need deadheading and often look good right through the winter. After several years, the center of Sedum plants will show signs of dying out, a sure sign they need dividing. Dividing them is a good idea at that point, to keep the plant vigorous.
Stem cuttings can be taken at any time, to propagate more Sedum.
More Drought Tolerant Succulent Plants to Grow
Sedums are not the only easy to grow succulent plants for your garden, although they do tend to be hardier than most other succulents. If you are interested in growing more of these fascinating drought-tolerant plants others you might try include Aeonium, Agave, Crassula, Echeveria, Euphorbia, Ice Plants (Lampranthus), Kalanchoe, and Senecio. Many of these also make great houseplants.
0
0
文章
Miss Chen
2018年06月23日


1.Agave in a Garden Pot
Succulent plants make great, easy container garden plants.
Succulent are one of my favorite container garden plants. They are low-maintenance, beautiful and they come in stunning colors, many different sizes, textures and shapes.
I am somewhat in awe of agaves. They are beautiful, striking and somewhat lethal, given their spikes, sharp tips and potentially toxic sap. Despite their seemingly hostile appearance they are fairly good-natured plants - not difficult to care for and tolerant of cool temperatures. Though they prefer hot, full sun, agaves will tolerate some shade.
P. Allen Smith uses agaves to great dramatic affect. Potted in large, dark containers, they punctuate the landscape and add a modern, sculptural sensibility as well as vertical interest.

2.Succulents on the Half Shell
These clamshells are packed full of succulent plants. They can be used for table decorations and make great house presents. You can use a mix of succulent plants, or use one type. These are planted with a few different kinds of hens and chicks, and some tiny echeverias.
As when planting any succulent, use either a potting soil made specifically for succulents and cacti, or make your own by taking a good quality potting mix and adding either pumice or perlite. Make sure to use a container that either has drainage holes one that you can punch or drill holes in. Drainage is key to keeping your succulents healthy.
To care for these miniature container gardens, give them full sun, or if you are in a very hot climate, keep them in partial shade. Do not over-water. During the growing season, keep the soil moist, but not wet. During the winter, when succulents go into dormancy, let the soil dry out between waterings.
Hens and chicks are incredibly forgiving plants. They are extremely hardy - most of them can survive in zone 3, and can tolerate poor soil.
For Step by step instructions on making clam shell container gardens.

3.Succulents in a Lunchbox
You can plant succulents in almost anything. Because of their shallow root structure, you don't need a very deep pot. You do need good drainage though. I took a large nail and hammered so many holes in the bottom of this box, that by the time I was done, it looked like Swiss cheese.
Because the metal is pretty thin, I made sure to punch the holes with the metal sitting directly on the ground, so it wouldn't bend the box.
After I punched the holes, I lined the box with plastic also with holes, so it wouldn't rust as quickly. I then filled it with a potting mix specifically designed for cacti and succulents. I packed the box full of plants, putting the ones that I knew would drape, near the edges, and the larger plants near the back.
The box sits in full sun, and I water it enough to keep the soil moist, but not wet. I'll bring it inside in the late fall and keep it in bright, indirect light. In the winter I'll let the soil dry out completely between waterings.
0
0
文章
Miss Chen
2018年05月14日

Potatoes are easy to grow, and the plants can be highly productive if grown under the best conditions. Oklahoma gardeners are fortunate to have a climate well-suited to growing potatoes, and starting your plants at the right time will help make sure your crop is a bountiful one.
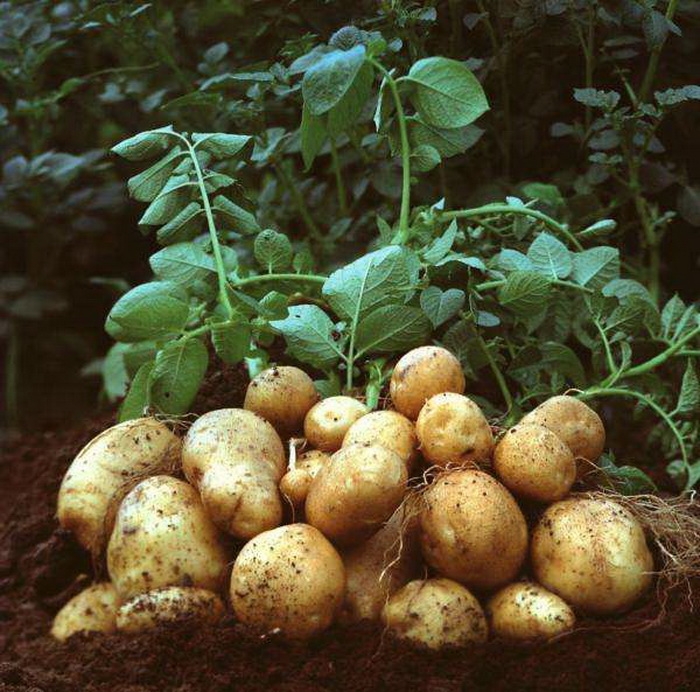
Time Frame
Potatoes are considered cool-season vegetables. They are not particularly sensitive to frost, and can be planted earlier than more tender garden plants. You can plant potatoes from mid-February to mid-March. If you live in southern Oklahoma, you should plant during the earlier portion of this range.
Considerations
Potatoes grow best in soil that is well aerated, moist and well drained; avoid compacting the soil. A pH between 5.0 and 5.5 is ideal. Potatoes grow well in sunny conditions, but excessive heat and lack of moisture reduce yield.

Sweet Potatoes
Sweet potatoes are less hardy than regular potatoes, and should be planted between May 1 and June 20.

Time Frame
Potatoes are considered cool-season vegetables. They are not particularly sensitive to frost, and can be planted earlier than more tender garden plants. You can plant potatoes from mid-February to mid-March. If you live in southern Oklahoma, you should plant during the earlier portion of this range.
Considerations
Potatoes grow best in soil that is well aerated, moist and well drained; avoid compacting the soil. A pH between 5.0 and 5.5 is ideal. Potatoes grow well in sunny conditions, but excessive heat and lack of moisture reduce yield.

Sweet Potatoes
Sweet potatoes are less hardy than regular potatoes, and should be planted between May 1 and June 20.
0
0
Finncarter
2018年05月13日

Notocactus Haselbergii:
- This suoer spikey cactus coverd, has bright red blooms during mid to late spring. A single cactus of its sort can produce up to 6-7 flowers a year, this plant is also very easy to cross-pollenate.
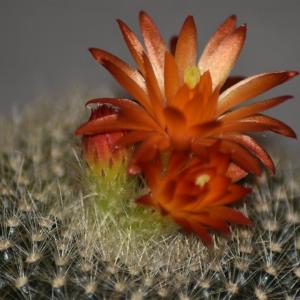
- This suoer spikey cactus coverd, has bright red blooms during mid to late spring. A single cactus of its sort can produce up to 6-7 flowers a year, this plant is also very easy to cross-pollenate.

1
0
文章
Miss Chen
2018年04月29日

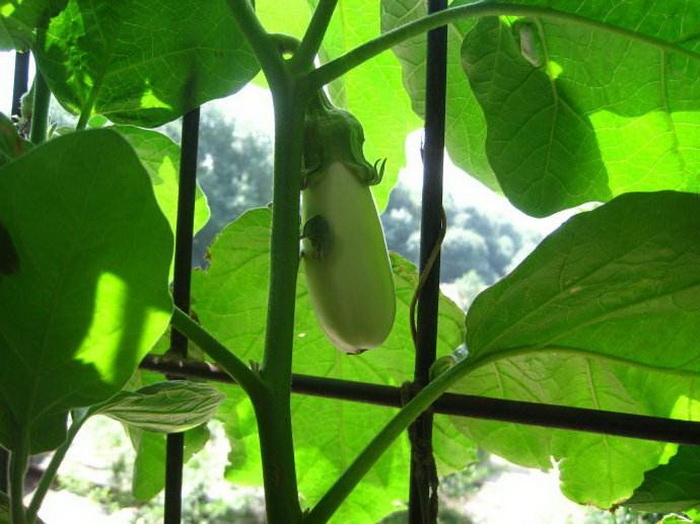
When growing exotics like white eggplants (Solanum melongena var. esculentum), it's not always easy to tell when the fruit is ready for picking, but even these ghostly varieties tell you when to harvest with their subtle signs.
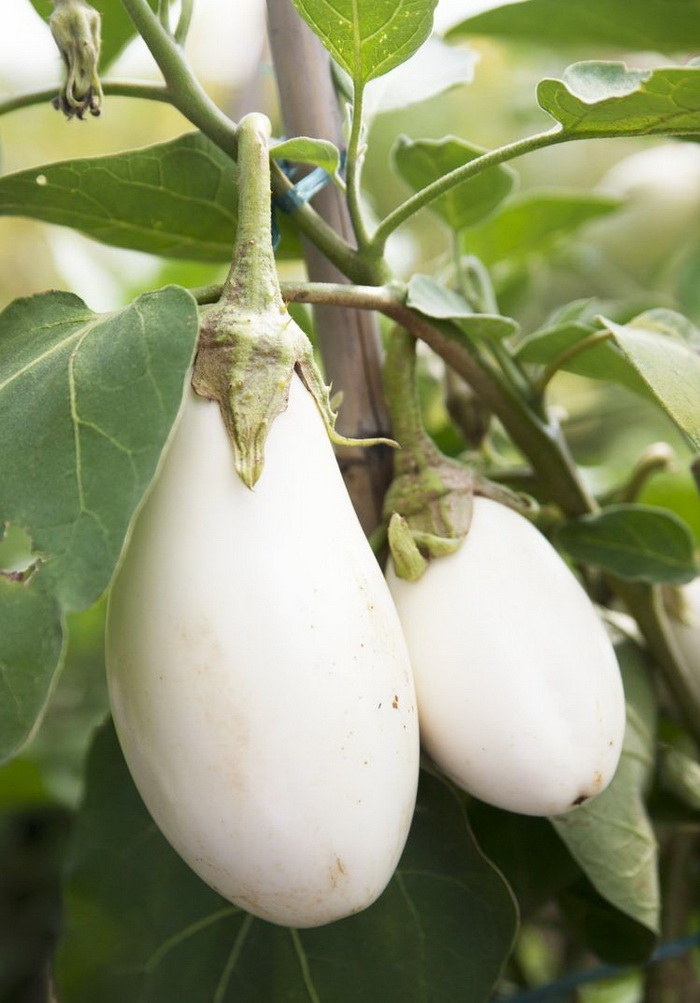
White vs. Purple Eggplants
Eggplants, both the traditional purple varieties and the exotic-looking white ones belong to the group of culinary or edible eggplants listed under the scientific name Solanum melongena var. esculentum, or alternately Solanum esculentum__. They are frost-tender perennials which grow in U.S. Department of Agriculture plant hardiness zones 9 through 12. In the vegetable garden eggplants typically are treated as annuals in all climates.
Identifying Ripe Eggplants
White edible eggplants turn ivory or white when ripe and have a glossy sheen. Once overripe, the skin starts to take on a yellow hue and loses its shine. Ripe white eggplants feel firm to the touch with a slight give when pressed. Cut one open and the seeds will look white or cream. Once the seeds start to darken, the white eggplant is overripe. White eggplants take about 75 days from planting to harvest, with some variation depending on the individual variety. Overripe eggplants get spongy and take on a bitter taste.
How to Harvest
Step 1
Put on gloves to protect your hands from the slightly prickly eggplant stems.
Step 2
Hold the ripe white eggplant in one hand and cut through the thick stem right above the point where it attaches to the fruit. Eggplants have a green hat-shaped stem that grows over the top part of the fruit. Make your cut right above this point.
Step 3
Sanitize your knife blade before harvesting other garden vegetables by soaking it for five minutes in a container filled with equal parts rubbing alcohol and water. Allow the blade to dry before closing or storing.
Edible White Eggplant Varieties
'Casper' (Solanum melongena var. esculentum 'Casper') is an ivory or cream white eggplant variety with mature fruits that grow 5 to 6 inches long. It has a delicate flavor and texture. 'Casper' takes 70 days to mature for harvest.
'Easter Egg' (Solanum melongena var. esculentum 'Easter Egg') looks a bit like an egg with its slightly oblong, rounded shape and white skin. This little edible eggplant that also has ornamental value and is ready for harvest 52 to 64 days after planting.
The hybrid variety 'Gretel' (Solanum melongena var. _esculentum 'Gretel'_) is a miniature white eggplant with a mature size of 3 to 4 inches long. You can start harvesting 'Gretel' 55 days after planting. If you're looking for an eggplant to grow in a container, try this dwarf variety.
'Comet' (Solanum melongena var. esculentum 'Comet'), a hybrid eggplant variety that ripens to pure white, has 10-inch-long, 2-inch-diameter fruits. 'Comet' has thin, delicate skin and takes 70 days from planting to harvest.
'White Star' (Solanum melongena var. _esculentum 'White Star'),_ is a hybrid type with oblong, white-skinned fruit. This mild, slightly sweet eggplant variety takes 75 days from planting to harvest.

White vs. Purple Eggplants
Eggplants, both the traditional purple varieties and the exotic-looking white ones belong to the group of culinary or edible eggplants listed under the scientific name Solanum melongena var. esculentum, or alternately Solanum esculentum__. They are frost-tender perennials which grow in U.S. Department of Agriculture plant hardiness zones 9 through 12. In the vegetable garden eggplants typically are treated as annuals in all climates.
Identifying Ripe Eggplants
White edible eggplants turn ivory or white when ripe and have a glossy sheen. Once overripe, the skin starts to take on a yellow hue and loses its shine. Ripe white eggplants feel firm to the touch with a slight give when pressed. Cut one open and the seeds will look white or cream. Once the seeds start to darken, the white eggplant is overripe. White eggplants take about 75 days from planting to harvest, with some variation depending on the individual variety. Overripe eggplants get spongy and take on a bitter taste.
How to Harvest
Step 1
Put on gloves to protect your hands from the slightly prickly eggplant stems.
Step 2
Hold the ripe white eggplant in one hand and cut through the thick stem right above the point where it attaches to the fruit. Eggplants have a green hat-shaped stem that grows over the top part of the fruit. Make your cut right above this point.

Step 3
Sanitize your knife blade before harvesting other garden vegetables by soaking it for five minutes in a container filled with equal parts rubbing alcohol and water. Allow the blade to dry before closing or storing.
Edible White Eggplant Varieties
'Casper' (Solanum melongena var. esculentum 'Casper') is an ivory or cream white eggplant variety with mature fruits that grow 5 to 6 inches long. It has a delicate flavor and texture. 'Casper' takes 70 days to mature for harvest.
'Easter Egg' (Solanum melongena var. esculentum 'Easter Egg') looks a bit like an egg with its slightly oblong, rounded shape and white skin. This little edible eggplant that also has ornamental value and is ready for harvest 52 to 64 days after planting.
The hybrid variety 'Gretel' (Solanum melongena var. _esculentum 'Gretel'_) is a miniature white eggplant with a mature size of 3 to 4 inches long. You can start harvesting 'Gretel' 55 days after planting. If you're looking for an eggplant to grow in a container, try this dwarf variety.
'Comet' (Solanum melongena var. esculentum 'Comet'), a hybrid eggplant variety that ripens to pure white, has 10-inch-long, 2-inch-diameter fruits. 'Comet' has thin, delicate skin and takes 70 days from planting to harvest.
'White Star' (Solanum melongena var. _esculentum 'White Star'),_ is a hybrid type with oblong, white-skinned fruit. This mild, slightly sweet eggplant variety takes 75 days from planting to harvest.
0
0
成长记
Shami
2018年04月23日

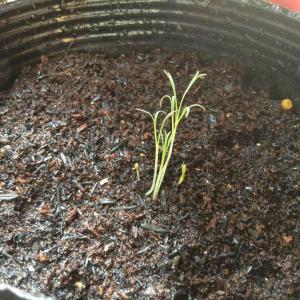
It said on the package that it was easy to grow. But I'm having a hard time on watering them. :( Date: April 23, 2018

0
0
文章
Miss Chen
2018年04月20日

Zucchini and other summer squash can be grown in vegetable gardens throughout the United States, providing a good crop each year. Although the squash are considered easy to grow, the plants can suffer damage when not cared for properly. Yellow leaves are a sign of a potential problem in many plants, zucchini included. In some cases, overwatering may cause the problem. However, that is only one potential cause.

Water Needs
Zucchini need about 1 inch of water per week, the University of Illinois Extension reports. When rainfall does not meet these needs, the best technique for watering the squash is to provide one deep water per week. If you grow zucchini in a sandy soil, water more frequently but use less water with each irrigation, the University of Minnesota Extension recommends.
Too Much Water
Yellow leaves on a zucchini plant can be a sign of many problems, including too much water. Typically, leaves yellow as a result of wet soil following heavy rains when temperatures are cool or cold, the University of Minnesota Extension reports. Leaves also may appear dark green or brown, and many may wilt or die back, when temperatures drop.
Other Causes
Cold weather and too much moisture are among many potential causes for yellow leaves on a zucchini plant. Powdery mildew can also cause yellowing, typically on the plant's oldest leaves. Downy mildew can also cause yellowing, although typically in spots and splotches. Pests including the squash vine borer and squash bugs can make leaves yellow and wilt. Finally, plant viruses such as squash mosaic can lead to yellowing of leaves.

Treatment and Care
How to care for a zucchini plant with yellowing leaves depends on the cause. When the problem develops following a cold and rainy spell, the plant's health may improve without your aid as temperatures warm and the soil dries out. If the yellow leaves are pest related, you can remove visible pests and their eggs and larvae by hand when checking the plants; alternatively, try an insecticide applied at the base of the vines, suggests the Iowa State University Extension. Herbicides can help control mildew and other plant diseases.

Water Needs
Zucchini need about 1 inch of water per week, the University of Illinois Extension reports. When rainfall does not meet these needs, the best technique for watering the squash is to provide one deep water per week. If you grow zucchini in a sandy soil, water more frequently but use less water with each irrigation, the University of Minnesota Extension recommends.
Too Much Water
Yellow leaves on a zucchini plant can be a sign of many problems, including too much water. Typically, leaves yellow as a result of wet soil following heavy rains when temperatures are cool or cold, the University of Minnesota Extension reports. Leaves also may appear dark green or brown, and many may wilt or die back, when temperatures drop.
Other Causes
Cold weather and too much moisture are among many potential causes for yellow leaves on a zucchini plant. Powdery mildew can also cause yellowing, typically on the plant's oldest leaves. Downy mildew can also cause yellowing, although typically in spots and splotches. Pests including the squash vine borer and squash bugs can make leaves yellow and wilt. Finally, plant viruses such as squash mosaic can lead to yellowing of leaves.

Treatment and Care
How to care for a zucchini plant with yellowing leaves depends on the cause. When the problem develops following a cold and rainy spell, the plant's health may improve without your aid as temperatures warm and the soil dries out. If the yellow leaves are pest related, you can remove visible pests and their eggs and larvae by hand when checking the plants; alternatively, try an insecticide applied at the base of the vines, suggests the Iowa State University Extension. Herbicides can help control mildew and other plant diseases.
0
0


