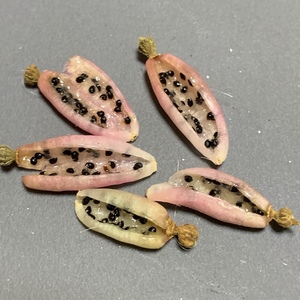
文章
Andy
2018年12月26日

Facebook Pinterest Twitter Google+ LinkedIn StumbleUponLearn how to grow a tamarind tree in this complete article. Growing tamarind tree is easy, it’s a low care plant with a few requirements.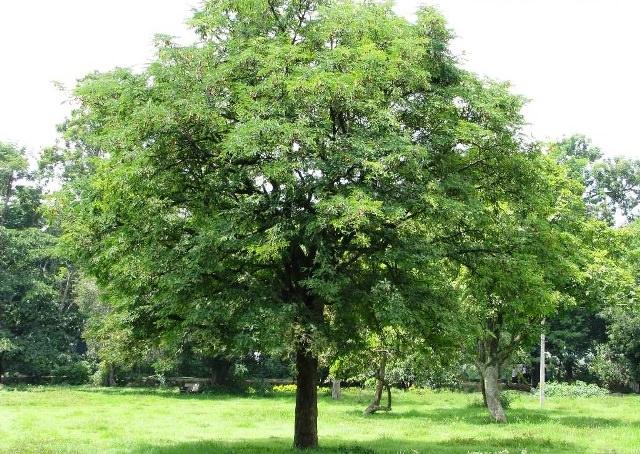

USDA Zone — 9b to 11
Difficulty — Easy
(adsbygoogle = window.adsbygoogle || []).push({});
Other Names — Tamarindus indica, tamarindo, tamarin, tamarinier, tamarinier des Indes, tamarindier, tamarinde, sampalok, asam jawa, ambli, imli, chinch, ma-kharm.
Tamarind tree is native to Africa and grows like a wild plant in Indian subcontinent. It’s also grown across Southeast Asia, South America and tropical parts of Australia and North America.
Information about Tamarind Tree
Tamarind is a slow-growing tree. It’s able to reach a height of 25 m and a circumference of 7 m, very long-lived, in fact, it can survive for more than 300 years.
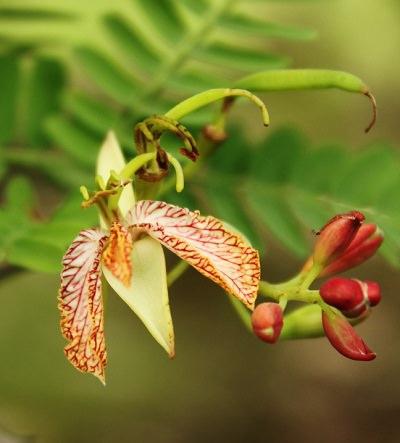

Tamarind leaves are evergreen, like pinnate up to 15 cm long consisting of 10 – 12 pairs of leaflets. Its leaves somewhat looks like acacia leaves. Tamarind flowers are grouped in inflorescence and have five yellow petals with red streaks. Pollination of flowers is entomophilous (pollinated by insects).
(adsbygoogle = window.adsbygoogle || []).push({});
Tamarind fruits are legumes. Slightly curved, 10 to 15 cm long and have a brown color. Its seeds, 4 to 12 in each pod, make up 34% of the legume and are inserted into a yellowish or brown colored pulp that taste very sour and sweet but pleasant and represents most of the fruit.
Compared to other fruits, in tamarind, during the maturation phase the acidity does not decrease, while the hydrolysis of the starch leads to an accumulation of reducing sugar (sucrose).
Tamarind pulp contains 70% carbohydrate, 3% protein and less than 1% fat, it also contains tartaric acid (8-10%), which also occurs in other fruits like bananas and grapes.
Tamarind Tree Varieties
There are different types of tamarind varieties, among which include: Sweet Tamarind, Australian tamarind, Manila tamarind, Velvet tamarind, Spanish Tamarind.
Propagation
Tamarind is propagated by seeds, grafting, cuttings and air layering. Seeds are viable for many months.
How to Grow Tamarind Tree from Seed
Soak tamarind seeds overnight in warm water to speed up germination. Sow seeds 1/2 inches deep in good quality seed starting mix. Germination occurs within one or two week after sowing.
*Plants grown from seeds do not go into production before the 6 – 7 years after germination. So it is better to grow tamarind from cutting or buy a plant from nursery if you want quick results.
Planting Tamarind
Dig a hole twice the size of the root ball of the plant. Gently remove the plant from the pot and cut dead or damaged roots. Insert the root ball in the hole and fill the soil around root ball to maintain the tree trunk above the soil line. Firm the soil and water the plant thoroughly.
For commercial growers, the planting density is large because of well developed foliage and width tamarind tree needs, the spacing should be around 5 – 15 m, depending more on the variety.
Position For Growing Tamarind Tree
Tamarind prefers tropical and subtropical, dry and windy climate. It can adapt even to the warm temperate climate, but there it’ll not be very productive. Young plants can’t withstand the cold, while the adults are resistant to temperature till 28 degree Fahrenheit only.
Best planting position is in full sun. For flowering, fruit setting and fruit development, tamarind tree needs clear sky and drier days.
How to Grow Tamarind Tree in Cold Climate

Tamarind is a tropical tree, it endures mild winter but growing it outside in colder climate is definitely a bad idea. If you want to grow it, grow tamarind tree in pot and keep it indoors or in a greenhouse during winter. You can also make a beautiful bonsai of tamarind tree.
Tamarind Tree Growing RequirementsSun
Tamarind loves full sun and heat.
Soil
Tamarind prefers deep loamy soil. It thrives in neutral, gritty, clay, even saline soil type. Soil should be well drained. For growing tamarind you don’t need to care about soil pH level. It grows in pH level around 4.5 – 9.
Watering
Water saplings deeply when the first inch of soil is dry to the touch. Once established, tamarind trees don’t need watering and can withstand periods of extreme drought conditions without experiencing adverse effects.
Fertilizer
Feed the tamarind plant with organic fertilizer according to the manufacturer’s instructions. Fertilize young trees with 6 – 6 – 3 (N – P – K) fertilizer every 2-3 month during season. Mature trees don’t need fertilizer but can be fertilized occasionally with 8 – 3 – 9 fertilizer to give a boost.
Application of compost and manure should be done too, to reduce the need of fertilizer.
Tamarind Tree CareMulching

Spread 4 or 5 inches thick layer of mulch around tamarind tree at the beginning of each spring. This helps to protect the roots of the tree, prevents weed and keeps the soil moist, mimicking the effects of a natural forest floor.
(adsbygoogle = window.adsbygoogle || []).push({}); Pruning
Prune your tamarind tree regularly to control its growth and maintain its shape. Remove dead and damaged wood from the plant.
Pests and Diseases
Tamarind tree is susceptible to pests like scales, mealy bugs, aphids and fruit borers. In diseases, it’s affected by root rot, sooty mold and leaf spot.
Tamarind Uses (adsbygoogle = window.adsbygoogle || []).push({});
Tamarind fruits are used for fresh consumption and for the preparation of juices, sauces, jams, beverages and syrups. Tamarind pulp is used in preparation of many South Asian cuisines and curry recipes.
Facebook Pinterest Twitter Google+ LinkedIn StumbleUpondiv.OUTBRAIN{padding:30px}


USDA Zone — 9b to 11
Difficulty — Easy
(adsbygoogle = window.adsbygoogle || []).push({});
Other Names — Tamarindus indica, tamarindo, tamarin, tamarinier, tamarinier des Indes, tamarindier, tamarinde, sampalok, asam jawa, ambli, imli, chinch, ma-kharm.
Tamarind tree is native to Africa and grows like a wild plant in Indian subcontinent. It’s also grown across Southeast Asia, South America and tropical parts of Australia and North America.
Information about Tamarind Tree
Tamarind is a slow-growing tree. It’s able to reach a height of 25 m and a circumference of 7 m, very long-lived, in fact, it can survive for more than 300 years.


Tamarind leaves are evergreen, like pinnate up to 15 cm long consisting of 10 – 12 pairs of leaflets. Its leaves somewhat looks like acacia leaves. Tamarind flowers are grouped in inflorescence and have five yellow petals with red streaks. Pollination of flowers is entomophilous (pollinated by insects).
(adsbygoogle = window.adsbygoogle || []).push({});
Tamarind fruits are legumes. Slightly curved, 10 to 15 cm long and have a brown color. Its seeds, 4 to 12 in each pod, make up 34% of the legume and are inserted into a yellowish or brown colored pulp that taste very sour and sweet but pleasant and represents most of the fruit.
Compared to other fruits, in tamarind, during the maturation phase the acidity does not decrease, while the hydrolysis of the starch leads to an accumulation of reducing sugar (sucrose).
Tamarind pulp contains 70% carbohydrate, 3% protein and less than 1% fat, it also contains tartaric acid (8-10%), which also occurs in other fruits like bananas and grapes.
Tamarind Tree Varieties
There are different types of tamarind varieties, among which include: Sweet Tamarind, Australian tamarind, Manila tamarind, Velvet tamarind, Spanish Tamarind.
Propagation
Tamarind is propagated by seeds, grafting, cuttings and air layering. Seeds are viable for many months.
How to Grow Tamarind Tree from Seed
Soak tamarind seeds overnight in warm water to speed up germination. Sow seeds 1/2 inches deep in good quality seed starting mix. Germination occurs within one or two week after sowing.
*Plants grown from seeds do not go into production before the 6 – 7 years after germination. So it is better to grow tamarind from cutting or buy a plant from nursery if you want quick results.
Planting Tamarind
Dig a hole twice the size of the root ball of the plant. Gently remove the plant from the pot and cut dead or damaged roots. Insert the root ball in the hole and fill the soil around root ball to maintain the tree trunk above the soil line. Firm the soil and water the plant thoroughly.
For commercial growers, the planting density is large because of well developed foliage and width tamarind tree needs, the spacing should be around 5 – 15 m, depending more on the variety.
Position For Growing Tamarind Tree
Tamarind prefers tropical and subtropical, dry and windy climate. It can adapt even to the warm temperate climate, but there it’ll not be very productive. Young plants can’t withstand the cold, while the adults are resistant to temperature till 28 degree Fahrenheit only.
Best planting position is in full sun. For flowering, fruit setting and fruit development, tamarind tree needs clear sky and drier days.
How to Grow Tamarind Tree in Cold Climate


Tamarind is a tropical tree, it endures mild winter but growing it outside in colder climate is definitely a bad idea. If you want to grow it, grow tamarind tree in pot and keep it indoors or in a greenhouse during winter. You can also make a beautiful bonsai of tamarind tree.
Tamarind Tree Growing RequirementsSun
Tamarind loves full sun and heat.
Soil
Tamarind prefers deep loamy soil. It thrives in neutral, gritty, clay, even saline soil type. Soil should be well drained. For growing tamarind you don’t need to care about soil pH level. It grows in pH level around 4.5 – 9.
Watering
Water saplings deeply when the first inch of soil is dry to the touch. Once established, tamarind trees don’t need watering and can withstand periods of extreme drought conditions without experiencing adverse effects.
Fertilizer
Feed the tamarind plant with organic fertilizer according to the manufacturer’s instructions. Fertilize young trees with 6 – 6 – 3 (N – P – K) fertilizer every 2-3 month during season. Mature trees don’t need fertilizer but can be fertilized occasionally with 8 – 3 – 9 fertilizer to give a boost.
Application of compost and manure should be done too, to reduce the need of fertilizer.
Tamarind Tree CareMulching


Spread 4 or 5 inches thick layer of mulch around tamarind tree at the beginning of each spring. This helps to protect the roots of the tree, prevents weed and keeps the soil moist, mimicking the effects of a natural forest floor.
(adsbygoogle = window.adsbygoogle || []).push({}); Pruning
Prune your tamarind tree regularly to control its growth and maintain its shape. Remove dead and damaged wood from the plant.
Pests and Diseases
Tamarind tree is susceptible to pests like scales, mealy bugs, aphids and fruit borers. In diseases, it’s affected by root rot, sooty mold and leaf spot.
Tamarind Uses (adsbygoogle = window.adsbygoogle || []).push({});
Tamarind fruits are used for fresh consumption and for the preparation of juices, sauces, jams, beverages and syrups. Tamarind pulp is used in preparation of many South Asian cuisines and curry recipes.
Facebook Pinterest Twitter Google+ LinkedIn StumbleUpondiv.OUTBRAIN{padding:30px}
0
0
文章
Andy
2018年12月26日

Facebook Pinterest Twitter Google+ LinkedIn StumbleUponLearn how to grow pomegranate tree. Growing Pomegranates in Containers is not difficult, and it is more cold hardy and easy to grow than other tropical fruits.
Pomegranate is one of the nicest fruit trees and perhaps the easiest to grow in pots because it has a shallow root system when compared to other fruit trees.
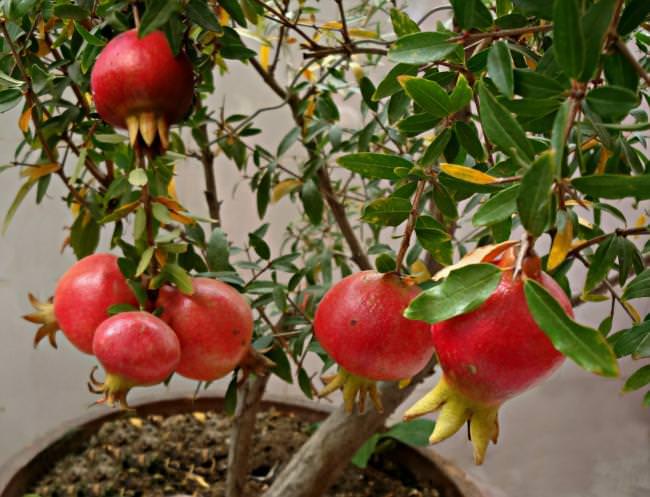

Pomegranate tree if grown under optimal conditions, live up to 200 years. It is native to the Middle East (Iran) and South Asia, Himalayan Northern India. It is a shrub or small tree that might grow up to 6 m (20 ft) but usually reduced to 2 m.
USDA Hardiness Zones: 9b – 11, *can be grown below zone 9 in containers
Difficulty: Easy
Soil pH: Neutral
(adsbygoogle = window.adsbygoogle || []).push({});
Other Names: Punic apple, Granatapfel, Granada, Grenade, Melograno, Melagrana, Anardana, Anar, Dadima, Fruit du, Pomme Grenade, Punica granatum, Roma, Shi Liu Gen Pi, and Shi Liu Pi
Appearance
The exotic container plant is adorned with five to eight centimeters long lance-shaped leaves that are shiny and bronze in color from the bud, which later turn green.
Pomegranate flowers are delicate, bell-shaped and show up in the wild bright red. Its flowers are up to 3 centimeters wide. Ornamental varieties can have flowers in pink, cream, and even white.
In addition to the decorative foliage and flowers, it is mainly the fruits that make the pomegranate tree so desirable. They are of the size of apples with a yellow-brown to a reddish-brown or pink or rich red hard shell. Inside, the fruit consists of countless tiny sacs that are transparent in color. They are juicy and have beautiful pink or red pulp and one hard seed in each, which is completely edible. Overall, the taste of pomegranate fruit is a sweet and juicy, and crunchy and little tart. Without a doubt, this is the best tasting fruit full of nutrients.
Also Read: How to Grow Indian Gooseberry ‘Amla Tree’
Dwarf Pomegranate VarietiesFruiting Varieties‘Nana’ – The most interesting variety among the pomegranates trees is the dwarf variety ‘Nana.’ It grows compact, floriferous and is considered robust and cold hardy. It grows in USDA Zones 7 to 11. As a container plant, it grows up to only about 1 m tall, forms orange to garnet red flowers that produce small fruits with viable seeds.‘Provence’ – When most of the pomegranate varieties are not much cold hardy, Provence is one you can look at. It can tolerate temperature down to 5 F (-15 C) and can be grown in cold climate.‘State fair’ – State fair is manageable variety for containers. It can get up to 1.5 m tall and grown in USDA Zones 7 to 11.Ornamental Varieties‘Flore Pleno’ – It’s a fruitless variety of pomegranate, the name translates as “double flower.” In summer, it produces countless beautiful orange-red flowers.Punica granatum ‘Madame Legrelle’ – A well-known ornamental variety. The special thing about this variety of pomegranate is its extraordinary, dense double flowers that come in shiny orange to salmon colors with a white border.
Note: Pomegranate is a manageable plant. You can also try large varieties.
Propagation and Growing Pomegranates in Containers
Pomegranate plants can be propagated by cuttings or by seeds in spring to summer when the temperature remains in the range of 68 F (20 C), but it is better to buy a 2-3 years old plant from nursery or online. This way you don’t have to wait long for fruits.
Propagation by Seeds
Buy as ripe pomegranate as possible. Separate and clean seeds from the pulp by rubbing them from paper towel, let them dry up for a few days before sowing.
Plant the seeds no more than ¼ inches deep in light seed-starting mix. Place the pots in a bright location, optionally inside a plastic bag or greenhouse that maintains a temperature around 68 F (20 C). Always keep the soil moist. Seeds will germinate within 1 – 6 weeks depending more on the variety and climate.
Propagation by Cuttings
Take several 8 to 10 inch-long cuttings. Plant the cutting in a well-drained potting mix. It roots easily and quickly at the ambient temperature of 20 degrees Celsius and high humidity.
*If you’re living in tropics, growing pomegranates is extremely easy for you. You can grow pomegranate in any season except peak summer. All other growing requirements given below are similar.
Choosing a pot
Pot should be appropriate to the size of the plant, increase the pot size by repotting as your plant grow. Also, care about to have sufficient holes in the base of pot you’re using for proper drainage.
Requirements for Growing Pomegranates in Pots

If you’ve grown citrus in a pot, growing pomegranates in a pot cannot be difficult for you. Moreover, pomegranate is more cold hardy and easy to grow. It requires a lot of water and fertilizer. It is also frost sensitive, but after all of this care, it rewards you with iron-rich, fresh juicy fruits.
Location
Choose the sunniest location to keep your pomegranate plant happy and healthy. The more sun it will receive, the more it will fruit. However, it also thrives in partial shade, but it makes the plant to bloom and fruit lesser. It is also possible to cultivate pomegranate tree near a windowsill if it receives full sun.
Soil
Soil should be loamy, rich in organic content, loose and permeable.
Watering
In the growing period, its water requirement is medium to high. Therefore, it should be watered regularly and deeply. Soil must be kept moist but not wet or waterlogged.
In the winter watering should be reduced.Pomegranate Tree CareFertilizer
During the growing season, the pomegranate tree is fertilized regularly. Fertilize after every two-three weeks using liquid 8-8-8 fertilizer according to the manufacturer’s instructions.
Pomegranate tree in pot often becomes zinc deficient, which is indicated by yellowing leaves. To overcome this, you can spray diluted zinc solution on foliage.
Application of compost or manure is also beneficial. Take care not to overfertilize it with nitrogen-rich fertilizer as it can cause the tree to produce lots of foliage and comparatively fewer flowers.
Overwintering Pomegranate
Overwintering pomegranate is similar to citrus. It is a deciduous tree that worships the sun. Most of its species are sensitive to frost. But for too low temperatures, the plant has developed a protective mechanism.
It sheds its leaves and become dormant below freezing temperature. There are only a few pomegranate tree varieties that survive really freezing temperatures with more than -10 C without damage.
If the pomegranate is cultivated in a pot in a cold climate below USDA Zone 9, it is important to prune it in the fall. The best place to keep pomegranate plant in winter is the garage or basement that remains warm. Temperature while keeping it indoors should not fall below 37 F (3 C). However, the optimum low temperature for most of the pomegranate varieties is 7 C (45 F).
If you’re able to keep your pomegranate tree in temperature around 55 F (15 C) indoors and allow it to take at least 4 hours of sunlight, it will not shed its leaves and go dormant. During the period of dormancy, the pomegranate hardly needs fertilizer or water. However, the plant in winter should not dry out completely.
In spring, bring back the plant to a warm and bright place so that it’ll gradually acclimate the climate. A window that is oriented to South is good. Just when the plant shows the first sign of growth and forms a few fully developed leaves, you can again start to fertilize it and give more water. Once the temperature comes in a range of 7 C (45 F) place it outside.
Pruning
Pruning is necessary to give and maintain the desired shape of your pomegranate tree and encourage flowering and fruiting. It is best done after all danger of frost has passed when the tree is about to start growing. Between early to mid spring.
Prune off weak, dead and undesirable branches to direct shrub’s energy to right parts and shorten long branches to encourage flowering.
Caveat: Some of the varieties have thorns, wear gloves before pruning for your safety.
Repotting
Repot your pomegranate tree when it becomes slightly root bound. The right time to repot is when there are no flowers or fruits on the plant, especially when it starts its growth at the beginning of growing season.
Diseases, Pests, and other Problems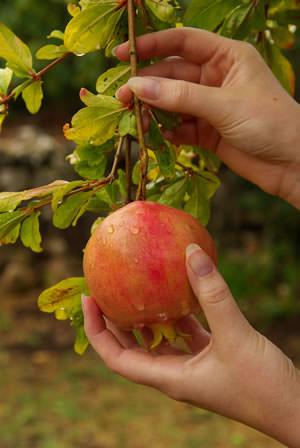

The pomegranate tree is not very vulnerable when it comes to pests and diseases. It is mostly attacked by fruit flies, whiteflies and pomegranate butterflies.
Fruit crack is one problem that is common in all pomegranate varieties. It occurs due to fluctuation or lack of moisture in a substrate at the time of fruiting.
Harvesting
If pomegranate is grown from seeds fruits will begin to form in the third year.
Generally, the fruit will ripen in three to six months after the appearance of flowers.
Harvest pomegranate when the crust of the fruit is intense red. Simply cut the fruit’s stem using sharp pruning shear or knife.
Pomegranate is one of the nicest fruit trees and perhaps the easiest to grow in pots because it has a shallow root system when compared to other fruit trees.


Pomegranate tree if grown under optimal conditions, live up to 200 years. It is native to the Middle East (Iran) and South Asia, Himalayan Northern India. It is a shrub or small tree that might grow up to 6 m (20 ft) but usually reduced to 2 m.
USDA Hardiness Zones: 9b – 11, *can be grown below zone 9 in containers
Difficulty: Easy
Soil pH: Neutral
(adsbygoogle = window.adsbygoogle || []).push({});
Other Names: Punic apple, Granatapfel, Granada, Grenade, Melograno, Melagrana, Anardana, Anar, Dadima, Fruit du, Pomme Grenade, Punica granatum, Roma, Shi Liu Gen Pi, and Shi Liu Pi
Appearance
The exotic container plant is adorned with five to eight centimeters long lance-shaped leaves that are shiny and bronze in color from the bud, which later turn green.
Pomegranate flowers are delicate, bell-shaped and show up in the wild bright red. Its flowers are up to 3 centimeters wide. Ornamental varieties can have flowers in pink, cream, and even white.
In addition to the decorative foliage and flowers, it is mainly the fruits that make the pomegranate tree so desirable. They are of the size of apples with a yellow-brown to a reddish-brown or pink or rich red hard shell. Inside, the fruit consists of countless tiny sacs that are transparent in color. They are juicy and have beautiful pink or red pulp and one hard seed in each, which is completely edible. Overall, the taste of pomegranate fruit is a sweet and juicy, and crunchy and little tart. Without a doubt, this is the best tasting fruit full of nutrients.
Also Read: How to Grow Indian Gooseberry ‘Amla Tree’
Dwarf Pomegranate VarietiesFruiting Varieties‘Nana’ – The most interesting variety among the pomegranates trees is the dwarf variety ‘Nana.’ It grows compact, floriferous and is considered robust and cold hardy. It grows in USDA Zones 7 to 11. As a container plant, it grows up to only about 1 m tall, forms orange to garnet red flowers that produce small fruits with viable seeds.‘Provence’ – When most of the pomegranate varieties are not much cold hardy, Provence is one you can look at. It can tolerate temperature down to 5 F (-15 C) and can be grown in cold climate.‘State fair’ – State fair is manageable variety for containers. It can get up to 1.5 m tall and grown in USDA Zones 7 to 11.Ornamental Varieties‘Flore Pleno’ – It’s a fruitless variety of pomegranate, the name translates as “double flower.” In summer, it produces countless beautiful orange-red flowers.Punica granatum ‘Madame Legrelle’ – A well-known ornamental variety. The special thing about this variety of pomegranate is its extraordinary, dense double flowers that come in shiny orange to salmon colors with a white border.
Note: Pomegranate is a manageable plant. You can also try large varieties.
Propagation and Growing Pomegranates in Containers
Pomegranate plants can be propagated by cuttings or by seeds in spring to summer when the temperature remains in the range of 68 F (20 C), but it is better to buy a 2-3 years old plant from nursery or online. This way you don’t have to wait long for fruits.
Propagation by Seeds
Buy as ripe pomegranate as possible. Separate and clean seeds from the pulp by rubbing them from paper towel, let them dry up for a few days before sowing.
Plant the seeds no more than ¼ inches deep in light seed-starting mix. Place the pots in a bright location, optionally inside a plastic bag or greenhouse that maintains a temperature around 68 F (20 C). Always keep the soil moist. Seeds will germinate within 1 – 6 weeks depending more on the variety and climate.
Propagation by Cuttings
Take several 8 to 10 inch-long cuttings. Plant the cutting in a well-drained potting mix. It roots easily and quickly at the ambient temperature of 20 degrees Celsius and high humidity.
*If you’re living in tropics, growing pomegranates is extremely easy for you. You can grow pomegranate in any season except peak summer. All other growing requirements given below are similar.
Choosing a pot
Pot should be appropriate to the size of the plant, increase the pot size by repotting as your plant grow. Also, care about to have sufficient holes in the base of pot you’re using for proper drainage.
Requirements for Growing Pomegranates in Pots


If you’ve grown citrus in a pot, growing pomegranates in a pot cannot be difficult for you. Moreover, pomegranate is more cold hardy and easy to grow. It requires a lot of water and fertilizer. It is also frost sensitive, but after all of this care, it rewards you with iron-rich, fresh juicy fruits.
Location
Choose the sunniest location to keep your pomegranate plant happy and healthy. The more sun it will receive, the more it will fruit. However, it also thrives in partial shade, but it makes the plant to bloom and fruit lesser. It is also possible to cultivate pomegranate tree near a windowsill if it receives full sun.
Soil
Soil should be loamy, rich in organic content, loose and permeable.
Watering
In the growing period, its water requirement is medium to high. Therefore, it should be watered regularly and deeply. Soil must be kept moist but not wet or waterlogged.
In the winter watering should be reduced.Pomegranate Tree CareFertilizer
During the growing season, the pomegranate tree is fertilized regularly. Fertilize after every two-three weeks using liquid 8-8-8 fertilizer according to the manufacturer’s instructions.
Pomegranate tree in pot often becomes zinc deficient, which is indicated by yellowing leaves. To overcome this, you can spray diluted zinc solution on foliage.
Application of compost or manure is also beneficial. Take care not to overfertilize it with nitrogen-rich fertilizer as it can cause the tree to produce lots of foliage and comparatively fewer flowers.
Overwintering Pomegranate
Overwintering pomegranate is similar to citrus. It is a deciduous tree that worships the sun. Most of its species are sensitive to frost. But for too low temperatures, the plant has developed a protective mechanism.
It sheds its leaves and become dormant below freezing temperature. There are only a few pomegranate tree varieties that survive really freezing temperatures with more than -10 C without damage.
If the pomegranate is cultivated in a pot in a cold climate below USDA Zone 9, it is important to prune it in the fall. The best place to keep pomegranate plant in winter is the garage or basement that remains warm. Temperature while keeping it indoors should not fall below 37 F (3 C). However, the optimum low temperature for most of the pomegranate varieties is 7 C (45 F).
If you’re able to keep your pomegranate tree in temperature around 55 F (15 C) indoors and allow it to take at least 4 hours of sunlight, it will not shed its leaves and go dormant. During the period of dormancy, the pomegranate hardly needs fertilizer or water. However, the plant in winter should not dry out completely.
In spring, bring back the plant to a warm and bright place so that it’ll gradually acclimate the climate. A window that is oriented to South is good. Just when the plant shows the first sign of growth and forms a few fully developed leaves, you can again start to fertilize it and give more water. Once the temperature comes in a range of 7 C (45 F) place it outside.
Pruning
Pruning is necessary to give and maintain the desired shape of your pomegranate tree and encourage flowering and fruiting. It is best done after all danger of frost has passed when the tree is about to start growing. Between early to mid spring.
Prune off weak, dead and undesirable branches to direct shrub’s energy to right parts and shorten long branches to encourage flowering.
Caveat: Some of the varieties have thorns, wear gloves before pruning for your safety.
Repotting
Repot your pomegranate tree when it becomes slightly root bound. The right time to repot is when there are no flowers or fruits on the plant, especially when it starts its growth at the beginning of growing season.
Diseases, Pests, and other Problems


The pomegranate tree is not very vulnerable when it comes to pests and diseases. It is mostly attacked by fruit flies, whiteflies and pomegranate butterflies.
Fruit crack is one problem that is common in all pomegranate varieties. It occurs due to fluctuation or lack of moisture in a substrate at the time of fruiting.
Harvesting
If pomegranate is grown from seeds fruits will begin to form in the third year.
Generally, the fruit will ripen in three to six months after the appearance of flowers.
Harvest pomegranate when the crust of the fruit is intense red. Simply cut the fruit’s stem using sharp pruning shear or knife.
0
0
文章
Andy
2018年12月26日

Facebook Pinterest Twitter Google+ LinkedIn StumbleUponLearn How to Grow Fenugreek in your garden or containers in your balcony. Growing fenugreek is easy. This quick growing vegetable is full of nutrients. 

Fenugreek or ‘Methi’ is native to Southwest Asia and widely cultivated for its medicinal and culinary uses. It’s an all purpose plant. Seeds are used as a spice, dried leaves as a herb, and fresh and tender leaves as a green leafy vegetable. It tastes little sweet with a touch of bitterness like mustard greens or bok choy. It can be a healthy alternative of spinach and any other greens.
USDA ZONES: All the zones as a seasonal crop
Difficulty: Easy
Growing Season: Spring, summer, and fall (year-round in warm climates, i.e., USDA Zone 9-11)
Other Names: Trigonella foenum-graecum (Scientific Name), Methi, Samudra methi, Shanbalile, Abesh, Hilbeh, Hilba, Helba, Halba, Kasturi methi
Growing fenugreek is easy, whether you live in a warm climate or cool, both on grounds or in containers. You can also grow it indoors on windowsills in small pots. You can also plant it in your balcony vegetable garden or patio, terrace, and rooftop with lettuce, spinach, and other greens.
How to Grow Fenugreek
Create a fenugreek bed with cilantro or grow it alone. You can cultivate it from seeds. It’s easy even for beginners.
Sow seeds ¼ inches deep in a good potting mix or soil in the desired spot or container when all the dangers of frost are passed, and the weather starts to warm up (for cool climate).
Remember, fenugreek hates to be transplanted. Leave 2 inches of space for each plant while sowing seeds. They’ll sprout quickly, and you’ll see seedlings just within 2-5 days.
Note: Buy best quality seeds from the garden center or online. You can also buy it from grocery stores or spice shops as its seeds are sold as a spice but beware of poor germination rate.
You can directly sow seeds but if you’ve bought them from grocery stores, soak them overnight to increase germination rate before planting.Growing Fenugreek in Containers


You can grow fenugreek in containers. It’s similar to any other green vegetable. Take a shallow but wide planter at least 6-8 inches deep with good drainage. Fenugreek has shallow roots so it won’t mind the low depth.
Fill the pot with rich potting mix. You can mix a 1/3 part compost or well-rotted cow or horse manure to it. Sprinkle seeds all over the pot and dust a thin quarter inch layer of soil briskly to cover them. Leave 1-2 inch of spacing between seeds. Don’t care about the spacing of seeds if you’re growing fenugreek as a microgreen.
Also Read: Best Microgreens You Should Grow
Growing Climate and TemperatureFenugreek grows well in a warm and hot climate when the temperature ranges from 50 to 90 F (10 C to 32 C).When planting it for seeds, grow it in spring or early summer. If you’re cultivating it to use as a vegetable or herb, then you can plant it anytime between spring to mid-fall.If you live in zone 9-11 or any warm place with frost-free winters outside the U.S., grow fenugreek year round.
Also Read: Best Basil Varieties for your Kitchen
Fenugreek Plant Care and RequirementsLocation
Fenugreek prefers neutral to slightly alkaline soil with pH level around 6.5-8.2. Plant it in a spot that receives at least 4-5 hours of direct sun with shade in the afternoon. Prefer a sunny spot if you’re growing it in a climate where is not intense and the weather is cold.
Watering
Do regular watering to keep the soil slightly moist. Care not to over-water the fenugreek plant and avoid waterlogged soil. This will impede the growth and kill your plant. If you’re growing fenugreek indoors or in a shady area, be vigilant about watering.
Fertilizer
Fenugreek does not require a lot of fertilizer. At the time of planting, you can mix manure or compost or time-based fertilizer in the soil, and that will keep it growing for a few weeks. Also, feed the plant with balanced liquid fertilizer, every other week for more robust growth.
Pests and Diseases
Fenugreek does not have many pests and diseases. Some pests and diseases that affect it are aphids, powdery mildew, charcoal rot, and root rot. You can easily save your plant from these problems by using organic pesticides regularly and watering properly.
Harvesting Fenugreek
In favorable conditions, within 20-30 days fenugreek will be ready for the first harvest. Trim the leaves gently to use as a leafy vegetable and prepare delicious recipes or air dry it to use as a herb. Leave the twigs, which will grow up again in 15 days. You can do this up to four times. To harvest fenugreek seeds, you will have to wait for 2-4 months, depending on the growing conditions.
It’s hot aroma like pepper and crunchy sour and sweet flavor gives it a distinctive taste, which you can’t compare with other vegetables. It is popularly used in Indian, Persian, Egyptian and Ethiopian cuisines, to prepare tastiest recipes. Fresh seeds are used to sprinkle on salad and dried seeds in pickles.


Fenugreek or ‘Methi’ is native to Southwest Asia and widely cultivated for its medicinal and culinary uses. It’s an all purpose plant. Seeds are used as a spice, dried leaves as a herb, and fresh and tender leaves as a green leafy vegetable. It tastes little sweet with a touch of bitterness like mustard greens or bok choy. It can be a healthy alternative of spinach and any other greens.
USDA ZONES: All the zones as a seasonal crop
Difficulty: Easy
Growing Season: Spring, summer, and fall (year-round in warm climates, i.e., USDA Zone 9-11)
Other Names: Trigonella foenum-graecum (Scientific Name), Methi, Samudra methi, Shanbalile, Abesh, Hilbeh, Hilba, Helba, Halba, Kasturi methi
Growing fenugreek is easy, whether you live in a warm climate or cool, both on grounds or in containers. You can also grow it indoors on windowsills in small pots. You can also plant it in your balcony vegetable garden or patio, terrace, and rooftop with lettuce, spinach, and other greens.
How to Grow Fenugreek
Create a fenugreek bed with cilantro or grow it alone. You can cultivate it from seeds. It’s easy even for beginners.
Sow seeds ¼ inches deep in a good potting mix or soil in the desired spot or container when all the dangers of frost are passed, and the weather starts to warm up (for cool climate).
Remember, fenugreek hates to be transplanted. Leave 2 inches of space for each plant while sowing seeds. They’ll sprout quickly, and you’ll see seedlings just within 2-5 days.
Note: Buy best quality seeds from the garden center or online. You can also buy it from grocery stores or spice shops as its seeds are sold as a spice but beware of poor germination rate.
You can directly sow seeds but if you’ve bought them from grocery stores, soak them overnight to increase germination rate before planting.Growing Fenugreek in Containers


You can grow fenugreek in containers. It’s similar to any other green vegetable. Take a shallow but wide planter at least 6-8 inches deep with good drainage. Fenugreek has shallow roots so it won’t mind the low depth.
Fill the pot with rich potting mix. You can mix a 1/3 part compost or well-rotted cow or horse manure to it. Sprinkle seeds all over the pot and dust a thin quarter inch layer of soil briskly to cover them. Leave 1-2 inch of spacing between seeds. Don’t care about the spacing of seeds if you’re growing fenugreek as a microgreen.
Also Read: Best Microgreens You Should Grow
Growing Climate and TemperatureFenugreek grows well in a warm and hot climate when the temperature ranges from 50 to 90 F (10 C to 32 C).When planting it for seeds, grow it in spring or early summer. If you’re cultivating it to use as a vegetable or herb, then you can plant it anytime between spring to mid-fall.If you live in zone 9-11 or any warm place with frost-free winters outside the U.S., grow fenugreek year round.
Also Read: Best Basil Varieties for your Kitchen
Fenugreek Plant Care and RequirementsLocation
Fenugreek prefers neutral to slightly alkaline soil with pH level around 6.5-8.2. Plant it in a spot that receives at least 4-5 hours of direct sun with shade in the afternoon. Prefer a sunny spot if you’re growing it in a climate where is not intense and the weather is cold.
Watering
Do regular watering to keep the soil slightly moist. Care not to over-water the fenugreek plant and avoid waterlogged soil. This will impede the growth and kill your plant. If you’re growing fenugreek indoors or in a shady area, be vigilant about watering.
Fertilizer
Fenugreek does not require a lot of fertilizer. At the time of planting, you can mix manure or compost or time-based fertilizer in the soil, and that will keep it growing for a few weeks. Also, feed the plant with balanced liquid fertilizer, every other week for more robust growth.
Pests and Diseases
Fenugreek does not have many pests and diseases. Some pests and diseases that affect it are aphids, powdery mildew, charcoal rot, and root rot. You can easily save your plant from these problems by using organic pesticides regularly and watering properly.
Harvesting Fenugreek
In favorable conditions, within 20-30 days fenugreek will be ready for the first harvest. Trim the leaves gently to use as a leafy vegetable and prepare delicious recipes or air dry it to use as a herb. Leave the twigs, which will grow up again in 15 days. You can do this up to four times. To harvest fenugreek seeds, you will have to wait for 2-4 months, depending on the growing conditions.
It’s hot aroma like pepper and crunchy sour and sweet flavor gives it a distinctive taste, which you can’t compare with other vegetables. It is popularly used in Indian, Persian, Egyptian and Ethiopian cuisines, to prepare tastiest recipes. Fresh seeds are used to sprinkle on salad and dried seeds in pickles.
0
0
文章
Andy
2018年12月26日

Tangy and sour, lemon adds flavor to every cuisine. Learn how to grow a lemon tree in a pot. Growing lemon tree is easy if you follow the requirements given below.

Image credit: the tree center
You want to grow lemons but stop because you run out of space or you don’t grow it because you live in a colder region. If this is your plight then growing a lemon tree in a pot is a smart idea. Plant it on a patio, terrace or in indoors, and you will be bestowed by its scented flowers and soft yellow citrus fruits. You can grow it in balcony too, Meyer lemon variety is perfect for kitchen and balcony gardens, especially for non-tropical zones.
Lemon Tree Varieties
Growing lemon tree from seed is a bad idea because it can take up to 4 years to produce fruits. Instead, ask in local nurseries for dwarf varieties that can do well in containers. Varieties that are most suitable for containers are Improved Meyer, Lisbon Lemon, and Dwarf Eureka. However, a lemon tree doesn’t grow too big, which means you can grow almost any variety in the pot.
*Buy a healthy lemon plant that is at least 3 years old, so that you don’t have to wait for it to start blooming and fruiting.
How to Grow a Lemon Tree in Pot
Choose a pot that is 25% bigger than the root ball of the plant. A clay pot is ideal because unlike plastic it is porous and evaporates water from sides, this helps the lemon tree to grow well as it dislikes being waterlogged. The quality and type of potting soil is an essential factor as well. For growing high yielding plants, use well draining organic potting mix.
*If you’re growing a lemon tree in a balcony or any other small space, take care of its spikes, keep the plant in a corner.
Requirements for Growing Lemon Tree in a Pot
Repot your lemon tree in every couple of years or so at the beginning of spring (in warm climates, winter is the best season). Your pot size should be according to the scale of your tree. Avoid too large or small planters, keep in mind to use a container that is one size bigger than your previously used pot.
*pH level of soil should be around 5.5 to 7 as this plant prefers slightly acidic soil to neutral soil.
Sunlight
All plants in the citrus family love full sun, around 7 to 8 hours of sunlight is essential. If growing lemon tree indoors, use grow lights to provide adequate lighting inside.
Also Read: Growing Pomegranates in Containers
Watering
The lemon tree requires consistent watering to produce healthy fruits. Giving it too much or too little water can lead to blossom and fruit drop and sometimes plant may die too. Check top 2-inch layer of soil for dryness before watering. On windy and hot days, it requires more frequent watering and slightly moist soil.
Humidity
If you are growing a lemon tree indoors, it requires a certain humidity level to thrive, 50% is ideal. You can maintain humidity by placing it on a pebble tray or using a humidifier.
Lemon Tree Care
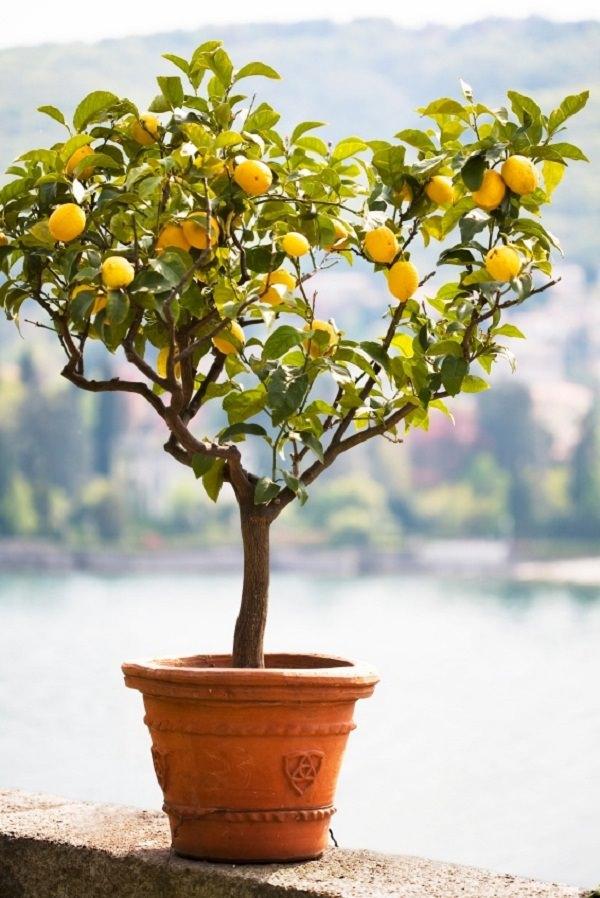

If you’re growing a lemon tree in a pot in USDA Zones 8b to 11, you don’t need to care for cold that much, but below these zones, special care is needed in harsh winters. Temperature below 30°F (-1 C) is life-threatening for the lemon tree, except ‘Meyer’ lemon variety that can tolerate some cold till 24°F (-4 C).
Freezing temperatures succumb these plants to death. Optimum temperature is around 50°F to 82°F (10°C to 28°C). To overwinter it, keep your potted plant indoors or in a greenhouse when the temperature falls below 35°F (2°C).
Pruning and Pinching Lemon Tree
Pinching encourages bushier growth, pinch growing tip when a branch is about 5 inches long. Pruning of lemon tree is best carried out when new growth starts (February – March). Be careful before pruning it, only prune diseased or dead branches because lemon stores excess food in its leaves and too much pruning can result in poor fruit crop. Also, keep looking for suckers and prune them immediately if found one.
Fertilizer for Growing Lemon Tree in a Pot
All plants of citrus family are heavy feeders, and lemon tree too requires fertilizer to produce juicy fruits, lush foliage, and fragrant blooms. Use special purpose citrus fertilizers for every citrus species plant, if unavailable use slow release fertilizer of NPK 12-6-6.
Look for a fertilizer that contains micronutrients, especially iron, manganese, and zinc. To give boost feed to your lemon tree apply a water-soluble fertilizer once in a month in growing season. Occasionally, side dress your plant with compost or well-rotted manure.
Pests and Diseases for Lemon Tree in Pot
Pests like mealy bugs, spider mites, aphids, and scales occasionally attract toward it. To get rid of them organically read this article.
Harvesting
Harvesting time depends on the type of variety you are growing and your weather conditions. The citrus fruits stop ripening once they are off the tree. To determine if the fruit is ripened, see if the fruit is heavy, soft and yellow.
Also Read: Growing Cucumbers on a Trellis
Additional Tips for Growing Lemon Tree in PotKeep your lemon tree in a less windy spot as it dislikes strong winds.If moving indoors for winter or outside for summer, acclimatize it to avoid shock.You can also do grafting to get two or more varieties from the single tree.


Image credit: the tree center
You want to grow lemons but stop because you run out of space or you don’t grow it because you live in a colder region. If this is your plight then growing a lemon tree in a pot is a smart idea. Plant it on a patio, terrace or in indoors, and you will be bestowed by its scented flowers and soft yellow citrus fruits. You can grow it in balcony too, Meyer lemon variety is perfect for kitchen and balcony gardens, especially for non-tropical zones.
Lemon Tree Varieties
Growing lemon tree from seed is a bad idea because it can take up to 4 years to produce fruits. Instead, ask in local nurseries for dwarf varieties that can do well in containers. Varieties that are most suitable for containers are Improved Meyer, Lisbon Lemon, and Dwarf Eureka. However, a lemon tree doesn’t grow too big, which means you can grow almost any variety in the pot.
*Buy a healthy lemon plant that is at least 3 years old, so that you don’t have to wait for it to start blooming and fruiting.
How to Grow a Lemon Tree in Pot
Choose a pot that is 25% bigger than the root ball of the plant. A clay pot is ideal because unlike plastic it is porous and evaporates water from sides, this helps the lemon tree to grow well as it dislikes being waterlogged. The quality and type of potting soil is an essential factor as well. For growing high yielding plants, use well draining organic potting mix.
*If you’re growing a lemon tree in a balcony or any other small space, take care of its spikes, keep the plant in a corner.
Requirements for Growing Lemon Tree in a Pot
Repot your lemon tree in every couple of years or so at the beginning of spring (in warm climates, winter is the best season). Your pot size should be according to the scale of your tree. Avoid too large or small planters, keep in mind to use a container that is one size bigger than your previously used pot.
*pH level of soil should be around 5.5 to 7 as this plant prefers slightly acidic soil to neutral soil.
Sunlight
All plants in the citrus family love full sun, around 7 to 8 hours of sunlight is essential. If growing lemon tree indoors, use grow lights to provide adequate lighting inside.
Also Read: Growing Pomegranates in Containers
Watering
The lemon tree requires consistent watering to produce healthy fruits. Giving it too much or too little water can lead to blossom and fruit drop and sometimes plant may die too. Check top 2-inch layer of soil for dryness before watering. On windy and hot days, it requires more frequent watering and slightly moist soil.
Humidity
If you are growing a lemon tree indoors, it requires a certain humidity level to thrive, 50% is ideal. You can maintain humidity by placing it on a pebble tray or using a humidifier.
Lemon Tree Care


If you’re growing a lemon tree in a pot in USDA Zones 8b to 11, you don’t need to care for cold that much, but below these zones, special care is needed in harsh winters. Temperature below 30°F (-1 C) is life-threatening for the lemon tree, except ‘Meyer’ lemon variety that can tolerate some cold till 24°F (-4 C).
Freezing temperatures succumb these plants to death. Optimum temperature is around 50°F to 82°F (10°C to 28°C). To overwinter it, keep your potted plant indoors or in a greenhouse when the temperature falls below 35°F (2°C).
Pruning and Pinching Lemon Tree
Pinching encourages bushier growth, pinch growing tip when a branch is about 5 inches long. Pruning of lemon tree is best carried out when new growth starts (February – March). Be careful before pruning it, only prune diseased or dead branches because lemon stores excess food in its leaves and too much pruning can result in poor fruit crop. Also, keep looking for suckers and prune them immediately if found one.
Fertilizer for Growing Lemon Tree in a Pot
All plants of citrus family are heavy feeders, and lemon tree too requires fertilizer to produce juicy fruits, lush foliage, and fragrant blooms. Use special purpose citrus fertilizers for every citrus species plant, if unavailable use slow release fertilizer of NPK 12-6-6.
Look for a fertilizer that contains micronutrients, especially iron, manganese, and zinc. To give boost feed to your lemon tree apply a water-soluble fertilizer once in a month in growing season. Occasionally, side dress your plant with compost or well-rotted manure.
Pests and Diseases for Lemon Tree in Pot
Pests like mealy bugs, spider mites, aphids, and scales occasionally attract toward it. To get rid of them organically read this article.
Harvesting
Harvesting time depends on the type of variety you are growing and your weather conditions. The citrus fruits stop ripening once they are off the tree. To determine if the fruit is ripened, see if the fruit is heavy, soft and yellow.
Also Read: Growing Cucumbers on a Trellis
Additional Tips for Growing Lemon Tree in PotKeep your lemon tree in a less windy spot as it dislikes strong winds.If moving indoors for winter or outside for summer, acclimatize it to avoid shock.You can also do grafting to get two or more varieties from the single tree.
0
0
文章
Andy
2018年12月26日

Facebook Pinterest Twitter Google+ LinkedIn StumbleUponLearn how to grow feijoa in this article. If you live in a mild temperate or warm subtropical climate, growing feijoa (Pineapple Guava) will be really easy for you.
USDA Zones— 8 to 11
Difficulty— Easy
Soil pH— Slightly acidic to slightly neutral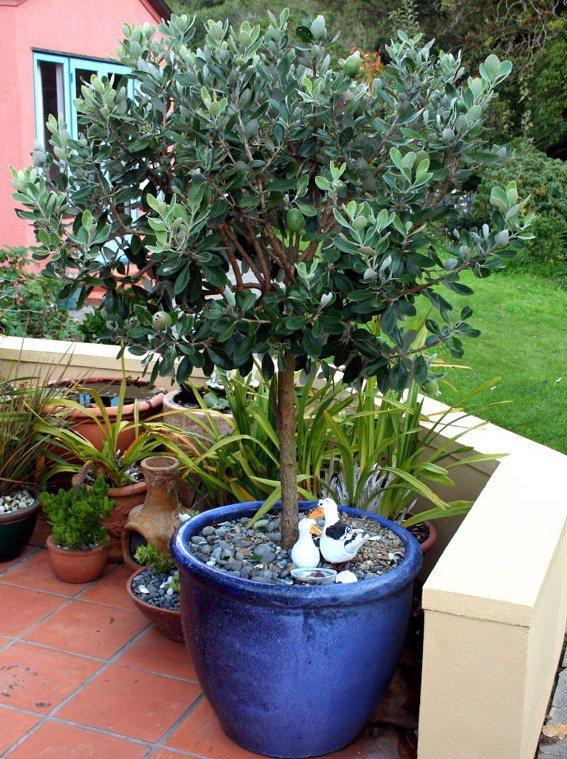

Feijoa or pineapple guava is a large and attractive evergreen shrub that is native of South America. It belongs to the myrtle family (Myrtaceae) and is widely known with the name of guaiabo, pineapple guava, guavasteen. However, it is not real guava and generally grown for its ornamental values and sweet, aromatic fruits that taste like a combination of guava, pineapple, and mint.
Growing Habit of Feijoa
If you’re growing pineapple guava, you should know it is a slow growing shrub that can grow up to 5.5 meters (18 feet). Its edible and mildly fragrant white flowers bloom in summer. Fruits mature in 5-6 months after the flowers.
These fruits have the shape of an oval, similar to chicken egg and they look like guavas with a combined flavor of pineapple, guava, and mint.
Feijoa lives long between 50 to 70 years. Despite its subtropical origin, it is resistant to some freezing temperature, although below 12 ° F (-11 ° C) the plant suffers.
How to Plant Pineapple GuavaPlant the shrub in slightly acidic soil that is rich and well drained. Pineapple guava can grow in a variety of soil types, but the plant does best in slightly acidic soil.Dig a hole that is twice in depth and width of the previous pot in which you’ve bought the plant from the nursery.Mix one part of soil with one part of compost and peat.Remove the plant from the container, loose the root ball and place the plant in the hole. Plant the plant in the depth of or slightly higher than it was planted in its previous pot.Pour the soil into the hole and gently pat the soil over the roots and around the plant.Water the growing medium around the plant carefully so that air bubbles are removed and the soil settles.Growing Feijoa in Pot
If you live below USDA Zone 8 or in a more cooler climate, growing feijoa in the pot is the best option. All the growing requirements and caring tips are similar as we’ve recommended for planting on the ground.
Also Read: How to Grow Dragon Fruit
Requirements for Growing FeijoaLocation
Make sure your plant is exposed to full sun, at least 6 hours. Grow other plants around it, to shade the base of your tree. It is resistant to some cold, drought and heat but it doesn’t grow well in a windy spot so don’t hesitate to plant it near a wall to protect it.
Soil
It prefers sandy soil that is rich in organic matter–loose, light and gritty. Soil should be well-drained but not too dry. While planting, add some perlite or sand in your garden soil.
Fertilization
Feijoas grow slowly and require the application of 8-8-8 NPK organic fertilizer once every two months to speed up growth. The fertilizer you use should contain trace elements like copper, boron, magnesium, zinc, manganese, iron, and molybdenum.
Watering
Water the plant frequently, especially during the plant’s first year of growth. Established and mature plants are drought-tolerant. Still, the plant should receive an inch of water every week. Water clayey soil once a week and light soil twice a week on the ground. Reduce the amount of watering in winter and rainy season.
Pineapple Guava CarePruning
It is not necessary to prune feijoa, except if you want to give it a shape that suits you. You can prune your tree only at the time when there are no fruits hanging on the plant. In fall when the harvest is done, it’s an excellent time to prune it.
Mulching
Do mulching at the base of your tree with organic matters like straws, grass clippings, and twigs. You can also use coffee grounds. Mulching conserves the moisture content in soil, prevent weeds and insulate the plant in winter.
USDA Zones— 8 to 11
Difficulty— Easy
Soil pH— Slightly acidic to slightly neutral


Feijoa or pineapple guava is a large and attractive evergreen shrub that is native of South America. It belongs to the myrtle family (Myrtaceae) and is widely known with the name of guaiabo, pineapple guava, guavasteen. However, it is not real guava and generally grown for its ornamental values and sweet, aromatic fruits that taste like a combination of guava, pineapple, and mint.
Growing Habit of Feijoa
If you’re growing pineapple guava, you should know it is a slow growing shrub that can grow up to 5.5 meters (18 feet). Its edible and mildly fragrant white flowers bloom in summer. Fruits mature in 5-6 months after the flowers.
These fruits have the shape of an oval, similar to chicken egg and they look like guavas with a combined flavor of pineapple, guava, and mint.
Feijoa lives long between 50 to 70 years. Despite its subtropical origin, it is resistant to some freezing temperature, although below 12 ° F (-11 ° C) the plant suffers.
How to Plant Pineapple GuavaPlant the shrub in slightly acidic soil that is rich and well drained. Pineapple guava can grow in a variety of soil types, but the plant does best in slightly acidic soil.Dig a hole that is twice in depth and width of the previous pot in which you’ve bought the plant from the nursery.Mix one part of soil with one part of compost and peat.Remove the plant from the container, loose the root ball and place the plant in the hole. Plant the plant in the depth of or slightly higher than it was planted in its previous pot.Pour the soil into the hole and gently pat the soil over the roots and around the plant.Water the growing medium around the plant carefully so that air bubbles are removed and the soil settles.Growing Feijoa in Pot
If you live below USDA Zone 8 or in a more cooler climate, growing feijoa in the pot is the best option. All the growing requirements and caring tips are similar as we’ve recommended for planting on the ground.
Also Read: How to Grow Dragon Fruit
Requirements for Growing FeijoaLocation
Make sure your plant is exposed to full sun, at least 6 hours. Grow other plants around it, to shade the base of your tree. It is resistant to some cold, drought and heat but it doesn’t grow well in a windy spot so don’t hesitate to plant it near a wall to protect it.
Soil
It prefers sandy soil that is rich in organic matter–loose, light and gritty. Soil should be well-drained but not too dry. While planting, add some perlite or sand in your garden soil.
Fertilization
Feijoas grow slowly and require the application of 8-8-8 NPK organic fertilizer once every two months to speed up growth. The fertilizer you use should contain trace elements like copper, boron, magnesium, zinc, manganese, iron, and molybdenum.
Watering
Water the plant frequently, especially during the plant’s first year of growth. Established and mature plants are drought-tolerant. Still, the plant should receive an inch of water every week. Water clayey soil once a week and light soil twice a week on the ground. Reduce the amount of watering in winter and rainy season.
Pineapple Guava CarePruning
It is not necessary to prune feijoa, except if you want to give it a shape that suits you. You can prune your tree only at the time when there are no fruits hanging on the plant. In fall when the harvest is done, it’s an excellent time to prune it.
Mulching
Do mulching at the base of your tree with organic matters like straws, grass clippings, and twigs. You can also use coffee grounds. Mulching conserves the moisture content in soil, prevent weeds and insulate the plant in winter.
0
0
文章
Miss Chen
2018年09月10日

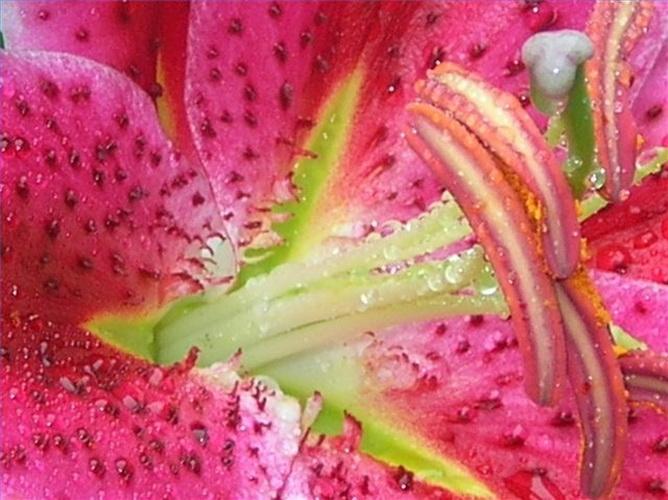
Growing beautiful stargazer lilies seems like a daunting task--how can such a strikingly unique and unusually large flower that seems to defy gravity be easy to grow? It is, however, with a little instruction and a few tips, you too can bring these jaw-dropping beauties into your landscape.Stargazer lilies will last for years with the proper care, and grows easily in zones 4-8.

Determine the location for your stargazer bulbs, and for each bulb, dig a hole three times the bulb's height. Remove any rocks that might impede the growth of the stalk when it emerges. Place the bulb in the hole with the pointy side up–if in doubt, plant the bulb sideways. Cover the bulb with soil and sprinkle with a small amount of fertilizer. Bulbs may be planted in the fall or in the spring.
Step 2
Water the emerging plants regularly, although they don't mind drought periods as long as the roots remain cool. Overwatering may cause the plants to rot, so it's best to err on the side of caution as far as water is concerned.Too much water may also attract slugs, which find lily leaves delicious. If slugs are a problem, place saucers of beer around the plant at night, which attracts them and they drown.
Step 3
Fertilize the plants in June, July and August with a light application of general purpose fertilizer around the base of the plant.
Deadhead the flower after it has finished blooming, which allows the plant to focus on its bulb, not setting seeds. Simply clip off the flower and about 6 inches of the stem below the flower. Leave the rest of the stem until fall, when you can cut back the entire plant to 3 inches.

Determine the location for your stargazer bulbs, and for each bulb, dig a hole three times the bulb's height. Remove any rocks that might impede the growth of the stalk when it emerges. Place the bulb in the hole with the pointy side up–if in doubt, plant the bulb sideways. Cover the bulb with soil and sprinkle with a small amount of fertilizer. Bulbs may be planted in the fall or in the spring.
Step 2
Water the emerging plants regularly, although they don't mind drought periods as long as the roots remain cool. Overwatering may cause the plants to rot, so it's best to err on the side of caution as far as water is concerned.Too much water may also attract slugs, which find lily leaves delicious. If slugs are a problem, place saucers of beer around the plant at night, which attracts them and they drown.
Step 3
Fertilize the plants in June, July and August with a light application of general purpose fertilizer around the base of the plant.

Deadhead the flower after it has finished blooming, which allows the plant to focus on its bulb, not setting seeds. Simply clip off the flower and about 6 inches of the stem below the flower. Leave the rest of the stem until fall, when you can cut back the entire plant to 3 inches.
2
0
文章
Miss Chen
2018年09月07日

Considered one of the top perennials for fall color, "Autumn Joy" sedum (Sedum x "Autumn Joy") grows in U.S. Department of Agriculture plant hardiness zones 5 through 9. Once you have one sedum, it's easy to make more by taking stem and leaf cuttings or dividing the plant. Because "Autumn Joy" is a hybrid, seeds will not produce exact copies of the parent plant.
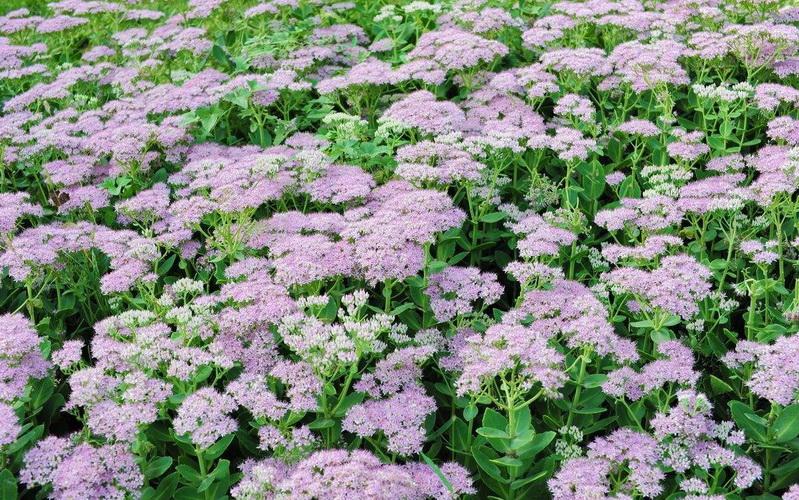
Cut Stems or Leaves
"Autumn Joy" sedum roots easily from stem or leaf cuttings. You can do this any time the plants are actively growing. Cuttings taken from new growth root more easily than cuttings from older stems.
Take cuttings in the early morning or late afternoon, and water the plants one hour before you take the cuttings. Make stem cuttings 2 to 6 inches long, with at least three sets of leaves. Cut the stem just below the node where a leaf joins the stem.
For leaf cuttings, remove the leaf along with the stalk that attaches the leaf to the stem. To keep them from drying out before planting, place stem and leaf cuttings in water or in a plastic bag with a damp paper towel.
Use sharp scissors or pruners to take the cuttings. Disinfect cutting tools by soaking them in a solution of 1 part bleach to 3 parts water for 5 minutes. Rinse them in clean water, and let them air-dry before use.
Plant Cuttings
Cuttings root best in a sterile, soilless potting mix. You can use a purchased seed-starting mix, or make your own for rooting cuttings by mixing equal parts river sand, perlite, and either vermiculite or peat moss. Use this mix to fill pots or planting trays with drainage holes. Water the potting mix so it is damp, and smooth the surface.
To avoid spreading disease, plant in new pots and planting trays or sterilize used pots before filling them with soil. Clean used pots and trays by scrubbing away any loose dirt, then soaking them in a solution of 1 part bleach to 9 parts water for 30 minutes. Wipe them dry before use. Always use pots and containers that have drainage holes.

For stem cuttings, use sterilized scissors or pruners to clip off the lowest set of leaves. If there are any flower buds on the cutting, remove those as well. Use a pencil to poke a hole in the potting mix, then place the cutting in the hole, firming the potting mix around the cutting so the place where you cut the leaves off is covered. For leaf cuttings, cover about 1/4 inch of the stem-end of the leaf with potting mix. There is no need to use a rooting hormone on "Autumn Joy" sedum cuttings.
Keep Them Moist
Cover the cuttings with clear plastic bags to help keep them from drying out. Some planting trays come with clear plastic domes which makes it easy to keep humidity levels high. The cuttings still need air circulation, though, so make sure there is space between the plastic and the pot or tray. Don't let the plastic touch the plant leaves.
Mist the cuttings as needed to keep the soil from drying out. You want the soil to stay moist, but not waterlogged. After two weeks, check if the stem cuttings are rooting by gently lifting the stem. If it comes free of the soil easily, replant it and check again in another week. Keep checking until the cuttings stay rooted in the soil when you gently tug at the stem.
You can tell leaf cuttings have rooted when new leaves start to emerge from the base of the leaf. Once the new stem or leaf cuttings have roots, gradually decrease the humidity by leaving the plastic off for several hours each day.
Move the Sedums Outside
The best time to plant new "Autumn Joy" sedum is in the spring after danger of frost has passed, but this plant is not picky about planting time. If you take cuttings in spring, the resulting plants can still be planted outdoors in the summer or fall. Mature plants reach 12 to 24 inches tall, and they should be spaced 12 to 18 inches apart.
A spot in full-sun is best, and "Autumn Joy" sedum will grow in any soil type as long as it drains well. Sedum is highly drought-tolerant, but water once a week for the first year if there is no rain. This encourages deep rooting.
Divide Established Plants
Once "Autumn Joy" sedum is established, divide the clumps every three to five years. This is an easy way to get new plants and to keep the sedum from becoming crowded. Divide the sedum in the spring, as soon as new growth starts to emerge from the soil. Choose an overcast day, preferably with light rain in the forecast. Water the plants the day before you plan to divide the plant.
Use a sharp spade to dig around the entire sedum clump, about 4 to 6 inches away from the base of the plant. Lift the entire clump, and shake off loose soil so you can see the root system better. Sedums form clumps, and you many need to use a sharp, large knife to divide the clump and cut through the roots. Sterilize this knife before use the same way you sterilized the pruning tools.
Replant the divisions as soon as possible. If you must delay planting, place the sedum in the shade and keep the soil moist. When you plant the new divisions, place them at the same depth they were previously growing. Firm the soil around the plants, and water thoroughly.

Cut Stems or Leaves
"Autumn Joy" sedum roots easily from stem or leaf cuttings. You can do this any time the plants are actively growing. Cuttings taken from new growth root more easily than cuttings from older stems.
Take cuttings in the early morning or late afternoon, and water the plants one hour before you take the cuttings. Make stem cuttings 2 to 6 inches long, with at least three sets of leaves. Cut the stem just below the node where a leaf joins the stem.
For leaf cuttings, remove the leaf along with the stalk that attaches the leaf to the stem. To keep them from drying out before planting, place stem and leaf cuttings in water or in a plastic bag with a damp paper towel.
Use sharp scissors or pruners to take the cuttings. Disinfect cutting tools by soaking them in a solution of 1 part bleach to 3 parts water for 5 minutes. Rinse them in clean water, and let them air-dry before use.
Plant Cuttings
Cuttings root best in a sterile, soilless potting mix. You can use a purchased seed-starting mix, or make your own for rooting cuttings by mixing equal parts river sand, perlite, and either vermiculite or peat moss. Use this mix to fill pots or planting trays with drainage holes. Water the potting mix so it is damp, and smooth the surface.
To avoid spreading disease, plant in new pots and planting trays or sterilize used pots before filling them with soil. Clean used pots and trays by scrubbing away any loose dirt, then soaking them in a solution of 1 part bleach to 9 parts water for 30 minutes. Wipe them dry before use. Always use pots and containers that have drainage holes.

For stem cuttings, use sterilized scissors or pruners to clip off the lowest set of leaves. If there are any flower buds on the cutting, remove those as well. Use a pencil to poke a hole in the potting mix, then place the cutting in the hole, firming the potting mix around the cutting so the place where you cut the leaves off is covered. For leaf cuttings, cover about 1/4 inch of the stem-end of the leaf with potting mix. There is no need to use a rooting hormone on "Autumn Joy" sedum cuttings.
Keep Them Moist
Cover the cuttings with clear plastic bags to help keep them from drying out. Some planting trays come with clear plastic domes which makes it easy to keep humidity levels high. The cuttings still need air circulation, though, so make sure there is space between the plastic and the pot or tray. Don't let the plastic touch the plant leaves.
Mist the cuttings as needed to keep the soil from drying out. You want the soil to stay moist, but not waterlogged. After two weeks, check if the stem cuttings are rooting by gently lifting the stem. If it comes free of the soil easily, replant it and check again in another week. Keep checking until the cuttings stay rooted in the soil when you gently tug at the stem.
You can tell leaf cuttings have rooted when new leaves start to emerge from the base of the leaf. Once the new stem or leaf cuttings have roots, gradually decrease the humidity by leaving the plastic off for several hours each day.
Move the Sedums Outside
The best time to plant new "Autumn Joy" sedum is in the spring after danger of frost has passed, but this plant is not picky about planting time. If you take cuttings in spring, the resulting plants can still be planted outdoors in the summer or fall. Mature plants reach 12 to 24 inches tall, and they should be spaced 12 to 18 inches apart.
A spot in full-sun is best, and "Autumn Joy" sedum will grow in any soil type as long as it drains well. Sedum is highly drought-tolerant, but water once a week for the first year if there is no rain. This encourages deep rooting.
Divide Established Plants
Once "Autumn Joy" sedum is established, divide the clumps every three to five years. This is an easy way to get new plants and to keep the sedum from becoming crowded. Divide the sedum in the spring, as soon as new growth starts to emerge from the soil. Choose an overcast day, preferably with light rain in the forecast. Water the plants the day before you plan to divide the plant.
Use a sharp spade to dig around the entire sedum clump, about 4 to 6 inches away from the base of the plant. Lift the entire clump, and shake off loose soil so you can see the root system better. Sedums form clumps, and you many need to use a sharp, large knife to divide the clump and cut through the roots. Sterilize this knife before use the same way you sterilized the pruning tools.
Replant the divisions as soon as possible. If you must delay planting, place the sedum in the shade and keep the soil moist. When you plant the new divisions, place them at the same depth they were previously growing. Firm the soil around the plants, and water thoroughly.
0
0
文章
Miss Chen
2018年09月07日

Delicate pale blue, or sometimes white and pink, forget-me-nots are a welcome sight after a long, snowy winter. Establishing forget-me-knots in your garden or yard is an easy task with great rewards. Forget-me-nots produce fantasy-like clouds of light blue that can provide quite a show-stopping display. They are a hardy perennial that will spread throughout your garden with very little effort on your part.

Step 1
Place potting soil in pots or six-pack inserts. Gently press the soil into the pot, but do not pack it too hard.
Step 2
Gently pour seeds from a packet into your hand. Forget-me-not seeds are very small; provided they are fresh, more than 90-percent of the seeds should germinate. Pinch a small amount of seeds and sprinkle them on top of the potting soil.
Step 3
Sprinkle more potting soil on top of the seeds so that there is about 1/8 inch of soil over the seeds. Press down to make sure the seeds have good contact with the soil, but do not pack the soil too hard.
Step 4
Water the soil. If your pots are in a cool location, cover them with plastic wrap to trap in heat, which aids in germination. The seeds should germinate within ten days. Let them grow for two weeks before transplanting them outdoors.
Step 5
Dig holes in the soil where you wish to transplant your forget-me-nots. Gently remove the plants from the six-pack plant pots and set them into the holes. Add soil around the stems and press lightly around the plants. Water only when your plants droop.
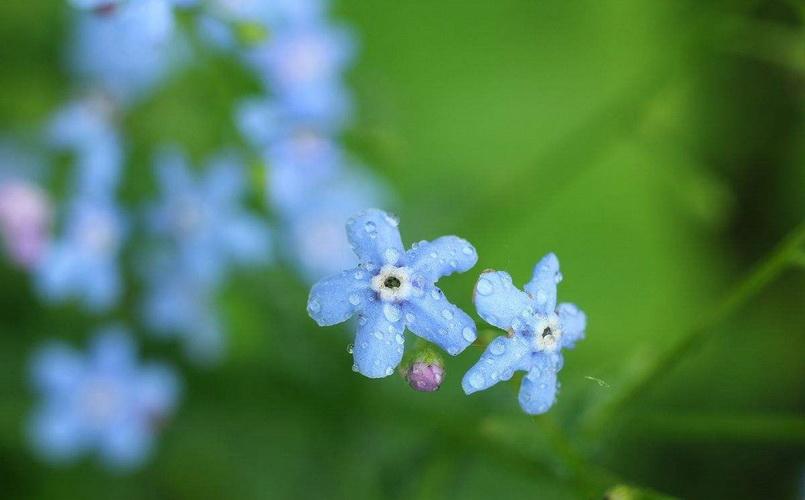
Step 6
Spread established forget-me-nots. Walk through the flowers as they begin to die off (in mid-June), and gently kick the plants to loosen and spread the seeds. You can also pull up a clump of flowers and shake them over areas where you would like to grow forget-me-nots the following year.

Step 1
Place potting soil in pots or six-pack inserts. Gently press the soil into the pot, but do not pack it too hard.
Step 2
Gently pour seeds from a packet into your hand. Forget-me-not seeds are very small; provided they are fresh, more than 90-percent of the seeds should germinate. Pinch a small amount of seeds and sprinkle them on top of the potting soil.
Step 3
Sprinkle more potting soil on top of the seeds so that there is about 1/8 inch of soil over the seeds. Press down to make sure the seeds have good contact with the soil, but do not pack the soil too hard.
Step 4
Water the soil. If your pots are in a cool location, cover them with plastic wrap to trap in heat, which aids in germination. The seeds should germinate within ten days. Let them grow for two weeks before transplanting them outdoors.
Step 5
Dig holes in the soil where you wish to transplant your forget-me-nots. Gently remove the plants from the six-pack plant pots and set them into the holes. Add soil around the stems and press lightly around the plants. Water only when your plants droop.

Step 6
Spread established forget-me-nots. Walk through the flowers as they begin to die off (in mid-June), and gently kick the plants to loosen and spread the seeds. You can also pull up a clump of flowers and shake them over areas where you would like to grow forget-me-nots the following year.
2
1
文章
Miss Chen
2018年09月05日

Bluebells (Campanula rotundifolia) grow naturally in wooded areas. In the United States they have become a favorite among wildflower lovers. The bluebell is easy to care for and spreads rapidly under the right conditions. This flower is a favorite of hummingbirds because of the shape of its blooms. The flowers are long and narrow, creating the perfect cup for a hummingbird to take nectar from.

Bell-Shaped Flowers
Native to England and Scotland, bluebell is a perennial plant named for the shape of the flower which looks like a tiny bell. These flowers grow in clusters and are usually, but not always, blue as the name implies. Bluebells can be a creamy, off-white color. The cream-colored bluebell is rarely found in nature. This plant has long stems and narrow leaves. It grows to be 12 to 18 inches tall.
Flexiblity for Garden Uses
Because bluebells are native to a range of habitats, including meadows, rocky hillsides, sandy soils and rocky crevices, they work well in many types of gardens. Tuck them into the small openings of a rock wall or among other small plants in a rock garden. Or plant them in a lightly shaded woodland area of your yard where they will multiply and naturalize to form a mass of bright blue in the late spring and throughout the summer. Moreover, bluebells attract hummingbirds wherever you plant them.
Growing Bluebells
Bluebells are common in wooded areas of Scotland, England and the United States, where they grow in USDA zones 3 to 8. They are grown from bulbs, which can endure frosts and hot temperatures. Plant the bulbs 2 inches underground in the fall, before the first frost. Plant bluebells at least 12 inches apart. The bluebell prefers partial sun with some shade in the afternoon. They do well when planted with ferns and other woodland plants. These plants do best when kept moist, so water them daily. Bluebells are useful for keeping the pest nematodes under control.

Propagation for More Plants
Bluebells are rapidly spreading perennials. As perennials, they will return each spring. As they return, they spread in clumps and choke out nearby vegetation if they are not divided every two or three years. Divide plants that are outgrowing their space in the garden. Divide the plants in fall. Place plant divisions in the ground before the threat of frost. Place 2 inches of manure over bulbs in the fall to ensure healthy plants the following spring.

Bell-Shaped Flowers
Native to England and Scotland, bluebell is a perennial plant named for the shape of the flower which looks like a tiny bell. These flowers grow in clusters and are usually, but not always, blue as the name implies. Bluebells can be a creamy, off-white color. The cream-colored bluebell is rarely found in nature. This plant has long stems and narrow leaves. It grows to be 12 to 18 inches tall.
Flexiblity for Garden Uses
Because bluebells are native to a range of habitats, including meadows, rocky hillsides, sandy soils and rocky crevices, they work well in many types of gardens. Tuck them into the small openings of a rock wall or among other small plants in a rock garden. Or plant them in a lightly shaded woodland area of your yard where they will multiply and naturalize to form a mass of bright blue in the late spring and throughout the summer. Moreover, bluebells attract hummingbirds wherever you plant them.
Growing Bluebells
Bluebells are common in wooded areas of Scotland, England and the United States, where they grow in USDA zones 3 to 8. They are grown from bulbs, which can endure frosts and hot temperatures. Plant the bulbs 2 inches underground in the fall, before the first frost. Plant bluebells at least 12 inches apart. The bluebell prefers partial sun with some shade in the afternoon. They do well when planted with ferns and other woodland plants. These plants do best when kept moist, so water them daily. Bluebells are useful for keeping the pest nematodes under control.

Propagation for More Plants
Bluebells are rapidly spreading perennials. As perennials, they will return each spring. As they return, they spread in clumps and choke out nearby vegetation if they are not divided every two or three years. Divide plants that are outgrowing their space in the garden. Divide the plants in fall. Place plant divisions in the ground before the threat of frost. Place 2 inches of manure over bulbs in the fall to ensure healthy plants the following spring.
0
0
文章
Miss Chen
2018年08月29日

If you're growing a weigela (Weigela spp.) or you're thinking of planting one, you probably know that it's an especially easy-to-grow shrub. A tough plant that has masses of colorful flowers in late spring or early summer, a weigela is cold-tolerant and grows in U.S. Department of Agriculture plant hardiness zones 4 through 9, depending on the variety. Whatever type of weigela you grow, it's a good idea to give it a bit of extra care as winter approaches and at winters end to help keep it flourishing.
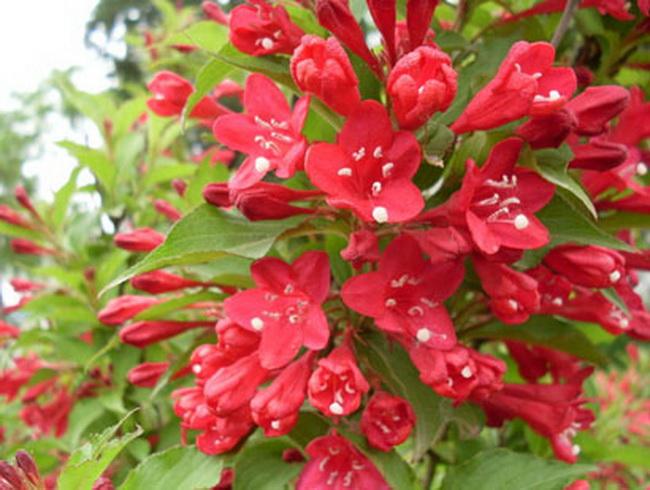
Fall Preparation
Although a weigela is a deciduous plant that drops its leaves in fall, its roots continue functioning for a while and don't become dormant as quickly as the top growth. Because of this, it's important to support good root growth during fall, especially if your weigela is newly planted. Continue watering the shrub during fall, giving it extra water whenever the top 1 to 2 inches of its soil feel dry to the touch. Moist soil also tends to stay warm longer than dry soil, so watering through fall helps keep the roots warm.
Adding a 6- or 8-inch layer of organic mulch, such as straw or shredded bark, in fall helps conserve soil moisture and keeps roots growing as long as possible. In cold-winter areas, mulch also protects the plant from freeze-thaw cycles that cause the ground to expand and contract. These cycles can heave roots out of the ground and damage them.
Winter Sun Damage
Because a weigela has no leaves in winter, its stems are susceptible to a problem called sun scald, which happens when sun heats up the bark on bright but cold days, stimulating activity in the stem that can be followed by tissue damage when the sun goes down and the stem is chilled. This is especially likely in a young or recently transplanted shrub, or in one planted where its south-facing side is unprotected. If sun scald develops, you'll see dried or cracked bark, or areas on a stem that are sunken or shriveled.
You can help prevent sun scald by wrapping the larger stems on a weigela with a commercial tree wrap or a light-colored plastic tree guard. If your weigela is bushy and has only thin stems that aren't easily wrapped, provide some shade on the south-facing side by stapling a sheet of burlap to two or three stakes driven into the ground near the south-facing side of the shrub.
At Winter's End
Although weigela is a hardy plant, it's prone to winter dieback, especially in areas with harsh winters. Because of this, it's a good idea to examine the plant at the end of winter and prune off any dead stems.

Double-check stems that look dead by scratching the bark with a fingernail. If tissue under the bark is greenish white, the stem is healthy, but dry tissue indicates the stem has died back.
Remove dead stems by cutting into healthy tissue behind the damaged part, using sharp shears or a pruning knife that you wipe with rubbing alcohol between each cut to prevent spreading disease.
You can also remove any broken or damaged branches at the end of winter, but a weigela has its heaviest flowering in spring on the previous season's growth, so it's best you don't prune heavily in winter to preserve flower buds. If your shrub is older and overgrown, you can stimulate its growth by pruning off a few large branches at the end of winter. Cut these off near the shrub's base to let light into its interior so new shoots can form.

Fall Preparation
Although a weigela is a deciduous plant that drops its leaves in fall, its roots continue functioning for a while and don't become dormant as quickly as the top growth. Because of this, it's important to support good root growth during fall, especially if your weigela is newly planted. Continue watering the shrub during fall, giving it extra water whenever the top 1 to 2 inches of its soil feel dry to the touch. Moist soil also tends to stay warm longer than dry soil, so watering through fall helps keep the roots warm.
Adding a 6- or 8-inch layer of organic mulch, such as straw or shredded bark, in fall helps conserve soil moisture and keeps roots growing as long as possible. In cold-winter areas, mulch also protects the plant from freeze-thaw cycles that cause the ground to expand and contract. These cycles can heave roots out of the ground and damage them.
Winter Sun Damage
Because a weigela has no leaves in winter, its stems are susceptible to a problem called sun scald, which happens when sun heats up the bark on bright but cold days, stimulating activity in the stem that can be followed by tissue damage when the sun goes down and the stem is chilled. This is especially likely in a young or recently transplanted shrub, or in one planted where its south-facing side is unprotected. If sun scald develops, you'll see dried or cracked bark, or areas on a stem that are sunken or shriveled.
You can help prevent sun scald by wrapping the larger stems on a weigela with a commercial tree wrap or a light-colored plastic tree guard. If your weigela is bushy and has only thin stems that aren't easily wrapped, provide some shade on the south-facing side by stapling a sheet of burlap to two or three stakes driven into the ground near the south-facing side of the shrub.
At Winter's End
Although weigela is a hardy plant, it's prone to winter dieback, especially in areas with harsh winters. Because of this, it's a good idea to examine the plant at the end of winter and prune off any dead stems.

Double-check stems that look dead by scratching the bark with a fingernail. If tissue under the bark is greenish white, the stem is healthy, but dry tissue indicates the stem has died back.
Remove dead stems by cutting into healthy tissue behind the damaged part, using sharp shears or a pruning knife that you wipe with rubbing alcohol between each cut to prevent spreading disease.
You can also remove any broken or damaged branches at the end of winter, but a weigela has its heaviest flowering in spring on the previous season's growth, so it's best you don't prune heavily in winter to preserve flower buds. If your shrub is older and overgrown, you can stimulate its growth by pruning off a few large branches at the end of winter. Cut these off near the shrub's base to let light into its interior so new shoots can form.
0
0
文章
Miss Chen
2018年08月26日

Hostas are one of the most popular herbaceous perennial plants grown around the world. They are easy to look after and will tolerate shade. Pruning your hosta will keep it looking good year-round and help to reduce the chances of it being attacked by an infection. Hostas need to be planted in soil which is not going to be allowed to dry out in hot weather as they will quickly wilt when thirsty. Regular watering and a layer of mulch will help to keep them in top condition.
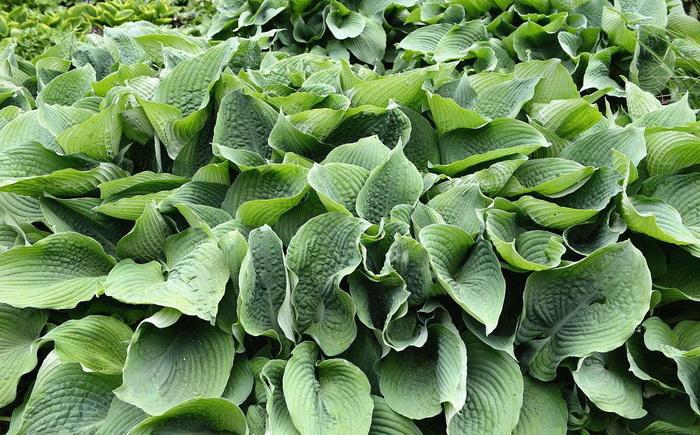
Step 1
Prune the hosta in fall when the leaves have died back. This way the plant will have taken as much energy and nutrients as possible from the leaves for next spring. Use pruning shears to carefully cut the dead leaves back to the base of the stem. Avoid pulling leaves out using your hands as this can tear into the living tissue at the base of the plant, leaving a wound which is open to fungal infection.
Step 2
Divide hostas in spring when you can clearly see where the new shoots are. Use a fork to dig the hosta out of the ground, removing as much soil from the roots as possible. Use pruning shears to remove any dead or unhealthy-looking roots. If left on the plant, this will worsen the plant's health and appearance. Use a spade to slice through the hosta root and replant the clumps at least 1 foot apart to give them space to grow.
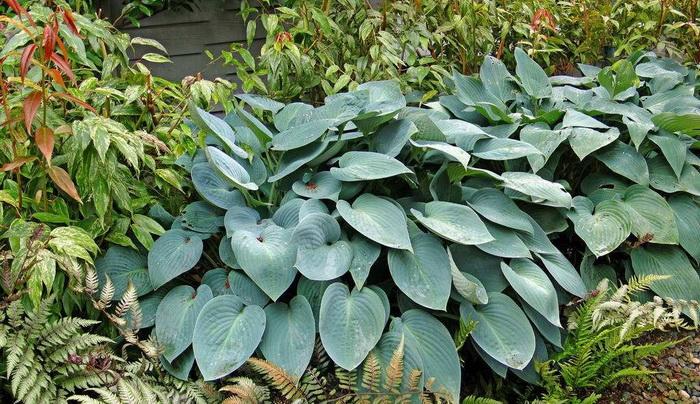
Step 3
After pruning and division, apply a layer of mulch around the plant. Mulch can be either well-rotted manure or compost and should be no more then 2 inches thick to discourage slugs from using it as a home. Mulch will feed the plant and help to keep it healthy. Mulch also keeps the soil moist in hot weather.

Step 1
Prune the hosta in fall when the leaves have died back. This way the plant will have taken as much energy and nutrients as possible from the leaves for next spring. Use pruning shears to carefully cut the dead leaves back to the base of the stem. Avoid pulling leaves out using your hands as this can tear into the living tissue at the base of the plant, leaving a wound which is open to fungal infection.
Step 2
Divide hostas in spring when you can clearly see where the new shoots are. Use a fork to dig the hosta out of the ground, removing as much soil from the roots as possible. Use pruning shears to remove any dead or unhealthy-looking roots. If left on the plant, this will worsen the plant's health and appearance. Use a spade to slice through the hosta root and replant the clumps at least 1 foot apart to give them space to grow.

Step 3
After pruning and division, apply a layer of mulch around the plant. Mulch can be either well-rotted manure or compost and should be no more then 2 inches thick to discourage slugs from using it as a home. Mulch will feed the plant and help to keep it healthy. Mulch also keeps the soil moist in hot weather.
0
0
文章
Miss Chen
2018年08月14日

The agave and aloe plants are succulents with fleshy, pointed leaves and a sculptural quality. Both provide a dramatic focal point in a garden. They are admired not only for their attractive form, but for their easy upkeep and drought tolerance. Though they appear superficially similar, there are many differences between the two plants. Agave is used for rope, tequila and a sugar substitute. Aloe is used for lotions and gels.
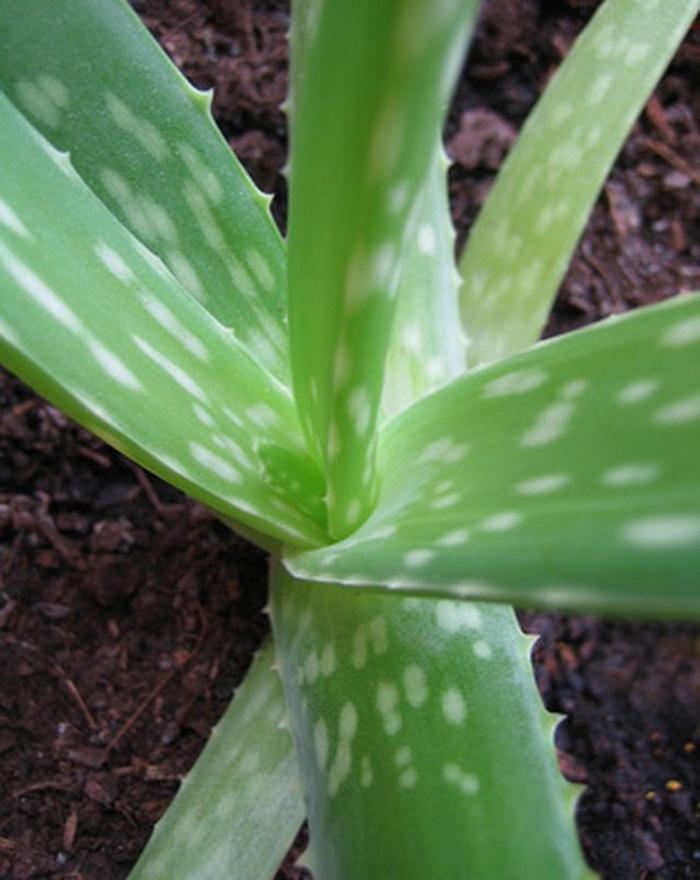
Origin
Though both agave and aloe are native to desert regions, they come from different areas of the world and different families in the plant kingdom. Agave is from the Agavaceae family and is native to Mexico. It is hardy in U.S. Department of Agriculture zones 8 to 10. Aloe, a member of the tree lily family known as Aloaceae, is native to parts of Africa and Arabia. It is hardy in zones 9 and 10.
Size
Agaves range from 6 inches to 10 feet tall. The smallest is the Agave parviflora, which has sharp pointy leaves with curled fibers on the ends. The Agave mapisaga, on the other end of the spectrum, grows 10 feet feet tall and wide. There are more than 300 species of aloe, ranging from 2 inches across to tree height. Aloe vera, often grown as a houseplant and kept in the kitchen, contains a gel that helps heal minor burns. Larger aloe, such as the 50-foot-tall Aloe bainesii, has ''a grotesquely thickened trunk and tapering branches that make it look like a character out of a Dr. Seuss story,'' according to ''The Book of Outdoor Gardening.''
Flowers
Many varieties of aloe have warmly colored red-orange, yellow or white flowers that replenish themselves throughout the plant's life. Aloe marlothii, for example, has side-leaning flowers that resemble red-hot flames blowing in the wind. It blooms year-round. A few agaves have flowers, but most of these bloom only once in the entire life of the plant. Queen Victoria agave is one flowering variety of agave. It blooms only after the plant has lived a decade or more and only in summer.

Leaves
The leaves of the aloe and agave may look similar, but they are actually quite different. The agave has a fibrous leaf, with a vascular system of fibers running the entire length of each leaf. These fibers are used to make rope and string. The leaves often last the entire life of the agave. Aloe, on the other hand, has leaves with a gelatinous interior. Fibers are not present. Another difference is the leaf margin. Agave has distinct, sharp teeth on its margin, with a line of demarcation. Aloe has what appear to be teeth, but are actually just elongations of the leaf without any line of demarcation.

Origin
Though both agave and aloe are native to desert regions, they come from different areas of the world and different families in the plant kingdom. Agave is from the Agavaceae family and is native to Mexico. It is hardy in U.S. Department of Agriculture zones 8 to 10. Aloe, a member of the tree lily family known as Aloaceae, is native to parts of Africa and Arabia. It is hardy in zones 9 and 10.
Size
Agaves range from 6 inches to 10 feet tall. The smallest is the Agave parviflora, which has sharp pointy leaves with curled fibers on the ends. The Agave mapisaga, on the other end of the spectrum, grows 10 feet feet tall and wide. There are more than 300 species of aloe, ranging from 2 inches across to tree height. Aloe vera, often grown as a houseplant and kept in the kitchen, contains a gel that helps heal minor burns. Larger aloe, such as the 50-foot-tall Aloe bainesii, has ''a grotesquely thickened trunk and tapering branches that make it look like a character out of a Dr. Seuss story,'' according to ''The Book of Outdoor Gardening.''
Flowers
Many varieties of aloe have warmly colored red-orange, yellow or white flowers that replenish themselves throughout the plant's life. Aloe marlothii, for example, has side-leaning flowers that resemble red-hot flames blowing in the wind. It blooms year-round. A few agaves have flowers, but most of these bloom only once in the entire life of the plant. Queen Victoria agave is one flowering variety of agave. It blooms only after the plant has lived a decade or more and only in summer.

Leaves
The leaves of the aloe and agave may look similar, but they are actually quite different. The agave has a fibrous leaf, with a vascular system of fibers running the entire length of each leaf. These fibers are used to make rope and string. The leaves often last the entire life of the agave. Aloe, on the other hand, has leaves with a gelatinous interior. Fibers are not present. Another difference is the leaf margin. Agave has distinct, sharp teeth on its margin, with a line of demarcation. Aloe has what appear to be teeth, but are actually just elongations of the leaf without any line of demarcation.
0
0
求助
tiffxnyvo
2018年07月28日

can anyone help me identify this mystery succulent? it’s super easy to accidentally remove the leaves, hence why i have so many in my propagation tray.


1
0
suculea:It streches because of lack of sunlight. it needs the biggest amount of direct sunlight that you can give it.
老毛:it may be a Sedum adolphii
and if you want to get your baby plant from the leaves,you should turn your leaves up side down
文章
Miss Chen
2018年07月21日

Nothing spices up cooking like fresh jalapeno peppers. Buying them at the store can be costly and inconvenient. Since jalapeno pepper plants are fairly easy to grow, why not add a few plants to your kitchen and enjoy fresh peppers year round?
Step 1
Buy healthy looking jalapeno plants at your home and garden store. Look for leaves that are a rich green in color, and that when pinched gently tend to spring back to life. Avoid plants that seem overly dry or that smell moldy. Be prepared to re-pot your plant once you bring it home.
Step 2
Line the bottom of the plant pot with small rocks or stones. This provides ample drainage for your jalapeno plant. Too much moisture will cause your plant to rot and won't yield any peppers.

Use good soil in your jalapeno plant. Rich soils are made specifically for plant and flower growth. Nutrients in rich soil fall into two categories; non-mineral nutrients and mineral nutrients. Non-mineral nutrient include hydrogen, carbon and oxygen. Mineral nutrients include nitrogen, phosphorus, calcium, magnesium, sulfur, boron, copper, iron, chloride, manganese, molybdenum, and zinc. Re-pot your jalapeno plant using a dark, nutrient-rich soil.
Step 4
Place your jalapeno plant in a window that receives at least a couple of hours of direct sunlight each day. Water your plant two to three times per week.
Step 5
Transfer your jalapeno plant into a larger pot when it reaches about one foot in height. Full grown plants may grow up to two feet high, so plan accordingly for that kind of growth.
Step 6
Pluck off any dried or dead leaves as needed. Allow the peppers to ripen on the plant for optimal taste.

Step 1
Buy healthy looking jalapeno plants at your home and garden store. Look for leaves that are a rich green in color, and that when pinched gently tend to spring back to life. Avoid plants that seem overly dry or that smell moldy. Be prepared to re-pot your plant once you bring it home.
Step 2
Line the bottom of the plant pot with small rocks or stones. This provides ample drainage for your jalapeno plant. Too much moisture will cause your plant to rot and won't yield any peppers.

Use good soil in your jalapeno plant. Rich soils are made specifically for plant and flower growth. Nutrients in rich soil fall into two categories; non-mineral nutrients and mineral nutrients. Non-mineral nutrient include hydrogen, carbon and oxygen. Mineral nutrients include nitrogen, phosphorus, calcium, magnesium, sulfur, boron, copper, iron, chloride, manganese, molybdenum, and zinc. Re-pot your jalapeno plant using a dark, nutrient-rich soil.
Step 4
Place your jalapeno plant in a window that receives at least a couple of hours of direct sunlight each day. Water your plant two to three times per week.
Step 5
Transfer your jalapeno plant into a larger pot when it reaches about one foot in height. Full grown plants may grow up to two feet high, so plan accordingly for that kind of growth.
Step 6
Pluck off any dried or dead leaves as needed. Allow the peppers to ripen on the plant for optimal taste.
0
0


