文章
Abigal
2017年03月26日


If you want to make a dramatic statement in your garden, without a lot of maintenence, a DIY dry creek bed is the way to go. It gives your yard a natural feel, without having to manage a real water feature. And they are surprisingly easy to DIY, but still have a professional look to the finished project. They are great options for an area that doesn’t drain well, has poor soil, or perhaps has an easement. A few tips to keep in mind?
The creek or stream bed should meander naturally, never in a straight line.
Add larger boulders at turns in the creek bed for drama.
Vary the size of the rock in your creek bed.
Anchor the “banks” of your creek bed with plants.
Choose rock that looks natural for your region.
Let’s start with a tutorial on the basics, how to build a dry creek bed, by BHG.


Fine Gardening also has a great tutorial on making a dry stream bed, but to get to the actual directions, you need to go to page 3 in their post. The first two pages has good information though, so take a peek.

‘Pink and Green Mama’ did an entire backyard makeover, and they have a DIY dry river bed to cover a drainage problem… Read about how they did it!

‘My Weeds are Very Sorry‘ has a lot of great tips on stone placement, and how much is enough. (And what is too much!) Good advice on getting a professional look.

Ok, now on to the inspiration. These don’t have tutorials, (you don’t need them now anyway, you got the basics above!) but they have great ideas for us to.. ahem… steal. :) This dry stream bed by Johnsen Landscapes & Pools was brought to us by ‘Serenity in the Garden‘.

Again from ‘Serenity’, this is a dry stream bed in the backyard of Jan Johnsen… Love the black rocks! This was done in a small backyard for all of you who think you don’t have enough space.
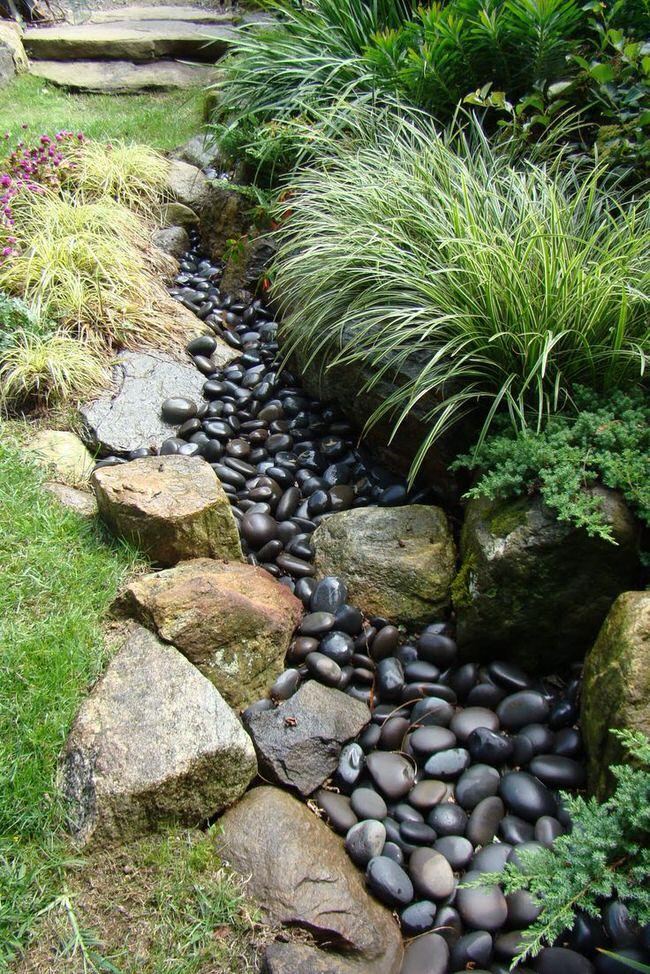
Lastly, from ‘Sharons Scrapbook’, this dry creek bed is a great example of lining the “bank” with plants.

1
0
文章
Abigal
2017年03月21日


The garden season is upon us, and what better way to spend time in a garden than in a DIY garden swing? Make it yourself and save money, but better still, customize it to your style and needs. Many of these projects repurpose supplies, and most are easy even for a beginner DIY’er with these instructions and tutorials. So get out your basic tools and let’s get to it!
Our featured project, above, is from A Beautiful Mess. Find out how to make their DIY tree swing! So cute!
From Sheryl Salisbury Photography, this DIY pallet swing looks easy, and I love this for a front porch! She even tackles some FAQ’s on her tutorial page.

Looking for something different, and a little organic looking? Oh, and it’s repurposed! Try the instructions for this laced pallet chair swing.

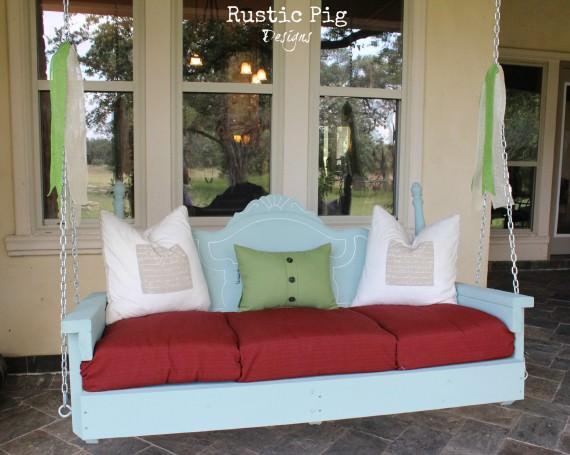
From The Rustic Pig, any country garden will love this back porch headboard swing! Great instructions too!
This DIY chair swing from This DIY Life is really fun, and inventive! Full tutorial with photos!

From Ana White, our fav DIY woodworking plan source, this large modern porch swing has a complete plan at the site. What would this be like painted a delicate pink?

From Julie at Life at Fire Lake Camp, this dreamy DIY hanging bed swing is exactly where I want to spend many long hours this summer reading novels and sipping lemonade. Ok, red wine, who am I kidding?

Download complete plans for this DIY garden swing from Sunset magazine for free. Amazing!

Relive your childhood with this DIY tire swing from Live Dan 330…

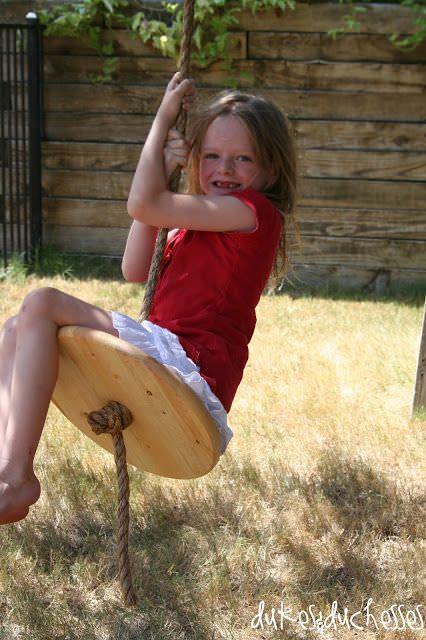
Lastly, a super simple DIY rope swing from Dukes and Duchesses. Not just for kids!
2
0
文章
Gina
2017年03月16日


If you are looking for an indoor gardening project that is cool, easy and just a little bit trendy, cactus and succulent projects are for you! Here we found for you some great inspiration and tutorials to help you bring the modern vibe to any room of your home. Did we mention, they are really easy to take care of, too? So if your thumb is brown, that’s ok… these plants and projects are just for you! Our featured project above and below, is from Cassidy at ‘Succulents and Sunshine’. Oh my, these are cute! These DIY painted planters are perfect little accents, and the succulents are really easy to grow. While you are there checking out her tutorial, be sure to check out her e-book, “How to Grow Succulents Indoors“. Then you will be an expert too!
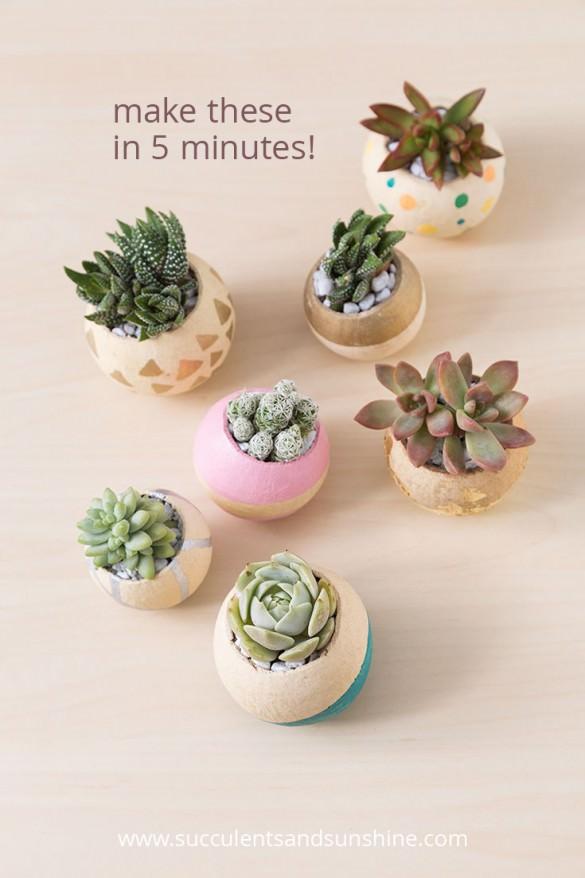
From Brittni Mehlhoff via ‘Curbly’, these DIY metallic planters took her 5 minutes to make. Cactus and succulents always look better when displayed in a cool pot… Simple, fast, easy!

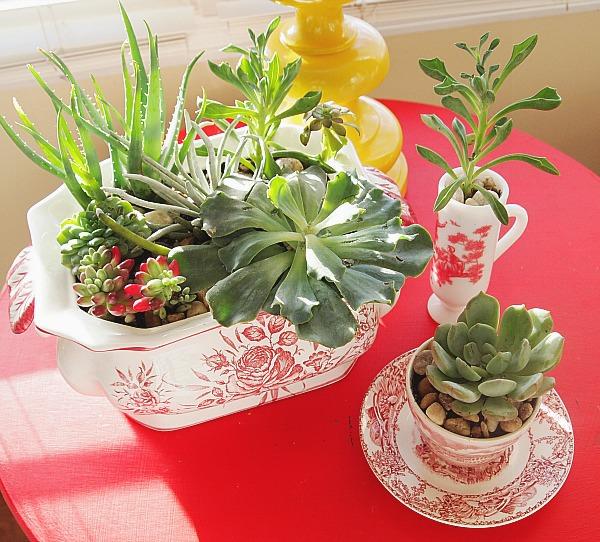
Want to do a project that is a bit more traditional? Learn how to make an indoor succulent dish garden from Manuela at ‘A Cultivated Nest’. Pretty way to use those dishes that aren’t very practical, but too gorgeous to get rid of!
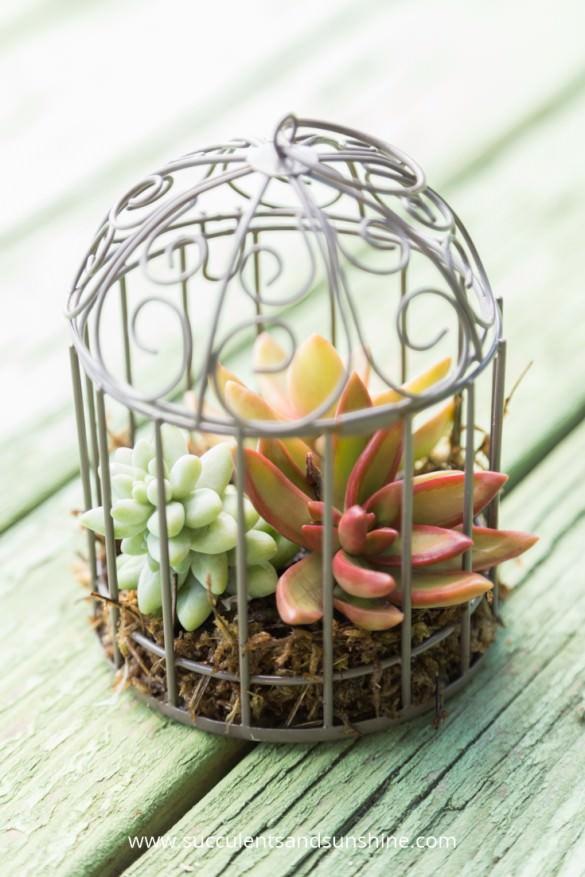
Again from Cassidy at ‘Succulents and Sunshine’, these miniature succulent bird cages look like so much fun to put together, and can be whimsical or traditional… Ok, and they are just so sweet! Find out just how to make them.
Looking for a simple cacti garden? Elsie at ‘A Beautiful Mess’ has you covered, and teaches you all about getting it done. Pretty colors on these desert plants!

Need a little “Zen”? Put down those adult coloring books, and try out this bright and cheerful Zen garden from Allison at ‘Dream a Little Bigger’. Step by step photos, and you gotta love that color! Perfect for your desk, right? That’s what I was thinking’…

Don’t want to figure it all out yourself? We found this Zen terrarium kit at the Etsy shop ‘Wendiland’… When we checked, this wasn’t available, but others like it were!

From ‘East Coast Creative’ learn how to make a DIY garden wall, from start to end! Great tutorial with step by step photos… depending on how large you make yours, this could be a major focal piece in a room. Love!

Make this DIY wire plant stand with this tutorial from ‘The Merry Thought’ to make your cacti stand out above the rest. Want to guess what she used?

I love these DIY mid century plant stands by ‘Sugar and Cloth’… they are perfect for the vibe of any cactus, don’t you think? These Christmas cacti will look amazing when they bloom! Yes, cacti bloom!

That isn’t enough? You need more ideas? Try this planted vintage dump truck from ‘The Potted Store’…

And if that wasn’t enough, jump on over to our post on sedum and succulent planters, for outdoors!
3
0
文章
Gina
2017年03月15日


One of the easiest (and cheapest) ways to inject a bit of personality into any garden is to pump up the garden decor. Painting pots is easy, fast and really makes an impact of your outdoor spaces. Here are three tips for painting pots, and a bunch of great projects with instructions, and inspiration!
Painting Pots Tips
Choose the same style for all your painted pots within the same garden. If half your pots are formal and the other half are whimsical (although there is always room for some crossover) then your outdoor spaces will seem disjointed. Keep in mind the same decorating principles you use indoors…tie the pots together by style or color.
Follow the instructions for prepping your pots properly. (Then say that ten times fast.) Outdoor painting projects can deteriorate quickly if they are done lazily…it’s worth the extra step.
Consider sealing your painted pots with an outdoor grade clear sealer. Same reason as prepping properly!
Enjoy!
Our first project from The Lovely Cupboard are DIY paint dipped pots… Easy, and really cool, she has step by step instructions for you.

Since dipped pots seem so popular right now, we thought you would like this neon dipped pot project from Hello Bee.

We really like this project from Amanda at Wit & Whistle. Here’s how she did it.

From Sunset, Terra Cotta Dress Ups! You could do these in any color combo, but I like the idea of keeping it to one color with a neutral, or two colors for a more lively look. Any more than that and it will be a very “busy” project! I especially love this project because it’s done in my favorite colors!
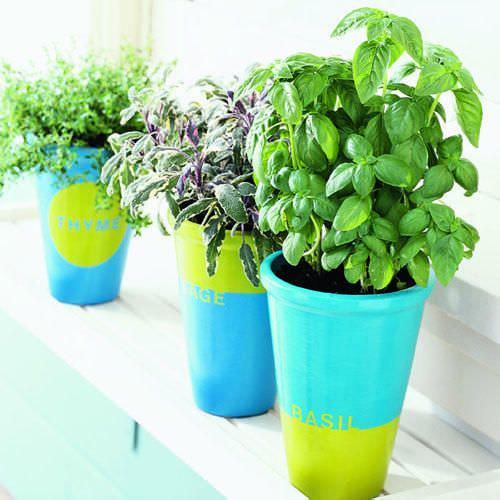
From A Beautiful Mess, I really like how they also painted the inside of these Color Block Terra Cotta Pots!
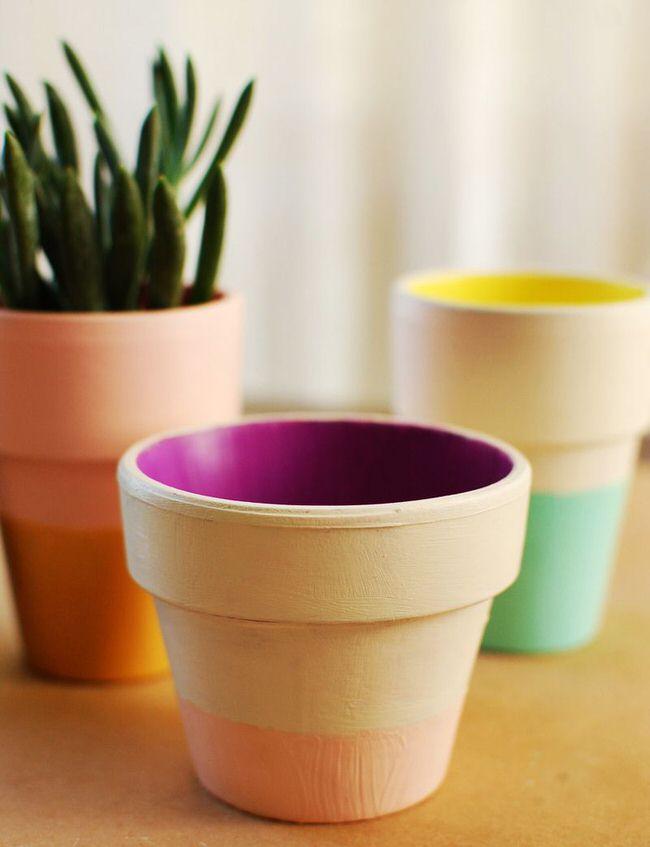
These very cute chalkboard flowerpots are from Fiskars, and they have really good instructions and step by step photos. Very crafty!

These DIY terra cotta plant pots from Dellie are simple and colorful, and I love this idea.

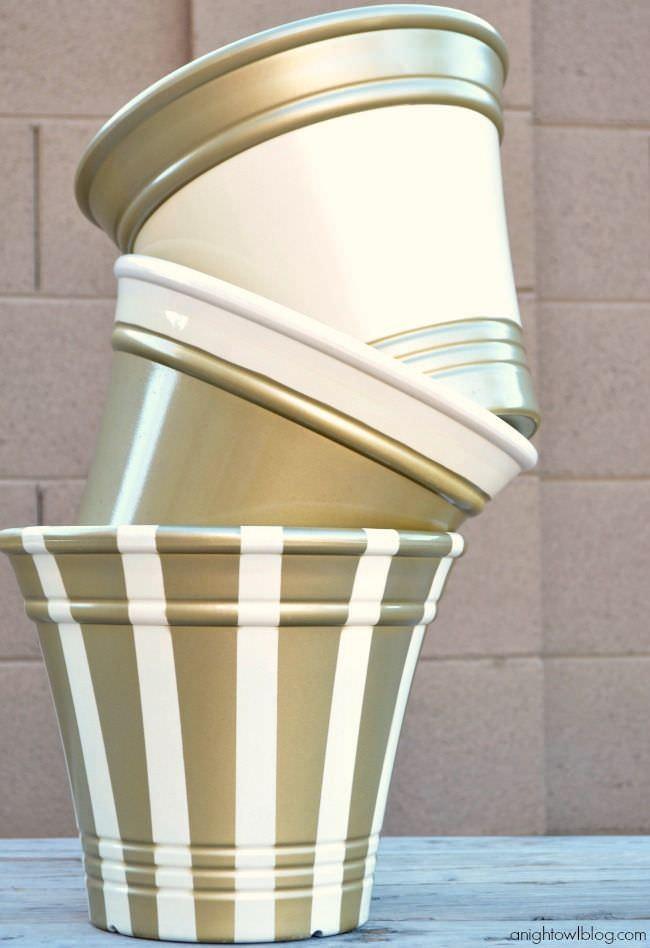
These golden fall planters from A Night Owl Blog don’t need to wait for fall as far as I’m concerned! What a great project for bringing some of the metallic trend into the garden.
Last on our list, this Raku look pot was created with spray paint! Find out how here.

Get crafting for the garden, what better time of year for it?
1
0
文章
Gina
2017年03月15日

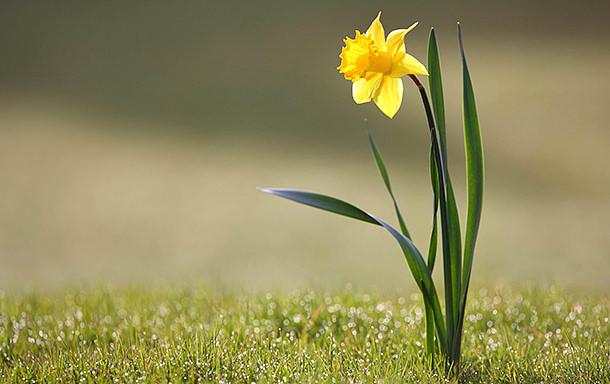
Just when you thought the snow would never melt, or the winds would never stop, daffodils brighten your garden with a burst of color in spring. Super easy to grow in most zones, daffodils are great cut flowers, can be used in both formal and informal gardens, can be grown in containers, and can even be forced to bloom out of season! There are many more varieties than just the time honored sunny yellow, and single and double foliage. There are even miniature daffodils, perfect for making a statement in a small garden, planting in a casual lawn of grass, or using in containers. If you know how to dig a hole and be patient, you can grow daffodils.
Daffodils must be planted in the fall to bloom in the spring with just a few easy care requirements.
How to Plant and Grow Daffodils
Choosing Bulbs and Varieties
Choose healthy bulbs by looking for bulbs that are papery, not shriveled. Full, heavy bulbs that don’t have gashes or cuts are a good sign of bulb health. Don’t buy any bulb with mold or fungus.
Most varieties will bloom wherever there is a winter frost, as they need a period of cold dormancy to force blooming. There are varieties that grow in the south in zone 9, check with your local nursery for best suggestions for your area. According to ‘Southern Living’, these types are perfect for Southern gardens. ‘Avalon’, ‘Carlton’, ‘February Gold’, ‘Geranium’, ‘Hawera’, ‘Ice Follies’, ‘Jack Snipe’, ‘Jetfire’, ‘Minnow’, Narcissus odorus, ‘Quail’, ‘Saint Keverne’, ‘Salome’, ‘Tête-à-tête’, ‘Thalia’, and ‘Trevithian’.
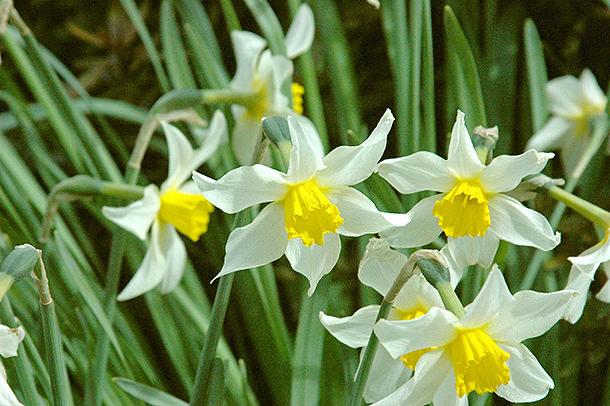
Varieties run from two foot tall sunny yellow traditional daffodils, to tiny little minis, to white doubles with a pure pink throat. There are pale yellows, coral throated beauties, and even a pure pink variety! Check out our favs at the end of the post to help you choose. Remember, choose for your space. Don’t expect a dozen minis to make a big impact on an acre lot.
Planting
Daffodil bulbs are planted in the fall, before the ground freezes. It’s best to plant them as soon as you can get your hands on them to give them time to set out roots.
Choose a light soil, they hate heavy clay. (Don’t we all?)
Plant 3 times deeper than their height. So if your bulb is 2 inches tall, you need to plant them 6 inches deep. 3-6 inches apart, depending on size, larger bulbs farther apart.
Choose a full to part sun position. Pink and red varieties have better color with afternoon shade, but all prefer 6 hours of sun a day for best flowering.

Seasonal Care
Fall
Plant bulbs and water well. Water occasionally if the fall is dry. Add a bulb fertilizer at time of planting and each fall after that to help the plant store energy for blooms. Bone meal is a good organic food for bulbs, especially in the planting hole.
Spring
Water the bulbs if it has been dry, and a half strength liquid fertilizer at this time can boost bloom.
Summer
Do not cut back withering foliage until it has totally died back, like most bulbs. They need every last bit of the green energy to store away enough for next seasons blooms. Most gardeners plant perennials or annuals near the bulbs so that as they grow in the spring, they cover much of the aging foliage. Cut back foliage to the ground when it it totally browned.
Winter
Daffodils are very hardy and do not require being dug up for winter. You may mulch to prevent them from being displaced by the heaving ground at hard freezes. Remember to remove the mulch in spring.
Tips and Cautions
Daffodils are poisonous if eaten, so do not plant where young children or pets can access them.
The flowers will tend to face the sun, so make sure you keep that in mind when choosing your site. You don’t want all those gorgeous blooms with their backs to you all day!
Daffodils can be lifted and divided with a sharp spade in early fall as they multiply, and then replanted for a larger display next year. Most can be divided every 3-4 years.
Daffodils are deer resistant.
Our Favorites
Our selections here are from ‘Brecks‘, as they are our favorite online bulb supplier. Nope, they did not sponsor this post, we just love ’em!
‘Carlton‘
A traditional yellow, medium sized bulb, these thrive just about anywhere, and naturalize beautifully! And they have a vanilla scent!

‘Mount Hood‘
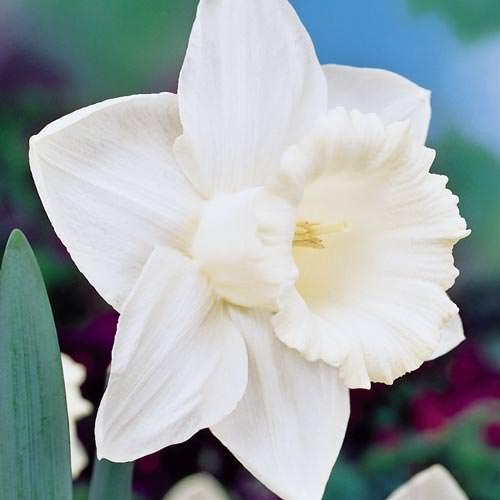
A tried and true pure white variety. Large blooms great for cutting.
‘Cotinga‘
We love pink daffodils, and Cotinga has white petals with a pink throat. This is a smaller one, less than 12 inches high, but the long throat and delicate translucence to the petals make this an elegant choice.

‘Riot‘
Need a little more color from your Daffys? Try Riot for its red cups against white petals. Medium sized at 16 inches and very weather resistant, these are a great choice for grabbing attention for your garden!

‘Dick Wilden‘ aka ‘Golden Beauty’
This stunning double yellow daffodil is a focal plant, to be sure. Medium height, easy to grow. Gorgeous in a vase!

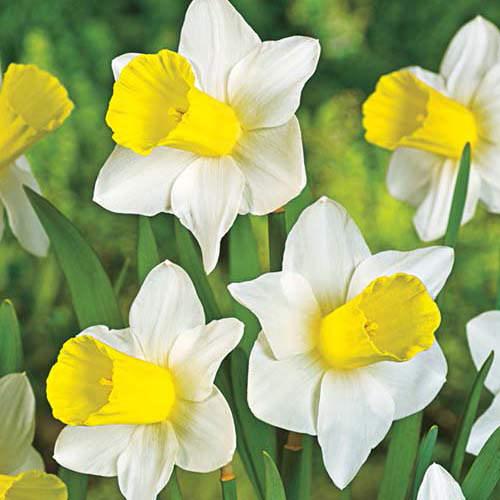
‘Bravoure‘
One of the most awarded daffodils, Bravoure is a great blend between a traditional happy yellow, tempered with a true pure white, and long elegant cups. Medium sized.
‘Petit Four‘
Tall, fragrant, beautiful.

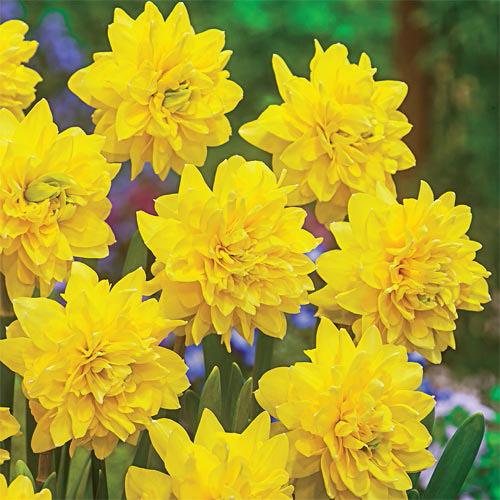
‘Tête-à-Tête’
This is the double version of the iconic Tête-à-Tête mini daffodil, and we love this! Perfect for pots at only 8 inches high, this is a lot of bloom packed into a tiny plant! The original Tête-à-Tête is not double, but just as sweet!
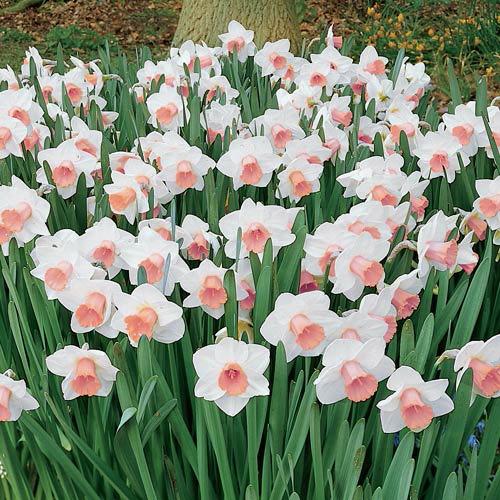
‘Salome‘
Our last choice is Salome for it’s apricot throats and pure white petals… These are medium plants that look amazing en masse. And they are fragrant!
2
2
文章
Hande Salcan
2017年03月15日

If you need to lay a new lawn, or repair or replace an old one, there is no faster way to get it established then laying sod. It’s not a difficult job if you follow some easy hints. Steve and I have both laid sod before, and we have a step by step guide for you and one big “got to know”. You will be sore. Accept it now…but it will be from a job well done, and nothing…I mean nothing transforms a yard faster then the velvet green of a sod lawn.
Why lay sod instead of seed? First of all, a seeded lawn can take months before it can be used for any kind of regular traffic, be that from pets, kids, or guests. Second, it requires the same prep time, yet weeks and weeks more extra maintenance chores while you baby that seed into germination and to become a full and lush lawn. Third, seed lawns tend to need patching later on, and use a lot more water to establish. (I guess thats fourth, too!) Need anymore? It’s pretty darn satisfying spending a good afternoon laying down sod, to step back and look at your instant happy garden. Also, sod can be laid pretty much anytime during the growing season, though spring and fall are best. (Summer installation requires more attention to watering!) Seed is best planted in spring, fall planting can be tough.The only con to laying sod (besides the “sore” part is that it initially costs more than seed. But if you factor in the extra water required to get a seed lawn started, the extra expense patching the lawn later on, and the time spent waiting to use your yard, sod is a pretty good investment.
Sod can be ordered straight from sod companies, or from your local nursery. It is delivered in 3-4 foot rolls on wood pallets, and is sold by the foot. You will need to figure our how many square feet you want to lay before you call to order.

Ok, so on to our step by step tutorial on how to lay sod!
1. Prep is everything. Just like any gardening, prepping the soil will make the difference between a lawn that is healthy and lush, and one that is thin, dries out easily and eventually fails. The weekend before you have the sod delivered, rent or borrow a rototiller and till the soil six inches deep. Add an inch or two layer of compost to the top of the soil and till it in. Then the fun part. Using a metal rake, smooth out the area to be sodded, and break up any large chunks. Water.

2. Have the sod delivered the morning of installation if possible. If not, no more than the day before. Water the sod on the pallets lightly to keep it from drying out. Hint: Don’t soak the sod, it will make it much heavier to pick up and carry.
3. Lay your first row of sod, usually along the longest side of the yard. Lay the sod strips with the ends butting up together, but not overlapping. This is key to not having weeds growing up between your sod strips while the lawn is establishing.

4. Lay the next row. This row, you want to stagger the seams, as This Old House says, “like you are laying brick.” Lay the rest of your rows in this staggering manner.
5. Use a sharp garden knife to cut strips to fit. My “garden” knife was an old serrated knife from the kitchen drawer. It lasted just long enough to get the whole lawn done. Be warned.
6. When the sod is all laid, walk along the seams to gently help them make contact with the soil. Some rent a roller, but we have never had an issue from just walking the seams. Water well with sprinklers.

7. Water the new lawn every day for a week, then every other day for the next week. By week three, you should be seeing significant growth and you should be able to water like a normal (new) lawn for your climate. When the lawn is 3 inches high, it’s time for the first mowing. It’s also ready for light foot traffic. Sod lawns are pretty tough, you can walk across them to set up a sprinkler, for instance, from day one. Just hold off on the football and slip and slide for a bit, ok?
That’s it, you have learned how to lay sod, and transformed your yard! Anyone laid sod before and want to share their tips? Share with us in comments!
Why lay sod instead of seed? First of all, a seeded lawn can take months before it can be used for any kind of regular traffic, be that from pets, kids, or guests. Second, it requires the same prep time, yet weeks and weeks more extra maintenance chores while you baby that seed into germination and to become a full and lush lawn. Third, seed lawns tend to need patching later on, and use a lot more water to establish. (I guess thats fourth, too!) Need anymore? It’s pretty darn satisfying spending a good afternoon laying down sod, to step back and look at your instant happy garden. Also, sod can be laid pretty much anytime during the growing season, though spring and fall are best. (Summer installation requires more attention to watering!) Seed is best planted in spring, fall planting can be tough.The only con to laying sod (besides the “sore” part is that it initially costs more than seed. But if you factor in the extra water required to get a seed lawn started, the extra expense patching the lawn later on, and the time spent waiting to use your yard, sod is a pretty good investment.
Sod can be ordered straight from sod companies, or from your local nursery. It is delivered in 3-4 foot rolls on wood pallets, and is sold by the foot. You will need to figure our how many square feet you want to lay before you call to order.

Ok, so on to our step by step tutorial on how to lay sod!
1. Prep is everything. Just like any gardening, prepping the soil will make the difference between a lawn that is healthy and lush, and one that is thin, dries out easily and eventually fails. The weekend before you have the sod delivered, rent or borrow a rototiller and till the soil six inches deep. Add an inch or two layer of compost to the top of the soil and till it in. Then the fun part. Using a metal rake, smooth out the area to be sodded, and break up any large chunks. Water.

2. Have the sod delivered the morning of installation if possible. If not, no more than the day before. Water the sod on the pallets lightly to keep it from drying out. Hint: Don’t soak the sod, it will make it much heavier to pick up and carry.
3. Lay your first row of sod, usually along the longest side of the yard. Lay the sod strips with the ends butting up together, but not overlapping. This is key to not having weeds growing up between your sod strips while the lawn is establishing.

4. Lay the next row. This row, you want to stagger the seams, as This Old House says, “like you are laying brick.” Lay the rest of your rows in this staggering manner.
5. Use a sharp garden knife to cut strips to fit. My “garden” knife was an old serrated knife from the kitchen drawer. It lasted just long enough to get the whole lawn done. Be warned.
6. When the sod is all laid, walk along the seams to gently help them make contact with the soil. Some rent a roller, but we have never had an issue from just walking the seams. Water well with sprinklers.

7. Water the new lawn every day for a week, then every other day for the next week. By week three, you should be seeing significant growth and you should be able to water like a normal (new) lawn for your climate. When the lawn is 3 inches high, it’s time for the first mowing. It’s also ready for light foot traffic. Sod lawns are pretty tough, you can walk across them to set up a sprinkler, for instance, from day one. Just hold off on the football and slip and slide for a bit, ok?
That’s it, you have learned how to lay sod, and transformed your yard! Anyone laid sod before and want to share their tips? Share with us in comments!
0
0
文章
Mirella
2017年03月13日

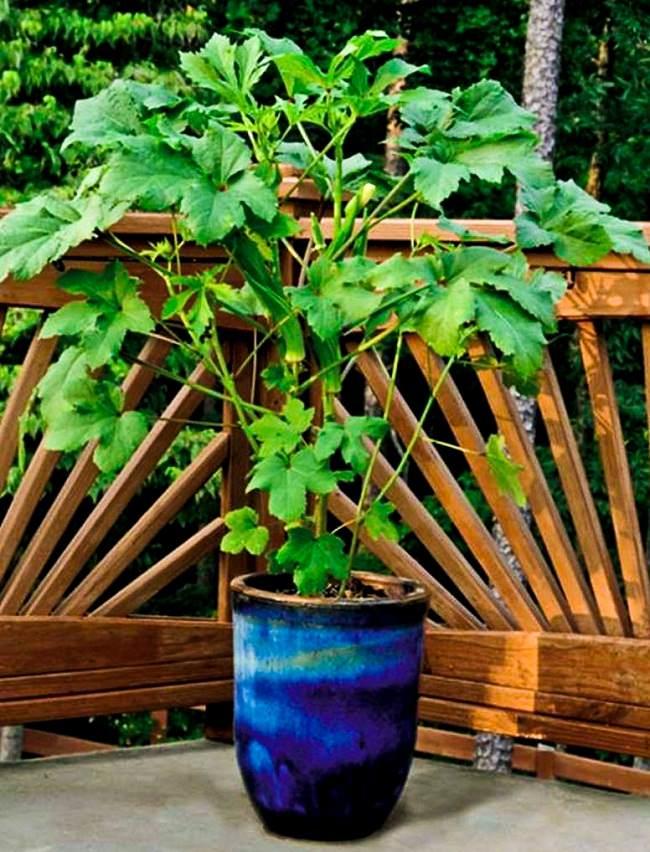
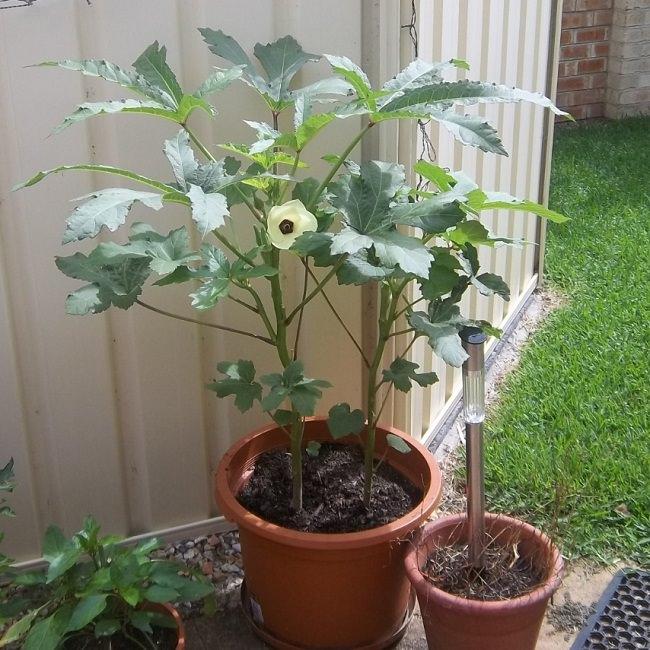
Learn how to grow okra in containers in this article. Growing okra in pots doesn’t require a lot of space and it is easy too if you complete all of the planting requirements.
Okra, which is also called lady’s finger is a warm season tropical vegetable that is also grown for ornamental purposes. Its delicate foliage and showy blooms that look like hibiscus (don’t forget okra belongs to the same hibiscus family) look amazing.
Very low in calories (25 to 40 kcal per 100g), okra is a vegetable rich in vitamins A, C and P, calcium and many minerals.
Choosing a pot
Choose a pot of whatever material you like. Pot should be at least 3 gallons in size. Ideally, a 5-gallon pot that is 10-12 inches deep and similar in diameter would be perfect for one okra plant if you have got a larger pot you can grow a few plants in it. Best to choose a black colored pot as okra loves heat.
Planting Okra Seeds
The first step for growing okra is to get the seeds. Ask for the dwarf okra variety that will not grow above 5 feet tall. However, you can grow any okra variety in a pot, but it is best if you choose the dwarf one. If you live in a climate with short summers, search for varieties that mature fast.
The best planting time is when the temperature starts to stay above 55-60 F (13-16 C) and all the dangers of frost are passed. Growing okra is possible year round if you live in USDA Zones 9-11 or any other subtropical or tropical region on our earth.
Due to its taproot, okra doesn’t transplant well that’s why you’ll have to directly plant the seeds in the container or a biodegradable pot. Sow 2-3 okra seeds 1/2 to 1 inch deep in each pot. Water with a sprayer and keep the seeds in a bright, warm place, the substrate should remain moist until seeds germinate. The germination takes 5 to 10 days after sowing. The more warmth, the faster the germination.
Requirements for Growing Okra in PotsPosition
Pick a spot that receives full sun (at least 5-6 hours of sunlight is essential). Like tomatoes and peppers, okra requires plenty of sunlight to produce well.
Soil
The soil you use must be loamy and crumbly; it must be well draining too. Opt for a soilless potting mix that is rich in organic matter. You can also add a lot of compost or aged manure to provide the constant supply of nutrients to your okra plant.
Watering
Okra requires slightly moist soil. Water regularly to keep the soil uniformly moist and particularly more from the beginning of the flowering period and until the end of production.
Temperature
The cultivation of okra plant is extremely easy but requires a lot of heat. The plant can grow above 50 F (10 C), but to flower and to bear fruit abundantly the temperature must be around 75 to 95 F (23-35 C) ideally. The plant can tolerate higher temperatures well but fails to grow when the temperature starts to touch lower levels.
Okra Plant Care
Fertilization
Mix manure in soil to provide nutrients to the plant, you can also side dress the plant with it. Also, at the time of planting, you can add balanced fertilizer if you want. Once the plant has reached the height of 6 inches, apply a dose of balanced fertilizer again. Keep in mind that if the soil is nitrogen rich, it may promote vegetative growth at the expense of fruiting so maintain the balance. Later on, feed the plant with low in nitrogen fertilizer such as NPK 5-10-15 or 6-12-12.
Pollination
Okra is self-pollinating so you don’t need to care about pollination.
Pinching and Topping
As you’re growing okra in containers, dwarf varieties we consider, the plant will not exceed the height of 5 feet. In that case, you don’t need to care about pinching or topping.
Pests and Diseases
Okra is susceptible to fusarium wilt and nematode attack as well as aphids and whiteflies in pests. Mealybugs also affect the plant’s growth. However, these pests do more damage on plants grown in large quantities. As you’re growing okra in pots, you can easily control them.
Harvesting
Okra requires frequent harvesting. It blooms about two months from planting, and the fruits appear 5-7 days after flowering. The fruits/pods are harvested when they are still tender. Otherwise, they become fibrous and too hard to be eaten. Ideally, the picking length is between 3 to 5 inches.
How to see if okras are not too late to be picked?
Bend the tip of any fruit and if it breaks easily this means that they are still tender and crispy and good to harvest.
Okra, which is also called lady’s finger is a warm season tropical vegetable that is also grown for ornamental purposes. Its delicate foliage and showy blooms that look like hibiscus (don’t forget okra belongs to the same hibiscus family) look amazing.
Very low in calories (25 to 40 kcal per 100g), okra is a vegetable rich in vitamins A, C and P, calcium and many minerals.

Choosing a pot
Choose a pot of whatever material you like. Pot should be at least 3 gallons in size. Ideally, a 5-gallon pot that is 10-12 inches deep and similar in diameter would be perfect for one okra plant if you have got a larger pot you can grow a few plants in it. Best to choose a black colored pot as okra loves heat.
Planting Okra Seeds
The first step for growing okra is to get the seeds. Ask for the dwarf okra variety that will not grow above 5 feet tall. However, you can grow any okra variety in a pot, but it is best if you choose the dwarf one. If you live in a climate with short summers, search for varieties that mature fast.
The best planting time is when the temperature starts to stay above 55-60 F (13-16 C) and all the dangers of frost are passed. Growing okra is possible year round if you live in USDA Zones 9-11 or any other subtropical or tropical region on our earth.
Due to its taproot, okra doesn’t transplant well that’s why you’ll have to directly plant the seeds in the container or a biodegradable pot. Sow 2-3 okra seeds 1/2 to 1 inch deep in each pot. Water with a sprayer and keep the seeds in a bright, warm place, the substrate should remain moist until seeds germinate. The germination takes 5 to 10 days after sowing. The more warmth, the faster the germination.
Requirements for Growing Okra in PotsPosition
Pick a spot that receives full sun (at least 5-6 hours of sunlight is essential). Like tomatoes and peppers, okra requires plenty of sunlight to produce well.
Soil
The soil you use must be loamy and crumbly; it must be well draining too. Opt for a soilless potting mix that is rich in organic matter. You can also add a lot of compost or aged manure to provide the constant supply of nutrients to your okra plant.
Watering
Okra requires slightly moist soil. Water regularly to keep the soil uniformly moist and particularly more from the beginning of the flowering period and until the end of production.
Temperature
The cultivation of okra plant is extremely easy but requires a lot of heat. The plant can grow above 50 F (10 C), but to flower and to bear fruit abundantly the temperature must be around 75 to 95 F (23-35 C) ideally. The plant can tolerate higher temperatures well but fails to grow when the temperature starts to touch lower levels.
Okra Plant Care

Fertilization
Mix manure in soil to provide nutrients to the plant, you can also side dress the plant with it. Also, at the time of planting, you can add balanced fertilizer if you want. Once the plant has reached the height of 6 inches, apply a dose of balanced fertilizer again. Keep in mind that if the soil is nitrogen rich, it may promote vegetative growth at the expense of fruiting so maintain the balance. Later on, feed the plant with low in nitrogen fertilizer such as NPK 5-10-15 or 6-12-12.
Pollination
Okra is self-pollinating so you don’t need to care about pollination.
Pinching and Topping
As you’re growing okra in containers, dwarf varieties we consider, the plant will not exceed the height of 5 feet. In that case, you don’t need to care about pinching or topping.
Pests and Diseases
Okra is susceptible to fusarium wilt and nematode attack as well as aphids and whiteflies in pests. Mealybugs also affect the plant’s growth. However, these pests do more damage on plants grown in large quantities. As you’re growing okra in pots, you can easily control them.
Harvesting
Okra requires frequent harvesting. It blooms about two months from planting, and the fruits appear 5-7 days after flowering. The fruits/pods are harvested when they are still tender. Otherwise, they become fibrous and too hard to be eaten. Ideally, the picking length is between 3 to 5 inches.
How to see if okras are not too late to be picked?
Bend the tip of any fruit and if it breaks easily this means that they are still tender and crispy and good to harvest.
1
0
文章
Andy
2017年03月13日

Learn how to grow licorice (Mulethi) in this article if you love to grow medicinal herbs. Growing licorice and licorice plant care is easy.

The licorice (Glycyrrhiza glabra), which means sweet root in Greek is actually a legume. It is native to the Mediterranean and parts of the South-West Asia and particularly to the Indian subcontinent, where it is called ‘Mulethi’ It is a perennial herb that grows to over a meter and a half tall. It is cultivated for its roots, the plant has an extensive root system. Roots grow 3 to 4 feet (1 – 1.2 m) deep and can extend to 25 feet (10 m) in a deep, permeable soil. Growing licorice in container is also possible.
Licorice Uses
Roots of this shrub are the part that usually consumed. Licorice roots, besides having a sweet anise like flavor are also beneficial to health with medicinal properties, such as anti-inflammatory and expectorant effect. It is used in traditional Chinese, Ayurvedic and greek medicines too.
Learn more about Licorice uses
USDA Zones— 6 – 11
Difficulty— Easy
Other Names— Acide Glycyrrhizique, Acide Glycyrrhizinique, Alcacuz, Alcazuz, Bois Doux, Bois Sucré, Can Cao, Chinese Licorice, Deglycyrrhized Licorice, Gan Cao, Gan Zao, Glabra, Glycyrrhiza, Glycyrrhiza glabra, Glycyrrhiza glabra typica, Glycyrrhiza glabra violacea, Glycyrrhiza glabra glandulifera, Glycyrrhiza Radix, Glycyrrhiza uralensis, Glycyrrhizae, Glycyrrhizic Acid, Glycyrrhizinic Acid, Isoflavone, Jethi-Madh, Kanzo, Lakritze, Licorice Root, Liquiritiae Radix, Liquirizia, Mulathi, Mulethi, Orozuz, Phytoestrogen, Phyto-œstrogène, Racine de Réglisse, Racine Douce, Radix Glycyrrhizae, Régalissse, Regaliz, Reglisse, Réglisse, Réglisse Déglycyrrhisée, Réglisse Espagnole, Réglisse Russe, Regliz, Russian Licorice, Spanish Licorice, Subholz, Sussholz, Sweet Root, Yashtimadhu, Yashti-Madhu, Yashti-Madhuka, Zhi Gan Cao, liquorice.
How to Grow LicoricePropagation
Propagating licorice is easy. It can be propagated from cuttings, division or seeds.
Growing Licorice from seeds
Soak the seeds for at least 24 hours in lukewarm water and then sow seeds in seed starting mix, which you can make yourself from these seed mix recipes. Sow the seeds at a depth of 1/2 inch. Cover the seeds with soil and keep it evenly moist until the seeds germinate. Germination occurs within two weeks. Optimum germination ranges around 68 F (20 C). Leave space of 2 feet between each plant.
Growing Licorice from Divison
Divide the licorice plant in spring or fall. Every division must have about one growth bud. If are dividing the plant in the fall (autumn), divisions must be replanted immediately or you can also store them in clamps for spring planting.
Planting
Licorice should be planted in the spring or summer. In warm subtropical or tropical climate growing licorice is possible year around except peak summer.
How to Grow Licorice on the Ground
Plant licorice on the ground in any land loosened deep, well-draining soil, devoid of stones.
Dig a pit that is 60 cm wide and 50 cm deep and then backfill it with the soil. If the soil is clay rich lighten it by adding compost and sand.
How to Grow Licorice in Pot
Choose a large pot (at least 20 cm) of a light color so that the temperature does not rise too much for the roots. Make a mixture of 1 parts sand 1 part compost and 1 part loam. In colder zones keep the pot indoors during winter.
Requirements for Growing Licorice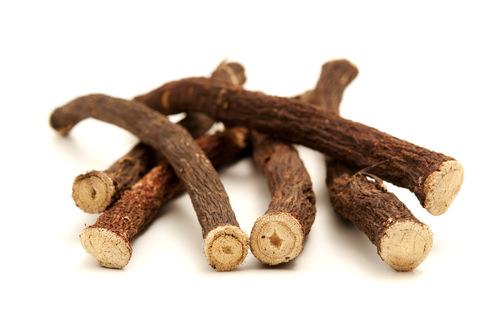
Position
This shrub needs to be in a location that is sunny to grow properly but if you’re growing licorice in tropics, plant it in on a location that receives shade in the afternoon.
Soil
A soil that is light and rich in humus facilitates the harvesting of the roots and maintains moisture. It prefers slightly sandy soil that is well draining but retains moisture with neutral to slightly alkaline pH levels.
Watering
Growing licorice requires regular and abundant watering during the growing period. Regular and deep watering is required to keep the soil slightly moist all the time. In winter, watering should be reduced.
Licorice Plant Care
Licorice plant care is simple, you just need to be careful about a few basic needs. This herbaceous perennial is mildly frost tolerant can bear temperature down to 5 F (-15 C)
Mulching
Mulch is required to retain the moisture in the soil.
Fertilizer
Licorice doesn’t need fertilizer. Although, if the soil is poor, mix compost at the time of planting or mulch around the base of plant with compost.
Temperature
It prefers average temperature around 60 – 85 F (15 to 30 C). Frost, high winds or too warm temperature can damage the plant.
Pests and Diseases
It usually remains pests and diseases free. Spider mites may invade the foliage, particularly in dry summers. Spraying the foliage with water helps to prevent them. Powdery mildew, slugs, and caterpillars can be a problem too.
Harvesting Licorice
Licorice roots are ready for harvest after two years of planting. Harvest the plant in fall. Extract the horizontal roots with a sharp spade and replant the plant so that it will regrow again. Preserve the main roots so as not to damage the plant.
Storage
Once dried, the licorice roots can be kept for several months.
Companion Plants for Licorice
Good companions — Marjoram, rosemary, and marigold.

The licorice (Glycyrrhiza glabra), which means sweet root in Greek is actually a legume. It is native to the Mediterranean and parts of the South-West Asia and particularly to the Indian subcontinent, where it is called ‘Mulethi’ It is a perennial herb that grows to over a meter and a half tall. It is cultivated for its roots, the plant has an extensive root system. Roots grow 3 to 4 feet (1 – 1.2 m) deep and can extend to 25 feet (10 m) in a deep, permeable soil. Growing licorice in container is also possible.
Licorice Uses
Roots of this shrub are the part that usually consumed. Licorice roots, besides having a sweet anise like flavor are also beneficial to health with medicinal properties, such as anti-inflammatory and expectorant effect. It is used in traditional Chinese, Ayurvedic and greek medicines too.
Learn more about Licorice uses
USDA Zones— 6 – 11
Difficulty— Easy
Other Names— Acide Glycyrrhizique, Acide Glycyrrhizinique, Alcacuz, Alcazuz, Bois Doux, Bois Sucré, Can Cao, Chinese Licorice, Deglycyrrhized Licorice, Gan Cao, Gan Zao, Glabra, Glycyrrhiza, Glycyrrhiza glabra, Glycyrrhiza glabra typica, Glycyrrhiza glabra violacea, Glycyrrhiza glabra glandulifera, Glycyrrhiza Radix, Glycyrrhiza uralensis, Glycyrrhizae, Glycyrrhizic Acid, Glycyrrhizinic Acid, Isoflavone, Jethi-Madh, Kanzo, Lakritze, Licorice Root, Liquiritiae Radix, Liquirizia, Mulathi, Mulethi, Orozuz, Phytoestrogen, Phyto-œstrogène, Racine de Réglisse, Racine Douce, Radix Glycyrrhizae, Régalissse, Regaliz, Reglisse, Réglisse, Réglisse Déglycyrrhisée, Réglisse Espagnole, Réglisse Russe, Regliz, Russian Licorice, Spanish Licorice, Subholz, Sussholz, Sweet Root, Yashtimadhu, Yashti-Madhu, Yashti-Madhuka, Zhi Gan Cao, liquorice.
How to Grow LicoricePropagation
Propagating licorice is easy. It can be propagated from cuttings, division or seeds.
Growing Licorice from seeds
Soak the seeds for at least 24 hours in lukewarm water and then sow seeds in seed starting mix, which you can make yourself from these seed mix recipes. Sow the seeds at a depth of 1/2 inch. Cover the seeds with soil and keep it evenly moist until the seeds germinate. Germination occurs within two weeks. Optimum germination ranges around 68 F (20 C). Leave space of 2 feet between each plant.
Growing Licorice from Divison
Divide the licorice plant in spring or fall. Every division must have about one growth bud. If are dividing the plant in the fall (autumn), divisions must be replanted immediately or you can also store them in clamps for spring planting.
Planting
Licorice should be planted in the spring or summer. In warm subtropical or tropical climate growing licorice is possible year around except peak summer.
How to Grow Licorice on the Ground
Plant licorice on the ground in any land loosened deep, well-draining soil, devoid of stones.
Dig a pit that is 60 cm wide and 50 cm deep and then backfill it with the soil. If the soil is clay rich lighten it by adding compost and sand.
How to Grow Licorice in Pot
Choose a large pot (at least 20 cm) of a light color so that the temperature does not rise too much for the roots. Make a mixture of 1 parts sand 1 part compost and 1 part loam. In colder zones keep the pot indoors during winter.
Requirements for Growing Licorice

Position
This shrub needs to be in a location that is sunny to grow properly but if you’re growing licorice in tropics, plant it in on a location that receives shade in the afternoon.
Soil
A soil that is light and rich in humus facilitates the harvesting of the roots and maintains moisture. It prefers slightly sandy soil that is well draining but retains moisture with neutral to slightly alkaline pH levels.
Watering
Growing licorice requires regular and abundant watering during the growing period. Regular and deep watering is required to keep the soil slightly moist all the time. In winter, watering should be reduced.
Licorice Plant Care
Licorice plant care is simple, you just need to be careful about a few basic needs. This herbaceous perennial is mildly frost tolerant can bear temperature down to 5 F (-15 C)
Mulching
Mulch is required to retain the moisture in the soil.
Fertilizer
Licorice doesn’t need fertilizer. Although, if the soil is poor, mix compost at the time of planting or mulch around the base of plant with compost.
Temperature
It prefers average temperature around 60 – 85 F (15 to 30 C). Frost, high winds or too warm temperature can damage the plant.
Pests and Diseases
It usually remains pests and diseases free. Spider mites may invade the foliage, particularly in dry summers. Spraying the foliage with water helps to prevent them. Powdery mildew, slugs, and caterpillars can be a problem too.
Harvesting Licorice
Licorice roots are ready for harvest after two years of planting. Harvest the plant in fall. Extract the horizontal roots with a sharp spade and replant the plant so that it will regrow again. Preserve the main roots so as not to damage the plant.
Storage
Once dried, the licorice roots can be kept for several months.
Companion Plants for Licorice
Good companions — Marjoram, rosemary, and marigold.
0
0
文章
Andrea
2017年03月13日

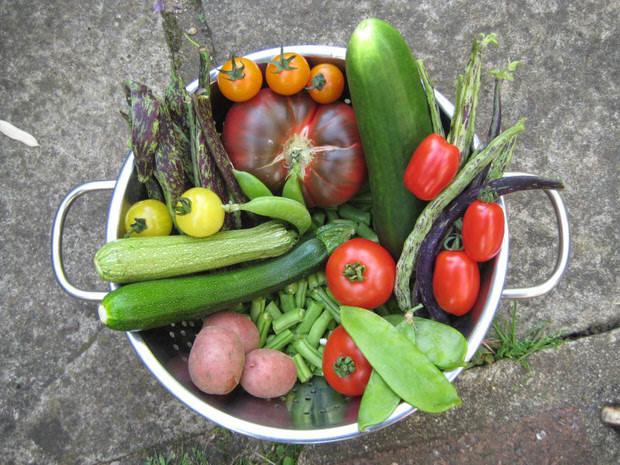
It’s that time of year again! Late summer and early fall is prime time for fresh vegetables in the garden. If you were lucky enough to grow some of the good stuff in your little spot this year, here are some easy tips to help you harvest your late summer vegetables at the right time for the best flavor, nutrition and texture.
Beans
Beans are a crop that should be harvested every other day as they continue to produce new beans. Pick when the beans are just under the maximum size for their type, and always pick late in the day, never in the morning. Picking beans when there is dew still present encourages mildew diseases.
Corn
Corn is ready when the silks start to turn brown but aren’t dried up yet. Kernels should be filled with a milky white juice if you cut one open. Corn starts to lose it’s sweetness as soon as it’s picked, so try to pick right before cooking.

Cucumbers
Harvest cucumbers as soon as they are the mature size for their type. If you allow them to grow large, they will become bitter. Harvest often to stimulate the plant to produce more, at least every couple of days.

Eggplant
Eggplant should be harvested when grown to mature size, and are smooth and shiny. If the seeds inside are dark, they were harvested late.
Herbs
Cut back most herbs often to keep them from blooming, and dry any herbs you cannot use right away. You can also freeze herbs as well. Follow this tutorial for instructions.
Melons
Cantaloupes: Pick when they are heavy and tan-colored with a slight yellowish cast. When ripe, a cantaloupe’s netting becomes harder and raised, and a crack forms around the stem where it touches the fruit. The melons should slip easily off the vines with a quick pull, but should not have already fallen off. The fruits get slightly softer at the bottom end and they smell fragrant.
Watermelons develop a dull green cast and have a light patch at the bottom that changes from green to light yellow when mature. Also, the leaf on the tendril nearest the fruit turns brown and withers. The skin should be hard–difficult to pierce with a fingernail. Some people say they can knock on a melon to detect a perfect hollow tone.
Pumpkins and Winter Squash
When the shell has developed it’s color and the rind cannot be pierced with a fingernail, they are ready. Cut 2-3 inch stem and allow to ripen in the field for 10 days. Store in a cool place.

Summer Squash
Summer squash is another one that most gardeners let grow too large…bigger is not always better! Larger fruits get seedy and watery, so pick when about 6 inches long. Round varieties can be picked at 3-4 inches.
Peppers
Peppers taste best when allowed to fully color before picking.
Tomatoes
Tomatoes are best when fully ripened to a deep color in the sun, but you can pick them early if you are having issues with cracking or cold nights. Do not ripen in the frig, on a counter is best.
Learning to harvest your vegetables at the right time helps them have better flavor and greater levels of nutrients. And let’s face it, it gives us bragging rights around the neighborhood as well!
1
0
文章
Abigal
2017年02月24日

I love songbirds, and I have several feeders in my yard. But I get bored with the same old stuff you find at the box stores… I love the idea of making your own bird feeders because it’s an easy project even for beginners, and also because I think it makes the connection with nature stronger when you have had a hand in it. And since I love things that are just a little bit unique, here are our top picks for creative #DIY bird feeders that any gardener can make for their feathered buds. Most of these have tutorials with great step by step instructions, and some of these would be fun to make as a family as well. Tip: when feeding the birds in your area, don’t just buy “wild bird seed” in a mixed package. Most of those mixes contain filler seeds that just get tossed out by many birds. Also, if you take the time to learn what birds visit your yard (or which ones you want to visit) and what they like to eat, not only is there less waste, but more enjoyment for everyone. We get lots of finches at our house, so I use both thistle (their favorite) and black oil sunflower seed. Sometimes, I mix them and sometimes use them alone. See what works best for you!

Our first project below, is from Hoosier Homemade. This DIY repurposed bird feeder is made of household items, and sure doesn’t look it. Read their instructions, complete with photos at their tutorial.

I really love this DIY bird feeder by Erins Creative. Made with just a plate, bowl and some hardware, its cute as well as functional! Great tutorial at the site, jump over and check it out!

From Tonya at Create Celebrate Explore, this DIY popsicle stick bird feeder is a great project to do with kids. Easy, fun, neat! Directions and photos on the tutorial.

Let The Art of Doing Stuff teach you how to make a bird feeder from glass shades. This project has a more modern vibe to it, and I really like how different they are from every other bird feeder. We’ve also seen these made using an embroidery hoop around the globe to hang from. This might have to go on our “to make” list!

From Plum Adorable, this tin can bird feeder is…well, adorable! So easy, you can do this with kids, or without and make it look funky, or subtle.

Recycle with this soda bottle bird feeder from Here Comes the Sun! A couple of wooden spoons for perches, and there ya go!

More bottles? This wine bottle bird feeder by The Chicken Street has a complete step by step for you. Not hard, and I love the repurposing!

From Two Llamas and a Whole Lotta Dramas Facebook page, they made this DIY bird feeder using a mason jar, an old chicken feeder and some copper tubing…
Purely inspirational, but with the same design, Life. By Design. found these amazing bird feeders at a market and shared. Epoxy glue and imagination! We like Gorilla Glue for these kind of projects.

We have featured projects from The Garden Roof Coop before, and this is why… these DIY glass bottle bird feeders look store bought, but they have a great tutorial and you won’t believe how easy it is! Love these!


Our first project below, is from Hoosier Homemade. This DIY repurposed bird feeder is made of household items, and sure doesn’t look it. Read their instructions, complete with photos at their tutorial.

I really love this DIY bird feeder by Erins Creative. Made with just a plate, bowl and some hardware, its cute as well as functional! Great tutorial at the site, jump over and check it out!

From Tonya at Create Celebrate Explore, this DIY popsicle stick bird feeder is a great project to do with kids. Easy, fun, neat! Directions and photos on the tutorial.

Let The Art of Doing Stuff teach you how to make a bird feeder from glass shades. This project has a more modern vibe to it, and I really like how different they are from every other bird feeder. We’ve also seen these made using an embroidery hoop around the globe to hang from. This might have to go on our “to make” list!

From Plum Adorable, this tin can bird feeder is…well, adorable! So easy, you can do this with kids, or without and make it look funky, or subtle.

Recycle with this soda bottle bird feeder from Here Comes the Sun! A couple of wooden spoons for perches, and there ya go!

More bottles? This wine bottle bird feeder by The Chicken Street has a complete step by step for you. Not hard, and I love the repurposing!

From Two Llamas and a Whole Lotta Dramas Facebook page, they made this DIY bird feeder using a mason jar, an old chicken feeder and some copper tubing…
Purely inspirational, but with the same design, Life. By Design. found these amazing bird feeders at a market and shared. Epoxy glue and imagination! We like Gorilla Glue for these kind of projects.

We have featured projects from The Garden Roof Coop before, and this is why… these DIY glass bottle bird feeders look store bought, but they have a great tutorial and you won’t believe how easy it is! Love these!

1
0
文章
Andy
2017年02月24日

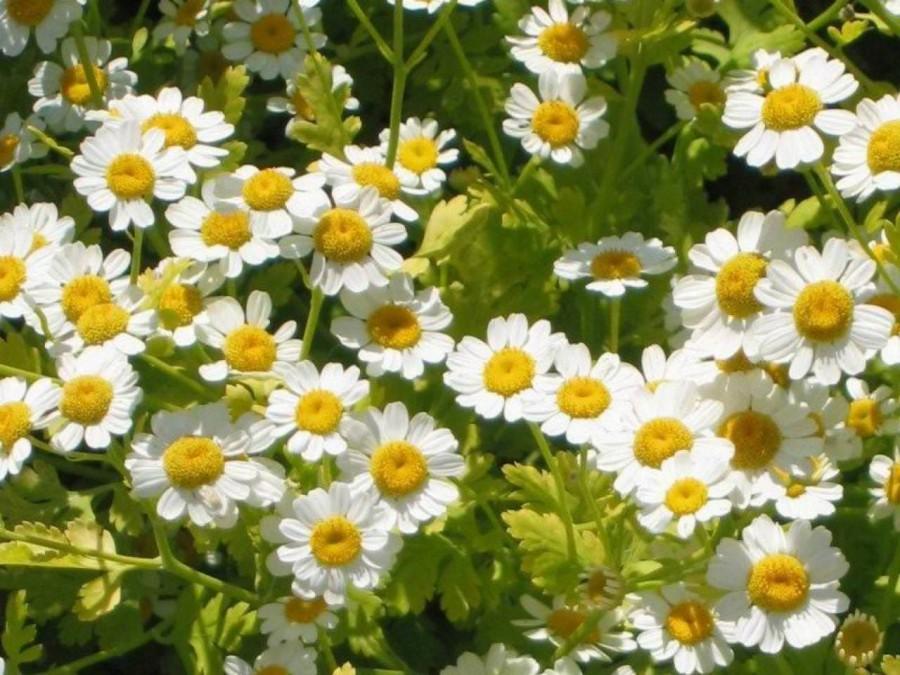
Learn how to #grow feverfew. Growing feverfew plant is relatively easy. It is a useful medicinal herb, plus it embellishes itself with beautiful yellow-white #flowers .
Difficulty — Easy
Other Names — Featherfew, Fever few, Febrifuge #plant , Featherfoil, Mid-summer daisy and wild chamomile .
Feverfew (Tanacetum parthenium) belong to the Asteraceae family (family of chrysanthemums). This plant is also called “false chamomile”. It is native to the Eastern Mediterranean. From there it was brought to Central and Western Europe a long time ago, where it was grown in gardens as a medicinal and ornamental plant.
In temperate areas, the feverfew is a short living perennial. Where the winters are harder, growing feverfew is possible as an annual plant. It is a low maintenance plant that loves to grow in typically variety of soil types and therefore frequently occurs as a garden weed.
Feverfew Uses
Feverfew is used to treat a wide range of health problems, such as fever, cold, rheumatism and cramps. It is also widely used to treat migraines. The flowers, stems and leaves are harvested for medicinal purposes. Parthenolide, a sesquiterpene lactone is considered the main biological active ingredient found in feverfew.
How to Grow FeverfewPropagation and Planting Feverfew
It can be propagated by seeds, cuttings and division.
To propagate it from seeds, since they are somewhat rare if you don’t find them locally, buy online. Sow them indoors in early spring in a seed tray using well draining starting mix. Scatter the seeds over the surface of soil and lightly tamp them. Cover the tray with plastic sheet or put in a plastic bag and keep that in a bright spot.
If you want to sow seeds directly on the ground wait until the temperature warms up around 60 F (15 C) and last frost date passes away in the spring. Keep the soil evenly moist until the germination. Germination occurs within one or two weeks after seed sowing.
To know more about feverfew propagation, read this article.
Requirements for Growing FeverfewLocation
Often this herb settles down by itself in the garden and is regarded by many gardeners wrongly as a weed. Ideal location to grow feverfew is full to partially sunny spot. Growing feverfew in pots, railing planters and window boxes is possible too, you can easily cultivate it on your balcony garden, just be careful not to keep it on windy spot.
Watering
Feverfew plants prefer soil which never dry out completely. Regular watering is important but overwatering can lead it to death, care in watering is required in cold weather conditions, in winter.
Soil
This undemanding plant grows in all soil types except heavy clay rich soil. Best to plant it in nutrient-rich, well drained and loose soil.
Feverfew Plant CareFertilizer
Growing feverfew doesn’t require fertilizer, if soil is rich in organic matter. However, you can apply a fertilizer you use for other flowers monthly.
Overwinter
Feverfew plants are grown as perennial and annual. Annual varieties die off in the winter and then germinate again in the spring. Feverfews are sensitive to extreme cold and need special care in winter time.
Mulching
Do protect mulching to protect the plant from severe cold in winters. Mulching also helps in summers in conserving moisture.
Pruning
Deadhead the faded flowers and slightly prune off the plant after the first flowering. Pruning stimulates the growth of new flowers. Prune long, leggy and diseased
branches with discolored leaves. You can prune off the plant up to about one-third of its size.
Pests and diseases
While growing feverfew plants, gardeners sometimes face problems due to wrong planting site and permanent waterlogging in soil. In pests and diseases, care feverfew plant from slugs, powdery mildew, spider mites and aphids. To prevent the pests, colonize geraniums, garlics or cress as companion plants.
Harvesting
1
0
文章
Abigal
2017年02月23日

Terra-cotta pots are inexpensive, easy to find and most of us have one or two lying around the garden shed… so let’s use them! Whether you prefer a natural, more contemporary look for your garden, or love color, cute and fun, we have the garden pot projects for you to add some personality to your yard and garden space. Check out these inspirational photos and tutorials for #garden pot projects…

Garden Muse has a great tutorial on making a bell tower wind chime from mini pots. We might prefer to leave the pots natural, but the idea is so original!

This tiered planter from HGTV would look great on a front entry landing, and we love that it is filled with foliage plants… but you could use flowering plants as well within any color scheme. Learn how here.

This rain chain made from pots from Natalie Witt is very cool… again, we prefer the natural, but I am liking the blue as well! Tutorial here.

This clay pot wreath is easy and inexpensive, and just says, “A gardener lives here.” This would make a great gift for a gardener as well! Learn how to make this wreath.

Last, but not least, we LOVE these terra cotta pot people! You can find out how to make them here.

Or this!

Or this one!

They all use the same basic technique, what a creative and cute garden project!

Garden Muse has a great tutorial on making a bell tower wind chime from mini pots. We might prefer to leave the pots natural, but the idea is so original!

This tiered planter from HGTV would look great on a front entry landing, and we love that it is filled with foliage plants… but you could use flowering plants as well within any color scheme. Learn how here.

This rain chain made from pots from Natalie Witt is very cool… again, we prefer the natural, but I am liking the blue as well! Tutorial here.

This clay pot wreath is easy and inexpensive, and just says, “A gardener lives here.” This would make a great gift for a gardener as well! Learn how to make this wreath.

Last, but not least, we LOVE these terra cotta pot people! You can find out how to make them here.

Or this!

Or this one!

They all use the same basic technique, what a creative and cute garden project!
1
0
文章
Joss
2017年02月22日

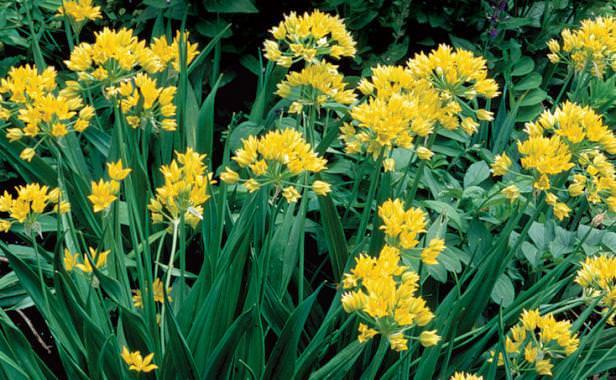
Alliums are one of the best and easiest bulbs to #grow in the gardening world, but often overlooked. Gorgeous, show stopping blooms, easy growing requirements, and amazing architectural shape make these perfect for any gardener, beginner or seasoned veteran. The large round or oval #flowers are borne on single stalks that tower over the garden from 1-4 feet, usually in mid spring to early summer, but there are varieties that bloom even in the fall. Flowers can be tiny little globes, or large 6 inch giants. One of the best traits of the allium over other spring and summer bulbs is that most animals will avoid eating them. Apparently, people aren’t the only ones who want to avoid onion breath! That’s right, alliums are simply ornamental, or flowering onions. Don’t let images of big smelly onions growing in your garden dissuade you, these plants are nothing of the sort, with a gorgeous, sweet scent. Beautiful as cut flowers as well, they come in whites, blues, purples, pinks and even yellow. Your tulips and daffodils may still get top billing in the spring, but make sure you tuck some alliums into your flower beds as well. Here is how to grow those amazing alliums! Photo below by ‘Dutch Flower Bulbs‘.

Photo below by ‘Fine Gardening‘. Allium “Jeannine”.
How To Grow Alliums
Buy allium bulbs from a good nursery or online resource. You want healthy bulbs with no cuts or soft spots. Research varieties to include several varieties of different bloom times to keep the show going!
Most varieties are hardy zones 3-9.
Like most bulbs, these look best planted in groups.
Plant the bulbs in the fall, before the ground freezes. Plant them to a depth of 3 times their diameter in a sunny or mostly sunny position. Generally, 6-8 inches.
Fertilize at planting and yearly in spring with bone meal or a bulb food.
Water well, then leave till they burst out in flower in spring and summer! After flowering, allium foliage will wither, brown, and go dormant.
Plant them under, behind, and around other perennial plants whose growing foliage will cover the allium foliage later in the summer when it browns.
Do not cut back the browning allium leaves until fall, that is how they store energy for flowers the next season. (This is why planting foliage plants around them is important.)
Photo below by ‘Gardener’s Supply‘.
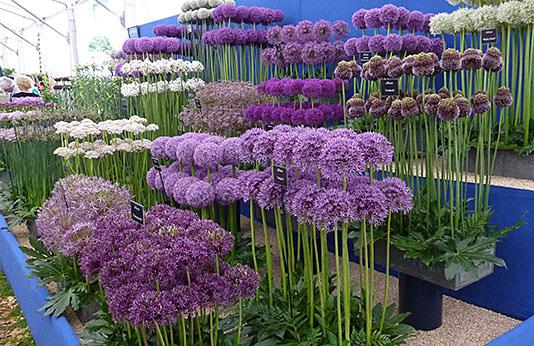
Our Favorite Allium Varieties
Gladiator – A giant variety. 3-4 feet tall, this showstopper blooms with 6 inch flowers in May-June. It prefers sun but will tolerate partial shade, and has a sweet scent. From ‘Eden Brothers‘. If you are looking to make a statement in your garden, this is it.

Globe Master – This one is the biggest giant we know of, with blooms topping out at a foot across! 36-40 inches high, it’s a gorgeous pick for any spring to early summer garden. Blooms are slightly more blue than Gladiator. From ‘American Meadows‘.

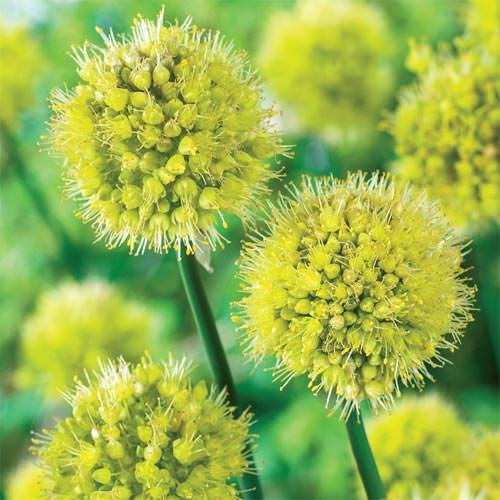
Allium obliquum – This unusual shade of yellow in a small flowered allium is a perfect selection for a naturalized planting. Growing to just 24 inches high, it’s fragrant and blooms late spring to early summer. From ‘Dutch Bulbs‘.
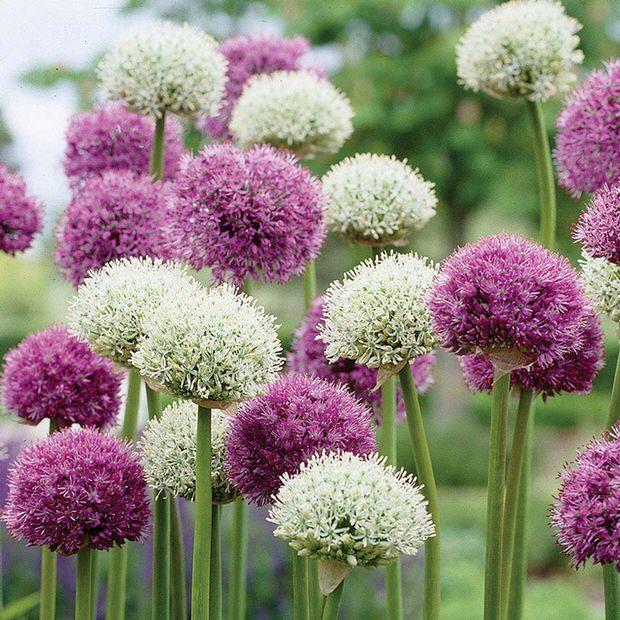
Mount Everest / Purple Sensation – Long the standard for garden alliums , “Purple Sensation” has 4-5 inch globes and grows to 24-30 inches high. It’s white partner here is “Mount Everest”, perfect in combination because they grow to similar sizes and have similar late spring – early summer bloom times. From ‘Longfield Gardens‘.
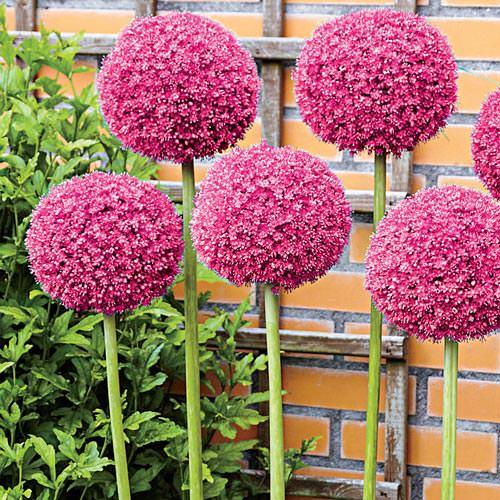
Twinkling Stars – This giant pink variety has 5-6 inch blooms and 3 1/2 – 4 foot stems, making it perfect for the back of the border. Blooms in May – June. From ‘Breck’s Bulbs‘.
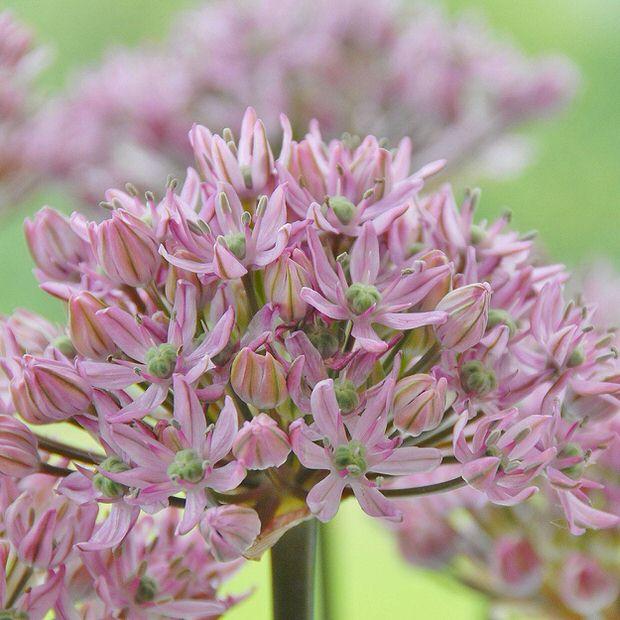
Pink Jewel – A later blooming allium, starting in June into July. This light pink selection grows to 24 inches high, and has 3 inch blooms. From ‘White Flower Farm‘.
Drumstick Allium – Our last selection is the drumstick allium, an oval shaped reddish bloom that grows to 24 inches high. This allium can actually be grown down to zone 2! Blooms early spring to early summer. Another variety great for naturalizing. From ‘American Meadows‘. So which is your favorite?
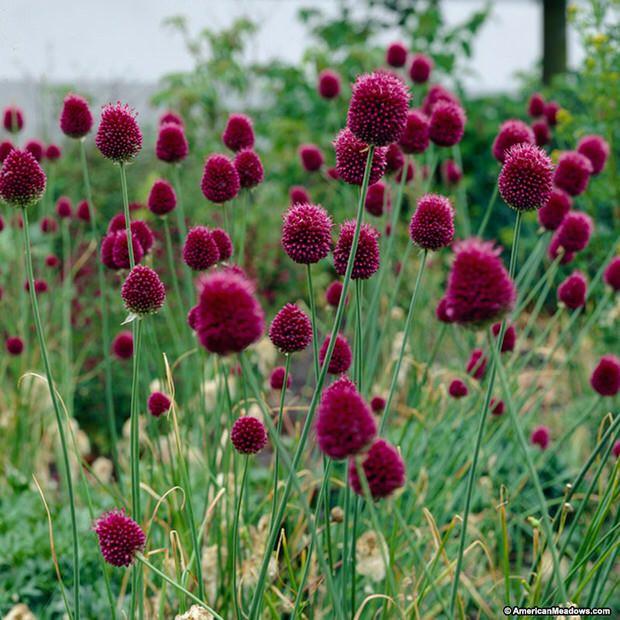

Photo below by ‘Fine Gardening‘. Allium “Jeannine”.

How To Grow Alliums
Buy allium bulbs from a good nursery or online resource. You want healthy bulbs with no cuts or soft spots. Research varieties to include several varieties of different bloom times to keep the show going!
Most varieties are hardy zones 3-9.
Like most bulbs, these look best planted in groups.
Plant the bulbs in the fall, before the ground freezes. Plant them to a depth of 3 times their diameter in a sunny or mostly sunny position. Generally, 6-8 inches.
Fertilize at planting and yearly in spring with bone meal or a bulb food.
Water well, then leave till they burst out in flower in spring and summer! After flowering, allium foliage will wither, brown, and go dormant.
Plant them under, behind, and around other perennial plants whose growing foliage will cover the allium foliage later in the summer when it browns.
Do not cut back the browning allium leaves until fall, that is how they store energy for flowers the next season. (This is why planting foliage plants around them is important.)
Photo below by ‘Gardener’s Supply‘.

Our Favorite Allium Varieties
Gladiator – A giant variety. 3-4 feet tall, this showstopper blooms with 6 inch flowers in May-June. It prefers sun but will tolerate partial shade, and has a sweet scent. From ‘Eden Brothers‘. If you are looking to make a statement in your garden, this is it.

Globe Master – This one is the biggest giant we know of, with blooms topping out at a foot across! 36-40 inches high, it’s a gorgeous pick for any spring to early summer garden. Blooms are slightly more blue than Gladiator. From ‘American Meadows‘.

Allium obliquum – This unusual shade of yellow in a small flowered allium is a perfect selection for a naturalized planting. Growing to just 24 inches high, it’s fragrant and blooms late spring to early summer. From ‘Dutch Bulbs‘.

Mount Everest / Purple Sensation – Long the standard for garden alliums , “Purple Sensation” has 4-5 inch globes and grows to 24-30 inches high. It’s white partner here is “Mount Everest”, perfect in combination because they grow to similar sizes and have similar late spring – early summer bloom times. From ‘Longfield Gardens‘.

Twinkling Stars – This giant pink variety has 5-6 inch blooms and 3 1/2 – 4 foot stems, making it perfect for the back of the border. Blooms in May – June. From ‘Breck’s Bulbs‘.

Pink Jewel – A later blooming allium, starting in June into July. This light pink selection grows to 24 inches high, and has 3 inch blooms. From ‘White Flower Farm‘.

Drumstick Allium – Our last selection is the drumstick allium, an oval shaped reddish bloom that grows to 24 inches high. This allium can actually be grown down to zone 2! Blooms early spring to early summer. Another variety great for naturalizing. From ‘American Meadows‘. So which is your favorite?

0
1
文章
Abigal
2017年02月22日

I love stone! Just do. So many of you loved our post “Got Stones?” that we are doing a #follow up with more great ideas for easy projects with stones and rocks. All of these are beginner projects, are simple, inexpensive, and creative…and best of all, you may have the stones right in your back yard!

Stick and Stones
Use bundles of branches or sticks to create a garden post, then top with decorative rocks from your #garden . Love this!

Gabions
A gabion is a box or container made of wire mesh or fencing, and filled with a material for stability. In this case, wire mesh is used to create a tall box, filled with rock, then used as a decorative column. You can create tables, benches, even retaining walls with this method. Its a trendy and modern way to re-purpose in the garden, and its so creative!

Spiral Garden
Use rocks and your fav plants to create a spiral garden.

Create a Mural
Got an ugly fence or wall that could use an artistic touch? Use rocks and stones and a construction adhesive from the home improvement store to create simple murals. This community garden has it right!

And just because it’s fun, here are some more inspirational photos with stone and rock!


Stick and Stones
Use bundles of branches or sticks to create a garden post, then top with decorative rocks from your #garden . Love this!

Gabions
A gabion is a box or container made of wire mesh or fencing, and filled with a material for stability. In this case, wire mesh is used to create a tall box, filled with rock, then used as a decorative column. You can create tables, benches, even retaining walls with this method. Its a trendy and modern way to re-purpose in the garden, and its so creative!

Spiral Garden
Use rocks and your fav plants to create a spiral garden.

Create a Mural
Got an ugly fence or wall that could use an artistic touch? Use rocks and stones and a construction adhesive from the home improvement store to create simple murals. This community garden has it right!

And just because it’s fun, here are some more inspirational photos with stone and rock!

0
0
文章
Abigal
2017年02月22日

Garden furniture can be one of the most expensive (and boring) parts of a backyard design. It’s not an easy task to find interesting #garden pieces that fit into your budget. It is easy however, to build these great #DIY garden furniture pieces to add a unique element to your yard. Did we also mention you will be up-cycling, on a budget? Win win!

Cinder Block & Wood – One Hour Bench
Try this tutorial from Kayla’s Basement, our featured image above! This is an easy and fast bench to create for any outdoor #space and nice because it is easily adjusted to fit different size cushions.

Yard Sale Chair Garden Bench:
This is a great touch to any garden, and you can use any style depending on the style of chairs you choose. This is the toughest of our five projects, so if it isn’t in your skill range, we have more! This one takes a little cutting of lumber, but still a pretty easy project for anyone willing to get their hands dirty. If you look at the bench, you will see how the basic assembly process goes, but here’s a quick step by step.
Face two wooden chairs next to each other. Using lumber from the home improvement yard, or better yet, recycle wood pallet slats, connect the chairs on both sides along the seat base. Don’t make these side pieces too long as you want the bench to be stable. Now measure the length from the back of one seat, to the back of the other. Cut and attach lumber over the seat to create a new bench seat. Now add lumber pieces for the “back” of the bench. Paint and seal, and enjoy!

Up-Cycled Cement Block Bench:
This one from BHG is a bit easier for the average DIY’er. Simply stack cinder or cement blocks (Can you get recycled ones from your local Habitat for Humanity Store?). Add a pad to the top of the bench for comfort. You can create one by covering a piece of foam from the craft store with fabric, or try finding a “last of it’s kind” garden cushion on clearance (or thrift store!) and lay it flat. Even scattered throw pillows!

Small Log Table:
If you have a wood pile, or access to a cut down tree, all this takes is cutting an armful of logs to the same length. Secure tightly with two straps. Done!

DIY Garden Tree Trunk Dining Table
LOVE this table! The biggest issue with this table is making sure the stump top is level. This can be pretty difficult but if you have access to a chain saw, this is a good bet. For the rest of us, we will be screwing scrap wood shims to the surface until we can create a level surface to secure a wood table top to.

Wood Tree Trunk Garden Stools (Or Ottomans!)
This tutorial from Shelterness is a cute idea for making easy garden stools from tree trunks. Great for kids or for putting your feet up! Easy!

Unique DIY garden furniture, for the cost of some up-cycled materials and a little elbow grease. Which one would you most like to try?

Cinder Block & Wood – One Hour Bench
Try this tutorial from Kayla’s Basement, our featured image above! This is an easy and fast bench to create for any outdoor #space and nice because it is easily adjusted to fit different size cushions.

Yard Sale Chair Garden Bench:
This is a great touch to any garden, and you can use any style depending on the style of chairs you choose. This is the toughest of our five projects, so if it isn’t in your skill range, we have more! This one takes a little cutting of lumber, but still a pretty easy project for anyone willing to get their hands dirty. If you look at the bench, you will see how the basic assembly process goes, but here’s a quick step by step.
Face two wooden chairs next to each other. Using lumber from the home improvement yard, or better yet, recycle wood pallet slats, connect the chairs on both sides along the seat base. Don’t make these side pieces too long as you want the bench to be stable. Now measure the length from the back of one seat, to the back of the other. Cut and attach lumber over the seat to create a new bench seat. Now add lumber pieces for the “back” of the bench. Paint and seal, and enjoy!

Up-Cycled Cement Block Bench:
This one from BHG is a bit easier for the average DIY’er. Simply stack cinder or cement blocks (Can you get recycled ones from your local Habitat for Humanity Store?). Add a pad to the top of the bench for comfort. You can create one by covering a piece of foam from the craft store with fabric, or try finding a “last of it’s kind” garden cushion on clearance (or thrift store!) and lay it flat. Even scattered throw pillows!

Small Log Table:
If you have a wood pile, or access to a cut down tree, all this takes is cutting an armful of logs to the same length. Secure tightly with two straps. Done!

DIY Garden Tree Trunk Dining Table
LOVE this table! The biggest issue with this table is making sure the stump top is level. This can be pretty difficult but if you have access to a chain saw, this is a good bet. For the rest of us, we will be screwing scrap wood shims to the surface until we can create a level surface to secure a wood table top to.

Wood Tree Trunk Garden Stools (Or Ottomans!)
This tutorial from Shelterness is a cute idea for making easy garden stools from tree trunks. Great for kids or for putting your feet up! Easy!

Unique DIY garden furniture, for the cost of some up-cycled materials and a little elbow grease. Which one would you most like to try?
0
0


