文章
lenny
2017年05月23日
Growing lettuce in containers is fun and easy and you can harvest fresh, crispy, and organic lettuce leaves for your salads in no time.

Lettuce is one of the vegetables that is very easy to grow in pots and you can even grow it in a small container. Healthy and continuously productive, this crispy salad green has many qualities that make it a blessing for health. Rich in water, fiber, vitamins and minerals such as calcium, magnesium, potassium and sodium, the lettuce is perfect for those who have intestinal transit problems, and also contributes to the smooth functioning of the nervous system.
You can start to harvest lettuce in no time– about 8 weeks for most of the varieties, it is super easy to grow and productive; similar to spinach. And the best part is you don’t need a lot of space to grow lettuce.
Also Read: How to Grow Spinach
Choosing a Pot
Almost all the lettuce varieties grow well in pots. As their shallow roots don’t need deep soil, they do best in wide and shallow containers. The pot must have adequate drainage holes in the bottom and should be at least 6 inches deep. You can use any material for pots such as plastic, clay or terracotta pots.
*However, if you’re growing lettuce in a container in a warm climate, do that in clay pots and plant heat resistant varieties.Planting Lettuce in Pots

Lettuce is a cool season crop and growing lettuce in pots is possible from spring to fall in most of the regions. Although, if you live in USDA Zones 10-11 or in any other subtropical or tropical part of the world, you should try to grow lettuce in winter.
You can easily cultivate the lettuce from seeds or from seedlings. If you want to grow it from seeds, read this post. Alternatively, you can directly buy the seedlings from a nearby nursery.
For continuous harvest do successive planting, sow seeds in every two weeks throughout the growing season.
In summer, when the weather starts to heat up the lettuce tends to bolt, to reduce this tendency keep your potted lettuce plant in a cool spot and provide proper shade.
Requirements for Growing Lettuce in ContainersSpacing
Considering you’re growing lettuce in a small space in your container garden, we assume you’ll harvest your lettuce plants regularly; trying “Cut And Come Again” method. This way you don’t need to care much about spacing.
Sow seeds densely and thin out the seedlings as they grow picking young, tender leaves regularly. Keep the plants 4-6 inches apart (depending on the size of the leaves you want and cultivar). However, head lettuces require more spacing than leaf lettuces and planting depth (8 inches) must be increased too.
Position
The lettuce loves the sunlight (*more in cooler zones) though it can be grown easily in a partially shaded area but if you’re growing lettuce in a warm climate where the sun is intense try to place the pot in a spot that receives only a few hours of morning sun.
During the hottest hours of the day (in the afternoon) it is recommended to create a shade for the plant to prevent the drying of the soil as lettuce prefers slightly moist soil constantly. Also, move the container in a cool spot when the temperature rises as this favorite green is heat sensitive.
Soil
For growing healthy lettuce, use a good quality soil mix which has plenty of organic matter, such as compost and peat. You can also add well-rotted manure or compost additionally. The soil you use must be loamy and well-drained and doesn’t hold water too much.
Watering
In shallow pots, you may need to water frequently so that the plant will not dry out completely. Make sure that you not only keep the soil slightly moist but also avoid to overwater your container grown lettuces as overwatering can kill the plants due to root rot.
Fertilizer
Because lettuce plants mature quickly, a single or double application of fertilizer is usually all that is needed to boost the production. Before you fertilize, wait for a few weeks to allow the seedlings to establish. To fertilize lettuce you can use a granular balanced fertilizer such as 10-10-10. You can also use liquid fertilizer for a quick boost. When fertilizing, be sure to follow manufacturer’s instructions as both over and under fertilization can be harmful.
Pests and Diseases
Growing lettuces in containers require care from leaf eating insects. However, if the plants are healthy there are fewer chances of infestation of pests or diseases. Mildew, leaf spot, rot and a variety of bacterial infections are common diseases that can attack lettuce. In pests and insects– caterpillars, cutworms, aphids, maggots and beetles can cause damage to the plant.
Harvesting
Once the lettuce leaves have reached the height of 4-6″ (the baby green size perfect for cut and come again method) or according to your desired size, either pick the outer leaves individually or harvest them by cutting the leaves off 1″ (2-3 cm) from above the base or crown (Must remember, don’t cut into or below the crown or else your plant will die). This way the plant will grow back and you’ll be able to harvest it again.
You can also pick the leaf lettuce before maturity, it’s simple, just remove the outer leaves when you need them in salads and keep the center leaves growing.

Lettuce is one of the vegetables that is very easy to grow in pots and you can even grow it in a small container. Healthy and continuously productive, this crispy salad green has many qualities that make it a blessing for health. Rich in water, fiber, vitamins and minerals such as calcium, magnesium, potassium and sodium, the lettuce is perfect for those who have intestinal transit problems, and also contributes to the smooth functioning of the nervous system.
You can start to harvest lettuce in no time– about 8 weeks for most of the varieties, it is super easy to grow and productive; similar to spinach. And the best part is you don’t need a lot of space to grow lettuce.
Also Read: How to Grow Spinach
Choosing a Pot
Almost all the lettuce varieties grow well in pots. As their shallow roots don’t need deep soil, they do best in wide and shallow containers. The pot must have adequate drainage holes in the bottom and should be at least 6 inches deep. You can use any material for pots such as plastic, clay or terracotta pots.
*However, if you’re growing lettuce in a container in a warm climate, do that in clay pots and plant heat resistant varieties.Planting Lettuce in Pots

Lettuce is a cool season crop and growing lettuce in pots is possible from spring to fall in most of the regions. Although, if you live in USDA Zones 10-11 or in any other subtropical or tropical part of the world, you should try to grow lettuce in winter.
You can easily cultivate the lettuce from seeds or from seedlings. If you want to grow it from seeds, read this post. Alternatively, you can directly buy the seedlings from a nearby nursery.
For continuous harvest do successive planting, sow seeds in every two weeks throughout the growing season.
In summer, when the weather starts to heat up the lettuce tends to bolt, to reduce this tendency keep your potted lettuce plant in a cool spot and provide proper shade.
Requirements for Growing Lettuce in ContainersSpacing
Considering you’re growing lettuce in a small space in your container garden, we assume you’ll harvest your lettuce plants regularly; trying “Cut And Come Again” method. This way you don’t need to care much about spacing.
Sow seeds densely and thin out the seedlings as they grow picking young, tender leaves regularly. Keep the plants 4-6 inches apart (depending on the size of the leaves you want and cultivar). However, head lettuces require more spacing than leaf lettuces and planting depth (8 inches) must be increased too.
Position
The lettuce loves the sunlight (*more in cooler zones) though it can be grown easily in a partially shaded area but if you’re growing lettuce in a warm climate where the sun is intense try to place the pot in a spot that receives only a few hours of morning sun.
During the hottest hours of the day (in the afternoon) it is recommended to create a shade for the plant to prevent the drying of the soil as lettuce prefers slightly moist soil constantly. Also, move the container in a cool spot when the temperature rises as this favorite green is heat sensitive.
Soil
For growing healthy lettuce, use a good quality soil mix which has plenty of organic matter, such as compost and peat. You can also add well-rotted manure or compost additionally. The soil you use must be loamy and well-drained and doesn’t hold water too much.
Watering
In shallow pots, you may need to water frequently so that the plant will not dry out completely. Make sure that you not only keep the soil slightly moist but also avoid to overwater your container grown lettuces as overwatering can kill the plants due to root rot.
Fertilizer

Because lettuce plants mature quickly, a single or double application of fertilizer is usually all that is needed to boost the production. Before you fertilize, wait for a few weeks to allow the seedlings to establish. To fertilize lettuce you can use a granular balanced fertilizer such as 10-10-10. You can also use liquid fertilizer for a quick boost. When fertilizing, be sure to follow manufacturer’s instructions as both over and under fertilization can be harmful.
Pests and Diseases
Growing lettuces in containers require care from leaf eating insects. However, if the plants are healthy there are fewer chances of infestation of pests or diseases. Mildew, leaf spot, rot and a variety of bacterial infections are common diseases that can attack lettuce. In pests and insects– caterpillars, cutworms, aphids, maggots and beetles can cause damage to the plant.
Harvesting
Once the lettuce leaves have reached the height of 4-6″ (the baby green size perfect for cut and come again method) or according to your desired size, either pick the outer leaves individually or harvest them by cutting the leaves off 1″ (2-3 cm) from above the base or crown (Must remember, don’t cut into or below the crown or else your plant will die). This way the plant will grow back and you’ll be able to harvest it again.
You can also pick the leaf lettuce before maturity, it’s simple, just remove the outer leaves when you need them in salads and keep the center leaves growing.
0
0
文章
Colorful
2017年05月23日
Love growing plants indoors? Some of the best indoor vines and climbers that are easy to grow are listed here. Must check out!A house with indoor plants looks more lavish and expensive. That’s a fact!1. Heartleaf Philodendron
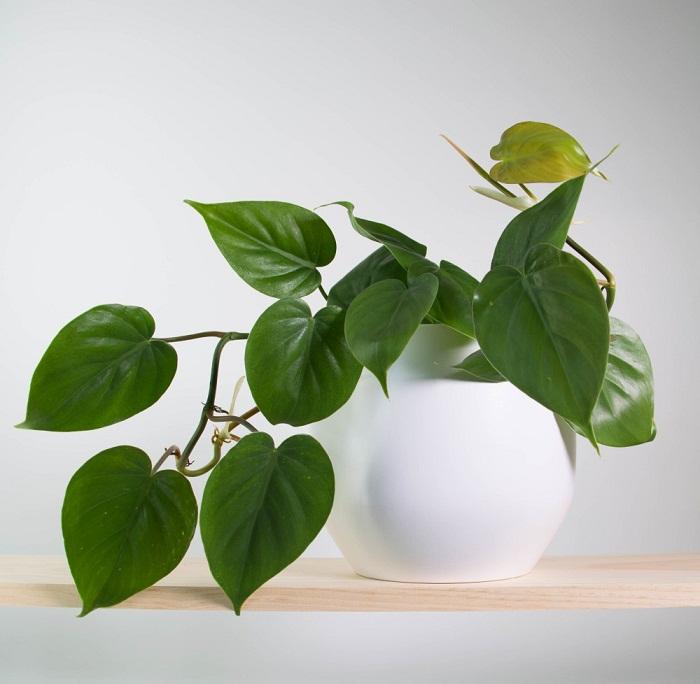
Heartleaf Philodendron is extremely easy to grow and great for beginners. It needs a moderate amount of light and prefers the soil to dry out between watering spells.
Also Read: Easiest Indoor Plants
2. Ivy
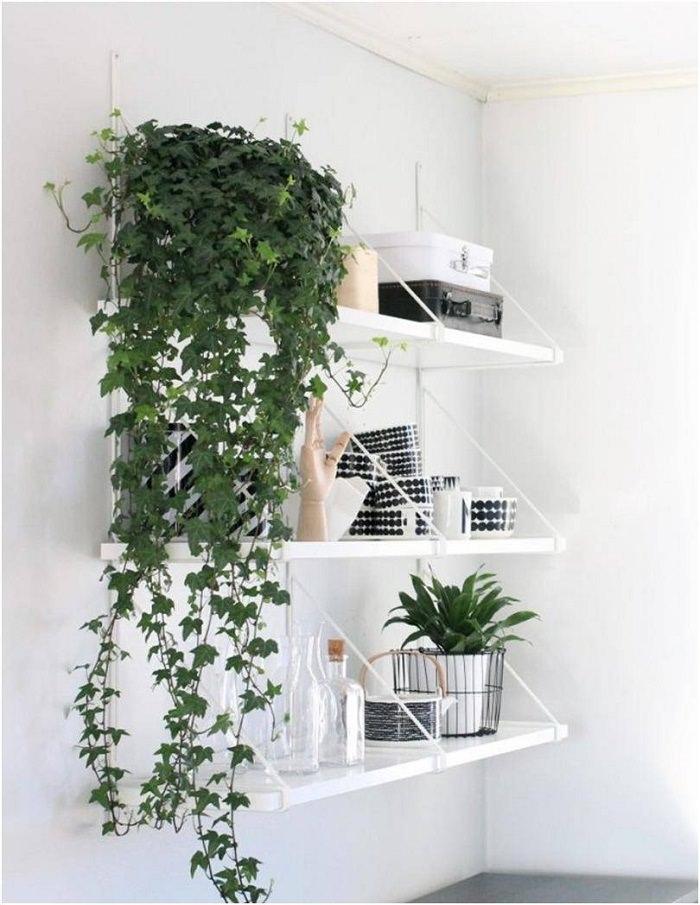
Ivy is one of the best indoor vines. It can easily adapt to many light conditions. This fast-growing vine has evergreen foliage that remains green even in winters. Plant it in a container that is wide and shallow rather than narrow and deep. Keep the pot in a spot that receives bright indirect sun.
Also Read: Best Indoor Plants According to Different Light Conditions
3. Pothos

Plants of the pothos family are easiest to grow and most of them can even grow without direct sunlight. They become great houseplants for beginners. Attractive and hardy vine prefers bright indirect light and a draft free place. It can grow in low light and needs moist soil.
Also Read: Plants You can Grow Without Sunlight
4. Betel Leaf Plant
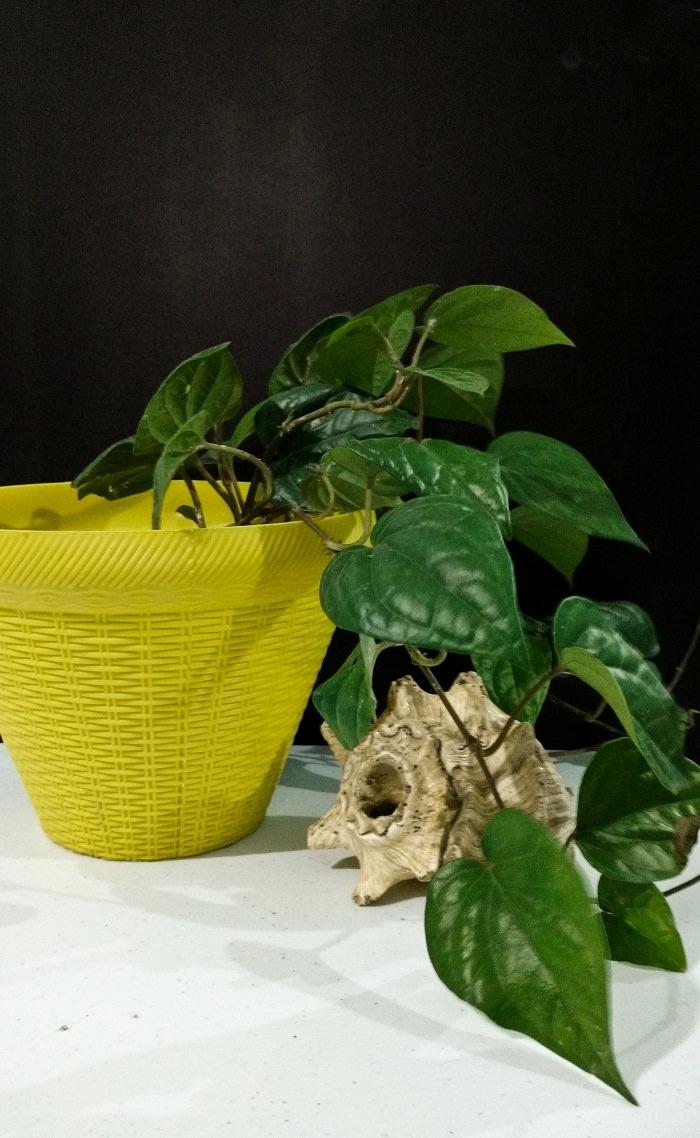
Betel leaf plant is very popular in South and East Asia, especially in the Indian subcontinent, Indonesia, Vietnam, and Thailand. This vine from pepper family has many culinary and medicinal uses. It can be tried indoors if space where you want to keep it receives part sun and remains slightly humid. All the other information is available here.
5. Jasmine

Many jasmine varieties can be grown indoors. If you keep this most fragrant vine in a bright spot where it receives some hours of direct sunlight daily, it’ll grow. The selection of jasmine varieties you want to plant indoors depends on the climate you live in. For colder regions, Jasminum polyanthum is the one you can try, whereas in tropics most of the plants from this species will grow.
6. Creeping Fig

It’s a slow growing creeper with small, leathery dark green foliage. Vigorous-growing, clinging, dense branches adhere to any surface and look enchanting. Be careful not to overwater creeping fig. Let the soil dry out before watering.
7. Arrowhead Plant

This elegant vine like houseplant prefers to be in a spot that is bright, needs moderate watering. Allow the soil to dry out between watering spells and make sure not to overwater it, as it may lead to root rot.
Also Read: Houseplants that are Harmful to Dogs
8. Hoya (Hoya spp.)
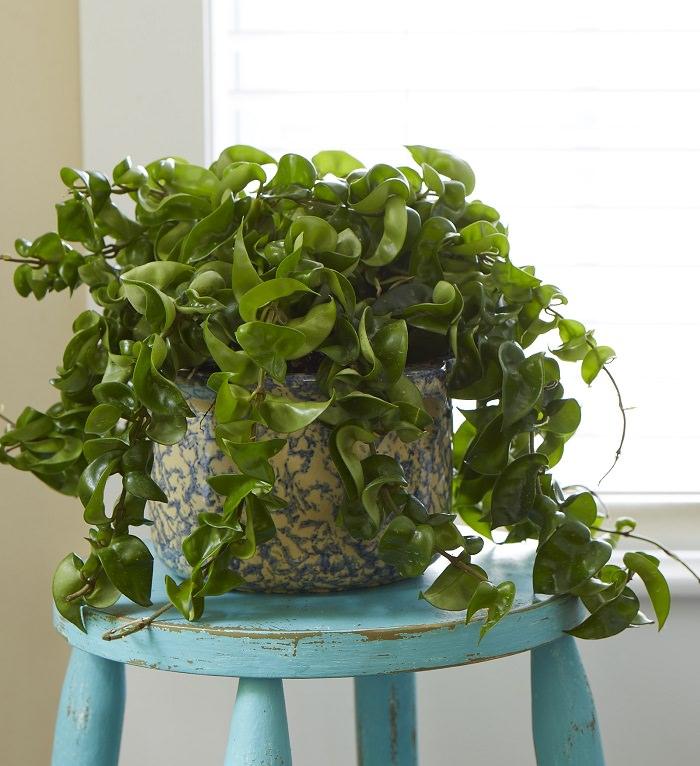
Beautiful waxy foliage and fragrant flowers, hoya looks stunning when grown indoors. The plant has low watering needs and doesn’t mind if you forget to water it occasionally. The trailing stems of this plant is approximately a foot in length along with clusters of aromatic waxy flowers.
Also Read: 99 Great Ideas to Display Houseplants
9. String Of Pearls
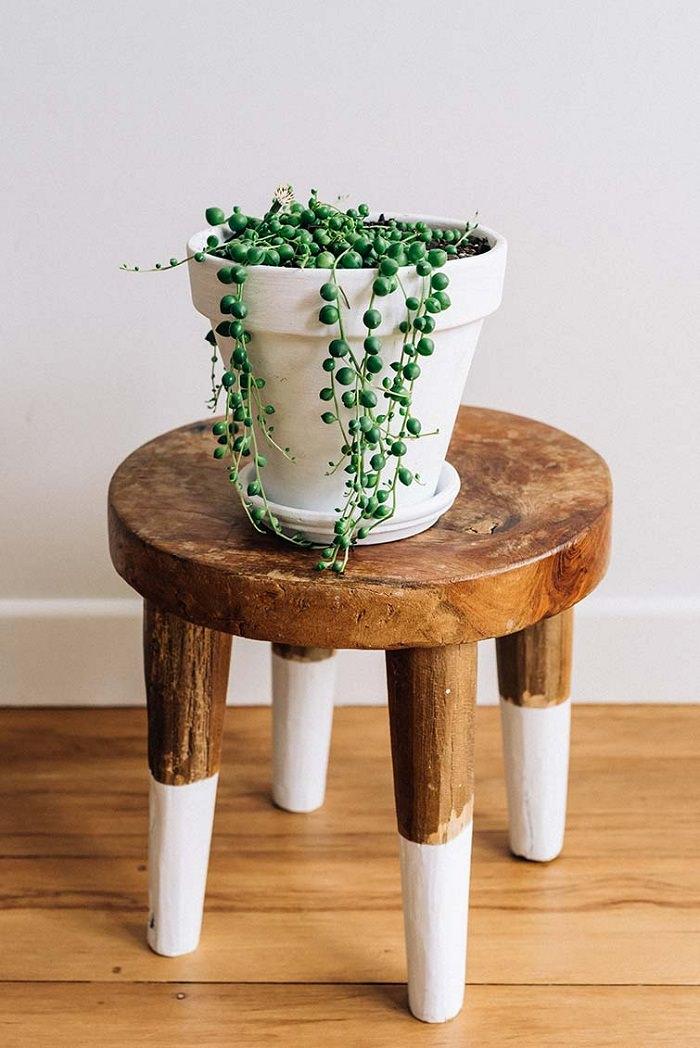
Growing string of pearls is easy, it is a low-maintenance creeper. This succulent tolerates prolonged drought and does well in a bright light position. You can also combine it with other houseplants to create a great appearance or it can be grown in a hanging basket.
10. Black Eyed Susan Vine

Black-eyed Susan vine can be grown indoors. Depending on your climate, this annual or perennial flowering plant can add a dramatic appeal to your rooms. Keep it near a window, where it receives a lot of sun.
11. Inch Plant
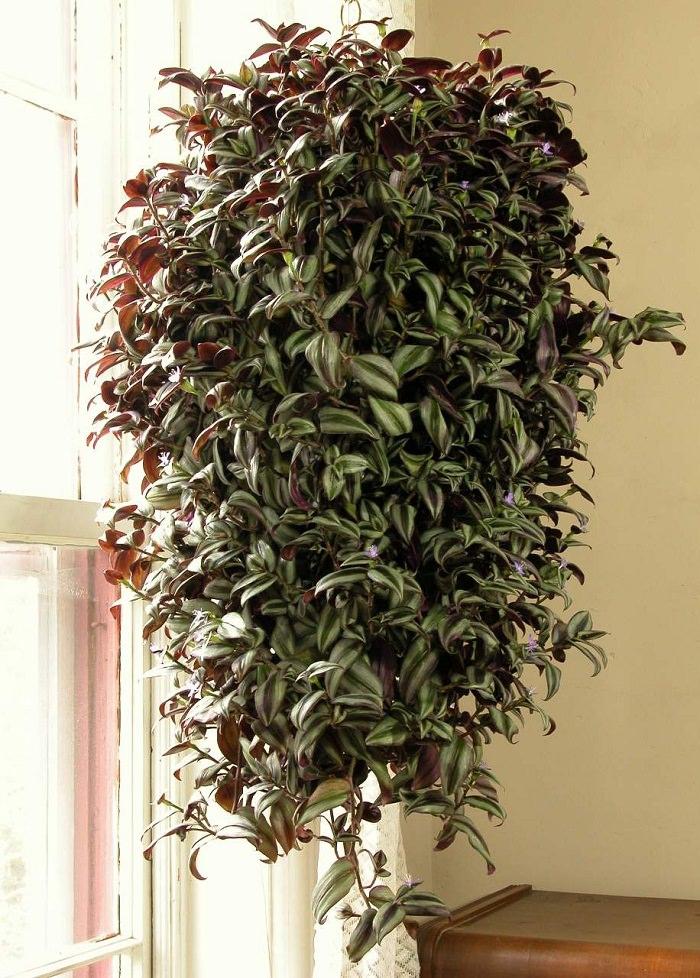
Also called “Wandering Jew” or “Purple heart”, this wonderful houseplant has beautiful trailing stems with attractive zebra patterned foliage that look stunning. Grow it in a pot or hanging basket, it’ll thrive. You can also keep this plant in dim light, but the markings on the foliage will fade.

Heartleaf Philodendron is extremely easy to grow and great for beginners. It needs a moderate amount of light and prefers the soil to dry out between watering spells.
Also Read: Easiest Indoor Plants
2. Ivy

Ivy is one of the best indoor vines. It can easily adapt to many light conditions. This fast-growing vine has evergreen foliage that remains green even in winters. Plant it in a container that is wide and shallow rather than narrow and deep. Keep the pot in a spot that receives bright indirect sun.
Also Read: Best Indoor Plants According to Different Light Conditions
3. Pothos

Plants of the pothos family are easiest to grow and most of them can even grow without direct sunlight. They become great houseplants for beginners. Attractive and hardy vine prefers bright indirect light and a draft free place. It can grow in low light and needs moist soil.
Also Read: Plants You can Grow Without Sunlight
4. Betel Leaf Plant

Betel leaf plant is very popular in South and East Asia, especially in the Indian subcontinent, Indonesia, Vietnam, and Thailand. This vine from pepper family has many culinary and medicinal uses. It can be tried indoors if space where you want to keep it receives part sun and remains slightly humid. All the other information is available here.
5. Jasmine

Many jasmine varieties can be grown indoors. If you keep this most fragrant vine in a bright spot where it receives some hours of direct sunlight daily, it’ll grow. The selection of jasmine varieties you want to plant indoors depends on the climate you live in. For colder regions, Jasminum polyanthum is the one you can try, whereas in tropics most of the plants from this species will grow.
6. Creeping Fig

It’s a slow growing creeper with small, leathery dark green foliage. Vigorous-growing, clinging, dense branches adhere to any surface and look enchanting. Be careful not to overwater creeping fig. Let the soil dry out before watering.
7. Arrowhead Plant

This elegant vine like houseplant prefers to be in a spot that is bright, needs moderate watering. Allow the soil to dry out between watering spells and make sure not to overwater it, as it may lead to root rot.
Also Read: Houseplants that are Harmful to Dogs
8. Hoya (Hoya spp.)

Beautiful waxy foliage and fragrant flowers, hoya looks stunning when grown indoors. The plant has low watering needs and doesn’t mind if you forget to water it occasionally. The trailing stems of this plant is approximately a foot in length along with clusters of aromatic waxy flowers.
Also Read: 99 Great Ideas to Display Houseplants
9. String Of Pearls

Growing string of pearls is easy, it is a low-maintenance creeper. This succulent tolerates prolonged drought and does well in a bright light position. You can also combine it with other houseplants to create a great appearance or it can be grown in a hanging basket.
10. Black Eyed Susan Vine

Black-eyed Susan vine can be grown indoors. Depending on your climate, this annual or perennial flowering plant can add a dramatic appeal to your rooms. Keep it near a window, where it receives a lot of sun.
11. Inch Plant

Also called “Wandering Jew” or “Purple heart”, this wonderful houseplant has beautiful trailing stems with attractive zebra patterned foliage that look stunning. Grow it in a pot or hanging basket, it’ll thrive. You can also keep this plant in dim light, but the markings on the foliage will fade.
4
4
文章
安静的美女子
2017年05月23日

Pachira Aquatica care and growing is easy. Also known as “Money Tree” it can easily be multiplied and is not threatened by many pests and diseases.
USDA Zones— Can be grown in all the zones as houseplant
Difficulty— Easy
Other Names— Malabar chestnut, French Peanut, Guiana chestnut, Provision tree, Saba nut, Monguba, Pumpo, Money tree, Money plant
Propagation
If you can’t find a potted money tree at the nursery. Growing money tree from seeds and cuttings is possible. However, money tree grown from seed grows slowly so it is better to propagate Pachira Aquatica from cuttings.
Requirements for Growing Pachira Money TreeLocation
The Money Tree likes a bright and warm location. If growing money tree indoors, you need to keep it near a bright window where it receives indirect light.
In addition, the houseplant must be sheltered from drafts.
Temperature
Keep the plant at moderate room temperature. Try not to expose it to the temperature below 50 F (10 C) for a long time as this tropical plant is not cold hardy. However, it can bear slight freezing temperatures down to 28 F for a short period.
Soil
Growing Pachira Aquatica needs a well-drained, loose and nutrient-rich soil.
Watering
The Money tree requires moderate watering. Keep the soil slightly moist but too much water is absolutely dangerous and causes the death of Pachira Aquatica. It is better to water the plant deeply but infrequently, only when the top surface of soil dries out.
Sprinkle the plant to increase humidity level if possible, as the plant likes high humidity. For spraying, use lime-free water. Otherwise, limescale will form on the leaves and make it look less attractive.
Pachira Aquatica CareFertilizing
Do not fertilize during the first year of planting. Fertilize the plant with liquid houseplant fertilizer but only in the growing season in every 14 days or so.
Pruning Pachira Aquatica
Pruning Pachira Aquatica is not necessary. Prune it if you want to give it a certain shape or control its height.
Repotting
Potted money tree plant usually comes in a small pot. Therefore, it is recommended that you must repot it immediately after the purchase. Repotting after every 2-3 years is usually required.
Overwintering
Pachira Aquatica care in winter is important. Overwinter it at room temperature. This should not be under 50 F (10 C), at least not for a long time.
Supply sufficiently light and humidity. Pour very little water in winter as the plant stops growing due to the temperature drop.
Pests and Diseases
0
0
文章
Micky
2017年05月23日


Come Fourth of July, most of us spend that day outdoors. It’s a great time to show your patriotic pride by making some outdoor 4th of July decor for your yard and garden. We’ve found some cool projects for you that are fun, easy and great for the kids to help on as well. So fly your flag and get out the red, white and blue! It’s Fourth of July!
Our featured project, above – ‘A Diamond in the Stuff’ has a project that just might be the best use for a wood pallet I’ve seen yet. Try her wood flag wreath… This could be a great porch decoration all year round!
From ‘Sunshine Girl Crafts’, this outdoor “fireworks” display is made from simple 4×4 wood scraps, some paint and a little dollar store froo froo!

‘For the Love Of’ has a simple tutorial to create these DIY patriotic luminaries with tissue paper…great craft with the kids!

‘Pink and Green Mama’ made these DIY 4th of July lawn stars with her kids…flour and water, and a homemade stencil… this is festive and fun!

This easy to make patriotic bunting from ‘Create and Babble’ will have your front porch just oozing the red, white and blue!

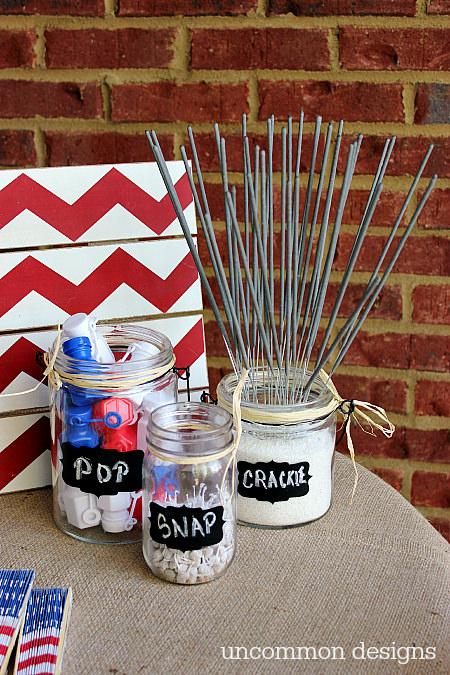
Set up this cool fun and games station by ‘Uncommon Designs’, and make sure all the kids make those wonderful summer memories at your 4th celebration.
Ehow has this cute cupcake liner wreath tutorial… you might even find all these supplies at your dollar store. Fun!

Love, love, love this DIY mason jar centerpiece by ‘Country Chic Cottage’… Lighted and amazing, you could use this year after year!

Our final project is by ‘Addicted 2 DIY’, these DIY patriotic jar lanterns are easy, and I love the glow they put off when lit at night.


What are your fav outdoor Fourth of July decorations? Share!
0
0
文章
安静的美女子
2017年05月23日

Find out how to grow and care for fiddle leaf fig. Learn about the right growing requirements and fiddle leaf fig care below.

Image Credit: Thebrunetteone.com
USDA Zones— 10 – 11, *can be grown indoors in cooler zones
Difficulty— Easy
Scientific Name— Ficus lyrata
Placing a little piece of nature inside the house or apartment does not necessarily mean it will be difficult to maintain. Many plants that offer a beautiful and elegant look in the house are also easy to grow, such as fiddle leaf fig (ficus lyrata). Fiddle Leaf Fig is well suited for growing indoors because it does not become excessively large and at the same time remain noticeable. Fiddle leaf fig care and growing is simple if you fulfill a few basic requirements, which are given below.
Fiddle Leaf Fig Care Information
Fiddle leaf is native to tropics and on its origin place, it grows tall (up to 40 feet), but its size can easily be reduced and kept under control (under 2 m) when grown in pots as a houseplant. Fiddle leaf fig’s leaves are large and dark in color– glossy and leathery, furrowed with yellow veins.
The plant with proper pruning, grows so dense, creating a web of leaves that look elegant and can change the appearance of any room, able to aesthetically fit in any type of environment. It also produces fruit but they are not edible and difficult to develop indoors.
How to Grow Fiddle Leaf Fig TreePropagation
Propagation is usually done from cuttings in the spring. Growing fiddle leaf fig from cuttings is easy, if not available, you can buy a potted plant from nursery and multiply it.
Location
Fiddle leaf fig as a houseplant, grows in a well lit spot. Where it receives indirect sunlight all day long. It likes warm temperature approx. 60 – 70 F (15 – 20 C). When growing fiddle leaf fig, remember that it prefers moist, humid air. Homes are rather dry, so alternatively you can mist the plant often to increase the humidity level.
Requirements for Growing Fiddle Leaf Fig IndoorsSoil
Soil is an essential ingredient in the growth of healthy plant. Loose, well drained soil that is rich in nutrients and organic matter is required.
Watering
Keep the soil slightly moist but let the top 1 inch surface to dry out between watering spells. In the summer it requires frequent watering. In winter, reduce the watering to avoid root rot.
Fiddle Leaf Fig Care

Image Credit: Room for Tuesday
Fiddle leaf fig care is easy, it involves several requirements and steps, which are explained below.
Fertilization
Fertilize about once a month with a water soluble houseplant fertilizer. Avoid fertilizing when it is not in active growth, usually in winter.
Repotting
In every 2-3 years repot the plant or whenever you find that it is root bound, providing a container slightly larger than the previous one.
Cleaning
Cleaning the leaves is an important fiddle leaf plant care step. Its large feathery foliage becomes dusty quite often.
Pruning
Prune your plant to control its size and remove dead and diseased branches, if necessary. Regular pinching of the top of stem once it has reached the desired height prevents the plant from getting lanky and encourages branching.
Pests, Diseases and ProblemsPests
If leaves that have small dark or white diffused patches: this is the sign of the presence of pests, which if not eradicated can damage the plant or lead it to death. The most common pests are mites and cochineal.
It is therefore important to counter them as early as possible as stop the invasion. For evergreens, such as ficus lyrata, attention should always be kept, more in the summer period, when the high temperature and humidity together promote the ideal climate for the development of pests, particularly under the inner leaves, where air circulation is less.
Diseases and Problems
Plant suffers from root rot if grown in waterlogged soil. Ensuring proper drainage and avoiding overwatering prevent this. Whereas, a bad appearance of the foliage or falling leaves are the most obvious symptoms of a few mistakes in the cultivation: Either the plant is exposed to cold drafts or temperature that is too rigid, watering is insufficient or conversely, too abundant. In any case, if treated in time the plant will recover from the damage.

Image Credit: Thebrunetteone.com
USDA Zones— 10 – 11, *can be grown indoors in cooler zones
Difficulty— Easy
Scientific Name— Ficus lyrata
Placing a little piece of nature inside the house or apartment does not necessarily mean it will be difficult to maintain. Many plants that offer a beautiful and elegant look in the house are also easy to grow, such as fiddle leaf fig (ficus lyrata). Fiddle Leaf Fig is well suited for growing indoors because it does not become excessively large and at the same time remain noticeable. Fiddle leaf fig care and growing is simple if you fulfill a few basic requirements, which are given below.
Fiddle Leaf Fig Care Information
Fiddle leaf is native to tropics and on its origin place, it grows tall (up to 40 feet), but its size can easily be reduced and kept under control (under 2 m) when grown in pots as a houseplant. Fiddle leaf fig’s leaves are large and dark in color– glossy and leathery, furrowed with yellow veins.
The plant with proper pruning, grows so dense, creating a web of leaves that look elegant and can change the appearance of any room, able to aesthetically fit in any type of environment. It also produces fruit but they are not edible and difficult to develop indoors.
How to Grow Fiddle Leaf Fig TreePropagation
Propagation is usually done from cuttings in the spring. Growing fiddle leaf fig from cuttings is easy, if not available, you can buy a potted plant from nursery and multiply it.
Location
Fiddle leaf fig as a houseplant, grows in a well lit spot. Where it receives indirect sunlight all day long. It likes warm temperature approx. 60 – 70 F (15 – 20 C). When growing fiddle leaf fig, remember that it prefers moist, humid air. Homes are rather dry, so alternatively you can mist the plant often to increase the humidity level.
Requirements for Growing Fiddle Leaf Fig IndoorsSoil
Soil is an essential ingredient in the growth of healthy plant. Loose, well drained soil that is rich in nutrients and organic matter is required.
Watering
Keep the soil slightly moist but let the top 1 inch surface to dry out between watering spells. In the summer it requires frequent watering. In winter, reduce the watering to avoid root rot.
Fiddle Leaf Fig Care

Image Credit: Room for Tuesday
Fiddle leaf fig care is easy, it involves several requirements and steps, which are explained below.
Fertilization
Fertilize about once a month with a water soluble houseplant fertilizer. Avoid fertilizing when it is not in active growth, usually in winter.
Repotting
In every 2-3 years repot the plant or whenever you find that it is root bound, providing a container slightly larger than the previous one.
Cleaning
Cleaning the leaves is an important fiddle leaf plant care step. Its large feathery foliage becomes dusty quite often.
Pruning
Prune your plant to control its size and remove dead and diseased branches, if necessary. Regular pinching of the top of stem once it has reached the desired height prevents the plant from getting lanky and encourages branching.
Pests, Diseases and ProblemsPests
If leaves that have small dark or white diffused patches: this is the sign of the presence of pests, which if not eradicated can damage the plant or lead it to death. The most common pests are mites and cochineal.
It is therefore important to counter them as early as possible as stop the invasion. For evergreens, such as ficus lyrata, attention should always be kept, more in the summer period, when the high temperature and humidity together promote the ideal climate for the development of pests, particularly under the inner leaves, where air circulation is less.
Diseases and Problems
Plant suffers from root rot if grown in waterlogged soil. Ensuring proper drainage and avoiding overwatering prevent this. Whereas, a bad appearance of the foliage or falling leaves are the most obvious symptoms of a few mistakes in the cultivation: Either the plant is exposed to cold drafts or temperature that is too rigid, watering is insufficient or conversely, too abundant. In any case, if treated in time the plant will recover from the damage.
1
1
lrgarden:good
文章
粉团
2017年05月23日

If you’re looking for an easy and most amazing way to transform your garden then use garden Pebbles!

Are you looking for a quick option to transform your garden and make it beautiful and attractive for visitors? If yes, then garden pebbles are the best options that you can opt for. One of the most important things about these is that regardless of what you do, your garden will always look remarkably beautiful and pleasant.
In the market, you can find varied, affordable and colorful garden pebbles. And there are many eye-catching and creative ways out there to use them. The best part is that these are very easy to maintain. For taking it to a whole new level and to increase the appeal of your garden and landscaping, you can opt for river rocks.
Why You Should Use Garden Pebbles
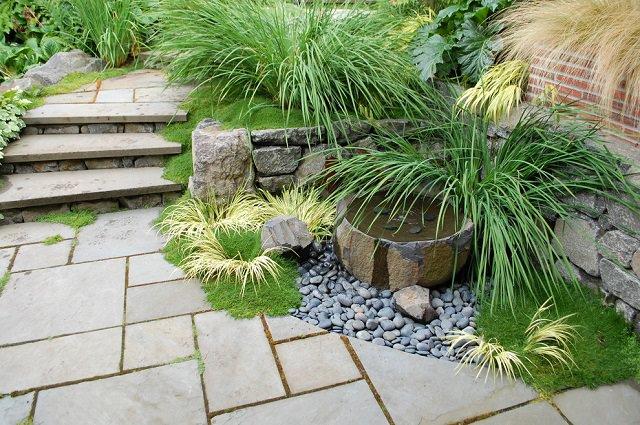
These are pleasant to look at and add a wide range of natural colors to the garden, thus, making your garden look more natural. It helps to maintain the original look and enhances the beauty of your garden. Some of the more notable benefits are:
These pebbles or stones are durable and can withstand almost any level of natural temperature. They are also effective for areas around the stove or fireplace as these are natural stones and resistant to most natural elements.You can also use them for mulching and if you have a container garden pebbles can make your container plants look better.The surfaces of the garden pebbles are flush and these are very safe to walk on. These stones offer more traction and as a result, slipping is out of the question with these stones in place.These stones can be used on dry surfaces such as on a plain landscape and also wet surfaces like a garden floor, swimming pool and portions of your deck.Useful Advice on Grouting Pebbles
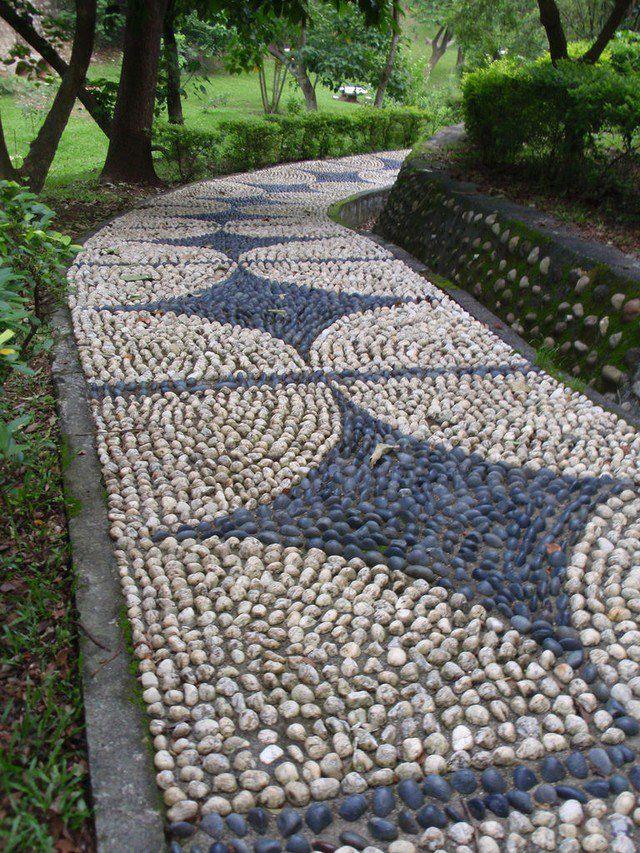
When you prepare the grout for placing the garden pebbles make sure that you avoid putting too much of water because adding a lot of water can result in a weak grout that can flake in later stages.In order to appreciate the beauty of these naturally attractive stones, you need to remove the excess grout with the help of a wet sponge. This is important because in order to make the setting beautiful you want to show as much stone as possible.In order to maintain the beauty of these natural stones, you need to make sure to apply sealant every 2-3 years so that the beauty can be prolonged.
Installing or using garden pebbles in your property all by yourself is a fun and creative activity. However, you need to make sure that you follow a proper procedure that will help to get everything done in the right way. If you are not good with working on grout and don’t have many creative ideas then it is best to call the professionals to help you in this regard.
Get Affordable Rates

There are a lot of things that you can buy to get your garden pebbles installed and there are many sellers available in the market. However, you need to make sure that you only buy from affordable sellers and get the best deals in this regard. Since there are multitudes of sellers in the market there is a lot of competition; and as a result, you can get attractive garden pebbles at the most affordable rates.
So, make sure that you compare all your options and then decide on the one that is most suitable for your needs. Get the help of the internet to understand the various possibilities that you have with these stones.

Are you looking for a quick option to transform your garden and make it beautiful and attractive for visitors? If yes, then garden pebbles are the best options that you can opt for. One of the most important things about these is that regardless of what you do, your garden will always look remarkably beautiful and pleasant.
In the market, you can find varied, affordable and colorful garden pebbles. And there are many eye-catching and creative ways out there to use them. The best part is that these are very easy to maintain. For taking it to a whole new level and to increase the appeal of your garden and landscaping, you can opt for river rocks.
Why You Should Use Garden Pebbles

These are pleasant to look at and add a wide range of natural colors to the garden, thus, making your garden look more natural. It helps to maintain the original look and enhances the beauty of your garden. Some of the more notable benefits are:
These pebbles or stones are durable and can withstand almost any level of natural temperature. They are also effective for areas around the stove or fireplace as these are natural stones and resistant to most natural elements.You can also use them for mulching and if you have a container garden pebbles can make your container plants look better.The surfaces of the garden pebbles are flush and these are very safe to walk on. These stones offer more traction and as a result, slipping is out of the question with these stones in place.These stones can be used on dry surfaces such as on a plain landscape and also wet surfaces like a garden floor, swimming pool and portions of your deck.Useful Advice on Grouting Pebbles

When you prepare the grout for placing the garden pebbles make sure that you avoid putting too much of water because adding a lot of water can result in a weak grout that can flake in later stages.In order to appreciate the beauty of these naturally attractive stones, you need to remove the excess grout with the help of a wet sponge. This is important because in order to make the setting beautiful you want to show as much stone as possible.In order to maintain the beauty of these natural stones, you need to make sure to apply sealant every 2-3 years so that the beauty can be prolonged.
Installing or using garden pebbles in your property all by yourself is a fun and creative activity. However, you need to make sure that you follow a proper procedure that will help to get everything done in the right way. If you are not good with working on grout and don’t have many creative ideas then it is best to call the professionals to help you in this regard.
Get Affordable Rates

There are a lot of things that you can buy to get your garden pebbles installed and there are many sellers available in the market. However, you need to make sure that you only buy from affordable sellers and get the best deals in this regard. Since there are multitudes of sellers in the market there is a lot of competition; and as a result, you can get attractive garden pebbles at the most affordable rates.
So, make sure that you compare all your options and then decide on the one that is most suitable for your needs. Get the help of the internet to understand the various possibilities that you have with these stones.
3
2
文章
Carol
2017年05月23日

You love to garden but don’t find time to maintain it. Don’t bother, imply these easy landscaping tips to make a low maintenance garden.
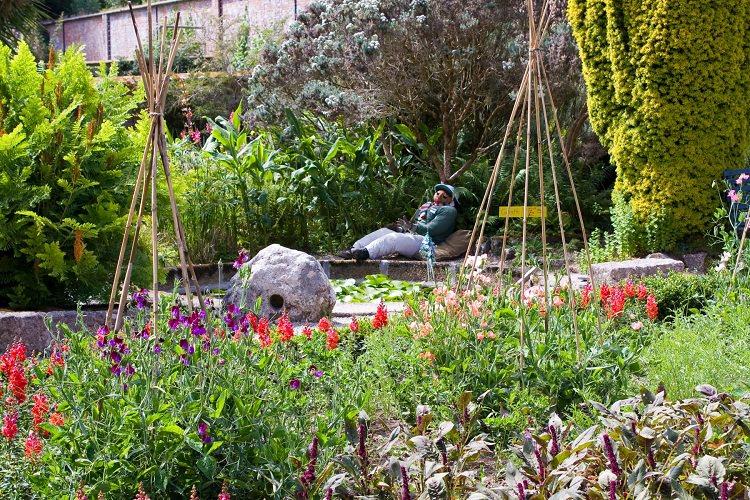
Easy Landscaping Tips for a Low Maintenance Garden
Unfortunately, there is no plant that is maintenance-free and every garden requires regular care and seasonal cleanup work. However, by making some changes you can reduce your efforts.
Grow plants that are low maintenance
1. So what are the plants that do not require special care? The answer is simple, native plants and the plants that are most suitable for your climate and growing conditions you have for them in your garden.
2. For a low maintenance garden, you’ll have to do a sacrifice. Instead of exotic plants, choose indigenous species, preferably those that occur naturally around your area. Such plants are easy to adapt, tough and resilient and will grow well even without special attention.
Group plants according to their requirements
3. Group plants according to their requirements at the right location, plants that require full sun or shade must be planted carefully together. Plants that require moist soil must not be planted with the ones that have low watering needs.
4. Give preference to drought tolerant plants as they require less watering. Also, the plants that grow slowly are a good option as they need less pruning. Those plants that spread widely must be planted too as they cover space, which means fewer plants. Also, don’t forget about the plants that resist pests and diseases.
Plant conifers
5. There are a variety of conifers that do not shed their needles in the winter, so in this period when everything seems dull they will look good in your garden. Conifers do not require regular care from pests too.
Opt for perennials
6. Instead of sowing seeds of annual plants routinely, opt for perennials. You will only need to do deadheading and pruning sometimes. Once grown, most of the perennials do well with infrequent watering. These plants are also quite resistant to pests than annuals. If you would like to grow annuals, grow the ones that are self-seeding and require less care.
No lawn please!

7. If you want a low care garden, avoid having a lawn. Instead, design a rock garden there or plan something unique. Plant a flower bed or grow lawn alternatives. Growing ground covers, small shrubs, and bushes is also a good idea. You can also create a wildflower meadow there, this will give a chance to wildlife to thrive.
Don’t overcrowd your garden
8. Plant moderately, don’t overcrowd your garden. The more plants you have, the more your garden will require treatment and attention.
Do something about watering
9. An indispensable solution may be the automatic irrigation system, which practically does not require maintenance, it allows to save time so that you would have to spend on watering the garden. Garden is irrigated by sprinklers or drip irrigation lines. The system is activated at a time you set and dispense the correct amount of water to particular groups of plants.
10. Automated watering system may be expensive, however, there are a few more hacks that can save your time like growing drought tolerant plants or those that prefer dry soil.
11. Large shrubs, long living trees, fruit plants once become established get water from nature and require watering sparingly. Also, you can replace your ordinary containers with self-watering ones.
Use slow release fertilizers
12. Slow release fertilizers limit the use of frequent fertilization. In addition, in the long run, they provide the plants the amount of nutrients they need, gradually.
Do mulching

13. Mulching is the part of easy landscaping. Do mulching everywhere, this will help in keeping the soil moist, water will evaporate less and roots will get ample moisture. Also, thick mulching (2-3 inches at least) helps in eliminating weeds. Around your garden beds, you can also cover the soil with pebbles and gravels. This will make your garden more attractive and it works as a mulch too.
14. You can also cover the empty space of your garden with sun blocking plastic sheeting, it may not look good but doesn’t allow weed seeds to germinate and spread.

Easy Landscaping Tips for a Low Maintenance Garden
Unfortunately, there is no plant that is maintenance-free and every garden requires regular care and seasonal cleanup work. However, by making some changes you can reduce your efforts.
Grow plants that are low maintenance
1. So what are the plants that do not require special care? The answer is simple, native plants and the plants that are most suitable for your climate and growing conditions you have for them in your garden.
2. For a low maintenance garden, you’ll have to do a sacrifice. Instead of exotic plants, choose indigenous species, preferably those that occur naturally around your area. Such plants are easy to adapt, tough and resilient and will grow well even without special attention.
Group plants according to their requirements
3. Group plants according to their requirements at the right location, plants that require full sun or shade must be planted carefully together. Plants that require moist soil must not be planted with the ones that have low watering needs.
4. Give preference to drought tolerant plants as they require less watering. Also, the plants that grow slowly are a good option as they need less pruning. Those plants that spread widely must be planted too as they cover space, which means fewer plants. Also, don’t forget about the plants that resist pests and diseases.
Plant conifers
5. There are a variety of conifers that do not shed their needles in the winter, so in this period when everything seems dull they will look good in your garden. Conifers do not require regular care from pests too.
Opt for perennials
6. Instead of sowing seeds of annual plants routinely, opt for perennials. You will only need to do deadheading and pruning sometimes. Once grown, most of the perennials do well with infrequent watering. These plants are also quite resistant to pests than annuals. If you would like to grow annuals, grow the ones that are self-seeding and require less care.
No lawn please!

7. If you want a low care garden, avoid having a lawn. Instead, design a rock garden there or plan something unique. Plant a flower bed or grow lawn alternatives. Growing ground covers, small shrubs, and bushes is also a good idea. You can also create a wildflower meadow there, this will give a chance to wildlife to thrive.
Don’t overcrowd your garden
8. Plant moderately, don’t overcrowd your garden. The more plants you have, the more your garden will require treatment and attention.
Do something about watering
9. An indispensable solution may be the automatic irrigation system, which practically does not require maintenance, it allows to save time so that you would have to spend on watering the garden. Garden is irrigated by sprinklers or drip irrigation lines. The system is activated at a time you set and dispense the correct amount of water to particular groups of plants.
10. Automated watering system may be expensive, however, there are a few more hacks that can save your time like growing drought tolerant plants or those that prefer dry soil.
11. Large shrubs, long living trees, fruit plants once become established get water from nature and require watering sparingly. Also, you can replace your ordinary containers with self-watering ones.
Use slow release fertilizers
12. Slow release fertilizers limit the use of frequent fertilization. In addition, in the long run, they provide the plants the amount of nutrients they need, gradually.
Do mulching

13. Mulching is the part of easy landscaping. Do mulching everywhere, this will help in keeping the soil moist, water will evaporate less and roots will get ample moisture. Also, thick mulching (2-3 inches at least) helps in eliminating weeds. Around your garden beds, you can also cover the soil with pebbles and gravels. This will make your garden more attractive and it works as a mulch too.
14. You can also cover the empty space of your garden with sun blocking plastic sheeting, it may not look good but doesn’t allow weed seeds to germinate and spread.
0
0
文章
Hande Salcan
2017年05月23日

Bamboo is a great choice for specimen planting or for screening, and it can be easy to grow if you know how to manage it. It fits in with most garden styles, and there are varieties of nearly every size and for every hardiness zone. Here are the basics on how to grow bamboo in your garden!
Types of Bamboo
There are basically two types of bamboo. Running bamboo is the type you have been warned about that can take over your entire yard (and the next one) in a pretty darn short time, turning it into a tropical jungle. But with some tricks, you can grow it!

Clumping bamboo is more well contained, and while it still spreads underground, it is much slower and controlled. This is a better choice for the casual gardener, or those with limited space but who still want to enjoy the beauty of graceful bamboo.
Bamboo Basics
Both types of bamboo have tropical varieties meant for warmer climates, and mountainous varieties hardy down to -15 degrees or more. Check your nursery tag.
Choose a bamboo that has a mature height that fits in with the scale of the effect you desire. Screening bamboos can be taller, specimens can be shorter.
Bamboo requires well drained soil.
For the first two years in the ground, water your bamboo well. Fertilize once in the spring. If you are trying to prevent running bamboo from, well, running… don’t fertilize as often.
Check on whether your variety prefers full sun, or some afternoon shade.
Prune back to the ground old, dull culms every year. (Culms are the upright “blades” of bamboo.) Some gardeners prefer to prune off any branches that extend horizontally, so that all culms run vertically straight up for a graphic and striking effect. If you have culms flopping over, they probably require more water, less feritlizer. You can prune back the height to help them recover, or just prune them down altogether.
How to Grow Running Bamboo
If you have found a species of running bamboo that you just have to try, you will have to contain the underground roots from spreading beyond your planting area. There are several ways to achieve this.
You can transplant your nursery bamboo into a large pot, then plant the whole pot into the ground. Leave the collar of the pot above ground. Cover with mulch if you find it unsightly.
Another option is to place a plastic or concrete barrier at least 12-18 inches below the soil. Bamboo are shallow rooted so this should prevent the bamboo from running away. You can prune back to the ground any culms that escape beyond the barrier.
Finally, you can dig a 12 inch deep trench around the area you would like to contain the bamboo too. Fill with sand, then several times a season, pull back the sand and prune back any roots that have poked through into the trench.

How to Grow Clumping Bamboo
Clumping Bamboo is much less likely to run rampant across your property. Many varieties are quite polite in fact. Make sure you check the size and space requirements of the variety you purchase.
Bamboo in Containers
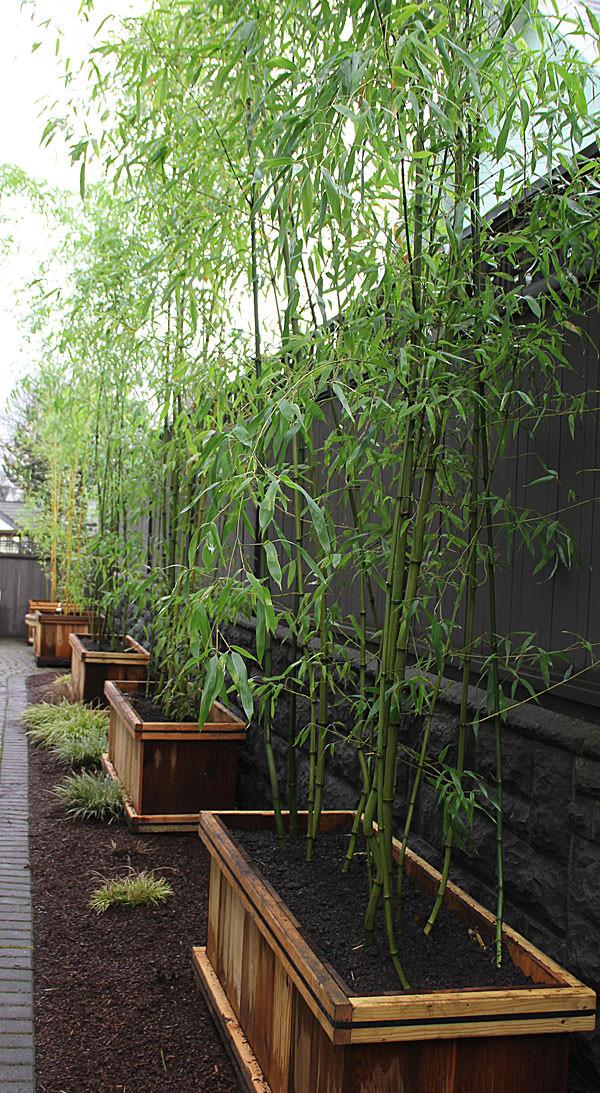
Both types of bamboo can be grown successfully in containers. This is the lowest maintenance option, and can help maintain the health of the rest of your garden. Be sure to choose a container large enough to be in scale with the eventual height of your variety.
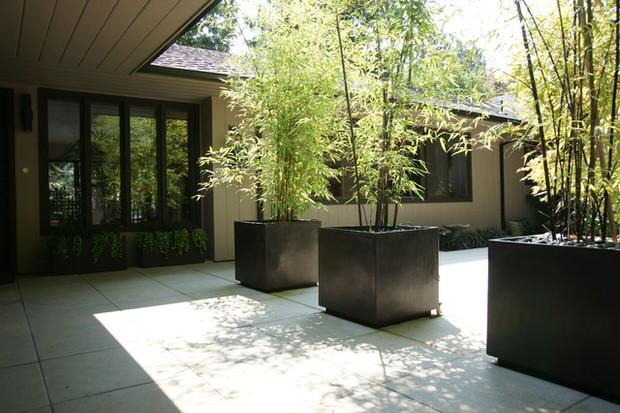
Bamboo is not the garden evil that urban legend portrays…as long as you tend to it’s needs. It can turn a ho hum yard into a stunning garden in a short time, with these few bamboo growing tips and tricks. So are you brave enough to give it a try?
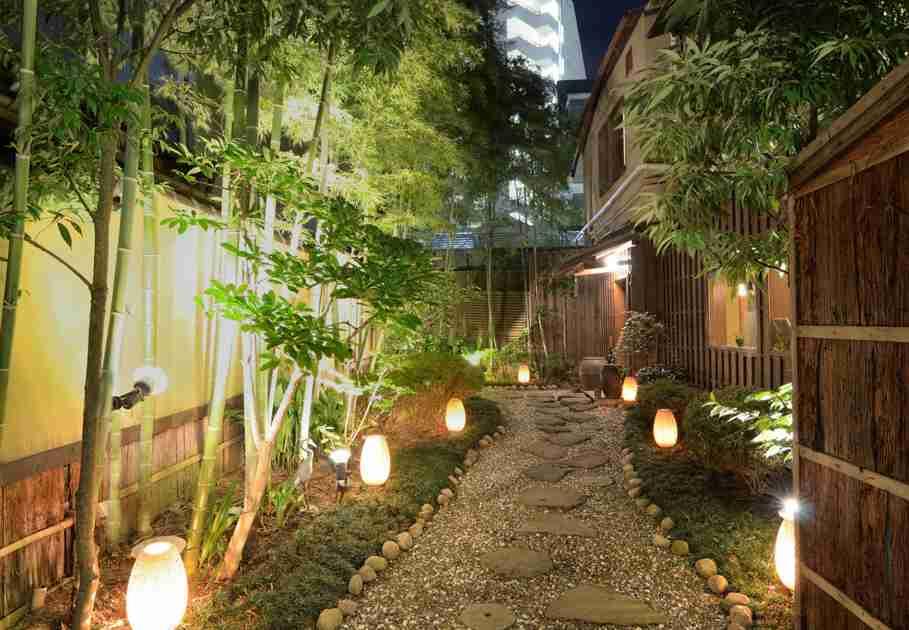
Types of Bamboo
There are basically two types of bamboo. Running bamboo is the type you have been warned about that can take over your entire yard (and the next one) in a pretty darn short time, turning it into a tropical jungle. But with some tricks, you can grow it!

Clumping bamboo is more well contained, and while it still spreads underground, it is much slower and controlled. This is a better choice for the casual gardener, or those with limited space but who still want to enjoy the beauty of graceful bamboo.
Bamboo Basics
Both types of bamboo have tropical varieties meant for warmer climates, and mountainous varieties hardy down to -15 degrees or more. Check your nursery tag.
Choose a bamboo that has a mature height that fits in with the scale of the effect you desire. Screening bamboos can be taller, specimens can be shorter.
Bamboo requires well drained soil.
For the first two years in the ground, water your bamboo well. Fertilize once in the spring. If you are trying to prevent running bamboo from, well, running… don’t fertilize as often.
Check on whether your variety prefers full sun, or some afternoon shade.
Prune back to the ground old, dull culms every year. (Culms are the upright “blades” of bamboo.) Some gardeners prefer to prune off any branches that extend horizontally, so that all culms run vertically straight up for a graphic and striking effect. If you have culms flopping over, they probably require more water, less feritlizer. You can prune back the height to help them recover, or just prune them down altogether.
How to Grow Running Bamboo
If you have found a species of running bamboo that you just have to try, you will have to contain the underground roots from spreading beyond your planting area. There are several ways to achieve this.
You can transplant your nursery bamboo into a large pot, then plant the whole pot into the ground. Leave the collar of the pot above ground. Cover with mulch if you find it unsightly.
Another option is to place a plastic or concrete barrier at least 12-18 inches below the soil. Bamboo are shallow rooted so this should prevent the bamboo from running away. You can prune back to the ground any culms that escape beyond the barrier.
Finally, you can dig a 12 inch deep trench around the area you would like to contain the bamboo too. Fill with sand, then several times a season, pull back the sand and prune back any roots that have poked through into the trench.

How to Grow Clumping Bamboo
Clumping Bamboo is much less likely to run rampant across your property. Many varieties are quite polite in fact. Make sure you check the size and space requirements of the variety you purchase.

Bamboo in Containers
Both types of bamboo can be grown successfully in containers. This is the lowest maintenance option, and can help maintain the health of the rest of your garden. Be sure to choose a container large enough to be in scale with the eventual height of your variety.

Bamboo is not the garden evil that urban legend portrays…as long as you tend to it’s needs. It can turn a ho hum yard into a stunning garden in a short time, with these few bamboo growing tips and tricks. So are you brave enough to give it a try?

2
3
文章
Juze
2017年05月23日

Learn how to grow papaya tree. Growing papaya is perfect for gardeners who like to grow easy to grow fruit trees. Papaya tree care is simple, it is low maintenance and productive.
USDA Zones— 9 – 11
Difficulty— Easy
Other Names— Banane de Prairie, Caricae Papayae Folium, Carica papaya, Carica peltata, Carica posoposa, Chirbhita, Erandachirbhita, Erand Karkati, Green Papaya, Mamaerie, Melonenbaumblaetter, Melon Tree, Papaw, Pawpaw, Papaya Fruit, Papayas, Papaye, Papaye Verte, Papayer, Papita.

Papaya (Carica papaya L.) is native to the tropics of Mexico and Central America. This fruit for high nutritional value, great taste and medicinal properties.
Papaya is mainly consumed as a fruit, but it is also used for making soft drinks, juices, pickles, jams, and curries. It produces latex that is extracted from the green fruit and stem, which contains an enzyme called papain that helps in digestion of proteins.
Plant Characteristics
Papaya is a herbaceous plant of relatively rapid growth and short life (not profitable to cultivate mature plants for longer than 3 years because the fruit yield gets low). It has a hollow, segmented and erect single stem and no branches. It presents a many large, lobed leaves. The plant height can reach up to several meters.
The fruit has a wide variety of forms, its shape and size vary depending on the variety and type of flower.
Pollination
If you’re growing papaya you must know that papayas come in three sexes: Male, female and hermaphrodite (bisexual). Male papaya trees must be eliminated as they don’t produce fruits. Female papaya trees require male tree for pollination. In orchards and papaya plantations, generally, 1 male tree per 10 female trees is grown. Bisexual papaya trees are self-pollinating and don’t require male trees for pollination. Commercial growers plant them. You will need to plant either female or bisexual papaya tree.
To learn how to identify male or female papaya, tree read this informative discussion on helpful gardener
Our recommendation for you is to buy seeds from quality source so that you know what you’re buying and to get a self-fertile bisexual tree. Most of the hybrid varieties that are coming are either bisexual or female, it is better to buy them. If you’re sowing seeds obtained from the fruits, choose seeds from elongated fruits instead of rounded fruits. Elongated fruits have 66% probability of hermaphrodite (bisexual) seeds and 33% female seeds.
Cross pollination from hand is required for pollination of female papaya trees.
How to Grow Papaya in Pots
Growing papaya in pots is not difficult, considering it is short living small tree. You can grow any papaya variety in pots but it is better to choose a dwarf variety.

Choosing a container
Choose a large 15-20 gallon size container for growing papaya in pots, also, ensure there are enough drainage holes in the bottom before planting. A pot that is around 18-22 inches in diameter and 12-15 inches deep would be sufficient.
Sow the seeds directly in the pot you wish to use for growing papaya tree as papayas don’t transplant well. All the other growing requirements are given below in the article.
Growing Papaya from Seeds
Seeds must be given treatment before sowing for germination. The first method is to simply wash the seeds to remove gelatinous coating before sowing. Another method is to immerse them in a container full of neutral water for the period of 4 days. Change the water twice in a day. After 2 days of soaking, separate the seeds that are floating on the surface from those that have settled down.
Leave the seeds that are settled down for another day. After this time, the seeds that float up again must be removed. This way only the viable papaya seeds are left. On the last day when changing the water, add fungicides in it.
After this process, keep the seeds on cotton cloth for 2 to 3 days, keeping up the seeds wet. Once the white dot in them can be observed they are ready for sowing.
Proceed to sow the seeds directly on the ground or in the pot or seed tray but remember that papaya trees don’t transplant well and you’ll have a low success rate. Seeds will germinate in 2-3 weeks. Optimum germination temperature is around 70 F (20 C).
Planting Papaya Tree
Once the seedlings germinate sow them directly in a spot as papayas have less success rate when transplanted.
Prepare the ground well before planting. Make a hole in soil that is of the same depth as of rootball of the plant but twice wide. Apply slow release 16-48-0, 18-46-0 or balanced 15-15-15 fertilizer according to the product instruction at the base of the hole, fill it with a thin layer of soil to prevent the plant roots from coming in direct contact with the fertilizer.
The base of each plant should be 1 cm above ground level, to prevent rot at the stem base. After transplanting, a fungicide can be applied to ensure greater protection especially if planting during the rainy season.
How to Grow Papaya Tree in Cold Climate
Papaya is a tropical fruit tree but if you are thinking to plant it in a temperate climate plant it in a large pot and try to overwinter it in a well-protected area, like a greenhouse. Another way is to start the seeds in fall, or in early spring indoors. Once the temperature soars up to plant the seedlings outside. The tree will grow until the frost comes and get killed but there is a possibility that you’ll get some juicy papayas.
Requirements for Growing Papaya TreeTemperature
It is also an important factor that determines if the plant will grow or not. Papaya is one of the easiest fruit trees you can grow the optimum temperature for growing papaya ranges between 68 – 86 F (20 to 30 C).
Low temperatures lead to a slow growth of the plant and higher temperatures cause low production. However, papaya tree can bear cold temperature down to 32 F (0 C) for a short period of time. In extremely high tropical temperatures and in heat waves and droughts, flower buds fall and the plant suspends its growth.
Location
The papaya needs plenty of sun due to its high photosynthetic activity. It is impossible to grow it in the lack of sunlight. One more thing you need to keep in mind when choosing a location for growing papaya trees that they are not strongest and must not be planted in a too windy spot.
Spacing
Papaya trees must be spaced 8-10 feet apart from each other.
Soil
The main characteristics of soil for growing a papaya tree are following:
Loose and moist.With good drainage.High organic matter content.A pH level around 5.5 to 7 (Neutral).Fertile and deep.
The ideal growing medium must be loamy and have adequate content of organic matter with good moisture retention and efficient drainage. Soil depth is also an important factor for root development. The soil that is more than a meter deep is suitable. Compact soil must be avoided, also, clean the rocks or other debris that is limiting the development of roots till the following depth.
Drainage is crucial in papaya cultivation. The proportion of sand, silt and clay determines the texture and soil structure.
Sandy soils have better drainage than clay. But too sandy soils that are low in organic matter have reduced water retention capacity, which must be avoided.
In clay-rich soils, water movement is slow and this can lead to root rot, slow development of plant and inhibit nutrition uptake. In very alkaline soils (above pH level 8.0) Zinc, iron, and other micro-element deficiency can occur.
Excess water causes yellowing of young leaves, premature fall of flowers and contribute to root rot. Low moisture in the soil can lead to slow growth, accelerated aging and premature leaf and fruit drop.
Good soil preparation practices are key to growing papaya, such as deep plowing and mixing organic matter.
Watering
Water is the main contributor of the plant (the plant is composed about 85% of water). In the process of germination, and first few months after planting, papaya needs a lot of water, so at this stage water regularly.
In the dry season, to get the good results in production, watering must be increased again. Keep the soil slightly moist but not wet. As a rule of thumb, water papaya plant deeply when top 1 inch of soil dries out.
Papaya Tree Care
Papaya tree care is easy if you grow it in the warm conditions in full sun.
Mulching
Mulching papaya tree with organic matter helps in retaining moisture, which is essential.
Fertilizer
Papayas are heavy feeders. Apply plenty of manure or compost regularly near the base of your plant.
You can also apply complete fertilizer 15-15-15, 0.1 kg or a similar mixture at intervals of two weeks during the first six months and 0.2 kg thereafter.
Pruning
No pruning is required.
Pests and Diseases
Pests that can attack it are fruit flies, mites, black vine weevil, aphids, leafhoppers, and whitefly. In diseases, it suffers from soil fungi, powdery mildew, fruit rot, papaya ringspot virus, and nematodes.
Harvesting Papayas
Papaya fruit set occurs 10-12 months after planting. The fruit is sensitive to sunburn and it must be separated from the tree carefully using plastic gloves or something similar, pick it lightly with a twist or use a short knife, leaving 0.5 cm stalk.
Harvesting should be done according to the following maturity indices:
1. 0% Ripe: Completely green, but well developed.
2. 10-15% Ripe: Color change, one or two yellow stripes with 10-15% yellow surface shell surrounded by a bright green color.
3. 25% Ripe: 25% of the surface of the shell is yellow surrounded by the clear green color.
4. 75% Ripe: 75% of the surface is yellow.
5. 76-100% Ripe: The surface of the shell have yellow to orange color.
Papaya is a fruit that after being cut continues its maturation without stopping. Papayas that are harvested for selling in the market are harvested green with two or three yellow stripes as fruits that reach 75 to 100% maturity are difficult to transport. Fruits must be harvested in the early hours of the day and must not be exposed to the sun.
USDA Zones— 9 – 11
Difficulty— Easy
Other Names— Banane de Prairie, Caricae Papayae Folium, Carica papaya, Carica peltata, Carica posoposa, Chirbhita, Erandachirbhita, Erand Karkati, Green Papaya, Mamaerie, Melonenbaumblaetter, Melon Tree, Papaw, Pawpaw, Papaya Fruit, Papayas, Papaye, Papaye Verte, Papayer, Papita.

Papaya (Carica papaya L.) is native to the tropics of Mexico and Central America. This fruit for high nutritional value, great taste and medicinal properties.
Papaya is mainly consumed as a fruit, but it is also used for making soft drinks, juices, pickles, jams, and curries. It produces latex that is extracted from the green fruit and stem, which contains an enzyme called papain that helps in digestion of proteins.
Plant Characteristics
Papaya is a herbaceous plant of relatively rapid growth and short life (not profitable to cultivate mature plants for longer than 3 years because the fruit yield gets low). It has a hollow, segmented and erect single stem and no branches. It presents a many large, lobed leaves. The plant height can reach up to several meters.
The fruit has a wide variety of forms, its shape and size vary depending on the variety and type of flower.
Pollination
If you’re growing papaya you must know that papayas come in three sexes: Male, female and hermaphrodite (bisexual). Male papaya trees must be eliminated as they don’t produce fruits. Female papaya trees require male tree for pollination. In orchards and papaya plantations, generally, 1 male tree per 10 female trees is grown. Bisexual papaya trees are self-pollinating and don’t require male trees for pollination. Commercial growers plant them. You will need to plant either female or bisexual papaya tree.
To learn how to identify male or female papaya, tree read this informative discussion on helpful gardener
Our recommendation for you is to buy seeds from quality source so that you know what you’re buying and to get a self-fertile bisexual tree. Most of the hybrid varieties that are coming are either bisexual or female, it is better to buy them. If you’re sowing seeds obtained from the fruits, choose seeds from elongated fruits instead of rounded fruits. Elongated fruits have 66% probability of hermaphrodite (bisexual) seeds and 33% female seeds.
Cross pollination from hand is required for pollination of female papaya trees.
How to Grow Papaya in Pots
Growing papaya in pots is not difficult, considering it is short living small tree. You can grow any papaya variety in pots but it is better to choose a dwarf variety.

Choosing a container
Choose a large 15-20 gallon size container for growing papaya in pots, also, ensure there are enough drainage holes in the bottom before planting. A pot that is around 18-22 inches in diameter and 12-15 inches deep would be sufficient.
Sow the seeds directly in the pot you wish to use for growing papaya tree as papayas don’t transplant well. All the other growing requirements are given below in the article.
Growing Papaya from Seeds
Seeds must be given treatment before sowing for germination. The first method is to simply wash the seeds to remove gelatinous coating before sowing. Another method is to immerse them in a container full of neutral water for the period of 4 days. Change the water twice in a day. After 2 days of soaking, separate the seeds that are floating on the surface from those that have settled down.
Leave the seeds that are settled down for another day. After this time, the seeds that float up again must be removed. This way only the viable papaya seeds are left. On the last day when changing the water, add fungicides in it.
After this process, keep the seeds on cotton cloth for 2 to 3 days, keeping up the seeds wet. Once the white dot in them can be observed they are ready for sowing.
Proceed to sow the seeds directly on the ground or in the pot or seed tray but remember that papaya trees don’t transplant well and you’ll have a low success rate. Seeds will germinate in 2-3 weeks. Optimum germination temperature is around 70 F (20 C).
Planting Papaya Tree
Once the seedlings germinate sow them directly in a spot as papayas have less success rate when transplanted.
Prepare the ground well before planting. Make a hole in soil that is of the same depth as of rootball of the plant but twice wide. Apply slow release 16-48-0, 18-46-0 or balanced 15-15-15 fertilizer according to the product instruction at the base of the hole, fill it with a thin layer of soil to prevent the plant roots from coming in direct contact with the fertilizer.
The base of each plant should be 1 cm above ground level, to prevent rot at the stem base. After transplanting, a fungicide can be applied to ensure greater protection especially if planting during the rainy season.
How to Grow Papaya Tree in Cold Climate
Papaya is a tropical fruit tree but if you are thinking to plant it in a temperate climate plant it in a large pot and try to overwinter it in a well-protected area, like a greenhouse. Another way is to start the seeds in fall, or in early spring indoors. Once the temperature soars up to plant the seedlings outside. The tree will grow until the frost comes and get killed but there is a possibility that you’ll get some juicy papayas.
Requirements for Growing Papaya TreeTemperature
It is also an important factor that determines if the plant will grow or not. Papaya is one of the easiest fruit trees you can grow the optimum temperature for growing papaya ranges between 68 – 86 F (20 to 30 C).
Low temperatures lead to a slow growth of the plant and higher temperatures cause low production. However, papaya tree can bear cold temperature down to 32 F (0 C) for a short period of time. In extremely high tropical temperatures and in heat waves and droughts, flower buds fall and the plant suspends its growth.
Location
The papaya needs plenty of sun due to its high photosynthetic activity. It is impossible to grow it in the lack of sunlight. One more thing you need to keep in mind when choosing a location for growing papaya trees that they are not strongest and must not be planted in a too windy spot.
Spacing
Papaya trees must be spaced 8-10 feet apart from each other.
Soil
The main characteristics of soil for growing a papaya tree are following:
Loose and moist.With good drainage.High organic matter content.A pH level around 5.5 to 7 (Neutral).Fertile and deep.
The ideal growing medium must be loamy and have adequate content of organic matter with good moisture retention and efficient drainage. Soil depth is also an important factor for root development. The soil that is more than a meter deep is suitable. Compact soil must be avoided, also, clean the rocks or other debris that is limiting the development of roots till the following depth.
Drainage is crucial in papaya cultivation. The proportion of sand, silt and clay determines the texture and soil structure.
Sandy soils have better drainage than clay. But too sandy soils that are low in organic matter have reduced water retention capacity, which must be avoided.
In clay-rich soils, water movement is slow and this can lead to root rot, slow development of plant and inhibit nutrition uptake. In very alkaline soils (above pH level 8.0) Zinc, iron, and other micro-element deficiency can occur.
Excess water causes yellowing of young leaves, premature fall of flowers and contribute to root rot. Low moisture in the soil can lead to slow growth, accelerated aging and premature leaf and fruit drop.
Good soil preparation practices are key to growing papaya, such as deep plowing and mixing organic matter.
Watering
Water is the main contributor of the plant (the plant is composed about 85% of water). In the process of germination, and first few months after planting, papaya needs a lot of water, so at this stage water regularly.
In the dry season, to get the good results in production, watering must be increased again. Keep the soil slightly moist but not wet. As a rule of thumb, water papaya plant deeply when top 1 inch of soil dries out.
Papaya Tree Care
Papaya tree care is easy if you grow it in the warm conditions in full sun.
Mulching
Mulching papaya tree with organic matter helps in retaining moisture, which is essential.
Fertilizer
Papayas are heavy feeders. Apply plenty of manure or compost regularly near the base of your plant.
You can also apply complete fertilizer 15-15-15, 0.1 kg or a similar mixture at intervals of two weeks during the first six months and 0.2 kg thereafter.
Pruning
No pruning is required.
Pests and Diseases
Pests that can attack it are fruit flies, mites, black vine weevil, aphids, leafhoppers, and whitefly. In diseases, it suffers from soil fungi, powdery mildew, fruit rot, papaya ringspot virus, and nematodes.
Harvesting Papayas
Papaya fruit set occurs 10-12 months after planting. The fruit is sensitive to sunburn and it must be separated from the tree carefully using plastic gloves or something similar, pick it lightly with a twist or use a short knife, leaving 0.5 cm stalk.
Harvesting should be done according to the following maturity indices:
1. 0% Ripe: Completely green, but well developed.
2. 10-15% Ripe: Color change, one or two yellow stripes with 10-15% yellow surface shell surrounded by a bright green color.
3. 25% Ripe: 25% of the surface of the shell is yellow surrounded by the clear green color.
4. 75% Ripe: 75% of the surface is yellow.
5. 76-100% Ripe: The surface of the shell have yellow to orange color.
Papaya is a fruit that after being cut continues its maturation without stopping. Papayas that are harvested for selling in the market are harvested green with two or three yellow stripes as fruits that reach 75 to 100% maturity are difficult to transport. Fruits must be harvested in the early hours of the day and must not be exposed to the sun.
3
0
文章
lenny
2017年05月23日

Container vegetable gardening allows you to cultivate edibles in smallest of spaces and in this article you’ll find out easy container vegetables which you can grow on your balcony or rooftop garden.
Easy Container Vegetables
Beans

Most of the beans are climbers and really easy to grow. You can grow them on your balcony or rooftop garden on a trellis near a wall and within weeks, you will get a green wall of a climber running up through soft tendrils over the trellis. For growing beans you will need a spot that receives the sun in abundance, a pot that is minimum 12 inches deep and a trellis like structure for support. Since beans fix the nitrogen most of the vegetables that require more nitrogen are good to grow with them. If you’re growing beans in a very large pot you can grow summer savory, kale, and celery in the base.
Tomatoes
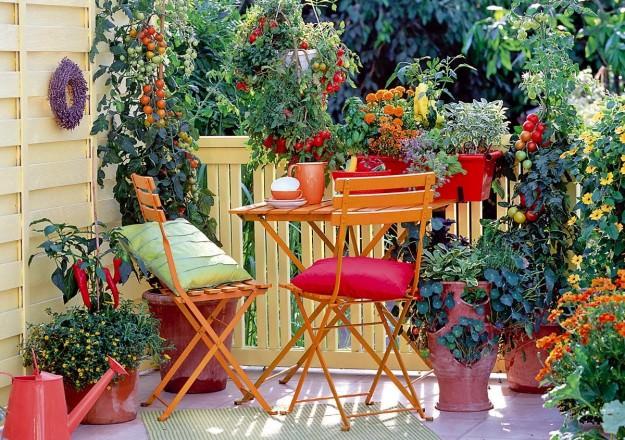
Without a doubt, tomatoes are easiest to grow. If you receive ample sun (at least 5-6 hours) you can grow tomatoes. For this, choose a large pot that is 12 inches deep. On a limited space, growing dwarf varieties of determinate type are best. You should also try cherry tomatoes for higher yield. Read our article on growing tomatoes on a balcony.
Lettuce

Growing lettuce in pots is easy. It grows up quickly and you will have the opportunity to harvest repeatedly. Lettuce is a cool season crop and you have to decide what is the right time for its growth according to your climate, usually, seeds are started in spring. But if you live in warm climate, grow lettuce in winter.
For growing lettuce, choose a wide planter rather than deep (6″ deep is enough). Leave space of 4-7 inches between each plant. Remember, leaf lettuces can be grown more closely than head lettuces. Use well draining soil and do shallow and frequent watering to keep the soil slightly moist.
Cucumber

Cucumbers are one of the easy container vegetables though it requires regular watering, full sun, warm temperature and fertilizer. If you have some space, instead of growing dwarf and bushier varieties grow tall, climbing varieties for higher yield. You can grow these varieties on a trellis in a large container in barely 1-2 sqft. of space. To know more about growing cucumbers vertically read our post.
Peppers and Chilies

After tomatoes, peppers and chilies are easiest to grow in containers and they are most productive too. If you keep the pot in a sunny spot and provide right soil and fertilizer at the time the plant will fruit prolifically. The Large and deep pot that is minimum 12 inches deep is optimum. Pepper plants are susceptible to pests. You will have to keep an eye on aphids.
Carrots

Sow the seeds of carrot varieties that are short instead of standard as they require more room to grow their roots. Choose containers that are deep enough (12″). Carrots are easy to grow in pots if you choose a right variety. Keep the plant in partial sun and water it regularly to keep the soil slightly moist, avoid overwatering. Also, carrots are susceptible to mildew so don’t wet the foliage.
Radishes

Radishes are one of the quickest growing vegetables and suitable for container vegetable gardening as you can also grow them in small pots. A planter that is 6 inches deep is enough but if you are growing larger varieties use 10 inches deep pot. You can plant radishes closely, allow 3 inches of space between each plant in a wide container. Radishes are ready for the harvest in 24-60 days, depending on the variety.
Peas

Peas require moist soil and cool to moderate weather to thrive. All varieties are suitable for container gardening but dwarf bushier varieties are better. A pot that is 6-12 inches deep is enough. You can grow 4-6 plants in a 12 inches wide and deep container, it depends more on the variety you are growing. Keep the potted plants in the partial sun if reach to full sunlight is not possible.
Eggplant

Most of the vegetables grow fairly easy in standard size 5-gallon pot. For growing eggplant, choose a one foot deep and wide pot to provide sufficient space. Eggplant is very productive
vegetable and fruits heavily if you provide it at least 6 hours of direct sun daily. Also, it is a heavy feeder like tomatoes, thus requires regular fertilizing. You have to provide support to plant by staking or caging. Simply poke a stick in the pot to help the plant when it starts to look lean.
Beets
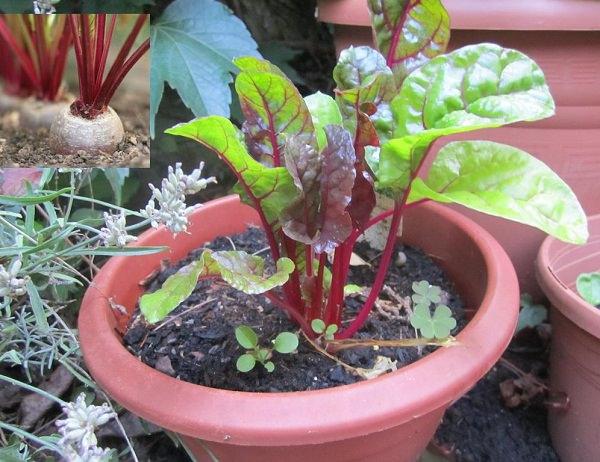
Growing beets in containers on a balcony or terrace is easy. It is a fast growing crop and you don’t need a large container for planting it. A medium sized container that is 6-8 inches deep is sufficient. The soil you use must be permeable and rich in compost.
A Tip
Do mulching, it also helps in container vegetable gardening. Mulch the surface of your potted vegetables with organic matter. It will reduce the process of evaporation and after the decomposition, the organic mulch will provide nutrition to plants.
Easy Container Vegetables
Beans

Most of the beans are climbers and really easy to grow. You can grow them on your balcony or rooftop garden on a trellis near a wall and within weeks, you will get a green wall of a climber running up through soft tendrils over the trellis. For growing beans you will need a spot that receives the sun in abundance, a pot that is minimum 12 inches deep and a trellis like structure for support. Since beans fix the nitrogen most of the vegetables that require more nitrogen are good to grow with them. If you’re growing beans in a very large pot you can grow summer savory, kale, and celery in the base.
Tomatoes

Without a doubt, tomatoes are easiest to grow. If you receive ample sun (at least 5-6 hours) you can grow tomatoes. For this, choose a large pot that is 12 inches deep. On a limited space, growing dwarf varieties of determinate type are best. You should also try cherry tomatoes for higher yield. Read our article on growing tomatoes on a balcony.
Lettuce

Growing lettuce in pots is easy. It grows up quickly and you will have the opportunity to harvest repeatedly. Lettuce is a cool season crop and you have to decide what is the right time for its growth according to your climate, usually, seeds are started in spring. But if you live in warm climate, grow lettuce in winter.
For growing lettuce, choose a wide planter rather than deep (6″ deep is enough). Leave space of 4-7 inches between each plant. Remember, leaf lettuces can be grown more closely than head lettuces. Use well draining soil and do shallow and frequent watering to keep the soil slightly moist.
Cucumber

Cucumbers are one of the easy container vegetables though it requires regular watering, full sun, warm temperature and fertilizer. If you have some space, instead of growing dwarf and bushier varieties grow tall, climbing varieties for higher yield. You can grow these varieties on a trellis in a large container in barely 1-2 sqft. of space. To know more about growing cucumbers vertically read our post.
Peppers and Chilies

After tomatoes, peppers and chilies are easiest to grow in containers and they are most productive too. If you keep the pot in a sunny spot and provide right soil and fertilizer at the time the plant will fruit prolifically. The Large and deep pot that is minimum 12 inches deep is optimum. Pepper plants are susceptible to pests. You will have to keep an eye on aphids.
Carrots

Sow the seeds of carrot varieties that are short instead of standard as they require more room to grow their roots. Choose containers that are deep enough (12″). Carrots are easy to grow in pots if you choose a right variety. Keep the plant in partial sun and water it regularly to keep the soil slightly moist, avoid overwatering. Also, carrots are susceptible to mildew so don’t wet the foliage.
Radishes

Radishes are one of the quickest growing vegetables and suitable for container vegetable gardening as you can also grow them in small pots. A planter that is 6 inches deep is enough but if you are growing larger varieties use 10 inches deep pot. You can plant radishes closely, allow 3 inches of space between each plant in a wide container. Radishes are ready for the harvest in 24-60 days, depending on the variety.
Peas

Peas require moist soil and cool to moderate weather to thrive. All varieties are suitable for container gardening but dwarf bushier varieties are better. A pot that is 6-12 inches deep is enough. You can grow 4-6 plants in a 12 inches wide and deep container, it depends more on the variety you are growing. Keep the potted plants in the partial sun if reach to full sunlight is not possible.
Eggplant

Most of the vegetables grow fairly easy in standard size 5-gallon pot. For growing eggplant, choose a one foot deep and wide pot to provide sufficient space. Eggplant is very productive
vegetable and fruits heavily if you provide it at least 6 hours of direct sun daily. Also, it is a heavy feeder like tomatoes, thus requires regular fertilizing. You have to provide support to plant by staking or caging. Simply poke a stick in the pot to help the plant when it starts to look lean.
Beets

Growing beets in containers on a balcony or terrace is easy. It is a fast growing crop and you don’t need a large container for planting it. A medium sized container that is 6-8 inches deep is sufficient. The soil you use must be permeable and rich in compost.
A Tip
Do mulching, it also helps in container vegetable gardening. Mulch the surface of your potted vegetables with organic matter. It will reduce the process of evaporation and after the decomposition, the organic mulch will provide nutrition to plants.
1
0
文章
粉团
2017年05月23日

This homemade pesticide recipe is CHEMICAL FREE, all natural and easy to prepare. 5 effective ingredients together and your plants will be free of pests.
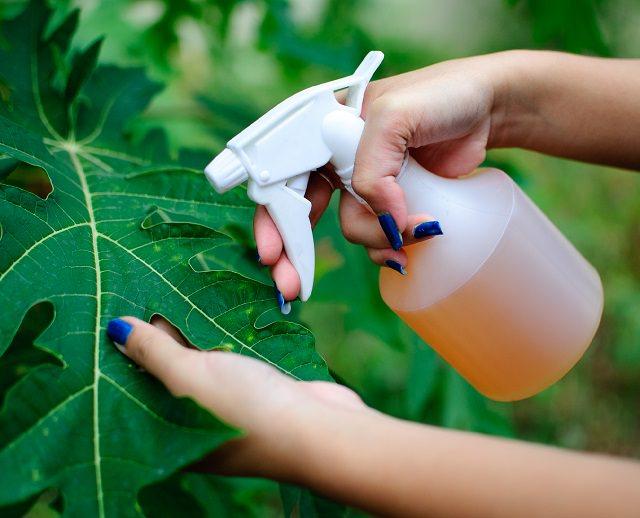
We all know how harmful chemical pesticides are, for the ecosystem and our environment. And after knowing all that if you’ve thought to go organic and looking for some natural ways to get rid of garden pests, you’re on right track.
Commercial pesticides are one of the most effective ways to tackle the problem of pest infestation but if you want to use homemade natural pesticides like this one, use it regularly for better results.
You can apply this amazing pesticide using the sprayer on your vegetable garden and herbs suffering from common pests and really it does work. Once in a week is sufficient, however, if the invasion of insects is way too much to handle you can apply more frequently. Once the plants start to recover, use it in every 2 weeks or so to get rid of pesky pests.
Things You’ll Need2 Whole Garlic Heads (Separate and peel the cloves)2 Tablespoon Turmeric powder2 Tablespoon Cayenne pepper (Or use any other hot pepper variety)2 Small Squirts of Dishwashing Liquid3 Cups of Mint Leaves (Sprigs included)12 Cups of WaterPreparationStep 1
Add garlic and mint to crush it in a food processor for a few seconds. Once done, add the water (in the quantity mentioned above) and pepper to the mixture.
Step 2
Transfer the mixture into a pot or boiler to boil this solution for a few minutes.
Step 3
Once boiled, remove from heat and let this sit overnight. That’s all, your natural pesticide spray is ready.
Step 4
Now strain the solution and add the liquid dish soap into it. Keep the solution into a bottle or sprayer.
Also Read: Plants That Attract Ladybugs In The Garden
How to Use it
Shake well before using it every time. Spray the solution all over the leaves of affected plants, don’t forget the undersides. The best time to use it when the day is cloudy, preferably in the evening or in the early morning.
2
3
文章
粉团
2017年05月23日

Making your own compost is the best way to enrich your soil organically. It’s simple and easy, check out!IntroductionComposting is not difficult and is probably the best way to provide nutrients to your plants. You can start composting even in a small compost bin if you’re a container gardener. A great source of organic fertilizer for your edibles.
Preparing garden compost is also simple as it only needs a few ingredients. These include nitrogen, carbon, air, and water. To get these ingredients, collect kitchen and yard waste, but remember that full decomposition is a lengthy period that may take months. Needless to say, it is a process that requires a number of steps. Eventually, the overall product is a proven and useful tool for farming. Now let us look at the steps!
Look at our 4 Step Composting Guide if you’re new to Composting.Steps to Preparing Suitable Garden CompostPurchase or get a compost binCome up with a bottom layerFill your compost binInspect the compost pile in three day timeMix the contents of the garden compostCheck if the compost is ready1. Purchase Or Get A Compost Bin
Do not be afraid if you’re unable to get a compost bin. We are here to help you! You only need to buy a pre-made container from any agricultural store or supplier. Then, go on and build a box of your own by using wood. Ensure that you put the box on moisture free, bare soil.
2. Establish A Bottom Layer

Make sure the bottom layer has sufficient air flow. At the bottom of the compost bin, create small holes using a gardening fork. This is to assist in drainage and proper aeration. The next procedure is to place twigs, feeble sticks and other straw-like substances at the bottom. They should be 4-6 inches, translating to about 10 centimeters deep.
3. Fill Your Compost Bin

Add nitrogenous compounds, these are mostly greens. They include plants such as cut grass, raw peelings from vegetables, coffee grounds, diluted urine, manure, and weeds. Proceed also in adding carbon compounds, which are the mostly ‘the browns’. They include cardboards, dead leaves, cereal boxes, hedge clippings, and brown pruning.
Also Read: 13 Things You Should Not Put in a Compost Pile
In this stage, you will also be required to mix the fast-rotting green materials with the slow-rotting brown materials. Let us take the example of freshly cut grass. This may be combined with feeble sticks or other wood compounds. Why is this so? The main reason behind this is to prevent odors.
To hasten the process of decomposition, consider adding bacteria’ such as pseudomonas. You may also use a variety of macro and micro nutrients as alternatives. Besides, chopping off large materials also increases the process of decomposition. For example, branches should be cut to small pieces, cardboards shredded and eggshells crushed. Last but not least, continue adding water as you fill in your compost heap.
Also Read: Ways to Use Worm Casting
4. Inspect The Compost Heap After Three Days

You can also check your compost temperature with a compost thermometer. Here is more on it.
In three days’ time, place your hand over the top of the heap to feel if it’s hot. If so, this shows the start to the decomposition process. Visit the compost heap after one week, and repeat the same procedure. If it has a cool feel, start mixing it. However, if it still feels hot, wait an extra week.
5. Mix The Contents Of The Garden Compost

Use a garden fork or a shovel to thoroughly and effectively mix up the matter inside the container. Stir and move the contents from top to bottom in a continuous manner. You may be wondering why this step involves mixing up the contents. This helps in the rate of decomposition by adding oxygen which is the final ingredient. Lastly, if the contents appear dry, it is advisable to add water before you start mixing. Repeat this process for the next four to six weeks.
Also Read: 11 Best Composting Tips You Must Read Now
6. Check If The Compost Is Ready
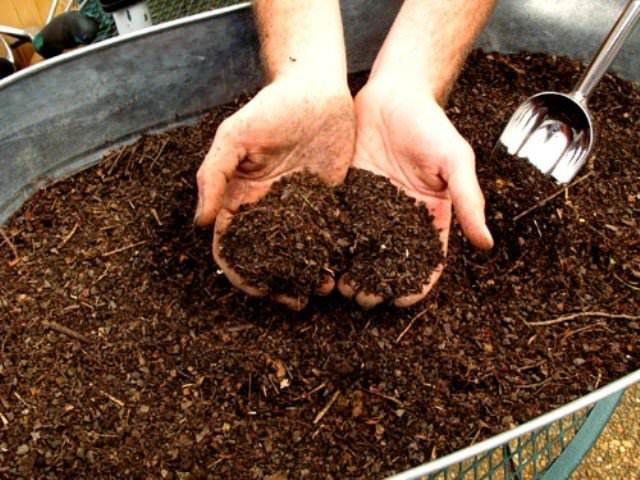
To determine if your compost heap is ready, look for a dark brown color, which often has the smell of earth.
Conclusion
Garden compost is an effective and cheap way of providing organic fertilizer to your vegetables and other garden plants. The article shows you some easy steps of preparing a simple compost heap and it is our hope that it’s well to your liking. If so, share this information with other interested parties and let’s keep the conversation going!
What are those challenges that you’ve faced in trying to make garden compost? Where do you go wrong?
Preparing garden compost is also simple as it only needs a few ingredients. These include nitrogen, carbon, air, and water. To get these ingredients, collect kitchen and yard waste, but remember that full decomposition is a lengthy period that may take months. Needless to say, it is a process that requires a number of steps. Eventually, the overall product is a proven and useful tool for farming. Now let us look at the steps!
Look at our 4 Step Composting Guide if you’re new to Composting.Steps to Preparing Suitable Garden CompostPurchase or get a compost binCome up with a bottom layerFill your compost binInspect the compost pile in three day timeMix the contents of the garden compostCheck if the compost is ready1. Purchase Or Get A Compost Bin

Do not be afraid if you’re unable to get a compost bin. We are here to help you! You only need to buy a pre-made container from any agricultural store or supplier. Then, go on and build a box of your own by using wood. Ensure that you put the box on moisture free, bare soil.
2. Establish A Bottom Layer

Make sure the bottom layer has sufficient air flow. At the bottom of the compost bin, create small holes using a gardening fork. This is to assist in drainage and proper aeration. The next procedure is to place twigs, feeble sticks and other straw-like substances at the bottom. They should be 4-6 inches, translating to about 10 centimeters deep.
3. Fill Your Compost Bin

Add nitrogenous compounds, these are mostly greens. They include plants such as cut grass, raw peelings from vegetables, coffee grounds, diluted urine, manure, and weeds. Proceed also in adding carbon compounds, which are the mostly ‘the browns’. They include cardboards, dead leaves, cereal boxes, hedge clippings, and brown pruning.
Also Read: 13 Things You Should Not Put in a Compost Pile
In this stage, you will also be required to mix the fast-rotting green materials with the slow-rotting brown materials. Let us take the example of freshly cut grass. This may be combined with feeble sticks or other wood compounds. Why is this so? The main reason behind this is to prevent odors.
To hasten the process of decomposition, consider adding bacteria’ such as pseudomonas. You may also use a variety of macro and micro nutrients as alternatives. Besides, chopping off large materials also increases the process of decomposition. For example, branches should be cut to small pieces, cardboards shredded and eggshells crushed. Last but not least, continue adding water as you fill in your compost heap.
Also Read: Ways to Use Worm Casting
4. Inspect The Compost Heap After Three Days

You can also check your compost temperature with a compost thermometer. Here is more on it.
In three days’ time, place your hand over the top of the heap to feel if it’s hot. If so, this shows the start to the decomposition process. Visit the compost heap after one week, and repeat the same procedure. If it has a cool feel, start mixing it. However, if it still feels hot, wait an extra week.
5. Mix The Contents Of The Garden Compost

Use a garden fork or a shovel to thoroughly and effectively mix up the matter inside the container. Stir and move the contents from top to bottom in a continuous manner. You may be wondering why this step involves mixing up the contents. This helps in the rate of decomposition by adding oxygen which is the final ingredient. Lastly, if the contents appear dry, it is advisable to add water before you start mixing. Repeat this process for the next four to six weeks.
Also Read: 11 Best Composting Tips You Must Read Now
6. Check If The Compost Is Ready

To determine if your compost heap is ready, look for a dark brown color, which often has the smell of earth.
Conclusion
Garden compost is an effective and cheap way of providing organic fertilizer to your vegetables and other garden plants. The article shows you some easy steps of preparing a simple compost heap and it is our hope that it’s well to your liking. If so, share this information with other interested parties and let’s keep the conversation going!
What are those challenges that you’ve faced in trying to make garden compost? Where do you go wrong?
0
0
文章
Hande Salcan
2017年05月23日


It can be easy and inexpensive to start garden seeds indoors for spring planting. Here at The Garden Glove, we use several methods.
Method #1 – Purchase an inexpensive dome style seed starter from your local garden center or discount store. These usually sell for less than $10, and contain everything except the seeds to get you growing, including a humidity dome to keep in heat, and soil or soil less cubes. The only downside to these is that the growing blocks are usually pretty small, so if you are going to plant fast growing annuals such as sunflowers, morning glories or squash, you might want to wait to just two weeks before last frost. Otherwise, you will have to transplant your seedlings into larger containers as they outgrow the seed dome.
This method works very well for growing perennials, since they are slower growing than annuals as a rule.
Make sure the growing medium is moist, place the seeds at the depth recommended by the packet, and place the dome on. You will see moisture condense inside the dome. This is great for starting out, as the heat and moisture is trapped in. However, once seedlings start to appear, you MUST remove the dome to prevent “damping off” a fungal disease that will kill the seedlings. Add water as necessary to keep the soil moist, but not wet.

Method #2 – The second method is the most economical one. This is where we plant seed into reusable or recycled containers. These containers must have drainage, and be able to be moved easily. Tupperware, egg cartons or pots made from recycled newspaper are several popular ideas. Placed on a tray, such as an old cookie sheet- they make great planting flats, if not too terribly attractive. It helps when using this method to enclose the entire tray in a clear plastic bag until seedlings appear. This does the same job as the $10 dome, by keeping in heat and moisture.
Hee is a tutorial from Hobby Room Diaries on making newspaper pots!

Method #3 – This is my preferred method, and one I just started using two years ago. I picked up a portable greenhouse. It has several metal shelves for seedling flats covered by a poly “tent” to keep in heat and moisture. This makes it very easy for me to move the entire set up outdoors for daylight, and the tent keeps the heat in, even when it hovers near freezing outside. I can grow several hundred seedlings in this setup. I caution you against leaving it outdoors during windy conditions, however. Also keep in mind during sunny days it can heat up inside the greenhouse quite quickly, so make sure you tie up one side and occasionally monitor the temps in your greenhouse. When the weather is warm enough, remove the poly tenting entirely.

Once the seedlings are up, they must have very bright, though not direct light. Using a windowsill during bad weather is acceptable, but to grow healthy and strong, seedlings should be placed in either artificial light, or on a protected porch for much of the day. Make sure you bring them in at night, and don’t leave them out on frosty weather.
You can create an artificial light system easily with a cheap shop light from the home improvement store, and a both a warm and cool 40 watt fluorescent tube. It does not have to be one of the more expensive plant growing tubes. Hang the lights from chains off a scrap 2×4 stand. Keep the lights very close to the seedlings, and leave on for at least 12 hours a day.
Starting garden seeds indoors will save you money and allow you to grow plant varieties in your garden that are special and unusual. It’s easy, so try starting your seeds indoors today!
2
0
文章
Hande Salcan
2017年05月23日

With cold weather approaching, it might be tempting to just push all the garden tools to the back of the shed and forget about them until nest season. However, taking a little time and effort (this is pretty easy guys) now will not only make your tools last longer, it will also make them more enjoyable to use! Here’s how to winterize your garden tools.
Shovels, rakes and spades
Make sure you clean all the dirt off the blade and the handle. Use a small whetstone to sharpen the blade of the shovels, if you desire, or have the hardware store do it for you for a small fee. Trust me, shovels and spades are not meant to be dull… you will thank us when you go to plant your first tree in the spring and you can slice right into that chilly ground!
Run some fine sandpaper over any wooden handles to remove splinters. Rub with a soft rag dipped in a bit of linseed oil.
Rub some oil over the metal parts of the tools, or store in a bucket full of sand and a bit of oil to prevent rust. Store in a dry shed or garage.

Hand Tools
Your hand trowels should be treated the same as your full size tools. Pruners should be cleaned and oiled.

Lawn Mowers
You should have your lawn mower serviced before putting it away each fall. If you absolutely know that by the time you get it serviced, the first crocuses will be popping up, then take some DIY action. Drain the gas tank, or run it all the way empty. Clean the blades. Residue will create rust. Rub linseed oil over the blades, then store. Grass catchers can be hung on the wall of a shed or garage. It’s important they are kept away from moisture to prevent rotting.

Other Power Garden Tools
For your grass trimmers or edgers, make sure you clean them well with a good brush. Drain the gas, and remove the spark plugs.
Easy maintenance for all your tools that will have you right out in the garden with he first Robin of spring, instead of in the shop, or running to the home improvement store to replace broken tools. And wouldn’t you rather be gardening?
0
1
文章
Hande Salcan
2017年05月23日


Making a DIY terrarium is a stylish and trendy garden project that is easy. Here is a simple tutorial on making and maintaining a terrarium garden in your home!
Supplies:
Glass container with open top
Activated charcoal chips (in bags in the indoor potting mix department)
Potting Soil
Plants
Sheet moss or decorative stones
Planting tool (I like a long handled spoon)
Choosing Plants to Fit the Container (Or vice-versa!)
First, choose your plants for the terrarium. Most plants can adapt to terrarium living, but keep in mind the plants water needs. Plants that need less moisture such as cacti, sedums and succulents need a very open container, so that the moisture has a chance to escape. Tropical houseplants, or my fav, a variety of mosses love moisture, so the container can have more narrow opening, as they will thrive on the humidity. Choose small specimens that will fit easily in your container, and don’t overcrowd. You want to leave a little space between plants.

Start your Terrarium
Start building your terrarium by adding a 1-2 inch layer of charcoal chips on the bottom. Now add your potting soil on top of the chips, packing gently as you go. Fill the container one third full. Pack down gently with your planting tool.
Add Plants
Now add your plants on top of the soil. Use your planting tool to add soil around the plant roots and gently pack down until the roots are covered.
Add Decorative Stones or Moss
Add small pieces of sheet moss between the plants, and/or decorative gravel or stones. Water until you see moisture at the bottom of the container.

Care of Your Terrarium
You can water your terrarium with a container with a spout, or you can use a mister for moisture loving plants. Be sure to water only as often as needed. If you use plants that prefer dried conditions, make sure the soil dries out between watering. Use scissors to prune plants as necessary. Place in a bright spot, but never where the terrarium gets direct sun.

That’s it! Easy, inexpensive and you can personalize your DIY terrarium to your own tastes. Try making several different kinds of terrariums. Here at TGG we are planning an all succulent terrarium, one with several varieties of moss, and a miniature garden. Watch for pics as the projects finish! Have you seen some cool terrariums at shops near you? Share any unique ideas with us!
2
0


