文章
Dummer. ゛☀
2017年07月01日

Yanlaihong nickname
Yanlaihong aliases are leaf comb, old Johnson, small blue, hydrangea, Amaranthus tricolor, old young at heart.
The growth habit of yanlaihong
Amaranth is a relatively easy breeding of plants, which can resistant to drought, not too cold, love moist and light environment, the requirements of environmental ventilation. It has little demand for soil, and enjoys loose, fertile and well drained soil.
Yanlaihong breeding is generally planting and breeding, it can broadcast sowing, usually in April - June. Such seedlings grow to about 10cm long time, can the basin on the colonization.
In the growth period of yanlaihong, should pay attention to ventilation, do not use too much water, to avoid the phenomenon of excessive growth.
The ornamental value of yanlaihong
Yanlaihong ornamental is quite unique, it is a kind of foliage plants, can be used as flower flower cultivation for breeding. Or grow on lawns, along the road, and other plants to form a certain pattern.
Morphological character
Herbs annual. Stems erect, 15-45 cm tall, simple or branched, glandular hairs. Lower leaves opposite, upper leaves alternate, broadly ovate, oblong and lanceolate, 2-7.5 cm long, apex acute, base attenuate or half clasping, entire, hairy on leaf surface, without petiole.
Paniculate cymes terminal, pubescent, pedicel very short; calyx tubular, calyx lobes lanceolate subulate, 2-3 mm long, with pilose outside, the results carry out or bent; corolla salverform, 1-2 cm in diameter, pink, red, purple, white, yellow and other colors, rounded lobes shaped, slightly shorter than corolla tube; stamens and style is much shorter than corolla. Capsule ellipsoid, ca. 5 mm, with persistent calyx below. Seeds oblong, ca. 2 mm, brown. [1]
Annual plant with 60-100cm tall stems, erect stems, stout, green or red, less branched, simple leaves alternate, ovate or rhombic ovate, long stalked. Early autumn when the upper leaf color, common varieties into red, yellow, green and white, fine varieties showed bright yellow Huoxian red, bright, very bright red top leaves, the ornamental period of 6 to October, which is the best ornamental period of 8-10 months. The flowers are small, unisexual or polygamous, clustered in leaf axils or inflorescence terminal spikes, small and not obvious, unisexual or bisexual flowers monoecious. Berry ovoid, mature September October; seed is tiny, shiny black.


0
0
文章
Dummer. ゛☀
2017年06月30日

Brazil iris
Brazil irises are also called horse, butterfly, iris, jade and butterfly.
The growth habit of iris Brazil
Brazil iris is a relatively easy to plant and has a strong adaptability to the environment. General in the breeding time, Brazil iris on the demand of the light is not high, but in order to make its growth is good, still need to keep the sun or semi shade.
Watering is usually to keep the soil moist, but in the summer, pay attention to the lack of water.
Morphological editor
Brazil iris plant height of about 40 ~ 50 cm, leaf extract Congji of roots, fan-shaped arrangement. Leaves broadly 2 cm, leathery, dark green; flowering to spring to summer
Neomarica gracilis
Neomarica gracilis
Season, but in the flattened leaflike stems, ribs obvious from the flower stalk at sheathlike bracts inside out, flowers have 6 petals, white bracts 3 petals valgus, basally with reddish brown patches, the other 3 petals erect involute, purple blue and white lines. Flowers are usually open to 3 in the afternoon to morning, 4 a.m. involution withered, but the flowers bloom after intrathecal, grow seedlings, seedlings growing finally fell to the soil surface, the root of seedling, seedling and flowering ability have the following year. The mode of reproduction of Brazil iris is very strange, like Chlorophytum after flowering, flowers will grow seedlings from the sheath.


0
0
文章
Dummer. ゛☀
2017年06月30日

Another name for snow lotus
The snow lotus leaf also called white chrysanthemum, finely divided silver leaf chrysanthemum, white snow, Miaoju rebaudian.
Growth habit of snow lotus
Snow lotus is a relatively non heat resistant plant, which is easy to die under high temperature, coupled with high humidity. The snow lotus prefers cool and humid climate, and the suitable growth temperature is between 20 and 25 degrees centigrade, and requires sufficient illumination. Choosing soil is generally a choice of loose, fertile soil, sandy soil, or humus rich soil.
Winter management of snow lotus
Winter, we should pay attention to the cultivation of snow lotus leaves, attention is to pay attention to heat preservation. Move the potted plants indoors or in a greenhouse, or cover them with warmth. And, in winter, snow lotus should also be careful to keep enough light.
chemical composition
Aboveground plant alkaloid jacobine (24 - 6), Senecio feering (24 - 9), othosenine (otosenine), retrorsine (24 - 7), the seed containing senecionine (24 - 8).


0
0
成长记
sarajordan2993
2017年06月26日

So many new tomatos . Just waiting for them to turn red .
#Tomato #gardening #easy #vegetables #bigred
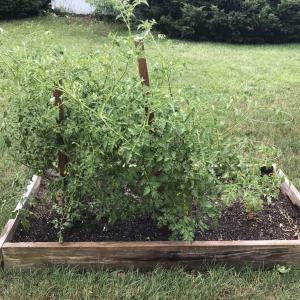
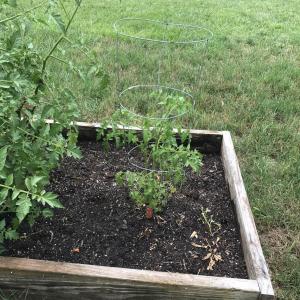
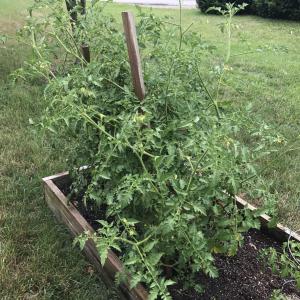


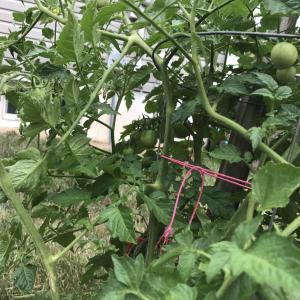
#Tomato #gardening #easy #vegetables #bigred


1
0
文章
Gina
2017年05月31日

Fall is one of the best times to up your curb appeal and create a welcoming yard and garden for all your family and friends. Updating your planters and containers for fall is easy, can be done in an afternoon, and can last well into the holiday season. Fall creates a whole new gardening personality… one that is more laid back and sleepy, but also electrified with color and texture. It’s almost as if Mother Nature wants one last dip in the pool before the summer sun sets for the cold winter. And she brings the margarita mix. Gotta love that.

3 Steps to Easy Fall Containers
Step One: Add foliage. When your existing containers get tired, nothing perks them up like a fresh foliage plant. Adding a foliage plant to help the eye “rest” is key in this season where everything can look busy. Foliage will also carry farther into the colder weather, extending your containers’ season. Our favs? Ornamental Kale is always a winner, but so are various types of ivy, lamium, and dusty miller. If you grow lambs ear (or any other foliage perennial for that matter) in the garden, now is a great time to divide it and plant some divisions in your pots. Hardy herbs can also be a great idea at this time of year. You may have some plants from the earlier season that can stay in place and contribute here too… don’t be too quick to boot out a plant just because it isn’t flowering.
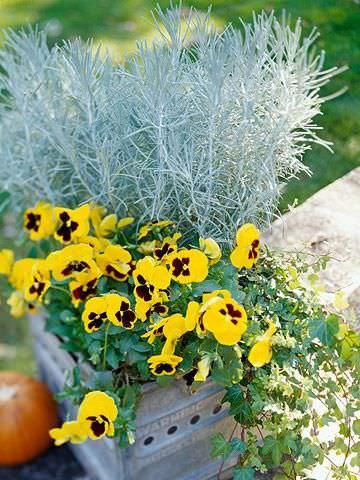
Step Two: Add filler flowers. This is where you add the sparkle! Pop in some festive fall annuals here, mums, pansies, asters, zinnias… You don’t need a bunch here, just choose one or two you love! And don’t skimp. Your plants won’t have much growing time to fill in, so tuck them pretty close together to give them a designer look. This time of year, you can either choose to stay with one or two colors for a calmer color scheme, or go all out and make it a fall fiesta.
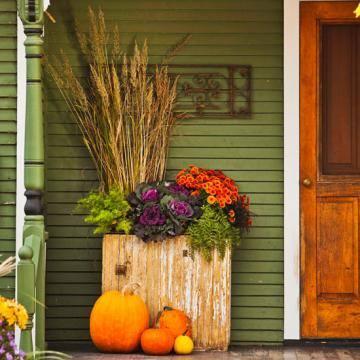
Step Three: Add texture. Ornamental grasses are a great bargain this time of year, and are usually on clearance. Pick up a few container size varieties to add texture, height and structure to your fall container garden. Make sure you plant the taller grasses in the back of the container.
Tips:
You will need to clean out the old summer annuals from your old containers. Pull out a few new containers if the budget allows. This is a great time of year for re purposed containers as well… a planted wheelbarrow or old tins buckets just hints at the hard work that went into the garden harvest!

When cleaning out the the old plants, don’t be shy about getting those packed in roots out of there. Use a sharp knife if necessary. Add additional fresh soil when you place the new plants into the containers, and pack lightly. Water.
What’s your opinion? Can’t wait to decorate the yard for fall, and usher in those holiday festivities with style? Or do you think its a waste of time… those flowers are just going to die anyway? (We’re hoping you pick the first one!)

3 Steps to Easy Fall Containers
Step One: Add foliage. When your existing containers get tired, nothing perks them up like a fresh foliage plant. Adding a foliage plant to help the eye “rest” is key in this season where everything can look busy. Foliage will also carry farther into the colder weather, extending your containers’ season. Our favs? Ornamental Kale is always a winner, but so are various types of ivy, lamium, and dusty miller. If you grow lambs ear (or any other foliage perennial for that matter) in the garden, now is a great time to divide it and plant some divisions in your pots. Hardy herbs can also be a great idea at this time of year. You may have some plants from the earlier season that can stay in place and contribute here too… don’t be too quick to boot out a plant just because it isn’t flowering.

Step Two: Add filler flowers. This is where you add the sparkle! Pop in some festive fall annuals here, mums, pansies, asters, zinnias… You don’t need a bunch here, just choose one or two you love! And don’t skimp. Your plants won’t have much growing time to fill in, so tuck them pretty close together to give them a designer look. This time of year, you can either choose to stay with one or two colors for a calmer color scheme, or go all out and make it a fall fiesta.
Step Three: Add texture. Ornamental grasses are a great bargain this time of year, and are usually on clearance. Pick up a few container size varieties to add texture, height and structure to your fall container garden. Make sure you plant the taller grasses in the back of the container.

Tips:
You will need to clean out the old summer annuals from your old containers. Pull out a few new containers if the budget allows. This is a great time of year for re purposed containers as well… a planted wheelbarrow or old tins buckets just hints at the hard work that went into the garden harvest!

When cleaning out the the old plants, don’t be shy about getting those packed in roots out of there. Use a sharp knife if necessary. Add additional fresh soil when you place the new plants into the containers, and pack lightly. Water.
What’s your opinion? Can’t wait to decorate the yard for fall, and usher in those holiday festivities with style? Or do you think its a waste of time… those flowers are just going to die anyway? (We’re hoping you pick the first one!)
2
1
T.c. Ünal Zengin:?
文章
Gina
2017年05月27日

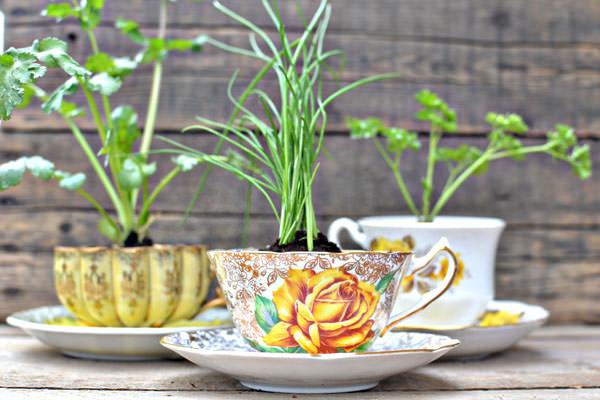
I love herbs, and growing them indoors is easy. Herbs add a texture, feel and scent to a room or a garden that is unlike any other plant. And, there is nothing like cooking with fresh herbs! But if you are like me, you like to do most things just a little bit different, so we found these DIY indoor herb garden projects and ideas that are just a cut above the usual terra cotta pots. (Not that there is anything wrong with that!) And in case you need a little guidance as well, some advice for which herbs grow well and how to maintain your herb garden indoors. Our featured photo above, is by Intimate Weddings. They have a step by step on creating this teacup herb garden.
Indoor Herb Garden Basics
Herbs generally require full sun, so you need to choose the placement of your herb garden well. A south facing window is ideal. As much bright light as possible is a key to success growing herbs inside, away from their natural environment.
Choose the right kind of herbs. Some herbs, such as basil, can be really tough to grow indoors because they really do need 6-8 hours of full sun each day, which is impossible to achieve in a window. Our favorite herbs to grow indoors include parsley, lemon balm, mint, chives and some varieties of thyme and oregano. The broader the leaf the better they do indoors. Lemon Thyme, or Doone Valley Thyme are favorites. In general, if an herb does well in partial shade outdoors, it will do well in a sunny indoor exposure.
Herbs need good drainage. Make sure you provide well draining soil and pots, and consider using gravel in the bottom for extra drainage. Adding a little grit or sand to the potting mix is great too. If you are using a container that tends to hold moisture, such as glass, use some activated charcoal in the bottom as well. (Sold in the houseplant section.)
Don’t overwater. Wait until the top inch of the soil is dry before watering most indoor plants. Overwatering is the number one killer.
Fertilize weekly with a weak liquid fertilizer for good growth, and remember to cut your herbs and use them! Cutting them back encourages new growth.
Now that you have the basics for growing herbs indoors down, here are some amazing projects we found to create one of a kind herb gardens.
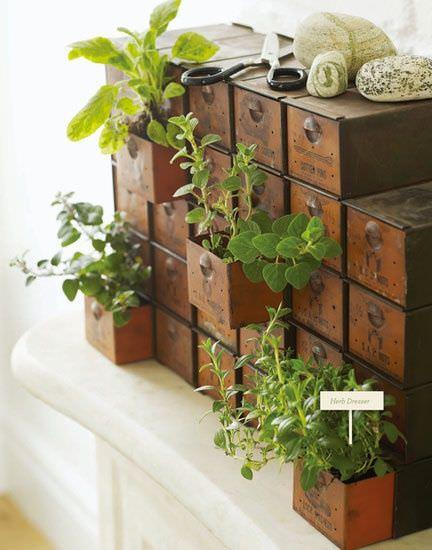
This idea is an easy one…we suggest inserting small pots and liners into the drawers first if the piece you are using has any value…
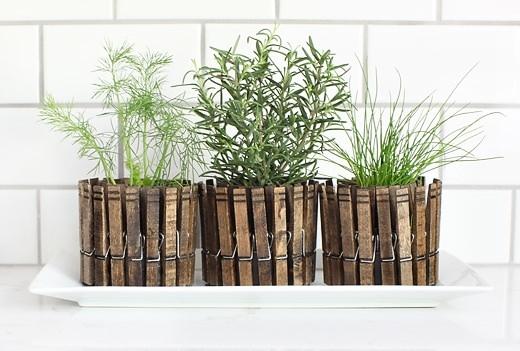
This project is simply old tuna cans (painted if desired), with stained wood clothespins clipped onto the edges of the can. You can get these old style clothespins at the dollar store. See how they did this lovely project over at ‘7th House on the Left’.
Old tin cans and chalkboard paint, plus a little chain from the home improvement store…

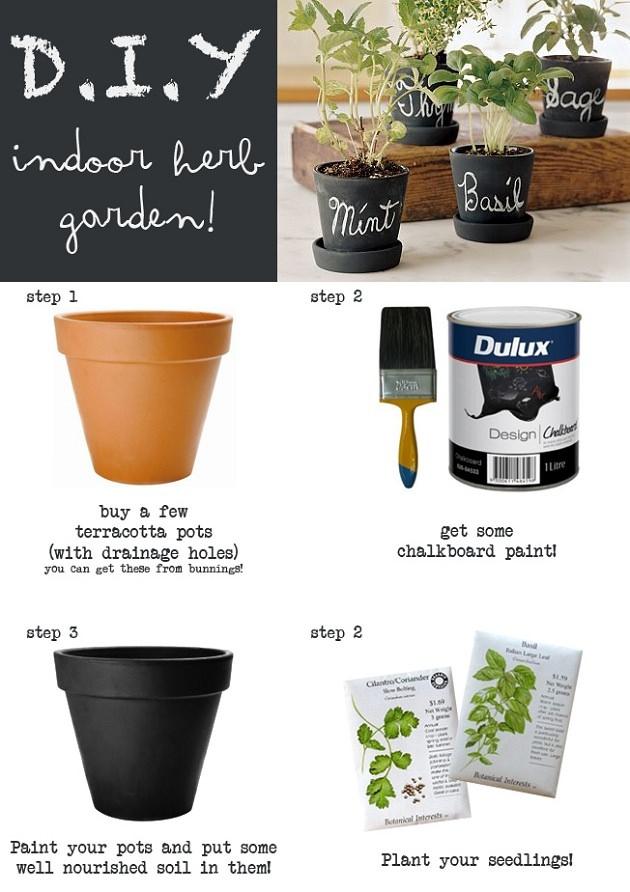
Speaking of chalkboard paint, Breakfast with Audrey has this great tutorial on creating chalkboard herb garden pots. I love this, because you can reuse them each year for new herbs or plants, and the chalkboard gives it a vintage quality…
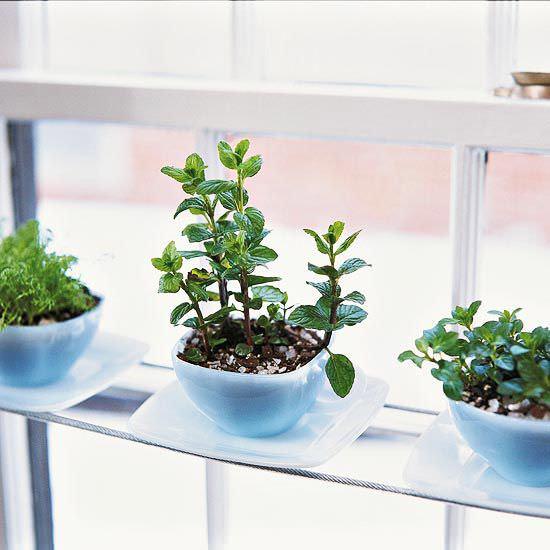
Another teacup herb garden by BHG, that has a more contemporary feel, but still homey…
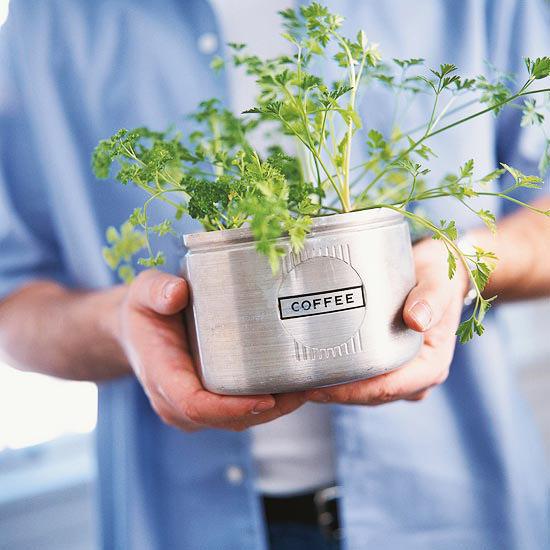
A great way to re-use this kitchen canister!
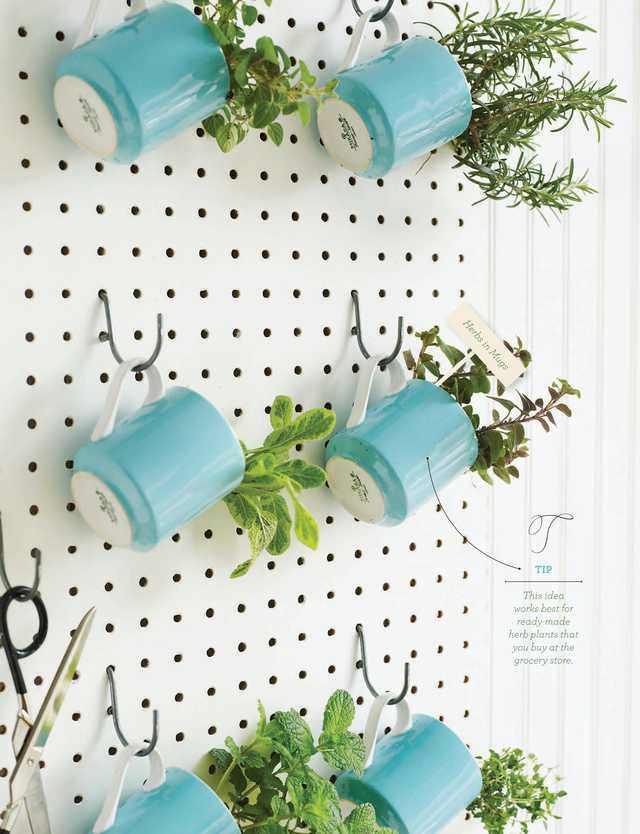
Sweet Paul Magazine has this great idea…Hang pegboard with s-hooks, and plant herbs in just a few of your coffee mugs! This is THE place to use charcoal and gravel in the bottom since they have no natural drainage, but talk about personality for the kitchen!
Paul Vitale, who designed the above project for Sweet Paul Magazine, also did this tin can herb garden. He simply attached cans to a piece of wood, then planted them.

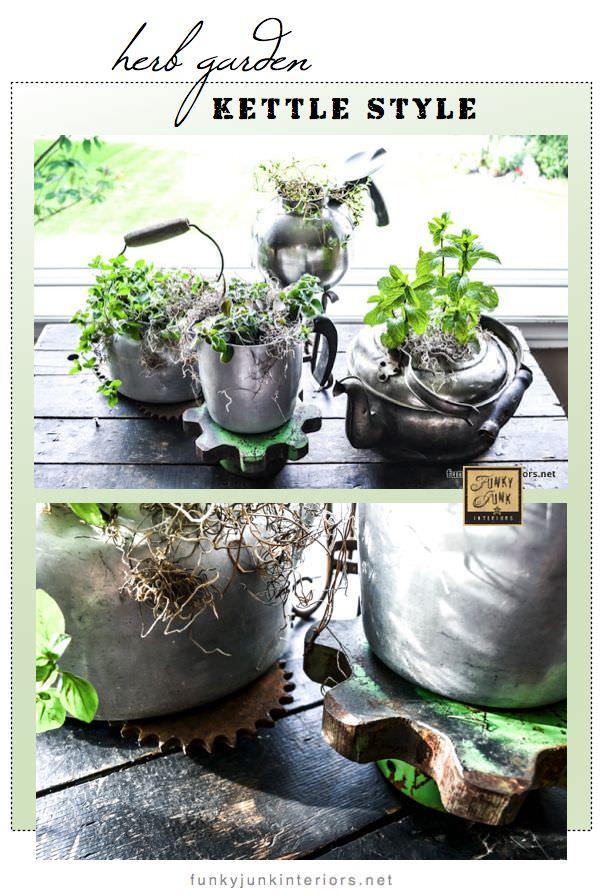
From Funky Junk Interiors, this old kettle herb garden is a great repuposed project!
Finally, Apartment Therapy brings us this inspiration tea tin herb garden!

3
1
文章
Gina
2017年05月25日

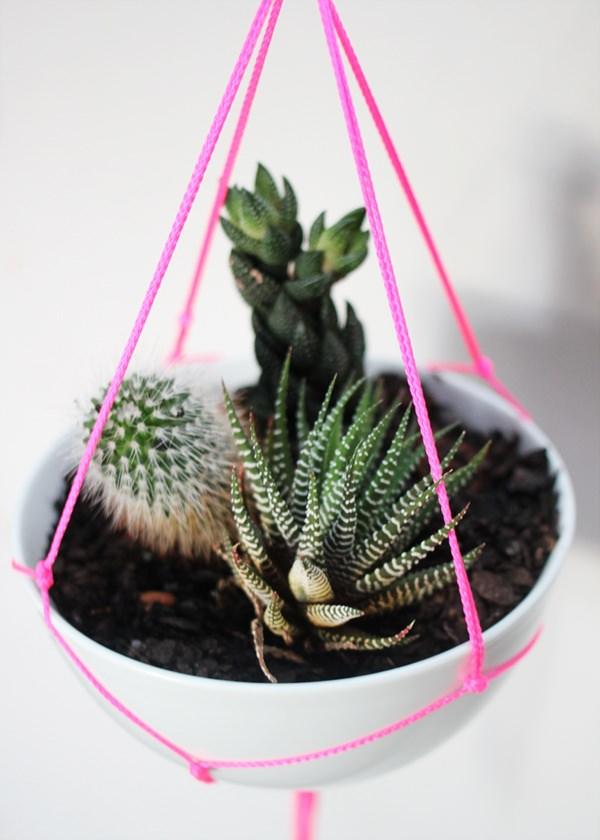
#Hanging planters work both indoors and out, with garden annuals and with evergreens. Creating your own DIY hanging planters is easy, and it adds character to your home or garden by giving you a unique container. Keep in mind that hanging planters can be heavy, so please use your judgement in choosing hanging materials, and in securing them to a structure. Other than that, anything that holds soil and is light enough to hang is fair game! Here are some DIY tutorials, inspirational photos and ideas to get you started. You can find the instructions for our featured project, above, at Drifter and the Gypsy.
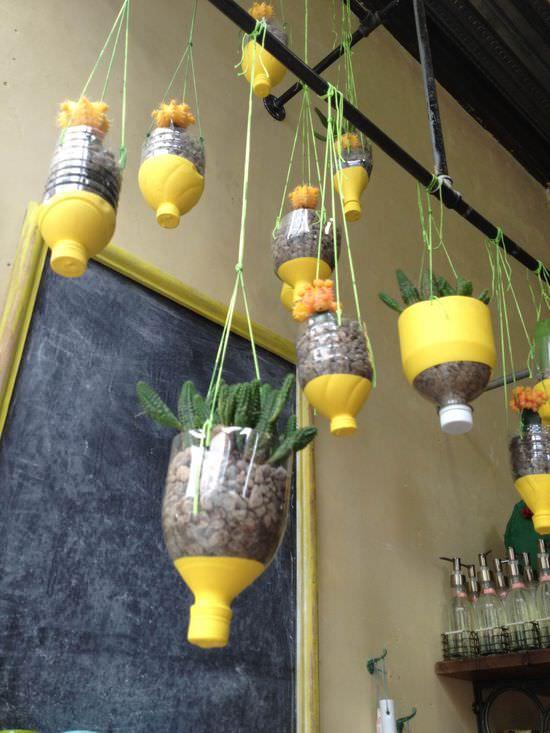
This re-cycled hanging container idea is an easy one to figure out… glue pop container lids on, dip into paint and let dry, then punch holes (I bet a hole punch would work!) and hang with twine.
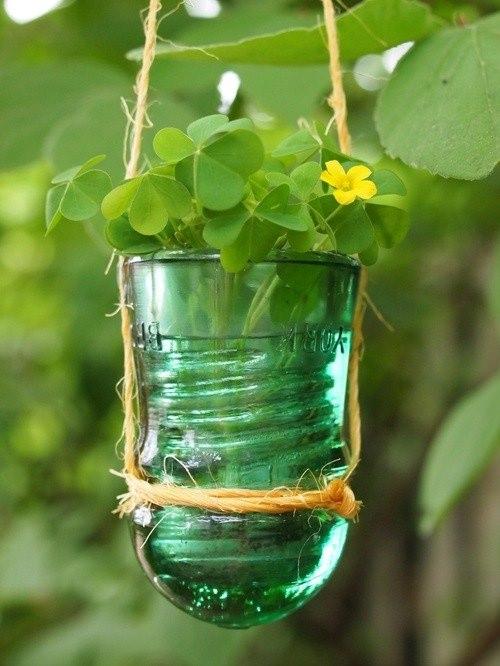
If you loved our post on garden lighting using insulators, you’re going to love this hanging planter. Pretty simple!
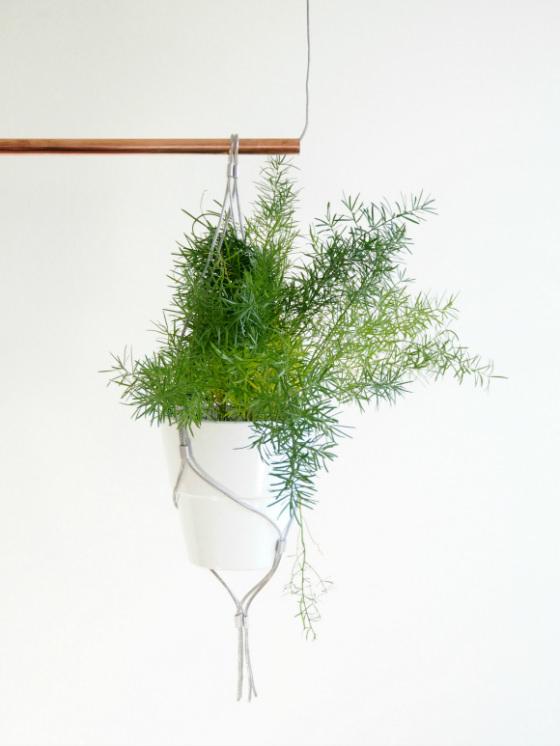
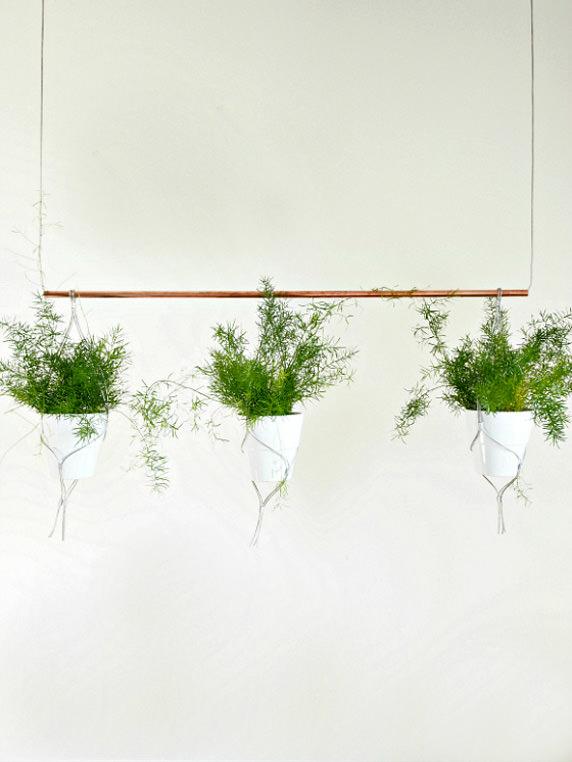
Eclectic Trends offers us this great tutorial on making this contemporary hanging planter with copper pipe and wire. Love the creativity!
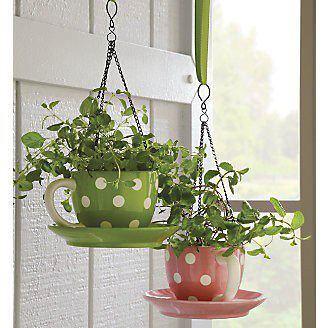
For the “cute” in all of us… these polka dot teacups were converted by gluing the saucers to the cups with industrial strength glue (we recommend Gorilla Glue) and using a ceramic tile bit and an drill to create holes for hanging.
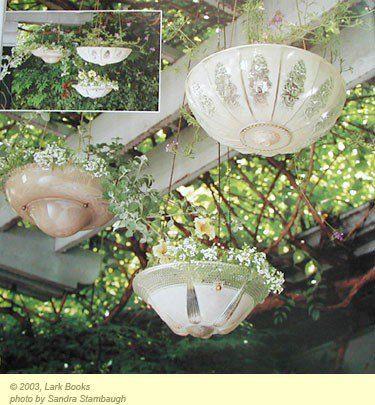
Old light fixtures and that same tile bit and drill create these great planters by Lark Books.
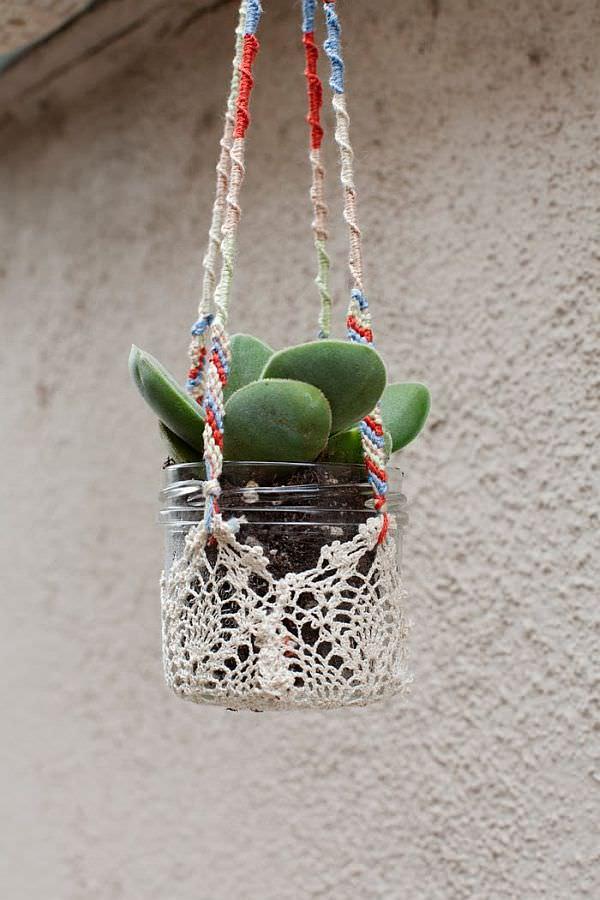
This project both recycles, which makes is cool modern, and uses a touch of the past. Love it’s originality. Find the DIY instructions here.
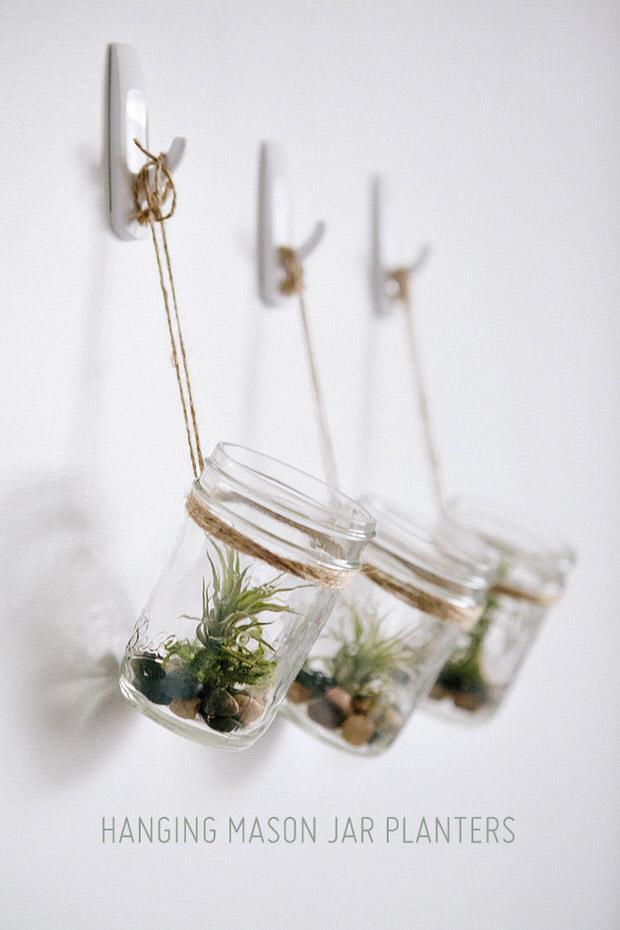
One of my favorites in this post is the DIY mason jar planters! Oh So Very Pretty has the complete instructions. See more mason jar ideas from us here.
So create some hanging planters for your garden! Don’t feel like you have to limit them to the front porch though. Hang them in trees, off brackets on fence posts, or from the top of arbors and decks. Let us know, which one is your favorite?
1
0
文章
lenny
2017年05月23日
Growing Banana trees in pots is easy, if you’re unable to grow it on the ground either due to lack of space or cold climate. Learn how to grow banana trees in this complete article.
There are banana varieties that can withstand temperature drops and grows well in containers, popular especially among the fans of exotic tropical plants in the garden.
The first question that may come up in your mind is– Will banana tree in a pot can bear fruits?
And the answer is yes. It is possible, a banana tree bears fruits in pot prolifically. It may take up to 3 to 5 years to fruit if grown from seeds.
Growing Banana Trees in Pots
Banana is a lush green, fast-growing plant that can give any place a tropical look and feel. Many varieties become excellent houseplants that don’t need much care and grow up very quickly.
Dwarf varieties of banana trees can grow anywhere between 2 to 4 meters. Compared to the ordinary banana trees that can reach up to 15 meters high.
Growing Banana Trees in Pots in Tropics
Growing banana tree in pot in a tropical climate is extremely easy, with little to no care banana tree grows in the container. If you’re living under USDA Zones 9 to 11, keep your banana tree in the shade in afternoon in summer, when the plant is young. All the other requirements are similar as given below in the article for temperate zones.
Banana Varieties you can Grow in Pots and Indoors
These dwarf varieties of banana tree restrict up to only 1.5 m to 4 m. (4 to 12 feet) tall and are suitable to grow in containers. You can also grow these banana varieties indoors.
Dwarf RedDwarf CavendishDwarf BrazilianDwarf JamaicanRajapuriWilliams HybridGran NainDwarf ‘Lady Finger’
If you would like to grow ornamental bananas check out these varieties:
Ensete ventricosumMusa sikkimensis ‘Red Tiger’Musa ornata
Also read: How to grow lemon in Pots
Requirements for Growing Banana Trees in PotsSun
Banana trees grow in tropical and subtropical parts of the world and therefore they love full sun, heat and humidity. If you’re growing banana tree you should keep it in a spot that receives the sun most of the day but preferably sheltered from the wind.
Soil
Growing Banana tree requires well-draining soil, sandy soil that is rich in organic matters and compost. Buy a good quality potting mix for your banana tree. If you are making it at home make sure to mix sand, perlite, and compost or manure.
Banana needs slightly acidic to neutral soil to produce those potassium rich nutritious bananas. The soil pH should be around 6 – 7. If your soil is alkaline mix sulfur to decrease the pH.
Watering
Banana loves moisture. Water it regularly and deeply but care not to overwater. In summer, water it every day. It may need water even two times a day in hot weather or when it is root bound. Soil for growing banana plants should be kept uniformly moist. Reduce watering in winter.
Banana Plant in Pot Care
Humidity
Banana plant prefers humidity levels above 50%. To increase humidity level around the plant, mist the plant and place it on a layer of pebbles in a tray filled with water.
Overwintering Banana Tree
Banana plants stop growing when the temperature drops below 50 ° Fahrenheit.
Before the onset of winter, do heavy mulching and prune the leaves.
Put it in a warm, bright room till the spring.
Fertilizer
Banana is a fast growing plant and it requires heavy feeding to grow at its full strength. Fertilize young plant when it establishes well with nitrogen-rich fertilizer to help it grow faster. Once your banana tree in pot becomes mature enough to produce fruit, fertilize it with 15:5:30 fertilizer regularly.
Pests and diseases
Bananas are quite resistant to diseases, still when you see the leaves turning brown and drying at the edges it means you’re overwatering and if the leaves turn yellow, banana plant is having a lack of nutrients.
Some pests that might attack banana plant are banana aphids, banana weevil, and coconut scale. These pests can easily be repelled using organic pesticides.

There are banana varieties that can withstand temperature drops and grows well in containers, popular especially among the fans of exotic tropical plants in the garden.
The first question that may come up in your mind is– Will banana tree in a pot can bear fruits?
And the answer is yes. It is possible, a banana tree bears fruits in pot prolifically. It may take up to 3 to 5 years to fruit if grown from seeds.
Growing Banana Trees in Pots
Banana is a lush green, fast-growing plant that can give any place a tropical look and feel. Many varieties become excellent houseplants that don’t need much care and grow up very quickly.
Dwarf varieties of banana trees can grow anywhere between 2 to 4 meters. Compared to the ordinary banana trees that can reach up to 15 meters high.
Growing Banana Trees in Pots in Tropics
Growing banana tree in pot in a tropical climate is extremely easy, with little to no care banana tree grows in the container. If you’re living under USDA Zones 9 to 11, keep your banana tree in the shade in afternoon in summer, when the plant is young. All the other requirements are similar as given below in the article for temperate zones.
Banana Varieties you can Grow in Pots and Indoors

These dwarf varieties of banana tree restrict up to only 1.5 m to 4 m. (4 to 12 feet) tall and are suitable to grow in containers. You can also grow these banana varieties indoors.
Dwarf RedDwarf CavendishDwarf BrazilianDwarf JamaicanRajapuriWilliams HybridGran NainDwarf ‘Lady Finger’
If you would like to grow ornamental bananas check out these varieties:
Ensete ventricosumMusa sikkimensis ‘Red Tiger’Musa ornata
Also read: How to grow lemon in Pots
Requirements for Growing Banana Trees in PotsSun
Banana trees grow in tropical and subtropical parts of the world and therefore they love full sun, heat and humidity. If you’re growing banana tree you should keep it in a spot that receives the sun most of the day but preferably sheltered from the wind.
Soil
Growing Banana tree requires well-draining soil, sandy soil that is rich in organic matters and compost. Buy a good quality potting mix for your banana tree. If you are making it at home make sure to mix sand, perlite, and compost or manure.
Banana needs slightly acidic to neutral soil to produce those potassium rich nutritious bananas. The soil pH should be around 6 – 7. If your soil is alkaline mix sulfur to decrease the pH.
Watering
Banana loves moisture. Water it regularly and deeply but care not to overwater. In summer, water it every day. It may need water even two times a day in hot weather or when it is root bound. Soil for growing banana plants should be kept uniformly moist. Reduce watering in winter.
Banana Plant in Pot Care

Humidity
Banana plant prefers humidity levels above 50%. To increase humidity level around the plant, mist the plant and place it on a layer of pebbles in a tray filled with water.
Overwintering Banana Tree
Banana plants stop growing when the temperature drops below 50 ° Fahrenheit.
Before the onset of winter, do heavy mulching and prune the leaves.
Put it in a warm, bright room till the spring.
Fertilizer
Banana is a fast growing plant and it requires heavy feeding to grow at its full strength. Fertilize young plant when it establishes well with nitrogen-rich fertilizer to help it grow faster. Once your banana tree in pot becomes mature enough to produce fruit, fertilize it with 15:5:30 fertilizer regularly.
Pests and diseases
Bananas are quite resistant to diseases, still when you see the leaves turning brown and drying at the edges it means you’re overwatering and if the leaves turn yellow, banana plant is having a lack of nutrients.
Some pests that might attack banana plant are banana aphids, banana weevil, and coconut scale. These pests can easily be repelled using organic pesticides.
4
2
文章
lenny
2017年05月23日

Make a Terrace Vegetable Garden on your rooftop, it is easy if you’ll do this with some planning. In this article you’ll learn which vegetables are suitable and how you can grow them on terrace.
Fresh home grown vegetables taste delicious, are good for health and safe from chemicals. You don’t need to acquire a regular garden to grow them, you can also grow these on a balcony or terrace.
There are some really interesting ways to incorporate the vegetable crops on the terrace. These alternatives are space saving and also a real eye-catcher.
1. Creating a vegetable Garden in Pots
In containers you can plant almost any vegetable. Choose large and deep pots, avoid thin and poor quality plastic pots because they heat up quickly and drain poorly.
Soil
Using normal garden soil is a bad idea for growing vegetables in pots. Instead use good quality potting mix for healthy growth of plants and productivity. You can also prepare it yourself, read this article.
Vegetables for Pots
Tomatoes
Cucumbers
Radishes
Beans
Potatoes
Onions
Carrots
Beetroot
Lettuce
Garlic
Chilies and Peppers
Gourds
Eggplant (Brinjal)
2. Create Raised Beds on Terrace
If you’re looking for practical as well as stylish way to make a terrace vegetable garden. Make a raised bed, in raised beds you’ll be able to grow lot of vegetables in compare to containers. Plants will thrive better with less care and maintenance, plus they are cheap.
The raised bed on the terrace does not differ fundamentally from those you see in a regular garden.
In well-stocked hardware stores or even online shops you will find special raised beds for terraces, you’ll only need to configure which one is better for you or you can make your own raised bed, which is very easy. Just ensure before installing it that the surface of terrace below it is waterproofed efficiently or not.
Fill Raised Bed with Soil
If you fill the raised bed with soil, consider to prevent voles and pests from entering the bed.
To make soil, just mix quality garden soil, ripe compost and manure.
Advantage of Raised Beds
Probably the greatest advantage of raised bed is of course its height and wideness on terrace. Gardening can hardly be more convenient.
3. Integrate Vegetable Patch on the Terrace
You can also integrate a vegetable patch on your terrace and grow vegetable on the surface itself. But doing this is only good on large rooftops. Vegetable patch is similar to making a normal garden bed.
The integrated bed should be filled normally with soil like a regular garden bed. An addition of compost in soil is a perfect natural fertilizer for most of the plants.
4. Creating a Vegetable Terrace Garden in Planter boxes
Flower boxes and planters can be used to create a vegetable garden. You can hang these on an existing railing or set them just on the floor. How do you use them is entirely up to you.
Do not use ordinary garden soil in these planter boxes, either use quality potting mix or compost rich soil. Fertilizing is also important to improve productivity but it varies according to plants: peppers and tomatoes are heavy feeders, whereas green leafy vegetables do not need much fertilizer.
Plants for Flower Boxes
Cucumbers
Tomatoes
Garlic
Chilies
Herbs
Radishes
Bush beans
Greens
Cucumbers, tomatoes and beans require a climbing aid, so that the plants do not break.
5. Repurpose Sandboxes
A sandbox is not just for games. From a small simple wooden sandpit, you can also make a hefty vegetable patch. This looks not only decorative, but provides your plants an optimal space to thrive.
Instead of using gravel for drainage, just fill the quality compost with soil. In the sandbox you can grow all sorts of small vegetables and herbs, mostly low growing that spreads too much.
Radishes
Herbs
Garlic
Lettuce
Spinach
Ginger
Asian Greens and lot of other green leafy vegetables
6. Optimize Vertical Space
Your main challenge is how smartly you utilize your vertical space to double up the space you have on your terrace, make a plan on how you should do this, if you have walls, hang planters on it.
Grow vegetable shrubs and vines like beans, squashes, gourds and tall tomato varieties near the walls and railings. This way they’ll not only get support but also grow outside and upward and you’ll save a lot of your space.
Use old shelves, racks to keep pots and buy pot holders, put them around the corners.
On these you can grow herbs to improve the taste of salads and cuisines you’ll prepare, you can also grow lot of flowers to appease ornamental views.
Tips for the Prolific Terrace Vegetable Garden
Fertilize vegetables regularly with good quality organic fertilizer. With some research and experience you’ll be able to find out which type of fertilizer you should feed to specific vegetables.
Water plants regularly and deeply. Read this article for container watering tips.
Check plants regularly for pests. Read this article for homemade natural pesticide recipes.
Prune vegetable plants to keep them in good shape and in healthy growth. Look out for suckers, especially in tomatoes and pinch them off immediately if found one.
For the vegetables, it is always good to grow them on the Southern or Western face, so the plants will have enough sun and can thrive easily. But too much sun is not good either. If you live in a warm tropical climate and the sun is too strong, it is advisable to provide afternoon shade to plants.

Fresh home grown vegetables taste delicious, are good for health and safe from chemicals. You don’t need to acquire a regular garden to grow them, you can also grow these on a balcony or terrace.
There are some really interesting ways to incorporate the vegetable crops on the terrace. These alternatives are space saving and also a real eye-catcher.
1. Creating a vegetable Garden in Pots
In containers you can plant almost any vegetable. Choose large and deep pots, avoid thin and poor quality plastic pots because they heat up quickly and drain poorly.
Soil
Using normal garden soil is a bad idea for growing vegetables in pots. Instead use good quality potting mix for healthy growth of plants and productivity. You can also prepare it yourself, read this article.
Vegetables for Pots
Tomatoes
Cucumbers
Radishes
Beans
Potatoes
Onions
Carrots
Beetroot
Lettuce
Garlic
Chilies and Peppers
Gourds
Eggplant (Brinjal)
2. Create Raised Beds on Terrace

If you’re looking for practical as well as stylish way to make a terrace vegetable garden. Make a raised bed, in raised beds you’ll be able to grow lot of vegetables in compare to containers. Plants will thrive better with less care and maintenance, plus they are cheap.
The raised bed on the terrace does not differ fundamentally from those you see in a regular garden.
In well-stocked hardware stores or even online shops you will find special raised beds for terraces, you’ll only need to configure which one is better for you or you can make your own raised bed, which is very easy. Just ensure before installing it that the surface of terrace below it is waterproofed efficiently or not.
Fill Raised Bed with Soil
If you fill the raised bed with soil, consider to prevent voles and pests from entering the bed.
To make soil, just mix quality garden soil, ripe compost and manure.
Advantage of Raised Beds
Probably the greatest advantage of raised bed is of course its height and wideness on terrace. Gardening can hardly be more convenient.
3. Integrate Vegetable Patch on the Terrace
You can also integrate a vegetable patch on your terrace and grow vegetable on the surface itself. But doing this is only good on large rooftops. Vegetable patch is similar to making a normal garden bed.
The integrated bed should be filled normally with soil like a regular garden bed. An addition of compost in soil is a perfect natural fertilizer for most of the plants.
4. Creating a Vegetable Terrace Garden in Planter boxes
Flower boxes and planters can be used to create a vegetable garden. You can hang these on an existing railing or set them just on the floor. How do you use them is entirely up to you.
Do not use ordinary garden soil in these planter boxes, either use quality potting mix or compost rich soil. Fertilizing is also important to improve productivity but it varies according to plants: peppers and tomatoes are heavy feeders, whereas green leafy vegetables do not need much fertilizer.
Plants for Flower Boxes
Cucumbers
Tomatoes
Garlic
Chilies
Herbs
Radishes
Bush beans
Greens
Cucumbers, tomatoes and beans require a climbing aid, so that the plants do not break.
5. Repurpose Sandboxes
A sandbox is not just for games. From a small simple wooden sandpit, you can also make a hefty vegetable patch. This looks not only decorative, but provides your plants an optimal space to thrive.
Instead of using gravel for drainage, just fill the quality compost with soil. In the sandbox you can grow all sorts of small vegetables and herbs, mostly low growing that spreads too much.
Radishes
Herbs
Garlic
Lettuce
Spinach
Ginger
Asian Greens and lot of other green leafy vegetables
6. Optimize Vertical Space

Your main challenge is how smartly you utilize your vertical space to double up the space you have on your terrace, make a plan on how you should do this, if you have walls, hang planters on it.
Grow vegetable shrubs and vines like beans, squashes, gourds and tall tomato varieties near the walls and railings. This way they’ll not only get support but also grow outside and upward and you’ll save a lot of your space.
Use old shelves, racks to keep pots and buy pot holders, put them around the corners.
On these you can grow herbs to improve the taste of salads and cuisines you’ll prepare, you can also grow lot of flowers to appease ornamental views.
Tips for the Prolific Terrace Vegetable Garden
Fertilize vegetables regularly with good quality organic fertilizer. With some research and experience you’ll be able to find out which type of fertilizer you should feed to specific vegetables.
Water plants regularly and deeply. Read this article for container watering tips.
Check plants regularly for pests. Read this article for homemade natural pesticide recipes.
Prune vegetable plants to keep them in good shape and in healthy growth. Look out for suckers, especially in tomatoes and pinch them off immediately if found one.
For the vegetables, it is always good to grow them on the Southern or Western face, so the plants will have enough sun and can thrive easily. But too much sun is not good either. If you live in a warm tropical climate and the sun is too strong, it is advisable to provide afternoon shade to plants.
1
1
文章
Gina
2017年05月23日


Forcing bulbs for the holidays, or for holiday gifts is a great idea to start now, when fall bulbs are available. You have a variety of healthy stock to choose from this time of year, and it really is an easy project! All is takes is some basic materials, fall bulbs, and a little room to store them until they bloom. Here is how to force bulbs for the holidays.
The most popular bulbs to force for the holidays are Paperwhite Narcissus and Amaryllis. The Paperwhites are fragrant, delicate and smaller. Amaryllis is a large bulb and a larger plant, with large flowers in a variety of colors. Red is an obvious holiday choice, but try white for a fresh option that can take you through the New Year.
How to Force Paperwhites

Paperwhites are easy to force in a tall glass container, with some decorative gravel. The tall container helps to support the plants as they grow. I like to add a little charcoal from the indoor plant section to keep the water smelling sweet.
Purchase firm, full, blemish free bulbs. When forcing in particular, quality counts.
Pour in two inches of pebbles that have been rinsed. Add a tablespoon or two of rinsed charcoal then more pebbles. Place bulbs, root-side down and almost touching one another, on top. Add enough tepid water to reach just below the bottoms of the bulbs. Replenish when the level falls by a quarter inch.
Paperwhites will bloom in four to six weeks, so if you are planting as gifts, count backwards in the calendar from the proposed gift giving time.
How to Force Amaryllis
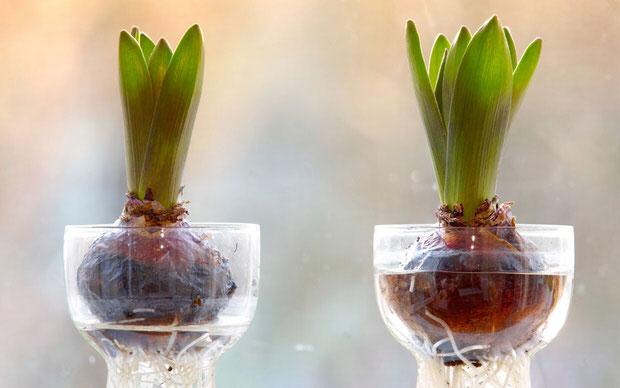
Force Amaryllis in a watertight, shallow container. Fill the container until two thirds full, add charcoal bits as desired. Fill with slightly warm water until they just barely cover the pebbles. Lay one Amaryllis bulb on top of the pebbles, root side down. Try to purchase a bulb with fleshy, healthy looking roots. Add more pebbles until you reach the neck of the bulb, to give it support as it grows. Add water as needed so that the water level touches the bottom of the bulb. It’s ok to reach a finger down into the pebbles to check the level every couple of days.
If you have a container that fits the bulb snugly, you can force Amaryllis without any gravel at all.
Amaryllis bloom in six to eight weeks.
Neither Paperwhite nor Amaryllis will re-bloom after forcing, so it’s best to just discard the bulbs.
That’s it! Stock up at fall bulb sales and plant extra for gifts, for holiday decor, or plant some every two weeks to keep bulbs flowering right through to spring!
0
1
文章
Colorful
2017年05月23日
New to growing plants and no idea what you should grow indoors? Learn about these 15 Best Houseplants for Beginners. They all are easy to grow!
Potted houseplants provide a lavish look and can be used to decorate the interior at low cost. Also, they create positive impact and many of them purify the air. But what you’ll do if you don’t have much knowledge about growing plants and the houseplants that are best to grow? Simple! Learn about these 15 Best Houseplants for Beginners! They are easy to grow and tolerate poor conditions.
1. Snake Plant
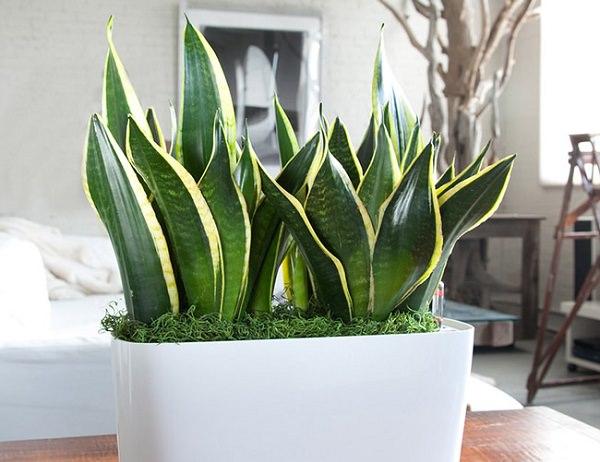
Snake plant is one of the best plants for the beginners. Easy to grow and hard to kill, it can be grown in low light and need to be watered occasionally. Snake plant also removes toxins from the air– All this makes it a perfect houseplant for beginners.
2. Heartleaf Philodendron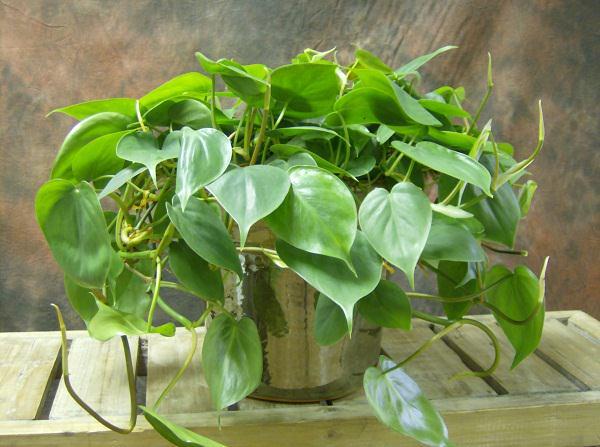
Philodendron scandens is extremely easy to grow and great for beginners. It needs a moderate amount of light and prefers the soil to dry out between watering spells.
3. Spider Plant
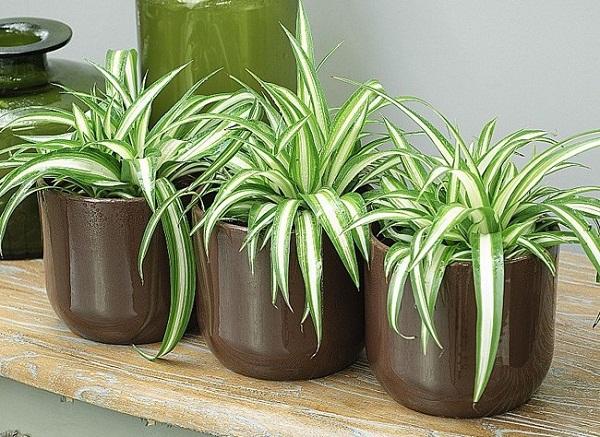
One of the most popular houseplants. Its popularity is due to its toughness and the ease of growing and maintenance. The plant can easily adapt to almost any condition. Keep the plant in a bright spot and maintain slight moisture in the soil and it will grow happily.
4. Peace Lily

The peace lily is among the easiest plants to grow indoors. It can tolerate a wide range of lighting conditions, and needs only moderate watering. With graceful curving leaves and white flower that rise up from the dark foliage, peace lily looks exotic and elegant.
5. English Ivy
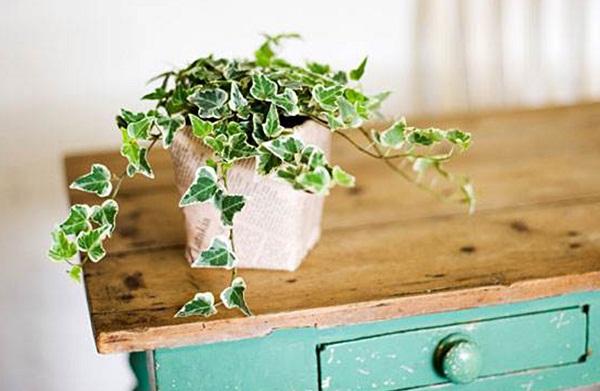
English Ivy is very hardy and easy to grow. Keep the pot in a spot that receives bright indirect sun and plant it in a container that is wide and shallow rather than narrow and deep.
6. Succulents and Cactus
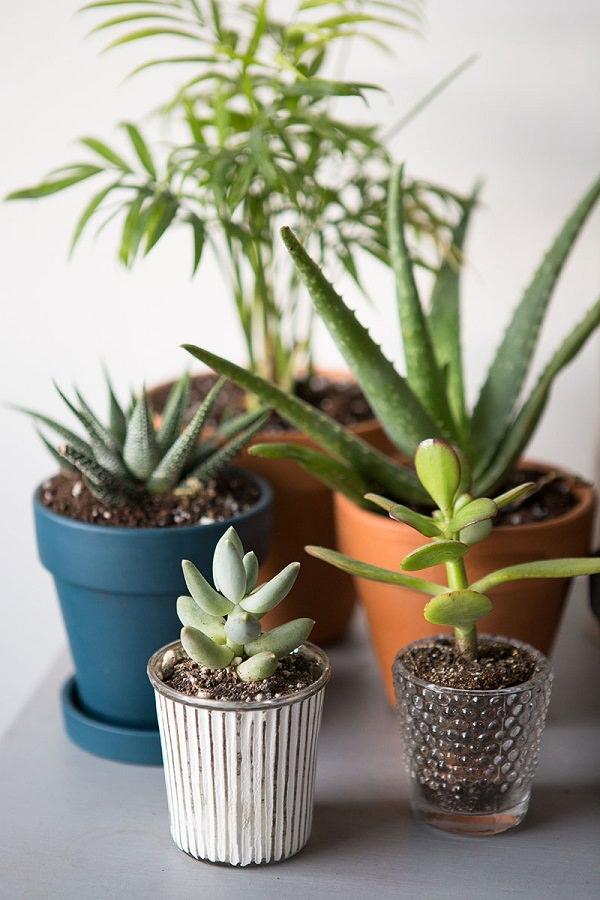
Succulents and cacti are ideal for those who forget to water and care for plants. They are very adaptable and can survive many adverse conditions.
They need to be placed on a bright spot and a well-drained soil with little water.
7. Lucky Bamboo
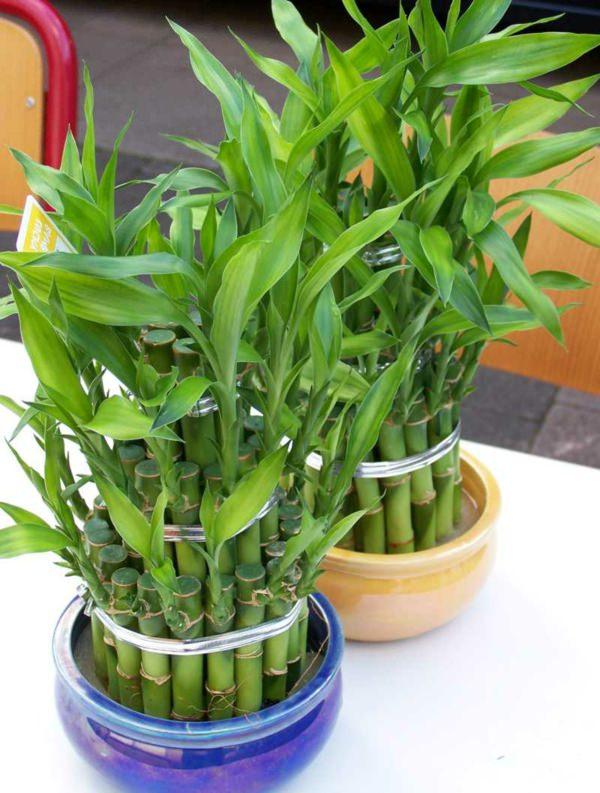
Lucky bamboo is not a bamboo, but a plant belongs to Dracaena genus. It is an easy-care houseplant. Just provide it abundant water and it’ll grow well even in indirect light. Protect the plant from cold drafts and provide iron fertilizer occasionally.
8. Jade Plant
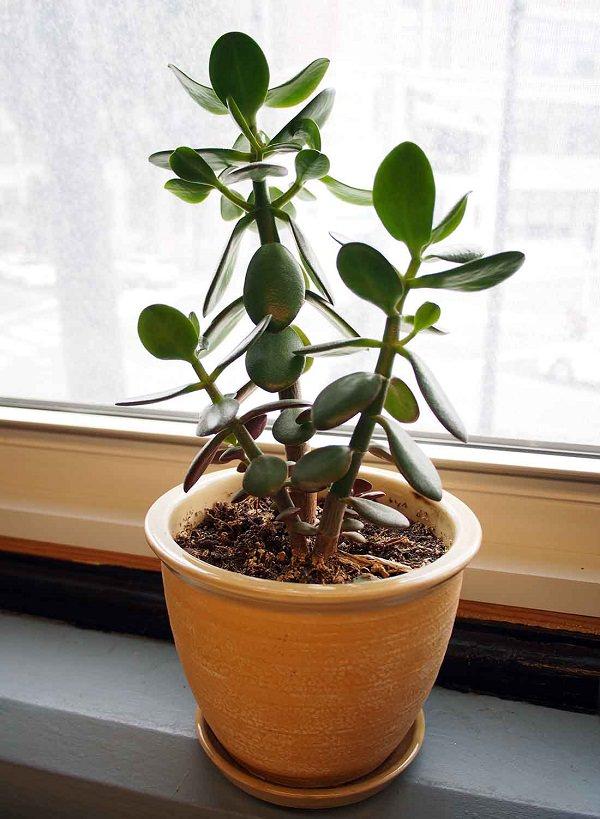
Jade plant is a succulent and is probably one of the best houseplants for beginners. When grown indoors, a jade plant can grow up to a size of a small shrub. Keep the plant in a spot that receives partial or indirect sunlight from having a healthy specimen.
9. Cast Iron Plant
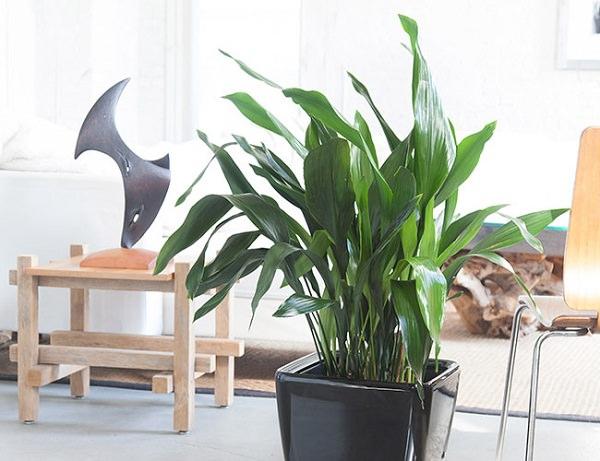
As the name suggest, one of the toughest plants that make it ideal for beginners. Cast-iron plant can withstands neglect, low light, low humidity, and a wide range of temperatures. It prefers moist soil.
10. Peperomia

Credit: Houseplants Expert
Another good plant for beginners is Peperomia. Peperomia is small striking houseplant that is available in different colors and shapes. Peperomia likes slightly moist soil and humidity but watering should be reduced in winter.
11. ZZ Plant
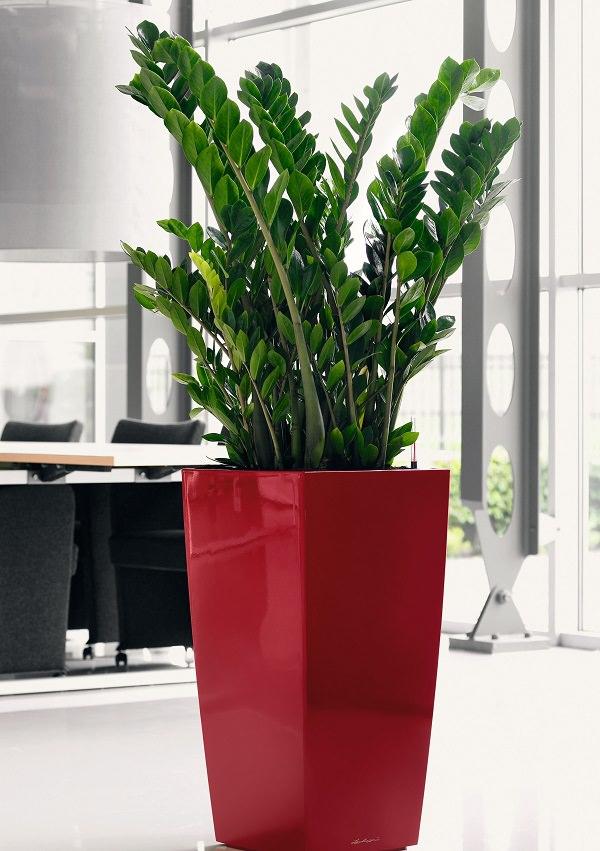
This super-tough plant is high resistant to adverse conditions like drought and low light. The plant prefers bright to moderate indirect light and well-drained soil. ZZ plant can do fine without fertilizer, but if you would like, you can fertilize the plant with half strength general fertilizer one to two times a year in the summer months.
12. Pothos (Devil’s Ivy)
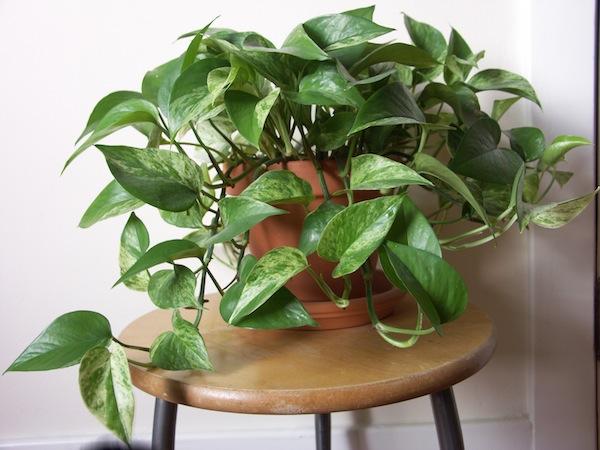
Plants of the pothos family are easy to grow and become great houseplants for beginners. This attractive and durable vine prefers bright indirect light and a draft free place. It can grow in low light and needs moist soil.
13. Dracaena
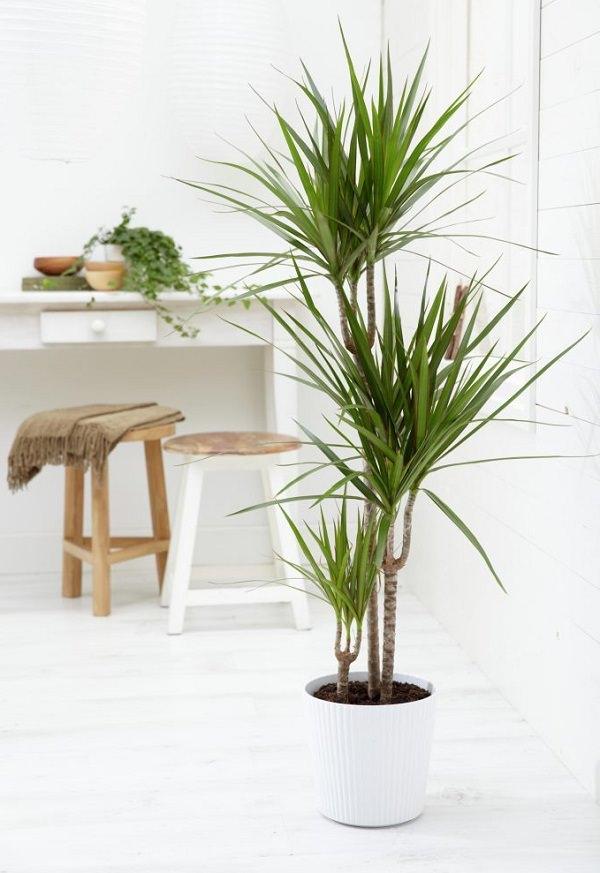
There are many varieties of Dracaena genus that are hardy houseplants, Dracaena marginata, Dracaena fragrans are among the most popular and easy to grow plants. This beautiful houseplant needs occasional pruning and regular watering. Keep the plant away from direct sun and avoid overwatering.
14. Bromeliads
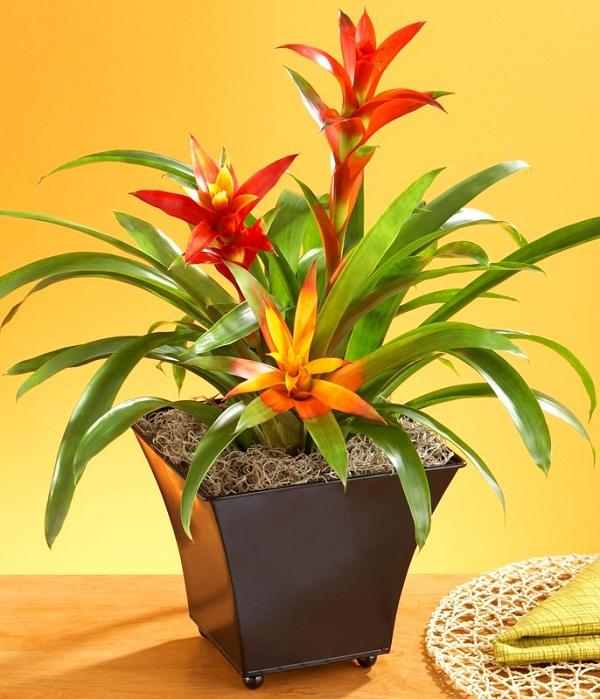
Bromeliad is a perfect plant to grow indoors, most of the varieties of this plant thrive easily indoors. Although it is difficult to make it bloom, there are many varieties that have beautiful foliage that makes an attractive display.
15. Rubber Plant
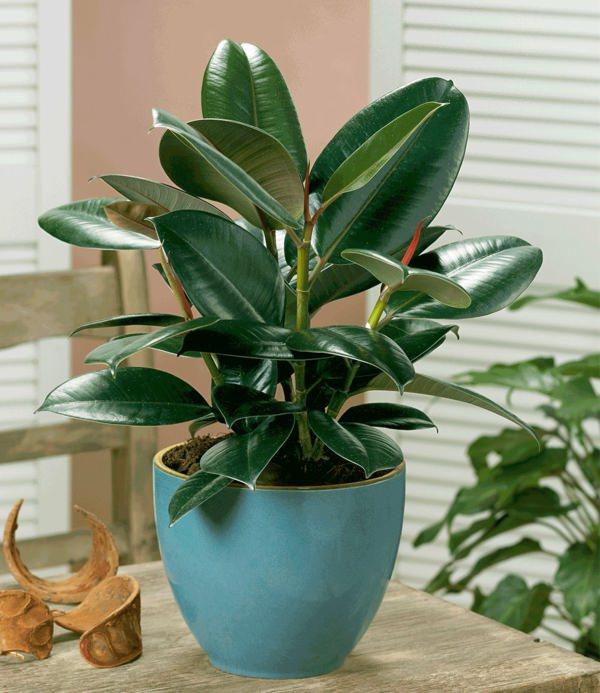
Rubber plant is a large houseplant that can become a focal point to any room. Low maintenance and easy to grow. Keep it in a well-lit position in your home and allow the soil to dry out between watering spells. Besides the ornamental aspect, rubber plant is also an air purifying plant.
Potted houseplants provide a lavish look and can be used to decorate the interior at low cost. Also, they create positive impact and many of them purify the air. But what you’ll do if you don’t have much knowledge about growing plants and the houseplants that are best to grow? Simple! Learn about these 15 Best Houseplants for Beginners! They are easy to grow and tolerate poor conditions.
1. Snake Plant

Snake plant is one of the best plants for the beginners. Easy to grow and hard to kill, it can be grown in low light and need to be watered occasionally. Snake plant also removes toxins from the air– All this makes it a perfect houseplant for beginners.
2. Heartleaf Philodendron

Philodendron scandens is extremely easy to grow and great for beginners. It needs a moderate amount of light and prefers the soil to dry out between watering spells.
3. Spider Plant

One of the most popular houseplants. Its popularity is due to its toughness and the ease of growing and maintenance. The plant can easily adapt to almost any condition. Keep the plant in a bright spot and maintain slight moisture in the soil and it will grow happily.
4. Peace Lily

The peace lily is among the easiest plants to grow indoors. It can tolerate a wide range of lighting conditions, and needs only moderate watering. With graceful curving leaves and white flower that rise up from the dark foliage, peace lily looks exotic and elegant.
5. English Ivy

English Ivy is very hardy and easy to grow. Keep the pot in a spot that receives bright indirect sun and plant it in a container that is wide and shallow rather than narrow and deep.
6. Succulents and Cactus

Succulents and cacti are ideal for those who forget to water and care for plants. They are very adaptable and can survive many adverse conditions.
They need to be placed on a bright spot and a well-drained soil with little water.
7. Lucky Bamboo

Lucky bamboo is not a bamboo, but a plant belongs to Dracaena genus. It is an easy-care houseplant. Just provide it abundant water and it’ll grow well even in indirect light. Protect the plant from cold drafts and provide iron fertilizer occasionally.
8. Jade Plant

Jade plant is a succulent and is probably one of the best houseplants for beginners. When grown indoors, a jade plant can grow up to a size of a small shrub. Keep the plant in a spot that receives partial or indirect sunlight from having a healthy specimen.
9. Cast Iron Plant

As the name suggest, one of the toughest plants that make it ideal for beginners. Cast-iron plant can withstands neglect, low light, low humidity, and a wide range of temperatures. It prefers moist soil.
10. Peperomia

Credit: Houseplants Expert
Another good plant for beginners is Peperomia. Peperomia is small striking houseplant that is available in different colors and shapes. Peperomia likes slightly moist soil and humidity but watering should be reduced in winter.
11. ZZ Plant

This super-tough plant is high resistant to adverse conditions like drought and low light. The plant prefers bright to moderate indirect light and well-drained soil. ZZ plant can do fine without fertilizer, but if you would like, you can fertilize the plant with half strength general fertilizer one to two times a year in the summer months.
12. Pothos (Devil’s Ivy)

Plants of the pothos family are easy to grow and become great houseplants for beginners. This attractive and durable vine prefers bright indirect light and a draft free place. It can grow in low light and needs moist soil.
13. Dracaena

There are many varieties of Dracaena genus that are hardy houseplants, Dracaena marginata, Dracaena fragrans are among the most popular and easy to grow plants. This beautiful houseplant needs occasional pruning and regular watering. Keep the plant away from direct sun and avoid overwatering.
14. Bromeliads

Bromeliad is a perfect plant to grow indoors, most of the varieties of this plant thrive easily indoors. Although it is difficult to make it bloom, there are many varieties that have beautiful foliage that makes an attractive display.
15. Rubber Plant

Rubber plant is a large houseplant that can become a focal point to any room. Low maintenance and easy to grow. Keep it in a well-lit position in your home and allow the soil to dry out between watering spells. Besides the ornamental aspect, rubber plant is also an air purifying plant.
0
2
文章
安静的美女子
2017年05月23日

Rubber tree plant care as a houseplant is easy. If you keep it in a well-lit position in your home. Besides the ornamental aspect, rubber tree is considered an air purifying plant.

Family: Moraceae
Soil pH: Neutral, slightly acidic
Plant type: Tree, Indoor plant
Vegetation type: Perennial
Foliage type: Evergreen
Toxicity: Its sap is toxic and causes mild skin irritation or burning sensation in eyes if comes contacted
Propagation: Rubber tree is commonly propagated from cuttings or air layering.
Popular Varieties– Ficus elastica ‘Tineke’ with variegated green and white leaves having overtones of burgundy and red veins.– Ficus elastica ‘Doescheri’: Also called “Indian Rubber Tree”, it has dark green foliage with yellow patches. Plant of this variety needs more natural light than most of the other variety.– Ficus elastica ‘Black Prince’: This variety has thick dark green leathery foliage with bronze undertones and large rounded leaves.-Ficus elastica ‘Decora’: This variety has thick dark green foliage.Rubber Tree Plant Information
Native to South-East Asia, the rubber tree grows on the edge of tropical rain forests. It can grow up to 30 m high in its native conditions. However, when you grow rubber tree indoors as a houseplant it only reaches 2-3 m high. *You can grow rubber tree outdoors in USDA Zones 9 – 11.
Rubber tree plant care is easy, which makes it a very popular houseplant. It survives even in poorly lit areas, though with slow growth.
Also Read: How to Grow Fiddle Leaf Fig
Rubber Tree Plant Care and Growing RequirementsLocation
Avoid direct sunlight, especially afternoon sun. Otherwise, the leaves will eventually fall off. Place the plant on a bright and well-lit spot that receives indirect or morning sunlight.
Soil
Use well-drained quality potting mix suitable for houseplants and a container with proper drainage. Rubber tree plant care will be easy if you fulfill only these two requirements.
Temperature
Ideally, the temperature that suits it best lies in a range of 59 – 68 F (15 to 20 C). It can withstand winter temperature down to 40 F (4 C), but the leaves may suffer.
Humidity
Rubber tree prefers moderately cool, moist and humid air. For humidity, you can mist water on its foliage.
Watering
Provide sufficient drainage to plant and avoid excess watering as it may cause root rot. Limit watering to keep the soil slightly moist and leave the surface soil to dry out between watering spells.
Fertilizer
Fertilize the plant with all-purpose fertilizer during the growing period in spring and summer.
Pests and Diseases
Rubber plant is resistant to pest and diseases. However, if grown in poor conditions and low light pests like spider mites and mealybugs cause a problem.
Pruning Rubber Tree
Pruning rubber tree is important if you want to keep it in a desired shape or size. You can prune the plant lightly at any time of the year but for proper pruning and trimming wait for spring. Prune your plant in the beginning of the growing season.
Rubber Tree Plant Care TipsRepot the plant when it becomes root bound. It grows quickly and within a year you’ll need to repot it.Once the desired size is achieved you can stop repotting and keep it root bound.If you’re unable to repot the plant, scrap a few inches of potting soil and replace it.When fertilizing indoor plants, ensure you don’t feed them heavily. Light dose is enough.Wipe and clean the leaves with a damp sponge once in a while.Avoid overwatering or misting of leaves with too cold water as rubber plant loses its leaves due to overwatering or when sprayed with too cold water.
0
0
文章
扭扭
2017年05月23日

Growing strawberries in gutters is the best way to use up your vertical space smartly. Strawberries are super easy fruits to grow in gutters, it also saves them from diseases like crown rot and fruit rot.
You can try to grow strawberries upside down too, learn here.
Things You’ll Need for Growing Strawberries in Gutters
A simple PVC pipe with a diameter of 10 cm., hole saw to make holes. You will also need something to clog pipe from both sides.
1. Step One
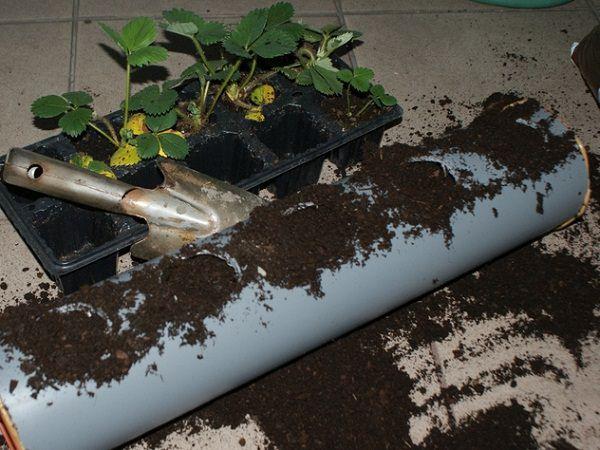
Image Credit: ogrodwcentrum
Divide PVC pipes into equal sizes as many you want and make holes according to the size of pipe (approx. 5 cm). Use hole saw to make holes. You’ll also need to make a few hole for drainage on the bottom. Then clog pipe from both sides.
2. Step Two

Image Credit: ogrodwcentrum
Now fill up the soil in the holes you made and plant strawberry plants carefully in each hole. Take care that the crown of strawberry plants should not be covered in soil.
3. Step Three

You can try to grow strawberries upside down too, learn here.
Things You’ll Need for Growing Strawberries in Gutters
A simple PVC pipe with a diameter of 10 cm., hole saw to make holes. You will also need something to clog pipe from both sides.
1. Step One

Image Credit: ogrodwcentrum
Divide PVC pipes into equal sizes as many you want and make holes according to the size of pipe (approx. 5 cm). Use hole saw to make holes. You’ll also need to make a few hole for drainage on the bottom. Then clog pipe from both sides.
2. Step Two

Image Credit: ogrodwcentrum
Now fill up the soil in the holes you made and plant strawberry plants carefully in each hole. Take care that the crown of strawberry plants should not be covered in soil.
3. Step Three

1
0


