文章
Abigal
2017年05月22日

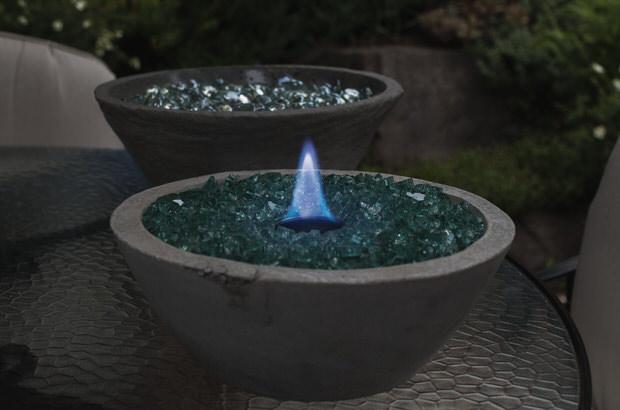
Sometimes you don’t want to build a whole “fire pit” adventure in your backyard, but you still want that fire factor. No problem, we found some easy DIY table top fire bowls for you that fit perfectly in any garden space! Whether you don’t want to smoke out the neighbors, or you just don’t have the space, fire bowls can be used on the patio any time of year. Fire is an element of nature that is a natural in a garden space, and allows you to enjoy the outdoors long after the sun goes down. Think “campfire” without the firewood hunting! (If you do want to go all out, learn how to build a fire pit!) Our feature photos below show us how to make a tabletop fire pit from ‘Dunn Lumber’, They use easy to find gel fuel, and they even have a budget tip for the fuel at the end! All of the supplies needed you can get at most home improvement stores.
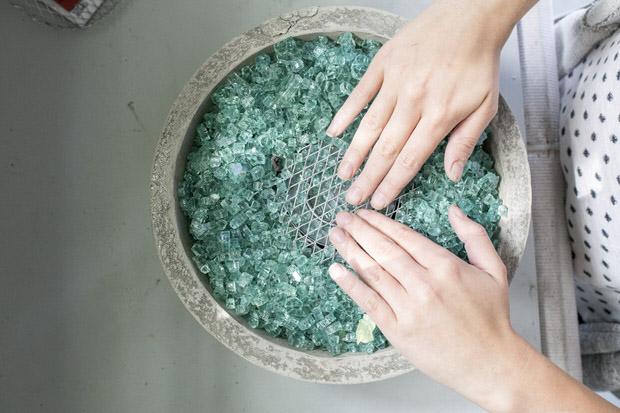
Mike from ‘Modern Builds’ shows us how to make his modern concrete fire bowl in video! This is a great tutorial for those of us who really need to be walked through a project visually, and honestly I think most of us fall into that category!

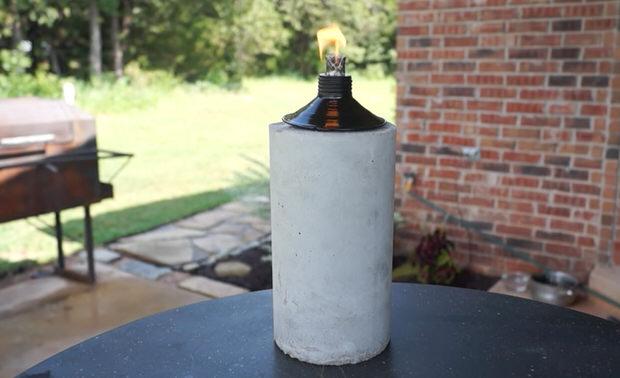
Also from Mike at ‘Modern Builds’ is this DIY concrete tabletop Tiki torch. Also in video, this tutorial was a little different, and we love different!
Karen at ‘The Art of Doing Stuff’ made this awesome DIY personal fire pit for cheap. She made this for under $25, and we’ve seen similar ones for over $150…

‘BHG” made this really simple backyard fire pit with a galvanized metal bowl, fire glass and gel fuel. Be sure if you use a metal container you remember it can get hot really fast.

Kim at ‘Today’s Creative Life’ made this DIY tabletop fire bowl from a flower bowl, gorgeous blue fire glass and gel fuel.

Now that you have Kim’s flower pot tutorial down, we will wrap up this post on DIY tabletop fire pits with this inspirational photo from ‘Pinterest’. Using a terra cotta flower pot with a base, this fire pit is an easy DIY!


Mike from ‘Modern Builds’ shows us how to make his modern concrete fire bowl in video! This is a great tutorial for those of us who really need to be walked through a project visually, and honestly I think most of us fall into that category!

Also from Mike at ‘Modern Builds’ is this DIY concrete tabletop Tiki torch. Also in video, this tutorial was a little different, and we love different!

Karen at ‘The Art of Doing Stuff’ made this awesome DIY personal fire pit for cheap. She made this for under $25, and we’ve seen similar ones for over $150…

‘BHG” made this really simple backyard fire pit with a galvanized metal bowl, fire glass and gel fuel. Be sure if you use a metal container you remember it can get hot really fast.

Kim at ‘Today’s Creative Life’ made this DIY tabletop fire bowl from a flower bowl, gorgeous blue fire glass and gel fuel.

Now that you have Kim’s flower pot tutorial down, we will wrap up this post on DIY tabletop fire pits with this inspirational photo from ‘Pinterest’. Using a terra cotta flower pot with a base, this fire pit is an easy DIY!

0
0
文章
Juze
2017年05月22日

Learn how to make a guava bonsai step by step in this guava tree information article. Guava tree becomes an excellent bonsai and doesn’t require too much care or maintenance.
Difficultly— Easy
Styles— Informal Upright, Formal Upright, Slanting, Semi-cascade, Broom
Requirements to Make a Guava BonsaiLocation
The guava is a tropical plant and therefore, it should be placed outdoors on a location that is sunny. If you live in a temperate region keep your guava bonsai indoors in winter.
Must Read: How to Grow Lemon Tree in a Pot
Soil

Use good quality bonsai soil mix composed of one-fourth part each of Akadama, Demolin Clay, Pumice, and Humus.
Watering
Guava tree bonsai has moderate watering needs. The soil should never dry out completely otherwise the fine roots will die.
Provide regular and deep watering when the tree is actively growing but reduce watering in winter.
In fall, the tree must be monitored more closely and must be watered only if the soil dries out or leaves starts to wilt.
Also Read: How to Water Container Plants
Pruning
The typical habit of this tree is to grow lots of branches and twigs, which should be pinched and pruned regularly to keep guava bonsai in the desired shape. Also, remove suckers as soon as you notice them.
Wiring
Another method to influence the shape of a guava bonsai is wiring. Its branches are rigid when matured and extremely easy to break. That’s why it is best to wire it when branches are young, using a copper wire. Wiring is best done in winter months and after the defoliation.
Must Read: Baobab Bonsai
Bonsai Guava Tree Care InformationFertilizer
Guava bonsai needs fertilizer during the growing season from spring to fall (autumn) using an organic balanced liquid fertilizer. Fertilizing should be suspended in winter or when the tree is not growing or if it is recently repotted.
Repotting
To prevent the tree from being pot-bound, regular repotting is crucial. The guava tree should be repotted in every 2 years in the spring. When repotting, pruned the roots so that the plant can fit in the pot. This also stimulates a better root system. Prune up to 1/4 root mass.
Overwintering
In colder zones, it should be brought indoors since the Guava is a tropical plant. The temperature should be around 55-60 degrees Fahrenheit. At the temperature below 50 degree Fahrenheit the tree starts to loose leaves.
It must be ensured that tree is overwintered in particularly the brightest spot possible, away from cold drafts.
Pests and Diseases Prevention
The best protection against diseases is a careful maintenance and regular inspection of guava tree bonsai. Although, guava is a tough plant but it can be attacked by common pests that are easily repelled by the use of organic pesticides.

Difficultly— Easy
Styles— Informal Upright, Formal Upright, Slanting, Semi-cascade, Broom
Requirements to Make a Guava BonsaiLocation
The guava is a tropical plant and therefore, it should be placed outdoors on a location that is sunny. If you live in a temperate region keep your guava bonsai indoors in winter.
Must Read: How to Grow Lemon Tree in a Pot
Soil

Use good quality bonsai soil mix composed of one-fourth part each of Akadama, Demolin Clay, Pumice, and Humus.
Watering
Guava tree bonsai has moderate watering needs. The soil should never dry out completely otherwise the fine roots will die.
Provide regular and deep watering when the tree is actively growing but reduce watering in winter.
In fall, the tree must be monitored more closely and must be watered only if the soil dries out or leaves starts to wilt.
Also Read: How to Water Container Plants
Pruning
The typical habit of this tree is to grow lots of branches and twigs, which should be pinched and pruned regularly to keep guava bonsai in the desired shape. Also, remove suckers as soon as you notice them.
Wiring
Another method to influence the shape of a guava bonsai is wiring. Its branches are rigid when matured and extremely easy to break. That’s why it is best to wire it when branches are young, using a copper wire. Wiring is best done in winter months and after the defoliation.
Must Read: Baobab Bonsai
Bonsai Guava Tree Care InformationFertilizer
Guava bonsai needs fertilizer during the growing season from spring to fall (autumn) using an organic balanced liquid fertilizer. Fertilizing should be suspended in winter or when the tree is not growing or if it is recently repotted.
Repotting
To prevent the tree from being pot-bound, regular repotting is crucial. The guava tree should be repotted in every 2 years in the spring. When repotting, pruned the roots so that the plant can fit in the pot. This also stimulates a better root system. Prune up to 1/4 root mass.
Overwintering
In colder zones, it should be brought indoors since the Guava is a tropical plant. The temperature should be around 55-60 degrees Fahrenheit. At the temperature below 50 degree Fahrenheit the tree starts to loose leaves.
It must be ensured that tree is overwintered in particularly the brightest spot possible, away from cold drafts.
Pests and Diseases Prevention
The best protection against diseases is a careful maintenance and regular inspection of guava tree bonsai. Although, guava is a tough plant but it can be attacked by common pests that are easily repelled by the use of organic pesticides.
0
0
文章
Juze
2017年05月22日

Learn how to grow pomegranate tree in pot. If you’ve grown citrus in pot, growing pomegranates in containers can not be difficult for you. Moreover, pomegranate is more cold hardy and easy to grow.
*Pomegranate is one of the nicest fruit trees and perhaps the easiest to grow in pots because it has shallow root system when compared to other fruit trees.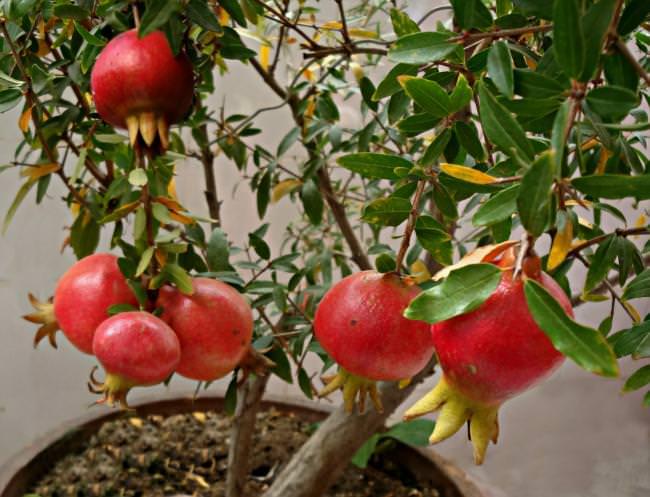
Pomegranate tree if grown under optimal conditions, live up to 200 years. It is native to Middle East (Iran) and South Asia. It is a shrub or small tree that might grow up to 6 m (20 ft) but usually reduced to 2 m.
USDA Hardiness Zones — 9b – 11, *can be grown below zone 9 in containers
Difficulty — Easy
Soil pH — Neutral
Other Names — Punic apple, Granatapfel, Granada, Grenade, Melograno, Melagrana, Anardana, Anar, Dadima, Fruit du, Pomme Grenade, Punica granatum, Roma, Shi Liu Gen Pi and Shi Liu Pi.
Appearance
The exotic container plant is adorned with five to eight centimeters long lance shaped leaves that are shiny and bronze in color from the bud, which later turn green.
Pomegranate flowers are delicate, bell-shaped and show up in the wild bright red. Its flowers are up to 3 centimeters wide. Ornamental varieties can have flowers in pink, cream, and even white.
In addition to the decorative foliage and flowers, it is mainly the fruits that make the pomegranate tree so desirable. They have the size of apples and a yellow-brown to reddish-brown shell. The juicy, red pulp inside the fruit enveloping the countless seeds that tastes aromatic and sweet.
Dwarf Pomegranate VarietiesFruiting Varieties‘Nana’ – The most interesting variety among the pomegranates trees is the dwarf variety ‘Nana’. It grows compact, floriferous and is considered robust and cold hardy, it grows in USDA Zones 7 to 11. As a container plant it grows up to only about 1 m tall, forms orange to garnet red flowers that produce small fruits with viable seeds.‘Provence’ – When most of the pomegranate varieties are not much cold hardy, provence is one you can look at. It can tolerate temperature down to 5 F (-15 C) and can be grown in cold climate.‘State fair’ – State fair is manageable variety for containers. It grows up to 1 . 5 m tall and grown in USDA Zones 7 to 11.Ornamental Varieties‘Flore Pleno’ – It is fruitless variety of pomegranate, the name translates as “double flower”. In summer, it produces countless beautiful orange-red flowers.Punica granatum ‘Madame Legrelle’ – A well-known ornamental variety. Special thing about this variety of pomegranate is its extraordinary, dense double flowers that come in shiny orange to salmon colors with white border.
Pomegranate is a manageable plant, you can also try large varieties.
Propagation and Growing Pomegranates in Containers
Pomegranate plants can be propagated by cuttings or by seeds in spring to summer when temperature remains in range of 68 F (20 C) but it is better to buy a 2 – 3 year old plant from nursery or online. This way you don’t have to wait long for fruits.
Propagation by seeds
Buy as ripe pomegranate as possible. Separate and clean seeds from the pulp by rubbing them from paper towel, let them dry up for a few days before sowing.
Plant the seeds no more than ¼ inches deep in light seed-starting mix. Place the pots in a bright location, optionally inside a plastic bag or greenhouse that maintains a temperature around 68 F (20 C). Always keep the soil moist. Seeds will germinate within 1 – 6 weeks depending more on the variety and climate.
Propagation by cuttings
Take several 8 to 10 inch-long cuttings. Plant the cutting in a well drained potting mix. It roots easily and quickly at ambient temperature of 20 degrees Celsius and high humidity.
*If you’re living in tropics, growing pomegranates is extremely easy for you, you can grow pomegranate in any season except peak summer. All other growing requirements given below are similar.
Choosing a pot
Pot should be appropriate to the size of plant, increase the pot size by repotting as your plant grow. Also care about to have sufficient holes in the base of pot you’re using for proper drainage.
Requirements for Growing Pomegranates in Pots
If you’ve grown citrus in pot, growing pomegranates in pot can not be difficult for you. Moreover, pomegranate is more cold hardy and easy to grow. It requires a lot of water and fertilizer. It is also frost sensitive but after all of this care it rewards you with iron rich, fresh juicy fruits.
Location
Choose a sunniest location to keep your pomegranate plant happy and healthy. The more sun it will receive, the more it will fruit. However, it also thrives in partial shade but it makes the plant to bloom and fruit lesser. It is also possible to cultivate pomegranate tree near a windowsill if it receives full sun.
Soil
Soil should be loamy, rich in organic content, loose and permeable.
Watering
In the growing period its water requirement is medium to high. Therefore, it should be watered regularly and deeply. Soil must be kept moist but not wet or waterlogged.
In the winter watering should be reduced.
Pomegranate Tree CareFertilizer
During the growing season pomegranate tree is fertilized regularly, fertilize after every two week using half strength liquid 8-8-8 fertilizer according to the manufacturer’s instructions.
Pomegranate tree in pot often becomes zinc deficient, which is indicated by yellowing leaves. To overcome this, you can spray diluted zinc solution on foliage.
Application of compost or manure is also beneficial. Take care not to over fertilize it as it can cause the tree to produce lots of foliage and comparatively less flowers.
Overwintering Pomegranate
Overwintering pomegranate is similar to citrus. It is a deciduous tree that worships sun. Most of its species are sensitive to frost. But to low temperatures, the plant has developed a protective mechanism.
It sheds its leaves and become dormant below freezing temperature. There are only a few pomegranate tree varieties that survive really freezing temperatures with more than -10 C without damage.
If the pomegranate is cultivated in a pot in a cold climate below USDA Zone 9, it is important to prune it in the fall. Best place to keep pomegranate plant in winter is the garage or basement that remains warm. Temperature while keeping it indoors should not fall below 37 F (3 C). However, the optimum low temperature for most of the pomegranate varieties is 7 C (45 F).
If you’re able to keep your pomegranate tree in temperature around 55 F (15 C) indoors and allow it to take at least 4 hours of sunlight, it will not shed its leaves and go dormant. During the period of dormancy the pomegranate hardly needs fertilizer or water. However, the plant in winter should not dry out completely.
In spring, bring back the plant to a warm and bright place so that it’ll gradually acclimate the climate. A window that is oriented to South is good. Just when the plant show the first sign of growth and forms a few fully developed leaves, you can again start to fertilize it and give more water. Once the temperature comes in range of 7 C (45 F) place it outside.
Pruning
Pruning is necessary to give and maintain desired shape of your pomegranate tree and encourage flowering and fruiting. Pruning it best done after all danger of frost has passed when the tree is about to start growing.
Prune off weak, dead and undesirable branches to direct tree’s energy to right part and shorten long branches to encourage flowering.
Repotting
Repot your pomegranate tree when it becomes slightly root bound. Right time to repot is when there are no flowers or fruits on the plant, especially when it start its growth in the beginning of growing season.
Diseases, pests and other problems
Pomegranate tree is not very vulnerable when it comes to pests and diseases. It is mostly attacked by fruitflies, whiteflies and pomegranate butterflies.
Fruit crack is one problem that is common in all pomegranate varieties. It occurs due to fluctuation or lack of moisture in substrate at the time of fruiting.
Harvesting
If pomegranate is grown from seeds fruits will begin to form in third year.
Generally the fruit will ripen in three to six months after the appearance of flowers.
*Pomegranate is one of the nicest fruit trees and perhaps the easiest to grow in pots because it has shallow root system when compared to other fruit trees.

Pomegranate tree if grown under optimal conditions, live up to 200 years. It is native to Middle East (Iran) and South Asia. It is a shrub or small tree that might grow up to 6 m (20 ft) but usually reduced to 2 m.
USDA Hardiness Zones — 9b – 11, *can be grown below zone 9 in containers
Difficulty — Easy
Soil pH — Neutral
Other Names — Punic apple, Granatapfel, Granada, Grenade, Melograno, Melagrana, Anardana, Anar, Dadima, Fruit du, Pomme Grenade, Punica granatum, Roma, Shi Liu Gen Pi and Shi Liu Pi.
Appearance
The exotic container plant is adorned with five to eight centimeters long lance shaped leaves that are shiny and bronze in color from the bud, which later turn green.
Pomegranate flowers are delicate, bell-shaped and show up in the wild bright red. Its flowers are up to 3 centimeters wide. Ornamental varieties can have flowers in pink, cream, and even white.
In addition to the decorative foliage and flowers, it is mainly the fruits that make the pomegranate tree so desirable. They have the size of apples and a yellow-brown to reddish-brown shell. The juicy, red pulp inside the fruit enveloping the countless seeds that tastes aromatic and sweet.
Dwarf Pomegranate VarietiesFruiting Varieties‘Nana’ – The most interesting variety among the pomegranates trees is the dwarf variety ‘Nana’. It grows compact, floriferous and is considered robust and cold hardy, it grows in USDA Zones 7 to 11. As a container plant it grows up to only about 1 m tall, forms orange to garnet red flowers that produce small fruits with viable seeds.‘Provence’ – When most of the pomegranate varieties are not much cold hardy, provence is one you can look at. It can tolerate temperature down to 5 F (-15 C) and can be grown in cold climate.‘State fair’ – State fair is manageable variety for containers. It grows up to 1 . 5 m tall and grown in USDA Zones 7 to 11.Ornamental Varieties‘Flore Pleno’ – It is fruitless variety of pomegranate, the name translates as “double flower”. In summer, it produces countless beautiful orange-red flowers.Punica granatum ‘Madame Legrelle’ – A well-known ornamental variety. Special thing about this variety of pomegranate is its extraordinary, dense double flowers that come in shiny orange to salmon colors with white border.
Pomegranate is a manageable plant, you can also try large varieties.
Propagation and Growing Pomegranates in Containers
Pomegranate plants can be propagated by cuttings or by seeds in spring to summer when temperature remains in range of 68 F (20 C) but it is better to buy a 2 – 3 year old plant from nursery or online. This way you don’t have to wait long for fruits.
Propagation by seeds
Buy as ripe pomegranate as possible. Separate and clean seeds from the pulp by rubbing them from paper towel, let them dry up for a few days before sowing.
Plant the seeds no more than ¼ inches deep in light seed-starting mix. Place the pots in a bright location, optionally inside a plastic bag or greenhouse that maintains a temperature around 68 F (20 C). Always keep the soil moist. Seeds will germinate within 1 – 6 weeks depending more on the variety and climate.
Propagation by cuttings
Take several 8 to 10 inch-long cuttings. Plant the cutting in a well drained potting mix. It roots easily and quickly at ambient temperature of 20 degrees Celsius and high humidity.
*If you’re living in tropics, growing pomegranates is extremely easy for you, you can grow pomegranate in any season except peak summer. All other growing requirements given below are similar.
Choosing a pot
Pot should be appropriate to the size of plant, increase the pot size by repotting as your plant grow. Also care about to have sufficient holes in the base of pot you’re using for proper drainage.
Requirements for Growing Pomegranates in Pots

If you’ve grown citrus in pot, growing pomegranates in pot can not be difficult for you. Moreover, pomegranate is more cold hardy and easy to grow. It requires a lot of water and fertilizer. It is also frost sensitive but after all of this care it rewards you with iron rich, fresh juicy fruits.
Location
Choose a sunniest location to keep your pomegranate plant happy and healthy. The more sun it will receive, the more it will fruit. However, it also thrives in partial shade but it makes the plant to bloom and fruit lesser. It is also possible to cultivate pomegranate tree near a windowsill if it receives full sun.
Soil
Soil should be loamy, rich in organic content, loose and permeable.
Watering
In the growing period its water requirement is medium to high. Therefore, it should be watered regularly and deeply. Soil must be kept moist but not wet or waterlogged.
In the winter watering should be reduced.
Pomegranate Tree CareFertilizer
During the growing season pomegranate tree is fertilized regularly, fertilize after every two week using half strength liquid 8-8-8 fertilizer according to the manufacturer’s instructions.
Pomegranate tree in pot often becomes zinc deficient, which is indicated by yellowing leaves. To overcome this, you can spray diluted zinc solution on foliage.
Application of compost or manure is also beneficial. Take care not to over fertilize it as it can cause the tree to produce lots of foliage and comparatively less flowers.
Overwintering Pomegranate
Overwintering pomegranate is similar to citrus. It is a deciduous tree that worships sun. Most of its species are sensitive to frost. But to low temperatures, the plant has developed a protective mechanism.
It sheds its leaves and become dormant below freezing temperature. There are only a few pomegranate tree varieties that survive really freezing temperatures with more than -10 C without damage.
If the pomegranate is cultivated in a pot in a cold climate below USDA Zone 9, it is important to prune it in the fall. Best place to keep pomegranate plant in winter is the garage or basement that remains warm. Temperature while keeping it indoors should not fall below 37 F (3 C). However, the optimum low temperature for most of the pomegranate varieties is 7 C (45 F).
If you’re able to keep your pomegranate tree in temperature around 55 F (15 C) indoors and allow it to take at least 4 hours of sunlight, it will not shed its leaves and go dormant. During the period of dormancy the pomegranate hardly needs fertilizer or water. However, the plant in winter should not dry out completely.
In spring, bring back the plant to a warm and bright place so that it’ll gradually acclimate the climate. A window that is oriented to South is good. Just when the plant show the first sign of growth and forms a few fully developed leaves, you can again start to fertilize it and give more water. Once the temperature comes in range of 7 C (45 F) place it outside.
Pruning
Pruning is necessary to give and maintain desired shape of your pomegranate tree and encourage flowering and fruiting. Pruning it best done after all danger of frost has passed when the tree is about to start growing.
Prune off weak, dead and undesirable branches to direct tree’s energy to right part and shorten long branches to encourage flowering.
Repotting
Repot your pomegranate tree when it becomes slightly root bound. Right time to repot is when there are no flowers or fruits on the plant, especially when it start its growth in the beginning of growing season.
Diseases, pests and other problems

Pomegranate tree is not very vulnerable when it comes to pests and diseases. It is mostly attacked by fruitflies, whiteflies and pomegranate butterflies.
Fruit crack is one problem that is common in all pomegranate varieties. It occurs due to fluctuation or lack of moisture in substrate at the time of fruiting.
Harvesting
If pomegranate is grown from seeds fruits will begin to form in third year.
Generally the fruit will ripen in three to six months after the appearance of flowers.
1
0
文章
Juze
2017年05月22日

Learn how to grow dragon fruit, it’s one of the most strange looking subtropical fruit you’d like to grow in your garden. Growing dragon fruit is fairly easy both outdoors or in the pot.

USDA Zones— 9 to 11
Propagation Method — Seeds, vegetative propagation
Difficulty — Moderate
Soil pH — 6 to 7
Other names — Indonesia buah naga, Khmer sror kaa neak, Thai kaeo mangkon, nanettika fruit, Kaktus madu, Long guo, Cereus triangularis, Thanh long, Strawberry Pear, Cactus fruit, Night blooming Cereus, Belle of the Night, Jesus in the Cradle.
Dragon fruit, also known as pitahaya or pitaya, belongs to the cactus family. Its flowers are unique and one among the largest in the world. It has a diameter of 25 cm and is about 30 cm long. One more feature of its bloom is: it only opens for one night and exudes inviting fruity fragrance.
Growing Regions
Dragon fruit is native to Central America and grown throughout the subtropical and tropical part of China, Israel, Vietnam, Malaysia, Thailand and
Nicaragua.
How to Plant and Grow Dragon Fruit
Dragon fruit plant is actually a climbing cactus and needs support to climb on, usually as the plant becomes mature it forms aerial roots from the branches and find something to climb. So, it’s best if you’re growing dragonfruit, find something to support your plant.
Dragon fruit is a sub tropical plant, it loves heat and sun but it’s better to plant it in a spot that remains dry and receives only partial sun.
If you’re living in more temperate climate or if you’re an urban gardener and don’t have much space, grow dragon fruit in pot, it’s fairly easy to grow and adapts itself well in containers. In pot you can move and overwinter it to save from frost as pitaya plant can survive only short period of freezing temperature (below 28 F is detrimental) and frost.
PropagationGrowing Dragon Fruit from Seed
With a knife, divide dragon fruit in half and scoop out the black seeds from the pulp. Wash the pulp off the seeds. Put these seeds on a moist paper towel and leave them overnight.
Fill the germinating tray or small pot with well draining but poor starting mix. You can make it yourself by mixing one part peat and one part perlite. Sprinkle the seed on soil surface and cover that with a thin layer of growing medium that barely covers the seeds.
Thoroughly moisten the soil using sprayer and cover the pot with plastic wrap. Keep the soil moist until seeds germinate, which will take around 15 to 30 days.
After the seeds germinate, uncover the plastic and transplant them to bigger pots when necessary.
Growing Dragon Fruit from Cuttings
To learn how to propagate dragon fruit from cuttings, read this.
Soil
For growing dragonfruit, well draining soil that is sandy is better. A mixture of sand in garden soil would be appropriate. It is forgiving to poor soil.
Water
Since the dragon fruit is a cactus, water it moderately with care like you do with other succulents. Water only when soil dries out completely.
Fertilizer for Growing Dragonfruit
Fertilize dragon fruit with balanced fertilizer every month when the plant is active in its growing season. Stop fertilizing in winter if growing in colder climate. Application of aged manure or compost can also be done time to time.
Dragon Fruit Pollination
Many dragon fruit varieties are self pollinating but there are some that requires cross pollination. If your dragon fruit is unable to do self pollination, you’ll need to grow two or more dragon fruit plants closely for cross pollination. As dragon fruit flowers are nocturnal, its pollination depends on moths and bats. For assurance, you can also do self pollination at night.
Harvest
Harvest dragon fruit when its skin color changes from bright green to red or pink. Its fruit is oval to ovate in shape and 10 to 15 cm long and forms 30 to 50 days after flowering.
Pericarp of dragon fruit is rough and scaly and is usually pink in color. However, there are also red, or yellow dragon fruits depending on the variety. The flesh is located in the interior is white and contains black seeds.
Pests and Diseases

USDA Zones— 9 to 11
Propagation Method — Seeds, vegetative propagation
Difficulty — Moderate
Soil pH — 6 to 7
Other names — Indonesia buah naga, Khmer sror kaa neak, Thai kaeo mangkon, nanettika fruit, Kaktus madu, Long guo, Cereus triangularis, Thanh long, Strawberry Pear, Cactus fruit, Night blooming Cereus, Belle of the Night, Jesus in the Cradle.
Dragon fruit, also known as pitahaya or pitaya, belongs to the cactus family. Its flowers are unique and one among the largest in the world. It has a diameter of 25 cm and is about 30 cm long. One more feature of its bloom is: it only opens for one night and exudes inviting fruity fragrance.
Growing Regions
Dragon fruit is native to Central America and grown throughout the subtropical and tropical part of China, Israel, Vietnam, Malaysia, Thailand and
Nicaragua.
How to Plant and Grow Dragon Fruit
Dragon fruit plant is actually a climbing cactus and needs support to climb on, usually as the plant becomes mature it forms aerial roots from the branches and find something to climb. So, it’s best if you’re growing dragonfruit, find something to support your plant.
Dragon fruit is a sub tropical plant, it loves heat and sun but it’s better to plant it in a spot that remains dry and receives only partial sun.
If you’re living in more temperate climate or if you’re an urban gardener and don’t have much space, grow dragon fruit in pot, it’s fairly easy to grow and adapts itself well in containers. In pot you can move and overwinter it to save from frost as pitaya plant can survive only short period of freezing temperature (below 28 F is detrimental) and frost.
PropagationGrowing Dragon Fruit from Seed
With a knife, divide dragon fruit in half and scoop out the black seeds from the pulp. Wash the pulp off the seeds. Put these seeds on a moist paper towel and leave them overnight.
Fill the germinating tray or small pot with well draining but poor starting mix. You can make it yourself by mixing one part peat and one part perlite. Sprinkle the seed on soil surface and cover that with a thin layer of growing medium that barely covers the seeds.
Thoroughly moisten the soil using sprayer and cover the pot with plastic wrap. Keep the soil moist until seeds germinate, which will take around 15 to 30 days.
After the seeds germinate, uncover the plastic and transplant them to bigger pots when necessary.
Growing Dragon Fruit from Cuttings
To learn how to propagate dragon fruit from cuttings, read this.
Soil

For growing dragonfruit, well draining soil that is sandy is better. A mixture of sand in garden soil would be appropriate. It is forgiving to poor soil.
Water
Since the dragon fruit is a cactus, water it moderately with care like you do with other succulents. Water only when soil dries out completely.
Fertilizer for Growing Dragonfruit
Fertilize dragon fruit with balanced fertilizer every month when the plant is active in its growing season. Stop fertilizing in winter if growing in colder climate. Application of aged manure or compost can also be done time to time.
Dragon Fruit Pollination
Many dragon fruit varieties are self pollinating but there are some that requires cross pollination. If your dragon fruit is unable to do self pollination, you’ll need to grow two or more dragon fruit plants closely for cross pollination. As dragon fruit flowers are nocturnal, its pollination depends on moths and bats. For assurance, you can also do self pollination at night.
Harvest
Harvest dragon fruit when its skin color changes from bright green to red or pink. Its fruit is oval to ovate in shape and 10 to 15 cm long and forms 30 to 50 days after flowering.
Pericarp of dragon fruit is rough and scaly and is usually pink in color. However, there are also red, or yellow dragon fruits depending on the variety. The flesh is located in the interior is white and contains black seeds.
Pests and Diseases
0
0
文章
Abigal
2017年05月22日

Learn how to grow star anise in this article. Star anise is a spice widely used in South East Asian cuisines, growing star anise is easy in subtropical climates. It is adorned with beautiful flowers and fruits that are star shaped.
USDA Zones— 8 – 11
Difficulty— Moderate
Other Names— Anis de Chine, Anís Estrellado, Anis Étoilé, Anis Étoilé Chinois, Aniseed Stars, Anisi Stellati Fructus, Ba Jiao Hui, Badiana, Badiane, Badiane de Chine, Bajiao, Chinese Anise, Chinese Star Anise, Eight-Horned Anise, Eight Horns and Illicium verum.
It belongs to the family of Illiciaceae, dicotyledonous angiosperm species. It is a tropical evergreen tree, tall between 5-10 m. Star anise has large glossy green foliage, its white flowers are beautiful and of great decorative value. Star anise fruit has eight carpels that together form the star-shaped fruit (hence called “Star anise”).
Propagation
Star anise is propagated by seeds or cuttings. How to grow star anise from seed: Seeds are propagated best when temperature range around 65 – 70 F (18 – 20 C). You can sow seeds in pots and or directly outside.
Water the seeds frequently to keep the soil moist and make sure the pot has drainage holes in the bottom to drain excess water.
Growing Condition
Star anise is native to Vietnam and China and grows in warm subtropical climate. It is a frost tender perennial. Star anise only grows in areas where the temperature does not fall below 15 F (-10 C) . If you live in a cooler area below USDA Zone 9, plant star anise in a container so that you can keep it in a greenhouse or indoors in winter.
Requirements for Growing Star AnisePosition
Star anise requires dappled shade, partial sun but if you’re growing star anise in a much cooler climate, plant it in a warm and sunny location. Choose location in a way that it is not exposed to cold and dry winds.
Soil
Provide soil that is humus and compost rich. Soil texture should be loamy and well drained. Slightly acidic to neutral soil is optimal.
Watering
For growing star anise, do regular watering and keep the soil slightly moist but reduce the watering in winter.
Star Anise CareFertilizer
Spread a 3-inch layer of compost or aged manure on the ground surrounding the tree in the spring. This is the only fertilizer it requires.
If soil is poor, apply slow release fertilizer all purpose fertilizer in the spring.
Pruning
When the plant is young pinch and prune it if you want to make it bushier. There are no special pruning requirements, however, you can always prune off dead, diseased and weak branches.
Harvest
Star anise tree takes at least 6 years to fruit if grown from seeds. These fruits (wrongly called seeds) are picked unripe while they are still green, later on these fruits are sun dried until their color change to reddish-brown, seeds can be removed once the fruits are ready to be stored.
Pests and Diseases
There are not any specific pest or disease that bothers it. Star anise itself has anti bacterial and pest repellent properties.
Uses
Star Anise is widely used in Asian cuisines to flavor dishes especially meat and curries, it is also used in desserts and beverages. Together with fennel seeds, cloves, cinnamon and pepper it is considered as one of the “Five Chinese Spice”, used for its strong taste and spicy flavor. It is an essential part of Chinese cuisines and also used in variety of Indian recipes. It’s addition to other popular Indian spices makes a special spicy ingredient, which is called “Garam masala”.
Warnings
While growing star anise, don’t confuse it with Japanese star anise (Illicium anisatum) or “Shikimi“, which is a poisonous plant and native to Japan. Its seeds or fruits are somewhat similar to those of star anise and are only slightly smaller and looks like cardamom, having a more rounded shape and have a small hook.
2
0
文章
Abigal
2017年05月22日

Learn how to grow gaura in your garden. Gaura plant care and growing is easy. This drought tolerant shrub thrives in well-drained soil and loves to bath in the day long sun.
The gaura is a beautiful perennial plant that is easy to grow and with minimal care, it offers a long blooming period and colorful flowers that attract butterflies.
Gaura Plant Care

USDA Zones— 5 – 10
Difficulty— Easy
Other Names— Wandflower, Butterfly gaura, Whirling butterfly, Siskiyou pink
The genus “Gaura” consists of about 20 species of plants. It is native to North America. Its fine erected foliage and irregularly shaped flowers make it attractive. You can vary the uses according to the species, low growing varieties (not more than 24 inches) are placed in borders or in rock gardens while the large shrub-like varieties are perfect for growing in the cluster behind low growing plants in flower beds.
Two Popular VarietiesGaura Biennis (Biennial Gaura): A tall variety that can grow 3-6 feet high. The foliage is red when matured, it has hairy flowering stems and light pink or white colored flowers that turn into coral red in late summer and fall.Gaura Lindheimeri (White Gaura): A Texas native, tolerant to drought. It grows up to 5 feet tall, flowers appears from summer to fall.How to Grow GauraPropagation
Gaura can be propagated from seeds.The seeds are available in local garden shops or can be bought online. Propagation by cuttings should be done in spring and late summer or by division in the fall.
Planting Gaura
Prepare the planting site by performing a deep plowing. Remove stones, debris, and weeds. This plant doesn’t transplant well, that’s why it is better to sow the seeds directly at the planting site, once all the dangers of frost are eliminated and the weather warms up.
If you are planting a potted gaura plant, make sure to make a planting hole in soil– twice wide and of the same depth as it was planted in the previous pot. Place the plant in the hole and fill that with well-drained soil. If the soil is very heavy or poor prepare it by adding compost or well-rotted manure and coarse sand in smaller proportion.
How to Grow Gaura in Pots
Growing gaura in pots is possible. Choose the pot that is 12 inches deep and 10 inches wide to provide a sufficient space to the plant. Keep the pot in sunny spot and water it only when the top surface of soil dries out.
Requirements for Growing Gaura

Position
Planting position must be sunny, for prolific blooms exposure to at least 6 hours of sunlight is ideal. If the location is windy provide support to plants.
Soil
Gaura grows well in light and sandy soil. Due to its taproot, the soil must be deep and also little fertile. Water logging soil that is clay rich and cloaks the drainage hinders the development and must be avoided.
Watering
Growing gaura is easy. As it adapts well to the drought-like conditions due to the long taproot it has, infrequent and economical watering is recommended. Water it deeply but only when the top two inch of soil seems dry.
Spacing
The planting distance for low growing varieties is around 12 inches. For more shrub like large varieties, space the plants 15 inches apart from each other.
Gaura Plant CareFertilizer
Gaura doesn’t require additional fertilizer to bloom. It thrives in poor soil. Application of manure or compost during planting is sufficient. Even adding too much natural fertilizer can cause the plant to grow limply.
Deadheading and Pruning
Remove spent flower spikes as soon as they fade, cut the entire stalk to promote more blooms. Once the blooming period ends in late summer, trim the shrub slightly (3″) to refresh it. The plant will start to flower again in fall with more vigor.
Overwintering
Gaura plant care is if you live in the warmer region. During the winter, let the faded stems on site, they provide protection against the cold. It is also recommended to mulch around the roots to insulate them, especially if you live below USDA Zone 8.
Diseases and Pests
The gaura is a beautiful perennial plant that is easy to grow and with minimal care, it offers a long blooming period and colorful flowers that attract butterflies.
Gaura Plant Care

USDA Zones— 5 – 10
Difficulty— Easy
Other Names— Wandflower, Butterfly gaura, Whirling butterfly, Siskiyou pink
The genus “Gaura” consists of about 20 species of plants. It is native to North America. Its fine erected foliage and irregularly shaped flowers make it attractive. You can vary the uses according to the species, low growing varieties (not more than 24 inches) are placed in borders or in rock gardens while the large shrub-like varieties are perfect for growing in the cluster behind low growing plants in flower beds.
Two Popular VarietiesGaura Biennis (Biennial Gaura): A tall variety that can grow 3-6 feet high. The foliage is red when matured, it has hairy flowering stems and light pink or white colored flowers that turn into coral red in late summer and fall.Gaura Lindheimeri (White Gaura): A Texas native, tolerant to drought. It grows up to 5 feet tall, flowers appears from summer to fall.How to Grow GauraPropagation
Gaura can be propagated from seeds.The seeds are available in local garden shops or can be bought online. Propagation by cuttings should be done in spring and late summer or by division in the fall.
Planting Gaura
Prepare the planting site by performing a deep plowing. Remove stones, debris, and weeds. This plant doesn’t transplant well, that’s why it is better to sow the seeds directly at the planting site, once all the dangers of frost are eliminated and the weather warms up.
If you are planting a potted gaura plant, make sure to make a planting hole in soil– twice wide and of the same depth as it was planted in the previous pot. Place the plant in the hole and fill that with well-drained soil. If the soil is very heavy or poor prepare it by adding compost or well-rotted manure and coarse sand in smaller proportion.
How to Grow Gaura in Pots
Growing gaura in pots is possible. Choose the pot that is 12 inches deep and 10 inches wide to provide a sufficient space to the plant. Keep the pot in sunny spot and water it only when the top surface of soil dries out.
Requirements for Growing Gaura

Position
Planting position must be sunny, for prolific blooms exposure to at least 6 hours of sunlight is ideal. If the location is windy provide support to plants.
Soil
Gaura grows well in light and sandy soil. Due to its taproot, the soil must be deep and also little fertile. Water logging soil that is clay rich and cloaks the drainage hinders the development and must be avoided.
Watering
Growing gaura is easy. As it adapts well to the drought-like conditions due to the long taproot it has, infrequent and economical watering is recommended. Water it deeply but only when the top two inch of soil seems dry.
Spacing
The planting distance for low growing varieties is around 12 inches. For more shrub like large varieties, space the plants 15 inches apart from each other.
Gaura Plant CareFertilizer
Gaura doesn’t require additional fertilizer to bloom. It thrives in poor soil. Application of manure or compost during planting is sufficient. Even adding too much natural fertilizer can cause the plant to grow limply.
Deadheading and Pruning
Remove spent flower spikes as soon as they fade, cut the entire stalk to promote more blooms. Once the blooming period ends in late summer, trim the shrub slightly (3″) to refresh it. The plant will start to flower again in fall with more vigor.
Overwintering
Gaura plant care is if you live in the warmer region. During the winter, let the faded stems on site, they provide protection against the cold. It is also recommended to mulch around the roots to insulate them, especially if you live below USDA Zone 8.
Diseases and Pests
1
0
文章
Micky
2017年05月22日

Learn how to grow datura. Growing datura is easy and this medicinal herb doesn’t require any special care or attention.
Flowering: Summer to late fall
Flower color: White, pink, yellow, purple
Exposure: Full Sun
Soil pH: Neutral
Height: 30 cm to 1.5 m
Plant type: Flower, Medicinal Herb
Type of foliage: deciduous
USDA Hardiness Zones: 9 – 11
Propagation Method: Seed sowing, cuttings
Toxicity: All parts of the plant are toxic, its ingestion leads to a delirium or hallucinatory feeling for several hours
Species and Varieties: The genus includes about twenty species. Datura stramonium, the Jimsonweed is often considered a weed and is one of the most poisonous plants in Solanaceae family.
Other Names— Jimson weed, Devil’s snare, thornapple, moon flower, hell’s bells, devil’s trumpet, devil’s weed, tolguacha, Jamestown weed, stinkweed, locoweed, pricklyburr, and devil’s cucumber
The plant is recognizable by its large leaves of 20 cm, dark green with jagged edges. It has a bushier growth and the plant usually grow 60 cm high but it can grow up to nearly 1.5 m. The flowers are bright colored and appear in late summer. Followed by fruits that come in the size of a small apricot, covered with long needle like thorns.
Growing Datura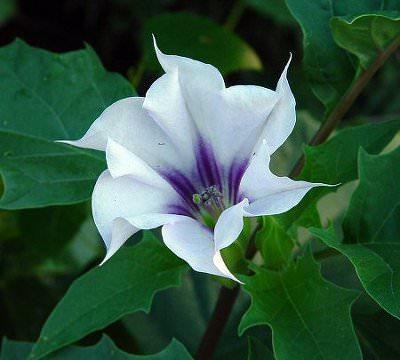
Growing datura is extremely easy. Just plant it in full sun in well-drained soil.
Soil
Humus-rich, well drained and calcareous soil is required for growing datura. However, it tolerates a variety of soil types.
Watering
Water your datura up regularly when it is establishing. Once matured, it doesn’t require watering as it seeks water deeply into the soil with the help of its long taproot.
Invasiveness
This plant is considered a weed. It can easily become invasive if grown in favorable conditions.
Pests and Diseases
The plant doesn’t bother by pests and diseases much. Still, spider mites, whiteflies, and mealybugs may attack it.
Uses and Effects
Datura stramonium contains powerful alkaloids. The plant if ingested can cause hallucinations, tachycardia, muscle weakness, and amnesia.

Flowering: Summer to late fall
Flower color: White, pink, yellow, purple
Exposure: Full Sun
Soil pH: Neutral
Height: 30 cm to 1.5 m
Plant type: Flower, Medicinal Herb
Type of foliage: deciduous
USDA Hardiness Zones: 9 – 11
Propagation Method: Seed sowing, cuttings
Toxicity: All parts of the plant are toxic, its ingestion leads to a delirium or hallucinatory feeling for several hours
Species and Varieties: The genus includes about twenty species. Datura stramonium, the Jimsonweed is often considered a weed and is one of the most poisonous plants in Solanaceae family.
Other Names— Jimson weed, Devil’s snare, thornapple, moon flower, hell’s bells, devil’s trumpet, devil’s weed, tolguacha, Jamestown weed, stinkweed, locoweed, pricklyburr, and devil’s cucumber
The plant is recognizable by its large leaves of 20 cm, dark green with jagged edges. It has a bushier growth and the plant usually grow 60 cm high but it can grow up to nearly 1.5 m. The flowers are bright colored and appear in late summer. Followed by fruits that come in the size of a small apricot, covered with long needle like thorns.
Growing Datura

Growing datura is extremely easy. Just plant it in full sun in well-drained soil.
Soil
Humus-rich, well drained and calcareous soil is required for growing datura. However, it tolerates a variety of soil types.
Watering
Water your datura up regularly when it is establishing. Once matured, it doesn’t require watering as it seeks water deeply into the soil with the help of its long taproot.
Invasiveness
This plant is considered a weed. It can easily become invasive if grown in favorable conditions.
Pests and Diseases
The plant doesn’t bother by pests and diseases much. Still, spider mites, whiteflies, and mealybugs may attack it.
Uses and Effects
Datura stramonium contains powerful alkaloids. The plant if ingested can cause hallucinations, tachycardia, muscle weakness, and amnesia.
1
1
文章
Micky
2017年05月22日

Learn how to grow timothy hay, growing timothy hay is easy but requires a few basic conditions which you can read below.
USDA Zones — 3-9
Difficulty — Easy
Other names — Herd grass, Herd’s grass, Meadow cat’s-tail, Phleum pratense, Timothy, Timothy grass, Meadow cat’s-tail and common cat’s tail.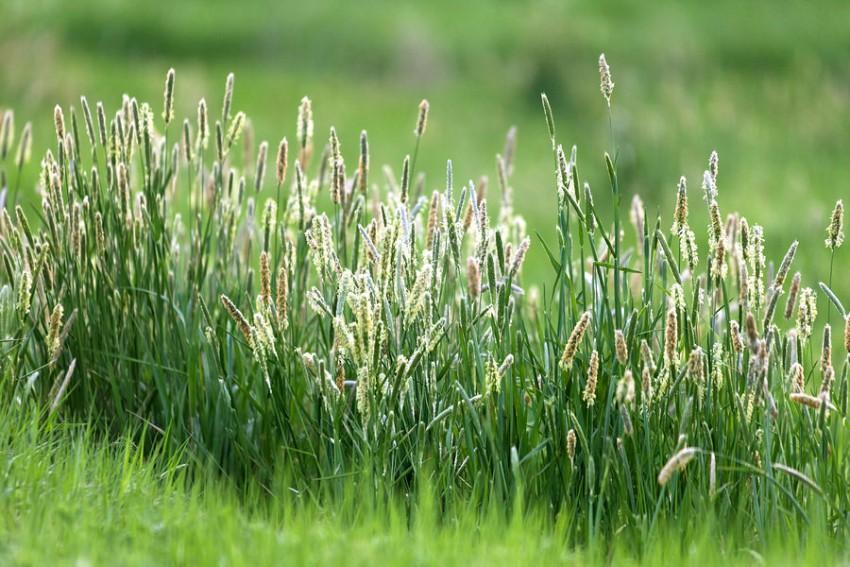
Timothy (Phleum pratense) is a perennial grass that grows of itself in some places, especially in the north, in the east and on the mountains. The leaves of timothy grass are quite pale green. Young leaves are rolled into the sleeve and then they grow in spirals. The base of the plant is often bulged and bulbous.
Timothy grass is generally used as hay to feed horses and that’s why is it also called Timothy hay. Apart from being used as hay it also produces a durable and attractive lawn. Growing timothy hay is relatively an easier task.
How to Grow Timothy HayPropagation and Planting Timothy GrassPrepare a place to sow seeds. Remove all weeds from the planting site with a hoe.Sprinkle the seeds on the planting site. The seeds must cover about one half of the total surface area of the soil.Rake to incorporate the planting site of the seeds in the soil. Sow the seeds no more than 1/2 inches deep.Slowly moisten the soil and keep it moist until the seeds germinate.For growing timothy hay, sow seeds in spring or late summer, you can also plant seeds in early fall.Requirements for Growing Timothy HayLocation
Timothy hay growing should be done on a flat area that receives partial shade. This cool season grass is undemanding and doesn’t require any special care.
Soil
Timothy grass grows well in both sandy or clay rich soil. It tolerates the wet conditions and thrives in slightly dry state for a short time too.
Watering
Keep the soil moist all the time. For growing timothy hay, regular watering is required as the plant has shallow roots that are not able to provide water under the surface of the soil, so even a short drought period can be detrimental for plant.
Timothy Hay Care
The timothy hay field should not be trampled on during drought periods because the grass has very shallow and fine roots that are sensitive at these times.
Fertilizer
Feed it with fertilizer rich in nitrogen in spring and again after harvesting. If you’re growing timothy hay with legumes, skip the nitrogen fertilizer. For accuracy in fertilization soil testing is recommended.
Harvesting
USDA Zones — 3-9
Difficulty — Easy
Other names — Herd grass, Herd’s grass, Meadow cat’s-tail, Phleum pratense, Timothy, Timothy grass, Meadow cat’s-tail and common cat’s tail.

Timothy (Phleum pratense) is a perennial grass that grows of itself in some places, especially in the north, in the east and on the mountains. The leaves of timothy grass are quite pale green. Young leaves are rolled into the sleeve and then they grow in spirals. The base of the plant is often bulged and bulbous.
Timothy grass is generally used as hay to feed horses and that’s why is it also called Timothy hay. Apart from being used as hay it also produces a durable and attractive lawn. Growing timothy hay is relatively an easier task.
How to Grow Timothy HayPropagation and Planting Timothy GrassPrepare a place to sow seeds. Remove all weeds from the planting site with a hoe.Sprinkle the seeds on the planting site. The seeds must cover about one half of the total surface area of the soil.Rake to incorporate the planting site of the seeds in the soil. Sow the seeds no more than 1/2 inches deep.Slowly moisten the soil and keep it moist until the seeds germinate.For growing timothy hay, sow seeds in spring or late summer, you can also plant seeds in early fall.Requirements for Growing Timothy HayLocation
Timothy hay growing should be done on a flat area that receives partial shade. This cool season grass is undemanding and doesn’t require any special care.
Soil
Timothy grass grows well in both sandy or clay rich soil. It tolerates the wet conditions and thrives in slightly dry state for a short time too.
Watering
Keep the soil moist all the time. For growing timothy hay, regular watering is required as the plant has shallow roots that are not able to provide water under the surface of the soil, so even a short drought period can be detrimental for plant.
Timothy Hay Care
The timothy hay field should not be trampled on during drought periods because the grass has very shallow and fine roots that are sensitive at these times.
Fertilizer
Feed it with fertilizer rich in nitrogen in spring and again after harvesting. If you’re growing timothy hay with legumes, skip the nitrogen fertilizer. For accuracy in fertilization soil testing is recommended.
Harvesting
0
0
文章
Micky
2017年05月22日

Learn how to grow carob tree. Growing carob tree is easy, it’s also grown as ornamental plant in the gardens.
Growing Carob is durable evergreen tree native to the Mediterranean. It has bright, green beautiful foliage, cluster of small flowers and edible pods that are used as cocoa powder substitute.
Carob pods contain about 8% protein, vitamins A and B and about one-third of calories than chocolate.
USDA Zones — 9-11
Propagation Method — Seeds
Difficulty — Easy
Soil pH — 6 – 8
Carob Tree Growing Conditions
Carob tree grows about 10 meter tall (exceptionally 15 m). It is a dioecious tree, which means each tree bears male or female flowers. Carob tree can bear up to 20 F temperature.
Carob tree has a thick and twisted trunk with a rough and brown bark. Its leaves are oval, dark green and shiny that are 12 to 30 centimeters long. Its foliage provides a welcome shade in hot countries. They form a very effective curtain against noise too.
Growing Carob from Seeds
The fresh carob tree seeds germinates quickly and easily. If you don’t find fresh seeds you can grow it from dry seeds which is scarified and soaked in water until they double in size. They can be planted in spring or fall.
Requirements for Growing Carob TreeSoil
The carob tree is a tree that grows in many soil types including hillsides with deep sandy soil or loam, even arid. It does not tolerate acidic or wet soils but requires good drainage.
Sun
Carob tree needs full sun and a position sheltered from wind.
Watering
It is resistant to drought. However, watering must be provided during dry seasons, especially if the tree is grown for its fruit.
Carob Tree Care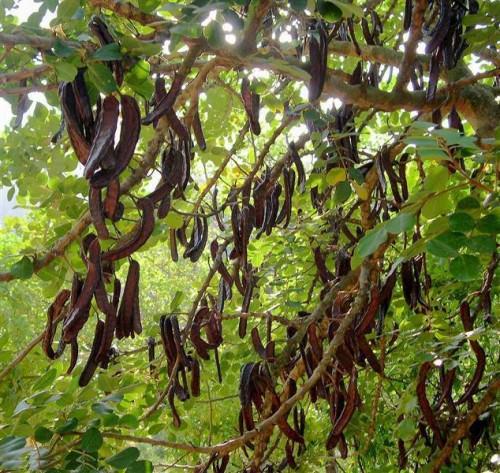
Once fully developed carob tree can withstand temperatures up to -7 ° C, but frost during flowering period can reduce or sometimes prevent fruiting. The tree is ideally grown in regions with a Mediterranean climate.
Fertilizer
Fertilizer is often unnecessary for carob trees. However, a 8-3-9 fertilizer can be applied occasionally to give plant a boost.
Pruning
Growing Carob is durable evergreen tree native to the Mediterranean. It has bright, green beautiful foliage, cluster of small flowers and edible pods that are used as cocoa powder substitute.
Carob pods contain about 8% protein, vitamins A and B and about one-third of calories than chocolate.

USDA Zones — 9-11
Propagation Method — Seeds
Difficulty — Easy
Soil pH — 6 – 8
Carob Tree Growing Conditions
Carob tree grows about 10 meter tall (exceptionally 15 m). It is a dioecious tree, which means each tree bears male or female flowers. Carob tree can bear up to 20 F temperature.
Carob tree has a thick and twisted trunk with a rough and brown bark. Its leaves are oval, dark green and shiny that are 12 to 30 centimeters long. Its foliage provides a welcome shade in hot countries. They form a very effective curtain against noise too.
Growing Carob from Seeds
The fresh carob tree seeds germinates quickly and easily. If you don’t find fresh seeds you can grow it from dry seeds which is scarified and soaked in water until they double in size. They can be planted in spring or fall.
Requirements for Growing Carob TreeSoil
The carob tree is a tree that grows in many soil types including hillsides with deep sandy soil or loam, even arid. It does not tolerate acidic or wet soils but requires good drainage.
Sun
Carob tree needs full sun and a position sheltered from wind.
Watering
It is resistant to drought. However, watering must be provided during dry seasons, especially if the tree is grown for its fruit.
Carob Tree Care

Once fully developed carob tree can withstand temperatures up to -7 ° C, but frost during flowering period can reduce or sometimes prevent fruiting. The tree is ideally grown in regions with a Mediterranean climate.
Fertilizer
Fertilizer is often unnecessary for carob trees. However, a 8-3-9 fertilizer can be applied occasionally to give plant a boost.
Pruning
0
0
文章
Micky
2017年05月22日

Want to grow a cashew tree in your garden? But for growing cashew nuts tree you’ll need to acquire some basic growing and planting information that is given below in this article.
Cashew nuts growing is easy, but it requires a more specific environment and growing conditions. If you can provide that environment then you can grow your cashew tree and enjoy the nuts and fresh fruits that are called cashew apple, throughout the year.

USDA Zones — 10 – 11
Difficulty — Moderate
Soil pH — Slightly acidic to neutral
Other names — Maranon, Noix d’anacarde, Caju, Kaju, Mundiri, Kazu, Pajuil, anacardio, Paringi mavu, 槚如树
Cashew Nuts Growing Information
Cashew or Anacardium occidentale originates from the Caribbean Island and the North East of Brazil. But today it is grown in several other tropical parts of the world. Mostly in Africa, India and Southeast Asia for cashew nuts.
It is also called as cashew apple tree; it is part of the Anacardiaceae family, the same family that belongs to pistachio and mango.
Cashew tree can grow up to 6 – 12 m (20 – 40 f) high. Its evergreen leaves are oval, leathery and dark green. They have a prominent midrib.
The flowers, white and pink are gathered in inflorescence at the tips of young shoots. They are smaller in size but very fragrant.
As for the fruits of this tree, do not be fooled by appearances. The cashew apple is oval-shaped, like bell pepper: yellow, orange or red in color is a false fruit (it is also edible). The real fruit, more discreet is a nut attached to the end of the fake fruit. It is that which contains the edible kernel, which we called cashew.
How to Grow Cashew Tree from Seed
Cashew tree can be grown from seeds, air layering, and grafting. To propagate it from seeds, you will need a matured unshelled nut (seed). These seeds are viable up to 4 months.
If you have collected the fresh seed from the tree, dry it in the sun for 3 days and soak in water overnight before sowing.
Sow the seeds in good quality seed starting mix; the seeds will germinate anywhere from 4 days to 3 weeks.
Requirements for Growing Cashew Nuts TreeSun
Cashew tree needs at least 6 hours of direct sun, it grows slowly and doesn’t fruit if grown in the shade.
Soil
Cashew prefers poor sandy and laterite soil with the pH level around 5 – 6.5. Never grow cashew tree in a clay-rich soil. It is heavy and encourages waterlogging, and in the case of growing cashew tree, the soil you use should be well drained in a way that water will flow smoothly.
Water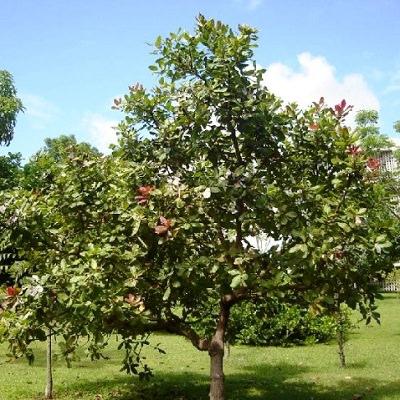
Cashew trees are moderately drought tolerant once established, but they produce more fruits if watered regularly. During the summer, water weekly or twice and deeply. Reduce or withhold watering during winter. Overwatering can harm or even kill your cashew tree, so water only if soil is dry and let the soil to dry out between spells of watering.
Fertilizer
Cashew tree needs regular application of fertilizer to grow vigorously and produce fruits. Use slow release fertilizer with N-P-K 8 – 3 – 9 according to the product instructions given on the packet, around the base of the tree every two months during growing season. Also apply compost or farm manure once in a year, around 30 pounds (15 kg) on the surface of the soil to a mature tree.
Cashew Nuts Growing CarePruning
Prune cashew trees regularly to remove weak, dead and entangled branches and branches that are infested with diseases or pests. Also, cut overcrowded branches to promote vigorous growth.
Mulching
Do mulching around your cashew tree with organic matters to prevent weeds and to conserve moisture.
Pests and Diseases
The cashew tree is generally pest free if it is in good health. Major pests that attack it are tea mosquito, stem and root borer, leaf Miner and blossom Webber.
Harvesting and Cashew Nut Processing
Harvest when cashew apples turn pink or red and cashew nut shell are gray. After harvesting, separate the cashew apple from the nut.
Cashew apple can be eaten raw or make juice of it. Unshelled cashew nut can be stored up to 2 years.
Do not attempt to break the shell before roasting; cashew shell contains very caustic oil which can burn skin.
When processing cashew nut at home must wear gloves and safety glasses and take special care. To learn more on how to process cashew– read this.
Also Read: How to Grow Mango Tree
Cashew Nuts Growing TipsSow fresh cashew seeds for germination, as they germinate easily.A tree grown from seeds take 3 to 5 years to produce its first fruits. Our recommendation is to buy a potted plant from a nursery, this way you’ll not have to wait that long.Choose a location that is well protected from the wind.Cashew grows better when the temperature remains around 80 degrees Fahrenheit (25 C) although it can withstand temperatures as low as 50 degrees Fahrenheit (10 C) and as high as 105 Fahrenheit (40.5 C) without any problem.Keep the area around the base of your cashew tree free from weeds, small shrubs, vines, and debris.Watch for sick or dead branches, prune them if necessary.Benefits of Cashew Nuts
One of the most delicious and healthiest nuts cashews are an amazing source of nutrients, and not only the cashew nuts but its fruit cashew apple is nutritious too. It is a rich source of vitamin C, five times more than an orange. It also contains higher amounts of calcium, iron and vitamin B1, which is more than most of the fruits. To know more about the benefits of cashew nuts read this article.
Also Read: How to Grow Mamoncillo
Cashew nuts growing is easy, but it requires a more specific environment and growing conditions. If you can provide that environment then you can grow your cashew tree and enjoy the nuts and fresh fruits that are called cashew apple, throughout the year.

USDA Zones — 10 – 11
Difficulty — Moderate
Soil pH — Slightly acidic to neutral
Other names — Maranon, Noix d’anacarde, Caju, Kaju, Mundiri, Kazu, Pajuil, anacardio, Paringi mavu, 槚如树
Cashew Nuts Growing Information
Cashew or Anacardium occidentale originates from the Caribbean Island and the North East of Brazil. But today it is grown in several other tropical parts of the world. Mostly in Africa, India and Southeast Asia for cashew nuts.
It is also called as cashew apple tree; it is part of the Anacardiaceae family, the same family that belongs to pistachio and mango.
Cashew tree can grow up to 6 – 12 m (20 – 40 f) high. Its evergreen leaves are oval, leathery and dark green. They have a prominent midrib.
The flowers, white and pink are gathered in inflorescence at the tips of young shoots. They are smaller in size but very fragrant.
As for the fruits of this tree, do not be fooled by appearances. The cashew apple is oval-shaped, like bell pepper: yellow, orange or red in color is a false fruit (it is also edible). The real fruit, more discreet is a nut attached to the end of the fake fruit. It is that which contains the edible kernel, which we called cashew.
How to Grow Cashew Tree from Seed
Cashew tree can be grown from seeds, air layering, and grafting. To propagate it from seeds, you will need a matured unshelled nut (seed). These seeds are viable up to 4 months.
If you have collected the fresh seed from the tree, dry it in the sun for 3 days and soak in water overnight before sowing.
Sow the seeds in good quality seed starting mix; the seeds will germinate anywhere from 4 days to 3 weeks.
Requirements for Growing Cashew Nuts TreeSun
Cashew tree needs at least 6 hours of direct sun, it grows slowly and doesn’t fruit if grown in the shade.
Soil
Cashew prefers poor sandy and laterite soil with the pH level around 5 – 6.5. Never grow cashew tree in a clay-rich soil. It is heavy and encourages waterlogging, and in the case of growing cashew tree, the soil you use should be well drained in a way that water will flow smoothly.
Water

Cashew trees are moderately drought tolerant once established, but they produce more fruits if watered regularly. During the summer, water weekly or twice and deeply. Reduce or withhold watering during winter. Overwatering can harm or even kill your cashew tree, so water only if soil is dry and let the soil to dry out between spells of watering.
Fertilizer
Cashew tree needs regular application of fertilizer to grow vigorously and produce fruits. Use slow release fertilizer with N-P-K 8 – 3 – 9 according to the product instructions given on the packet, around the base of the tree every two months during growing season. Also apply compost or farm manure once in a year, around 30 pounds (15 kg) on the surface of the soil to a mature tree.
Cashew Nuts Growing CarePruning
Prune cashew trees regularly to remove weak, dead and entangled branches and branches that are infested with diseases or pests. Also, cut overcrowded branches to promote vigorous growth.
Mulching
Do mulching around your cashew tree with organic matters to prevent weeds and to conserve moisture.
Pests and Diseases
The cashew tree is generally pest free if it is in good health. Major pests that attack it are tea mosquito, stem and root borer, leaf Miner and blossom Webber.
Harvesting and Cashew Nut Processing
Harvest when cashew apples turn pink or red and cashew nut shell are gray. After harvesting, separate the cashew apple from the nut.
Cashew apple can be eaten raw or make juice of it. Unshelled cashew nut can be stored up to 2 years.
Do not attempt to break the shell before roasting; cashew shell contains very caustic oil which can burn skin.
When processing cashew nut at home must wear gloves and safety glasses and take special care. To learn more on how to process cashew– read this.
Also Read: How to Grow Mango Tree
Cashew Nuts Growing TipsSow fresh cashew seeds for germination, as they germinate easily.A tree grown from seeds take 3 to 5 years to produce its first fruits. Our recommendation is to buy a potted plant from a nursery, this way you’ll not have to wait that long.Choose a location that is well protected from the wind.Cashew grows better when the temperature remains around 80 degrees Fahrenheit (25 C) although it can withstand temperatures as low as 50 degrees Fahrenheit (10 C) and as high as 105 Fahrenheit (40.5 C) without any problem.Keep the area around the base of your cashew tree free from weeds, small shrubs, vines, and debris.Watch for sick or dead branches, prune them if necessary.Benefits of Cashew Nuts
One of the most delicious and healthiest nuts cashews are an amazing source of nutrients, and not only the cashew nuts but its fruit cashew apple is nutritious too. It is a rich source of vitamin C, five times more than an orange. It also contains higher amounts of calcium, iron and vitamin B1, which is more than most of the fruits. To know more about the benefits of cashew nuts read this article.
Also Read: How to Grow Mamoncillo
1
0
文章
Andy
2017年05月22日

Learn how to grow tulsi plant, its care and growing requirements are simple and easy.
Tulsi or holy basil is an incredible herb revered in Indian mythology in Hinduism for its medicinal and spiritual characteristics.
Tulsi, a medicinal herb is native to India, its spicy and refreshing fragrance and tiny colorful flowers makes this a useful houseplant. Tulsi grows as a perennial plant in areas with mild winter and as an annual in cold and temperate climates.
USDA Zones — 10-11, can be grown in the cooler zones as annual
Tulsi or holy basil is an incredible herb revered in Indian mythology in Hinduism for its medicinal and spiritual characteristics.

Tulsi, a medicinal herb is native to India, its spicy and refreshing fragrance and tiny colorful flowers makes this a useful houseplant. Tulsi grows as a perennial plant in areas with mild winter and as an annual in cold and temperate climates.
USDA Zones — 10-11, can be grown in the cooler zones as annual
0
0
文章
Gina
2017年05月22日


Looking for a quick and easy garden container to add some flair to a boring deck, yard or patio? Here is a before and after project that will take less than 30 minutes, can be inexpensive and is a creative take on ordinary container gardening!
Supplies:
Any container that has sections.
(We used an old wood soda crate)
Potting soil
Alpine or compact plants
Polished stones

Step One: Choose plants that are of an alpine or compact nature. You don’t want to the plants overgrowing the container so much that you can no longer see the structure that gives it a good design. Line the container with plastic to protect it if you choose, but be sure it has some drainage. If drainage is an issue, place a layer of gravel at the bottom of the container first. Fill the container with potting soil, gently pack down, and place the plants. Fill with more soil, gently press down with your fingers, and water. Tip: Don’t plant all the sections of your container. Leaving some empty space highlights the plants and gives the eye a place to rest.
Step Two: Fill some of the empty sections with polished stones or glass. You can find these at craft shops or dollar stores, or perhaps you already have a collection. The stones are a nice contrast to the container and the plants.
Step Three: Place your container, keep it watered and prune the plants as needed to keep them controlled. Remember, in this particular project, you are highlighting the creative container as much as the plants!
Done! Some ideas?
Use recycled materials from a building renovation store and succulents for a more modern or contemporary look.
Repeat the same plant over and over, or vary your plants for more contrast. Try small grasses, succulents, compact annuals, or even experiment with a trailing houseplant over one side. Think about all containers that have sections…kitchen containers, building supplies, plastic organizing trays, or create your own by placing a series of smaller containers inside a larger one!
Easy, quick garden container project to make your small space or patio garden something special. You can make it as budget friendly as you wish, and this is a great project to reuse and recycle, making it green gardening as well!
0
0
文章
Micky
2017年05月22日


If you are looking for a pumpkin carving project that’s easy, a little different, and can double for great fall decor as well, pumpkin drilling is for you. You can place these all around the garden and light them with candles (careful!) glow sticks, or even those dollar store led stick up lights. While I think this is safer than using knives to carve, still be very careful using power tools, and know how your drill works and how to keep yourself safe. And if your arm gets tired, give it a rest or take turns… We drilled the pumpkins first, then scooped them afterwards. It seemed to give more stability to the pumpkin while you drill. Yes, your drill bits will get goopy… Just un-goop, and move on. :) However, if you prefer to scoop first, more power to ya! Here’s your tutorial on how to drill pumpkins!
Step One: Create a pattern and use painters tape to help you mark it onto your pumpkin. We used dry erase marker to make the initial marks, then punched with a skewer to make it easier to get the drill going in the right place.

Step Two: Using various sized bits, we drilled straight into the pumpkin at the pre-marked spots. It helps to have someone hold the pumpkin while another person handles the drill.

Step Three: Clean up the mess. Scoop if you haven’t already. We used a small knife as well to clean up any holes that didn’t have clean cuts.

We haven’t tried it ourselves, but we hear if you dip the drilled pumpkin in a bucket with a bleach water solution, it will last much longer. We hear a tablespoon of bleach to a gallon of water is the best bet, then let dry. Let us know if it works for you, or if you have any other ideas for helping your pumpkins to last! Happy Halloween!
0
0
文章
绮丽
2017年05月18日


垂吊型矮牵牛
轻浪(Easy Wave)系列
花直径5-6厘米,地栽株高20-30厘米,冠幅达75厘米。
“轻浪”不需要长日照诱导便可开花,适合秋冬季栽培。
“轻浪”是多用途品种,无论园林造景、公园花坛、吊篮,还是容器栽培,都有上佳表现。


波浪(Wave)系列
在垂钓型系列中波浪无疑是最受欢迎的品种,它的盆栽形式多种多样,丰富多姿的造型是使它成为畅销花种的标志性特点。
它的花朵基本呈瀑布状分布在枝蔓上,另外因其完全蔓生的习性可以将整个地被进行覆盖,极具视觉效果。
生长十分得迅速,可在短期内延伸出长达1.2米的花蔓。它的生长季即是花期,开花不间断,也不需用修剪来使其重新发枝。耐热性和抗寒性也为十分出色。

花篱型矮牵牛
潮波(Tidal Wave)系列
“潮波”的株型在其整个生长季节始终为灌木丛状,植株生长由外葡匐蔓延开始,逐步转为向上生长,然后会延续这两个方向的长势,最终形成极其丰满的植株。
“潮波”亦适合大型容器栽植。
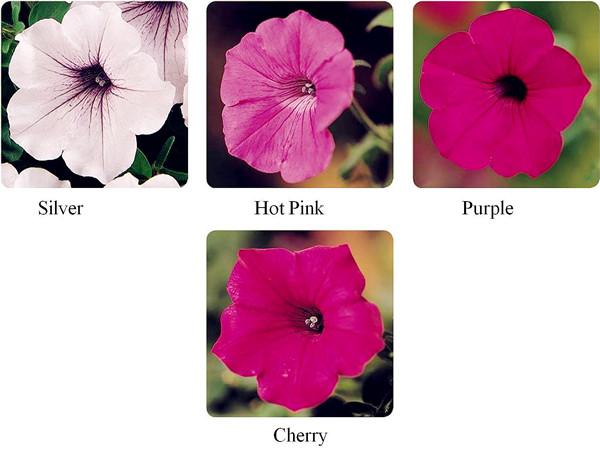
梦幻(Dreams)系列
包括矮牵牛的所有基本花色。
有无限开花的习性,花期即自花始到花终,适于春季进行栽培,各花色品种的开花期时差仅在一周以内,分枝习性增加了它在货架销售中的优势,受灰霉病影响小,在花园栽培中也相当受欢迎。
种子质量高而稳定。
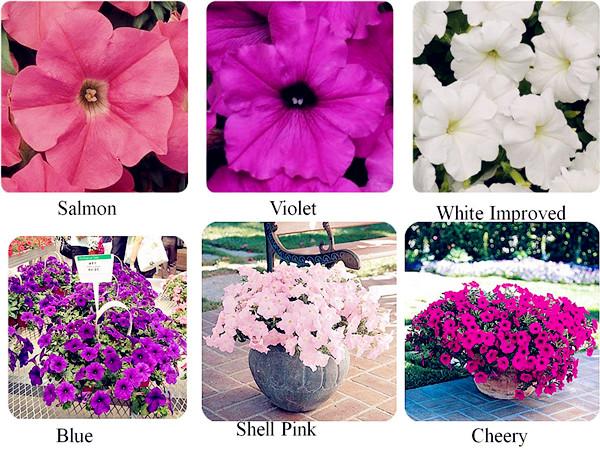
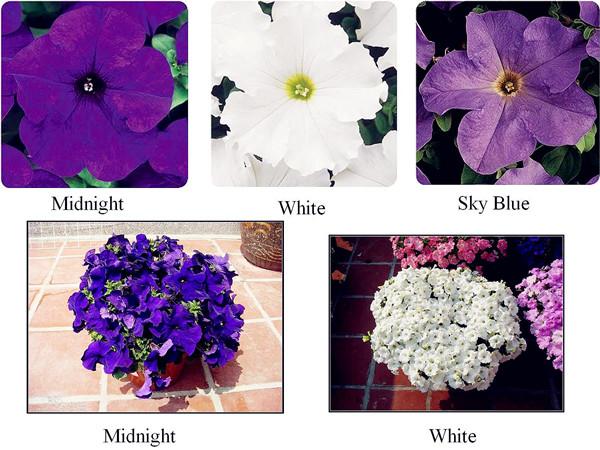
大地(Daddy)系列
在带脉纹大花矮牵牛品种系列中独占销售宝座,同时此矮牵牛品种系列全部由脉纹品种组成,有着独特的品相。
花径一般10厘米,开花早,有良好的盆栽习性。

超级瀑布(Supercascade)系列
分枝良好,花特大,直径达10至13厘米。开花早。
多花单瓣型矮牵牛
地毯(Carpet)系列
无限开花习性,株型非常紧凑,耐热性佳,在花园中有着令人吃惊的表现。
整个花期繁花似锦,仿若一块漂亮的彩色地毯。
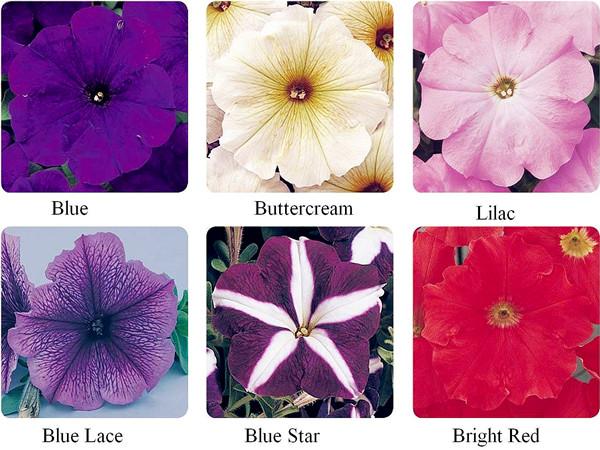
海市蜃楼(Mirage)系列
既有了大花型花的“大”与多花型花的“多”的双重优势,还有种子质量高和幼苗活力旺盛的特点,生长习性、花期等多方面,都无明显的瑕疵。
在同类型矮牵牛品种中,花色最全。

大花重瓣型矮牵牛
双瀑布(Double Cascade)系列
此系列花种分枝性好、生长习性佳,植株在大花重瓣品种中尤为紧凑,开花较早,可早开花2-4周。特大花,直径10-13厘米。
花瓣浓密,即使是在寒冷的天气条件下,花朵亦能保持良好。
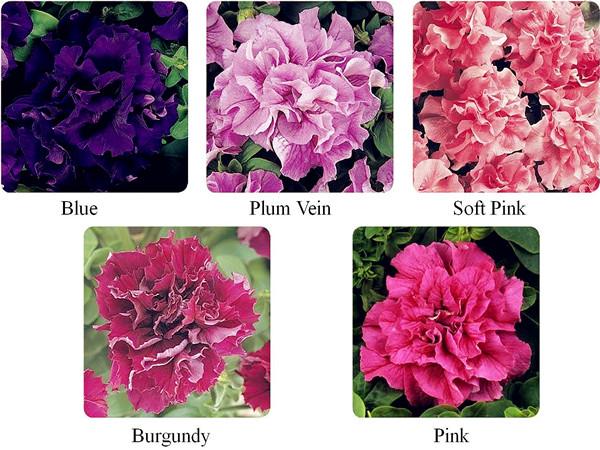
旋转(Pirouette)系列
花瓣波状,花径10厘米左右。
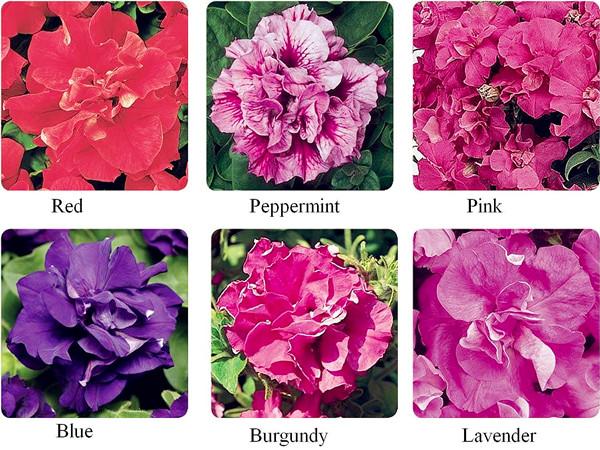
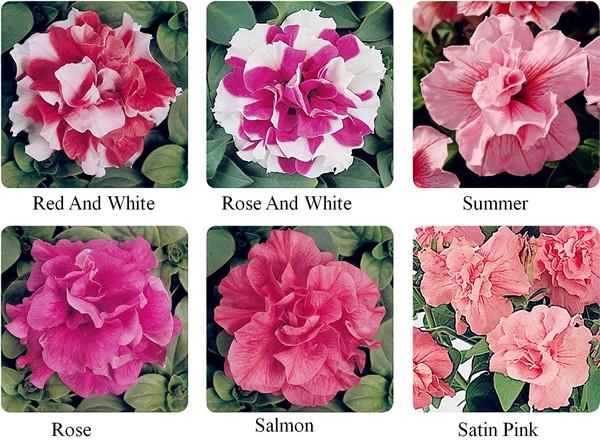
多花重瓣型矮牵牛
二重唱(Duo)系列
花色丰富,花型整齐一致且整个系列开花早。分枝性好,株型整齐紧凑。
总结
跟着小编认识了这么多美丽的矮牵牛品种,你是不是也想去养一种来让自己的家变得更加迷人呢?如果有的朋友不知道怎样正确种植,小编会告诉你有关矮牵牛的养殖方法和养护技巧。
0
1
文章
Abigal
2017年05月16日


One of the most important design elements in a #garden is structure. It’s easy (ok, it is a little bit of work!) to add structure by adding paths and walkways. They give the eye a place to rest, #follow , and let you lead visitors throughout the garden. Classic #DIY garden walkway #projects can be done in a weekend, and can seriously up the anty on any garden design. Even adding a simple pathway from the street to the front door adds value. Direct the garden wanderings, keep visitors out of special areas, and lead to the important focal points and recreation areas of your yard with a walkway.
We’ve done a few posts on casual, creative paths, but it was time to make sure you all had the classic options as well. Try out these projects to give your garden a smart framework and foundation.
Learn how to lay a paver or flagstone walkway from ‘BHG’… instructions for three different options of pathway.

‘Paint Speckled Paw Prints‘ transformed their existing “paver in the grass” walkway into one laid into rock for easier mowing… Make sure you scroll down to the end of their post and see the photo of the front yard with the finished path… Big improvement! I would have chosen a different rock, but I’m probably biased against red lava rock… saw too much in my youth in California…

Another idea of the same type of project… with a different mulching material between the pavers! This walkway project is by Danielle from ‘Life Be Green‘…

Find out how to lay a slate walkway from ‘Young House Love’… This one looks so high end!

How to lay a brick path, from ‘This Old House’. This is a great choice for a more traditional home…

Also from ‘This Old House’, how to lay a gravel path. I would use this material for a more casual home, but remember to choose gravel that compacts together for easy walking. Round pea gravel is not easy to walk in!

And number 7 is how to build a concrete walkway, by ‘Family Handyman’… This is the most permanent solution, so make sure of your placement before you take this one on. Good luck with adding a walkway to your garden!

0
1


