成长记
SUCC_mycacfromtheback
2019年04月10日

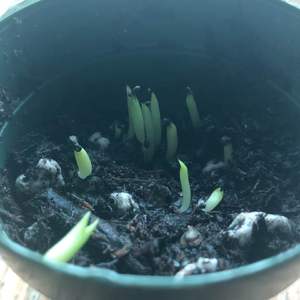
I now added "Germinating cacti (species unknown)" in my "garden"

0
0
NathPhoL
2019年03月28日

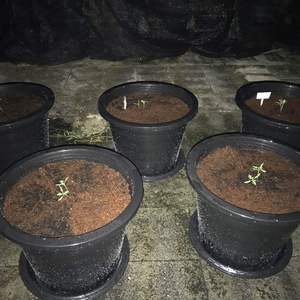
Preparing 2 species of tomato seedling & transplanted at Kasetsart University, Bangkok, Thailand



0
0
求助
Lucky Coyote
2018年12月30日

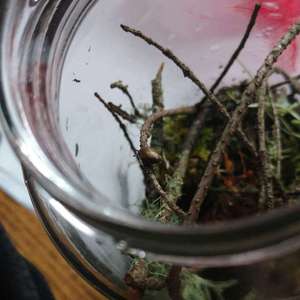
Does anyone know what species of snail this could be? It doesn't match up with any native Oregon snails, but I would like to know how to better equip its terrarium




0
0
求助
Ueca
2018年10月14日

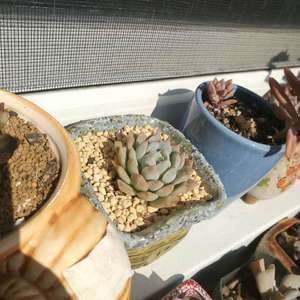
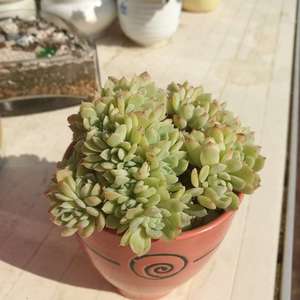
Hello, what species are these two Echeverias? The second one's always had a crested stem, resulting in long ridges of leaves.


0
0
mailipod5:how much did you buy?
文章
Miss Chen
2018年09月04日

The care and effort it takes to overwinter elephant ears (Colocasia spp.), which grow in U.S. Department of Agriculture plant hardiness zones 8 through 11 with some variation within species, depends on your climate. In frost-free tropical and sub-tropical areas, these lush foliage plants grow year-round with minimal winter care. In frost-prone regions, overwintering elephant ears takes a little more effort, but it's worth it when the 2- to 3-foot-long heart-shaped leaves bring a tropical flair to the garden the following summer.

Mild Climates Need Little Care
In USDA zones 10 through 11, elephant ear plants will grow year-round, remaining green through the winter. Discontinue watering from late fall through winter so the soil dries out. The soil can dry out completely during the dormant period, but natural rainfall will likely keep the soil moist. Cut back dead foliage and stalks as they die 2 to 4 inches from the soil line. Elephant ear foliage dies back throughout the year, but winter is a good time to tidy plants. You can cut out dead leaves any time of year.
Frosty Areas Require Some Protection
While elephant ear plants survive winters in frost-prone areas, specifically within USDA zones 8 through 9, the foliage will die back after a frost or cold spell. Once the first frost kills the foliage, cut back the stalks 2 to 4 inches from the soil line, then cover the soil with a layer of mulch 4 inches deep. No additional water is necessary during the dormant period. The mulch helps insulate the soil. Sawdust, seed-free straw, leaf-mold and compost all make good mulching materials.
Overwintering Indoors
Outside of the growing zone -- anywhere colder than USDA zone 8 -- elephant ears are not reliably hardy. The roots will freeze in the cold soil, killing the plants. In cold areas you have two choices: you can grow elephant ears in pots and keep them in a frost-free area over winter in a dormant state, or dig the tubers in the fall and .
Overwintering Pots Indoors
Before the first frost, move the container to an area that won't freeze over winter. An unheated garage or shed that stays above 50 degrees Fahrenheit works well. Discontinue watering through the winter. This forces elephant ear tubers into dormancy. Cut all the stalks down at the soil level. In the spring when the temperature is consistently at or above 60 degrees F, water when the top of the soil feels dry. Once the last frost has passed, you can return the pots outdoors.

Digging and Storing Tubers
Allow the leaves and stalks to die back naturally with the first of the winter frosts. Once dead, cut back the foliage 2 to 4 inches from the soil, then carefully dig out the roots. Elephant ears have fleshy tubers for roots. Brush soil away from the surface and identify the shape and size of the tuber, then dig down around the outside of the root and lift it from the soil. Brush off extra dirt and pack the tubers in dry sawdust or peat moss in a bucket or tub. Keep the tubers dry in a 50-degrees F spot through the winter.

Mild Climates Need Little Care
In USDA zones 10 through 11, elephant ear plants will grow year-round, remaining green through the winter. Discontinue watering from late fall through winter so the soil dries out. The soil can dry out completely during the dormant period, but natural rainfall will likely keep the soil moist. Cut back dead foliage and stalks as they die 2 to 4 inches from the soil line. Elephant ear foliage dies back throughout the year, but winter is a good time to tidy plants. You can cut out dead leaves any time of year.
Frosty Areas Require Some Protection
While elephant ear plants survive winters in frost-prone areas, specifically within USDA zones 8 through 9, the foliage will die back after a frost or cold spell. Once the first frost kills the foliage, cut back the stalks 2 to 4 inches from the soil line, then cover the soil with a layer of mulch 4 inches deep. No additional water is necessary during the dormant period. The mulch helps insulate the soil. Sawdust, seed-free straw, leaf-mold and compost all make good mulching materials.
Overwintering Indoors
Outside of the growing zone -- anywhere colder than USDA zone 8 -- elephant ears are not reliably hardy. The roots will freeze in the cold soil, killing the plants. In cold areas you have two choices: you can grow elephant ears in pots and keep them in a frost-free area over winter in a dormant state, or dig the tubers in the fall and .
Overwintering Pots Indoors
Before the first frost, move the container to an area that won't freeze over winter. An unheated garage or shed that stays above 50 degrees Fahrenheit works well. Discontinue watering through the winter. This forces elephant ear tubers into dormancy. Cut all the stalks down at the soil level. In the spring when the temperature is consistently at or above 60 degrees F, water when the top of the soil feels dry. Once the last frost has passed, you can return the pots outdoors.

Digging and Storing Tubers
Allow the leaves and stalks to die back naturally with the first of the winter frosts. Once dead, cut back the foliage 2 to 4 inches from the soil, then carefully dig out the roots. Elephant ears have fleshy tubers for roots. Brush soil away from the surface and identify the shape and size of the tuber, then dig down around the outside of the root and lift it from the soil. Brush off extra dirt and pack the tubers in dry sawdust or peat moss in a bucket or tub. Keep the tubers dry in a 50-degrees F spot through the winter.
0
0
文章
Miss Chen
2018年09月03日

The best time for transplanting phlox has to do with bloom time and species. "Phlox" can refer to over 60 species and a range of cultivars, so you need to know which one is in your garden before you decide when to transplant. The common name "creeping phlox" may refer to three species:

Moss phlox (Phlox subulata). This rock-garden perennial is hardy in U.S. Department of Agriculture plant hardiness zones 2 through 9. It grows about 6 inches tall, and spreads up to 36 inches.
True creeping phlox (Phlox stolonifera). This plant is hardy in USDA zones 5 through 9. It forms a mat of foliage 3 inches tall, which can spread indefinitely to naturalize an area. The flowers form on 8 inch stalks.
Sand phlox (Phlox _bifid_a). This creeping phlox grows 6 inches tall and spreads up to 12 inches wide. It is a slow-growing plant that's hardy in USDA zones 4 through 8.
When to Transplant
Perennial plants should be transplanted or divided when they are not blooming. This lets the plants focus their energy on growing new roots and leaves instead of flowers. In general, spring-blooming plants should be transplanted in the fall, and fall-blooming plants should be moved in the spring.
Sand phlox blooms mid- to late spring.
Moss phlox blooms midspring through early summer.
True creeping phlox blooms midsummer through early fall.
Transplant true creeping phlox in the spring and sand and moss phlox in the early fall. You can also divide or transplant phlox immediately after flowering, but the plants require more care at this time. If you transplant spring-blooming phlox after flowering, the plants need extra water to survive the warm summer months. If you transplant fall-blooming phlox after flowering, the plants need winter protection to keep the shallow roots safe from cold.
Where to Transplant
Prepare the planting location before you transplant phlox. Moss phlox and sand phlox both prefer a sunny location with well-draining soil. True creeping phlox grows best in full-sun or part-shade locations with evenly moist, well-draining soil high in organic matter.

Moss phlox and sand phlox grow in a variety of well-draining soils, including sandy and gravely locations, but do not tolerate heavy clay or wet soil. Amending compacted, poorly draining soil enough for these plants is difficult. If you decide to amend this type of soil, remove the soil to a depth of 18 inches, combine the soil with sand at a ratio of 1 part soil to 3 parts sand, and then use that mixture to fill in the hole. After that, plant phlox as you would in any well-draining location. You can also spread 1 to 2 inches of organic matter over the soil and work that in to a depth of 6 to 8 inches before planting.
True creeping phlox benefits from organic amendments before planting. Adding organic amendments like sphagnum peat or well-rotted compost increases moisture retention and soil fertility. Spread these amendments 2 to 3 inches deep over the soil surface, and work them in to a depth of 6 to 8 inches before planting.
How to Transplant
Water the phlox plant thoroughly a day or two before you plan to transplant it, or wait to transplant until a day or two after it rains. When you're ready to transplant, use clean gardening shears to trim back the foliage so that you can see the base of the plant. You can remove up to half of the foliage before transplanting.
Use a clean shovel or gardening fork to dig all around the plant at a distance of 4 to 6 inches from the base. Next, slide your digging tool under the plant and lift it as a clump. Phlox are shallow-rooted, so they should come up from the soil easily. If you want, you can divide plants at this time and plant them in several locations.
Plant the transplanted phlox as soon as possible after digging at the same depth it was previously growing. Firm soil around the plant, and then water thoroughly. Keep the soil moist, but not soggy, for the first two weeks. After that, water sand phlox and moss phlox when the top 2 to 3 inches of soil feels dry to the touch. Water true creeping phlox often enough to keep the soil evenly moist.

Moss phlox (Phlox subulata). This rock-garden perennial is hardy in U.S. Department of Agriculture plant hardiness zones 2 through 9. It grows about 6 inches tall, and spreads up to 36 inches.
True creeping phlox (Phlox stolonifera). This plant is hardy in USDA zones 5 through 9. It forms a mat of foliage 3 inches tall, which can spread indefinitely to naturalize an area. The flowers form on 8 inch stalks.
Sand phlox (Phlox _bifid_a). This creeping phlox grows 6 inches tall and spreads up to 12 inches wide. It is a slow-growing plant that's hardy in USDA zones 4 through 8.
When to Transplant
Perennial plants should be transplanted or divided when they are not blooming. This lets the plants focus their energy on growing new roots and leaves instead of flowers. In general, spring-blooming plants should be transplanted in the fall, and fall-blooming plants should be moved in the spring.
Sand phlox blooms mid- to late spring.
Moss phlox blooms midspring through early summer.
True creeping phlox blooms midsummer through early fall.
Transplant true creeping phlox in the spring and sand and moss phlox in the early fall. You can also divide or transplant phlox immediately after flowering, but the plants require more care at this time. If you transplant spring-blooming phlox after flowering, the plants need extra water to survive the warm summer months. If you transplant fall-blooming phlox after flowering, the plants need winter protection to keep the shallow roots safe from cold.
Where to Transplant
Prepare the planting location before you transplant phlox. Moss phlox and sand phlox both prefer a sunny location with well-draining soil. True creeping phlox grows best in full-sun or part-shade locations with evenly moist, well-draining soil high in organic matter.

Moss phlox and sand phlox grow in a variety of well-draining soils, including sandy and gravely locations, but do not tolerate heavy clay or wet soil. Amending compacted, poorly draining soil enough for these plants is difficult. If you decide to amend this type of soil, remove the soil to a depth of 18 inches, combine the soil with sand at a ratio of 1 part soil to 3 parts sand, and then use that mixture to fill in the hole. After that, plant phlox as you would in any well-draining location. You can also spread 1 to 2 inches of organic matter over the soil and work that in to a depth of 6 to 8 inches before planting.
True creeping phlox benefits from organic amendments before planting. Adding organic amendments like sphagnum peat or well-rotted compost increases moisture retention and soil fertility. Spread these amendments 2 to 3 inches deep over the soil surface, and work them in to a depth of 6 to 8 inches before planting.
How to Transplant
Water the phlox plant thoroughly a day or two before you plan to transplant it, or wait to transplant until a day or two after it rains. When you're ready to transplant, use clean gardening shears to trim back the foliage so that you can see the base of the plant. You can remove up to half of the foliage before transplanting.
Use a clean shovel or gardening fork to dig all around the plant at a distance of 4 to 6 inches from the base. Next, slide your digging tool under the plant and lift it as a clump. Phlox are shallow-rooted, so they should come up from the soil easily. If you want, you can divide plants at this time and plant them in several locations.
Plant the transplanted phlox as soon as possible after digging at the same depth it was previously growing. Firm soil around the plant, and then water thoroughly. Keep the soil moist, but not soggy, for the first two weeks. After that, water sand phlox and moss phlox when the top 2 to 3 inches of soil feels dry to the touch. Water true creeping phlox often enough to keep the soil evenly moist.
0
0
文章
Miss Chen
2018年08月31日

Hellebore is the common spelling for Helleborus spp., a genus of flowering perennials that grow in U.S. Department of Agriculture plant hardiness zones 3 through 9, depending on species. Ideally, transplant hellebores during their dormant period in fall. The popular variety lenten rose (Helleborus orientalis), hardy in USDA zones 4 through 9, adapts most readily to transplanting. Regardless of species, it may take two to three years for plants to fully recover after a move and start blooming with their previous abundance.

Relocation and Bed Preparation
Ideally, transplant hellebores at one or two years old. You can still transplant more mature, established hellebores, but success rate and recovery time will vary.
Hellebores thrive in light shade and moist, organically rich soil. Before transplanting, prepare the bed at the new location by mixing compost with the soil. Use a 2- to 3-inch-thick layer spread evenly over the bed, then dig it 12 inches deep into the soil. Adding the compost before transplanting hellebores provides the high amount organic matter these perennials enjoy.
There's no need to cut back hellebores before transplanting.
Digging and Transplanting
Use a shovel to dig out and lift the root ball from the soil. To get enough of the roots, look at the drip line -- the soil under the outer leaf tips -- and dig the root ball the same diameter.
Dig a hole at the new planting site the same depth and slightly wider than the root mass.
Set the hellebore in the hole -- adjust the soil level at the bottom until the point where the roots meet the stem sits level with the soil -- then fill in around the root ball. Use the same soil you just dug out to fill the hole.
Water and Mulching
Water right after transplanting. This settles the soil, minimizes transplant shock and helps the roots adapt quickly to the new environment. Water when the top of the soil feels dry through any remaining dry fall weather.

Mulch the bed to keep the soil moist after transplanting. The mulch layer also provides some cold protection over winter. Use 2 to 3 inches of compost spread evenly over the soil but leave 1 to 2 inches of space between the hellebore stalks and the compost. This helps minimize rot and insect problems.

Transplanting Seedlings
When mature hellebores go to seed after flowering, new seedlings grow the following spring near the parent plant. You can transplant these seedlings in the spring, either into pots or to fill out new areas of the garden. Transplant them when they are big enough to handle, and before new foliage on the parent plant blocks the sun. Dig out the seedlings with a small trowel, being careful not to disrupt the root ball. Replant them in moist soil and light shade.
To plant the seedlings in pots, select containers at least 8 inches in diameter with drainage holes, filled with potting soil.

Relocation and Bed Preparation
Ideally, transplant hellebores at one or two years old. You can still transplant more mature, established hellebores, but success rate and recovery time will vary.
Hellebores thrive in light shade and moist, organically rich soil. Before transplanting, prepare the bed at the new location by mixing compost with the soil. Use a 2- to 3-inch-thick layer spread evenly over the bed, then dig it 12 inches deep into the soil. Adding the compost before transplanting hellebores provides the high amount organic matter these perennials enjoy.
There's no need to cut back hellebores before transplanting.
Digging and Transplanting
Use a shovel to dig out and lift the root ball from the soil. To get enough of the roots, look at the drip line -- the soil under the outer leaf tips -- and dig the root ball the same diameter.
Dig a hole at the new planting site the same depth and slightly wider than the root mass.
Set the hellebore in the hole -- adjust the soil level at the bottom until the point where the roots meet the stem sits level with the soil -- then fill in around the root ball. Use the same soil you just dug out to fill the hole.
Water and Mulching
Water right after transplanting. This settles the soil, minimizes transplant shock and helps the roots adapt quickly to the new environment. Water when the top of the soil feels dry through any remaining dry fall weather.

Mulch the bed to keep the soil moist after transplanting. The mulch layer also provides some cold protection over winter. Use 2 to 3 inches of compost spread evenly over the soil but leave 1 to 2 inches of space between the hellebore stalks and the compost. This helps minimize rot and insect problems.

Transplanting Seedlings
When mature hellebores go to seed after flowering, new seedlings grow the following spring near the parent plant. You can transplant these seedlings in the spring, either into pots or to fill out new areas of the garden. Transplant them when they are big enough to handle, and before new foliage on the parent plant blocks the sun. Dig out the seedlings with a small trowel, being careful not to disrupt the root ball. Replant them in moist soil and light shade.
To plant the seedlings in pots, select containers at least 8 inches in diameter with drainage holes, filled with potting soil.
0
0
文章
Miss Chen
2018年08月27日

Fill patio planters and pots with hydrangeas (Hydrangea spp.) in spring for a summer full of flowers. Hydrangeas grow in U.S. Department of Agriculture plant hardiness zones 3 through 9 depending on the species, and they range in size from 3 to 9 feet tall. Two varieties that grow well in containers are big leaf hydrangea (Hydrangea macrophylla), hardy in USDA zones 5 through 9, and mountain hydrangea (Hydrangea serrata), hardy in USDA zones 6 through 9. While spring is the best time to plant, you can pot up hydrangeas anytime through summer.

The Right Planter
When selecting a planter for hydrangeas, consider both aesthetics and functionality. You can choose the material of the planter based on aesthetics, such as wood, colored plastic, terracotta or glazed ceramic, but it must have drainage holes. Terracotta and wood dry out more rapidly, so if watering is an issue in your area, consider plastic or glazed ceramic. Some new pots come with a plug in the bottom covering the drainage hole. Make sure to pop it out before planting hydrangeas.
Look for a planter or pot 2 to 4 inches bigger in diameter than the nursery pot or planter the hydrangea is in.
Disinfecting Pots and Planters
Clean and disinfect both new and old planters before planting.
Dump out old dirt and give the pot a scrub with detergent and water to remove any soil particles.
Fill a bucket or trough -- make sure its large enough to submerge the planter -- with a 9-to-1 water-to-bleach solution.
Soak the old planters for 10 to 15 minutes.
Remove the planter and wash it with soapy water, then rinse.
Allow the pot to air-dry before potting up your new hydrangeas.
Large planters are difficult to soak because it's not always easy to find something large enough for full submersion. An alternative method is to seal the drain holes temporarily -- try duct tape -- then fill the container up to the top with the bleach solution. Allow it to sit in the pot for 10 minutes, then drain, remove the tape, wash, rinse and allow to dry.
Acidic Potting Blend
Hydrangeas like acidic potting soil. Use peat moss to increase the acidity of regular potting soil. Use equal parts of each, and blend them thoroughly before planting. If the peat moss is dry, soak it in a bucket of water overnight, then drain out the excess water before mixing it with potting soil.

Scoop two to three handfuls of potting medium into the bottom of the container to form a base for the root ball.
Potting Up
Gently wiggle the hydrangea out of the nursery pot, handling it by the roots, and set it on top of the peat moss and potting soil blend. Add or take out material from the bottom of the pot until the top of the root ball is 3 inches below the edge of the pot. Fill in around the roots with additional damp peat moss, bringing the level up to the base of the stalks.
Place potted hydrangeas in full morning sun with light afternoon shade. For an indoor plant, set it in a room with bright morning light but no direct afternoon sun.
Water and Fertilizer
Water potted hydrangeas immediately after planting, then each time the potting mix starts to dry out 1 inch deep. Soak the potting mix until a little extra leaks out the drainage hole in the bottom. That way you know the water penetrated through to the bottom.
Fertilize right after planting, then every two weeks, with a complete water-soluble fertilizer. Dilute 3/4 tablespoon in 1 1/2 gallons of water and use it, along with additional water if necessary, to water the potting soil of outdoor plants.
Repot in Spring
Repot hydrangeas in early spring before new growth starts using a blend of equal parts peat moss and potting soil. Gently tease the root ball out of the container and brush of excess dirt to expose the outer roots. Check for rot or mushy spots and pull apart roots that circle the root ball. Repot in the same planter, or go up a pot size if the root ball is crowded in the old planter.

The Right Planter
When selecting a planter for hydrangeas, consider both aesthetics and functionality. You can choose the material of the planter based on aesthetics, such as wood, colored plastic, terracotta or glazed ceramic, but it must have drainage holes. Terracotta and wood dry out more rapidly, so if watering is an issue in your area, consider plastic or glazed ceramic. Some new pots come with a plug in the bottom covering the drainage hole. Make sure to pop it out before planting hydrangeas.
Look for a planter or pot 2 to 4 inches bigger in diameter than the nursery pot or planter the hydrangea is in.
Disinfecting Pots and Planters
Clean and disinfect both new and old planters before planting.
Dump out old dirt and give the pot a scrub with detergent and water to remove any soil particles.
Fill a bucket or trough -- make sure its large enough to submerge the planter -- with a 9-to-1 water-to-bleach solution.
Soak the old planters for 10 to 15 minutes.
Remove the planter and wash it with soapy water, then rinse.
Allow the pot to air-dry before potting up your new hydrangeas.
Large planters are difficult to soak because it's not always easy to find something large enough for full submersion. An alternative method is to seal the drain holes temporarily -- try duct tape -- then fill the container up to the top with the bleach solution. Allow it to sit in the pot for 10 minutes, then drain, remove the tape, wash, rinse and allow to dry.
Acidic Potting Blend
Hydrangeas like acidic potting soil. Use peat moss to increase the acidity of regular potting soil. Use equal parts of each, and blend them thoroughly before planting. If the peat moss is dry, soak it in a bucket of water overnight, then drain out the excess water before mixing it with potting soil.

Scoop two to three handfuls of potting medium into the bottom of the container to form a base for the root ball.
Potting Up
Gently wiggle the hydrangea out of the nursery pot, handling it by the roots, and set it on top of the peat moss and potting soil blend. Add or take out material from the bottom of the pot until the top of the root ball is 3 inches below the edge of the pot. Fill in around the roots with additional damp peat moss, bringing the level up to the base of the stalks.
Place potted hydrangeas in full morning sun with light afternoon shade. For an indoor plant, set it in a room with bright morning light but no direct afternoon sun.
Water and Fertilizer
Water potted hydrangeas immediately after planting, then each time the potting mix starts to dry out 1 inch deep. Soak the potting mix until a little extra leaks out the drainage hole in the bottom. That way you know the water penetrated through to the bottom.
Fertilize right after planting, then every two weeks, with a complete water-soluble fertilizer. Dilute 3/4 tablespoon in 1 1/2 gallons of water and use it, along with additional water if necessary, to water the potting soil of outdoor plants.
Repot in Spring
Repot hydrangeas in early spring before new growth starts using a blend of equal parts peat moss and potting soil. Gently tease the root ball out of the container and brush of excess dirt to expose the outer roots. Check for rot or mushy spots and pull apart roots that circle the root ball. Repot in the same planter, or go up a pot size if the root ball is crowded in the old planter.
0
0
文章
Miss Chen
2018年08月26日

With more than 400 species, Aloe is one of the largest groups of succulents. The most widely planted aloe, Aloe vera, is a favorite house plant and has naturalized in North Africa, India, the Caribbean, South America, and other frost-free areas, according to the Cactus and Succulent Society of America. Originating largely in Africa and the Arabian Peninsula, aloe is grown primarily for its spiky leaves, but many aloes also produce flowers.

Aloe vera
The aloe vera plant is the most familar and widely cultivated aloe. Gel from inside aloe vera leaves is used as a first aid treatment for burns, herbal remedies, food supplements, and in cosmetics. Succulent grayish green leaves up to 20 inches long grow from a dense rosette at the plant's base. Aloe vera produces offset pups, which are propagated and grow to adult size in individual containers.
Tree aloes
The largest African tree aloe is Aloe barberae, reaching almost 50 feet high with a stem diameter of approximately 3 feet. Unlike aloe vera, propagation is usually from seeds or stem cuttings. Another tree aloe is Aloe dichotoma (quiver tree). The quiver tree can grow to 30 feet. Native to South Africa and Namibia, tree roots are used in traditional medicine to treat asthma and tuberculosis.
Mountain aloes
Aloe marlothii is known as the mountain aloe. Described by Kew Gardens as "one of the most iconic of the hundreds of aloes occurring in Africa," this species fills South African hillsides with hundreds of plants. This is a tall aloe, 6 to 12 feet tall and rosette crown. Leaves are dull green with numerous short spikes on leaf edges and flat surfaces. Some ethnomedical uses of Aloe marlothii leaf gel include treating internal parasites in humans and livestock.

Miniature aloes
Miniature aloes include Aloe descoingsii, labeled the world's smallest aloe. A native of Madagascar, individual heads are approximately 1 1/2 inches across. Triangular leaves with whitish specks sit below small orange flowers. A little bigger is Aloe jucunda, with heads slightly larger than 2 inches. Another miniature aloe is Aloe haworthioides, with 2-inch heads, dark green leaves and hairy bristles.

Aloe vera
The aloe vera plant is the most familar and widely cultivated aloe. Gel from inside aloe vera leaves is used as a first aid treatment for burns, herbal remedies, food supplements, and in cosmetics. Succulent grayish green leaves up to 20 inches long grow from a dense rosette at the plant's base. Aloe vera produces offset pups, which are propagated and grow to adult size in individual containers.
Tree aloes
The largest African tree aloe is Aloe barberae, reaching almost 50 feet high with a stem diameter of approximately 3 feet. Unlike aloe vera, propagation is usually from seeds or stem cuttings. Another tree aloe is Aloe dichotoma (quiver tree). The quiver tree can grow to 30 feet. Native to South Africa and Namibia, tree roots are used in traditional medicine to treat asthma and tuberculosis.
Mountain aloes
Aloe marlothii is known as the mountain aloe. Described by Kew Gardens as "one of the most iconic of the hundreds of aloes occurring in Africa," this species fills South African hillsides with hundreds of plants. This is a tall aloe, 6 to 12 feet tall and rosette crown. Leaves are dull green with numerous short spikes on leaf edges and flat surfaces. Some ethnomedical uses of Aloe marlothii leaf gel include treating internal parasites in humans and livestock.

Miniature aloes
Miniature aloes include Aloe descoingsii, labeled the world's smallest aloe. A native of Madagascar, individual heads are approximately 1 1/2 inches across. Triangular leaves with whitish specks sit below small orange flowers. A little bigger is Aloe jucunda, with heads slightly larger than 2 inches. Another miniature aloe is Aloe haworthioides, with 2-inch heads, dark green leaves and hairy bristles.
1
0
文章
Miss Chen
2018年08月21日

Reaching heights of up to 6 feet tall and producing curling, feathery fronds, ostrich fern (Matteuccia struthiopteris) is a perennial species that thrives in cool, shaded areas. It requires minimal maintenance and care, and is rarely bothered by pests or diseases. The fern often spreads, forming dense colonies when planted in ideal growing conditions.

Choose a Shady Site
Ostrich fern is hardy in U.S. Department of Agriculture plant hardiness zones 3 through 7, where it prefers partial and full shade. A wooded area, the north side of a building or a shady riverbank or pond side are ideal locations for the plant. It does best in naturally cool climates and suffers when grown in humid, southern U.S. regions. Because each ostrich fern can grow 5 to 8 feet wide, provide at least 5 feet of space between each fern and other plants. Transplant an ostrich fern by digging it up carefully in early spring, leaving plenty of room around its crown -- where its above-ground and below-ground parts join -- to avoid disturbing its roots. Replant the fern so that soil completely encloses its root ball, but don't place the fern so deeply that soil gets in its center, from which its fronds or stems grow; soil in that location may cause rot.
Add Organic Material to Soil
Ostrich fern tolerates a wide variety of soil types, though it looks its best in well-draining soil generously enhanced with organic matter. If your location has light, sandy soil or heavy clay soil, mix a 2-inch-thick layer of organic material, such as composted pine bark, with the top 10 inches of the soil before planting. Rather than just mixing the organic matter into each planting hole, mix the material into the whole planting bed so that water doesn't fill the hole and cause root damage to the plants.
Water Regularly
Water frequently -- at least once each week unless it rains -- to keep each ostrich fern's soil moist at all times. Do not allow the soil to dry out completely; err on the side of too wet rather than too dry because ostrich fern tolerates wet soil. Applying a 2- to 3-inch-thick layer of organic matter such as leaves or pine straw on the soil surface -- but not touching the plants -- in spring and fall helps retain moisture in the soil. In a wooded area, the ferns receive some natural mulch from fallen leaves and evergreen needles.

Fertilize Sparingly
Ferns are sensitive to fertilizer, though they can benefit from a light application in spring, right after their new fronds begin to emerge. Use a controlled-release, granular, 14-14-14 fertilizer, spreading 1/8 cup of it uniformly on the soil surface per 10 square feet, avoiding getting it on the ferns and other plants. Till it into the top 1/2 to 1 inch of the soil very lightly if you can avoid damaging the ferns' roots or rhizomes. Store unused fertilizer in a cool, dry place away from children and pets.

Choose a Shady Site
Ostrich fern is hardy in U.S. Department of Agriculture plant hardiness zones 3 through 7, where it prefers partial and full shade. A wooded area, the north side of a building or a shady riverbank or pond side are ideal locations for the plant. It does best in naturally cool climates and suffers when grown in humid, southern U.S. regions. Because each ostrich fern can grow 5 to 8 feet wide, provide at least 5 feet of space between each fern and other plants. Transplant an ostrich fern by digging it up carefully in early spring, leaving plenty of room around its crown -- where its above-ground and below-ground parts join -- to avoid disturbing its roots. Replant the fern so that soil completely encloses its root ball, but don't place the fern so deeply that soil gets in its center, from which its fronds or stems grow; soil in that location may cause rot.
Add Organic Material to Soil
Ostrich fern tolerates a wide variety of soil types, though it looks its best in well-draining soil generously enhanced with organic matter. If your location has light, sandy soil or heavy clay soil, mix a 2-inch-thick layer of organic material, such as composted pine bark, with the top 10 inches of the soil before planting. Rather than just mixing the organic matter into each planting hole, mix the material into the whole planting bed so that water doesn't fill the hole and cause root damage to the plants.
Water Regularly
Water frequently -- at least once each week unless it rains -- to keep each ostrich fern's soil moist at all times. Do not allow the soil to dry out completely; err on the side of too wet rather than too dry because ostrich fern tolerates wet soil. Applying a 2- to 3-inch-thick layer of organic matter such as leaves or pine straw on the soil surface -- but not touching the plants -- in spring and fall helps retain moisture in the soil. In a wooded area, the ferns receive some natural mulch from fallen leaves and evergreen needles.

Fertilize Sparingly
Ferns are sensitive to fertilizer, though they can benefit from a light application in spring, right after their new fronds begin to emerge. Use a controlled-release, granular, 14-14-14 fertilizer, spreading 1/8 cup of it uniformly on the soil surface per 10 square feet, avoiding getting it on the ferns and other plants. Till it into the top 1/2 to 1 inch of the soil very lightly if you can avoid damaging the ferns' roots or rhizomes. Store unused fertilizer in a cool, dry place away from children and pets.
0
0
文章
Miss Chen
2018年08月20日

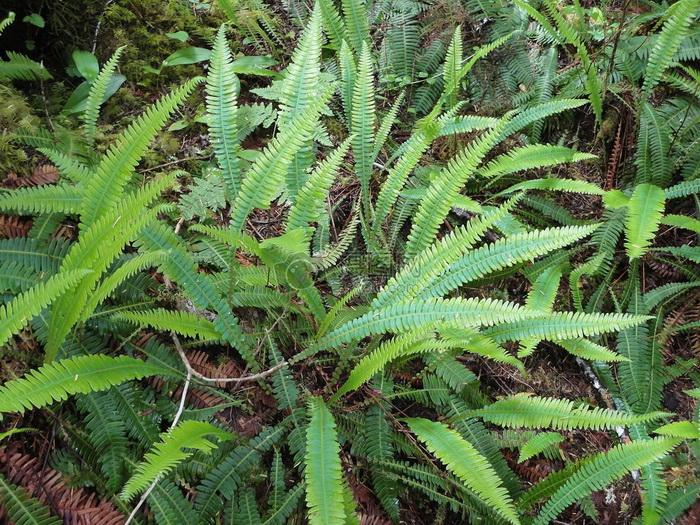
Ferns are one of the oldest forms of plant life. There are over 10,000 known species of fern, some of which are deciduous and some that are evergreen. Fern leaves are called fronds, and they house the reproductive spores that ferns produce instead of seeds. Deciduous ferns lose their leaves in winter and tend to look ratty over the season when some of them die back but don't fall off. Evergreen ferns are vibrant year-round but they can benefit from cleanups to remove damage and dead fronds. Timing is important when pruning ferns so new fiddleheads (immature ferns) are not disturbed and spores are able to disperse.
Timing is Everything
Pruning of ferns needs to occur after the spores on fruiting fronds have matured and released. Trim them when they are dormant, which is during winter. They can also be pruned in very early spring. Many ferns do not object to pruning at any time of the year. The hardy ferns such as sword fern can be pruned once a year if necessary, just about any time, since they are continuously growing.
Evergreen Ferns
As a rule, ferns don't really need pruning. Ferns in nature are generally self-cleaning and will release old fronds as they die. In the garden, occasional removal of dead fronds will improve the appearance of the plant, but it is strictly cosmetic. Where the plants are large and very old, severe pruning can take place to the crown. All the fronds can be removed in late winter or before the first new fiddleheads appear. Prune the stems away from the crown in a circular pattern so you are left with a little dome. This is not only attractive, but it prevents accidental damage to the newest growth which appears at the center of the plant.
Deciduous Ferns
Deciduous ferns don't necessarily drop all their fronds when temperatures plummet. They do experience dieback and many of the fronds will fall off or turn brown. From a cosmetic standpoint, it is best to get these dead fronds out of the plant. You will also increase light and room for new leaflets. Many people prune the deciduous ferns in fall so they are ready for the spring, but the old fronds provide protection for the crown. It is best to leave them, unattractive though they may be, until spring.
Pruning Indoor Ferns
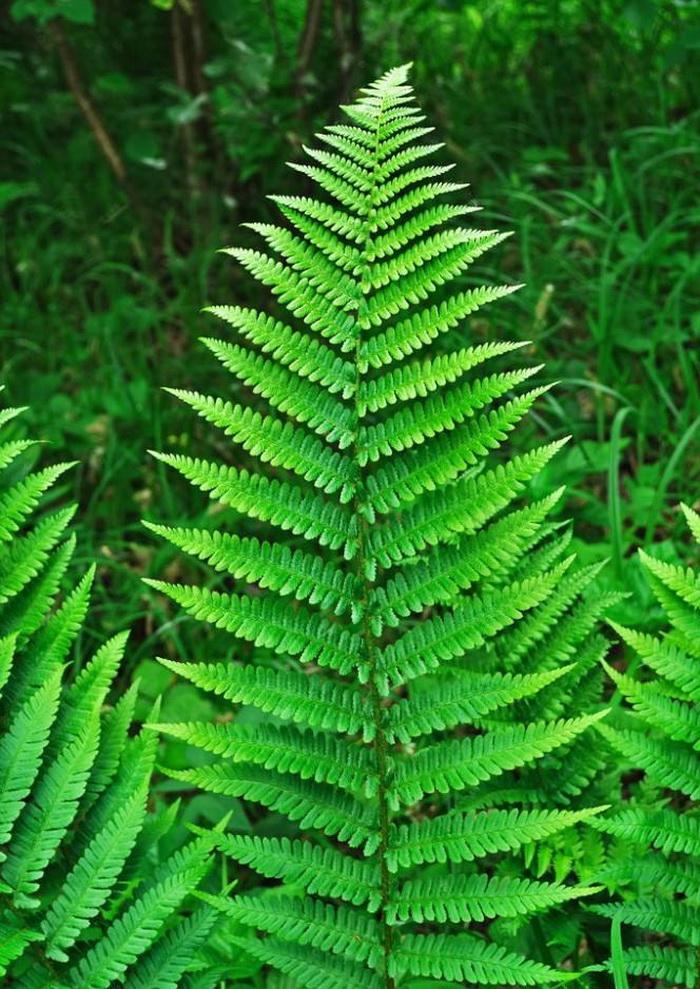
Boston, staghorn and maidenhair are some of the common ferns used as houseplants. These plants do not need pruning but they do need cleaning. The difference is that pruning increases the health of a plant and is done for many reasons, while cleaning is just routine maintenance. As with outdoor ferns you may choose to remove dead fronds. These should be cut with very sharp scissors or pruning shears and taken back 1/4 to 1/2 inch above the crown. The only time you would ever need to prune out all the fronds is when you are faced with a monumental pest problem. In this case, fertilize one week before the big haircut and then remove all the fronds.

Timing is Everything
Pruning of ferns needs to occur after the spores on fruiting fronds have matured and released. Trim them when they are dormant, which is during winter. They can also be pruned in very early spring. Many ferns do not object to pruning at any time of the year. The hardy ferns such as sword fern can be pruned once a year if necessary, just about any time, since they are continuously growing.
Evergreen Ferns
As a rule, ferns don't really need pruning. Ferns in nature are generally self-cleaning and will release old fronds as they die. In the garden, occasional removal of dead fronds will improve the appearance of the plant, but it is strictly cosmetic. Where the plants are large and very old, severe pruning can take place to the crown. All the fronds can be removed in late winter or before the first new fiddleheads appear. Prune the stems away from the crown in a circular pattern so you are left with a little dome. This is not only attractive, but it prevents accidental damage to the newest growth which appears at the center of the plant.
Deciduous Ferns
Deciduous ferns don't necessarily drop all their fronds when temperatures plummet. They do experience dieback and many of the fronds will fall off or turn brown. From a cosmetic standpoint, it is best to get these dead fronds out of the plant. You will also increase light and room for new leaflets. Many people prune the deciduous ferns in fall so they are ready for the spring, but the old fronds provide protection for the crown. It is best to leave them, unattractive though they may be, until spring.

Pruning Indoor Ferns
Boston, staghorn and maidenhair are some of the common ferns used as houseplants. These plants do not need pruning but they do need cleaning. The difference is that pruning increases the health of a plant and is done for many reasons, while cleaning is just routine maintenance. As with outdoor ferns you may choose to remove dead fronds. These should be cut with very sharp scissors or pruning shears and taken back 1/4 to 1/2 inch above the crown. The only time you would ever need to prune out all the fronds is when you are faced with a monumental pest problem. In this case, fertilize one week before the big haircut and then remove all the fronds.
0
0
成长记
Ueca
2018年08月19日

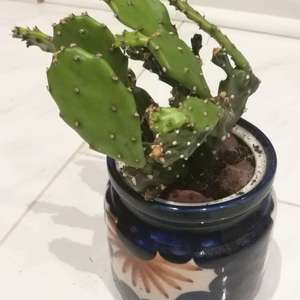
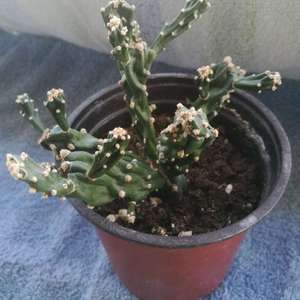
Any idea on the species of Opuntia? Looks bent because it fell off a table. Second image is from about a year ago.


0
0
文章
Miss Chen
2018年08月19日

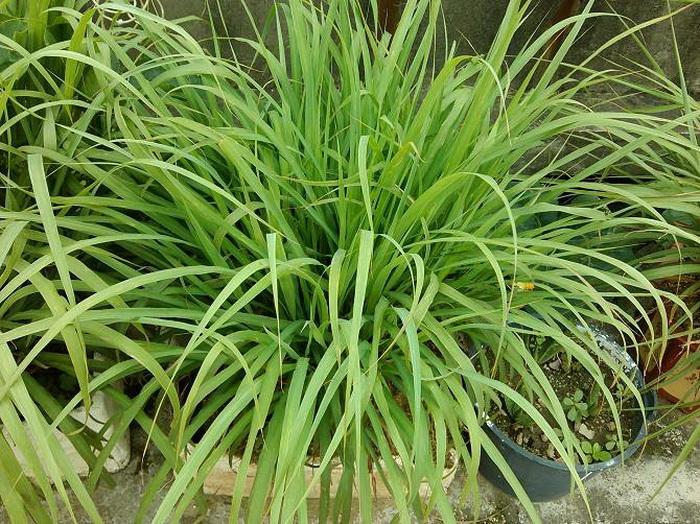
Lemongrass (Cymbopogon spp.) is the common name for several species of grasses in the genus Cymbopogon. These grasses are native to tropical parts of Asia, Africa and Australia, and they are generally frost-tender and do not survive winters in cold climates.
Annuals vs. Perennials
The term annual refers to those plants that complete their entire life cycles within a single growing season. Generally, annuals grow from a seed, produce their own flowers and seeds, and die in a single season, and new plants grow the following year from the seeds produced by the parent plant. Perennial plants, in contrast, survive through multiple growing seasons; although their reproductive cycles might be completed in one growing season, the parent plants will continue to grow and reproduce in subsequent seasons.
The year-after-year survival of perennial plants, however, is usually limited by their relative tolerance or intolerance of cold temperatures, and in climates where winters are colder than a given species will tolerate, the plant will usually die at the end of the growing season when the weather turns cold. When they're grown in climates where they're not winter-hardy, some perennials plants are treated as annuals by gardeners, who replant new plants each spring.
Sometimes when a perennial is grown in climates that fall just outside the climate in which the plant is fully winter-hardy, cold temperatures will cause the foliage and above-ground structure of the plant to die back, but the plant's root system will survive. In this case, the plant may survive the winter and begin to grow new foliage in the spring.
Lemongrass
The Cymbopogon species most commonly grown as the garden ornamental called lemongrass (Cymbopogon citratus) is a perennial, but it is sensitive to frost and below-freezing temperatures, and in the United States, it is fully winter hardy only in U.S. Department of Agriculture plant hardiness zones 10 to 11. In these zones, the grass, which typically grows to a height of between 2 and 4 feet, will remain green throughout the winter.
In moderately cooler zones, lemongrass may survive the winter and return in the spring even though the plant's leaves die back. Lemongrass roots are typically hardy in USDA zones 8b and 9, and in these zones, the plant may return year after year.
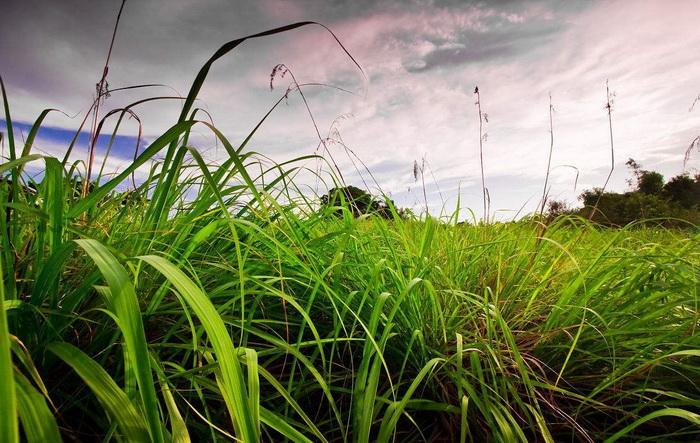
In zones colder than USDA zone 8b, lemongrass will likely not survive the winter and must be grown in the garden as an annual. Alternatively, the plant may be grown in a container and taken indoors when temperatures begin to fall and over-wintered in a sunny room.

Annuals vs. Perennials
The term annual refers to those plants that complete their entire life cycles within a single growing season. Generally, annuals grow from a seed, produce their own flowers and seeds, and die in a single season, and new plants grow the following year from the seeds produced by the parent plant. Perennial plants, in contrast, survive through multiple growing seasons; although their reproductive cycles might be completed in one growing season, the parent plants will continue to grow and reproduce in subsequent seasons.
The year-after-year survival of perennial plants, however, is usually limited by their relative tolerance or intolerance of cold temperatures, and in climates where winters are colder than a given species will tolerate, the plant will usually die at the end of the growing season when the weather turns cold. When they're grown in climates where they're not winter-hardy, some perennials plants are treated as annuals by gardeners, who replant new plants each spring.
Sometimes when a perennial is grown in climates that fall just outside the climate in which the plant is fully winter-hardy, cold temperatures will cause the foliage and above-ground structure of the plant to die back, but the plant's root system will survive. In this case, the plant may survive the winter and begin to grow new foliage in the spring.
Lemongrass
The Cymbopogon species most commonly grown as the garden ornamental called lemongrass (Cymbopogon citratus) is a perennial, but it is sensitive to frost and below-freezing temperatures, and in the United States, it is fully winter hardy only in U.S. Department of Agriculture plant hardiness zones 10 to 11. In these zones, the grass, which typically grows to a height of between 2 and 4 feet, will remain green throughout the winter.
In moderately cooler zones, lemongrass may survive the winter and return in the spring even though the plant's leaves die back. Lemongrass roots are typically hardy in USDA zones 8b and 9, and in these zones, the plant may return year after year.

In zones colder than USDA zone 8b, lemongrass will likely not survive the winter and must be grown in the garden as an annual. Alternatively, the plant may be grown in a container and taken indoors when temperatures begin to fall and over-wintered in a sunny room.
0
0


