首页
动态
文章
百科
花园
设置
简体中文
已关注
+
关注
动态 (3585)
Dummer. ゛☀
2017年09月14日
Dummer. ゛☀
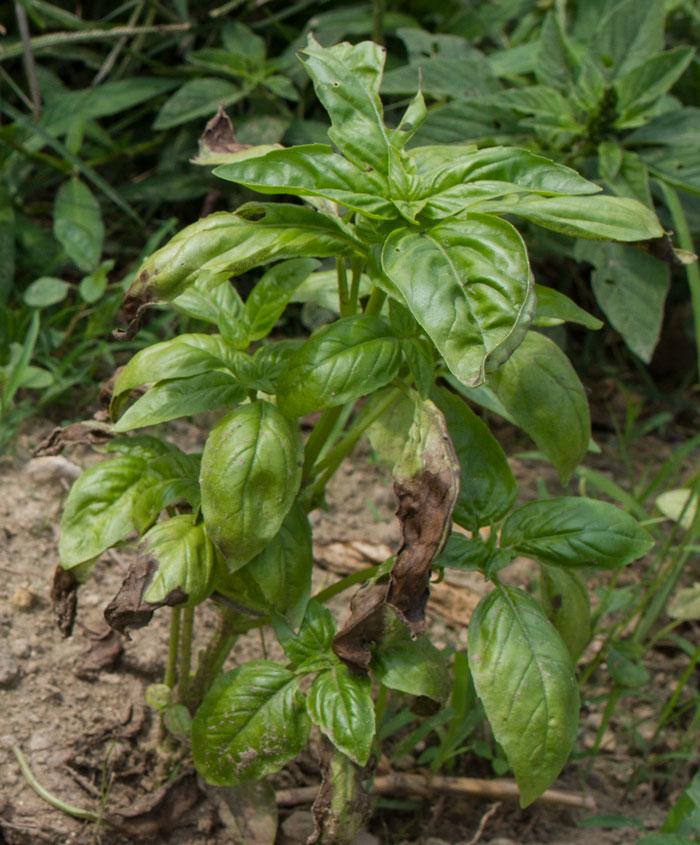
A reader wrote in about newly planted Bradford pear trees, saying that they had borne the brunt of high winds for a couple of days. The Bradford pears on the property developed brown leaves; they suffered from leaf wilt and looked dead, despite the homeowner's keeping the ground damp. So what, if anything, can be done in cases like this?
Windy Weather Only Partly Responsible for Leaf Wilt and Related Diseases Bradford pears and other trees that have just been transplanted experience transplant shock in a great many cases. Their roots have been disrupted, and they can be quick to show their displeasure. If someone picked you up, carried you out of your home and plopped you down on a strange property, you probably would be none too happy, either.
In its state of shock, the damaged Bradford pear tree's roots can't send water up to the leaves as they normally would. Pounding winds make matters worse. One result can be leaf wilt. Other plant problems can be caused by these conditions, as well, on deciduous trees. The Purdue University Cooperative Extension Service lists some of them: Leaf scorch. Yellowing of the leaves. Leaf rolling. Curling of the leaves. Purdue observes that, at its onset, leaf scorch is indicated by the coloration of the "tissue between the veins or along the margins of leaves" becoming yellow, and that, as the problem progresses, this tissue becomes dry, resulting in a brown color.
What Is the Treatment for Leaf Wilt on Bradford Pear Trees? What can you do to revive Bradford pear trees that have fallen prey to leaf wilt? Sadly, there is not much at this stage of the game that you can do. This is a case where prevention before the fact is more effective than treatment after the fact. For future reference, windbreaks could have minimized wilt damage, but it is rather late for that once the wilting has taken place. One should, however, emphasize what not to do: Do not fertilize. By feeding the plants, you would be encouraging additional leaf growth. That is not something that you want at this point. The root system can't support the canopy as it is, as said above; so there is no sense in adding to its burden.
Provide the Bradford pear trees with irrigation regularly. Other than that, all you can do is exercise patience and see if they revive from their transplant shock and subsequent leaf wilt. Transplant Shock and "Bare-Root" Plants As the same Purdue source points out, "Bare root trees and shrubs are most susceptible to transplant shock. Such 'stressed' plants are very fragile and are more susceptible to other stress factors." If you are used to buying plants at garden centers growing in flats or pots (or balled-and-burlapped, in the case of trees), then that terminology, "bare-root" might leave you scratching your head. But the definition of this term is surprisingly straightforward: Bare-root plants are shipped with no soil "clothing" their roots. When you buy shrubs at the garden center, they may well come in containers, but when you order them from garden catalogs, they will often arrive as bare-root plants.
You may wonder if shipping a plant with no soil on its roots is harmful to the plant. The fact is, not just any plant can be shipped bare-root. But certain plants -- for example, rose bushes -- can survive this method of transport in a sort of dormancy. But do not push your luck! Planting bare-root plants as soon as possible after they have arrived by mail is recommended. And if you cannot plant immediately, at least place the roots in water.
As faithful as you might be in following these instructions, though, there is simply a lot that can go wrong when installing new plants -- whether it be bare-root or not. One of the "stress factors" cited by Purdue is drainage problems. To improve the chances that your new Bradford pear tree (or other plant) will survive and thrive, ensure that the soil under and around your plant's roots drains well, so that water won't collect and rot the roots.
0
0
文章
Dummer. ゛☀
2017年09月14日
Dummer. ゛☀
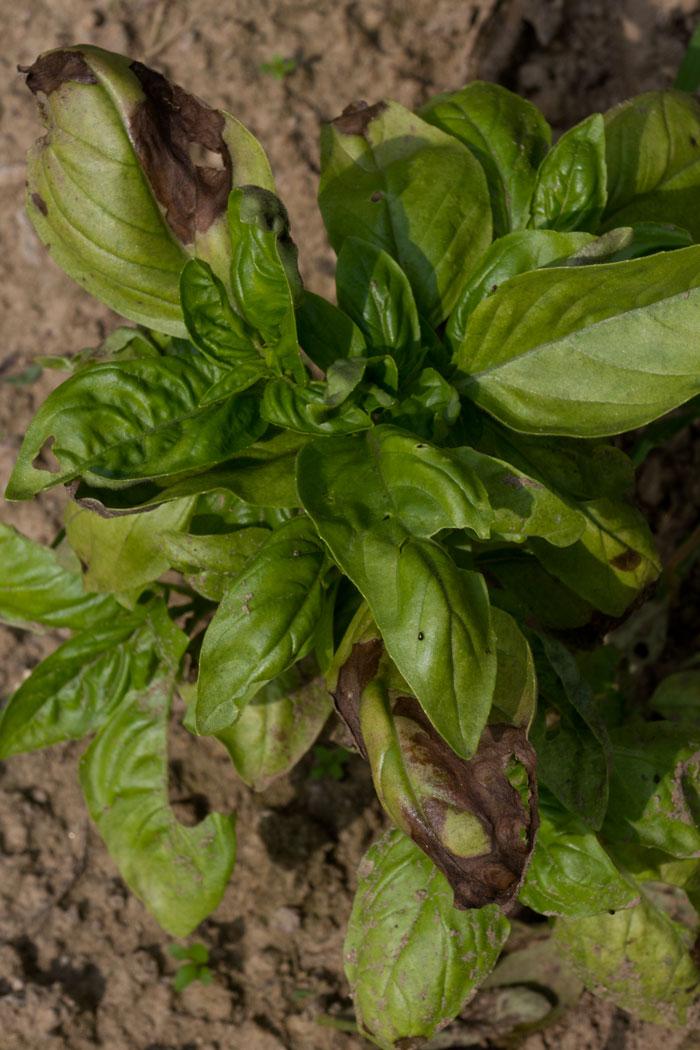
A reader wrote in about newly transplanted weigela shrubs suffering from leaf-wilt, noting that it had been very windy in his area of late. The weigela leaves wilted in spite of his keeping the ground damp. So are the plants dead? What, if anything, can be done for plants with wilted leaves?
See my answer below: Why Do Leaves Wilt? It is important to realize that not all leaf-wilt is created equal. Rather, there are a number of different reasons why leaves wilt. Before taking any action, you must determine which of these reasons applies to your wilting plant: Damaged roots Lack of water Fungal infection Plant roots draw water out of the ground and send it up through the above-ground parts of the plant. If the roots are damaged, the flow of water to the leaves is reduced. Wilting leaves can result.
Roots can sustain damage from a number of sources, including from: Transplant shock Physical injury from digging (while cultivating around the plant, etc.) Overwatering It is common when transplanting shrubs, including weigela shrubs, to cause transplant shock. The disturbed roots find it difficult to nourish the leaves with sufficient water in their damaged state, as the roots of a healthy, established shrub would. High winds simply exacerbate the problem: they have a drying effect that further robs the leaves of moisture. The result is leaf-wilt.
Direct Answer to the Reader's Question Assuming that transplant shock is the reason behind the wilting leaves in your case, the positive actions you can take to help the weigela shrubs, at this point, are limited. Unfortunately, only forethought can prevent (or, at least, minimize) the effects of transplant shock. Windbreaks would have been effective (to shelter your weigela from drying winds). Likewise, you can prevent or minimize leaf-wilt by picking the best times to transplant. By avoiding transplanting at the hottest times of the year, you put less stress on the plants' root systems, thereby keeping them healthier.
But the good news is that your weigela bushes are not dead: they just need time to recover. Here is what not to do: do not fertilize. Fertilizing would foster extra leaf growth -- which you do not want, since the weigela shrubs' disturbed roots are already struggling to support the current amount of foliage. Do water your weigela shrubs when the soil is dry, but do not overwater. When a plant's roots have been damaged (from transplant shock or any other source), they have to be given time to heal. Flooding a root system with water when that system is incapable of absorbing the water is, at best, useless and, at worst, counterproductive.
Root damage can also be caused by digging too close to your plant while cultivating. For example, some gardeners will dig around a plant to remove weeds and accidentally sever roots in the process. You can largely avoid this problem by mulching. Others make the mistake of cutting into root systems when working compost or manure into the soil. Here the solution is to apply, instead, a compost tea or manure tea, which involves no digging. Again, once the damage has occurred, resist the temptation to combat the resulting leaf-wilt by overwatering (which will do no good). Finally, overwatering, itself can damage plant roots. The roots essentially rot and lose their ability to take up water. Adding more water in such a case can be like adding fuel to a fire.
What if the Reason for Leaf-Wilt Is Not Root Damage? I have already mentioned a couple of alternate reasons for leaf-wilt, above. One is a soil fungus. Weigela shrubs are, in fact, one of the plants susceptible to the fungus, Verticillium wilt. According the University of Minnesota Extension (UVM), one way to identify this fungus is to look for "a scorched appearance" on leaf margins. To combat Verticillium wilt, UVM recommends selecting resistant plants and providing basic care (proper watering, fertilizing, etc.).
That leaves one last cause of leaf-wilt, the one that most gardeners think of immediately: namely, lack of water. Yes, sometimes the reason is no more complicated than that the soil has dried out around your plant. If you do not see scorched leaf margins on your plant and have no reason to believe that root damage has occurred, you're lucky. Solving the problem is as easy as giving the plant a drink of water.
0
0
文章
Dummer. ゛☀
2017年09月14日
Dummer. ゛☀
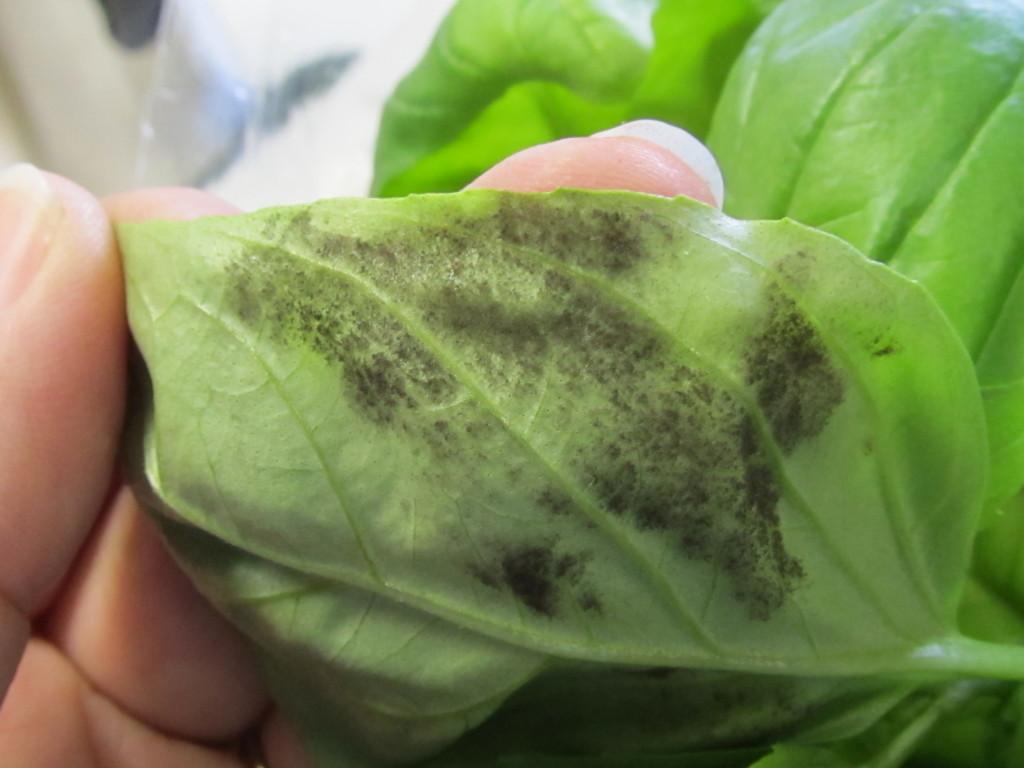
Now that you have Basil Downy Mildew, what do you do next? It is a highly contagious disease, with little warning. Because it is transmitted through spores that are nearly invisible to the naked eye, it can be blown in on the wind, carried in on clothing, hands or tools. Here are some things you can do after you find Basil Downy Mildew in your garden.
Remove Infected Plants Basil that has become infected with Downy Mildew may have a yellowish appearance, similar to a nutritional problem. The leaves turn yellow and fall off, while the stems wither, and the plant eventually dies. The most common symptom is the dusty spots, actually spores, that are located on the bottoms of the leaves. If you want a definitive diagnosis, you can bring an affected leaf to your local County Extension office for identification. Carefully pinch off a leaf and place it in a ziploc baggie for transport.
Once you are certain that it is Downy Mildew, cover the entire plant with a bag to prevent as much of the spores from being shaken off as possible. Pull up the entire plant and remove from garden area. Do not try to compost or try to remove only the visibly affected leaves. Both of these techniques can result in the spread of the spores. Do not save your basil seeds from any part of that year's crop. The spores can infect the seeds and affect the following year's plants.
Will It Stay In My Soil? Yes. The disease can stay viable for many years in the soil. Some experts say that the spores can stay viable for 8 years or more. If nothing else, rotate your crop of basil and plant in an entirely new location for the next season.
Is Basil Poisonous That Has Downy Mildew? In a word, no. However, it is not advisable to eat leaves that are clearly affected. When you first notice signs of BDM, it is best to remove the entire plant and make pesto out of all the healthy leaves. Because basil grows so fast, quick removal and starting new plants in a new location is the best way to prevent spreading spores.
0
0
文章
Dummer. ゛☀
2017年09月14日
Dummer. ゛☀
What does one do to treat "fire blight" on Bradford pear trees? And what exactly is this horrible-sounding problem? No good can come, surely, from a condition that unites those two ominous words, given the destructive power of fire and the downcast mood evoked by "blight" (which, in the general sense, is defined as any cause of impairment, destruction, ruin, or frustration).
A reader wrote in to inquire about just this problem. "The flowers on my Bradford pear trees turned black this year, and the new growth has died," he scribed. "The ends of the limbs are dead. What is wrong? Is this some sort of disease? And if so, how should I treat it?"
What Is Fire Blight, Exactly? The symptoms that the reader reports indicate fire blight. Before you learn what to do about it, let's explore precisely what it is. Fire blight (sometimes spelled as one word) is a bacterial disease. The type of bacterium that causes it has the Latin name of Erwinia amylovora. The disease attacks trees and bushes in the rose family. If you have not been introduced to the rose family, please note that this designation does not refer simply to the fragrant rose bushes with which you have probably been familiar since childhood. Both apple trees and pear trees belong to this plant family, for example.
Not only do the pear trees grown for their edible fruit succumb to fire blight, but also ornamental types such as 'Aristocrat' pear trees. While Bradford pear trees are relatively resistant to fire blight, that does not mean that they are totally immune to it (especially in warmer climates). Blackened flowers are an indication of fire blight. Fire blight bacteria can move down a branch and form a canker; it can eventually kill the branch or even the entire specimen. Remember that, since bacteria is at the root of the problem, treatment with a fungicide will have no effect on fire blight.
What to Do About Fire Blight on Bradford Pear Trees Taking care of fire blight DIY-style is somewhat problematic, according to the University of California. They write, “Copper products are the only materials available to homeowners for fire blight control, and they often don’t provide adequate control even with multiple applications.” They suggest that some good can be done by a weak “Bordeaux mixture or other copper product applied several times as blossoms open,” but they go on to say that this will not solve your fire blight problem entirely.
Have an arborist look at your Bradford pear tree if it is infested with fire blight. The disease can be treated if it is caught in time. An arborist will locate, prune off and dispose of the affected branches to stop the spread of the bacteria. As professionals, arborists also have access to sprays to which the average homeowner would not have access. An arborist may elect to use a bactericide (with streptomycin sulfate) on your Bradford pear tree to control fire blight.
0
0
文章
Dummer. ゛☀
2017年09月14日
Dummer. ゛☀
Fusarium wilt (foo-zair-ee-um) is caused by the fungus Fusarium oxysporum f.sp. lycopersici. Fusarium wilt is found worldwide and even resistant tomato varieties may be affected. The fungus is soil borne and makes its way into the plant through the roots. Once inside, it clogs and blocks the xylem, the tissue that moves water and some nutrients through the plant, preventing water from traveling up the stem and out into the branches and leaves.
It may not kill your tomato plants, but they won't be very productive. Species of Fusarium can infect many plants including: potatoes, peppers, eggplants, legumes and bananas. Symptoms of Verticillium wilt can be very similar to Fusarium wilt.
What Causes Fusarium Wilt? The Fusarium wilt pathogen is soil borne and can remain in infected soil for years. It can also be carried and transmitted in multiple ways, like: infected seed seedlings from infected soil the bottom of shoes shovels and equipment used in infected soil infected soil blown into the garden Ideal conditions for Fusarium wilt include warm, dry weather and acidic soil pH (5.0 - 5.6) There are tomato varieties that are resistant to fusarium wilt, but if they are weakened by root-knot nematode, they become more susceptible to it. Plants infected with Fusarium wilt will be stunted and the earlier they are infected, them more severe the stunting. Keep reading for more photos and descriptions of Fusarium Wilt symptoms and how to control it.
Symptoms of Fusarium Wilt on Tomatoes Fusarium wilt can sometimes be confused with other wilts, but here are some symptoms to help you identify it in tomatoes: Wilting The plants will literally wilt. Often it starts with a single leaf or shoot, near the top of the plant. It will recover at night, when temperatures are cooler, but as it progresses, the entire plant will wilt and not recover. Watering does not make a difference. Yellowing Lower leaves will turn yellow, often starting on only one side. As with the wilting, the yellowing will gradually move up the plant. Dry Leaves The wilted leaves will dry out and fall off. Discolored Stem If you cut open the stem length-wise you will see dark brown streaks.
Management and Control of Fusarium Wilt of Tomatoes There is no cure for Fusarium and since it persists in the soil for years, it can be very hard to eradicate. Here are some measures to help you control it. Resistant Varieties - If you've had problems with Fusarium wilt, you would be wise to stick with resistant varieties. Seed packets and many seedlings will be labeled with their resistance to various diseases. You could also consult a seed catalog for choices. Sterile Potting Soil - If you are starting your own seedlings, begin with a sterile soilless potting mix.
Raise the Soil pH - Apply lime to the soil in your garden, to bring the pH up into the neutral range of about 6.5 - 7.0. Control Nematodes - Since root-knot nematodes can lessen resistance to Fusarium wilt, don't let nematode populations build up in your soil. Don't Cultivate - Avoid injuring plants' roots by not using a hoe or cultivator around your tomato plants. Damaged roots are entry points for the pathogen.
Disinfect Tools - Clean all tools that may have come in contact with infected soil and make it a habit to regularly clean and disinfect your garden tools. Rotate Your Crops - Since the pathogen can persist in the soil for years, you will have to find another area to plant your tomatoes. A 5 to 7 year rotation is recommended, but that does not guarantee the pathogen will be entirely gone.
0
0
文章
Dummer. ゛☀
2017年09月13日
Dummer. ゛☀
One day your clematis vine is thriving and ready to flower. The next day it’s withering before your eyes. What happened? Chances are it’s a fairly common fungus that affects clematis plants, called clematis wilt. Clematis wilt can kill the entire top of your clematis vine, but the roots should still survive. Here's how to identify this quick spreading disease and what you can do about it.
What Does Clematis Wilt Look Like? Clematis wilt is a fungus disease (Ascochyta clematidina) that is also sometimes referred to as clematis leaf and stem spot. Clematis wilt causes the foliage and stems of your clematis vine to dry and whither, possibly even turning black. You may start to see reddish lesions along the stems, but the onset and spread of clematis wilt can be quick. That means you may not have any warning before an entire clematis vine turns brown. However it’s not unheard of for only a few stems to be affected, so if you see sudden discoloring, take heed.
What Causes Clematis Wilt? Clematis wilt is spread by spores that probably remained in the area on the debris of last year's vines, or possibly were blown in on the wind, from another nearby clematis plant. Like most fugal diseases, it is more prevalent in damp or humid weather. If your clematis vine is thick and tangled and remains wet well into the day, it will be even more prone to attack. On older clematis plants, the woody portion near the ground is often the first area affected. It may also be the area where the spores over-wintered. Once affected, the plant begins to die back because the fungus cuts off its vascular, or circulatory, system and no water can be carried through the plant. Left untreated, clematis wilt will spread throughout the plant and can kill a heavily infested plant.
What to Do for Affected Plants The good news is that clematis plants can recover from wilt, because it does not attack their root system. However, the bad news is that you can lose the entire top growth of your vine, during flowering time. To give your clematis the best chance of surviving clematis wilt, at the first sign of withering or drying, cut the affected stems back to ground level. It sounds severe, but it can save your plant. Dispose of the cuttings somewhere other than the compost.
Since the roots were not affected, new shoots should emerge from the base shortly after cutting. If your plant does not re-sprout within a few weeks, don't give up. Washington State University Extension’s fact sheet said “One resource on this subject states that renewed shoots can appear up to three years after the problem, so do not lose heart if this happens.” After pruning back the diseased vine, keep the clematis roots watered, even if there is no top growth. How to Help Prevent Clematis Wilt from Coming Back To lessen the chance of clematis wilt re-infesting next year, remove all remaining vine and leaf growth in the fall and dispose of it outside of the garden and somewhere other than your compost bin. The fungus can easily over-winter in the dead foliage.
If you wish to use a preventative fungicide, sulfur is recommended. Spray in the spring, when new growth first appears. Are All Clematis Susceptible to Clematis Wilt? To some degree, yes, clematis wilt can attack any type of clematis. The larger flowered varieties are most prone, while some of the smaller flowering varieties, like Clematis alpina and Clematis viticella, show better resistance. There is also some evidence that the older and better established a plant is, the less likely it is to become infected, but it's no guarantee. The best you can do is keep your plant in good health, prune your type of clematis when you should, and be on the alert.
0
0
文章
Dummer. ゛☀
2017年09月13日
Dummer. ゛☀
Plants need insects for pollination, so no garden should be insect-free, but there's no denying some insects are garden pests. Learning to identify which insects to worry about and which to welcome is part of the learning process of gardening. Here are a handful of common garden insects. Some are garden pests, some are beneficial and some are just passing through. Always assess the situation before spraying. But when you must treat the problem, the info offered here will be helpful.
Lady Beetle (Ladybug) Nymphs Not all bugs are bad. Most gardeners know that ladybugs or lady beetles are voracious aphid eaters and very welcome in the garden. What many don't know is that the in the nymph stage, these beetles are almost unrecognizable and they look like something you don't want on your plant's leaves. Learning to recognize the good guys is an important part of integrated pest management in the garden.
Leaf Miners Squiggly lines through a plant's leaves usually signal the work of leaf miners. Leaf miners are the larva of various insects. Eggs that were laid on the leaves hatch and the larva burrow inside the leaf tissue, feeding their way through the leaf and leaving a transparent trail of where they've been. Some plants, like columbine, are especially prone to leaf miners. Gain some tips for controlling or even avoiding leaf miner damage.
Scale Insects Scale insects look like little bumps along the stems of plants and are often mistaken for some type of disease. They adhere themselves to the plant and suck on the plant's juices, drying it out and causing serious damage. There are thousands of species of scale and each type has their favorite plants to feast on, so many plants can become infected with scale. Mealy bugs, those fussy, cotton covered insects often found on stems and in the stem and leaf joints, are in the scale family. Here's how to get rid of scale insects on plants.
Japanese Beetle Control Is there any garden pest as reviled as the Japanese beetle? As an adult, it can defoliate plants in an afternoon. As a grub, it destroys your lawn. And there alarming rate of reproduction makes matters even worse. The pheromone traps that are often sold to control adult Japanese beetles in your yard were actually developed to monitor the size of the Japanese beetle population: meaning they were designed to attract every beetle in the area, which is exactly what you don't need. Find some better suggestions here.
Spittlebugs (or Froghoppers) Every now and then you'll see a clump of foam on one of your plants that looks like someone spit on it. Close -- more likely it's the spittlebug at work. The actual bug is very tiny and he's hiding from predators under this mass of froth. It fools the birds, but it's a red flag for gardeners. Don't let it worry you. Spittlebugs do little damage to the plant and they'll be on their way in no time flat. Curious about what's in the foam? Read on for more about spittlebugs.
0
0
文章
Dummer. ゛☀
2017年09月13日
Dummer. ゛☀
Emerald cedar (more properly termed "arborvitae") is a highly useful tall shrub or small tree, but homeowners and businesses who plant it frequently experience the problem of having its leaves turn brown. Insects, diseases, or even dog urine can be the sources of the problem if the leaves are turning brown in summer, as well as a more obvious potential culprit: namely, drought.
Many people have asked me to address this issue. Arborvitae is widely planted in highly visible hedges and foundation plantings, where brown leaves will stick out like a sore thumb and create an eyesore. I was finally inspired to write an article about the problem by a reader who emailed me the following question: I planted over 40 Emerald Cedars along the border between my property and my neighbour as a privacy fence, as well as a sound barrier for my dogs barking. I planted the trees at least 5 years ago, and just last summer I noticed that they are all turning brown, instead of having that lovely fresh green colour they used to. Can you tell me what the problem is and what you might suggest as a remedy to save my Emerald cedar trees?
Location of Brown Foliage Determines Whether You Have a True Problem When you see brown leaves on the inner part of Emerald cedars, that is generally not a problem: it is normal to see brown leaves in this area in fall or spring, as that foliage is just getting old and the Emerald cedars are shedding it. But leaves turning brown at the outer tips of branches can be a serious problem. If you see such brown leaves in the summer, it could be due to any of the following (or some combination thereof): Your Emerald cedars could be infested with aphids (in which case you would have to spray). Inspect foliage closely for masses of these tiny, soft-bodied insects. They could be infested with spider mites (in which case you would have to spray). Look closely for tiny webs. Your Emerald cedars could be succumbing to fungal diseases. Look for tiny black spots in summer. If you see them, remove infected branches to prevent further spread. If the problem persists, have your local garden center recommend an antifungal spray.
During a hot, dry summer, plants often fail to receive sufficient water. To address reason
#4 above, as a preventive measure, you can supply artificial irrigation and bark mulch. For established plants, a deep soaking every other week is sometimes recommended. Of course, this does not address the issue of vegetation that has already been damaged by drought. In severe cases, root damage can occur, resulting in dead plants. How do you check to see if your plant is dead or still alive? Slice off a bit of bark with a knife, so that you can "look under the hood," so to speak. If you see green, the plant is probably still alive (on a partially dead plant, it may take you a few tries before you find green somewhere). If all that you find is brown, the plant is most likely dead, and you should start making plans to remove it and replace it.
Is Your Yard Going to the Dogs? Although this does not apply to the reader mentioned above (because it is unlikely to account for browning on 40 Emerald cedar trees all at once), it could apply to someone with a small number of Emerald cedars: if the foliage has been sprayed with dog urine, that can cause brown leaves. This is just one of many examples of the challenges we face in landscaping with dogs. If there is a stray dog problem in your area, you can deter dogs with dog repellents.
Note also that, in diagnosing and solving this problem of Emerald cedar leaves turning brown, it is important to specify the time of year. The above assumes the problem developed during the summer. I have a separate FAQ dealing with brown leaves on arborvitae (Emerald cedars) in winter.
0
0
文章
Dummer. ゛☀
2017年09月13日
Dummer. ゛☀
Orchids have a love/hate relationship with fungi. Many people know that orchids developed their amazing flowers to attract very specific pollinators in the wild, but fewer people are aware of the plant's relationship to various fungus. After pollination, an orchid plant produces a large seed pod. This seed pod is filled with thousands or even tens of thousands of tiny seeds. In general, plants have two strategies with seeds: they either produce very few large seeds that are loaded with food and nutrients to help the seed germinate, or they produce many smaller seeds but invest less in each seed.
Orchids are definitely among the latter group: their seeds tend to be tiny, vulnerable little packets of cells that can't even properly germinate on their own. After an orchid seed is released from its seed pod, it floats on the wind until it lands in a suitable location. Once there, the seed must be colonized by a specific kind of fungus. The colonized orchid seed destroys and digests the fungal, drawing enough energy from it to begin germination. So it's fair to say that orchids would not exist without fungus.
Common Fungi In cultivation, however, various fungi extract a terrifying revenge: they are among the most common killers of orchids. Orchids are susceptible to some fungi, including Pythium, Phytophthora, Rhizoctonia, Fusarium, Anthracnose, Botrytis, and Cercospora, among others. These fungal agents attack various parts of the plant, including roots, stems, leaves, and flowers. Destructive by themselves, fungal attacks also leave the plant vulnerable to opportunistic infection by bacteria.
Why Is Fungi an Issue? Part of the reason fungi is such a problem in orchids is because they naturally thrive under the same conditions that many people assume orchids like wet, humid, and still. This, however, is something of a misconception. Most orchids we grow are canopy plants, not swamp plants. They rely on good air circulation and drying periods to stay healthy. So the first and best defense against fungal attacks is cultural: don't let your plants stay wet, never head into a night with wet plants, and provide plenty of strong airflows to keep your plants healthy.
That said, however, most orchid growers will deal with some fungal infection at some point, especially the annoying black leaf spots that disfigure our perfect plants. In most cases, these infections can be successfully treated by spraying early with an effective anti-fungal agent.
0
0
文章
Dummer. ゛☀
2017年09月13日
Dummer. ゛☀
Yellowing leaves on a phalaenopsis are not necessarily a cause for alarm. It's normal and natural for older leaves to yellow and gradually drop off. Older phalaenopsis often have somewhat elongated stems where old leaves have dropped away. On healthy plants, new roots will continuously emerge from the stem, eventually forming a mass of roots.
However, if the leaves are yellowing from the top of the plant, there is a problem. If the leaves are still plump and firm, the plant is most likely receiving too much light and it's washing out the color. If the leaves are wrinkled and listless, the plant is most likely dehydrated.
Yellow Leaves If the leaves on your Phalaenopsis orchid are yellow, it could be an indication that something is wrong. There are a number of factors that can cause the leaves of an orchid to become discolored, including direct sunlight, low temperatures, and root rot. Once any yellowing is discovered, it is time to figure out if there is a problem with the plant. If you discover the yellowing leaf is located on the bottom of the plant, don’t worry. This is a natural process of the plant to discard the mature leaf in order to produce a new leaf. However, if multiple leaves are turning yellow or top leaves are yellow, your plant may be sick.
3 Reasons Why Your Phalaenopsis Leaves Are Yellow The first step is to isolate the plant away from any other orchids that you may have to ensure that they do not become ill as well. Here are 3 steps to take to try to determine the problem: Direct sun may be the culprit. The leaves of a Phalaenopsis orchid can burn and turn yellow if they are exposed to direct sunlight. Try putting your orchid in a place that receives sufficient indirect sunlight.
Is the temperature right? Overly low temperatures can also cause orchid leaves to turn yellow. Make sure the temperatures around your orchid are between 65 and 80 degrees Fahrenheit during the day and 60 and 70 degrees at night. Check the roots. Overwatering can lead to root rot, which can in turn cause its leaves to turn yellow. You should only water the plant when the top one inch of the potting medium is dry and the roots are white, and make sure there are enough holes in the pot to allow proper drainage. If your orchid is suffering from root rot but you see your plant still has some healthy green roots, trim the rotted roots and repot the plant in new media. Mist the leaves the first week in place of watering.
A Tip to Prevent Overwatering Overwatering is one of the most common problems and one of the most serious Here's a hint to make sure that in your quest to keep your orchid happy, healthy and beautiful that you don't overwater. To avoid overwatering, we recommend watering your Phalaenopsis orchid with three ice cubes once a week so that the roots will soak up water slowly.
1
0
文章
相关用户
举报 反馈

您有什么意见或建议,欢迎给我们留言。

请输入内容
设置
VIP
退出登录
分享

分享好文,绿手指(GFinger)养花助手见证你的成长。

请前往电脑端操作

请前往电脑端操作

转发
插入话题
提醒好友
发布
/
提交成功 提交失败 最大图片质量 成功 警告 啊哦! 出了点小问题 转发成功 举报 转发 显示更多 _zh 文章 求助 动态 刚刚 回复 邀你一起尬聊! 表情 添加图片 评论 仅支持 .JPG .JPEG .PNG .GIF 图片尺寸不得小于300*300px 最少上传一张图片 请输入内容