文章
Dummer. ゛☀
2017年08月12日

Epiphytic plants are those that grow on vertical surfaces such as another plant, a rock, or any other structure the epiphyte can attach to. Epiphytes are not parasitic but do use other plants as support. Epiphytes for the home interior are mounted, generally on bark, wood or cork. It’s creative and fun to learn how to mount epiphytic plants. These varieties add a unique, tropical note to the home and epiphyte plant care is easy and carefree.
Epiphyte Mounting Tips
There are 22,000 species of epiphytes around the world. Many of these are becoming common houseplants due to their unique beauty but also their ease of care. Mounting these plants is the best way to view them, provides the plant the aerial situation it requires and assists in epiphyte plant care. Choose any mount that is porous and is free of chemicals and salts. Now it is time to take a few epiphyte mounting tips and get creative. The pros choose their mounting medium carefully. This is especially true of orchid collectors. Orchids tend to grow on specific species of tree and it is important to try to match that wood whenever possible. Usually, this is not the case, however, so a benign substitute is chosen. Your choice of mounting medium will depend upon the size of your epiphyte, the weight of the medium and durability. For the most part, driftwood, cork and large pieces of hardwood or bark will provide adequate homes for the plants. Your mounting material is your next choice. Use pantyhose, fishing line, wire, twine or even hot glue.
How to Mount Epiphytic Plants
Epiphyte growing and mounting can become addictive. The bromeliads, orchids, tillandsia, staghorn fern and other varieties of epiphyte will produce a unique collection. Any of the plants that have minimal roots or aerial roots are good candidates for mounting. The best medium for any type of plant will vary according to its native region; however, an overall good medium to cradle root systems is sphagnum moss. Moisten the moss and pack it around the roots. You can use a bit of coconut coir around that if you wish and then bind the whole mass to the plant with twine.
Epiphyte Growing and Mounting
You should have all the parts that you need together now. Take your plant and wrap the roots in the moistened sphagnum moss. Bind this to the base of the plant and then take your mounting piece and attach the base of the plant. Use glue, twine or whatever method you choose. Take care to hide any string in the foliage of the plant for best appearance. Epiphytes need more moisture than plants in pots. Provide water two to four times a week, depending upon how hot and dry your home is and what time of year. In summer, occasionally submerge the plant in water for an hour if it is not getting enough moisture. If your humidity is low, spray them with water occasionally. Place the plant where it gets bright but indirect light. Fertilize in spring with a dilution of a 10-5-5 that is low in copper.

Epiphyte Mounting Tips
There are 22,000 species of epiphytes around the world. Many of these are becoming common houseplants due to their unique beauty but also their ease of care. Mounting these plants is the best way to view them, provides the plant the aerial situation it requires and assists in epiphyte plant care. Choose any mount that is porous and is free of chemicals and salts. Now it is time to take a few epiphyte mounting tips and get creative. The pros choose their mounting medium carefully. This is especially true of orchid collectors. Orchids tend to grow on specific species of tree and it is important to try to match that wood whenever possible. Usually, this is not the case, however, so a benign substitute is chosen. Your choice of mounting medium will depend upon the size of your epiphyte, the weight of the medium and durability. For the most part, driftwood, cork and large pieces of hardwood or bark will provide adequate homes for the plants. Your mounting material is your next choice. Use pantyhose, fishing line, wire, twine or even hot glue.

How to Mount Epiphytic Plants
Epiphyte growing and mounting can become addictive. The bromeliads, orchids, tillandsia, staghorn fern and other varieties of epiphyte will produce a unique collection. Any of the plants that have minimal roots or aerial roots are good candidates for mounting. The best medium for any type of plant will vary according to its native region; however, an overall good medium to cradle root systems is sphagnum moss. Moisten the moss and pack it around the roots. You can use a bit of coconut coir around that if you wish and then bind the whole mass to the plant with twine.

Epiphyte Growing and Mounting
You should have all the parts that you need together now. Take your plant and wrap the roots in the moistened sphagnum moss. Bind this to the base of the plant and then take your mounting piece and attach the base of the plant. Use glue, twine or whatever method you choose. Take care to hide any string in the foliage of the plant for best appearance. Epiphytes need more moisture than plants in pots. Provide water two to four times a week, depending upon how hot and dry your home is and what time of year. In summer, occasionally submerge the plant in water for an hour if it is not getting enough moisture. If your humidity is low, spray them with water occasionally. Place the plant where it gets bright but indirect light. Fertilize in spring with a dilution of a 10-5-5 that is low in copper.
0
0
文章
Dummer. ゛☀
2017年08月12日

Air plant (Tillandsia) is the largest member of the bromeliad family, which includes the familiar pineapple. How many varieties of air plants are there? Although estimates vary, most agree there are at least 450 different types of tillandsia, not to mention countless hybrid varieties, and no two air plant varieties are exactly the same. Ready to learn about a few different types of air plants? Keep reading.
Types of Tillandsia
Tillandsia plant types are epiphytes, a huge group of plants with roots that anchor the plant to a host – often a tree or a rock. Epiphytes are different from parasitic plants because, unlike parasites, they take no nutrients from the host plant. Instead, they survive by absorbing nutrients from the air, from composted material on the host plant, and from the rain. Examples of well-known epiphytes include various mosses, ferns, lichens and orchids.
Tillandsia air plants range in size from less than an inch to more than 15 feet. Although the leaves are often green, they may be red, yellow, purple, or pink. Many species are fragrant. Tillandsias propagate by producing offshoots, often known as pups.
Air Plant Varieties
Here are some different types of air plants. T. aeranthos – This species is native to Brazil, Uruguay, Paraguay and Argentina. Aeranthos is a popular air plant with scaly, silver-blue leaves with dark blue blooms emerging from dark pink bracts. It is available in several forms, including a number of hybrids. T. xerographica – This hardy air plant is native to the semi-desert regions of El Salvador, Honduras and Guatemala. Xerographica consists of a spiral rosette that can grow to widths of 3 feet, with a similar height when in flower. The silvery-gray leaves are wide at the base, curling to narrow, tapered tips. T. cyanea – This widely cultivated air plant displays loose rosettes of arching, dark green, triangle-shaped leaves, often with a stripe near the base. The spiky blooms are purple and vivid pink to dark blue. T. ionantha – The ionantha species includes several air plant varieties, all compact, striking plants with plentiful, curved leaves measuring about 1 ½ inches in length. Leaves are silvery grayish-green, turning red towards the center before the plant blooms in late spring. Depending on the variety, blooms may be purple, red, blue or white. T. purpurea – Tillandsia plant types include purpurea (which means “purple”). Purpurea is appropriately named for the bright, reddish-purple blooms, notable for their mild, cinnamon-like aroma. The leaves, which reach up to 12 in long, grow in a spiral fashion. The stiff leaves are a lovely shade of purple-tinted mauve.

Types of Tillandsia
Tillandsia plant types are epiphytes, a huge group of plants with roots that anchor the plant to a host – often a tree or a rock. Epiphytes are different from parasitic plants because, unlike parasites, they take no nutrients from the host plant. Instead, they survive by absorbing nutrients from the air, from composted material on the host plant, and from the rain. Examples of well-known epiphytes include various mosses, ferns, lichens and orchids.
Tillandsia air plants range in size from less than an inch to more than 15 feet. Although the leaves are often green, they may be red, yellow, purple, or pink. Many species are fragrant. Tillandsias propagate by producing offshoots, often known as pups.

Air Plant Varieties
Here are some different types of air plants. T. aeranthos – This species is native to Brazil, Uruguay, Paraguay and Argentina. Aeranthos is a popular air plant with scaly, silver-blue leaves with dark blue blooms emerging from dark pink bracts. It is available in several forms, including a number of hybrids. T. xerographica – This hardy air plant is native to the semi-desert regions of El Salvador, Honduras and Guatemala. Xerographica consists of a spiral rosette that can grow to widths of 3 feet, with a similar height when in flower. The silvery-gray leaves are wide at the base, curling to narrow, tapered tips. T. cyanea – This widely cultivated air plant displays loose rosettes of arching, dark green, triangle-shaped leaves, often with a stripe near the base. The spiky blooms are purple and vivid pink to dark blue. T. ionantha – The ionantha species includes several air plant varieties, all compact, striking plants with plentiful, curved leaves measuring about 1 ½ inches in length. Leaves are silvery grayish-green, turning red towards the center before the plant blooms in late spring. Depending on the variety, blooms may be purple, red, blue or white. T. purpurea – Tillandsia plant types include purpurea (which means “purple”). Purpurea is appropriately named for the bright, reddish-purple blooms, notable for their mild, cinnamon-like aroma. The leaves, which reach up to 12 in long, grow in a spiral fashion. The stiff leaves are a lovely shade of purple-tinted mauve.

0
0
求助
cecetea123
2017年08月12日

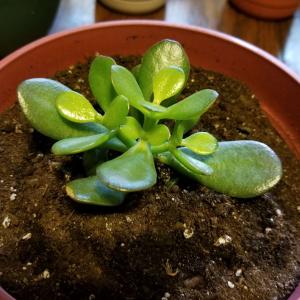
What plant is this?


0
1
Katia De Juan:I think it’s an echeveria
Huckeem4:What plant is this?
成长记
Ueca
2017年08月12日

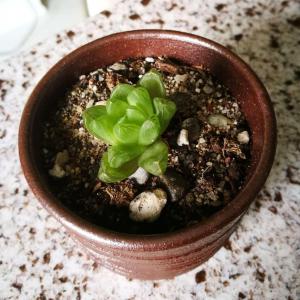
Condition has improved somewhat, but the mother plant has eaten the pups at the base.

1
0
成长记
SucculentLover021815
2017年08月11日

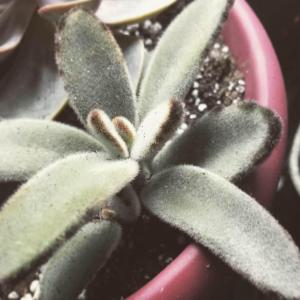
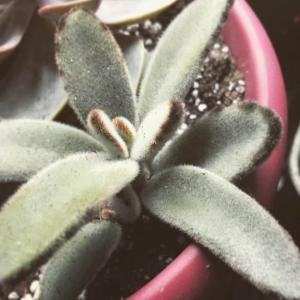
I new added a "Kalanchoe Tomentosa 'Panda Plant'" in my "garden"

0
0
文章
Miss Chen
2017年08月11日

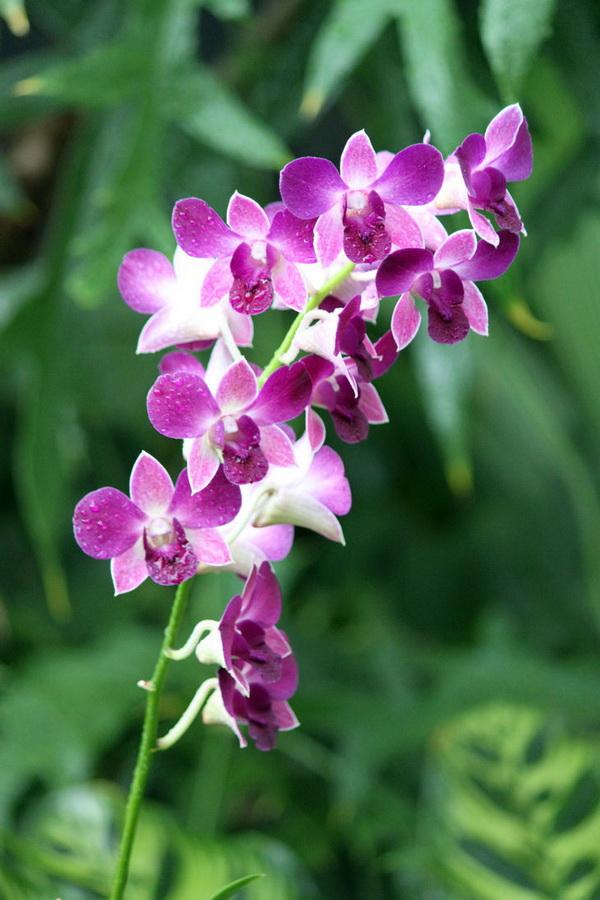
It is time to transplant your orchid when the roots are growing over the side of the pot or the lower leaves have died and weakened the center stem. The plant has either become too big for the container or the potting medium has broken down and no longer supports the plant. Always wait for an orchid to finish blooming before transplanting.

Transplanting Materials
Gather together new potting medium, hand-held pruners and a pot one size bigger than its present container. The potting medium must be fast-draining and also water-retentive. Commercial orchid potting medium contains volcanic rock, coconut fiber, tree bark, charcoal or a combination of these. Aliflor is an expanding clay medium that is often used in orchid mixes. Bark-based potting medium drains well but breaks down easily. Peat-based material retains moisture well but must be replaced yearly. Choose either clay or plastic pots for your orchid. Ensure the hand-held pruners are sterilized with alcohol before using, to prevent the spread of harmful bacteria.
Remove Orchid From Pot
Grasp the orchid plant by the main stem and gently remove it from the overturned pot. A very root-bound plant will be difficult to shake loose, and sometimes the pot needs to be broken. Remove all of the old potting medium by shaking the plant and picking the medium out from between the roots. Do not reuse any of this material in the transplant process. Gently wash off the orchid roots with water to remove fine particles. Pull off dead or weak lower leaves and pull off plant tissue at the leaf juncture. Prune all shriveled roots carefully with hand-held pruners, being careful not to cut healthy growth. Dead tissue is hollow when squeezed or wiry looking.
New Pot
Choose a plastic or clay pot that will accommodate the entire root system comfortably. Cover the bottom of the pot with a thin layer of potting mix. Place the plant in the pot with the lower leaves slightly above the rim. Place and push potting material in the spaces between the roots, pressing gently as you go. Ensure the bottom leaves remain slightly above the pot rim. Tap the pot gently to settle the materials and add more if needed to fill the space. Experienced orchid gardeners add a label to each plant indicating its name and bloom time.
Water and Ongoing Care
An orchid needs to be soaked thoroughly after it has been transplanted to a new pot. Always use tepid water and soak long enough so all the planting material is wet. Allow the pot to drain completely and empty the drip pan so the roots do not continue to absorb water through the drainage hole. Orchids are watered once a week after the transplant. Fertilize monthly with 1/2-strength commercial orchid fertilizer during summer and fall. Do not fertilize during the spring flowering cycle.

Transplanting Materials
Gather together new potting medium, hand-held pruners and a pot one size bigger than its present container. The potting medium must be fast-draining and also water-retentive. Commercial orchid potting medium contains volcanic rock, coconut fiber, tree bark, charcoal or a combination of these. Aliflor is an expanding clay medium that is often used in orchid mixes. Bark-based potting medium drains well but breaks down easily. Peat-based material retains moisture well but must be replaced yearly. Choose either clay or plastic pots for your orchid. Ensure the hand-held pruners are sterilized with alcohol before using, to prevent the spread of harmful bacteria.
Remove Orchid From Pot
Grasp the orchid plant by the main stem and gently remove it from the overturned pot. A very root-bound plant will be difficult to shake loose, and sometimes the pot needs to be broken. Remove all of the old potting medium by shaking the plant and picking the medium out from between the roots. Do not reuse any of this material in the transplant process. Gently wash off the orchid roots with water to remove fine particles. Pull off dead or weak lower leaves and pull off plant tissue at the leaf juncture. Prune all shriveled roots carefully with hand-held pruners, being careful not to cut healthy growth. Dead tissue is hollow when squeezed or wiry looking.
New Pot
Choose a plastic or clay pot that will accommodate the entire root system comfortably. Cover the bottom of the pot with a thin layer of potting mix. Place the plant in the pot with the lower leaves slightly above the rim. Place and push potting material in the spaces between the roots, pressing gently as you go. Ensure the bottom leaves remain slightly above the pot rim. Tap the pot gently to settle the materials and add more if needed to fill the space. Experienced orchid gardeners add a label to each plant indicating its name and bloom time.

Water and Ongoing Care
An orchid needs to be soaked thoroughly after it has been transplanted to a new pot. Always use tepid water and soak long enough so all the planting material is wet. Allow the pot to drain completely and empty the drip pan so the roots do not continue to absorb water through the drainage hole. Orchids are watered once a week after the transplant. Fertilize monthly with 1/2-strength commercial orchid fertilizer during summer and fall. Do not fertilize during the spring flowering cycle.
0
0
文章
Miss Chen
2017年08月11日

The orchid family (Orchidaceae) includes approximately 600 genera and about 30,000 natural species worldwide. Orchids thrive in U.S. Department of Agriculture plant hardiness zones 1 through 13, depending on the species, but most houseplants are tropical orchids. These exotic-looking plants have earned a reputation as being difficult to grow, but many are surprisingly easy to care for. Lighting and watering needs vary, but most orchids require fertilizer high in both potassium and calcium. Making your own orchid fertilizer from common household items is quick and easy.

Eggshells and Chicken Bones
In two vital ways, chickens provide orchids with the nutrients they need to grow. Both eggshells and chicken bones contain high amounts of the calcium and potassium that orchids crave. Wash and dry eggshells and crush them with a mortar and pestle to create fertilizer for orchids. Dried chicken bones require the same technique, but are a little more difficult to process. Once you've created the crushed mixture, sprinkle it over the orchid's bark mixture.
Don’t Throw Out Cooking Water
The cooking water from both potatoes and rice provides valuable nutrients to orchids. While rice water provides a good source of vitamin B, potato water contains calcium and potassium. Save the water from cooking potatoes and rice and store it in the fridge. Apply the water to orchids every two weeks.
Milk, Molasses and Epsom Salt
Ordinary cow's milk provides a good source of protein for your orchids, but dilute it first -- 1 part milk to 4 parts water -- or get into the habit of rinsing out your milk carton with water and using it to water your orchids every two weeks. Molasses gives your orchids a boost of potassium. Mix a teaspoon of molasses to a quart or two of water and use it when you water your orchids. Mixing a teaspoon of Epsom salt in two quarts of water gives your orchids a boost of magnesium – but use caution not to use scented Epsom salt sold as foot wash. Look for Epsom salt in the gardening section of your home improvement center.
Oak Leaves and Teabags
Oak leaves and teabags, which are high in nitrogen can be used as natural fertilizer to boost orchid growth. Oak leaves need to be brewed -- 1 part water to 2 parts leaves -- for about two weeks in the sun to create liquid fertilizer. Water your orchids with the brewed oak-leaf tea once a month. Open teabags and sprinkle the contents on the soil of your orchid plants once a month during the growing season.
Easy Does It
Orchids are light feeders and do not require frequent fertilizer. While homemade orchid fertilizers provide them with the nutrients they need to thrive, heavy applications may harm your orchids. Try one or two remedies at a time and use the health of your orchids as your guide to fertilizer application. Signs of over-fertilization include a white crust on top of the bark, leaf tips dying and roots that turn black. Always flush your pot monthly with water to remove the build up of salt from fertilizers. Homemade fertilizers may not give your orchid all the NPK nutrients it requires for proper health. If signs of poor health occur that are not from over-fertilizing, supplement with a water-soluble 20-20-20 blend, mixed at one teaspoon per gallon of water and apply monthly.
0
0
文章
Miss Chen
2017年08月11日

Orchids are part of a plant group with over 30,000 species. Most orchids can rebloom several times after the blossoms dry up and die off. Some species require different care after the blooms die, but good general orchid care will help ensure your flower has the opportunity to rebloom.

Cutting
Some orchids require you to cut them to encourage reblooming. Certain species should be cut with a sterile tool just above where the stem grows out of the leaf and bulb. Other orchid species have black lines on the lower part of the stem that you should cut above. Other species do not require any cutting. Check with a greenhouse or garden store if you need help identifying your orchid's species or need specific cutting instructions. If you are concerned that your stem will get infected, you can rub a bit of cinnamon or rubbing alcohol on the freshly cut portion to keep bacteria out.
Repotting
After your orchid blooms die, you may need to repot your plant. Orchids should stay in the same potting soil for only two or three years at the most. Many orchids' roots are extremely sensitive, so use caution when repotting to avoid disturbing the roots too much. Plastic and clay pots are both suitable for orchids, but clay dries out quicker. Orchids in clay pots will require more frequent watering. Make sure your pot has adequate drainage holes to get rid of excess water. Repot your orchid in a premade orchid soil mix or make your own from osmunda fiber, soil, peat moss and shredded bark.

Watering
Overwatering your orchid can lead to root rot and quicker decay of the soil and compost. Use water the same temperature as the atmosphere around the orchid. Do not leave the soil soggy. Some orchid species require consistently moist soil, while others should be allowed to dry out completely before watering them again. Yellow or crinkled leaves are signs of overwatering, but these can take months to appear. Black or dark brown mushy roots are rotted. Remove these sections and repot your orchid.
Light and Temperature
Orchids thrive in humid environments with daytime temperatures between 65 and 80 degrees Fahrenheit. Nighttime temperatures 10 to 15 degrees cooler than the average daytime temperature will help stimulate new growth and blooms. Increase the humidity by placing your orchid pot on a tray with moist pebbles and mist your flowers with warm water each morning. Bright light will help your orchid rebloom after the blooms die. Allow your plant to get eight to ten hours of sunlight each day or use 40-watt florescent lights placed about 12 inches above the plant.
Fertilizing
Do not fertilize your orchids while they are dormant. During the blooming period, use a half-strength solution of a balanced 10-10-10 fertilizer every two weeks. If you grow your orchids in soil with a lot of tree bark, use a half-strength mixture of 30-10-10 every two weeks since tree bark does not contain the nutrients orchids need to thrive.

Cutting
Some orchids require you to cut them to encourage reblooming. Certain species should be cut with a sterile tool just above where the stem grows out of the leaf and bulb. Other orchid species have black lines on the lower part of the stem that you should cut above. Other species do not require any cutting. Check with a greenhouse or garden store if you need help identifying your orchid's species or need specific cutting instructions. If you are concerned that your stem will get infected, you can rub a bit of cinnamon or rubbing alcohol on the freshly cut portion to keep bacteria out.
Repotting
After your orchid blooms die, you may need to repot your plant. Orchids should stay in the same potting soil for only two or three years at the most. Many orchids' roots are extremely sensitive, so use caution when repotting to avoid disturbing the roots too much. Plastic and clay pots are both suitable for orchids, but clay dries out quicker. Orchids in clay pots will require more frequent watering. Make sure your pot has adequate drainage holes to get rid of excess water. Repot your orchid in a premade orchid soil mix or make your own from osmunda fiber, soil, peat moss and shredded bark.

Watering
Overwatering your orchid can lead to root rot and quicker decay of the soil and compost. Use water the same temperature as the atmosphere around the orchid. Do not leave the soil soggy. Some orchid species require consistently moist soil, while others should be allowed to dry out completely before watering them again. Yellow or crinkled leaves are signs of overwatering, but these can take months to appear. Black or dark brown mushy roots are rotted. Remove these sections and repot your orchid.
Light and Temperature
Orchids thrive in humid environments with daytime temperatures between 65 and 80 degrees Fahrenheit. Nighttime temperatures 10 to 15 degrees cooler than the average daytime temperature will help stimulate new growth and blooms. Increase the humidity by placing your orchid pot on a tray with moist pebbles and mist your flowers with warm water each morning. Bright light will help your orchid rebloom after the blooms die. Allow your plant to get eight to ten hours of sunlight each day or use 40-watt florescent lights placed about 12 inches above the plant.
Fertilizing
Do not fertilize your orchids while they are dormant. During the blooming period, use a half-strength solution of a balanced 10-10-10 fertilizer every two weeks. If you grow your orchids in soil with a lot of tree bark, use a half-strength mixture of 30-10-10 every two weeks since tree bark does not contain the nutrients orchids need to thrive.
2
0
求助
Rawhide
2017年08月11日

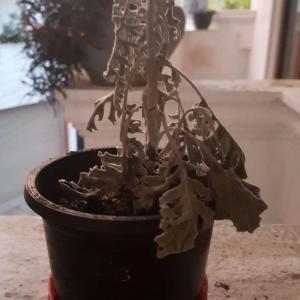
does anyone know what this plant is? And how I can save it. It's all white and high maintenance.

0
0
Ueca:It is called Senecio cineraria, if that helps.
奇怪终结者:It seems no way can save it ....
文章
Miss Chen
2017年08月11日

Like most plants, when an orchid (plants in the Orchidaceae family) produces new leaves, older ones naturally turn yellow before dying back. When newer leaves turn yellow, it's important to reevaluate how you care for the plant and then check it for some common orchid diseases. While almost all of the symptoms of these include some sort of yellowing of the leaves, only a few turn leaves completely yellow.

Too Much Light
Most of the more than 25,000 species of orchids grow in tropical forests, shaded by the canopy. Although some species thrive in bright sunlight, others will experience yellow foliage. This will eventually drop off the plant. To avoid the problem in the future, provide the orchid with indirect sunlight by setting it on the sill of an east-facing window or within two feet of a south-facing window. If you know that your particular orchid species requires medium sunlight, place it on the sill of a west-facing window or within one foot of a window that receives southern exposure.
Cold Temperatures
Orchids are hardy outdoors in U.S. Department of Agriculture plant hardiness zones 2 through 11, depending on species. Outside of the tropics, most are grown indoors, however, where they do fine with typical indoor temperatures. Some orchids, such as phalaenopsis (Phalaenopsis spp.), hardy in USDA zones 10 through 12, are sensitive to temperatures below 60 degrees Fahrenheit, and leaves will turn yellow. Again, these leaves will naturally fall from the plant. Adjust the temperature until you find one that suits the orchid best, between 60 and 80 degrees during the daytime and 50 to 55 degrees at night.
Bacterial Rot
Bacterial soft and brown rot are orchid diseases that turn the orchid's leaves yellow before they darken to black. Treat the infection by removing affected parts of the plant with sterile tools and then spraying the orchid until it is wet with a broad-range virucide, bactericide and fungicide, such as Physan 20. Use 2 teaspoons in 1 gallon of water. Repeat the spray once a month to prevent further occurrences. Keeping the foliage dry and increasing air circulation around the orchid also helps prevent this infection.

Fusarium Wilt
This disease can be distinguished from other orchid diseases by the wrinkled or shriveled appearance of the yellow leaves. Since it is typically caused by poor sanitation, prevention involves sterilizing cutting equipment before using it on the plant. A five-minute soak in solution containing 1 part household bleach and 3 parts of water and rinsing with clear water afterward should do the trick. Dip the tools and rinse them before each cut made to the orchid.
Southern Blight
If the lower part of the orchid's stems turn yellow as well as its leaves, suspect southern blight, a fungal infection. Treat southern blight with a systemic fungicide containing thiophanate methyl. Mix 1/2 teaspoon of the fungicide in 1 gallon of water and pour it over the soil. Reapply the fungicide in four weeks. Prevent southern blight on your orchids by providing increased air circulation and proper sanitation.

Too Much Light
Most of the more than 25,000 species of orchids grow in tropical forests, shaded by the canopy. Although some species thrive in bright sunlight, others will experience yellow foliage. This will eventually drop off the plant. To avoid the problem in the future, provide the orchid with indirect sunlight by setting it on the sill of an east-facing window or within two feet of a south-facing window. If you know that your particular orchid species requires medium sunlight, place it on the sill of a west-facing window or within one foot of a window that receives southern exposure.
Cold Temperatures
Orchids are hardy outdoors in U.S. Department of Agriculture plant hardiness zones 2 through 11, depending on species. Outside of the tropics, most are grown indoors, however, where they do fine with typical indoor temperatures. Some orchids, such as phalaenopsis (Phalaenopsis spp.), hardy in USDA zones 10 through 12, are sensitive to temperatures below 60 degrees Fahrenheit, and leaves will turn yellow. Again, these leaves will naturally fall from the plant. Adjust the temperature until you find one that suits the orchid best, between 60 and 80 degrees during the daytime and 50 to 55 degrees at night.
Bacterial Rot
Bacterial soft and brown rot are orchid diseases that turn the orchid's leaves yellow before they darken to black. Treat the infection by removing affected parts of the plant with sterile tools and then spraying the orchid until it is wet with a broad-range virucide, bactericide and fungicide, such as Physan 20. Use 2 teaspoons in 1 gallon of water. Repeat the spray once a month to prevent further occurrences. Keeping the foliage dry and increasing air circulation around the orchid also helps prevent this infection.

Fusarium Wilt
This disease can be distinguished from other orchid diseases by the wrinkled or shriveled appearance of the yellow leaves. Since it is typically caused by poor sanitation, prevention involves sterilizing cutting equipment before using it on the plant. A five-minute soak in solution containing 1 part household bleach and 3 parts of water and rinsing with clear water afterward should do the trick. Dip the tools and rinse them before each cut made to the orchid.
Southern Blight
If the lower part of the orchid's stems turn yellow as well as its leaves, suspect southern blight, a fungal infection. Treat southern blight with a systemic fungicide containing thiophanate methyl. Mix 1/2 teaspoon of the fungicide in 1 gallon of water and pour it over the soil. Reapply the fungicide in four weeks. Prevent southern blight on your orchids by providing increased air circulation and proper sanitation.
0
0


